Constraints
The Constraints system allows Admin users to configure custom field validation and limitations into IPAM and Resource fields. Many constraint types are available, such as mathematical comparison operators, length, enumeration, pre-set lists, RegEx, IPv4/IPv6, Phone, email, hostname, FQDN, Mac Address, and URL.
The Constraints Tab has one sub-tab - Configuration - where new constraints may be created and managed.
...
| Table of Contents |
|---|
Constraints Tab
...
The Constraints Tab, available to Admin users, allows for custom field validation and field restrictions to be created for Resource and IPAM fields. Constraints are applied to Resource fields from the Edit Section page and to IPAM fields from the Admin Edit IPAM Columns page. The applied constraint may be anything from a numerical comparison operation, a check against a pre-determined text string, ensuring selections from a pre-set list, or forcing entries into a specific format, such as IPv4/IPv6, phone number, or RegEx.
These constraints can be applied to Resource fields and the following IPAM fields:
...
Depending on the type of constraint applied, the constraint may be a simple single-value comparison needing only one constraint to be created, such as "Equals to" or "Length Max". Some other constraint types, however, may have two or more levels deep of constraint types and value checks. One example of this is "Enumeration", which requires the user to first set up an "Enumeration" constraint, and then a second level list of sub-constraint types or a list of values. For a detailed constraint tree, it may be worth
Available Constraint Types
...
| Type | Description |
|---|---|
Enumeration | Create a list of child enum items. Note: Set binding / control type for parent constraint (enumeration) only, do not provide for child items. Children type: Valid child enum types are: =, !=, ﹥, ﹤, ﹥=, ﹤=, regex, allow, oneof, allof, ip, ipv4, ipv6, email, url, hostname, fqdn, mac, phone, lenmax, lenmin, section_entry |
| Section Entry | Creates an enumeration based on all entries that belong to a given section. |
| Resource Type | Creates an enumeration based on a Resource type. |
| Resource Entry | Creates an enumeration based on all resource entries. |
| IPAM Region | Creates an enumeration based on all IPAM Regions. |
| IPAM Tags | Creates an enumeration based on all IPAM Tags. |
| Equals to | Checks to ensure a value is exactly equal to a provided value, e.g. (X == Y) is true |
| Not Equal to | Checks to ensure a value is not equal to a provided value, e.g. (X != Y) is true |
| Greater Than | Checks if the input value (left operand) is greater than a given value (right operand). e.g. (X ﹥ Y) is true |
| Less Than | Checks if the input value (left operand) is less than a given value (right operand). e.g. (X ﹤ Y) is true |
| Greater Than or Equal to | Checks if the input value (left operand) is greater than or equals to a given value (right operand). e.g. (X ﹥= Y) is true |
| Less Than or Equal to | Checks if the input value (left operand) is less than or equals to a given value (right operand). e.g. (X ﹤= Y) is true |
| One of | Create a list of child constraint items. It will be true if one of child constraints is true. Its children must be previously configured. Note: Set binding / control type for parent constraint (enumeration) only, do not provide for child items. |
| All of | Create a list of child constraint items. It will be true if all of the child constraints are true. Its children must be previously configured. Note: Set binding / control type for parent constraint (enumeration) only, do not provide for child items. |
| Length Max | Checks to ensure a string has, at most, the specified number of characters |
| Length Min | Checks to ensure a string has, at minimum, the specified number of characters |
| Regular Expression | Compares the input format to a provided Regular Expression |
| IPv4 | Sets the required format for the input to an IPv4 address |
| IPv6 | Sets the required format for the input to an IPv6 address |
| Sets the required format for the input to an email address (uses an "@" symbol) | |
| Hostname | Sets the required format for the input to a hostname. Hostnames may not have underscore or dash characters. |
| FQDN | Sets the required format for the input to a FQDN |
MAC Address | Sets the required format for the input to a MAC address |
| URL | Sets the required format for the input to a url |
| Phone Number | Sets the required format for the input to a phone number |
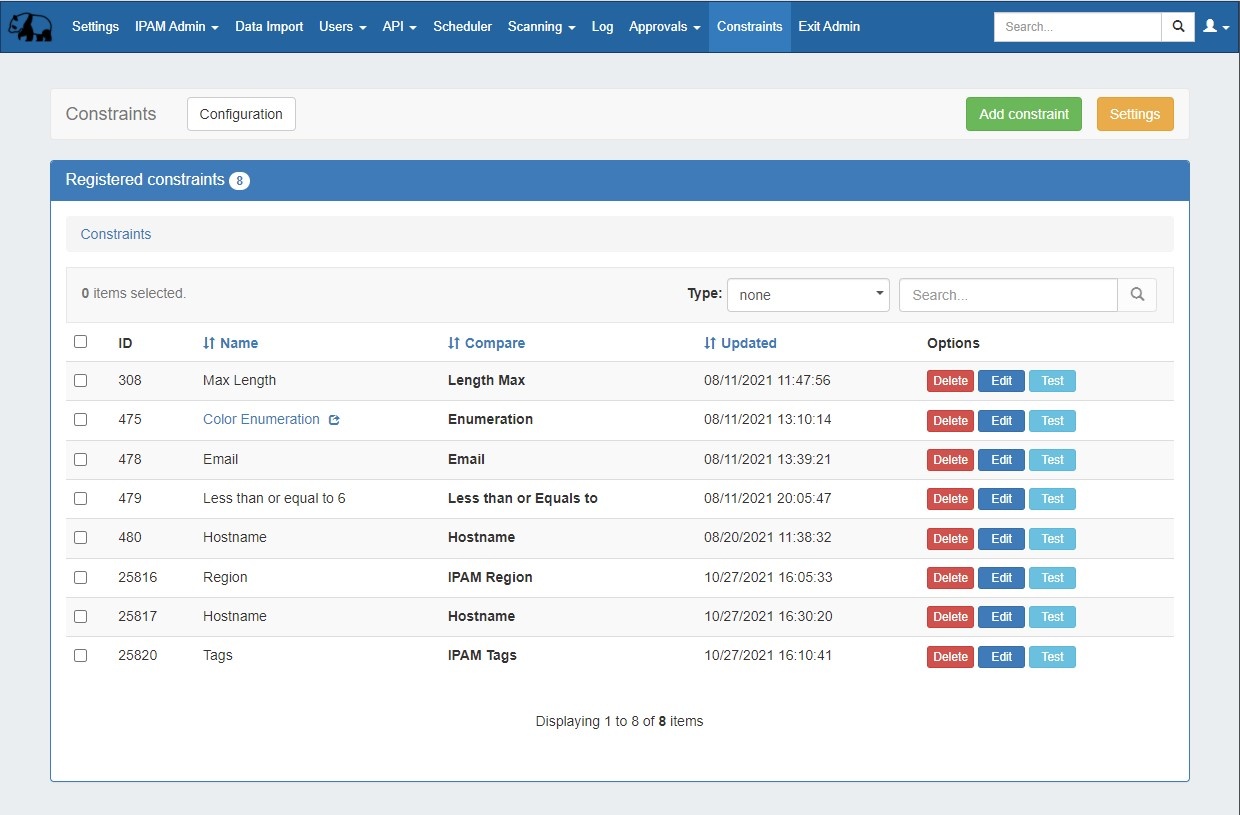
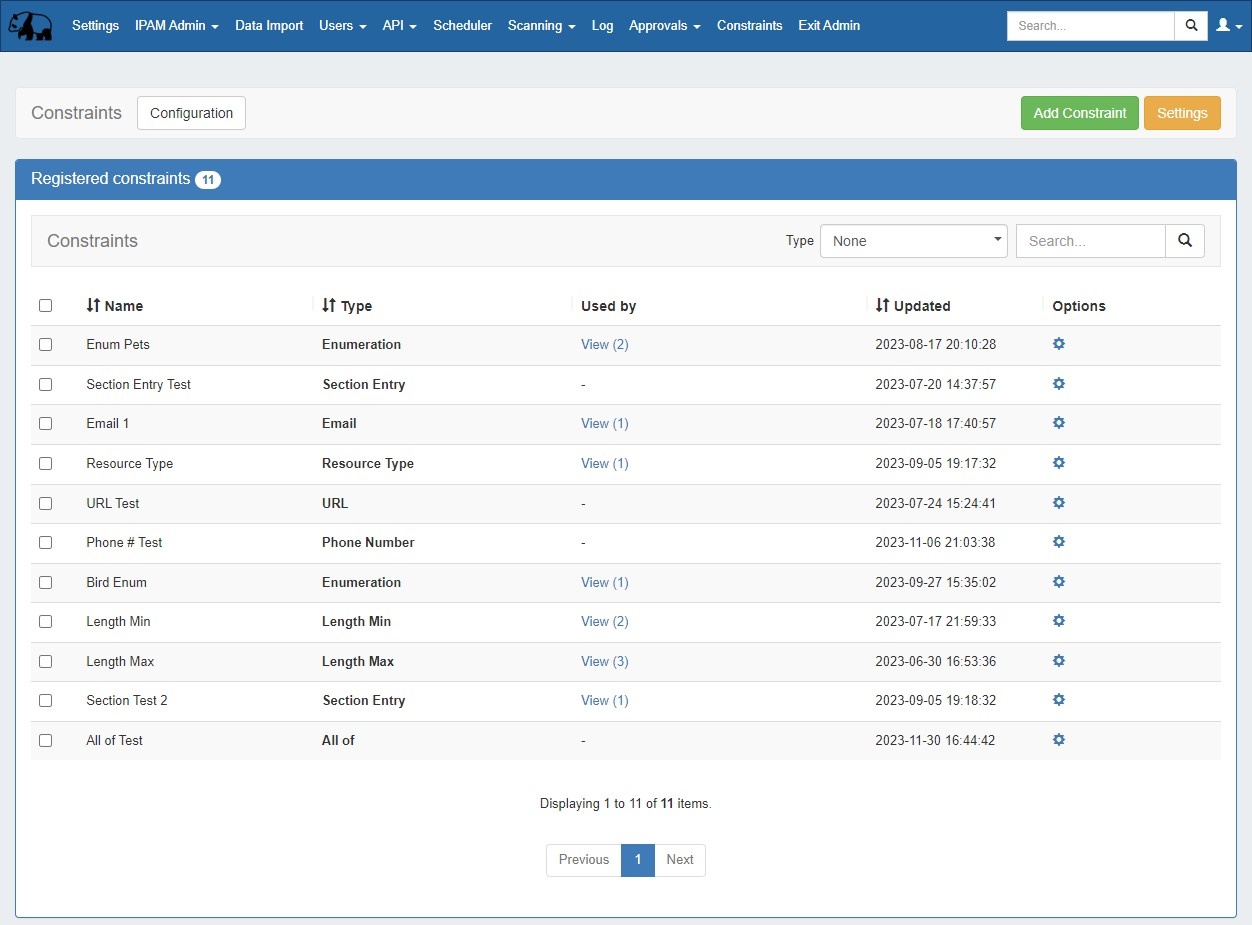
Constraints List Overview
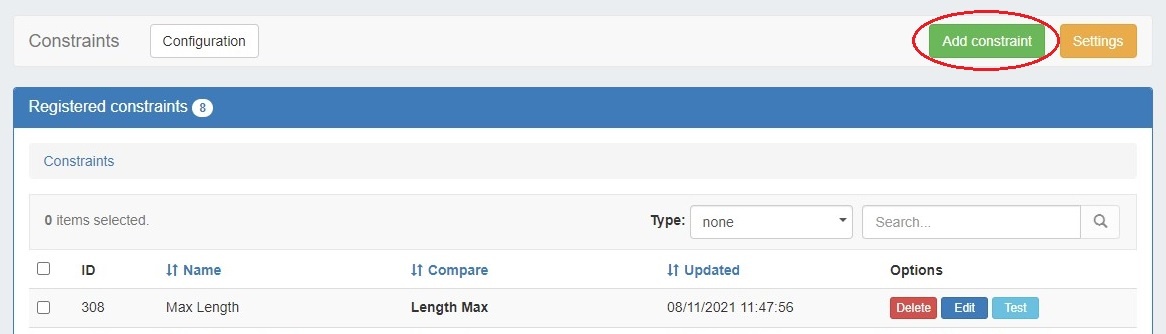
The Constraints List displays all registered constraints and is where you can view, edit, test, and delete existing constraints.
Search / Filter
Filter the list for a specific constraint by typing all or part of the name in the searchbox.
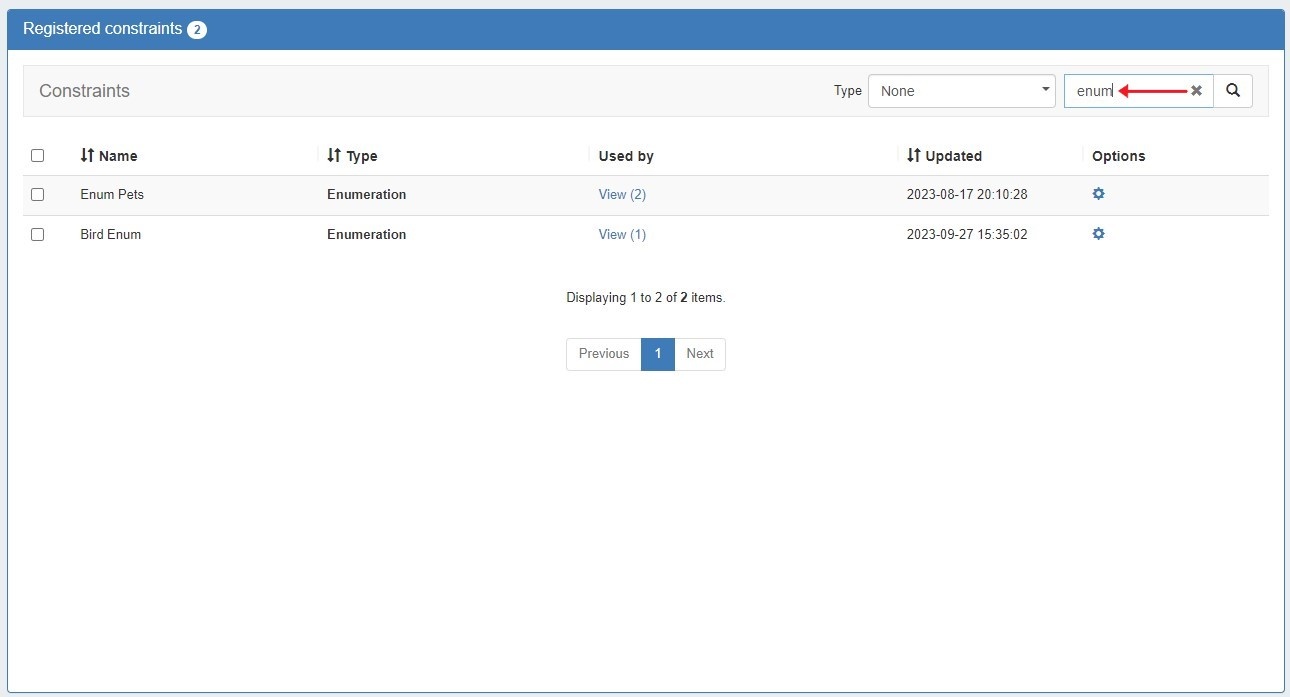
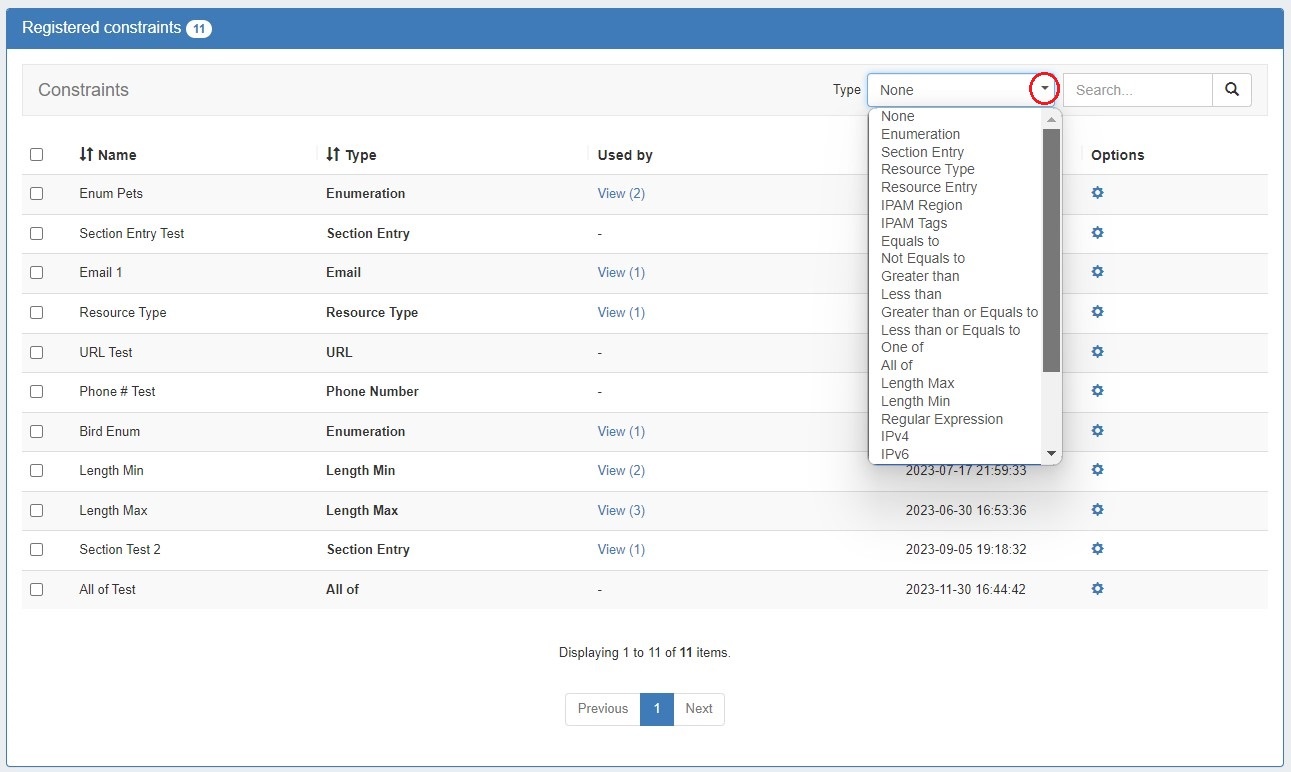
Filter the list by type via the dropdown selector at the top.
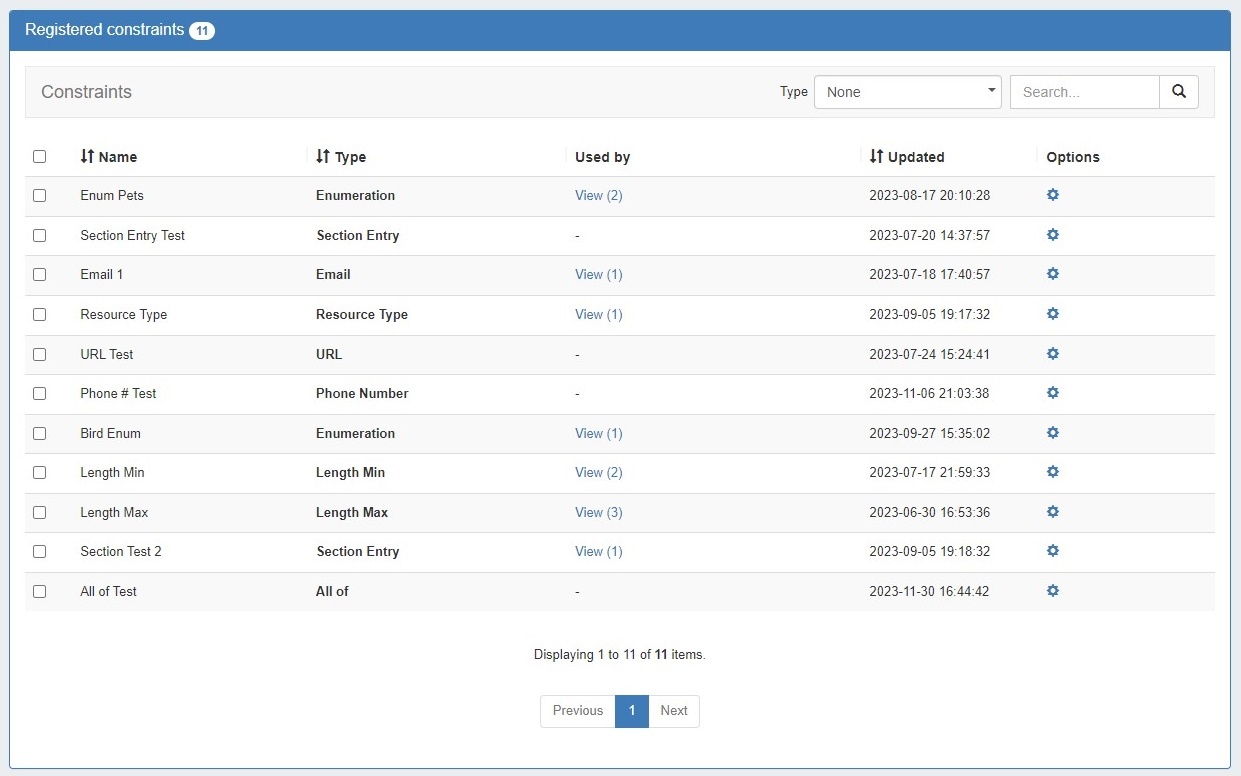
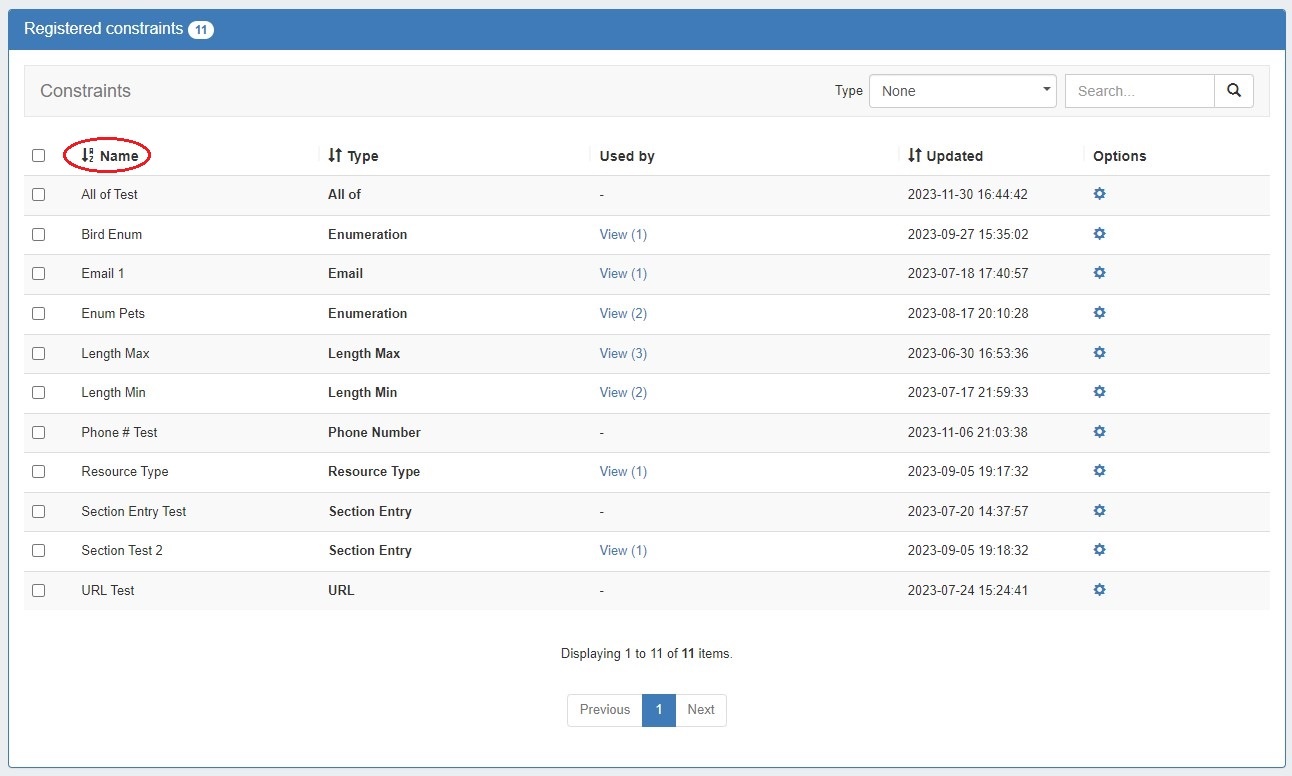
Sort
Sort columns into ascending/descending order by clicking on the column header for any column with an up/down arrow (⇅).
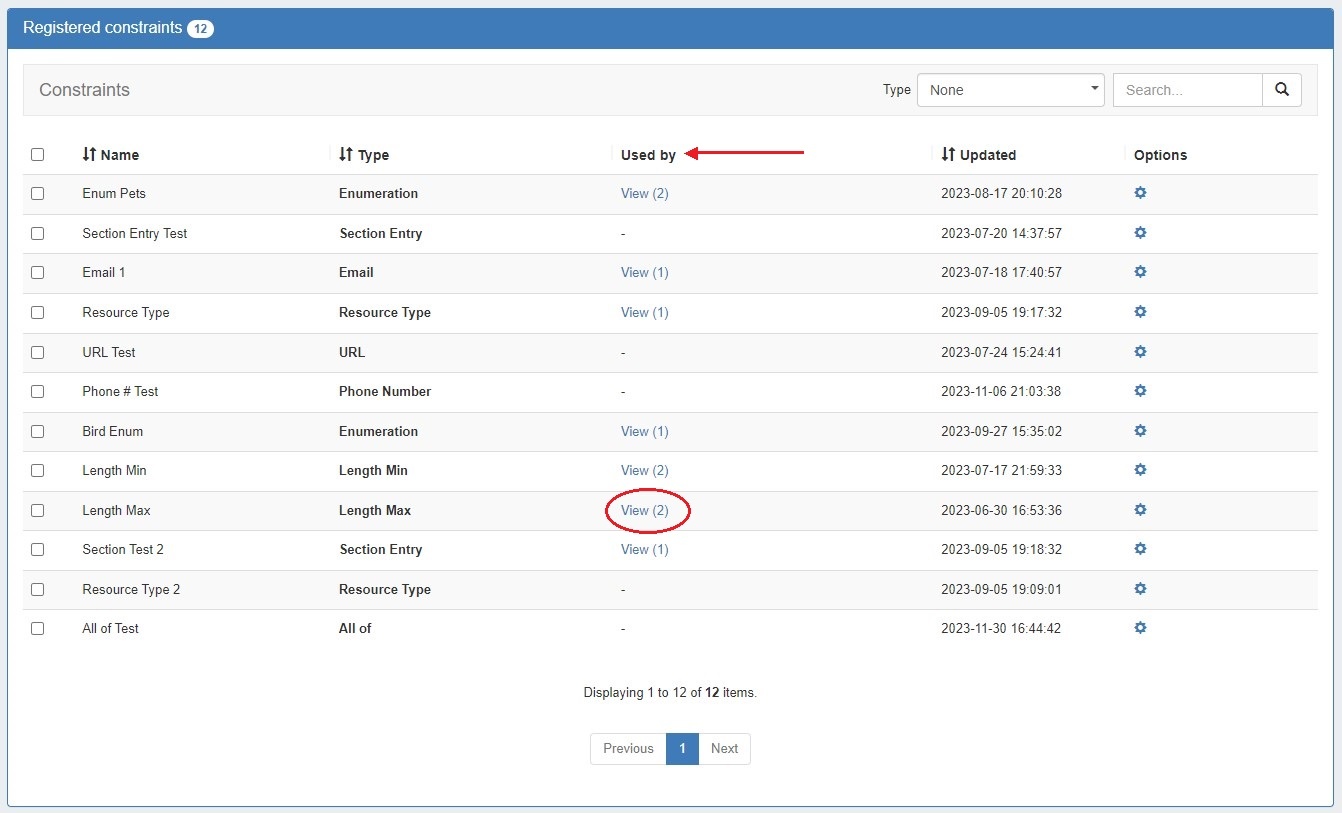
View Applied Constraints
The "Used by" column allows users to view which resource views and/or IPAM attributes have a specific constraint applied. Simply click the constraint's "View" link in the "Used by" column and a modal will open.
Click the link for a resource field to see which sections have that field enabled. Click a section name to go to the Section Edit page. Click the link for a IPAM column to go to the Edit IPAM Columns page. Constraints can be applied or removed from both these locations.

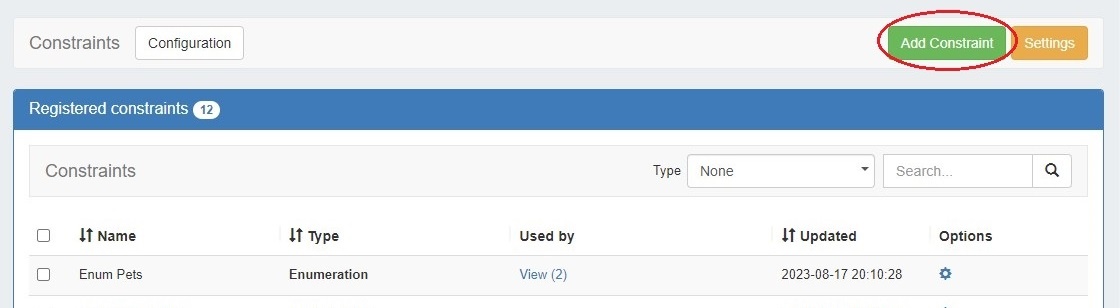
Add a Constraint
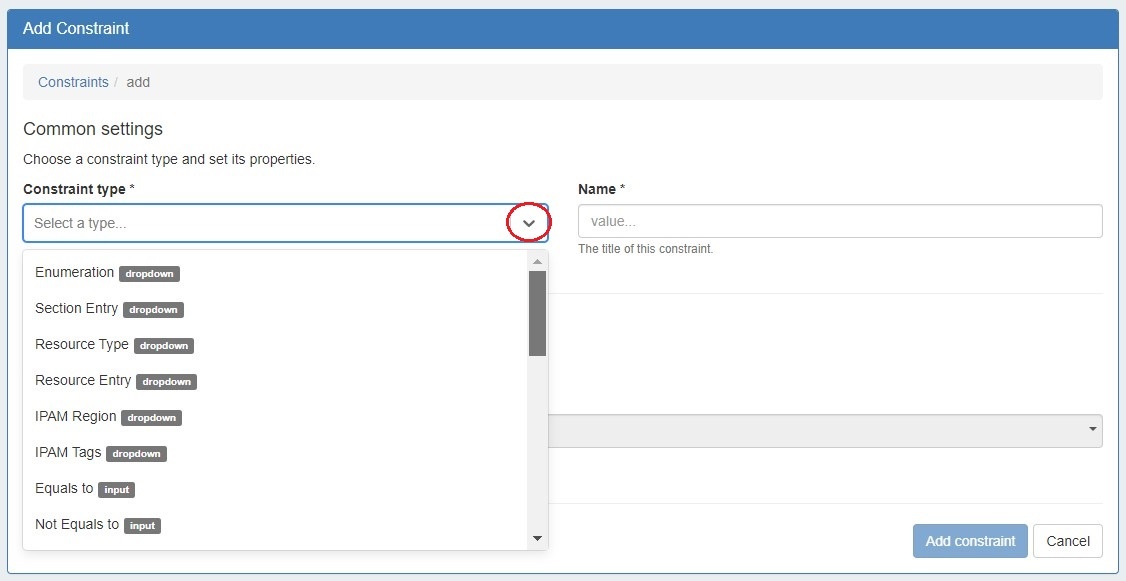
To add a new Constraint, click "Add Constraint" at the top right of the page.
The Constraint type selector indicates the control type of any given constraint (i.e. dropdown, input).
In the "Add Constraint" screen, select (at minimum, depending on the selected constraint type):
- The constraint type (here, "Length Min")
- The name for the constraintThe attribute (IPAM Field) on which to apply the constraintConstraint specific comparison values, here as "Length"
- Select whether to allow empty values in the attribute field
If desired, you may enter a custom error message , customize the UI binding (although it it automatically filled in if you select a standard IPAM Attribute), or add an event hook settingor placeholder text.
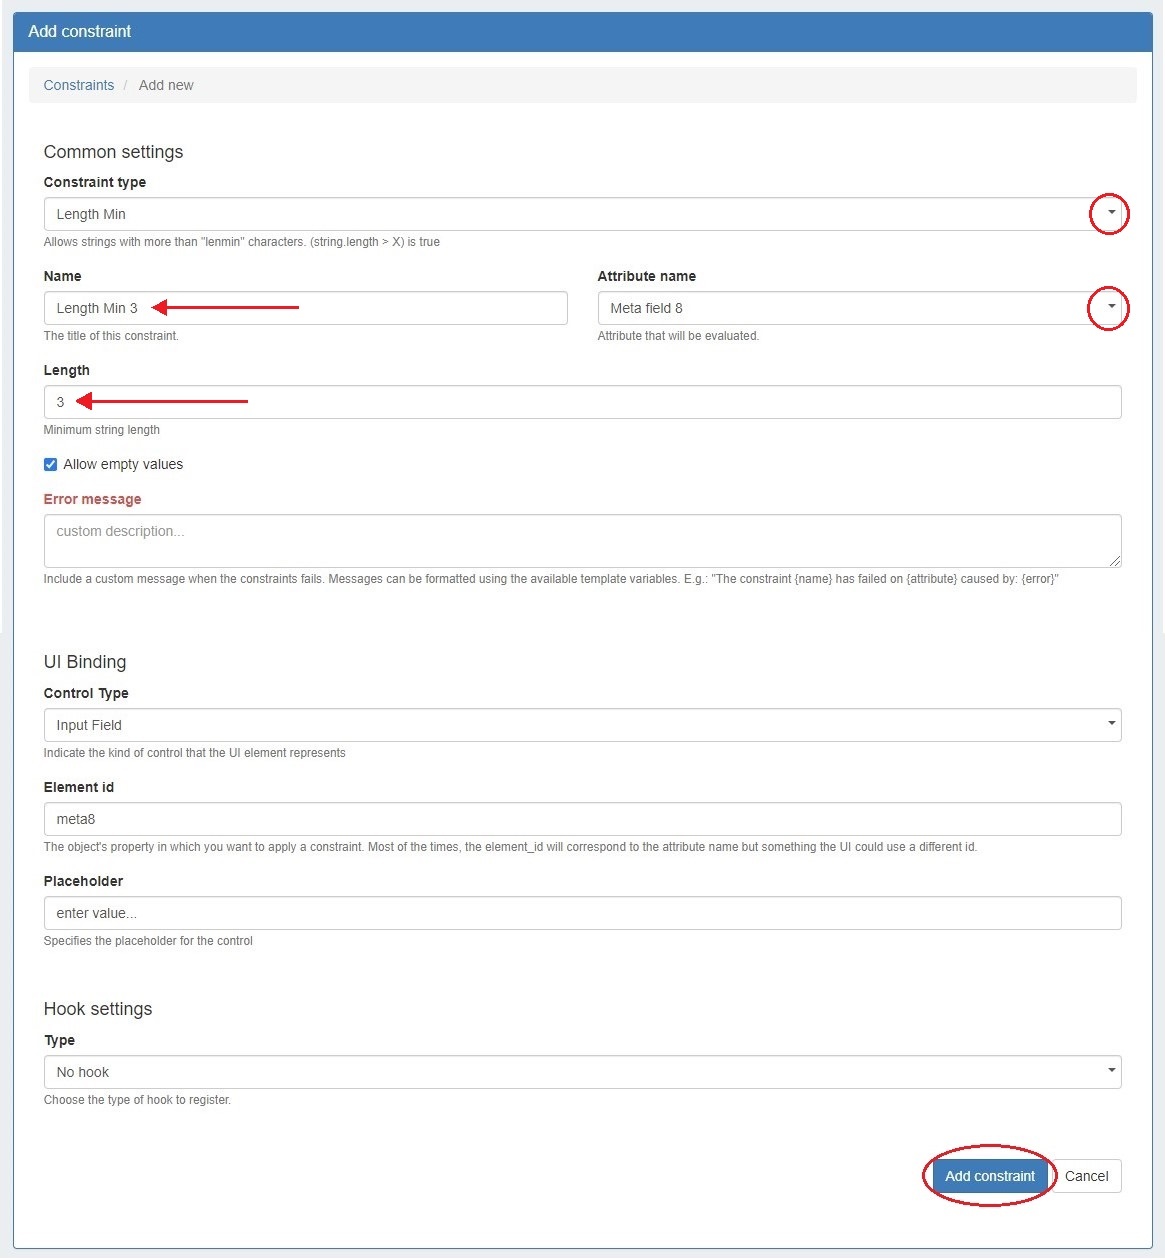
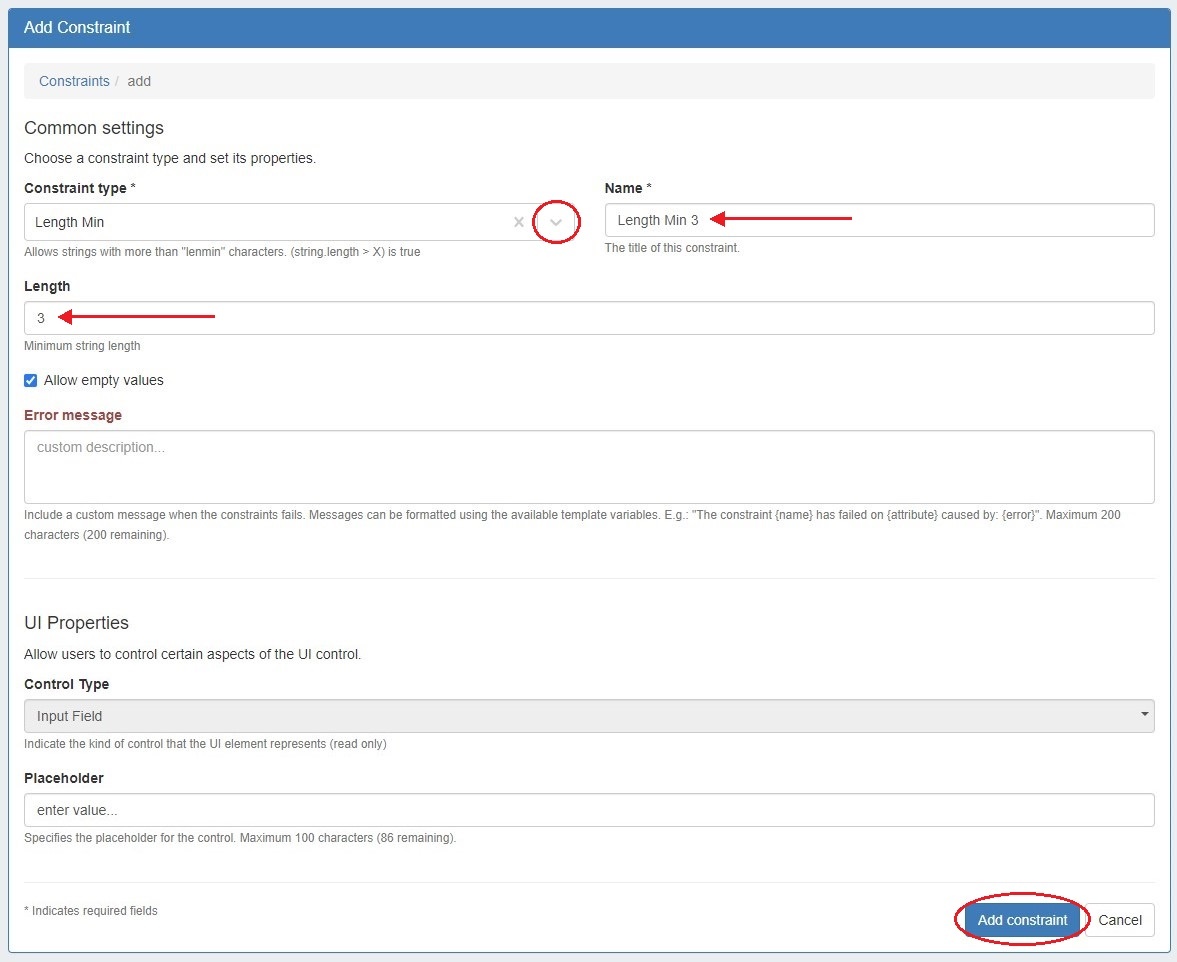
When done, click "Add Constraint" to save.
...
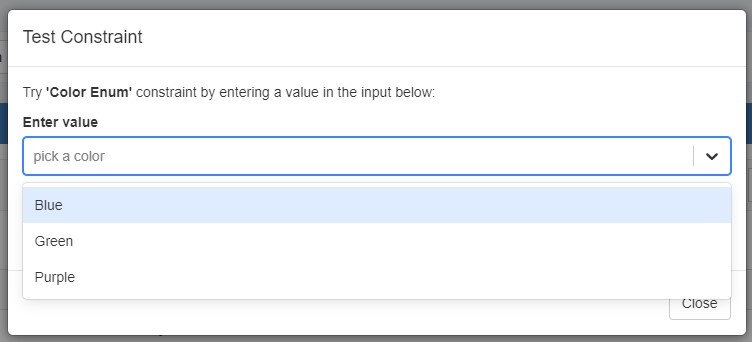
Test Constraint
To test a Constraint, right click to open the Options action menu and select "Test".


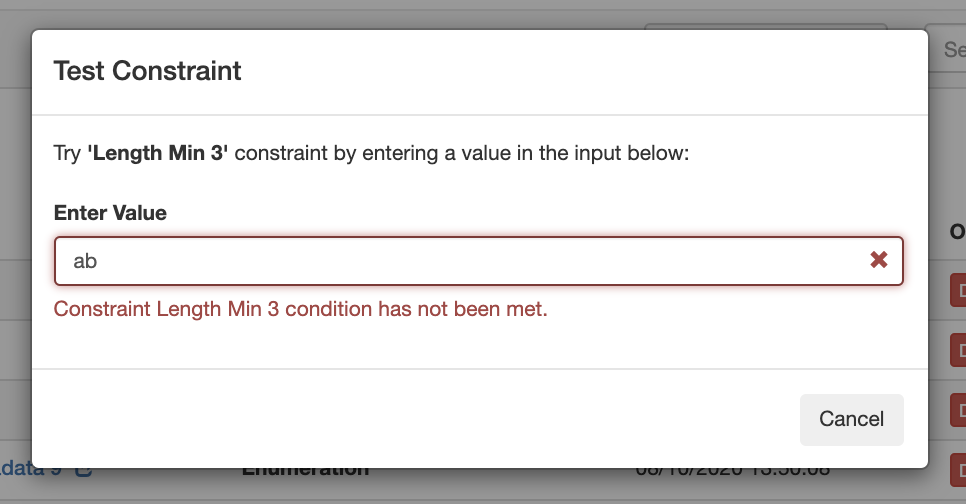
The test constraint form will appear - enter a test value, and you can check whether the constraint returns an appropriate invalid or valid response:
Invalid result, for "Length Min 3":
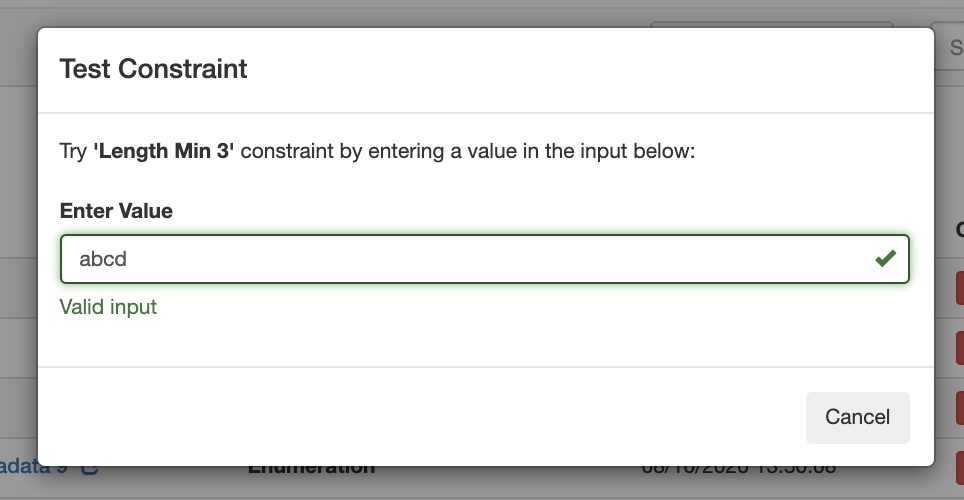
Valid result, for "Length Min 3":
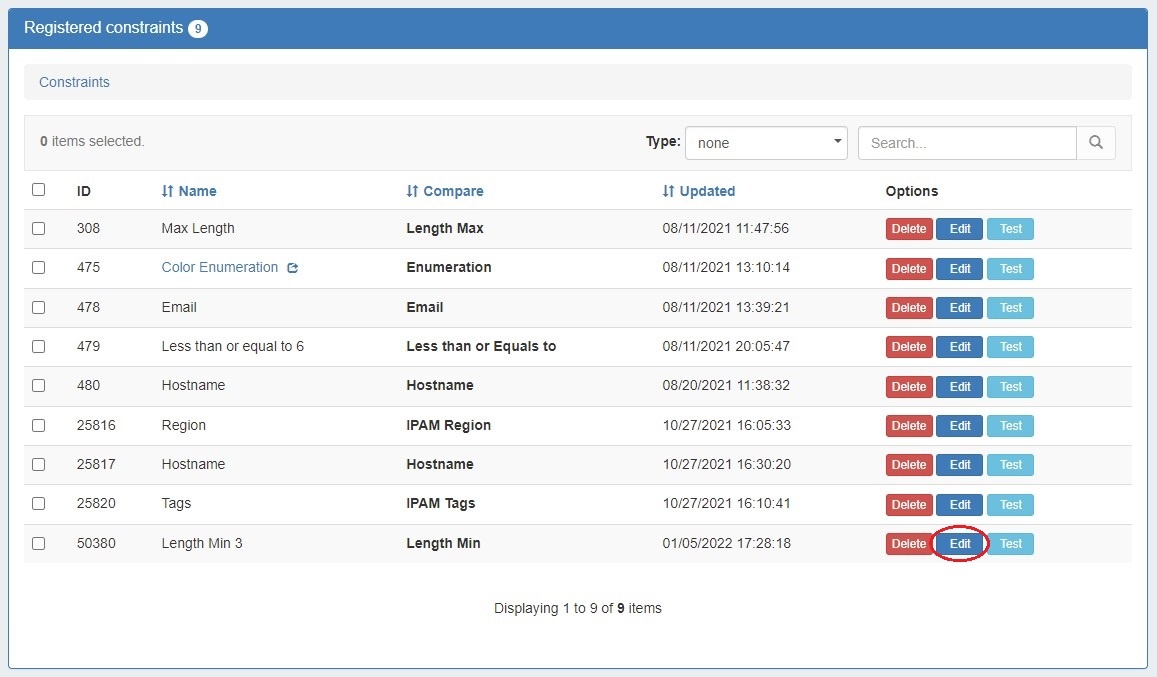
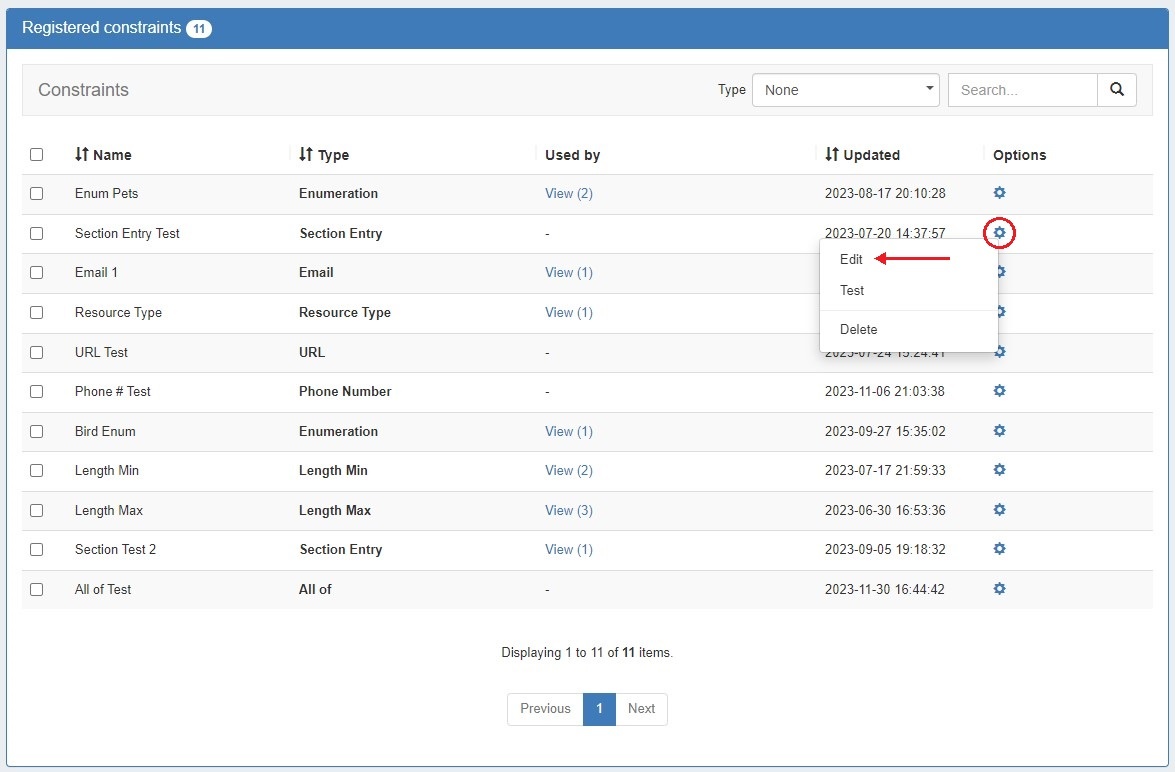
Edit Constraint
To edit a Constraint, right click to open the Options action menu and select "Edit". The constraint details will open, matching the "Add Constraint" form.
Adjust values or settings as desired, and then click "Update Constraint".
Delete Constraint
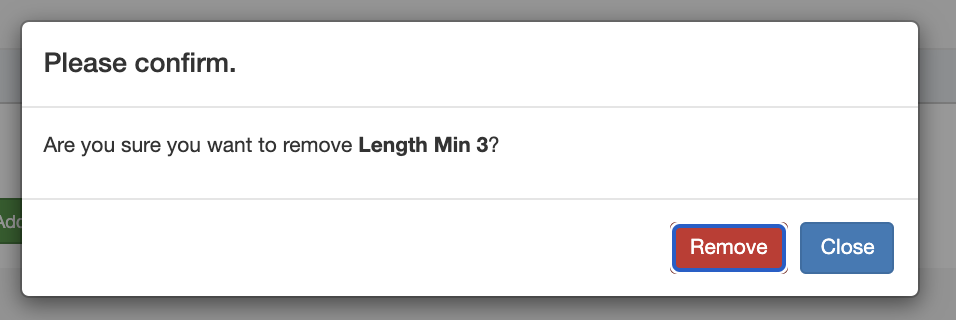
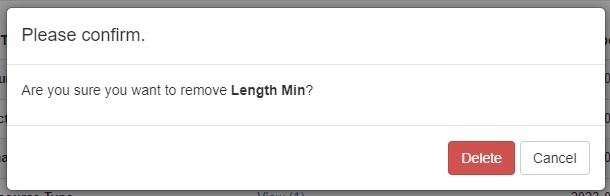
To delete a Constraint, right click to open the Options action menu and select "Delete".
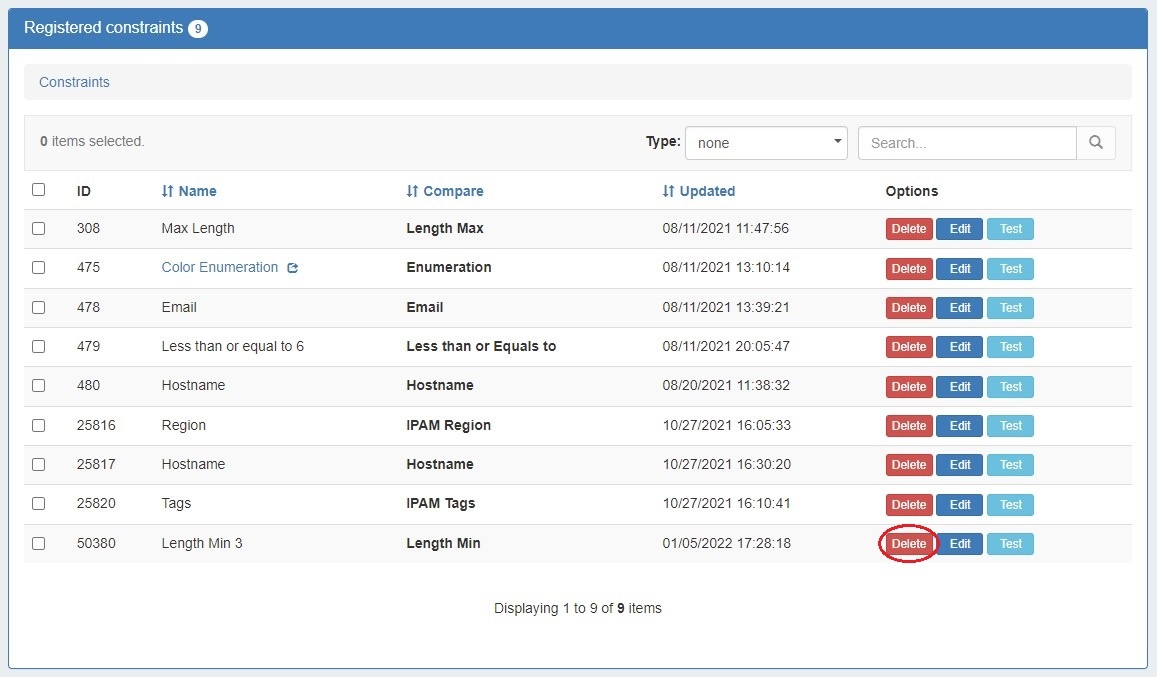
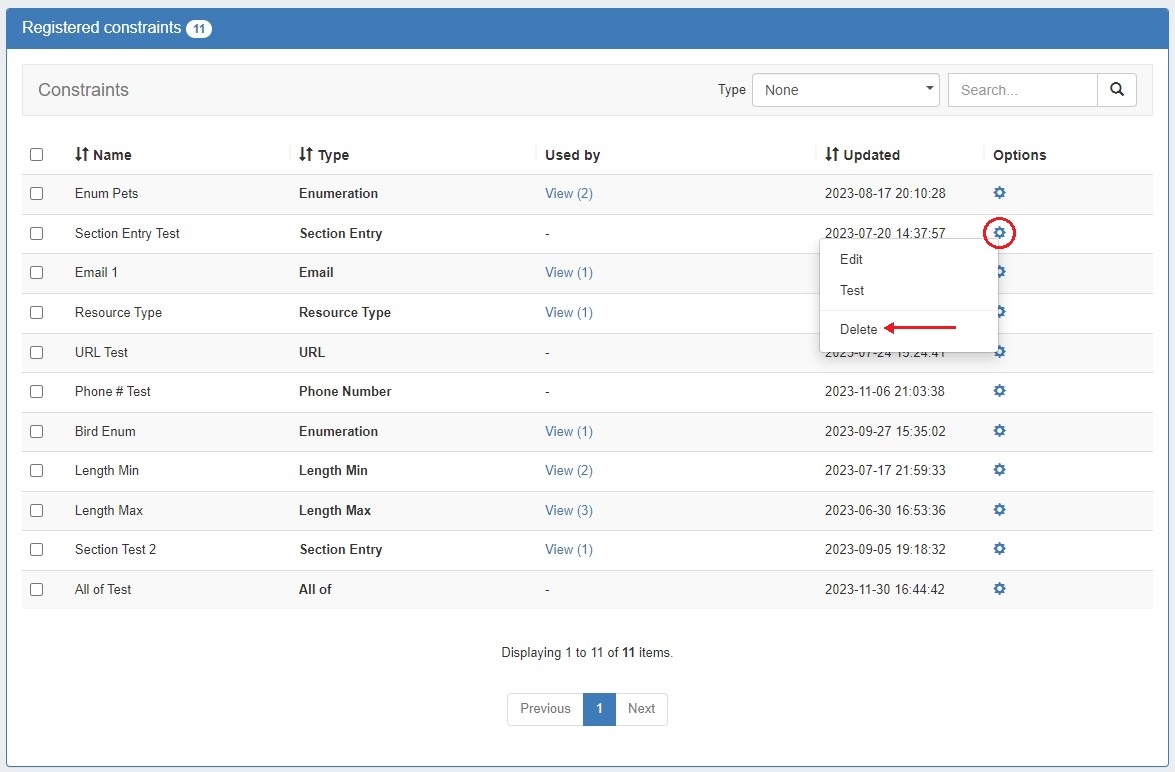
A Confirmation box will appear - confirm whether to delete the constraint, or click "Close" to exit without deletion.
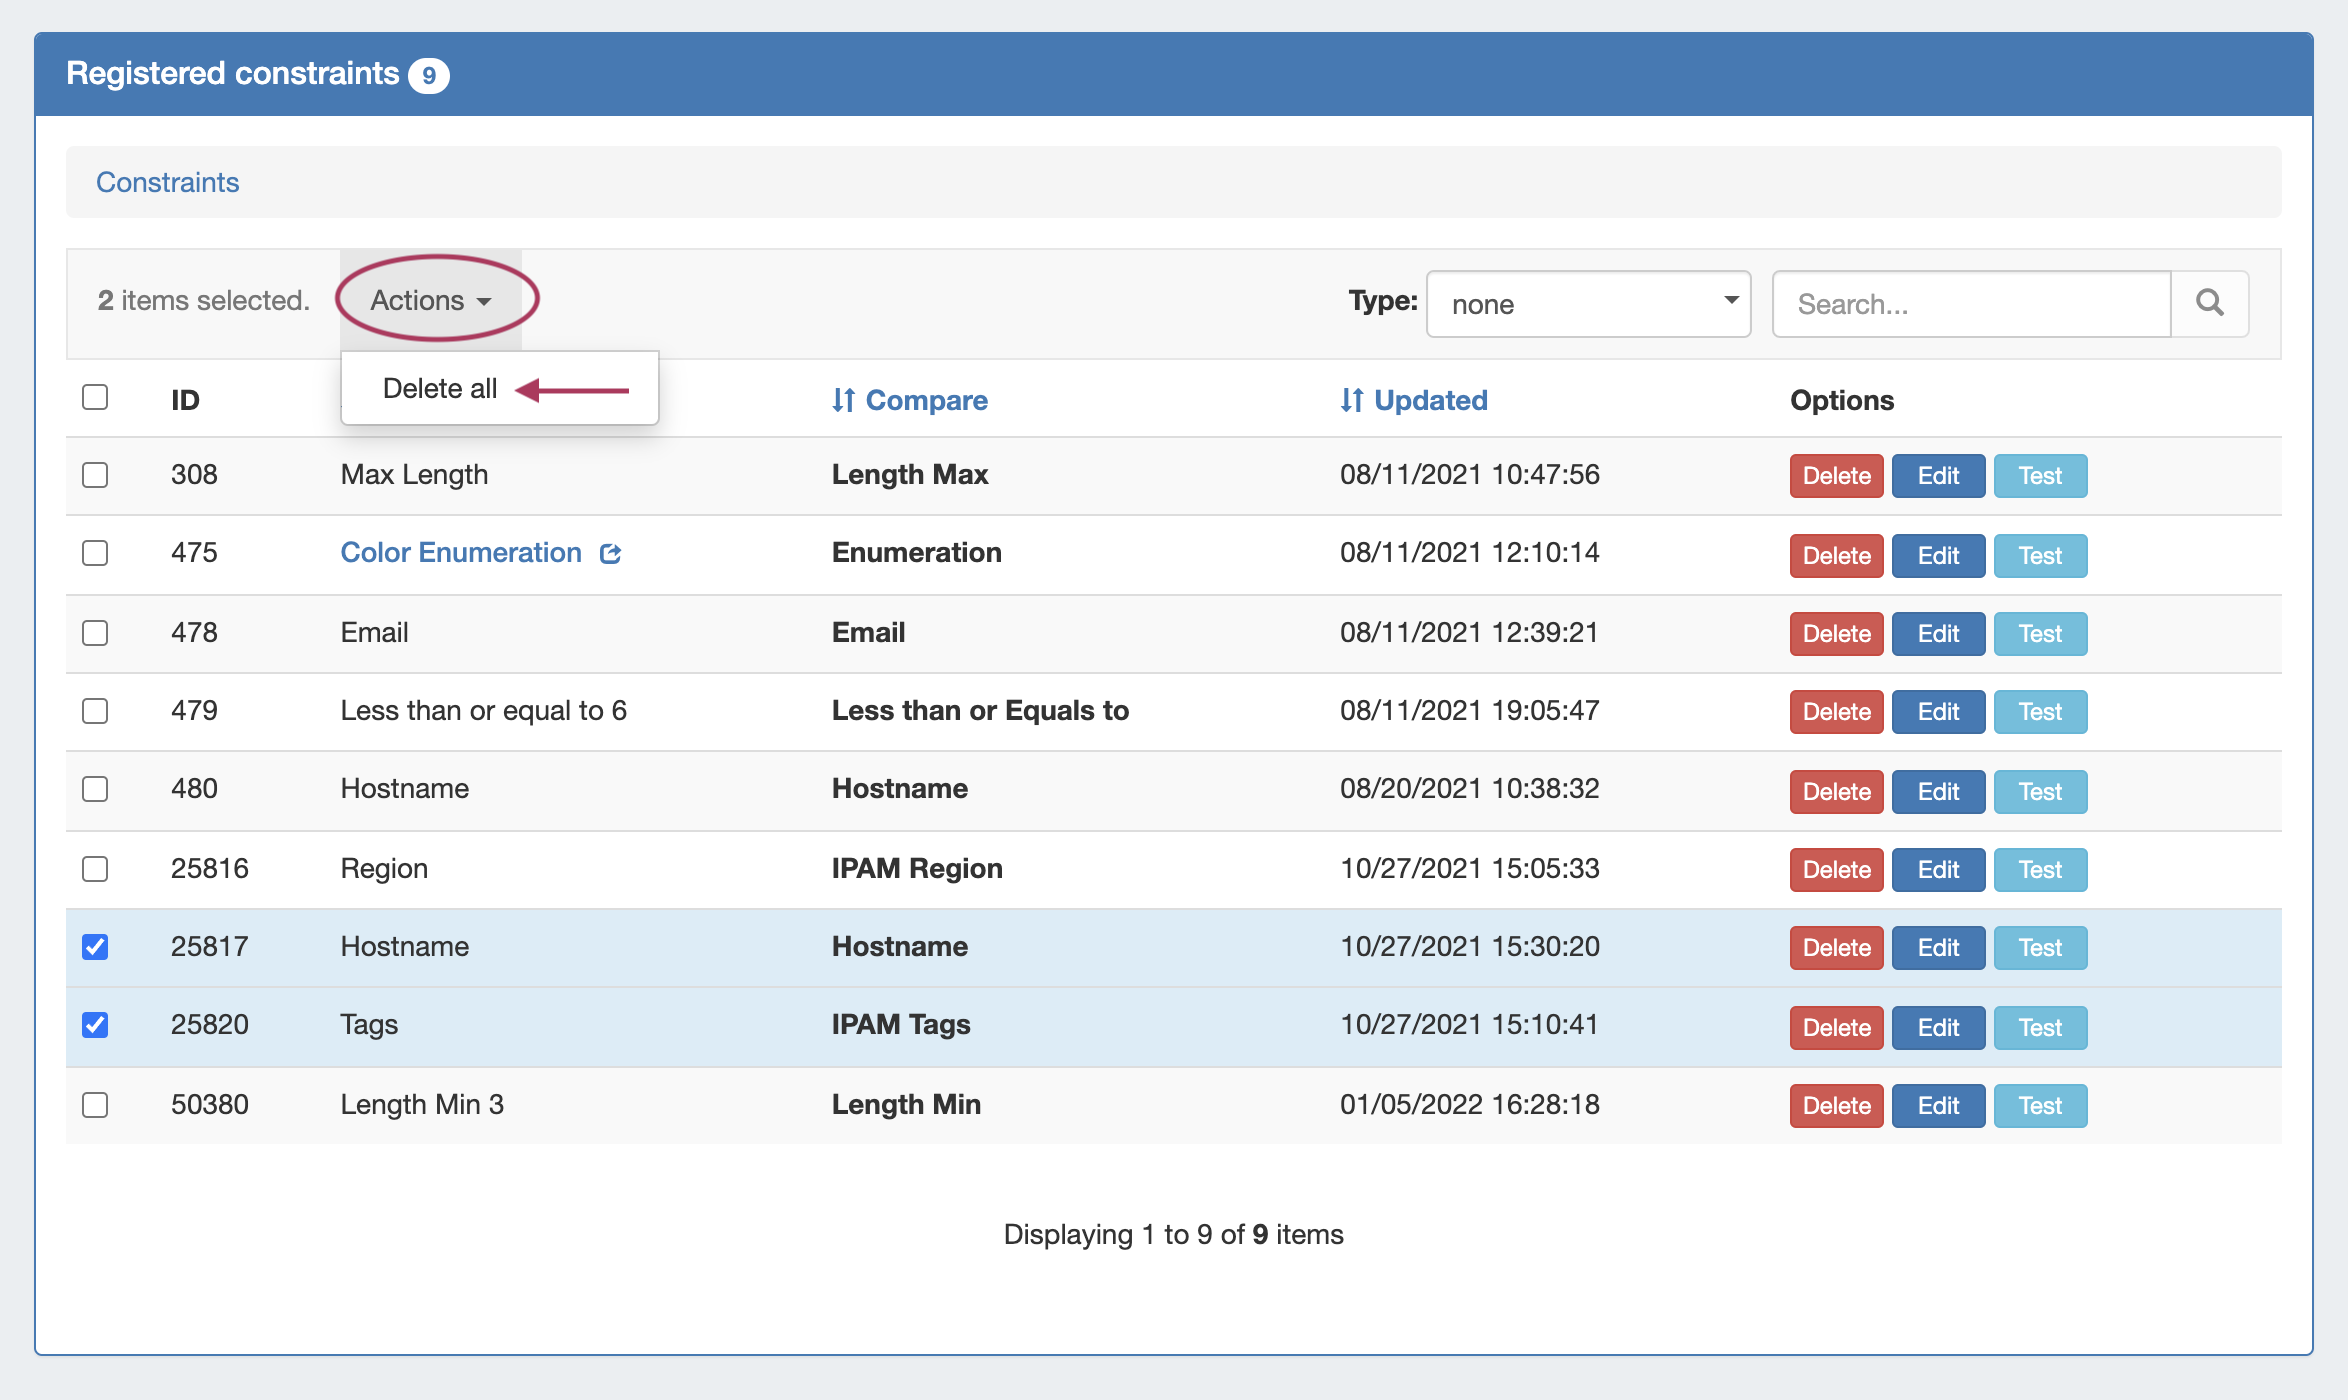
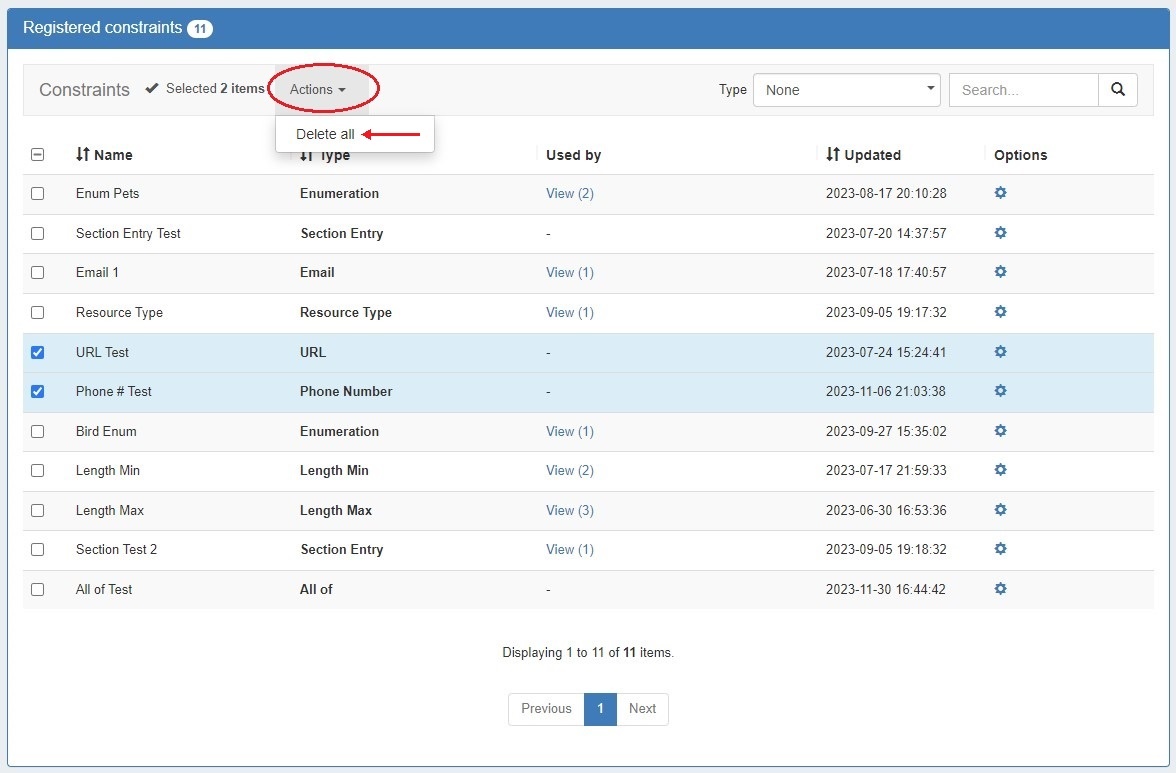
You may also select more than one constraint to delete.
To do so, select the checkboxes for the desired constraints, then under the "Actions" menu at the top of the list, select "Delete All".
Working with Constraints
...
in IPAM
Apply a Constraint
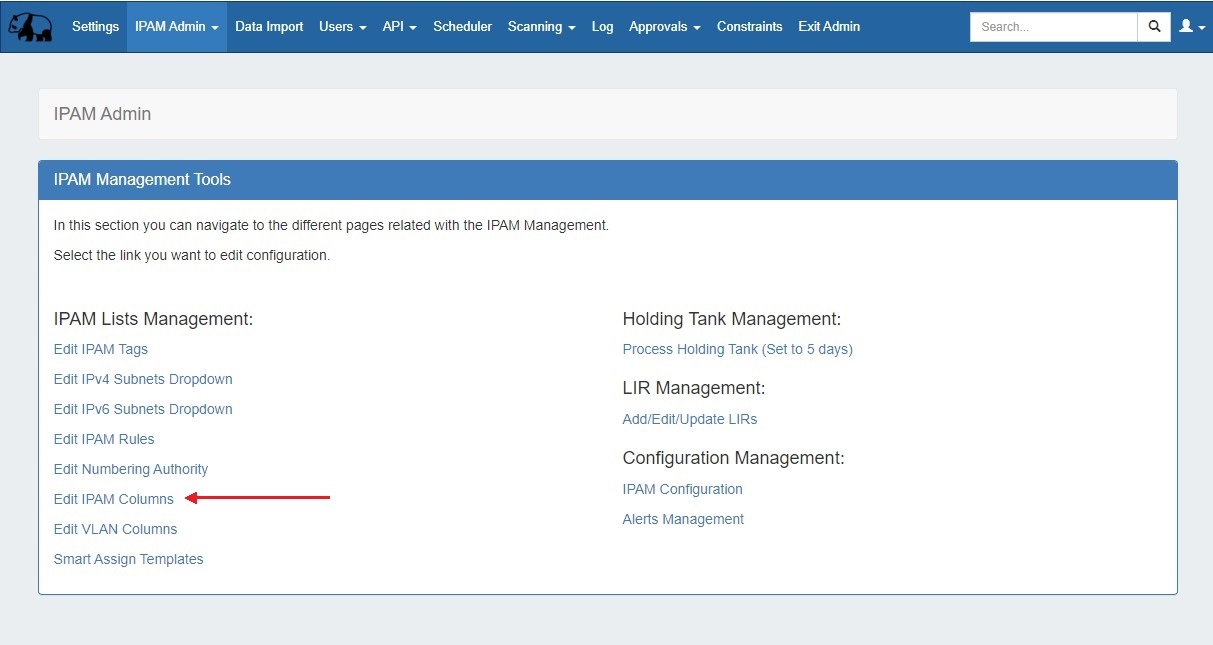
To apply a constraint to an IPAM field, go to IPAM Admin → Edit IPAM Columns.
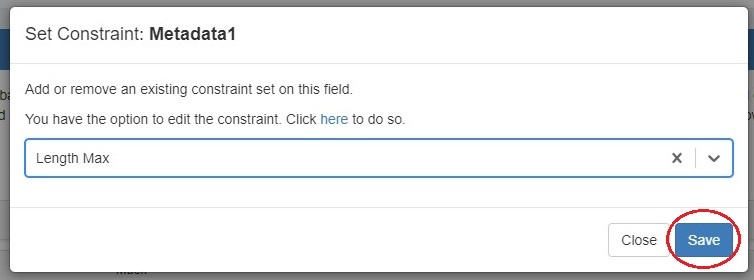
A column that may have a constraint applied will have a checkmark icon. Click the icon and select a constraint from the dropdown.
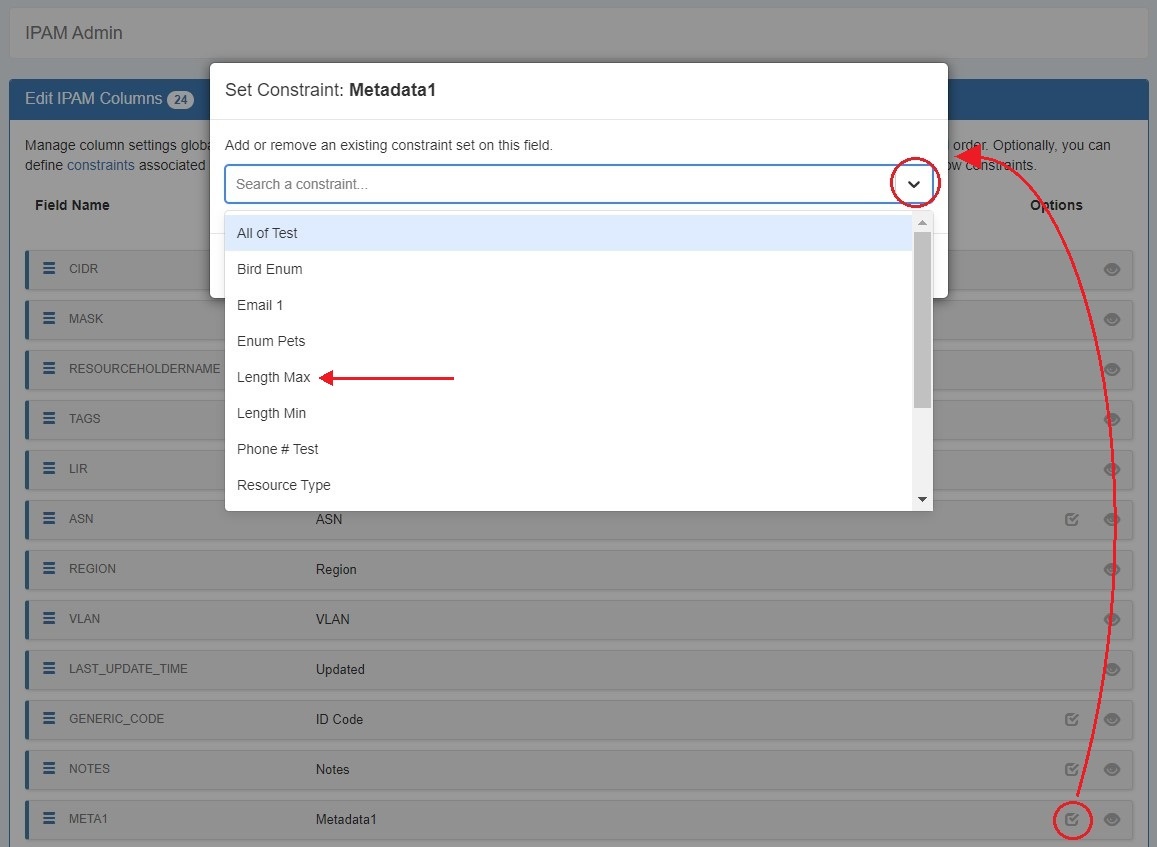
Click "Save".
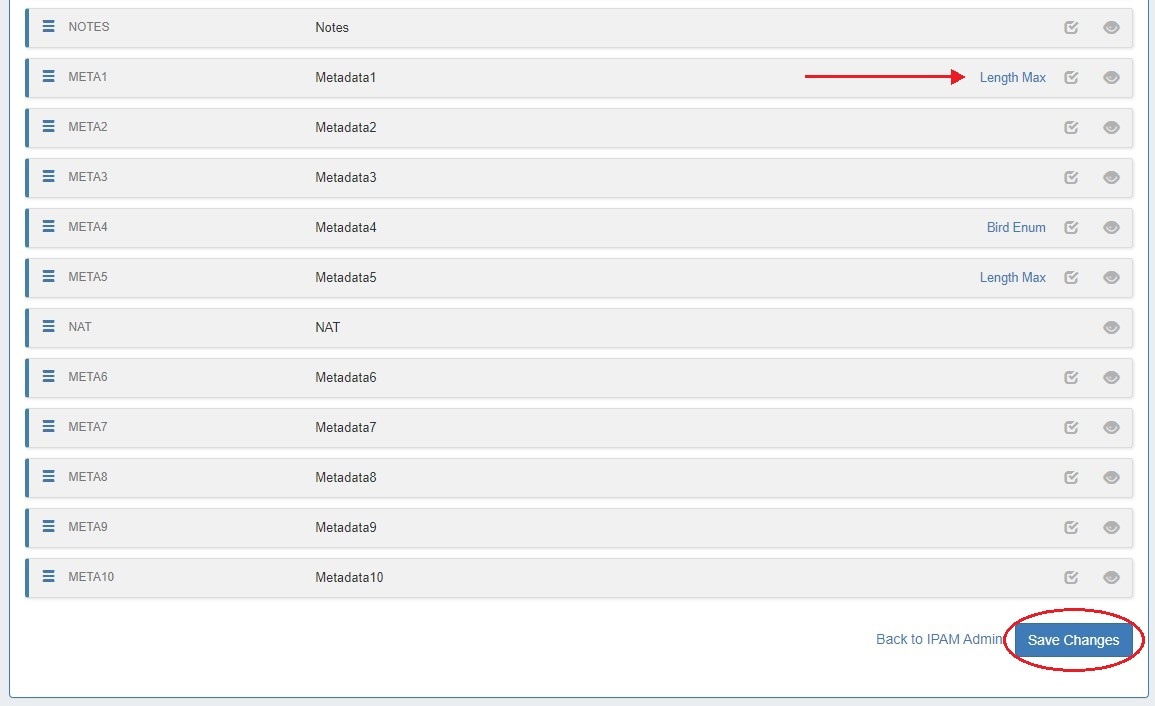
The applied constraint name will then be displayed in the column row. Click "Save Changes" before exiting the IPAM Column page to retain changes.
Constrained Fields in IPAM
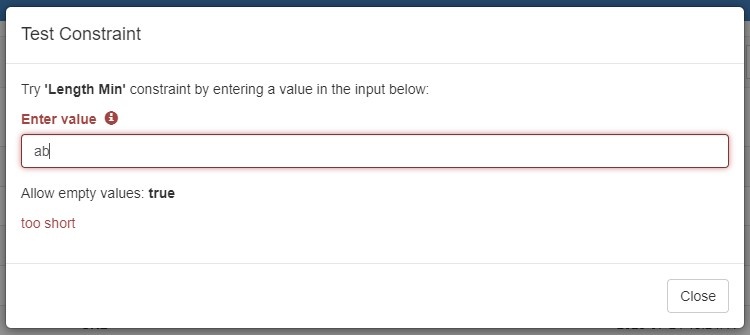
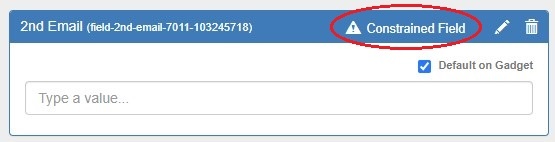
When a field is viewed in IPAM Manage that has a constraint applied, a "check" icon will display next to the field input for simple input constraint checks, if empty values are allowed.
...
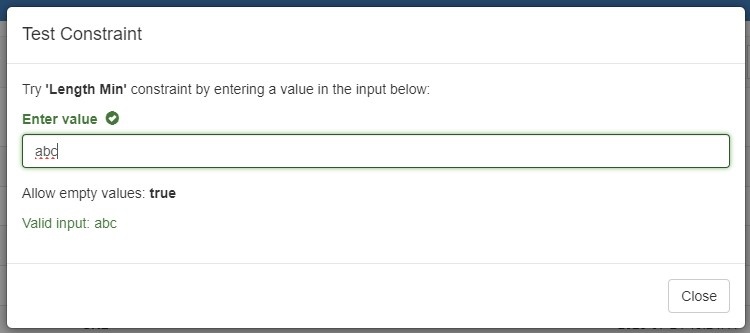
On the other hand, a valid input will return to displaying the "valid" success checkmark:
Working with Constraints in Resources
Apply a Constraint
To apply a constraint to an Resource field, go to Edit Section, "Manage Fields" tab. Open the edit modal for an assigned field. Select a constraint from the dropdown and click "Save".

| Note |
|---|
Applying a constraint to a field affects all sections to which a field is assigned. In the above example, adding a constraint to a field in QA Test Section 1 will also apply the constraint to the field in the Contact Section. You can see which sections are using the field displayed in the Edit Field modal. |
Once a constraint is applied to a field, it will be visible to the user.
Remember to save before exiting the tab to retain changes.

Constrained Fields in Resources
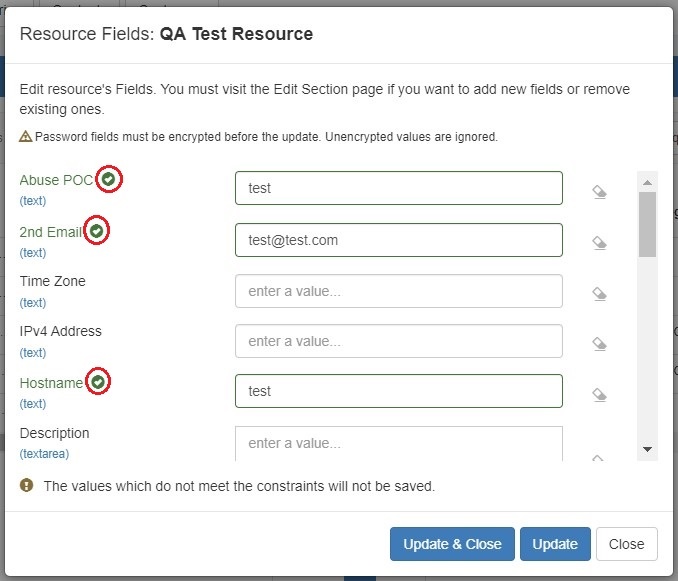
A constrained field is available to edit from the Resource List Edit Fields modal and the Resource's Fields Gadget.
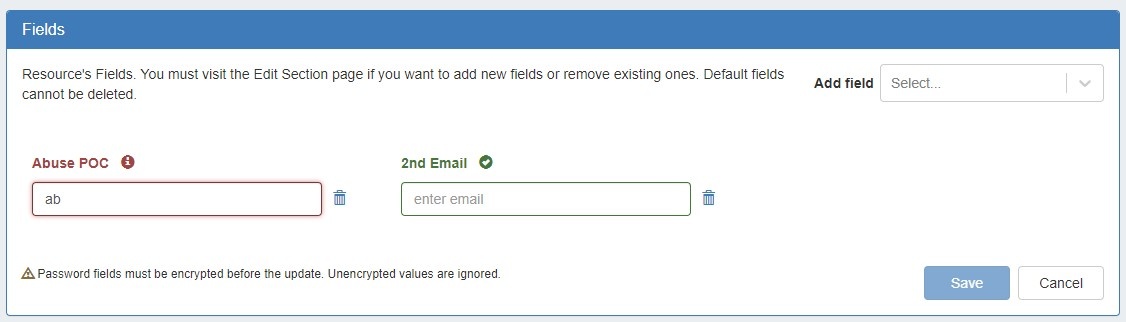
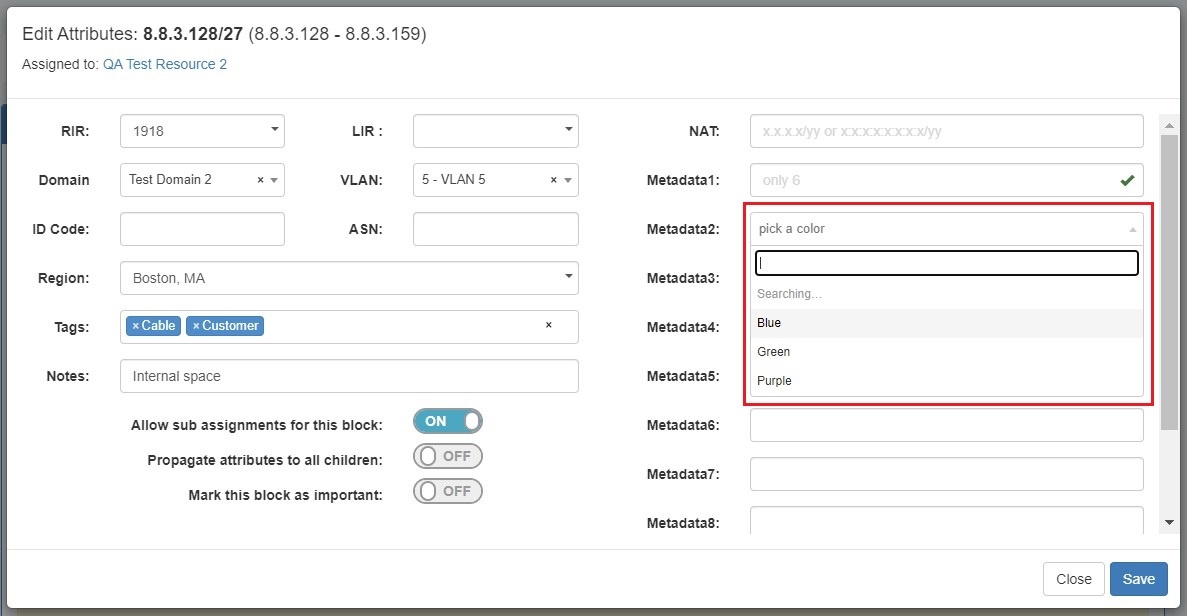
When a field is viewed that has a constraint applied, a "check" icon will display next to the field input for simple input constraint checks.
If the constraint is of a type that has been set up with a dropdown box, then the dropdown box and placeholder text will be applied:
![]()
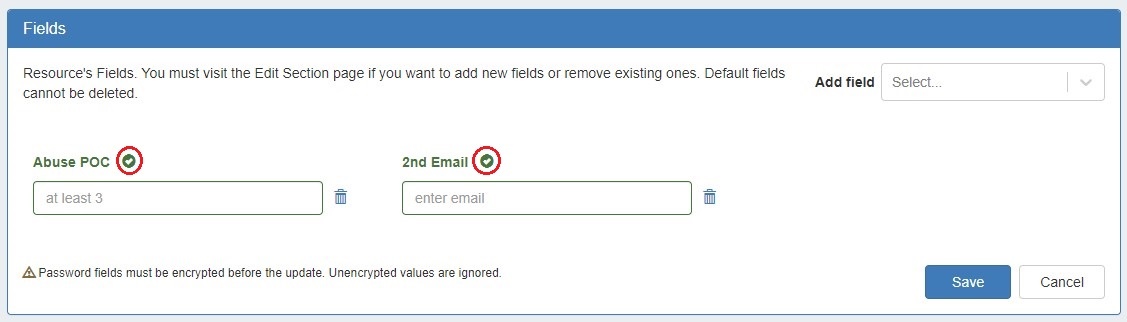
In this example, a Length Min constraint has been applied to the field "Abuse POC", so if we enter less than three characters into that field, we should get an error and see a visual indicator for the input not meeting the constraint settings:

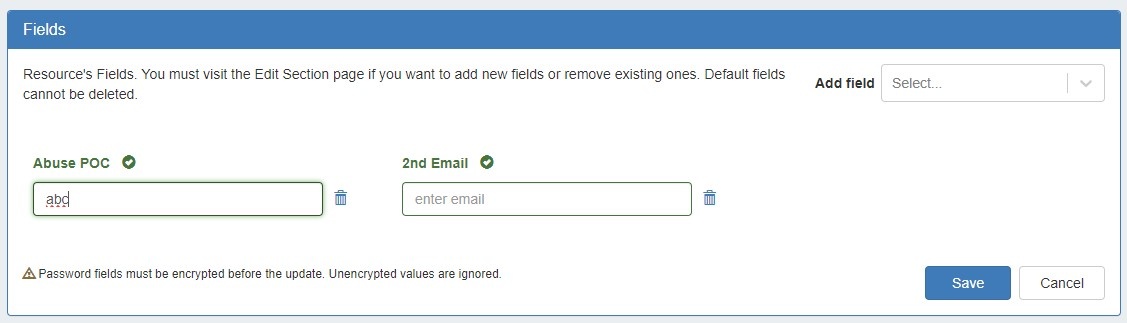
On the other hand, a valid input will return to displaying the "valid" success checkmark:
Constrained fields display the same way in a Resource's Fields Gadget when editing.
A failed constraint input:
A valid constraint input:
Constraint Permissions
Admins can limit which users are bound by certain constraints by clicking "Settings" at upper right.
...
| Note |
|---|
Enabling user group permissions applies to all constraints, including those already existing. If no group is assigned to a constraint, it will not be visible in IPAM Manage to any users. |
Example: Adding an Enumeration
...
Constraint Containing Children
This example shows how to add a two-level Enumeration constraint, such as Enumeration, All of, or One of - all of which are set up having a "parent" constraint at the top level list, and "child" items or constraints on a sub-level. Here, we will be using Enumeration as the example constraint, although All of and One of may be created similarly - just using the "add constraint" button to create children instead of the "add item" button.
Create the Parent Constraint
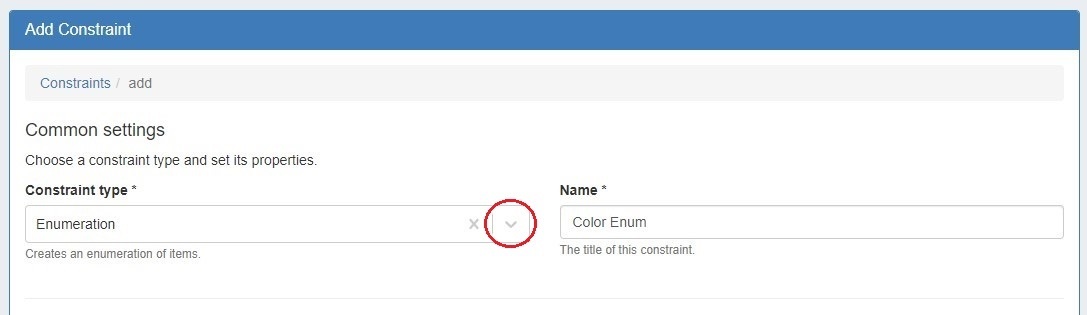
From the Constraints "Configuration" page, click "Add Constraint".
...
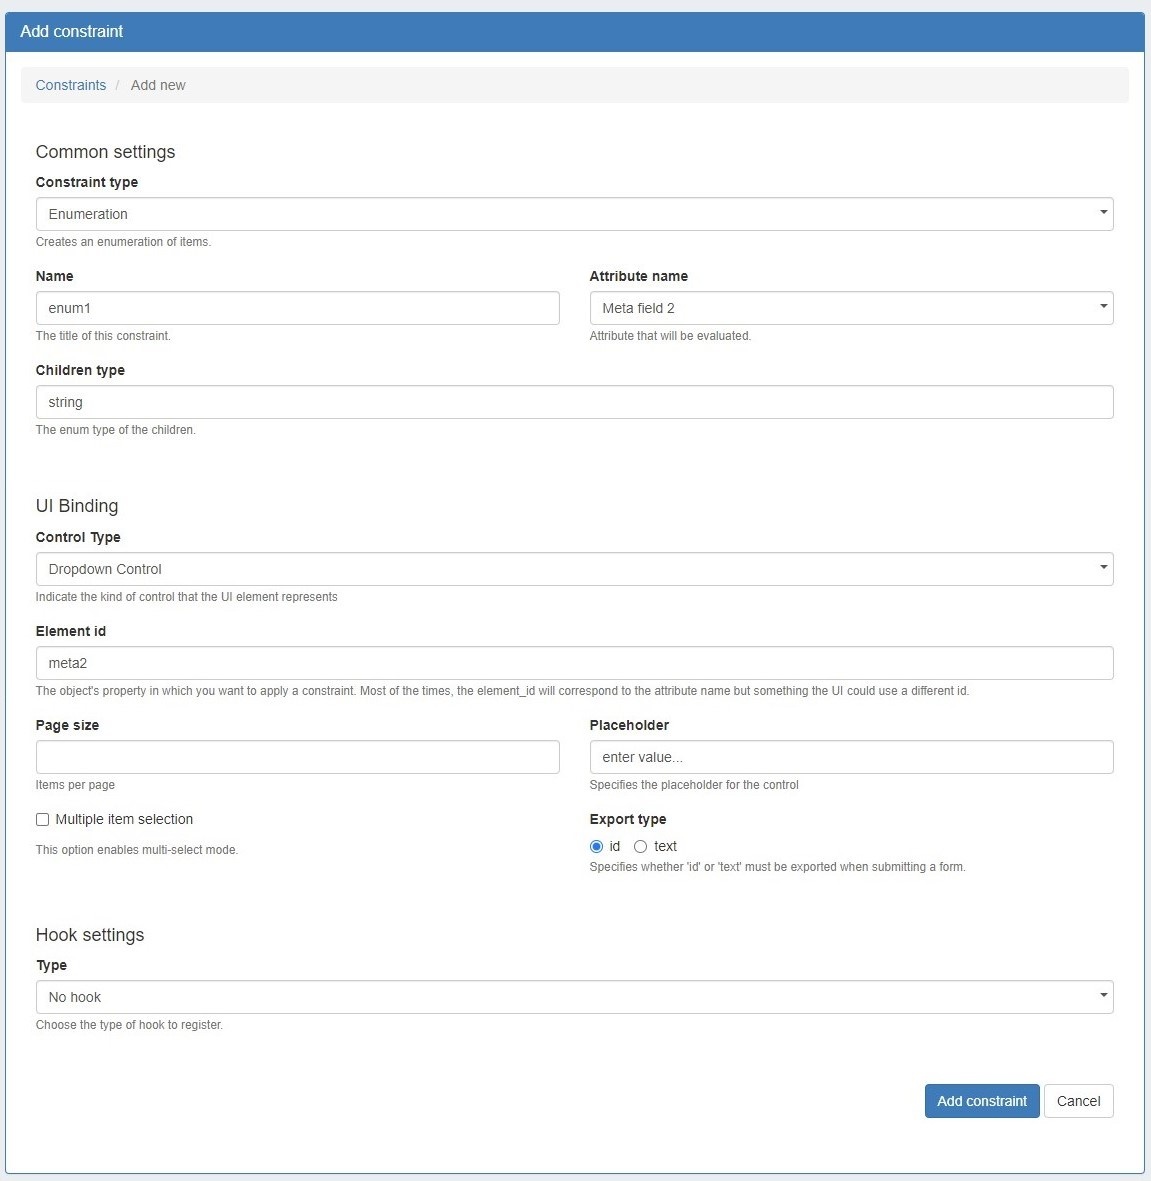
Select "Enumeration" for the constraint type , and enter a name, attribute binding, and select the Control type - here, we will be using a dropdown control.
| Info |
|---|
For Parent/Child constraint types, you only need to enter the attribute binding and control type for the parent constraint, and do not need to enter these settings for the child items - those settings are inherited by the child items you will create later. |
All other fields are optional, and may be skipped if desired.
When done, Click "Add Constraint". You will see the new constraint added to the Constraints List.
Open the Parent Constraint
Constraints that have parent/child relations show as a blue link in the constraint list. Click on the constraint name to open the parent constraint to view or add child settings.

Add Child Items
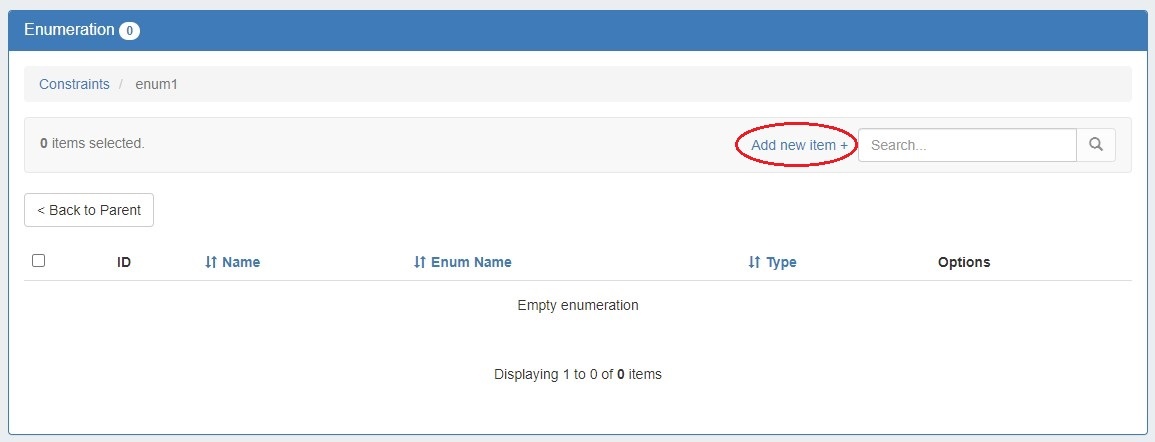
Once you have opened the parent constraint, here: Enumeration, you can add the child values that you wish to have listed as valid options.
For Enumeration, click "Add New Item", If using All of or One of types, then you will need to click "Add Constraint" to add child constraint items.
| Info |
|---|
For Parent/Child constraint types such as "All of" and "One of", you only need to enter the attribute binding and control type for the parent constraint, and do not need to enter these settings for the child items. |
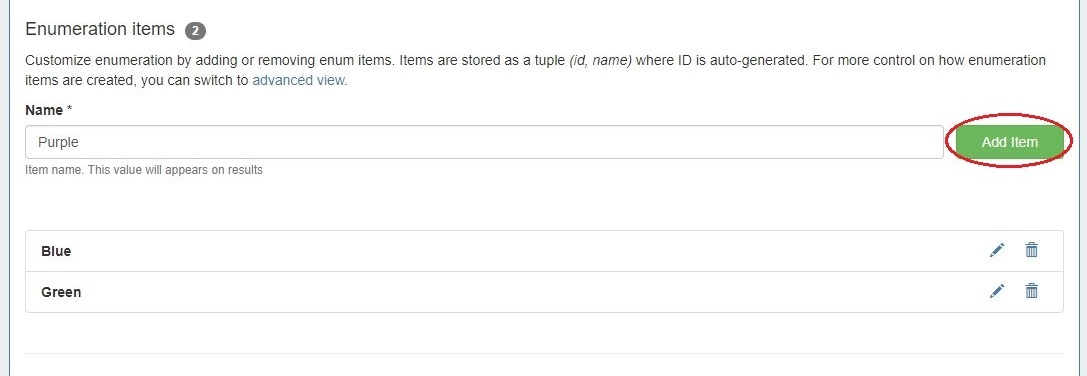
Add a new child enum item by entering a title, name/value, and the type. Typically, the type will be "=", for "equals this value".

When done, click "Add Item", and repeat for any additional values that you wish to make available in your enumeration dropdown.
Here, we have added additional enum items to cover "val1" through "val 5".
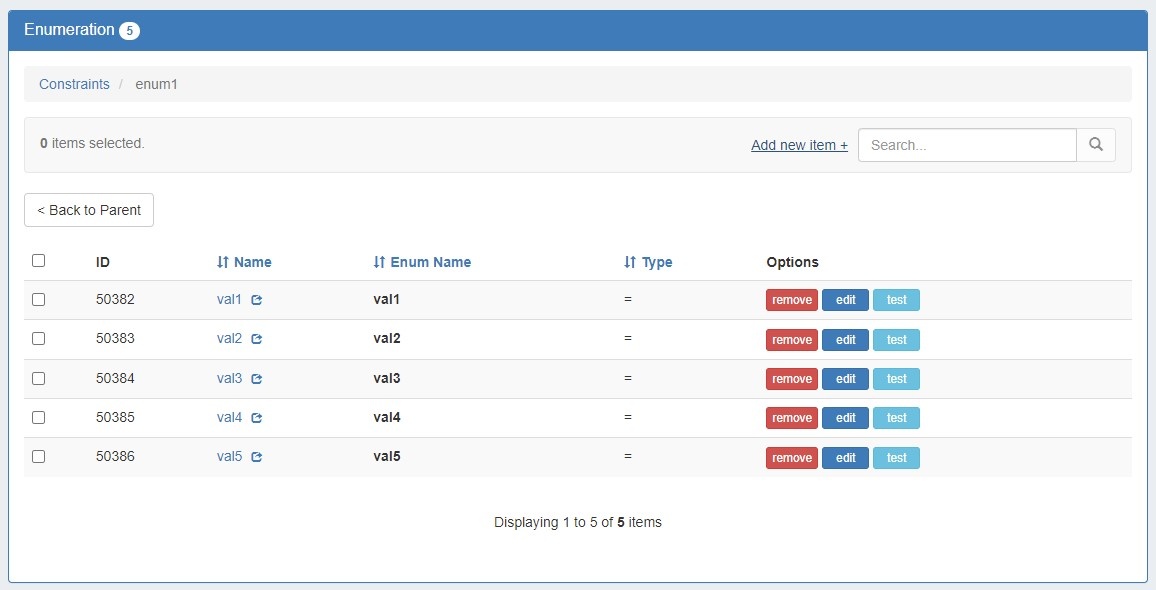
From here, navigate back up to the parent constraint list that displays "enum1", and click "Test" (test will not work on individual child constraint items)
In the section "Enumeration items" enter a name for an option and click "Add Item". Repeat for any additional values that you wish to make available in your enumeration dropdown. You can edit or delete options via the row icons.
In the "UI Properties" section, you may enter custom placeholder text or enable multiple item selection. When done, click "Add Constraint".
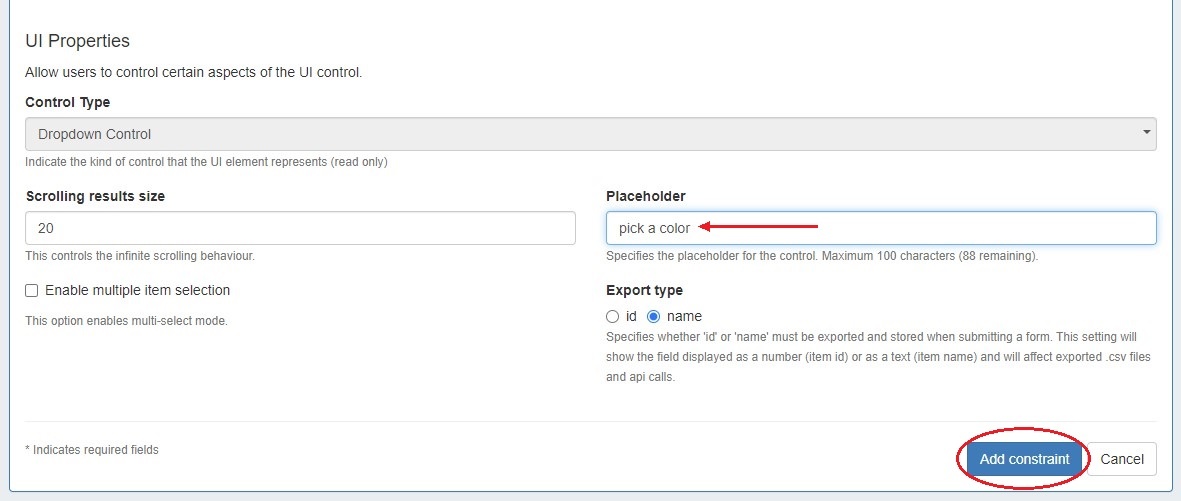
| Info |
|---|
"Export type" specifies whether an id or name should be exported when submitting a form and will affect exported .csv files and api calls. |
On the main Constraints List, open the action menu and select "Test".
A display dropdown box will appear, click . Click inside of it to confirm your child items show as selectable options.
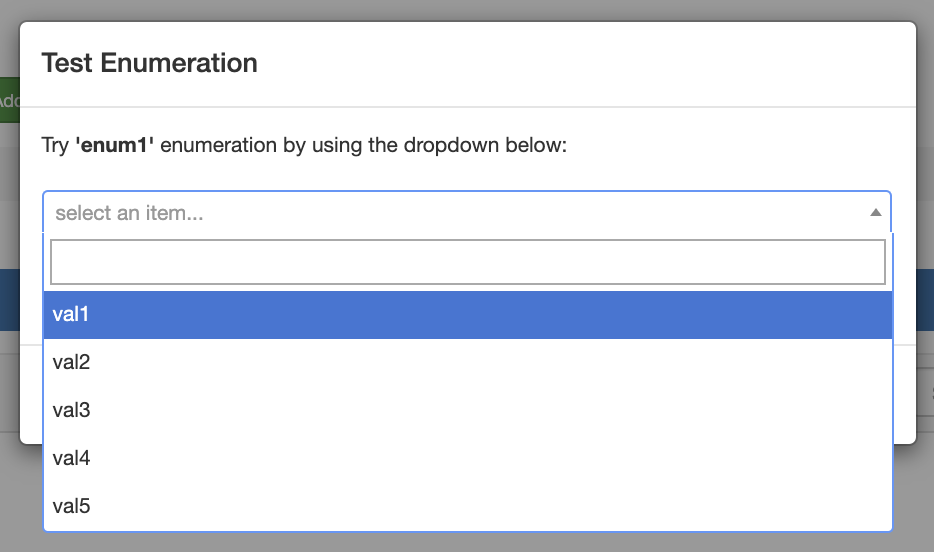
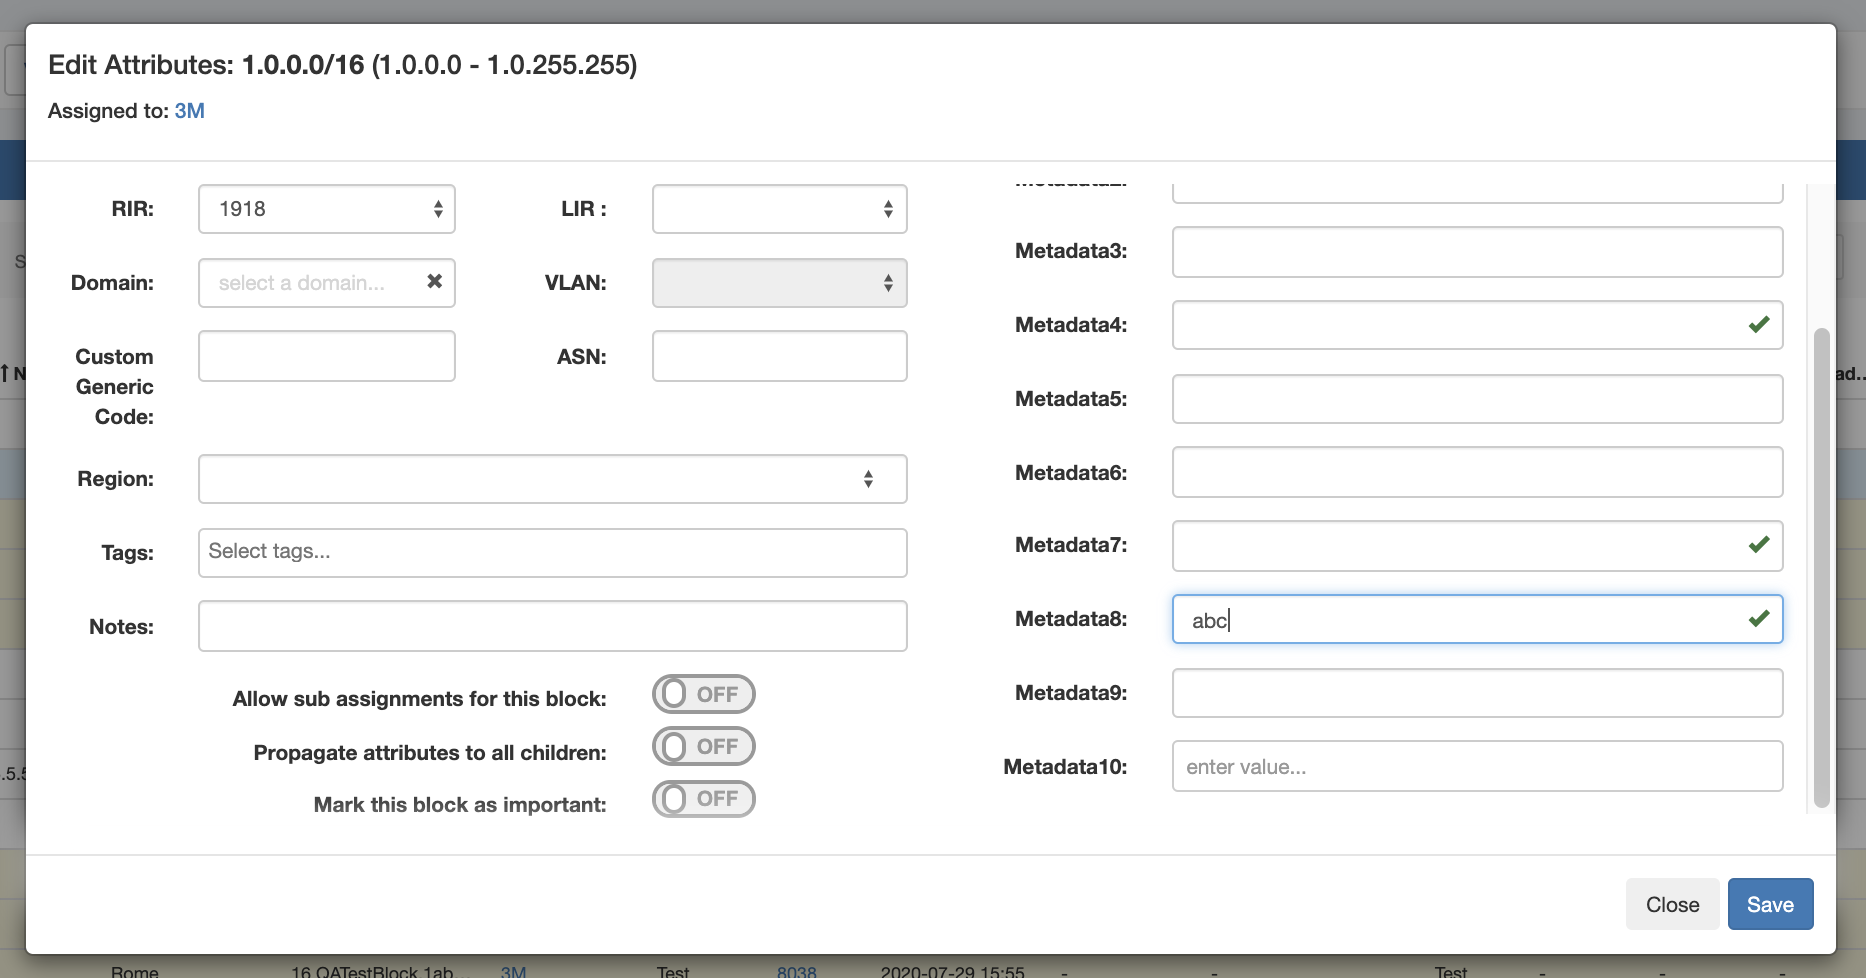
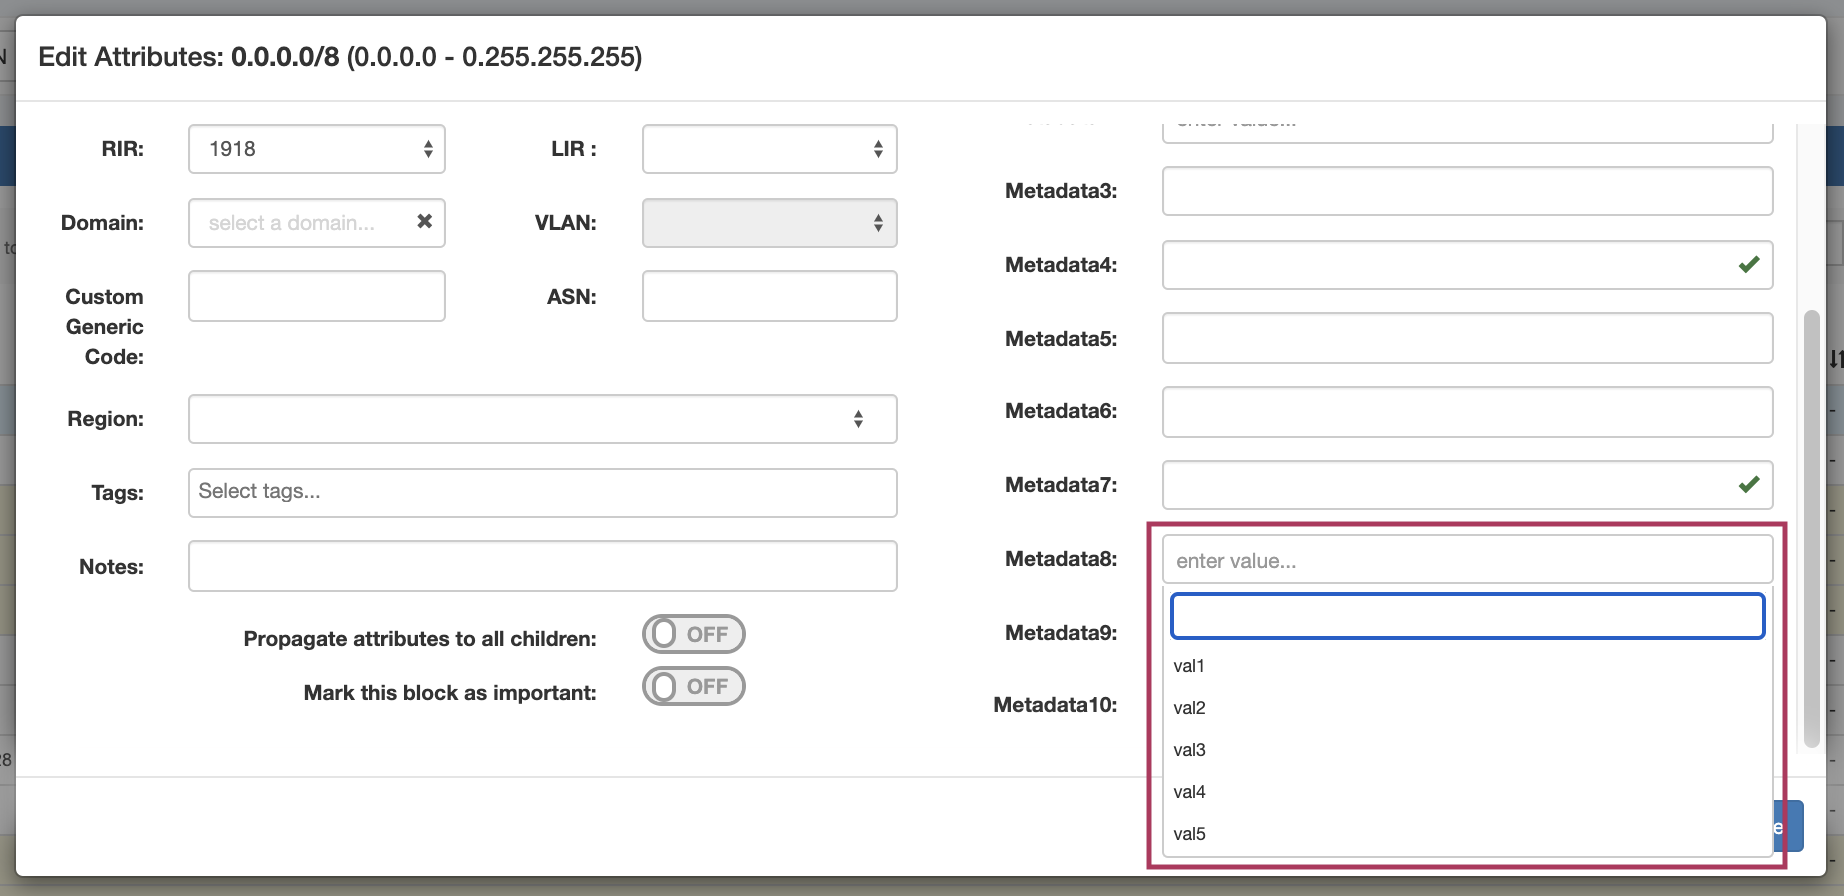
Using the Enumeration
To see the constraint in action in IPAM Manageor Resources, navigate to a block or field and open Edit Block mode. Select the field that to which you applied the "enum1" element binding to (metadata 8, here), enumeration to view/select constraint items from the dropdown
Additional Information
...