...
The "Add Aggregate" button opens a new page to add an aggregate block with options for RIR, VLAN, Tags, Region, Resource, and enabling sub assignments. A resource must be selected to enable sub assignments.
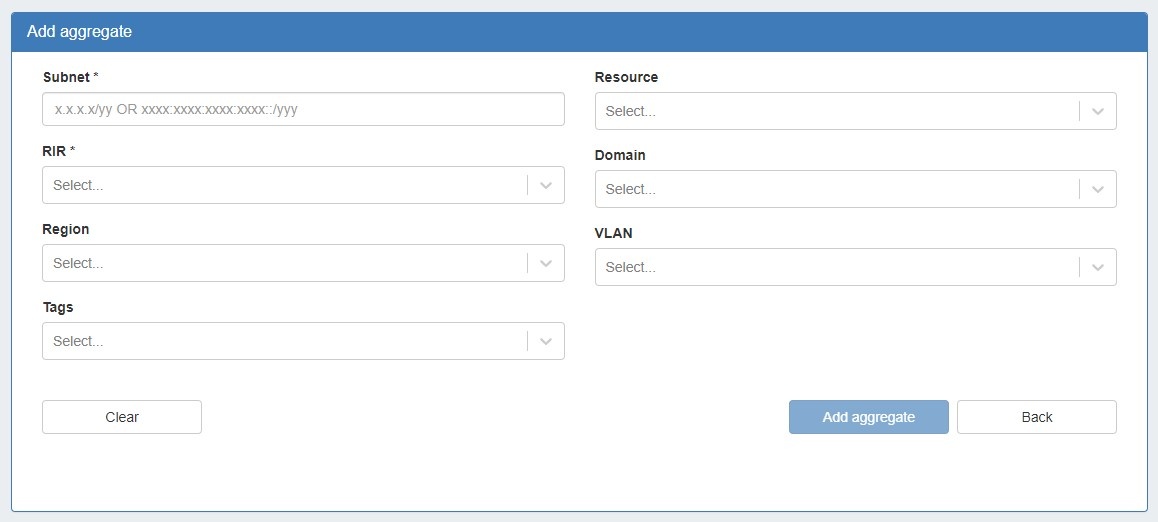

When done, click "Add Aggregate". A link to the newly created aggregate will be available or you may hit "Clear" and create another aggregate. New aggregates will be listed under the Host Utilization and Aggregate Blocks list of the IPAM Tab for further management.
...
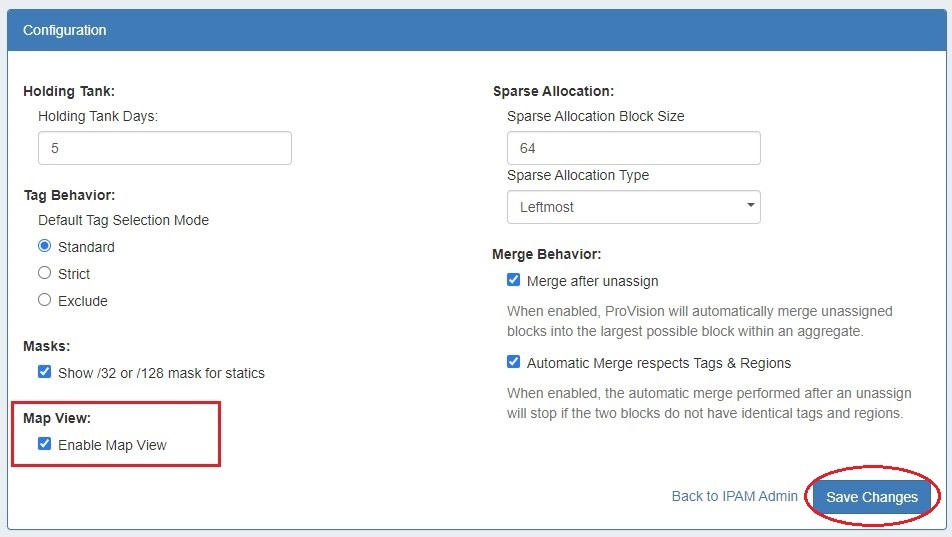
Map View enabled on the IPAM Configuration page
Expand 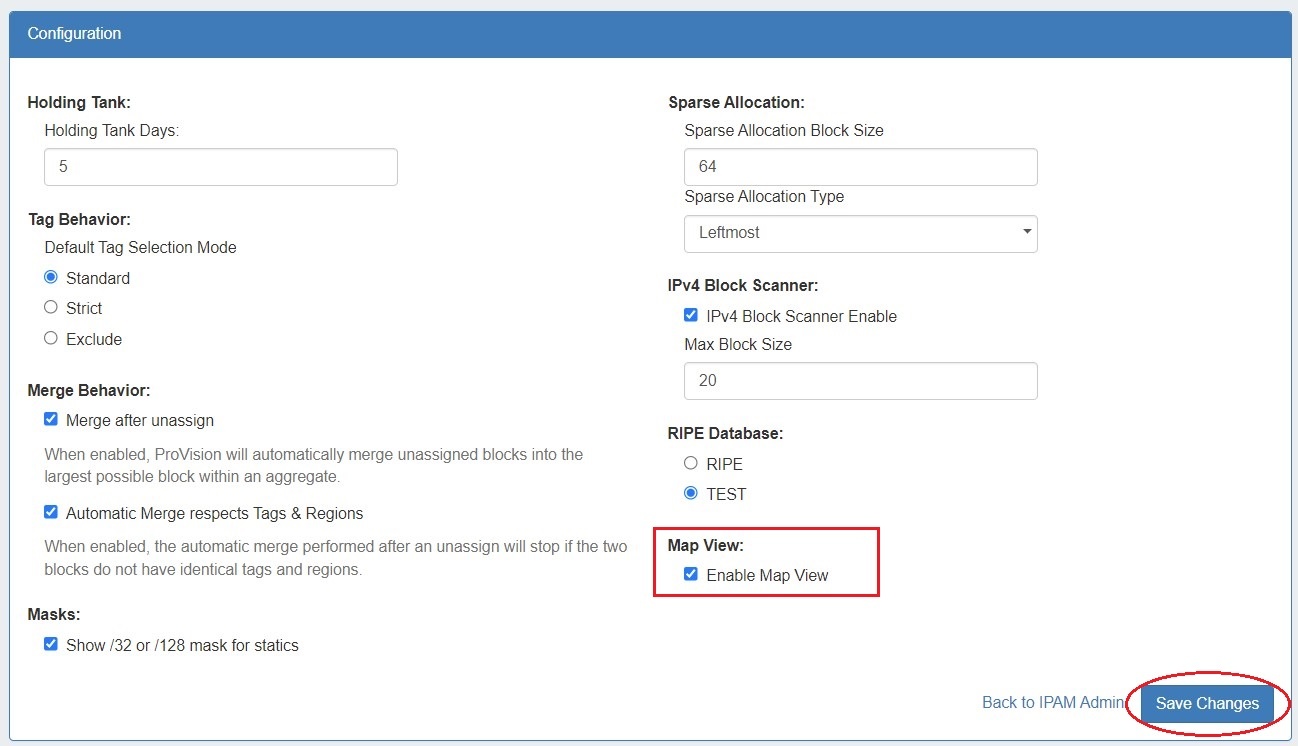
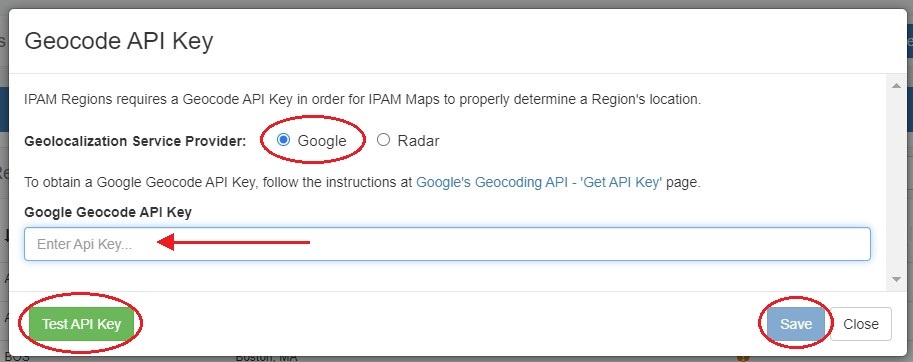
A Geocoding API Key provided in the Edit Regions page. See Edit Regions for additional detail.
Expand title How to Get and Apply a Google Geocoding API Key Step 1: Obtain a Google Geocoding API Key
To get a Google Geocoding API Key, follow the instructions listed here:
How to get a Google Geocoding API Key
Note: In order to obtain a Google Geocoding API Key, a company must have a subscription enabled to Google Cloud Platform Console.
Step 2: Assign the API Key to IPAM Regions
Once assigned a Google Geocoding API Key, from the Edit Regions page, click "Geocode API Key". Then select the Google radio button, paste the API key into the Geocode API dialog, and click "Save" . You can test the API Key by clicking the Test button at lower left.
Expand title How to Get and Apply a Radar Geocoding API Key Step 1: Obtain a Radar Geocoding API Key
To get a Radar Geocoding API Key, follow the instructions listed here:
How to get a Radar Geocoding API Key
Step 2: Assign the API Key to IPAM Regions
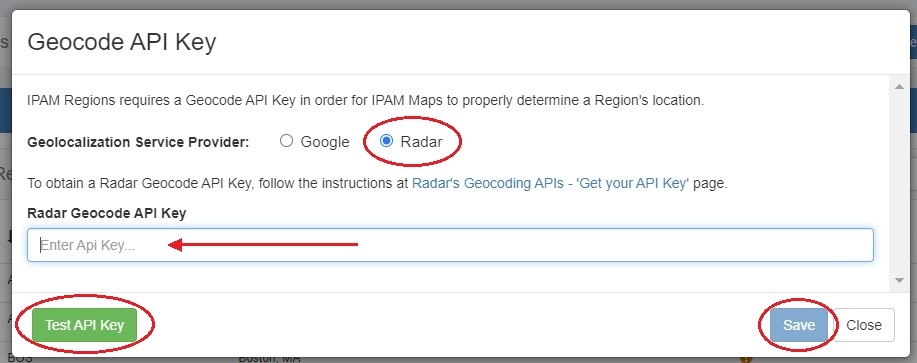
Once assigned a Radar Geocoding API Key, from the Edit Regions page, click "Geocode API Key". Then select the Radar radio button, paste the API key into the Geocode API dialog, and click "Save". You can test the API Key by clicking the Test button at lower left.
Regions created with a valid "Address" (location) field. The "Address" field may be a street address, city, airport code, or geo-coordinates. See Edit Regions for additional detail.
Note title Miscellaneous Terms as Addresses Being that the validity of the "Address" field is determined by the Geocoding API, unexpected location mapping may occur if a company name or other non-location specific term is used in the Address field.
Google treats the item as a search term and returns the most likely location result back - but it might not be what you were expecting! When in doubt, check the address term by pasting it into Google Search, and verify that the top result returns your desired location.
- Regions enabled in IPAM Columns and assigned to aggregates / blocks for the IPAM Map view to populate data. See Edit IP Block Attributes for additional detail.
...
| Expand |
|---|
The ProVision WHOIS Server is a thin client for our REST API that listens on port 43 and accepts WHOIS requests that gets forwarded to our API. It is written in Python 3 using the socketserver module, and uses the ProVision endpoint /api/ipam/whois to receive all requests from the WHOIS server. The main business logic is located in services/WhoisService.php Running the Server manuallyThe Python requests library must first be installed: Ubuntu:sudo apt install -y python3-pip CentOS / Alma Linux:sudo yum install python3-pip OR sudo dnf install python3-pip The server is located at whois_server/main.py in the ProVision repository. Open main.py and update these variables: Running the server can be done with: sudo python3 main.py server is located at whois_server/main.py in the ProVision repository.Running the server can be done with: sudo python3 main.py (We need root because we are binding to port 43) Quering the WHOIS server
Installing the WHOIS server as a serviceDifferent Linux distributions might have different ways to setup a service that runs on startup. systemdThere is a Unit file for systemd in the repository: whois_server/provision_whois.service that is used when a service is created in systemd env. 1) Edit the file to setup the proper path to the python server/file ExecStart=/usr/bin/python3 /root/whois_server/main.py WorkingDirectory=/root/whois_server/ 2) Copy the file to /etc/systemd/system (on CentOS this directory should be: /lib/systemd/system/) - sudo cp whois_server/provision_whois.service /etc/systemd/system/provision_whois.service 3) Start the service with service provision_whois start 4) Verify that is working with service provision_whois status and making a test query whois -h 127.0.0.1 ﹤query﹥ The systemd services are run as root, so there shouldn't be issues with binding to port 43. init.dThere is also init.d file located at whois_server/provision_whois 1) Edit the file to setup the proper path to the python server/file DAEMON_OPTS="/var/www/projects/whois/app.py" 2) Copy the file to /etc/init.d/ 3) chmod +x /etc/init.d/provision_whois -v 4) Verify that is working with service provision_whois status and making a test query whois -h 127.0.0.1 ﹤query﹥ |
...
| Expand | ||
|---|---|---|
| ||
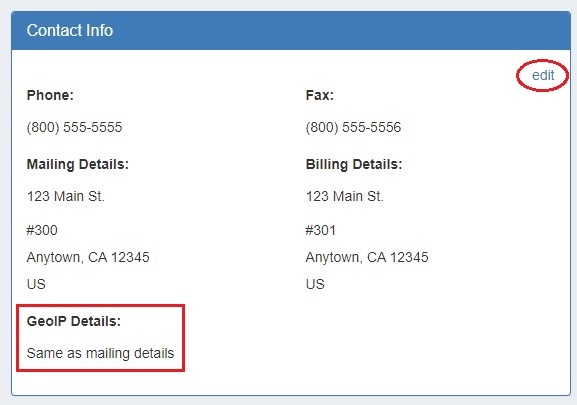
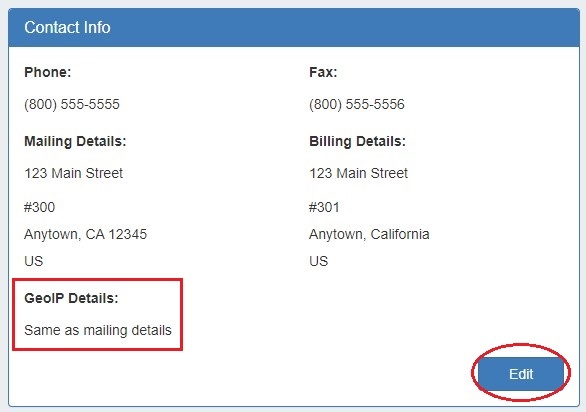
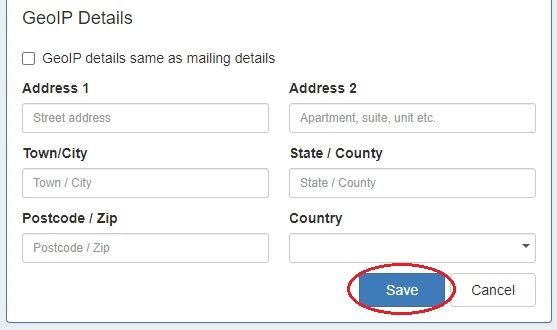
1) Enter GEO IP data to Resources Add GEO IP location data to a Resource by selecting "Edit" for the Contact Info Gadget.
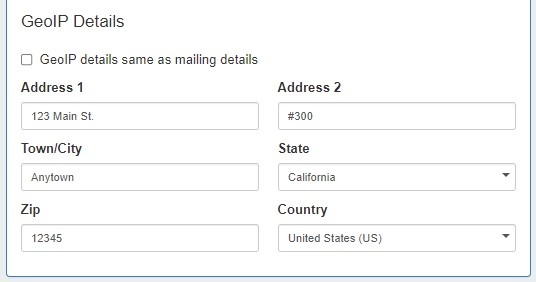
Enter a separate address to denote as the GEO IP location, or you may select "Same as Mailing Address":
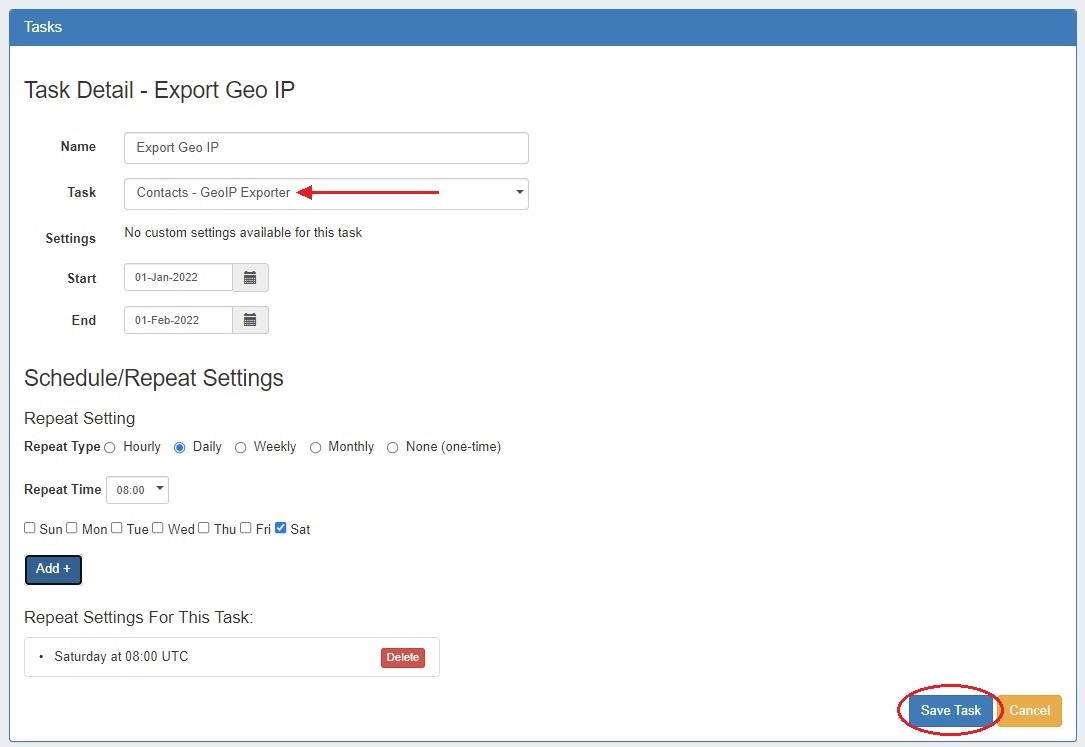
2) Set up the Geo IP Export Scheduler Task Create a Scheduler task to export GEO IP data:
3) Run the Scheduler Task / File Access Run the GEO IP scheduler task, either via "Run Now" or as a scheduled run - the task will search for resources with an assigned IP address, and either Geo IP location data or a Mailing Address entered in the Contact Info Gadget, and add the data to the .csv output.
Once the task has completed, the GEO IP data will be written to the ProVision root directory as "geoip_feed.csv":
|


...