| HTML |
|---|
<div id="google_translate_element"></div>
<script type="text/javascript">
function googleTranslateElementInit() {
  new google.translate.TranslateElement({pageLanguage: 'en'}, 'google_translate_element');
}
</script>
<script type="text/javascript" src="//translate.google.com/translate_a/element.js?cb=googleTranslateElementInit"></script> |
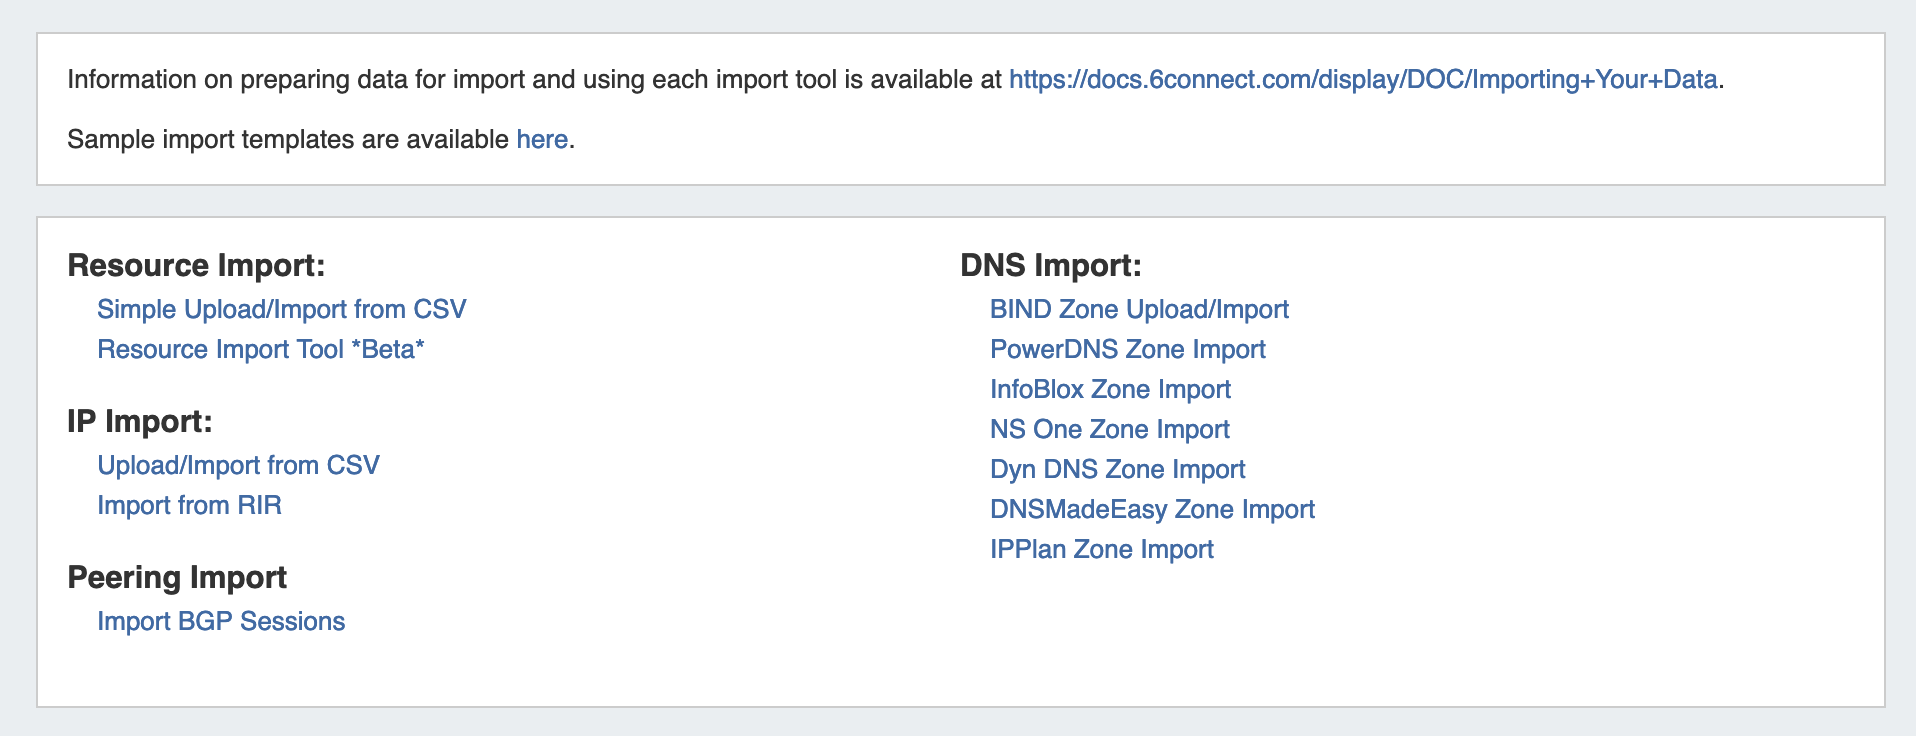
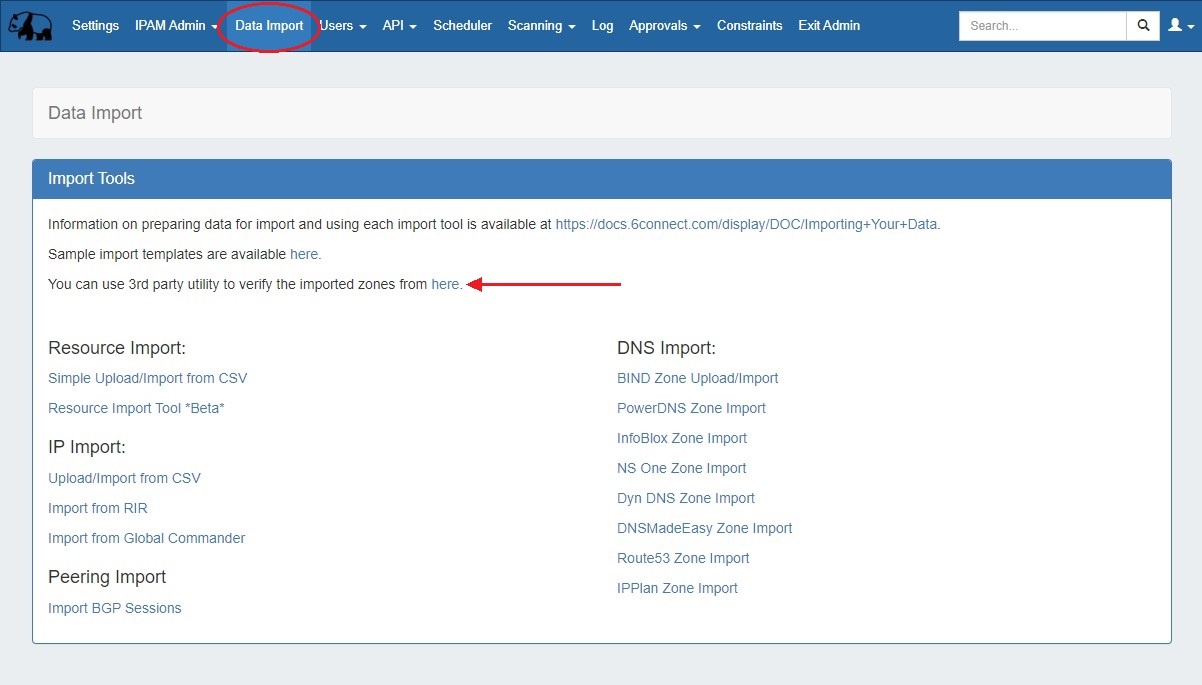
Importing DNS Zones
ProVision offers multiple DNS zone import options, available under the the Data Import Import tab in in the the the Admin section of ProVision.
...
Admin section. Additional Import options may be available on zone or server pages.
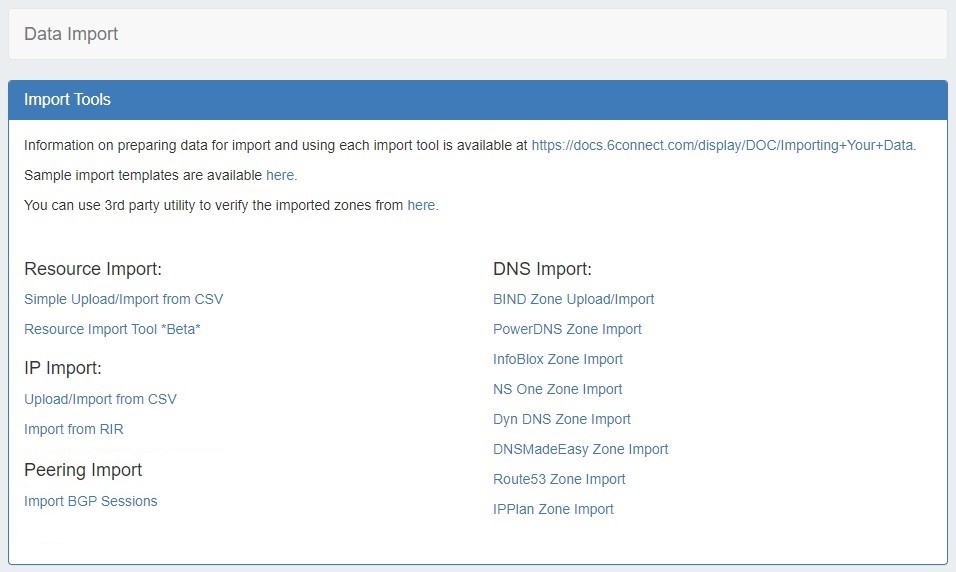
DNS Global Import Options
ProVision offers various DNS zone import options available under the Data Import Data Import tab in the the Admin section of ProVision:
BIND Zone Import
- Imports using the named.conf configuration file tied to the zones you are uploading, a .zip or .tar file of the zones themselves, and an optional .csv file mapping zones to customers.
...
- Imports DNS zones using a provided Host, Username, and Password. The InfoBlox import pulls all zones on the InfoBlox LOCAL grid and adds them to a designated Group. It is advised to create a DNS Group prior to the import with default parameters and NS records to be inherited by the imported records.
...
- Imports DNS zones using IPPlan MySQL database options. It is advised to create a DNS Group prior to the import with default parameters and NS records to be inherited by the imported records.
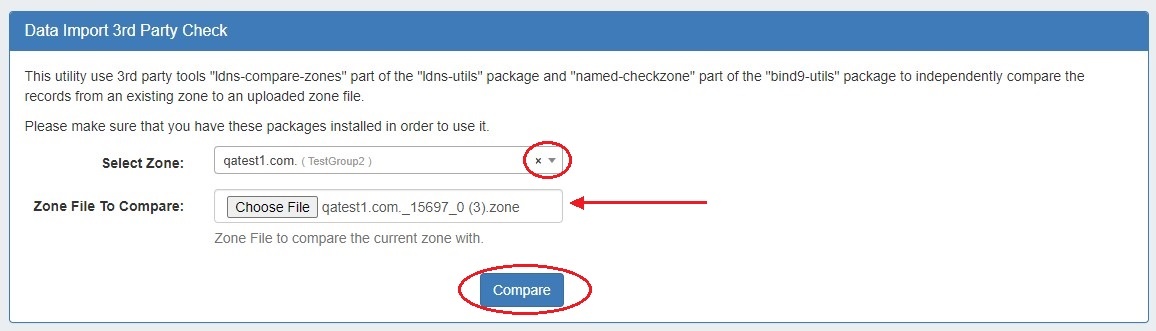
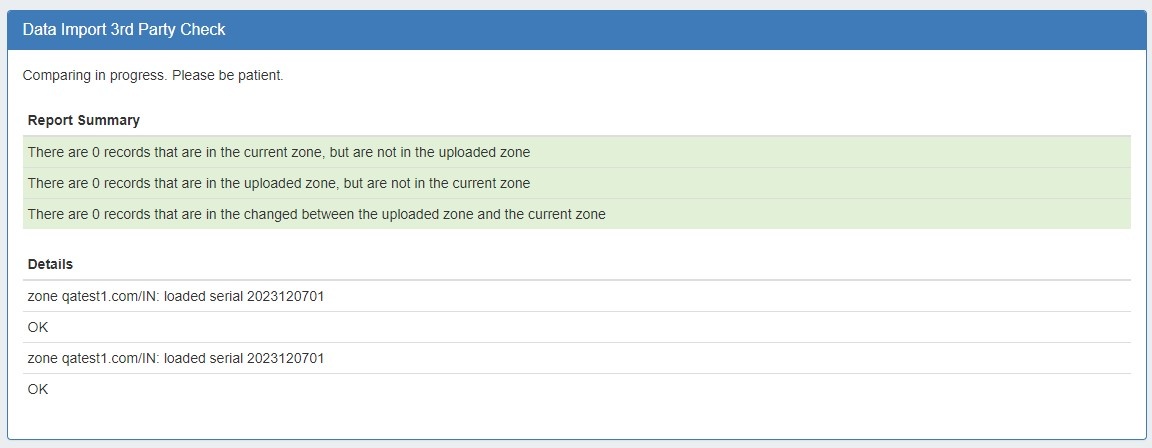
3rd Party Zone Check
The DNS Import Check is accessible from the Admin Section --> Data Import Tab.
| Expand |
|---|
Select an existing zone from the dropdown and upload a .zone file. Click the "Compare" button to start the process.
The resulting comparison will verify the zone matches the uploaded file or highlight differences found between the two.
|
Additional DNS import options may be available on a per-zone or per-server level, accessed from the DNS Tab:
DNS Zone Import Options (Individual)
DNS Zone / Record Import:
- This tool is available on a zone's "View Zone" page, and allows the user to import additional zone/record information into an existing ProVision zone by uploading a zone file (.zone).
Expand Import Zone / Import Records
A zone file (.zone) may be imported into a ProVision zone to populate record data. Note: To import the record data, the zone must already exist in ProVision - although it may be an empty placeholder zone if necessary.
Enable Saving Import Files (Admin Setting - Optional)
Before you import a zone file, you may (optionally) select to save the import file to the zone. Saving the file allows you to later re-download it directly from ProVision.
To enable saving import files, go to Admin Preferences → DNS Settings sub-tab. From there, select "Import Settings" in the DNS Global Settings module.
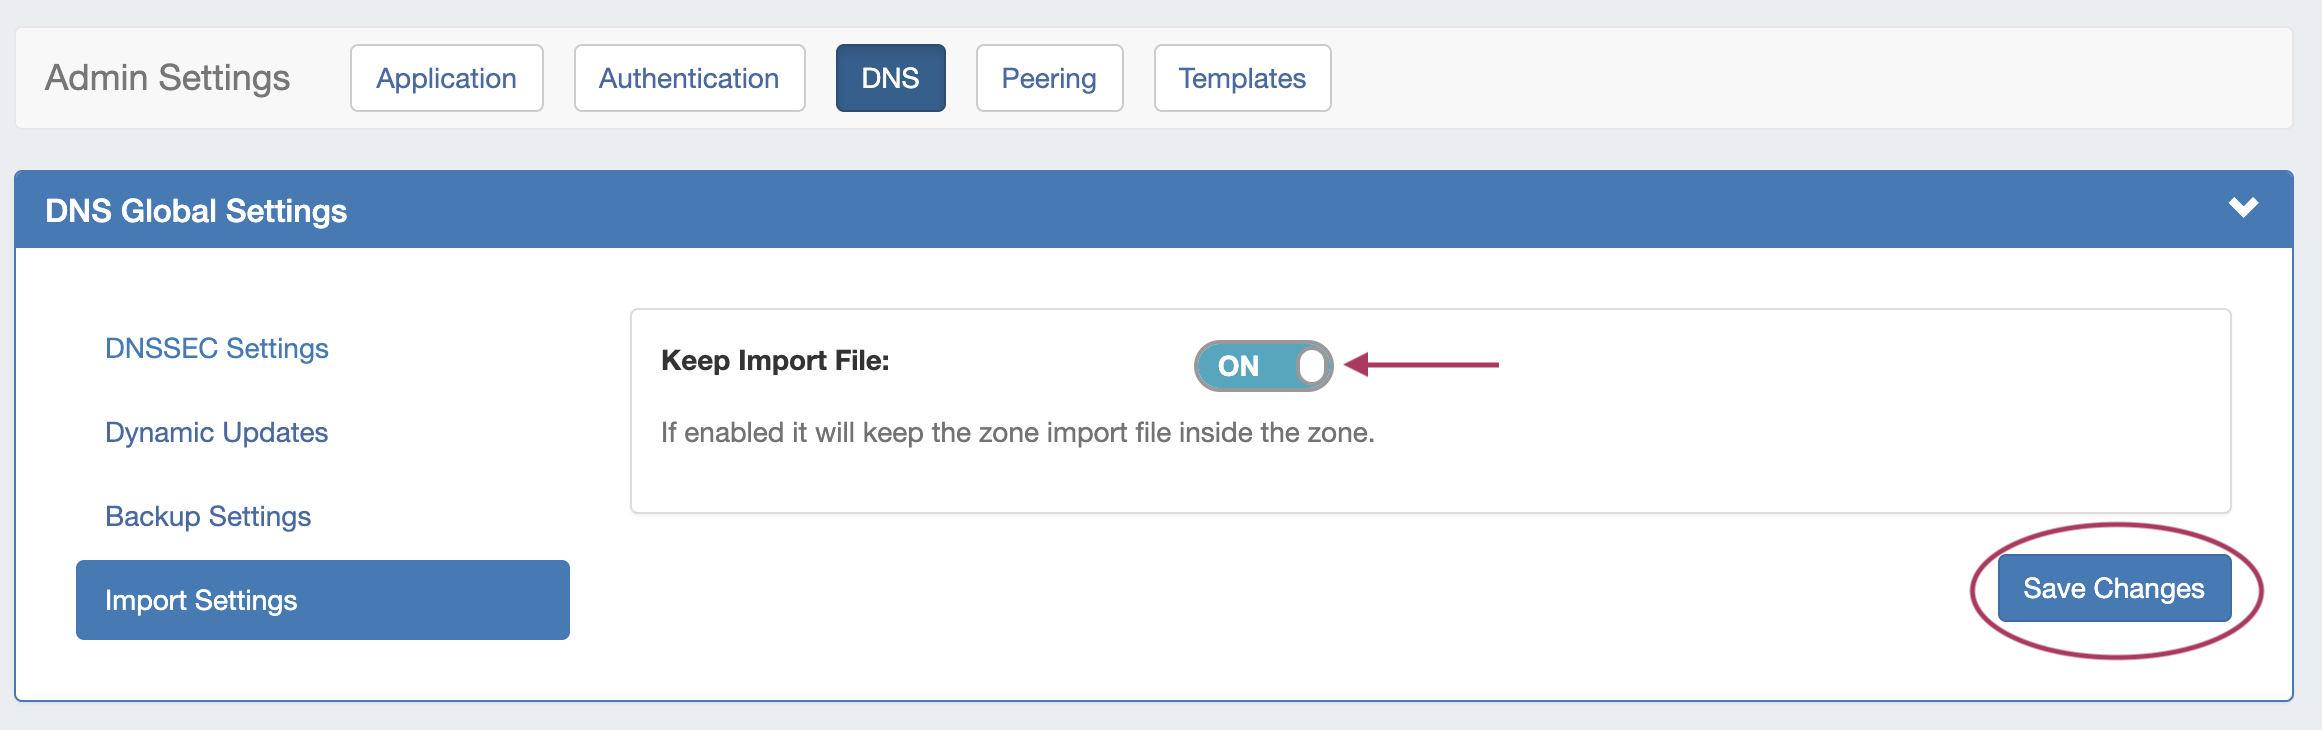
Toggle "Keep Import File" into the ON position, then select "Save Changes".
Import Zone File
To import a zone file to populate record data in ProVision, go to the View Zone page for the zone. The zone must already exist in ProVision, although it may be empty
Click "Import Zone" on the View Zone page.

A Zone Import dialog box will open. Next to Zone File:, click "Choose File" and select your .zone file to import. Then, select an import policy to follow.
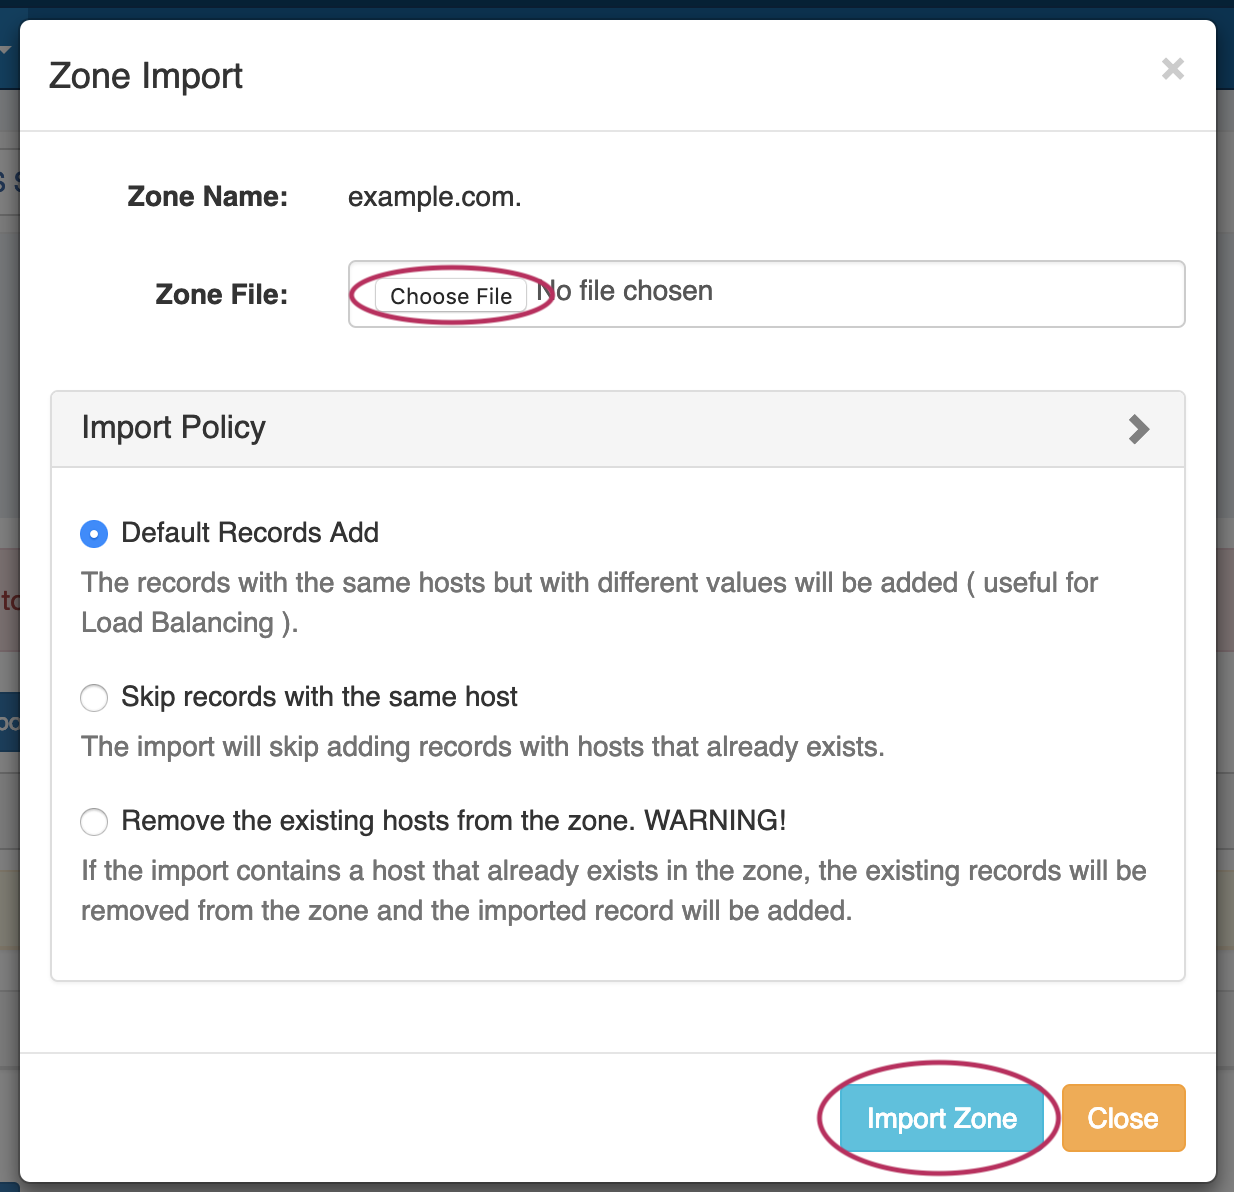
When done, Click "Import Zone".
Importing Zone file with Comments
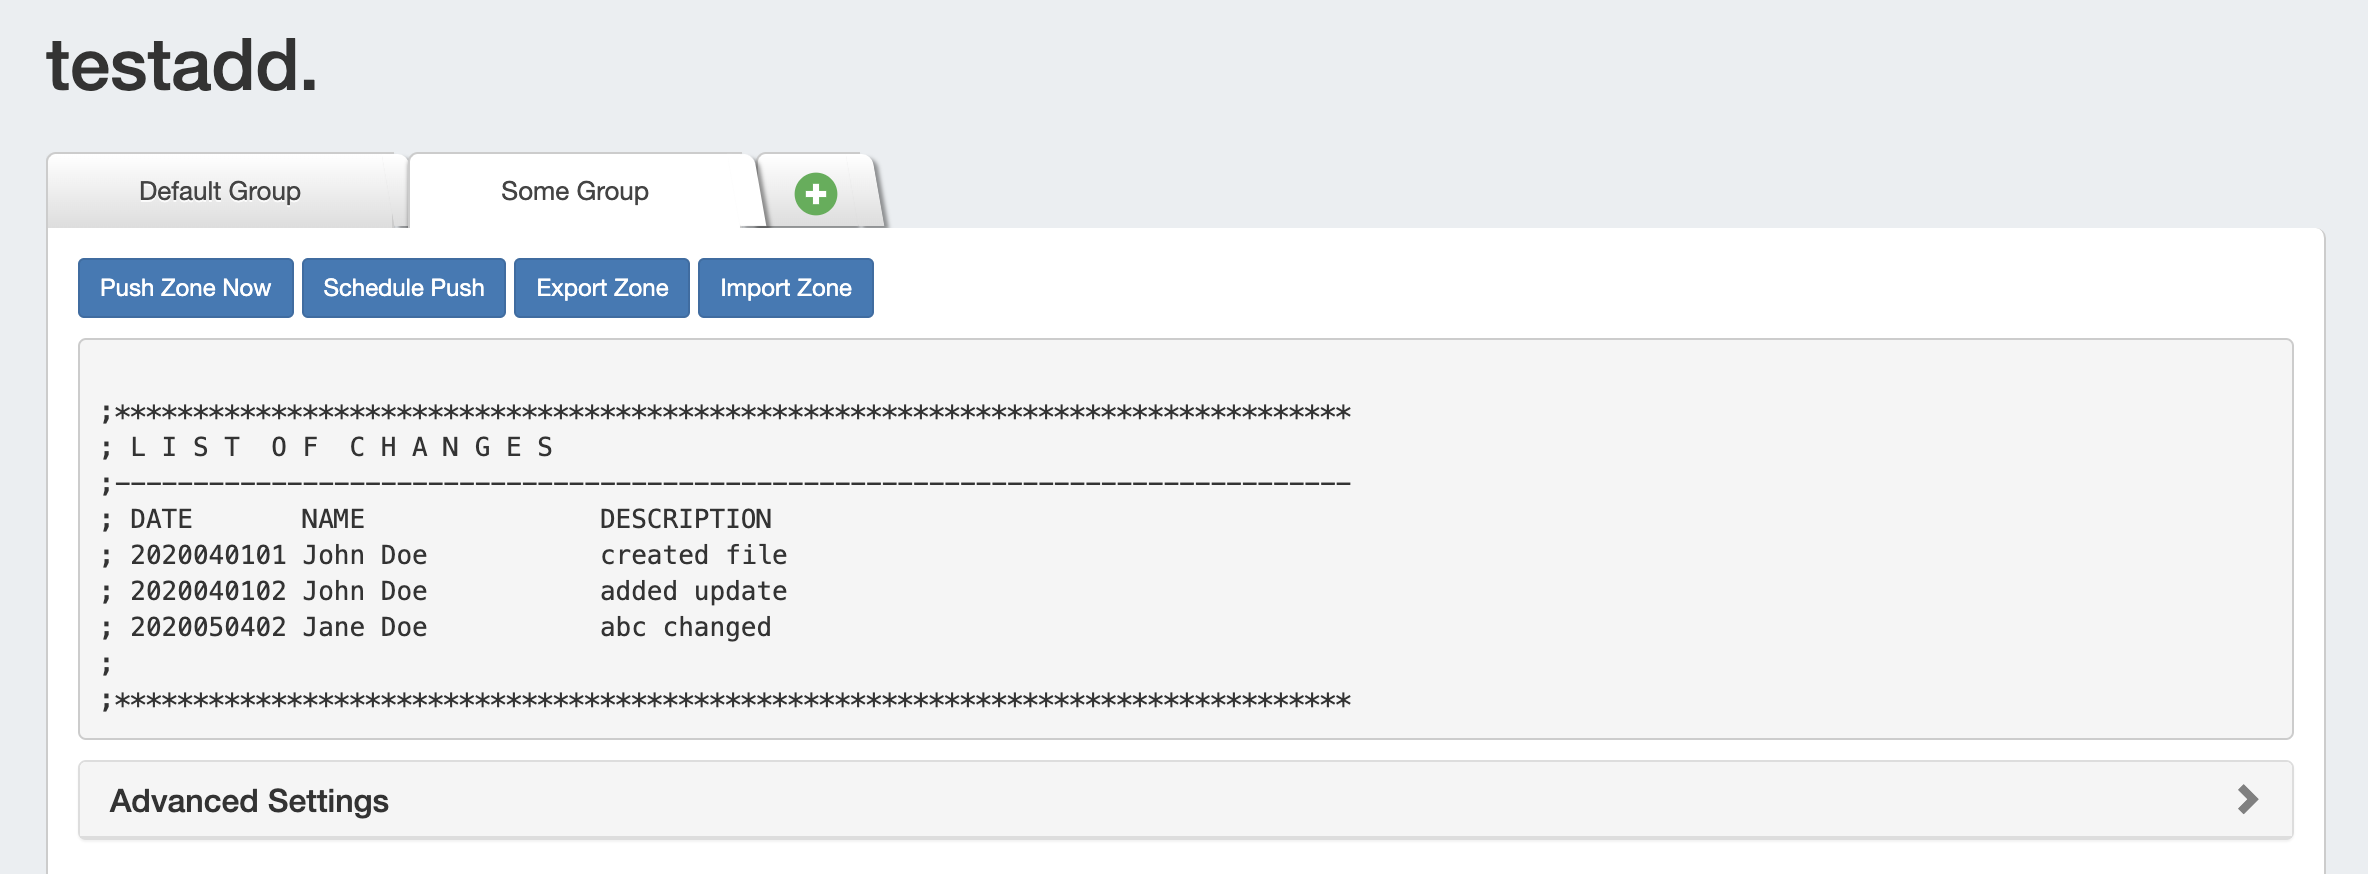
DNS Zone Import will also import comments contained in the .zone file, such as an internal change log (as seen in the image below).
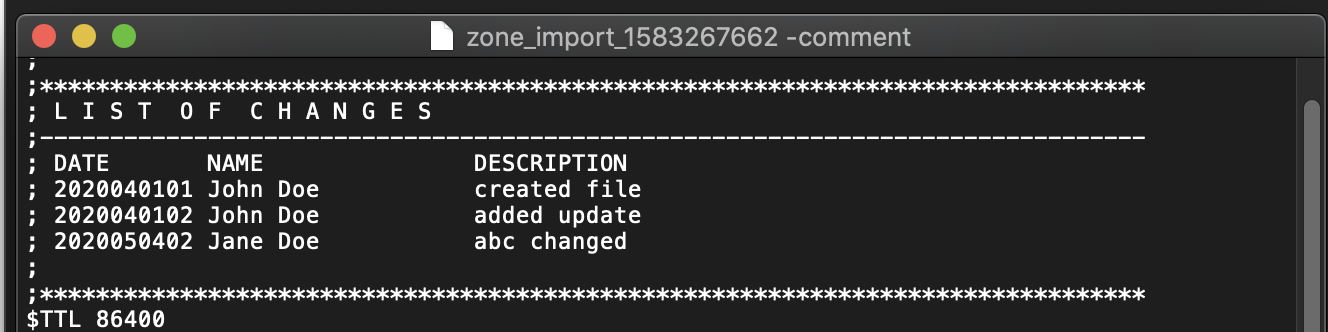
During import, these comments are added to ProVision's zone comments field:
Additional Information
Continue to the following sections for details on performing each import method:
...