...
| HTML |
|---|
<div id="google_translate_element"></div>
<script type="text/javascript">
function googleTranslateElementInit() {
  new google.translate.TranslateElement({pageLanguage: 'en'}, 'google_translate_element');
}
</script>
<script type="text/javascript" src="//translate.google.com/translate_a/element.js?cb=googleTranslateElementInit"></script> |
Importing BGP Sessions
| Table of Contents |
|---|
...

Importing peering sessions requires Admin-level permissions, and is accessible only from the Admin section of ProVision.
From the Admin section of ProVision, navigate to the Data Import Tab. Under Peering Import, select Import BGP Sessions. This will take you to the Peering Import section of ProVision.
| Table of Contents |
|---|
Standard BGP Session Import
Before You Begin
Before attempting a session import, ensure that the applicable exchange and router have been added into ProVision. See Peering Exchanges and Peering Routers for details.
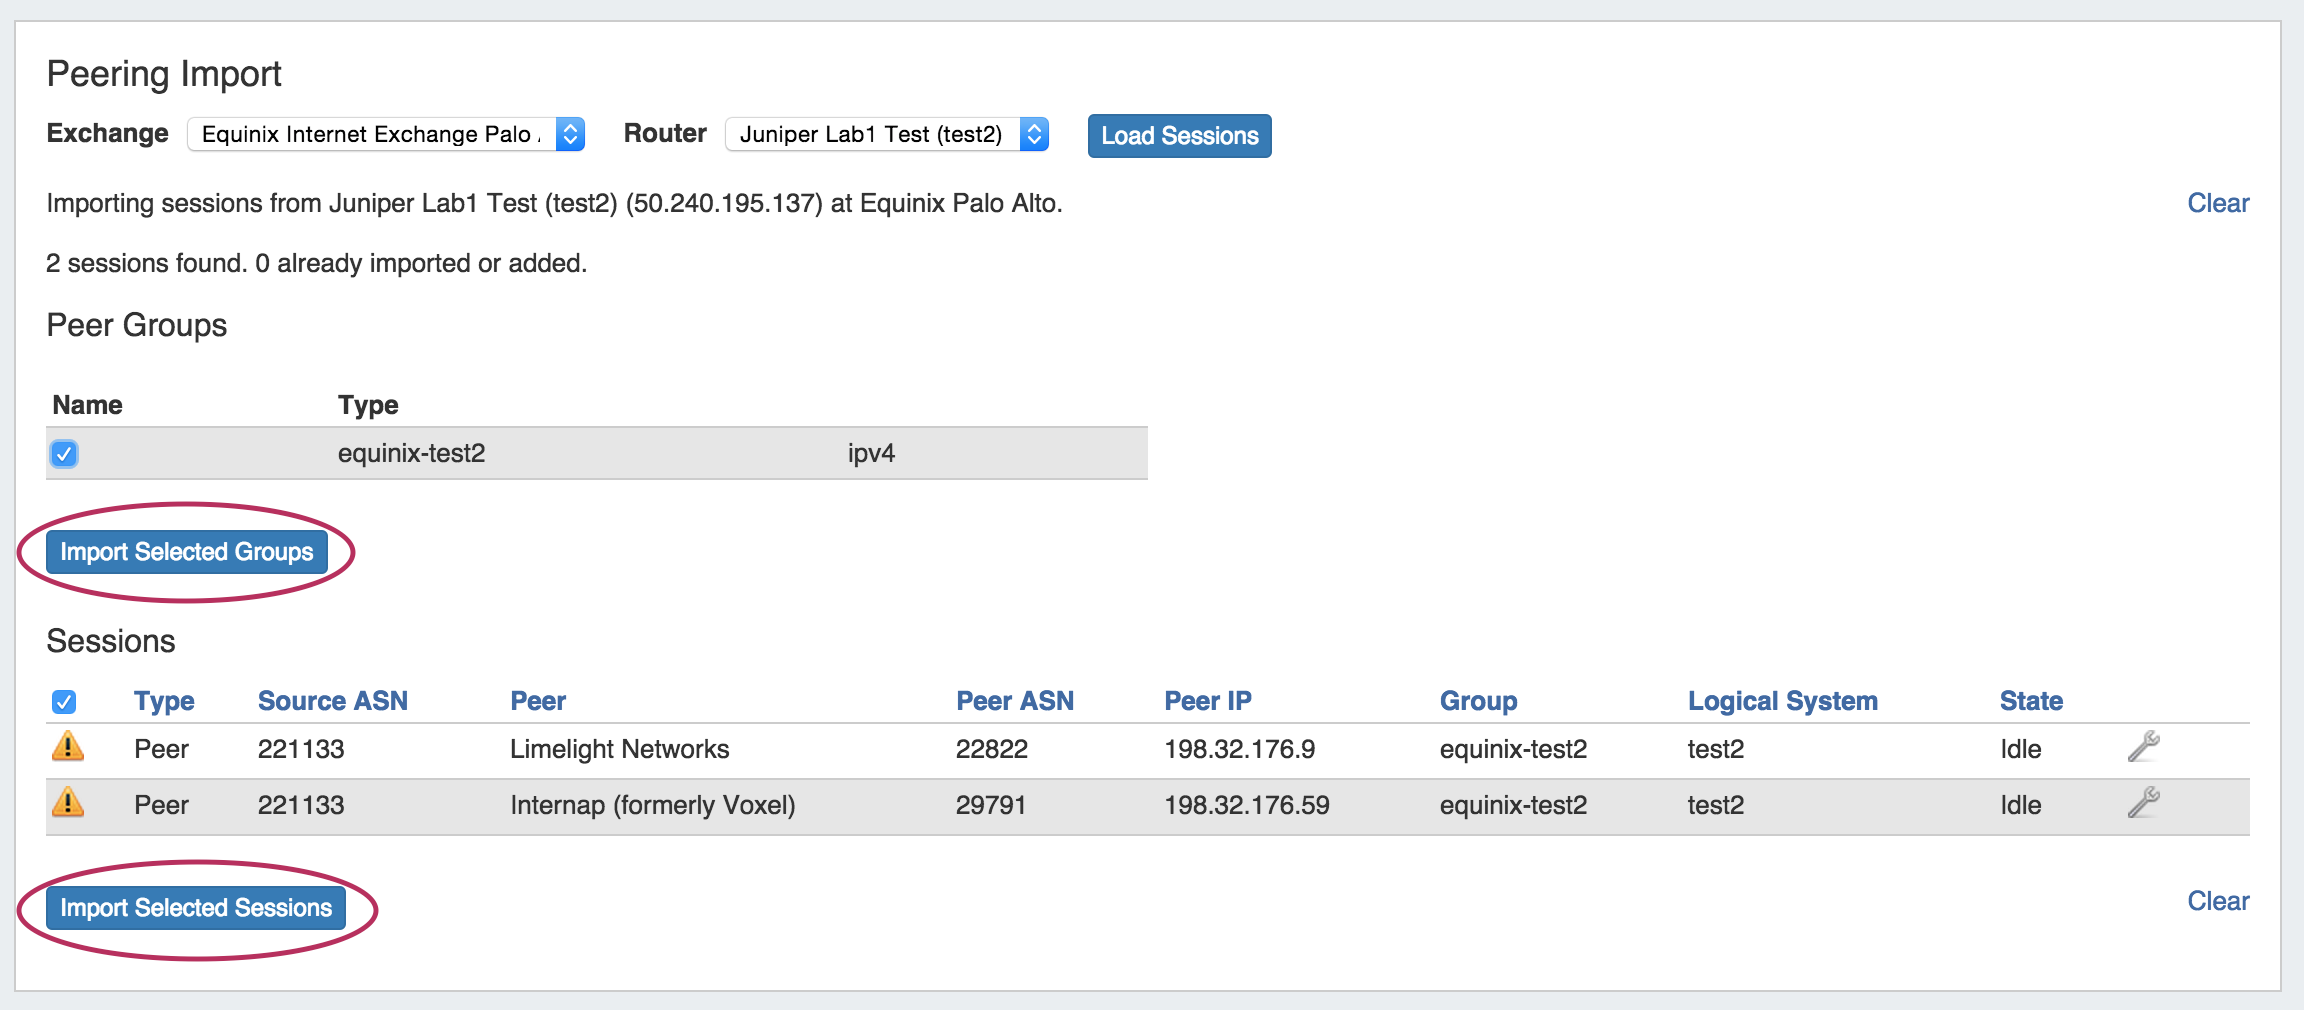
Load Router Sessions
...
Successful imports will then display with a green check mark at the beginning of the row.
Once imported, you can manage and configure your sessions from the Peering Tab.
Importing with Router File Connectors
| Note |
|---|
Note: These connector types are only used for this direct data import process - do not select these for standard ProVision router/session creation, as peering management functions (config pushes, session states, etc) do not obtain a router connection while using File Connectors. File Connectors should only be used in rare circumstances where direct router access is unavailable. |
Step 1
Generate a router response data text file (it should be named “cisco_router_data.txt”, “juniper_router_data.txt” or “arista_router_data.txt”) and place it in ProVision's /data directory.
To generate the router response, run the following commands:
| Cisco | Juniper | Arista |
|---|---|---|
| terminal length 0 show bgp ipv4 unicast sum show bgp ipv4 unicast neighbor show bgp ipv6 unicast neighbor | show bgp neighbor | display xml | no-more show bgp group | display xml | no-more | terminal length 0 show ip bgp summary show ip bgp neighbors |
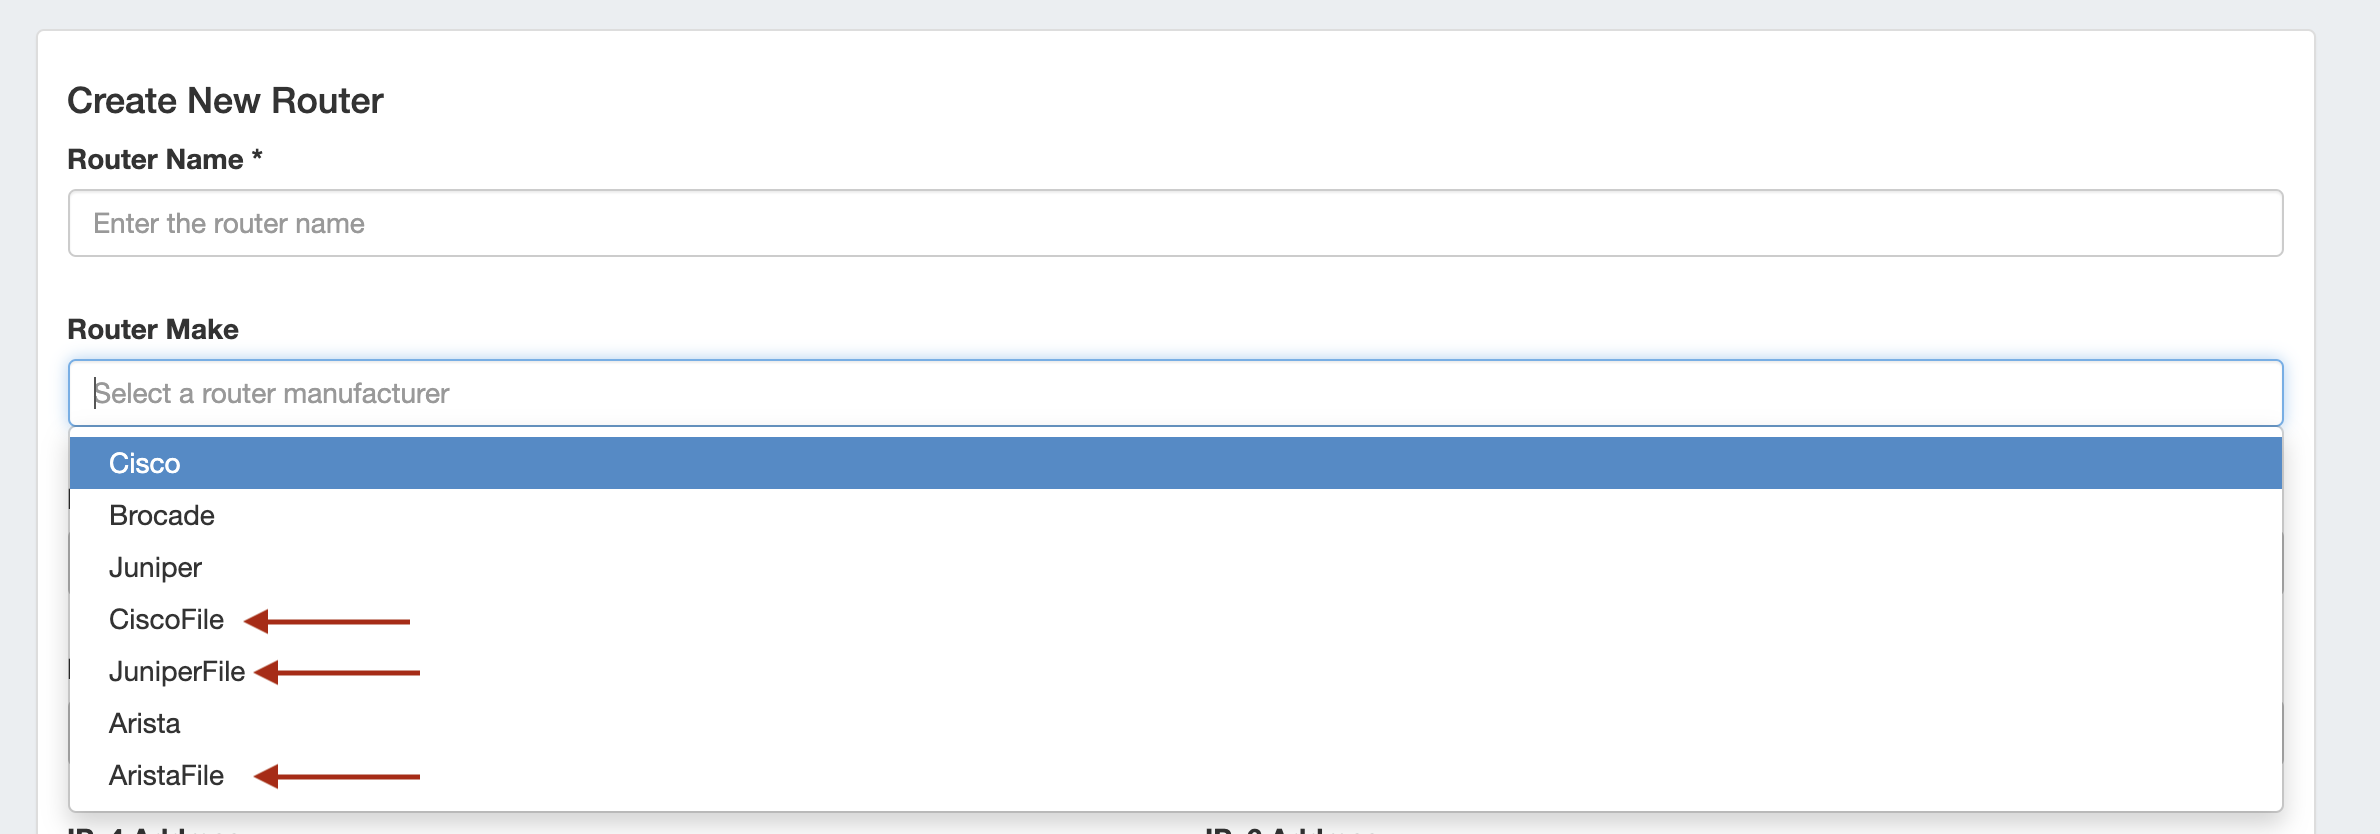
Step 2
Create a new 'Router' in ProVision, selecting the appropriate file connector as the Router Make type - CiscoFile, JuniperFile, or AristaFile.
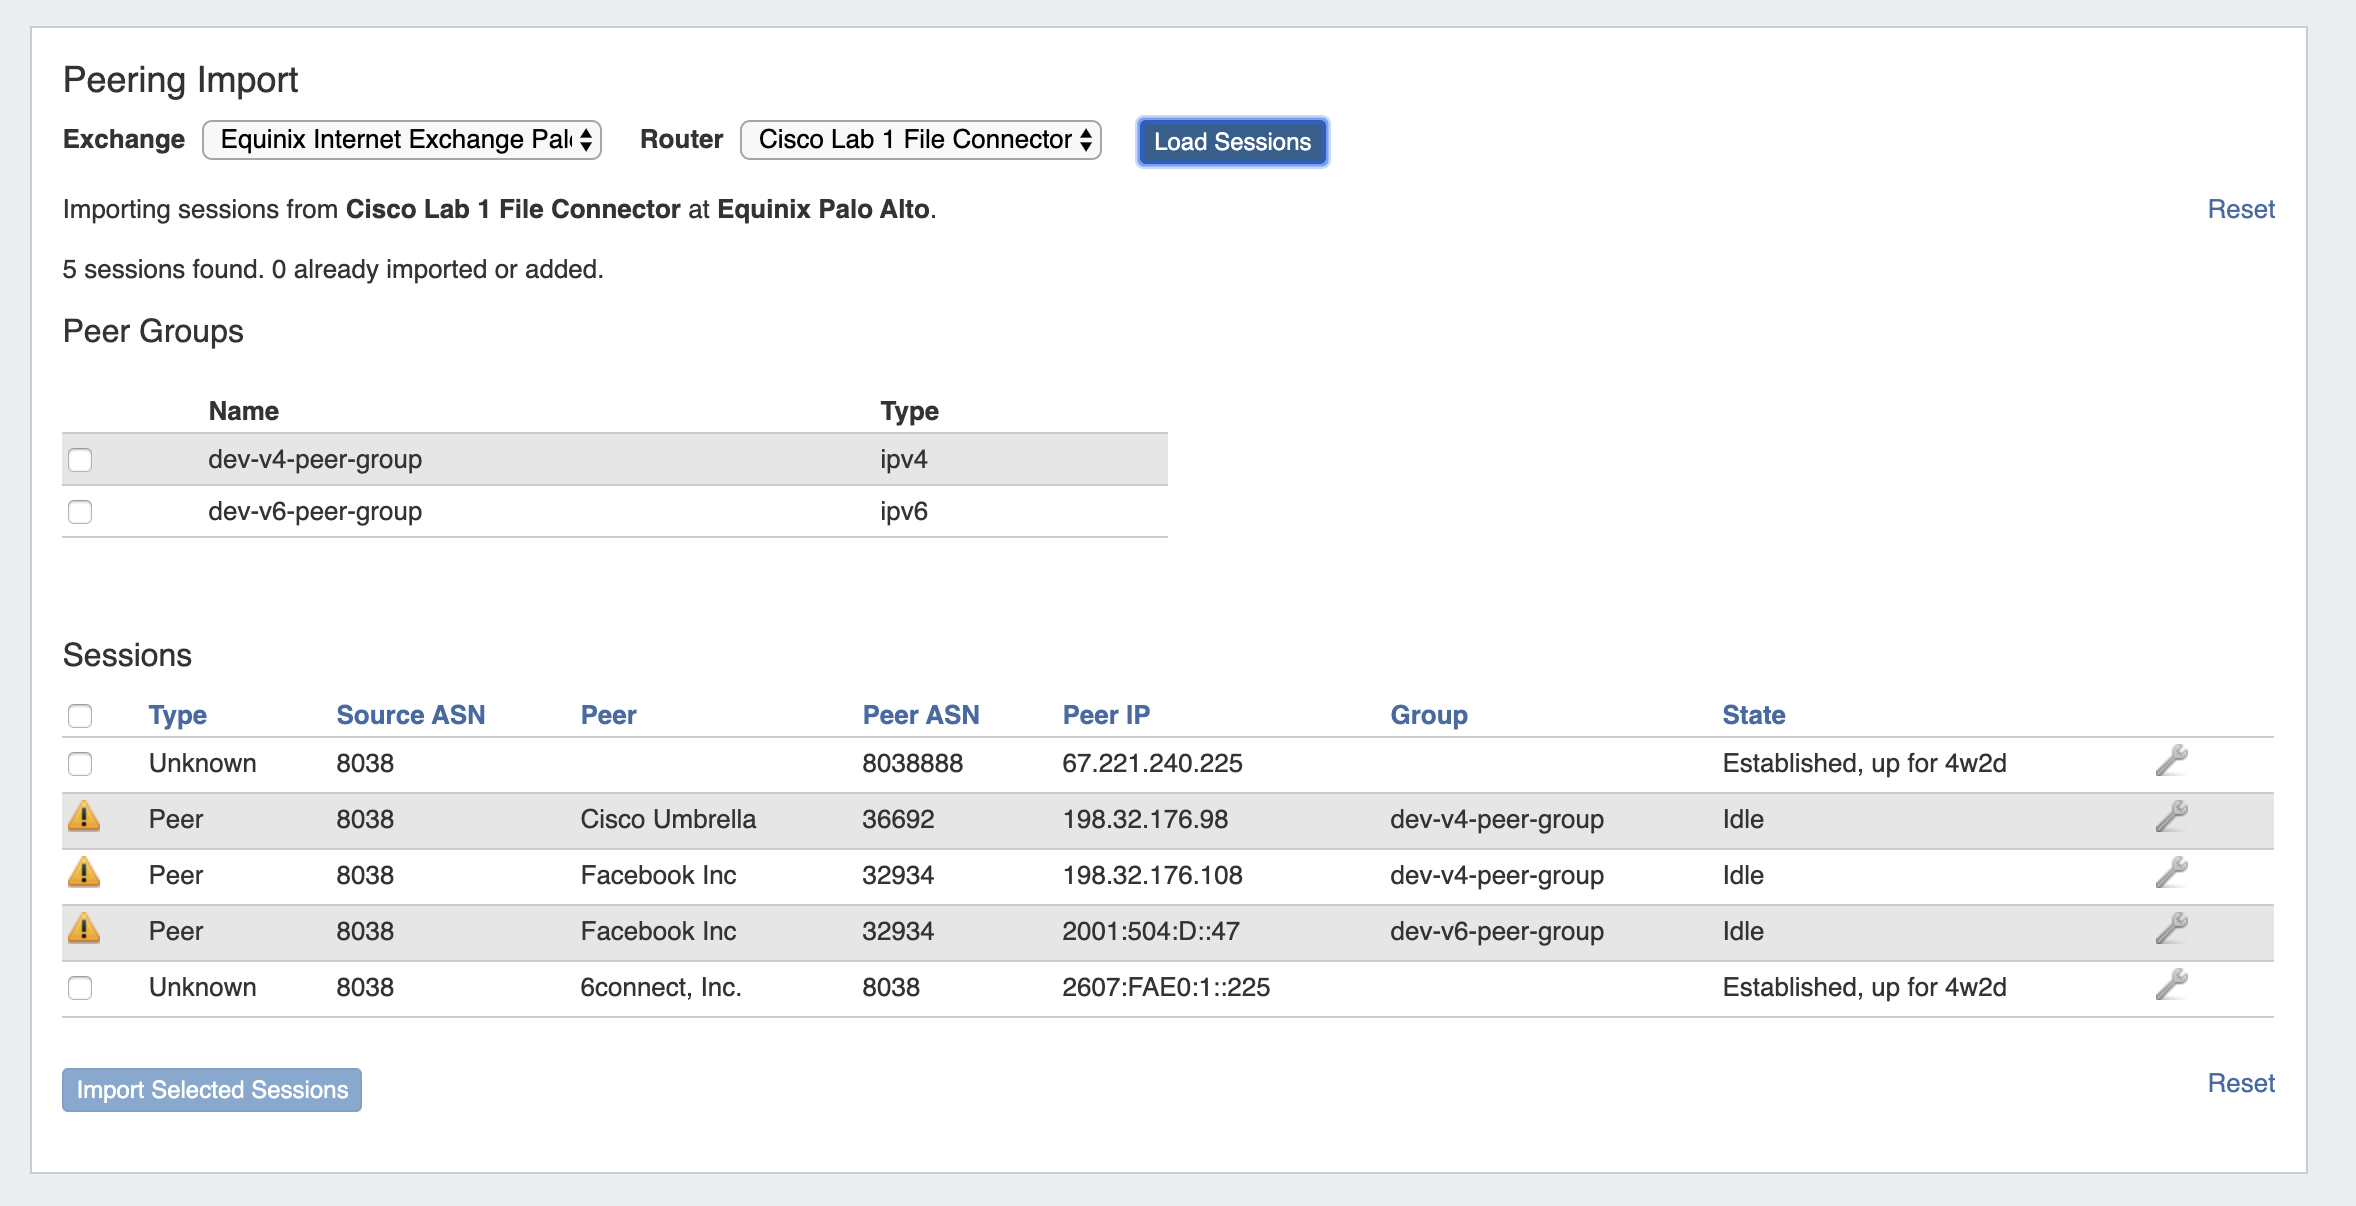
Step 3
Navigate to Admin → Data Import → Peering BGP Import.
Select the appropriate exchange, then the File Connector Router that you created.

Click "Load Sessions", and the sessions contained within the router data file will be available to review, select, and/or import into ProVision.
Via APIv2
The same import process may also be performed via APIv2, using the following information:
1) "router id" contained within the URL for an already-created File Connector Router
2) "ix_id" (the ID of the exchange) in the body
3) "router_response" (the output from the router) in the body
The APIv2 details can be view from ProVision swagger documentation at ['instance']/dev/swagger/spec.php?family=peering#/default/single_parse_bgp_info
Additional Information
See the following areas for more information on working with Peering tasks:
...