...
- Updated UI for all VLAN pages - featuring a cleaner look, collapsible sections, and easy access to management actions
- Supports custom domain ranges and exclusions, using ProVision's Numbering Authority
- Create Domains and add VLANs directly from the VLAN Home page
- Associate Domains with Routers
- VLAN Manage updated to reflect IPAM's interface
- Customizable VLAN Metadata Columns (IPAM Admin → VLAN Columns) in lieu of VLAN tags
- Action shortcut panels in VLAN Utilization - Quickview, Assign IP, and Edit VLAN
- New "VLAN Advanced" page provides a global list view of all Domains, VLANs, and their associated metadata
- Improved VLAN workflow by removing the VLAN Admin page, and integrating functions directly into the VLAN Tab.
For more information, see detailed breakdowns of the features, below, or see documentation at IPAM Tab -> VLAN.
VLAN Updates by Page / Feature:
...
Reporting v2 replaces ProVision's previous Reporting Tab with a new interface, new reports, and exciting new features. Reports existing from v1 (IPAM Utilization, Customer List, User Activity) have been updated and included as default report options. New report types and default reports have been provided under the categories of IPAM, Peering, DNS, Users and Resources. Note: Reporting v2 is only accessible to admin level users, non-admin users will instead be directed to Reporting v1.

To access Reporting v2, select the Reporting Tab. To view the available report modules (IPAM, Peering, DNS, Users, and Resources), click on the applicable sub-tab button at the top of the page, or select it from the Reporting Tab dropdown menu.
...
| Expand |
|---|
IPAM ReportsIPAM Utilization reports display IPv4/IPv4 utilization charts organized by RIR and SWIP status, and provide a listing of ProVision blocks meeting the applied filter criteria. The report view includes the block data for all applied IPAM Columns, in the order set under IPAM Admin → IPAM Columns. IPAM Reports may be exported to .csv (limit: 100,000 records; no chart provided) or PDF (limit: 1000 records; chart included). Default reports include:
Peering ReportsTwo new peering report types are available - Peering Health and Peering Status. Peering Health reports display the sessions existing in ProVision, with the associated fields of Router Name, Peer Name, IP, Session Type, Session State, Peer Group, and session Created Date. Peering Status reports are set per-exchange, and display pie charts for Peer Status/Qualification Status, as well as a data table of the Peer Name, Request Status, Peer Status, Qualification Status, Message Count, and Last Message Time. All Peering Reports may be exported to .csv (limit: 100,000 records; no chart provided). Default reports include:
DNS ReportsDNS Zone reports provide a list of zones existing in ProVision, along with the fields of Zone ID, Name, Last Modified Date, Forward/Reverse Type, and Record Count information. DNS Zone Reports may be exported to .csv (limit: 100,000 records). Default reports include:
User ReportsUsers reports provide a listing of ProVision log events associated with user actions. Provided fields include the Timestamp, User, IP, Log Level, and the Action, and the report may be filtered to include one or more users / user groups, as well as basic data filters. User Reports may be exported to .csv (limit: 100,000 records). Default reports include:
Resource ReportsResource reports provide a list of all (non-DNS) ProVision resources, and field data from the Contact, Billing, Tech Info, and Resource Field Gadget(s) associated with the resource. The report may be filtered to include one or more Sections or Categories, as well filtered by resource name. Resource Reports may be exported to .csv (limit: 100,000 records). Default reports include:
For additional information, see Reporting and and Working with Reports. |
Reporting IPAM Stats Widget
...
| Expand | ||||||||||
|---|---|---|---|---|---|---|---|---|---|---|
| ||||||||||
Edit a TemplateFrom the Template Details view, edit the template by clicking inside the template body and typing the desired changes - if you need a reminder as to syntax or variables, click the help icon (Question Mark button) at top right to open the template editing guide.
Click "Update" when done. SyntaxTemplates use the Mustache format https://mustache.github.io/mustache.5.htmlthe Mustache Format
|

...
| Expand | ||||||
|---|---|---|---|---|---|---|
| ||||||
Using Router File ConnectorsStep 1Generate a router response data text file (it should be named “cisco_router_data.txt”, “juniper_router_data.txt” or “arista_router_data.txt”) and place it in ProVision's /data directory. To generate the router response, run the following commands:
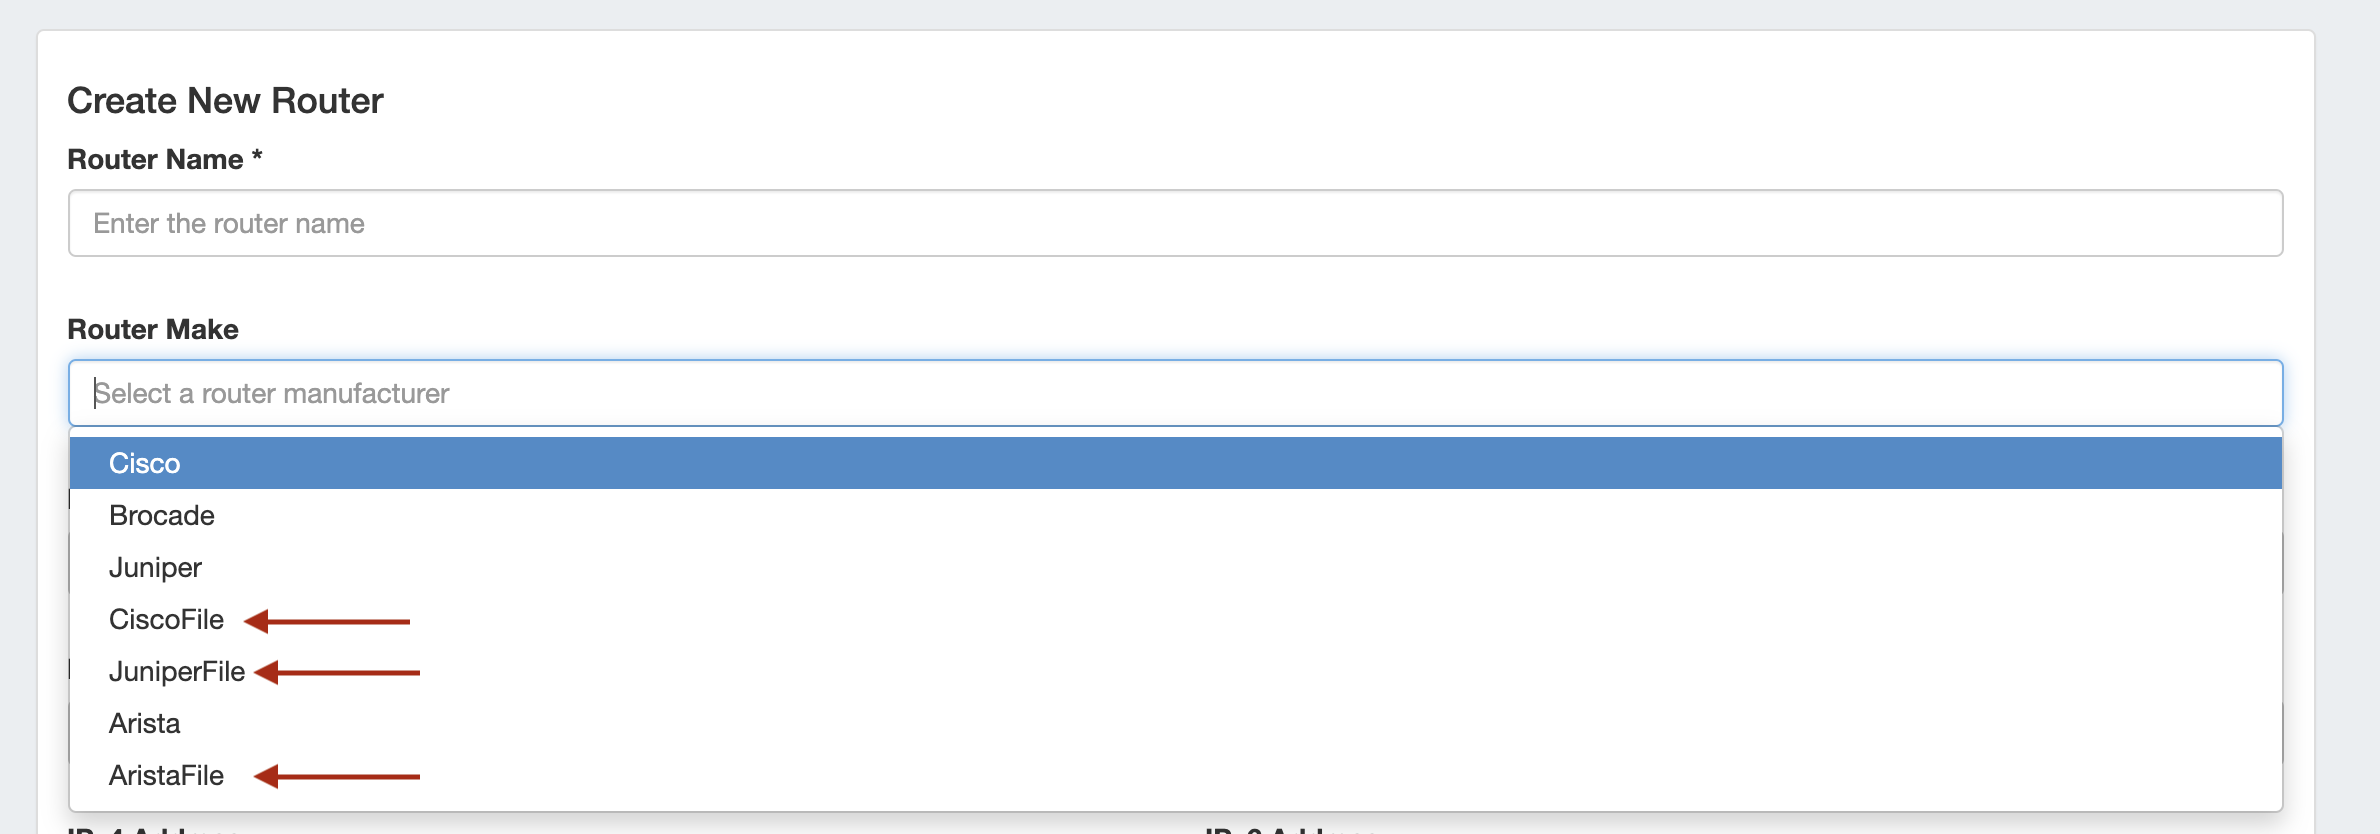
Step 2Create a new 'Router' in ProVision, selecting the appropriate file connector as the Router Make type - CiscoFile, JuniperFile, or AristaFile.
Note: These connector types are only used for this direct data import process - do not select these for standard ProVision router/session creation, as management functions (config pushes, session states, etc) do not obtain a router connection while using File Connectors. Step 3Navigate to Admin → Data Import → Peering BGP Import. Select the appropriate exchange, then the File Connector Router that you created.  Click "Load Sessions", and the sessions contained within the router data file will be available to review, select, and/or import into ProVision. 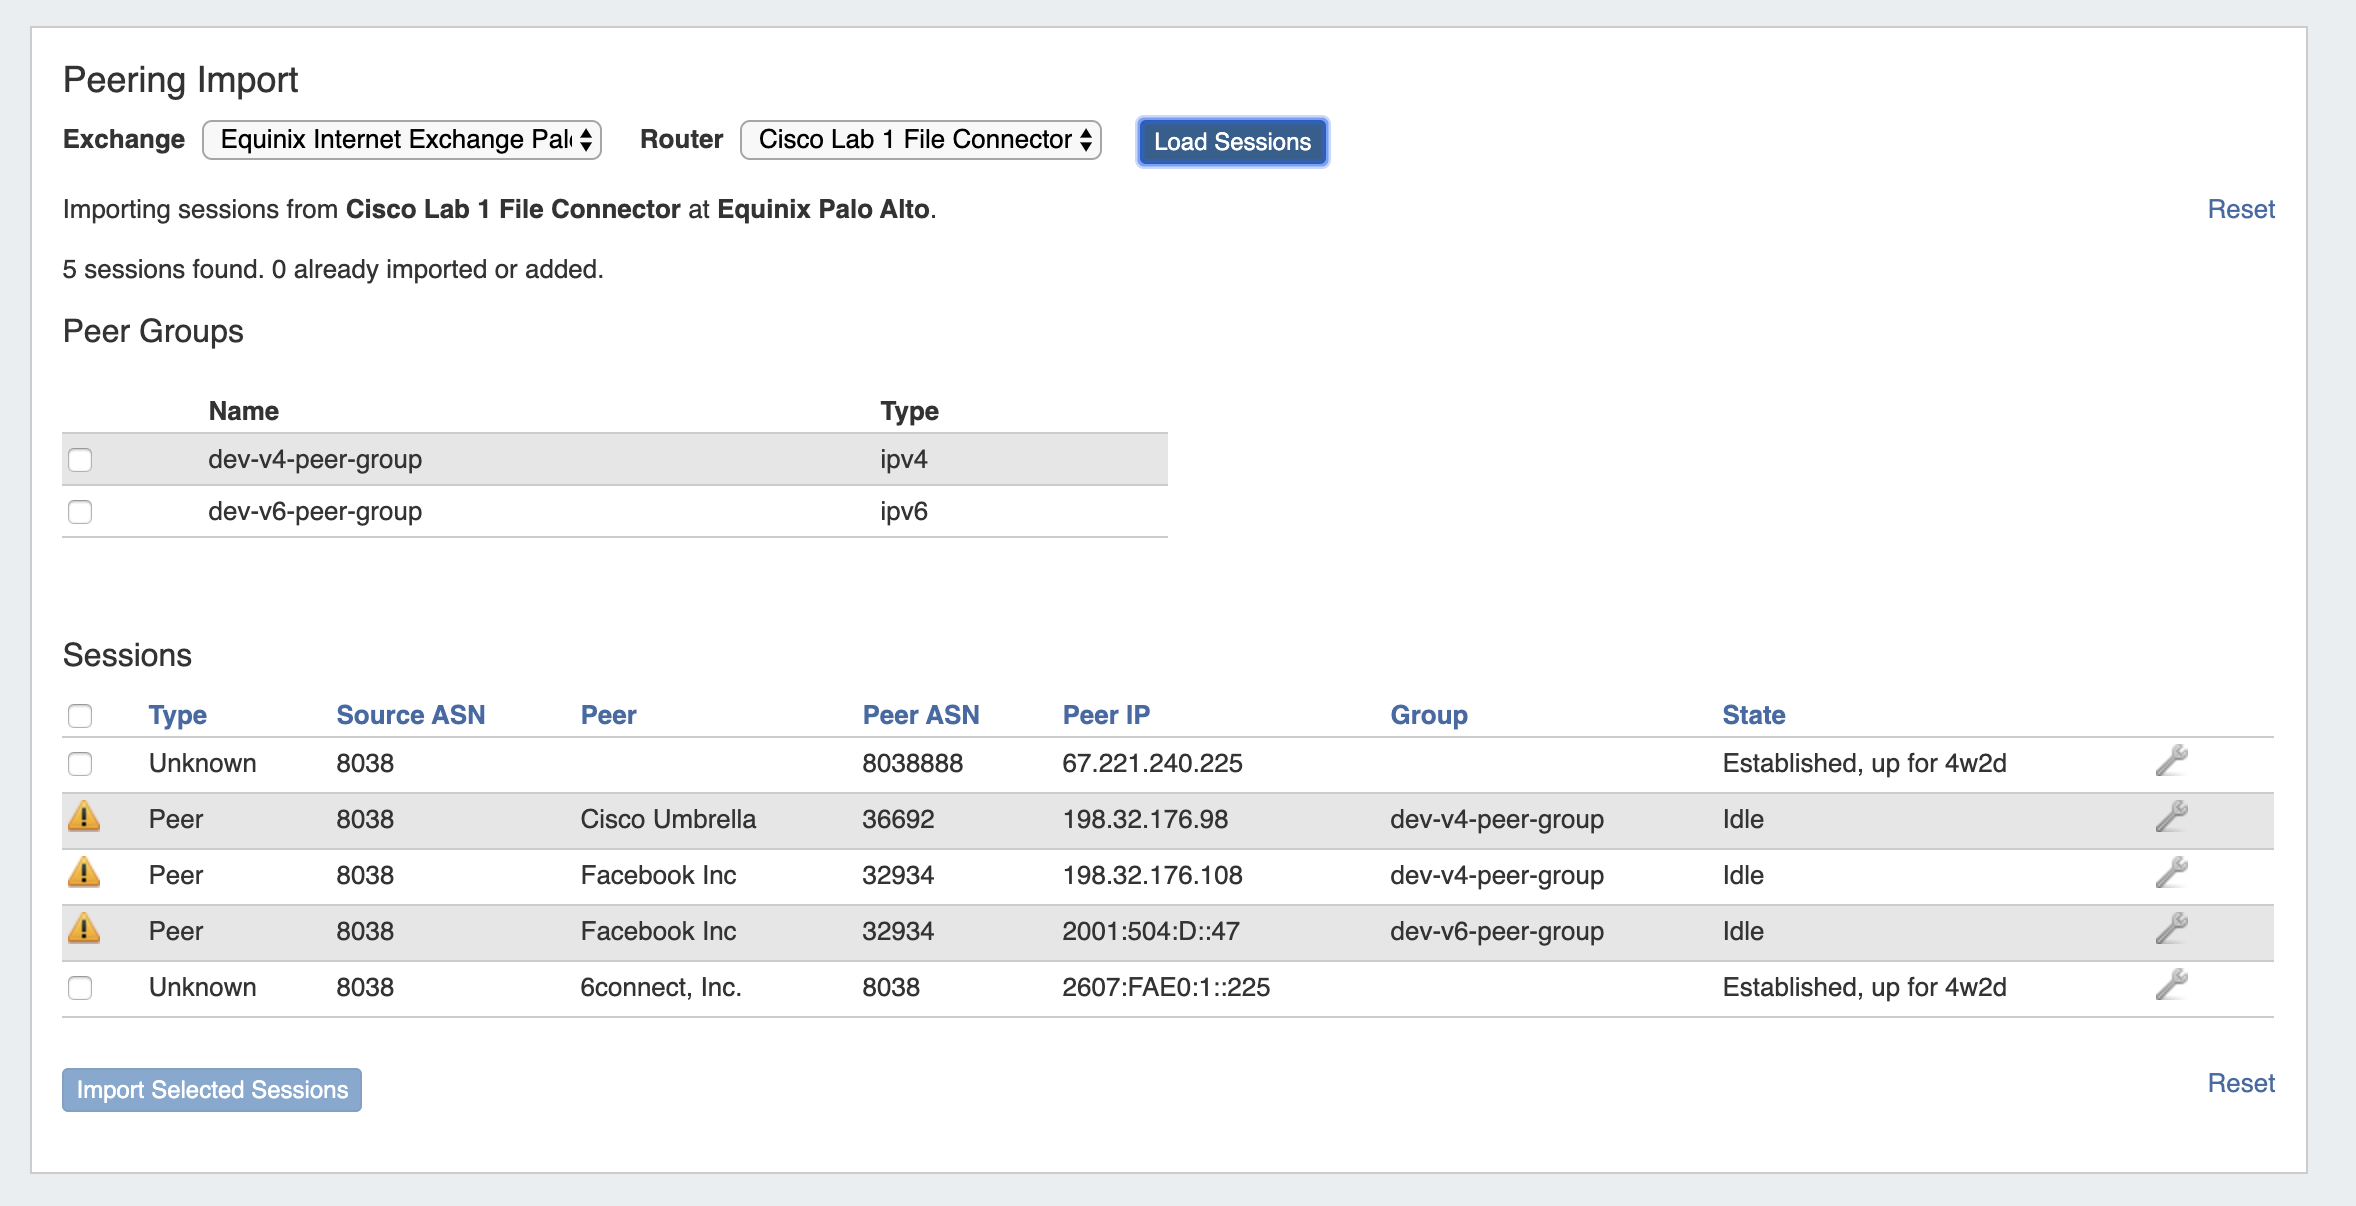 Via APIv2The same import process may also be performed via APIv2, using the following information: 1) "router id" contained within the URL for an already-created File Connector Router 2) "ix_id" (the ID of the exchange) in the body 3) "router_response" (the output from the router) in the body The APIv2 details can be view from ProVision swagger documentation at ['instance']/dev/swagger/spec.php?family=peering#/default/single_parse_bgp_info That command will parse the router output and return an array of detected sessions and groups. The sessions and groups then need to be individually added using POST /peering/sessions and POST /peering/peergroups. |
...