...
Table of Contents maxLevel 3
What are Gadgets?
Our gadget system is similar to the Atlassian Gadget system (and Google Gadgets). When creating or editing a Section, gadgets can be added in a way similar to how you would add or remove a field (see Customizing Sections). Gadgets Gadgets display on the Resource Entry page, providing information or actions for various ProVision modules. They are best described as self contained webapps; widgets but with more power. Gadgets can have their own fields, HTML templates, and even accompanying scripts and stylesheets. They can interface with the API to display simple information such as the Type of the Resourceresource Section, or they can perform much more complex functions as demonstrated with the IPAM gadget in the following section., such as IP assignment in the IPAM Gadget.
Gadgets are enabled per Section, so that the Gadgets that display in the UI may be different for various section types - A resource with the "Server" section would have different display and functionality needs than a resource using the "Resource Holder" resource.
Adding Gadgets to a Section
In order to display on a Resource Entry page, Gadgets must first be added to a Section - see Customizing Sections for detailed instructions.
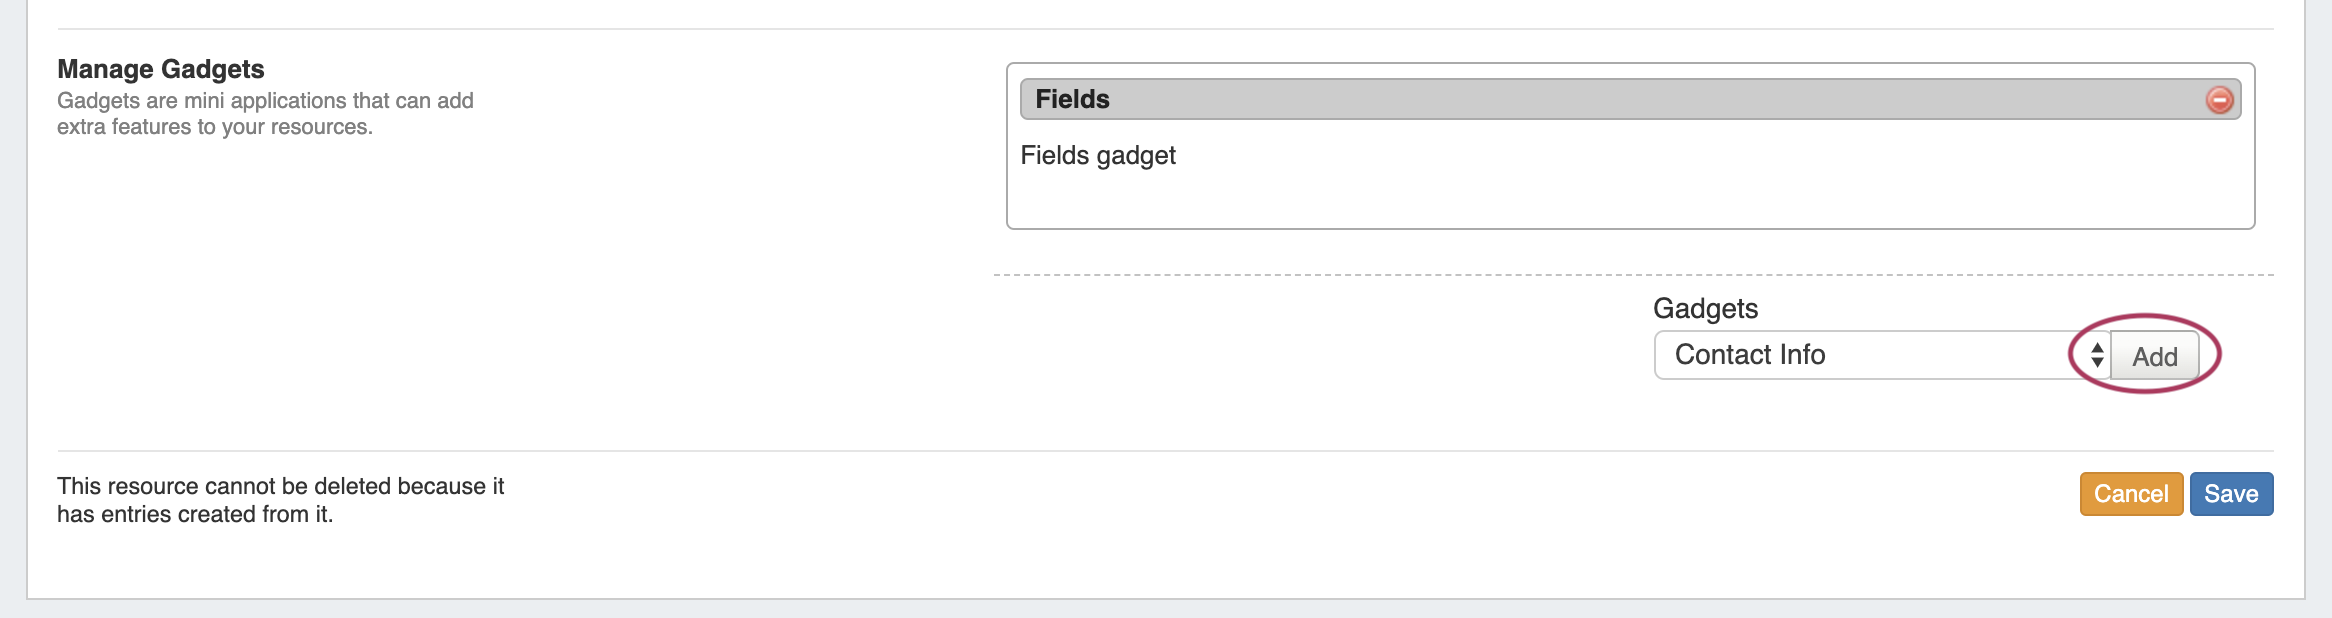
When editing a Section, navigate to the "Manage Gadgets" area at the bottom of the page, select the Gadget you want to show for that section, and hit "Add".
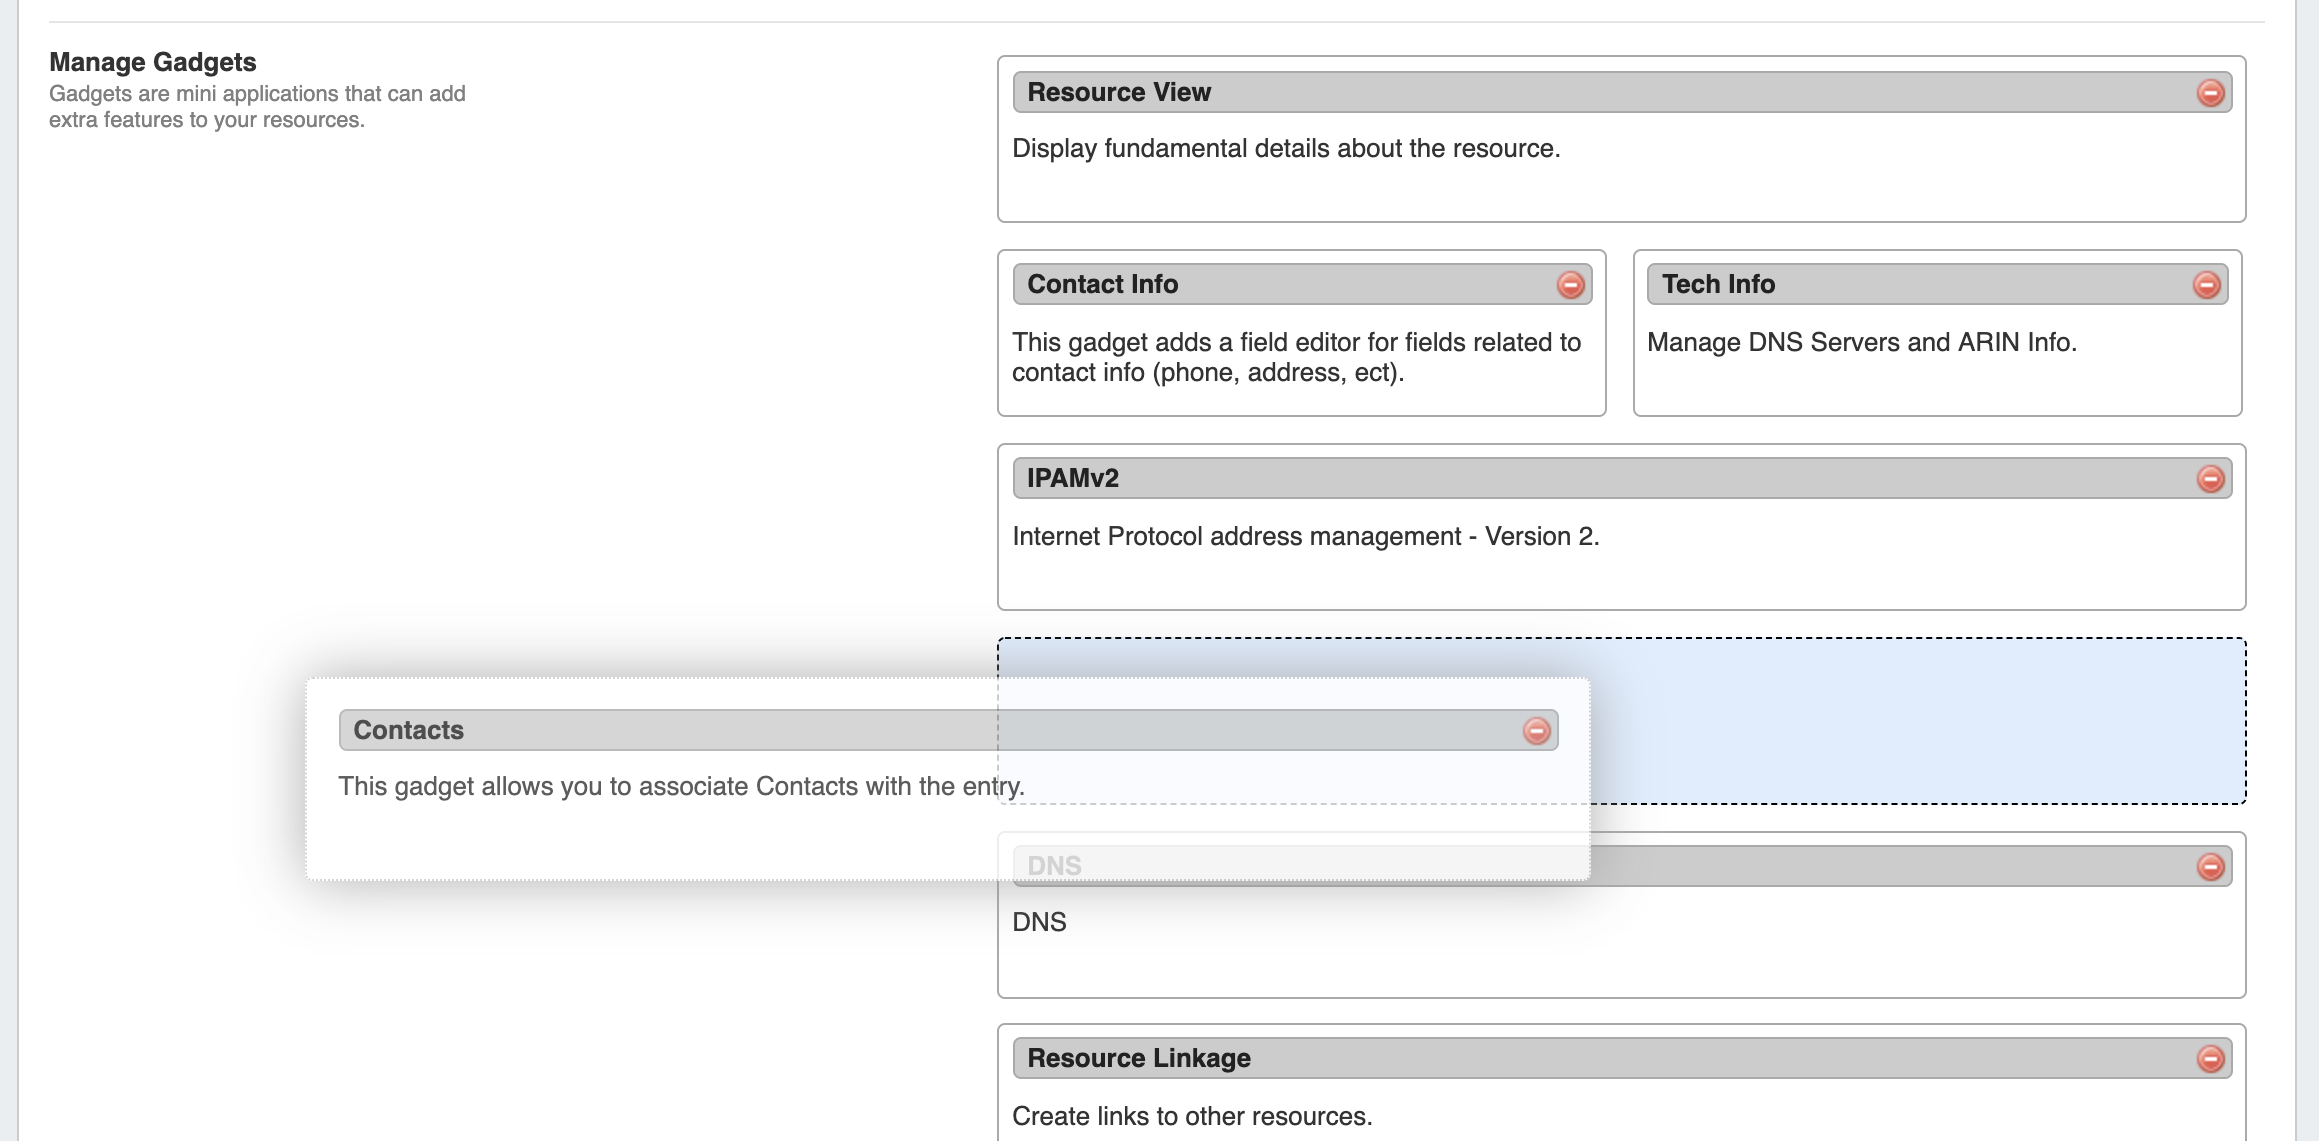
Once added, you may customize the order you wish them to appear on the page by dragging and dropping into the desired order.
When done, click "Save". Once added to the Section, Gadgets will be visible for all Resources of that section.
To view the Gadgets, open the Resource Entry page for any resource under that section.
For additional details on editing sections and enabling Gadgets, see Customizing Sections.
Available Gadgets
ACP ("Workflows") Gadget
The ACP Workflow Form is a Gadget connecting ACP (API Composer Platform) with the ProVision interface to run Workflows.
It allows users to specify and execute Workflows created in the ACP product on a ProVision Resource Entry page.
...
| Expand | |||||
|---|---|---|---|---|---|
| |||||
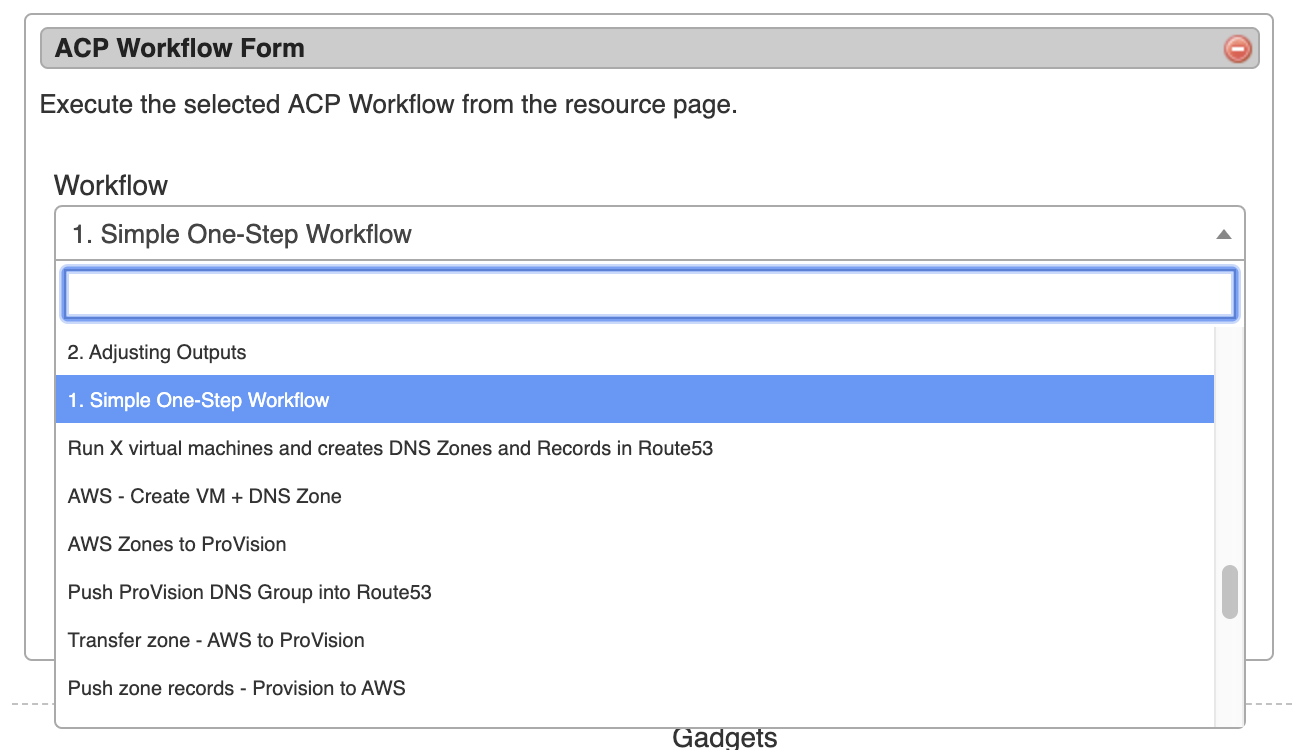
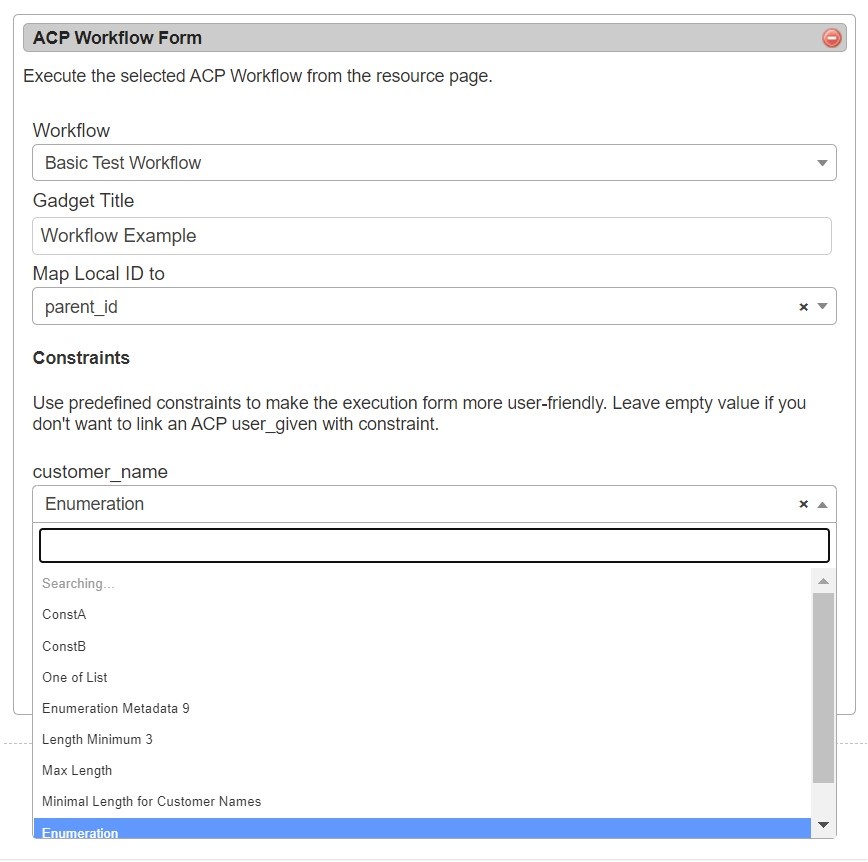
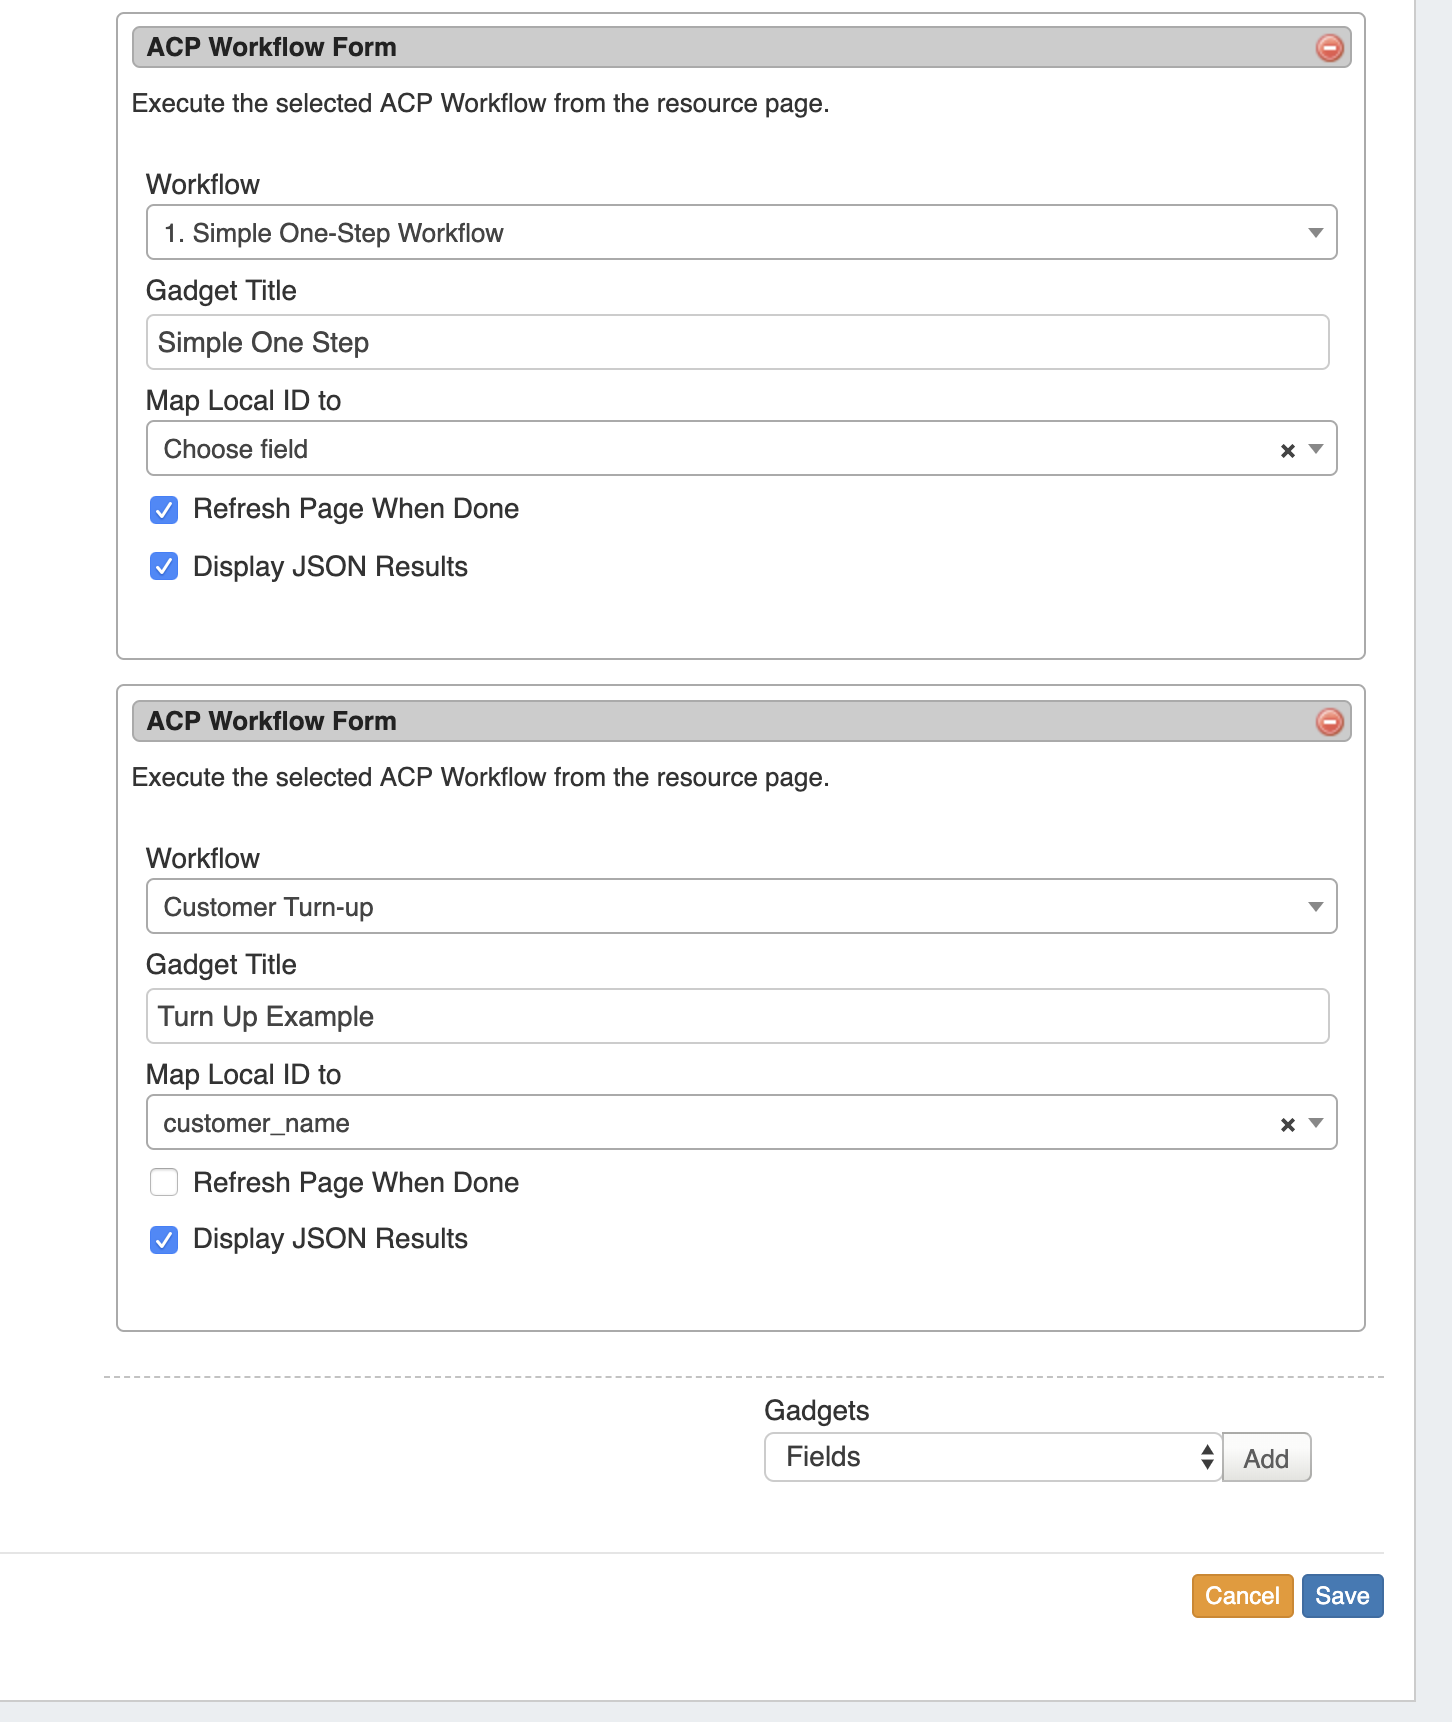
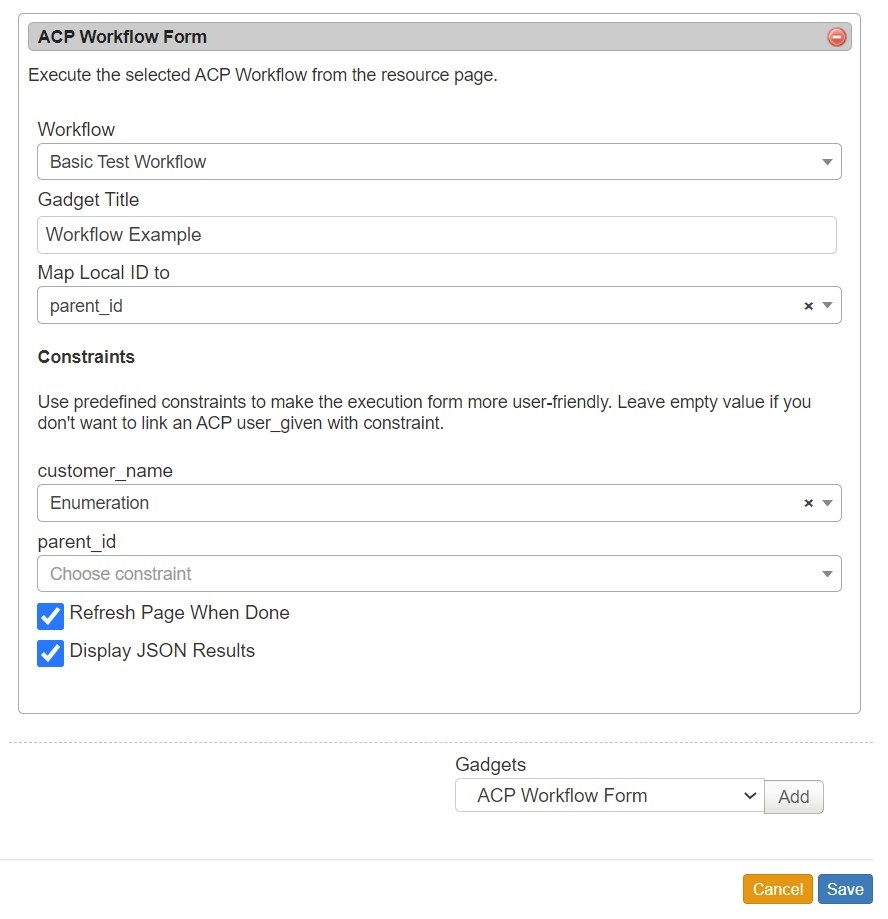
Setting up ACP Access in ProVision Before using the ACP Workflow Gadget, you must set the ACP URL and user credentials in Admin → Admin Preferences. 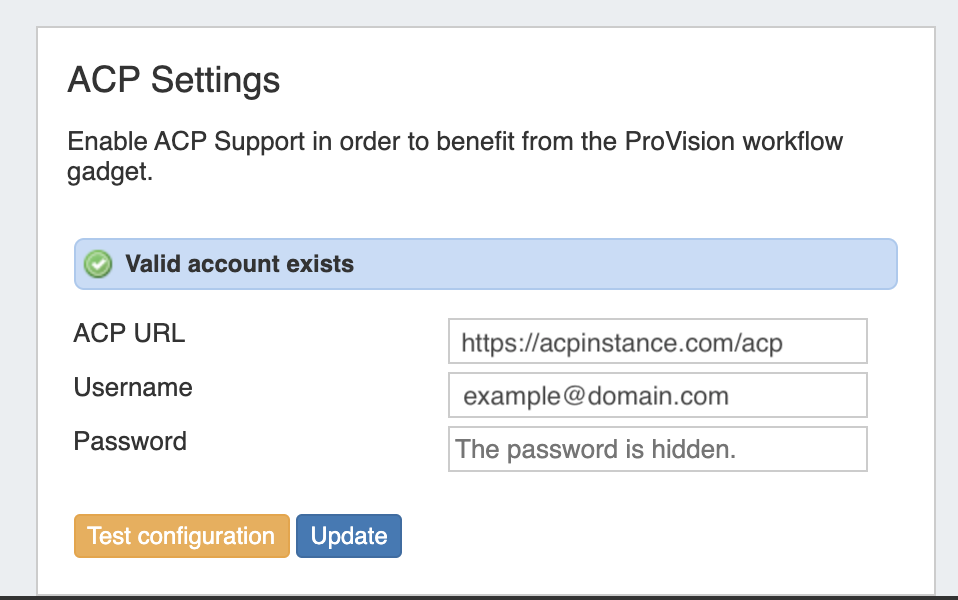 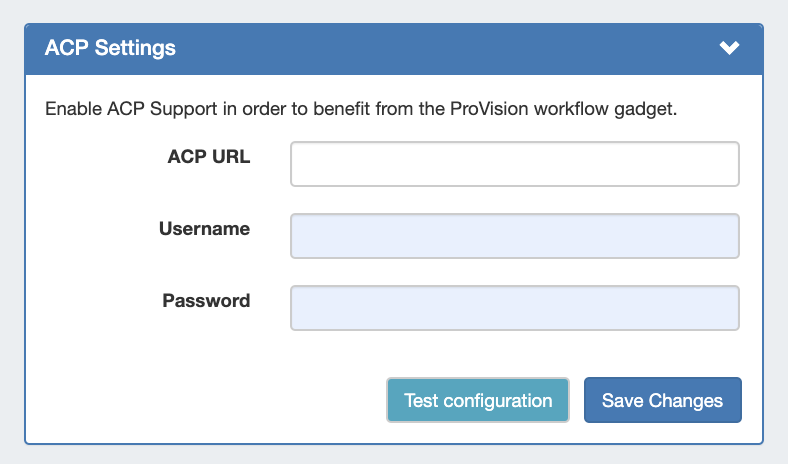 Enter the ACP URL for a licensed ACP instance, then provide the ACP Username and Password for the user that should be used to execute Workflows. To verify the account, click "Test Configuration" - you will be notified whether the account is valid. When done, click "Update". After setup, the ACP Workflows Gadget will Gadget will load with the available Workflows from your ACP instance, and can be configured to select which Workflow and inputs you wish to use. Configuring the ACP Workflow Form The ACP Workflow form is access from the Edit Section page, under "Manage Gadgets". Once ACP settings have been added to Admin Preferences, the "ACP Workflow Form" Gadget can be added to a Section, and Workflows from the associated ACP instance will be available to select. containing fields to select the desired Workflow to Run, Title, and map input options.
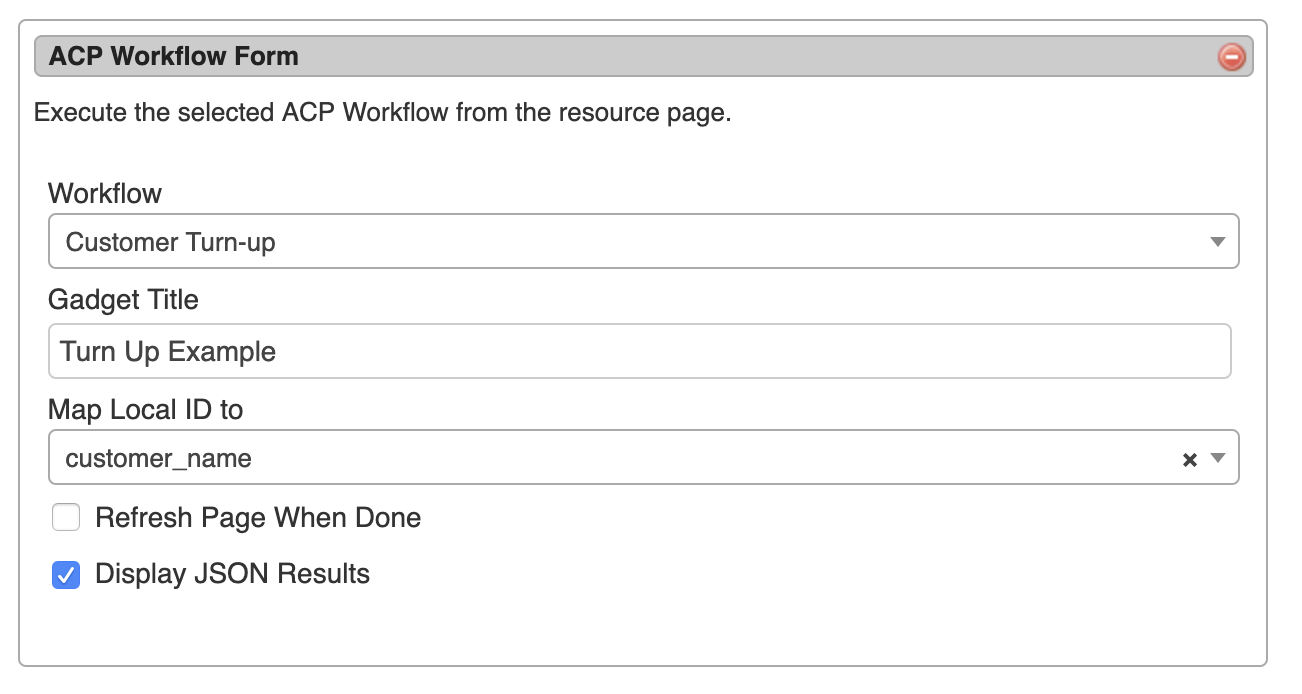
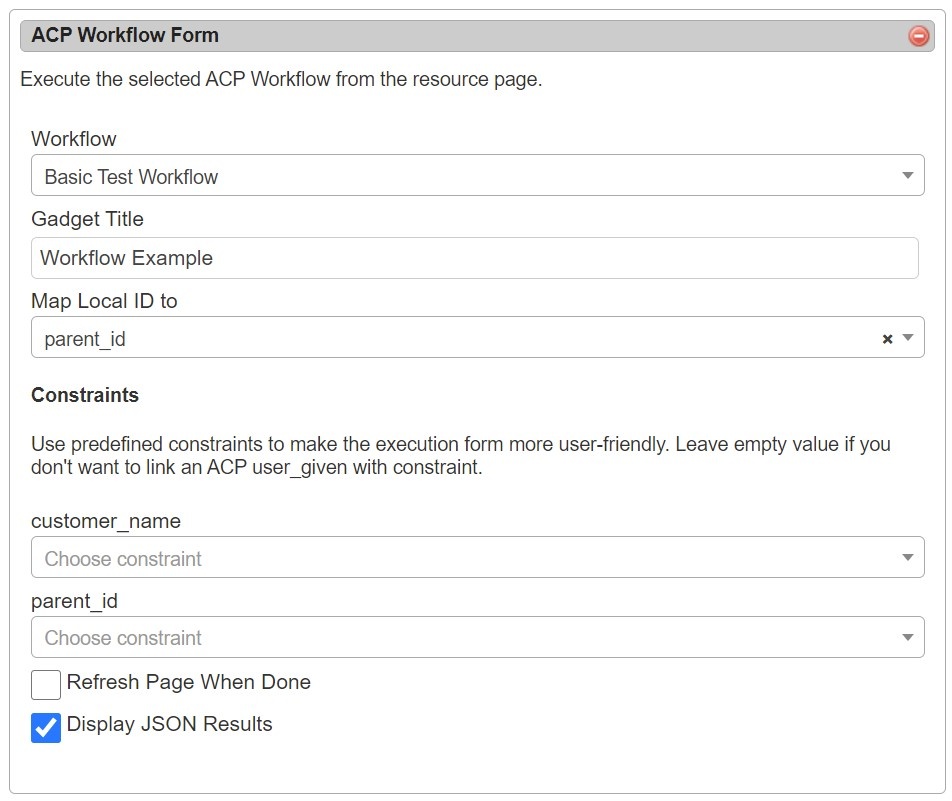
Select a Workflow, then edit the title to display on the gadget and map input options. Input options will vary according to the selected Workflow. Registered constraints can be applied to default input fields. See Constraints for more details.
You may also choose to refresh the page once the workflow execution is complete, and/or show JSON results.
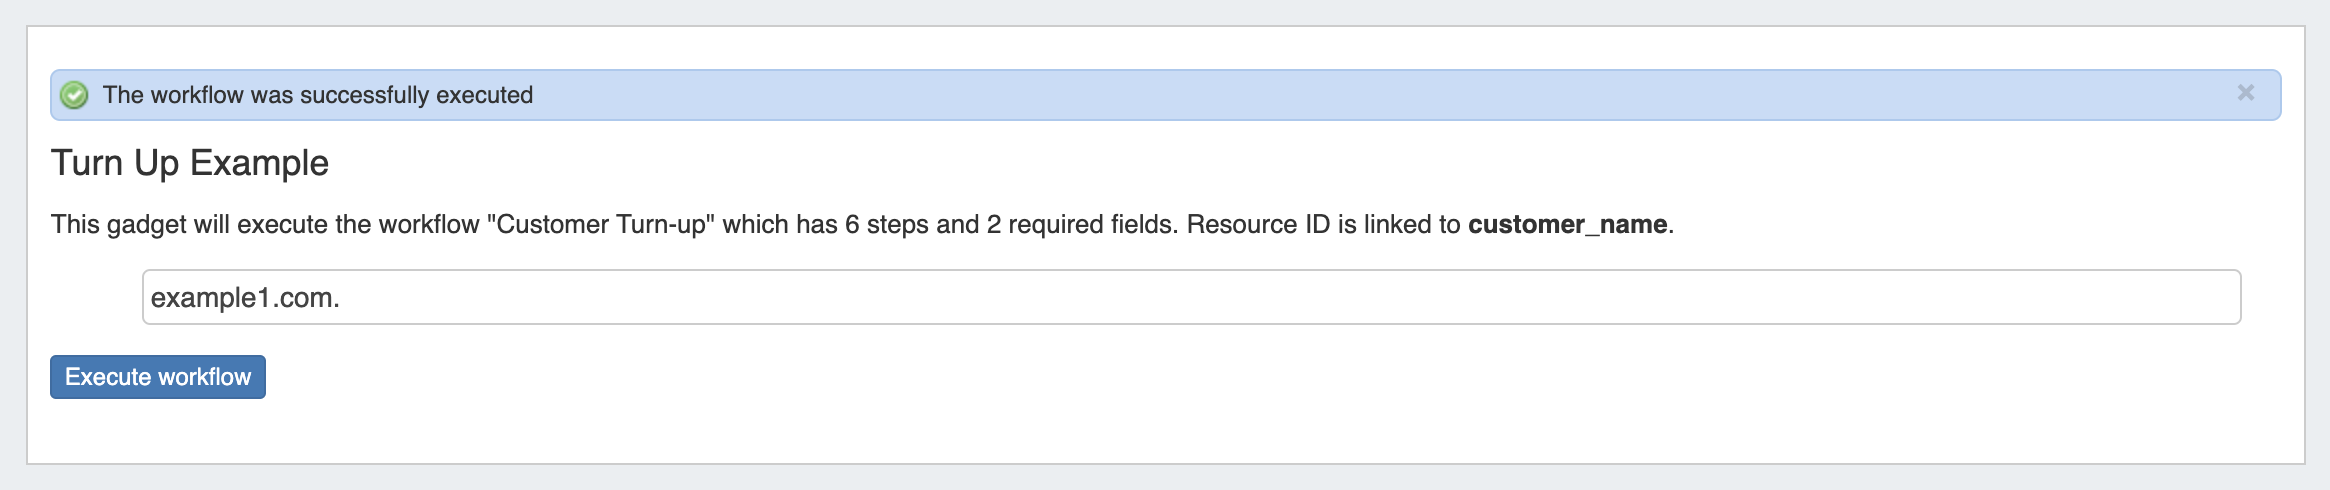
Multiple Forms may be added to a Section, in order to run additional Workflows or option settings. When complete, click "Save". Working with the ACP Workflow Form Once enabled, the Gadget will show on the resource page for any resource of the section type. Input the field data necessary for the Workflow - here, it's adding a hostname - then click "Execute Workflow" to process the chain of workflow calls.
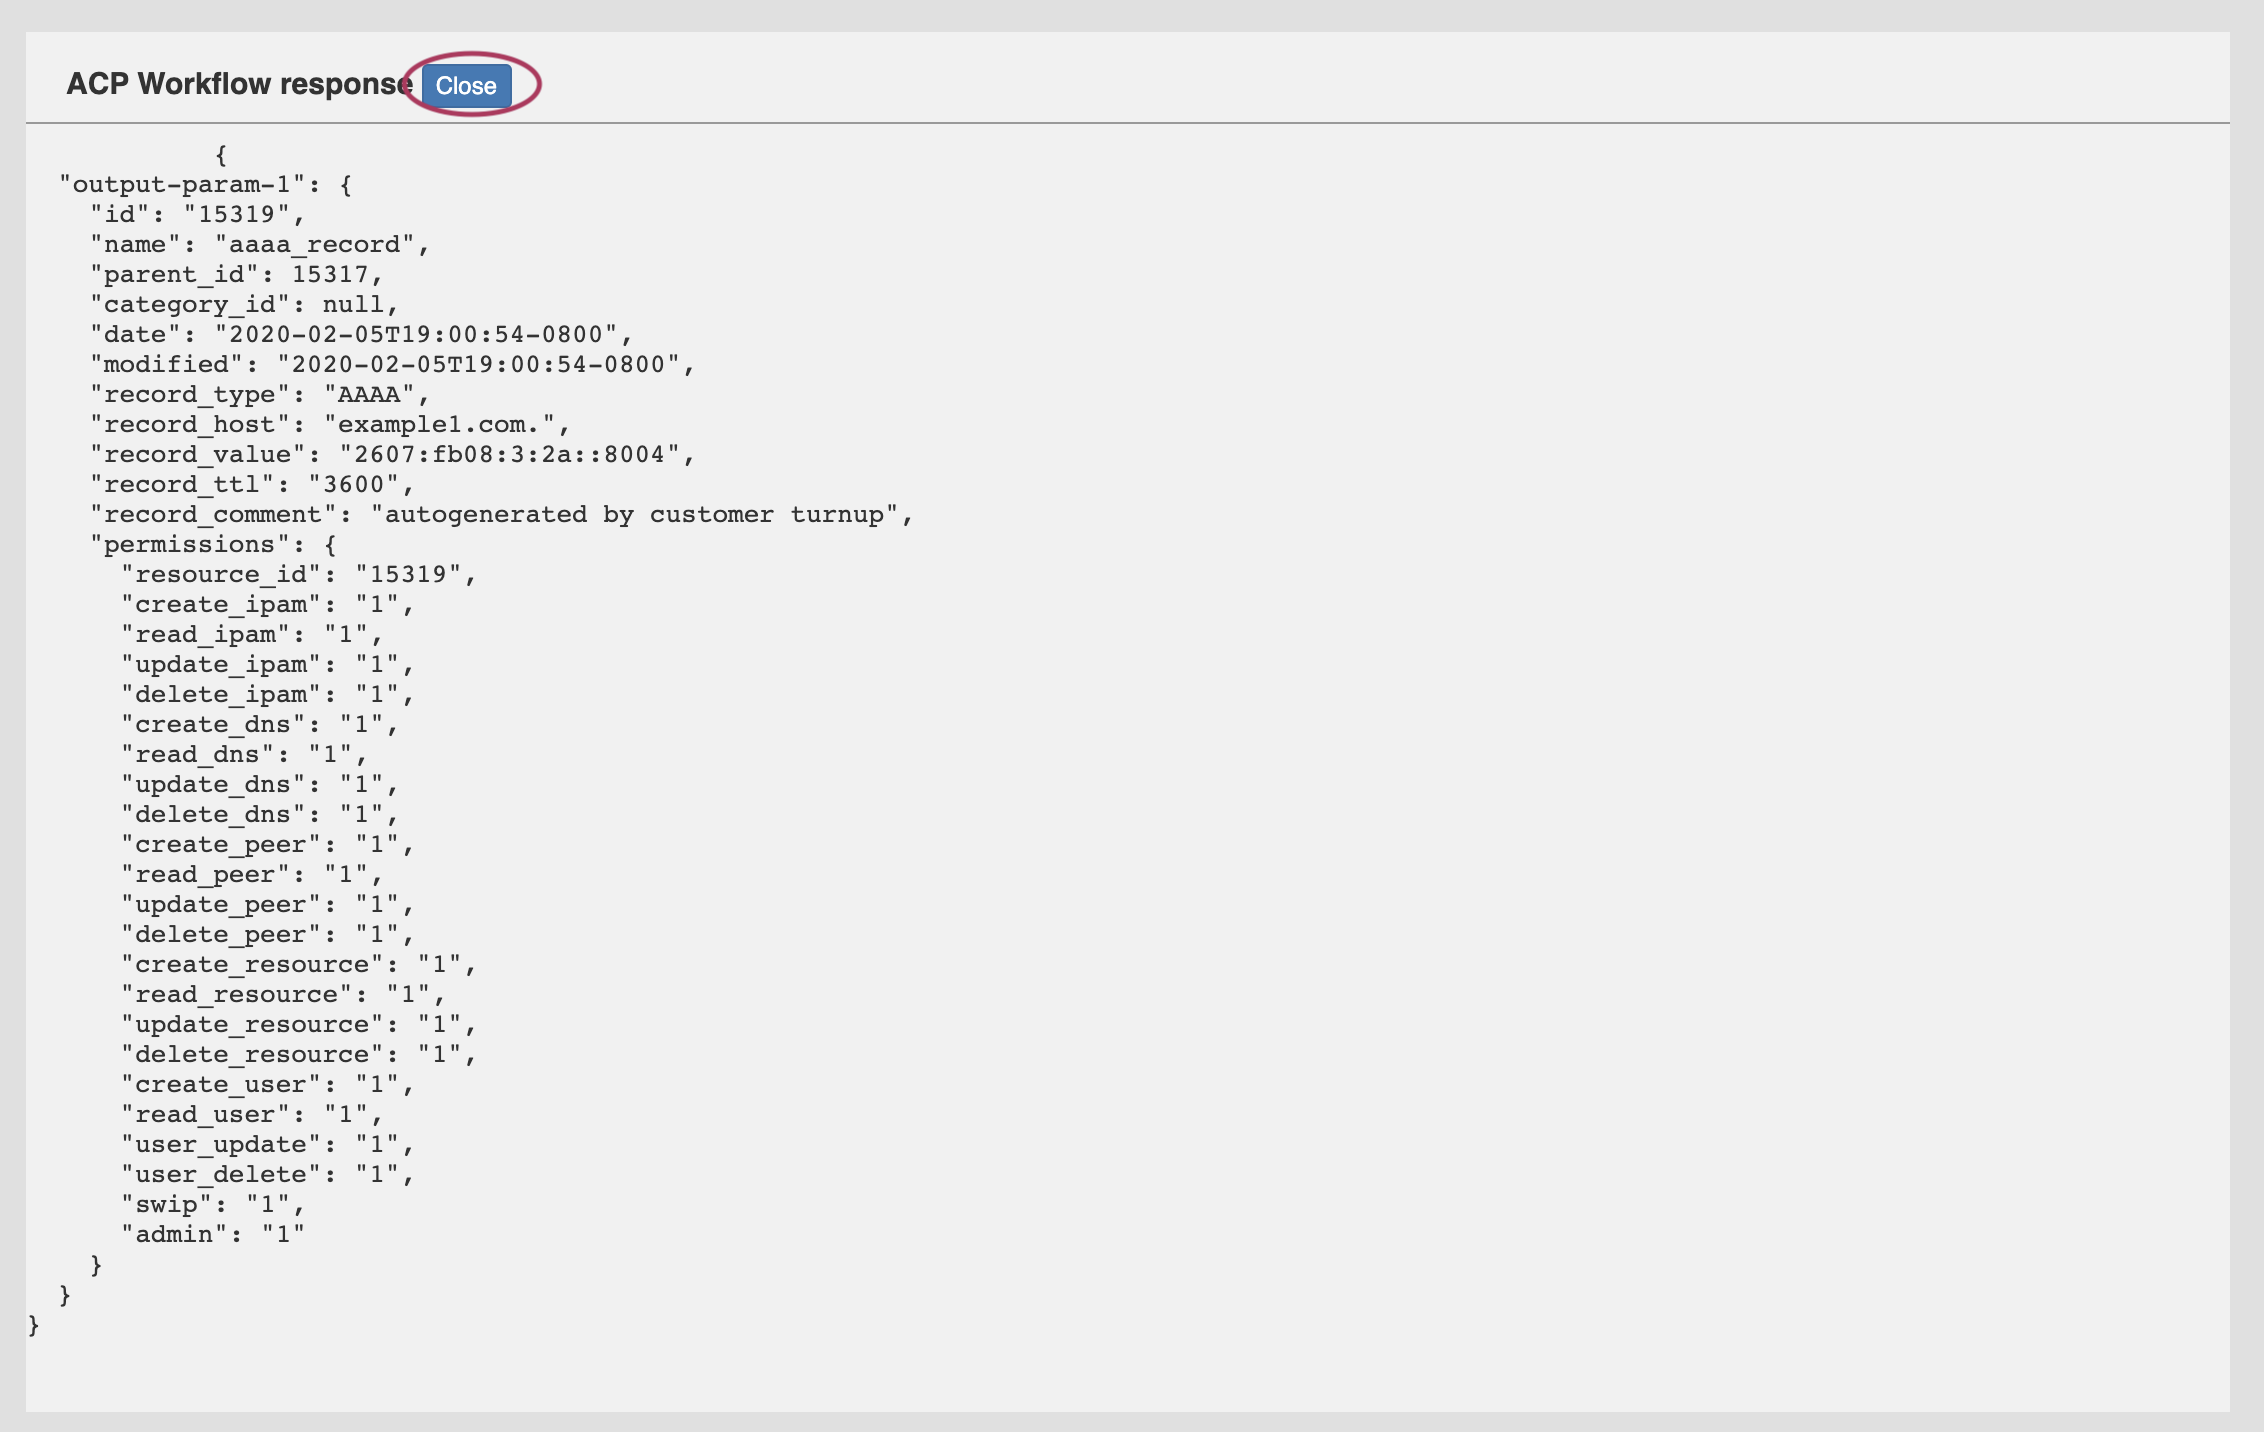
If "Display JSON Results" has been enabled, a display modal will appear showing the JSON response of the executed workflow.
When done reviewing the response, click "Close". If the page has not refreshed, you will see a message informing you whether the Workflow has successfully executed.
In this example, a "Customer Turn-Up" Workflow was selected (created in ProVision's ACP product) that performed six functions with one button click. The successful "Execute" for "Customer Turn-Up" created a new customer resource entry, assigned IPv4 and IPv6 blocks to them, created a DNS zone for the hostname, and lastly created 'A' and 'AAAA' records for the zone. |

...
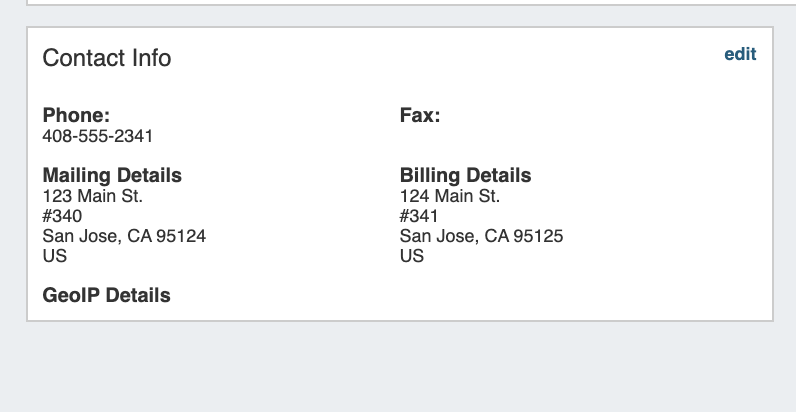
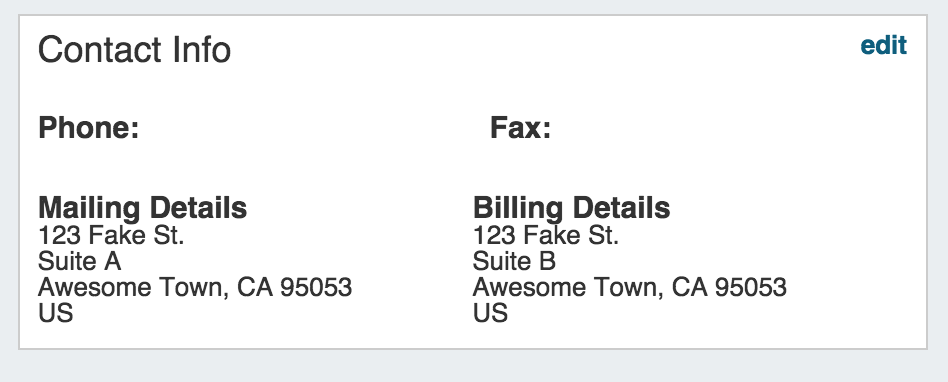
This Gadget is used on the Resource Holder Section type. In the Contact Info Gadget, you can track information such as mailing / billing addresses, phone number, and fax number for that Resource. phone number, and fax number for that Resource. You may also add a separate GEO IP address, if desired.
Contacts
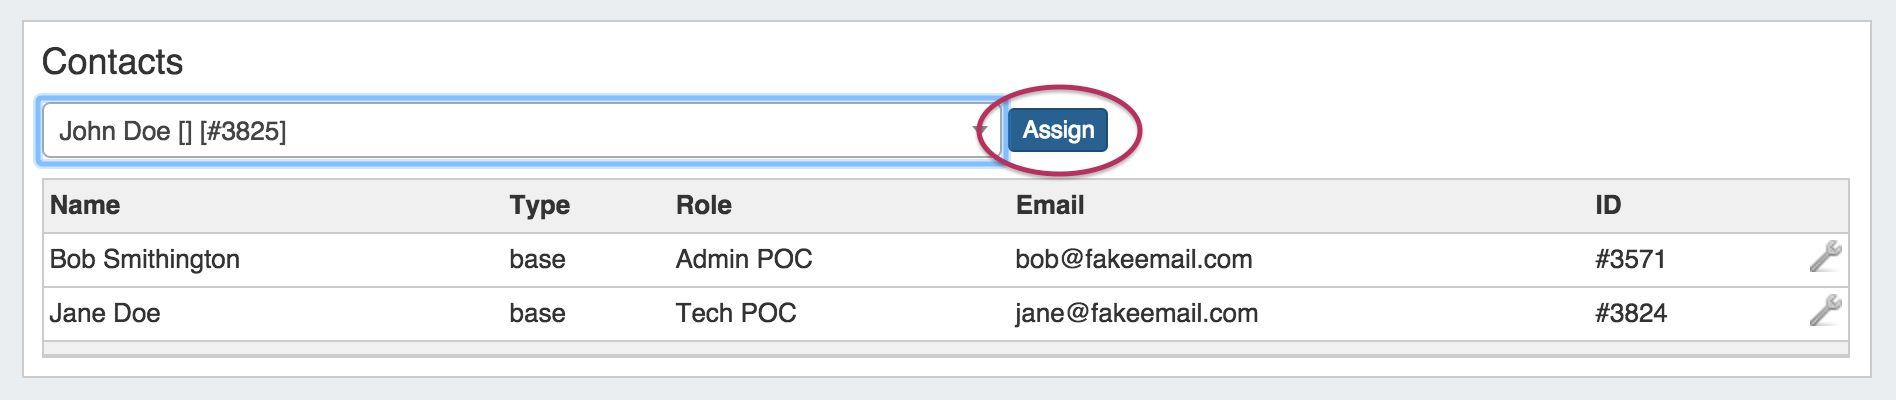
The Contacts Gadget may be used on any Section type to assign a contact (from the Contact Manager) to a Resource.
To assign a contact, search for and select the desired contact in the search box, then click "Assign". The Contact will show in the list below.

| Expand | |||||
|---|---|---|---|---|---|
| |||||
Contacts Action Menu: The Action Menu (wrench icon) in the contacts gadget has three options: Set Role: Opens a dialog box to select a role to assign to the contact, add a new role, or delete an existing role.
Unassign: Unassigns the contact from the resource View: Redirects to the contact's detail page in the Contact Manager Refer to the Contact Manager page in the documentation for more detail on working with the Contacts gadget and the Contact Manager.
|

...
The DHCP Server Management Gadget should be used with the "Server" Section.
When initally initially added to the section, it will show in the "Off" configuration:
...
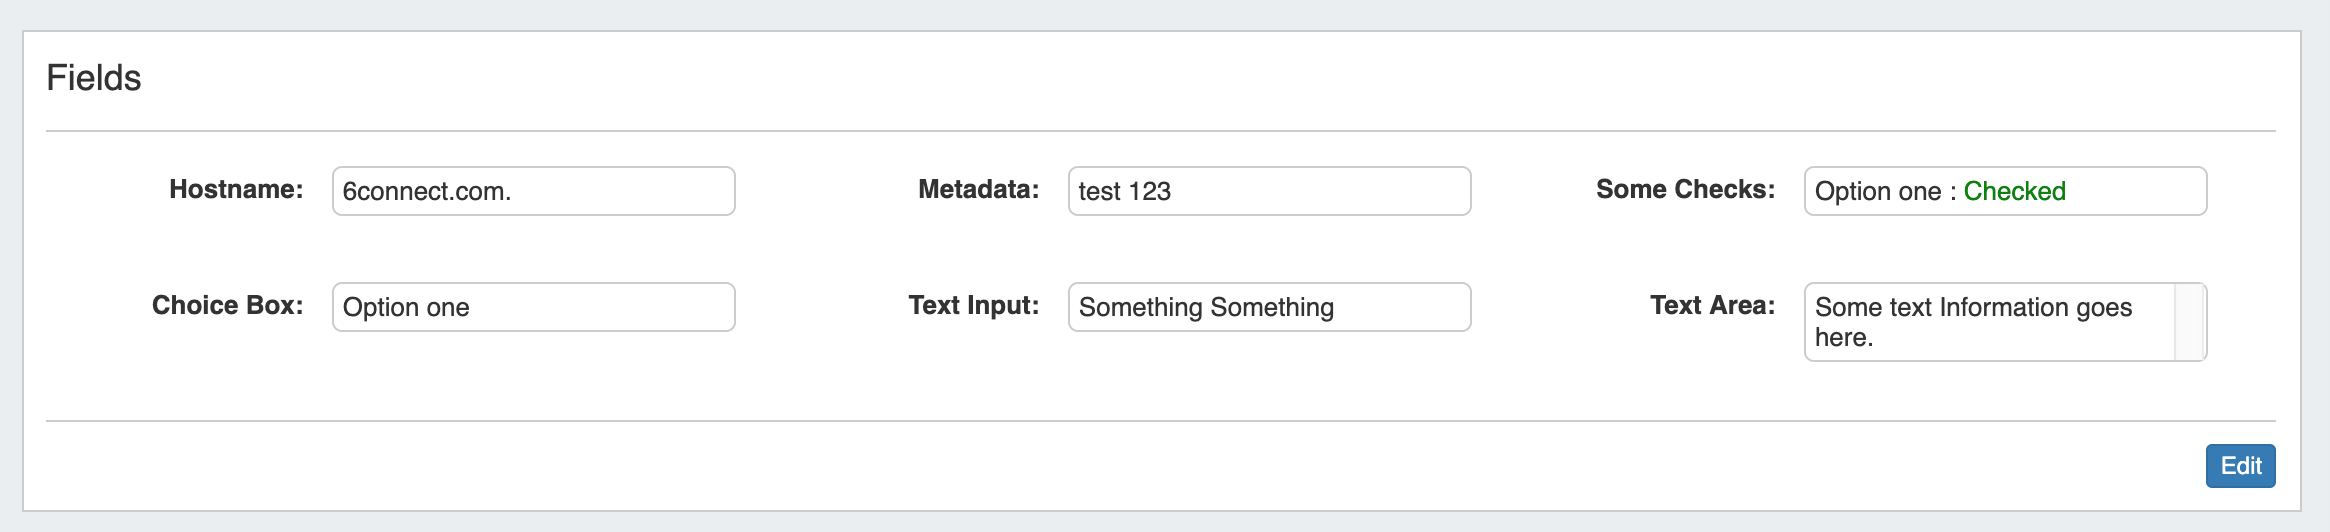
The Field Gadget displays the information fields available for the Section and added to the specific Resource that is being viewed on the Resource Entry page.
Users may add enabled fields to the resource, edit field values, and remove fields from the Resource through this Gadget. Field values in this Gadget (such as Hostname, Username, and Password, among others) may also be used by other Resource Gadgets and Provision modules.
Before You Begin
Provision modules.
Before You Begin
First, ensure that the Feld Gadget has been added to the section - see "Adding Gadgets to a Section" at the top of this page, or go to Customizing Sections for detailed instructions.
Then, fields Fields must be enabled and added to the Resource's Section before they can Section in order to be used in the Field Gadget.
...
Working with the Field Gadget
Once the Field Gadget has been added, and fields have been enabled for a Section, they will be available to select in the "Add New Field" dropdown. the Field Gadget will display on the Resource Entry page for a resource of that section.
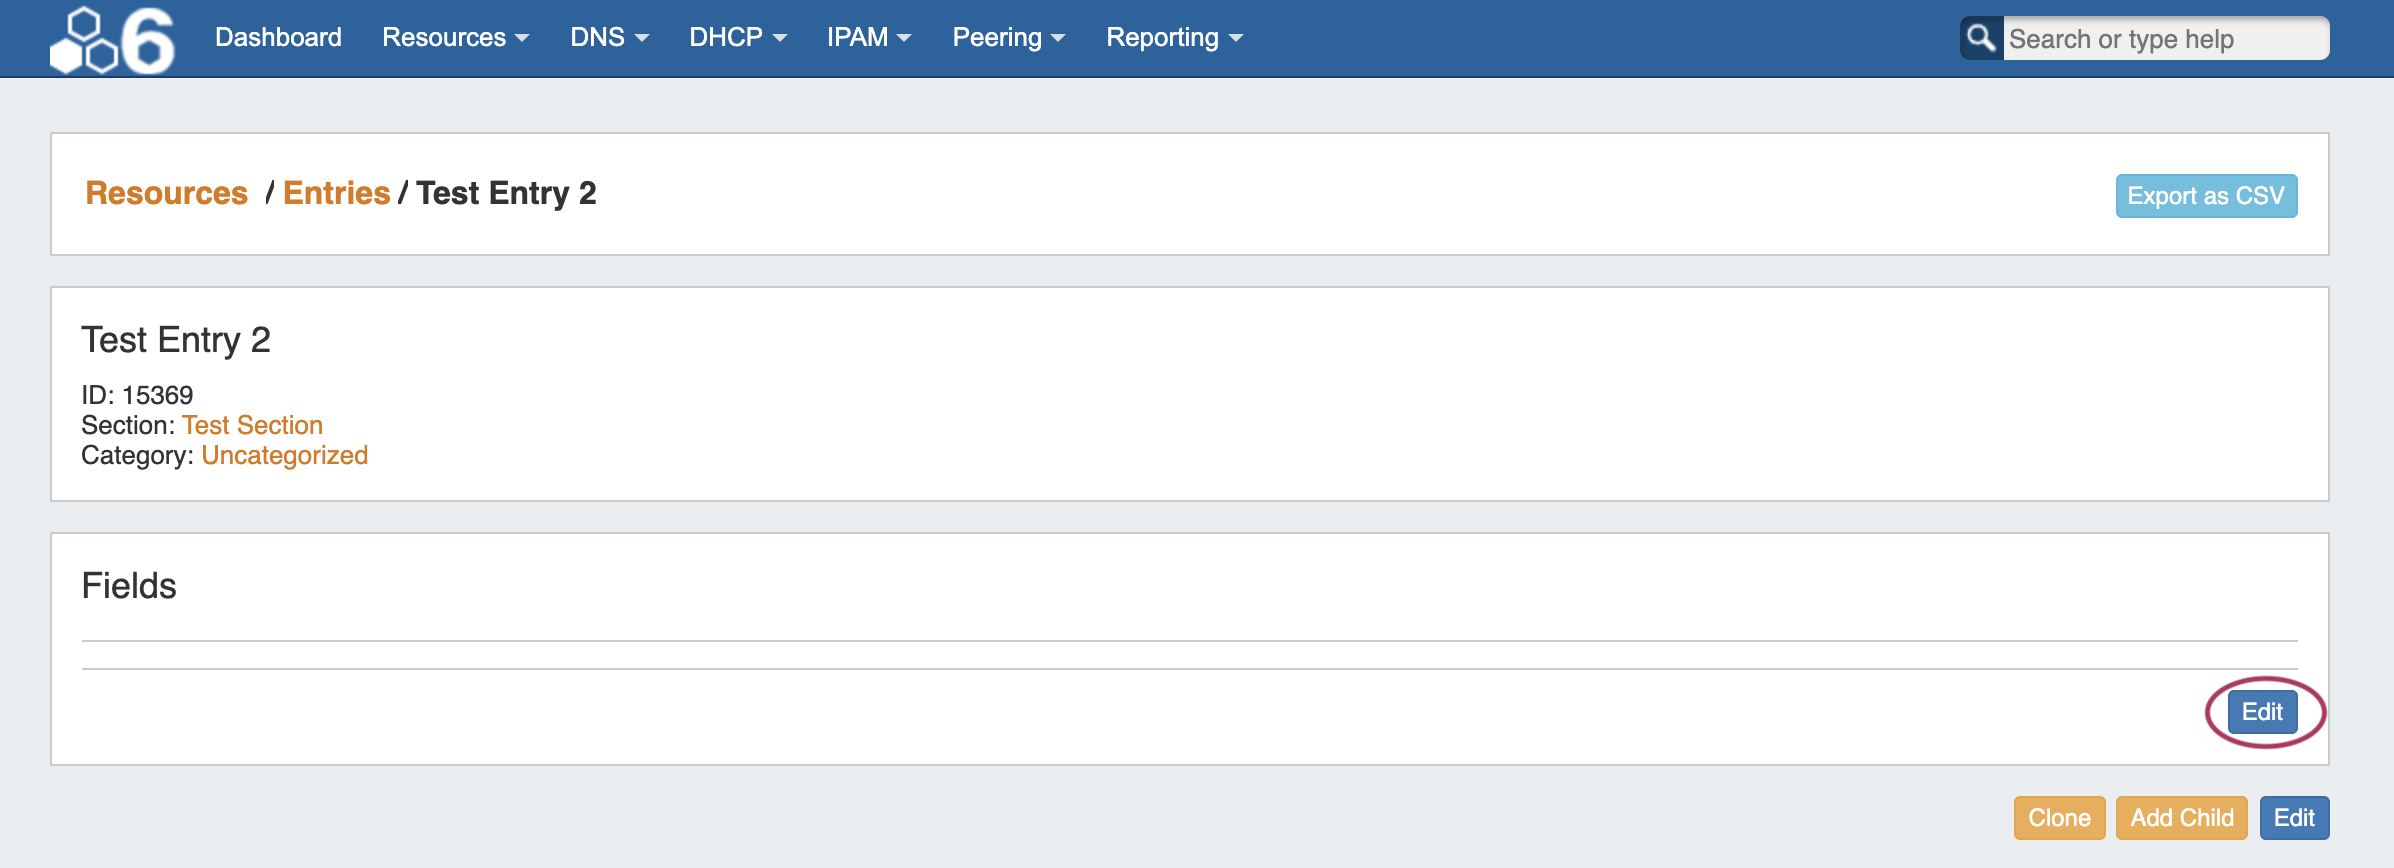
To add all or some of the enabled fields to the Gadget, navigate to the Resource Entry page, and To Add fields, click the "Edit" Button at the bottom right corner of the Field Gadget.
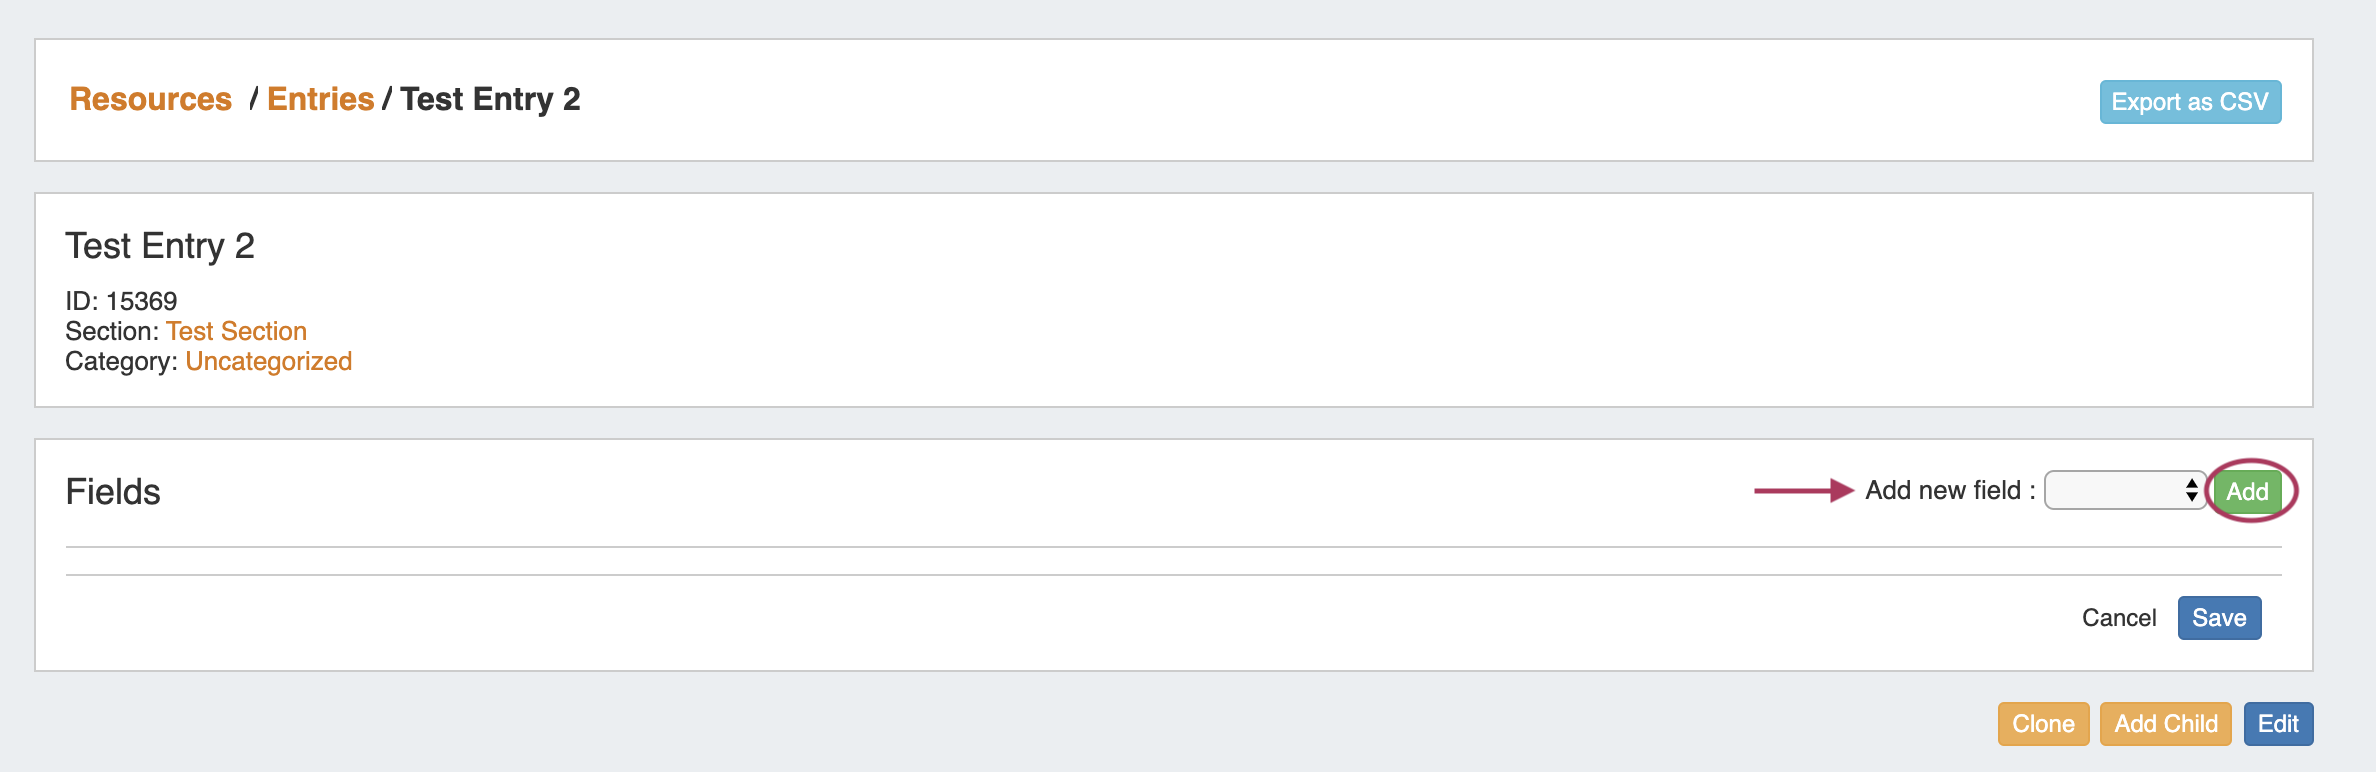
Then, next to "Add New Field:", select one of the available fields from the dropdown, and click "Add".
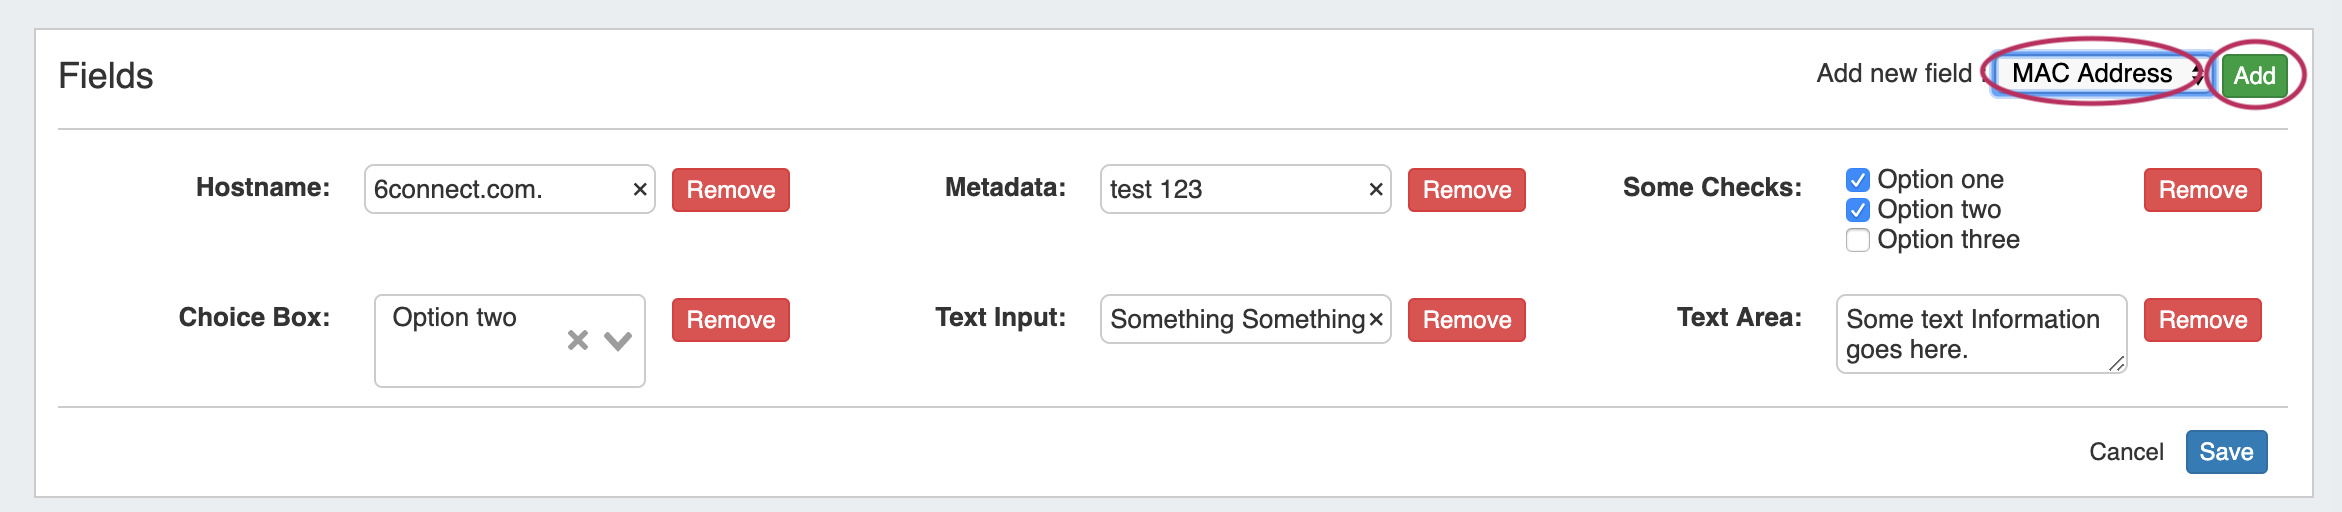
Continue to add the desired fields to display for this specific resource.
Once added, the field will be available to edit or remove. Edit field value(s) as desired, then click "Save".
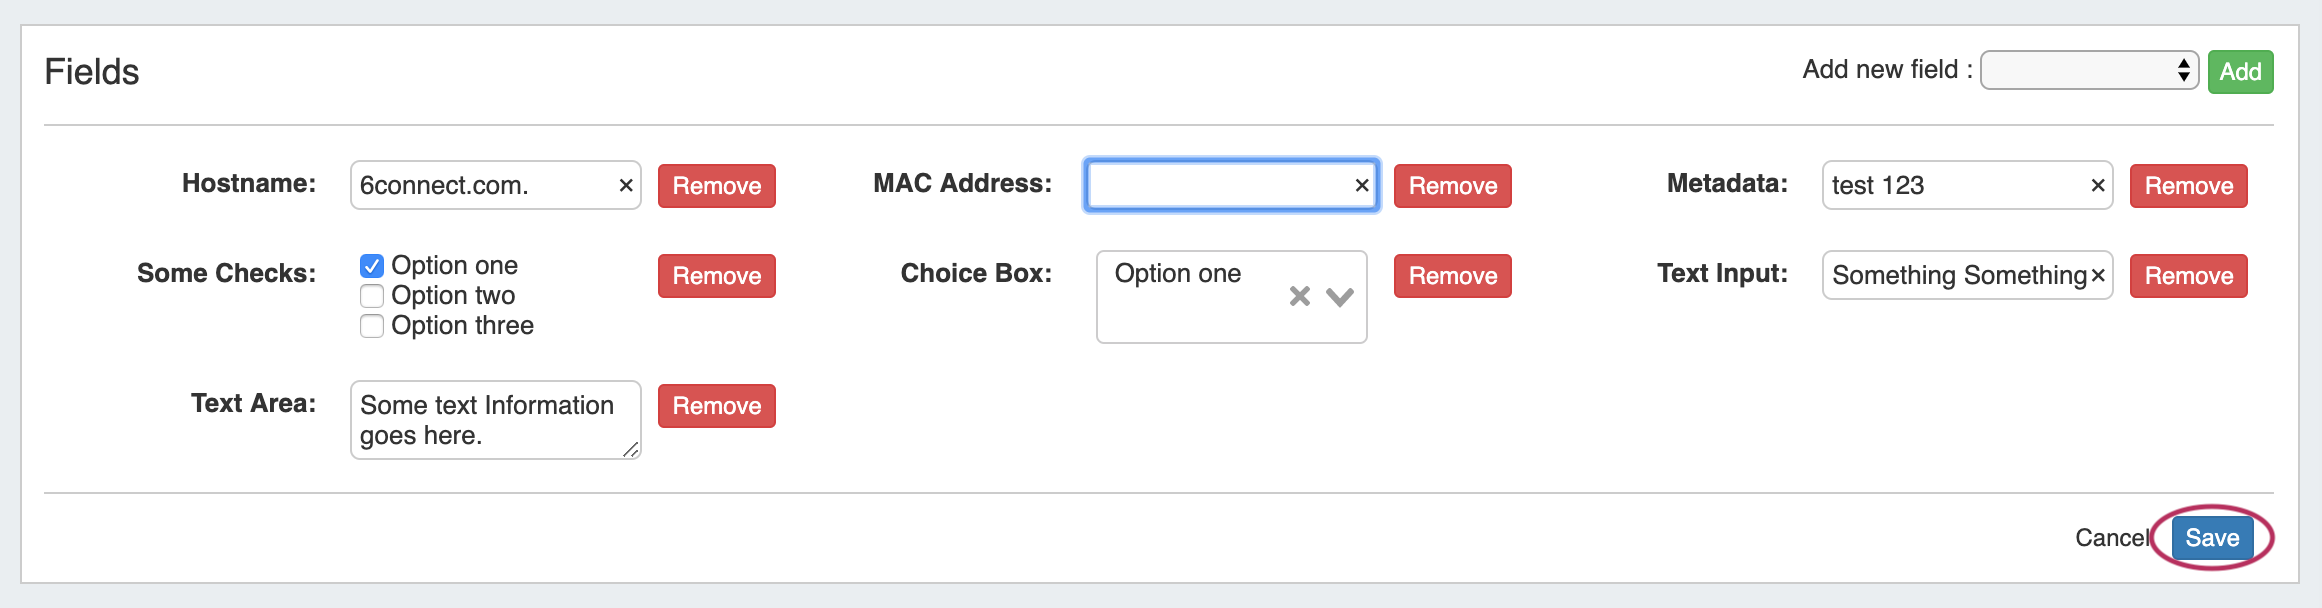
Once added, the field will be available to edit or remove. Edit field value(s) as desired, then click "Save".
| Info |
|---|
The Encrypted Data field can be used to store passwords or other sensitive data in encrypted format. When added to the Field Gadget, this field will display obscured text with a green "Decode" button. The data will only display as plain text when "Decode" is clicked by a user with update permissions for the selected resource. |
IPAM (Legacy)
| Info |
|---|
The IPAM Gadget has functionally been replaced by the IPAMv2 Gadget in version 7.0.0. Although the original IPAM Gadget is still able to be used by existing customers, we recommend switching to the IPAMv2 Gadget for improved speed, filters, and UI customization options. |
...
| Expand | ||
|---|---|---|
| ||
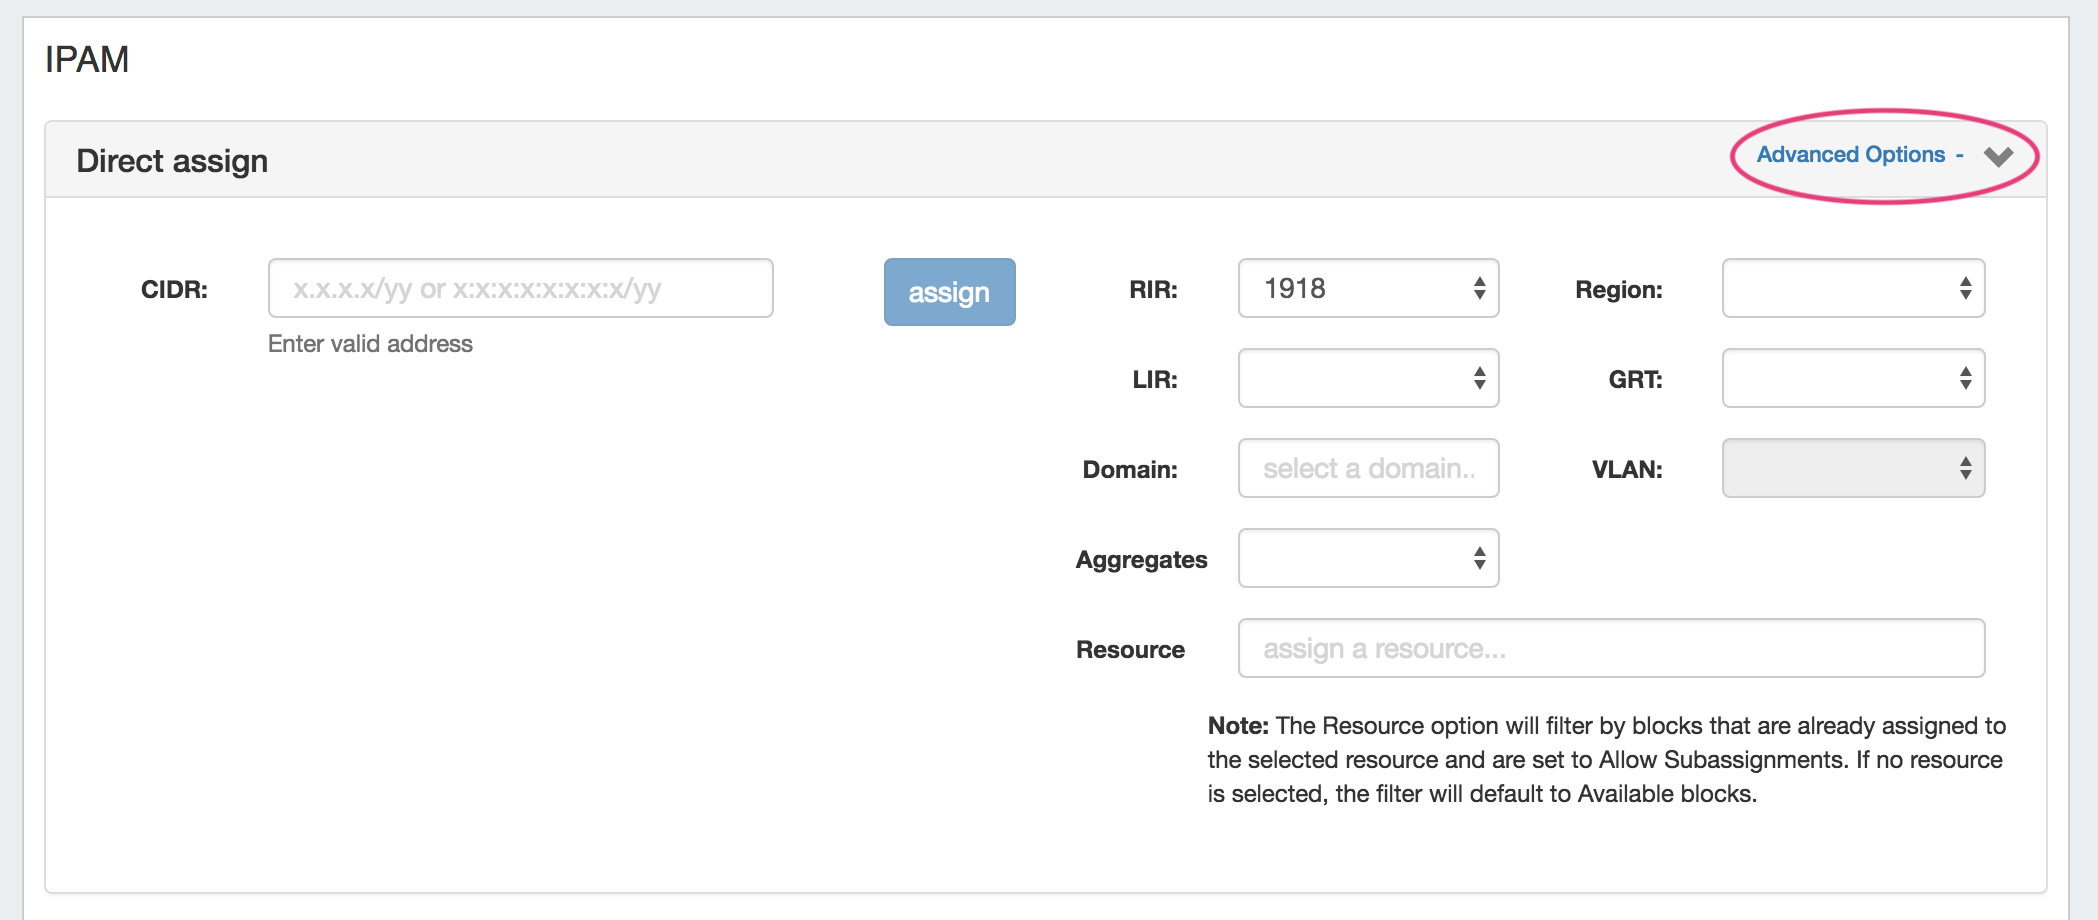
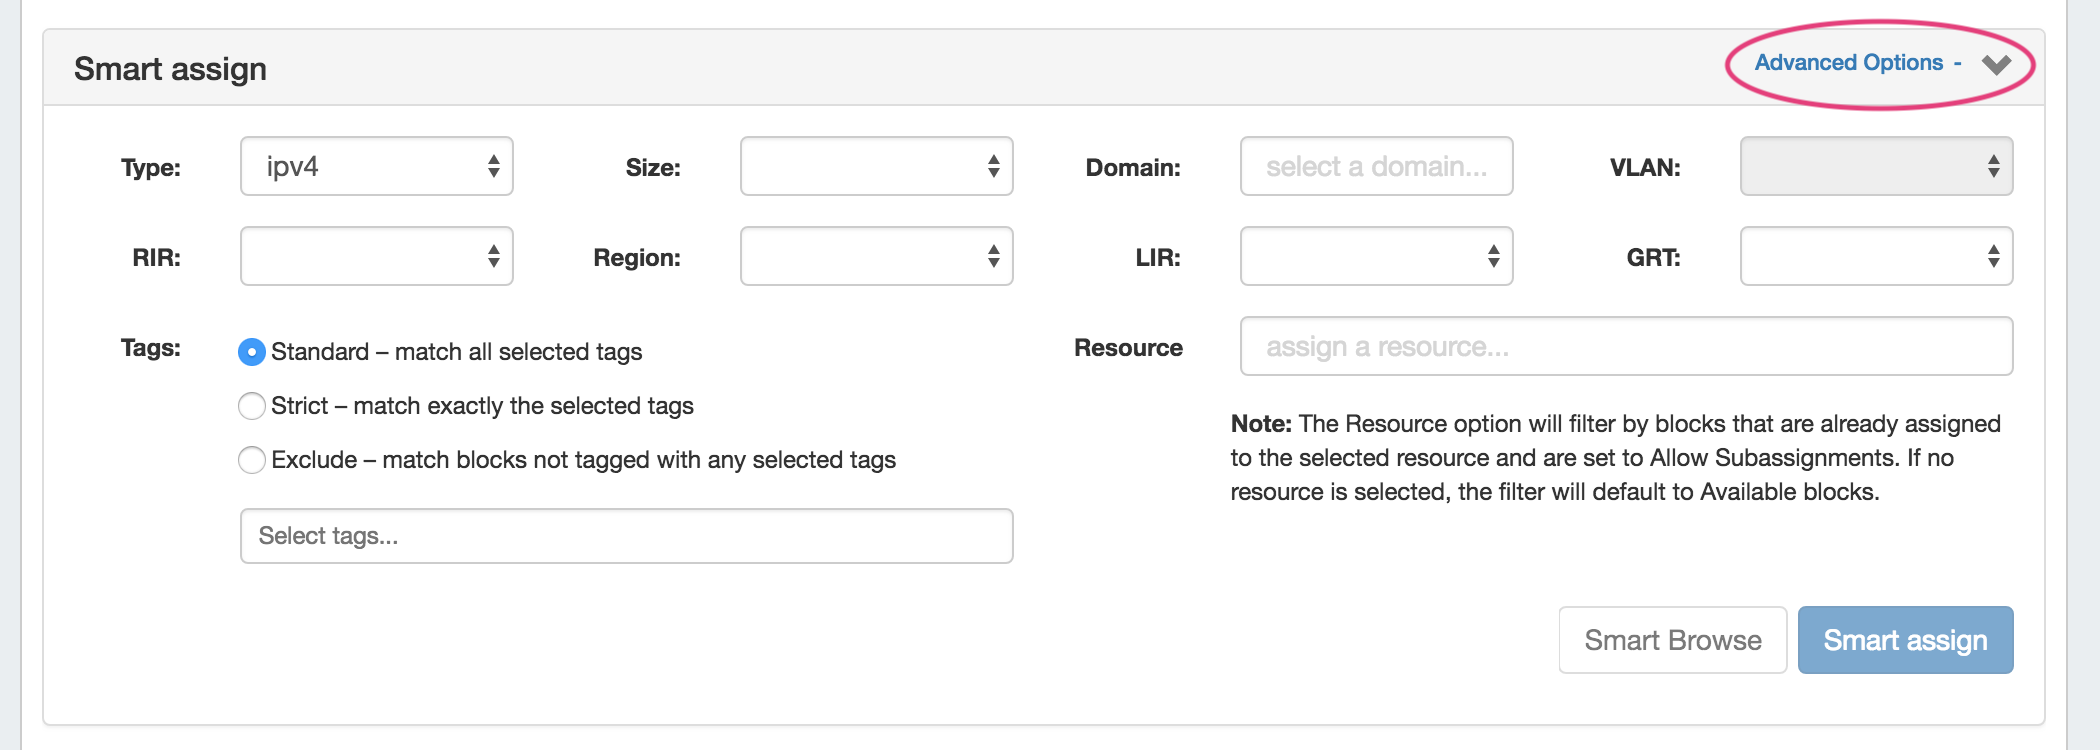
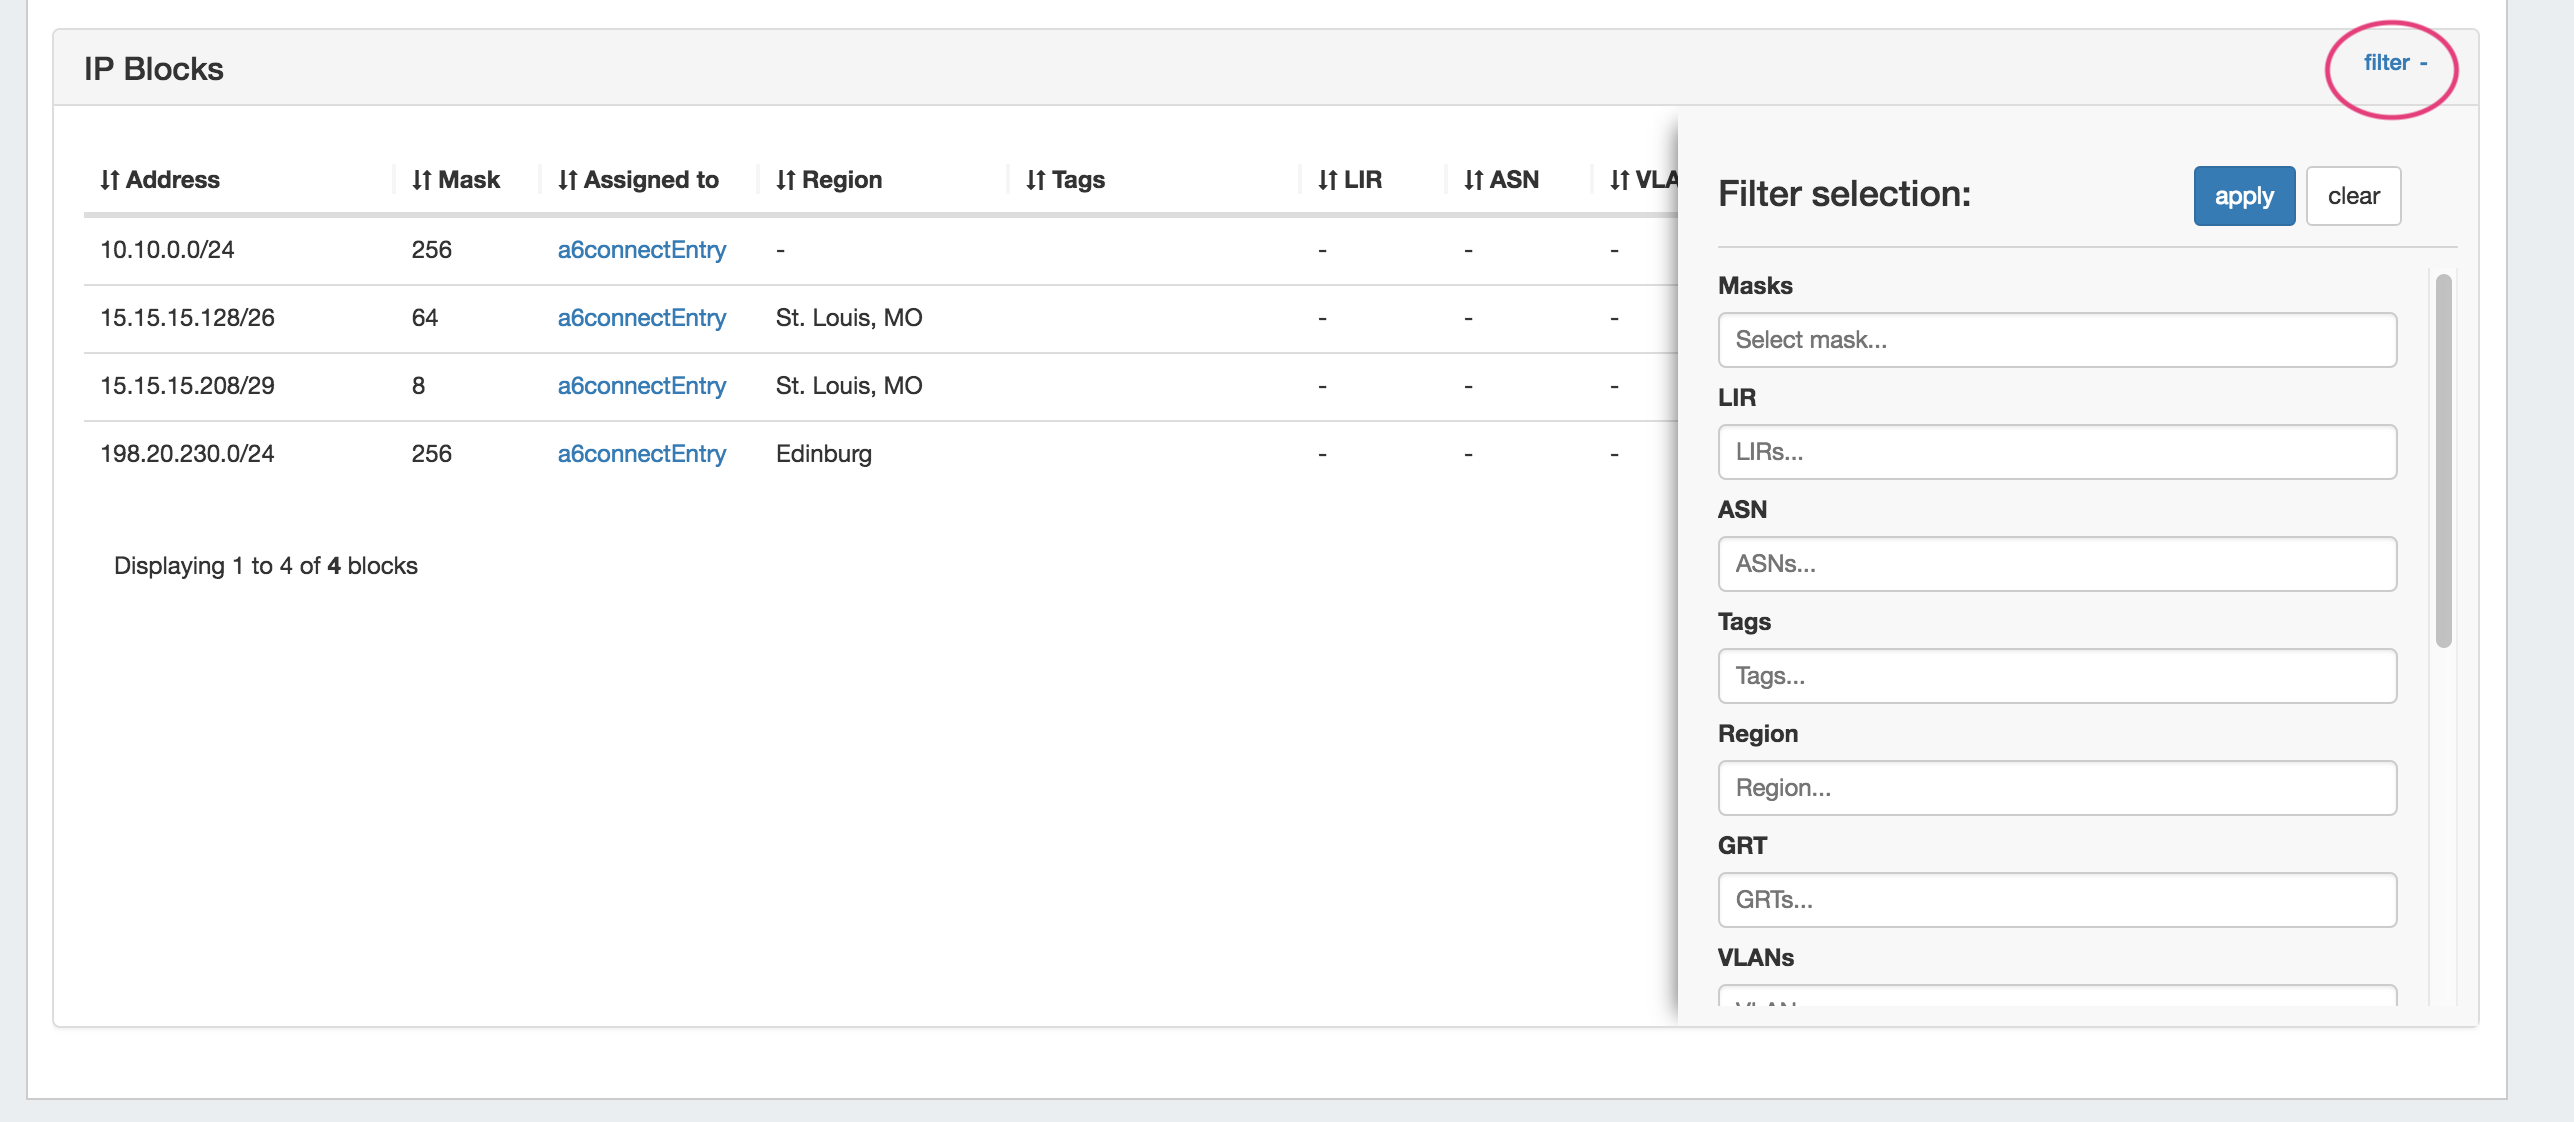
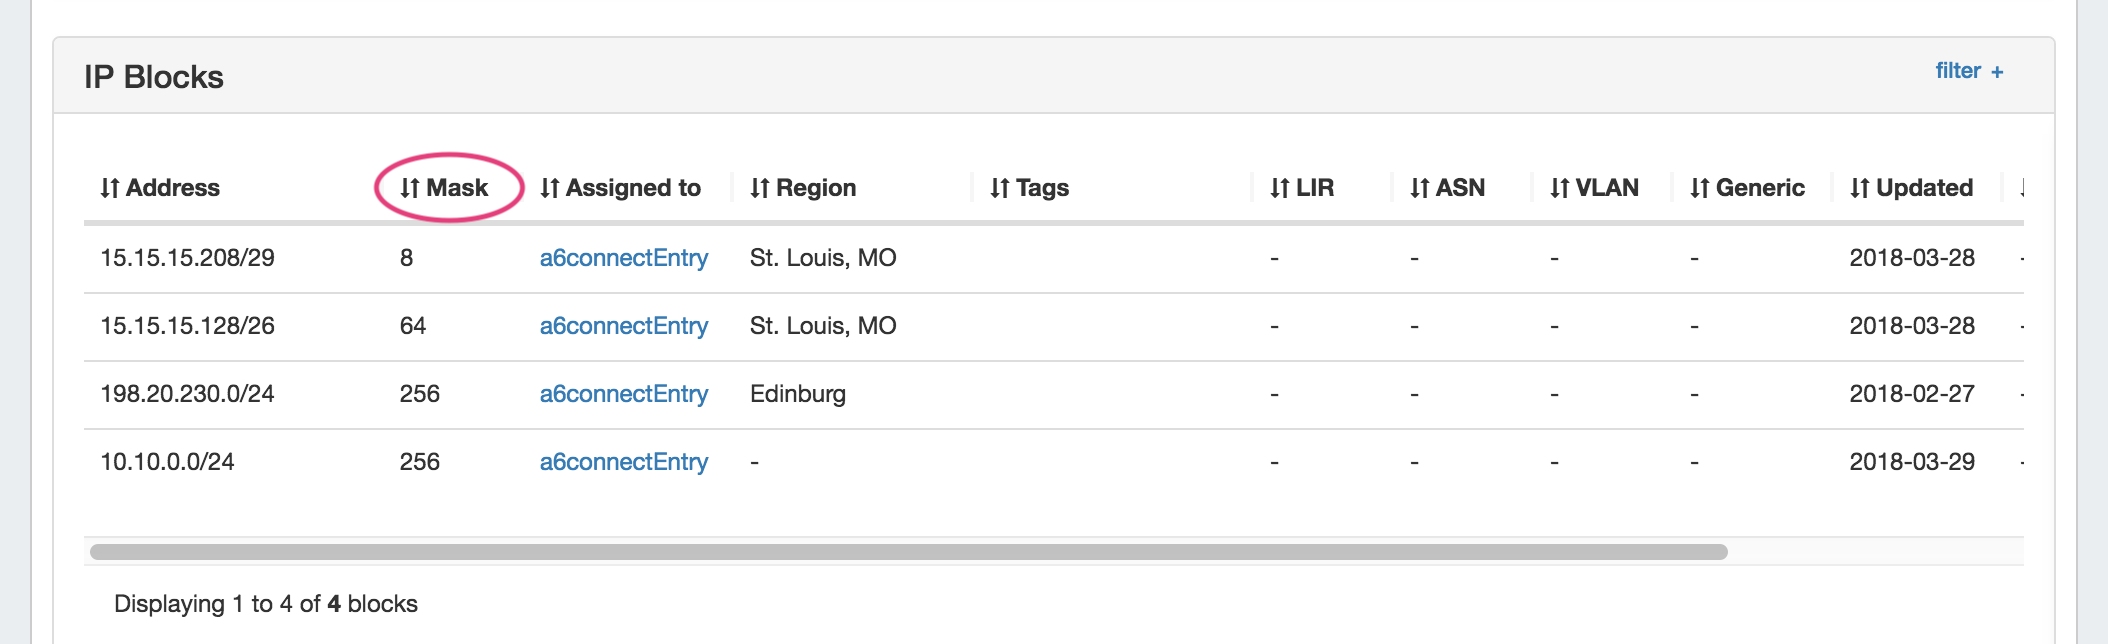
Using this gadget, you can:
For more information on assigning and managing blocks, see Working with IP Blocks - Assigning IP Space. |
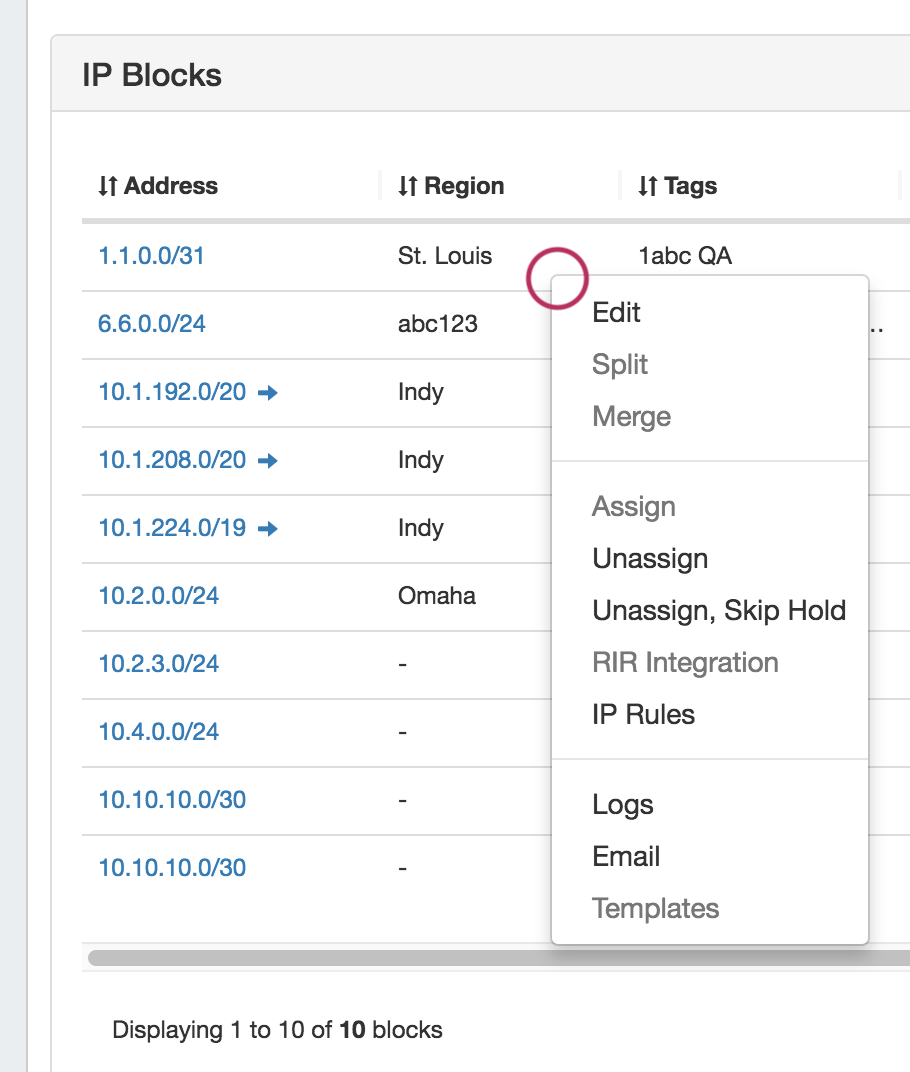
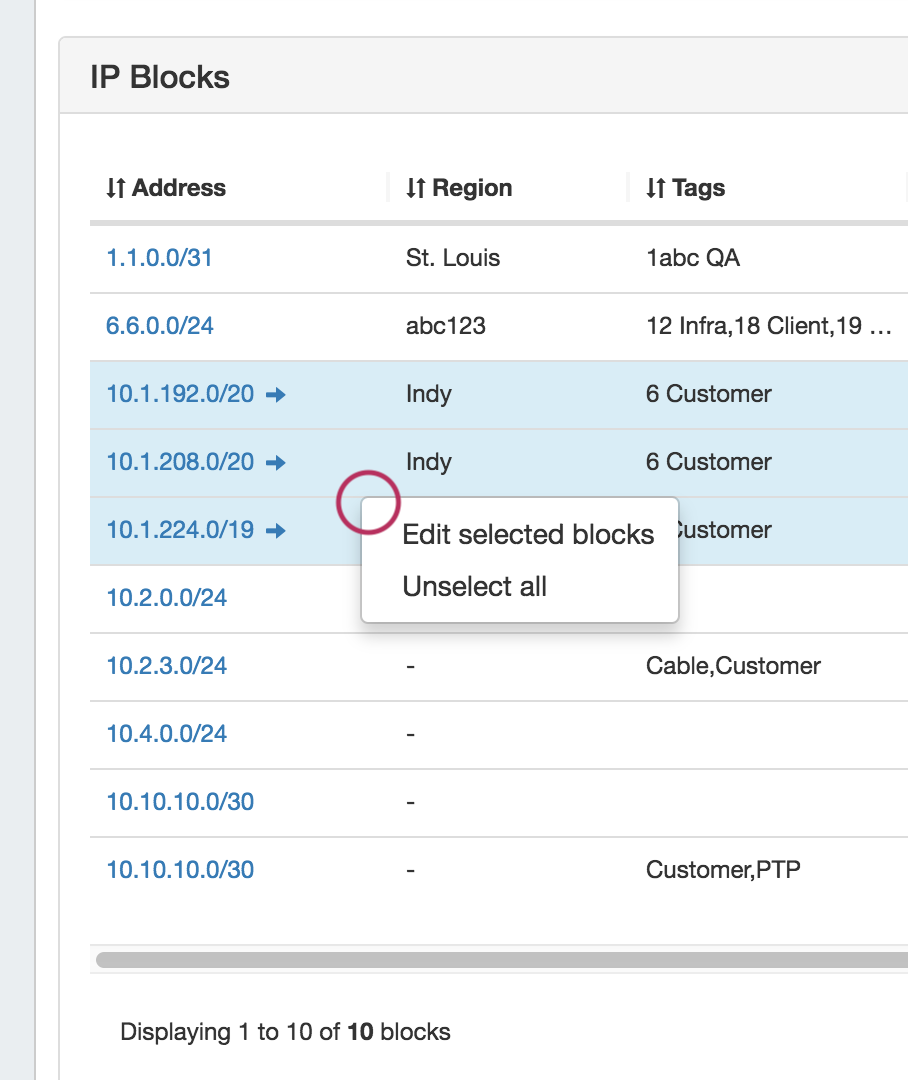
...
For additional information on Peering, see Peering v2.
Peering Sessions
This Gadget is used on the Router Section type. From here, new sessions may be added by clicking on the "Add Session" button, then entering session information into the "Create New Session" page.
...
For additional information on Peering, see Peering v2.
Peering VRFs
The Peering VRF Gadget allows you to add VRFs from a router's Resource Entry page.
...
XML specifications are available for users interested in creating their own gadgets for ProVision. See the XML Specifications section linked below for more information.
| Children Display |
|---|
| Warning |
|---|
User created gadgets are not supported at this time and the specification below could change without notice. If you want to make your own gadget, please get in touch so we can help you |
| Children Display |
|---|
Additional Information
Continue on to the following pages for additional information on Working on Working with Resources in Resources in Provision:
...