| HTML |
|---|
<div id="google_translate_element"></div>
<script type="text/javascript">
function googleTranslateElementInit() {
  new google.translate.TranslateElement({pageLanguage: 'en'}, 'google_translate_element');
}
</script>
<script type="text/javascript" src="//translate.google.com/translate_a/element.js?cb=googleTranslateElementInit"></script> |
Configuring
...
ACL Views
ProVision's ACL module applies the specified network lists to the in the named.conf for zones inside the group and the servers that belongs to the group, when exporting the group or zone.
...
| Table of Contents |
|---|
| Note | ||
|---|---|---|
| ||
| If you see a view named "_6connectDefault" - DO NOT DELETE IT. |
Create
...
an ACL View
ACL views may be created under each DNS Group, accessed from the DNS tab DNS Groups sub-tab.
Expand the Group that you want the view applied to, and then expand the section "Applied ACLs" by clicking on the expansion arrow to the right of the section name.
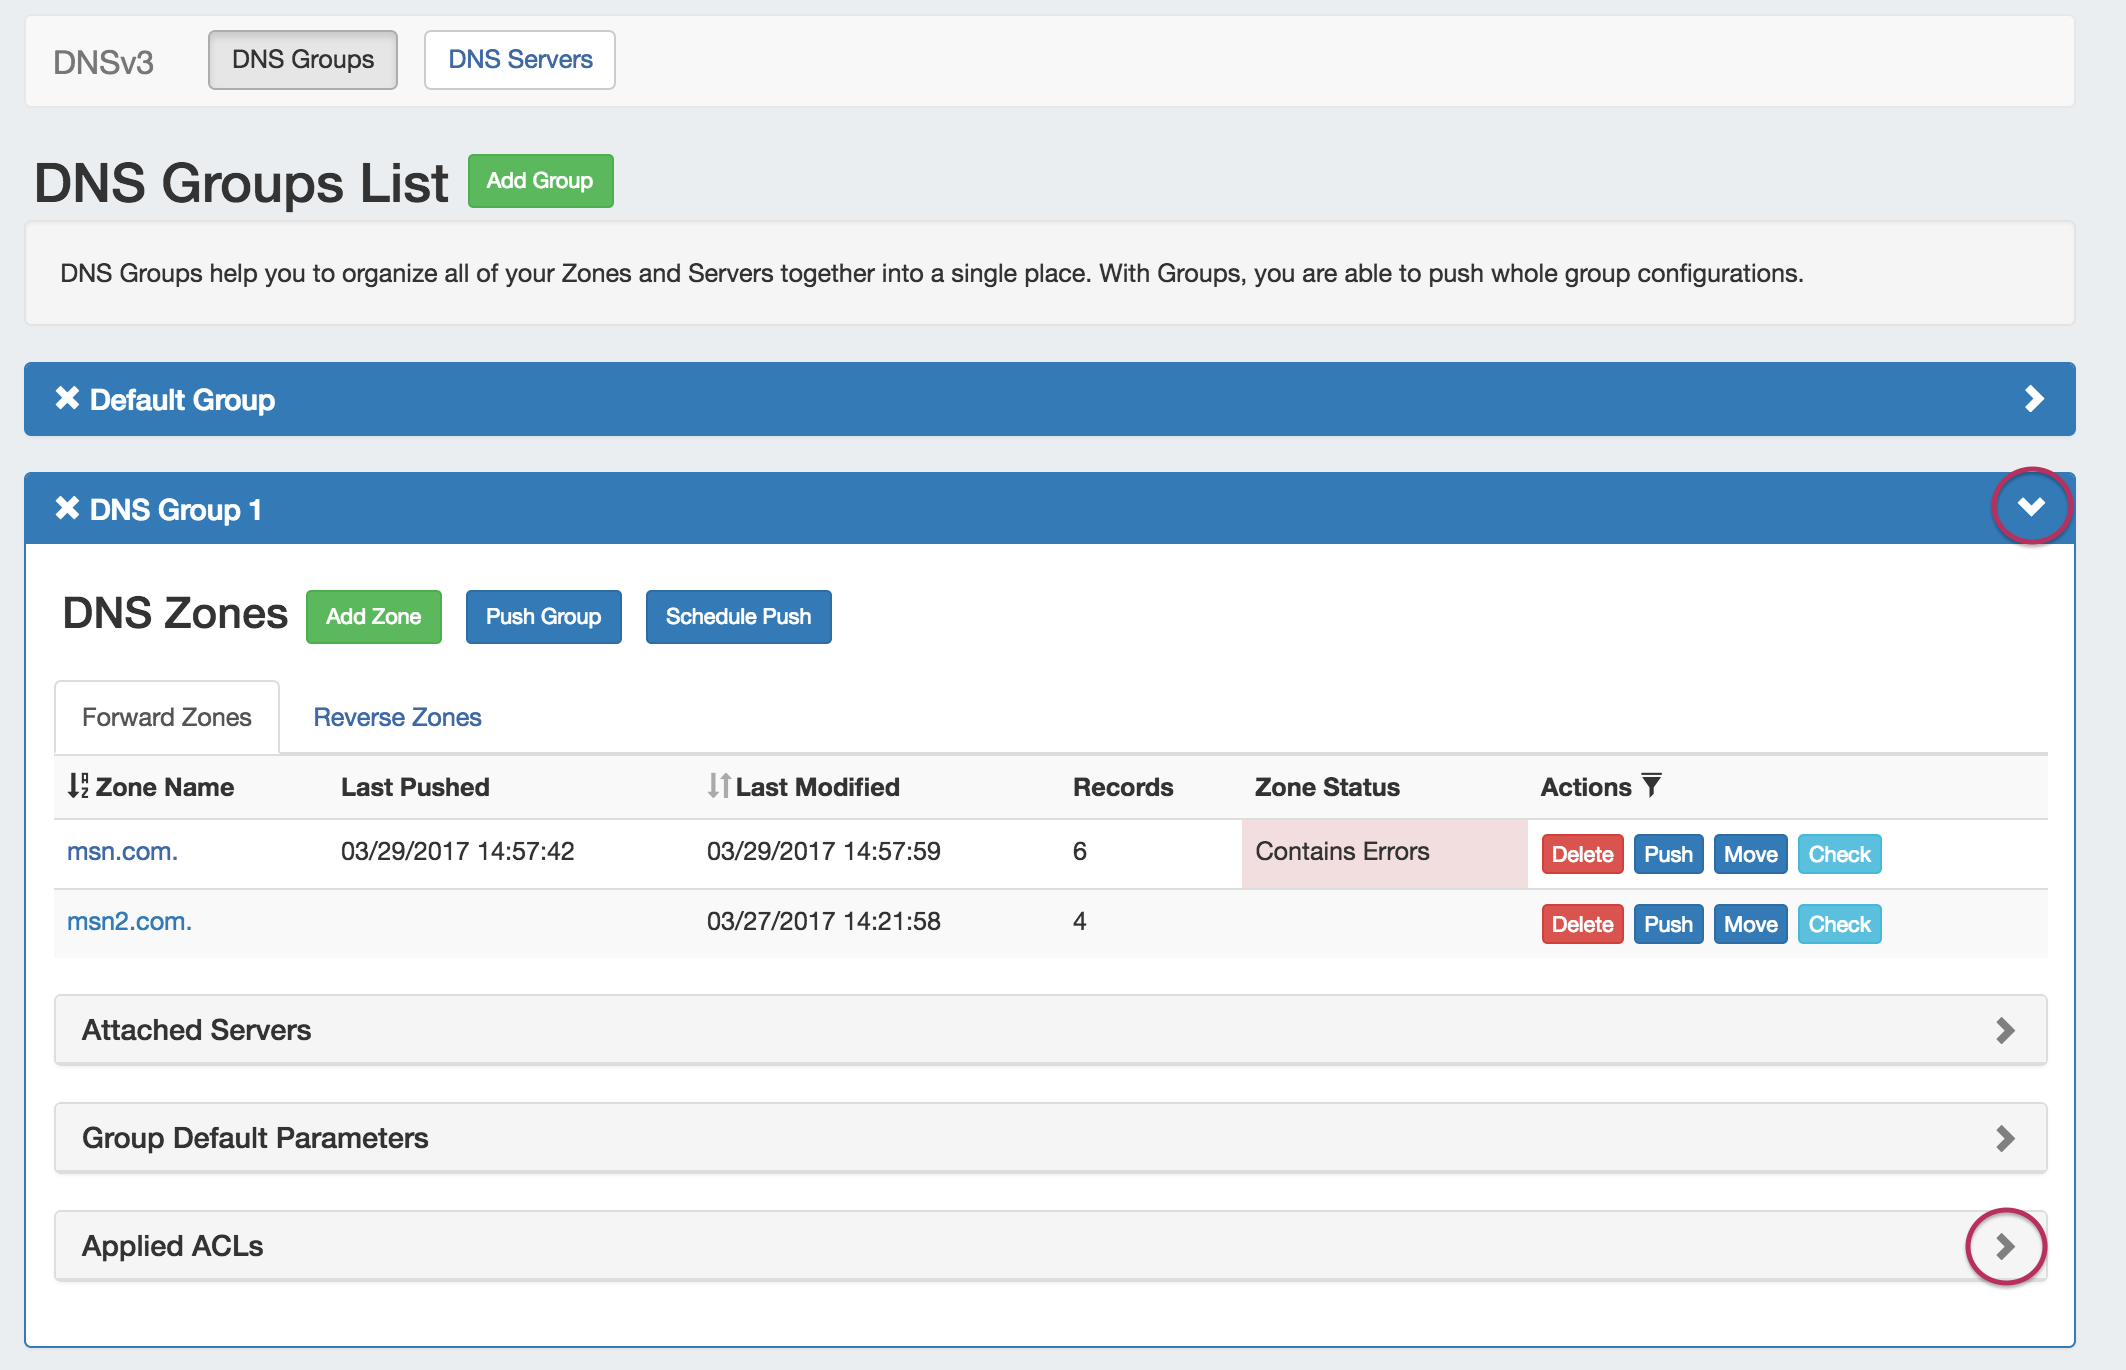
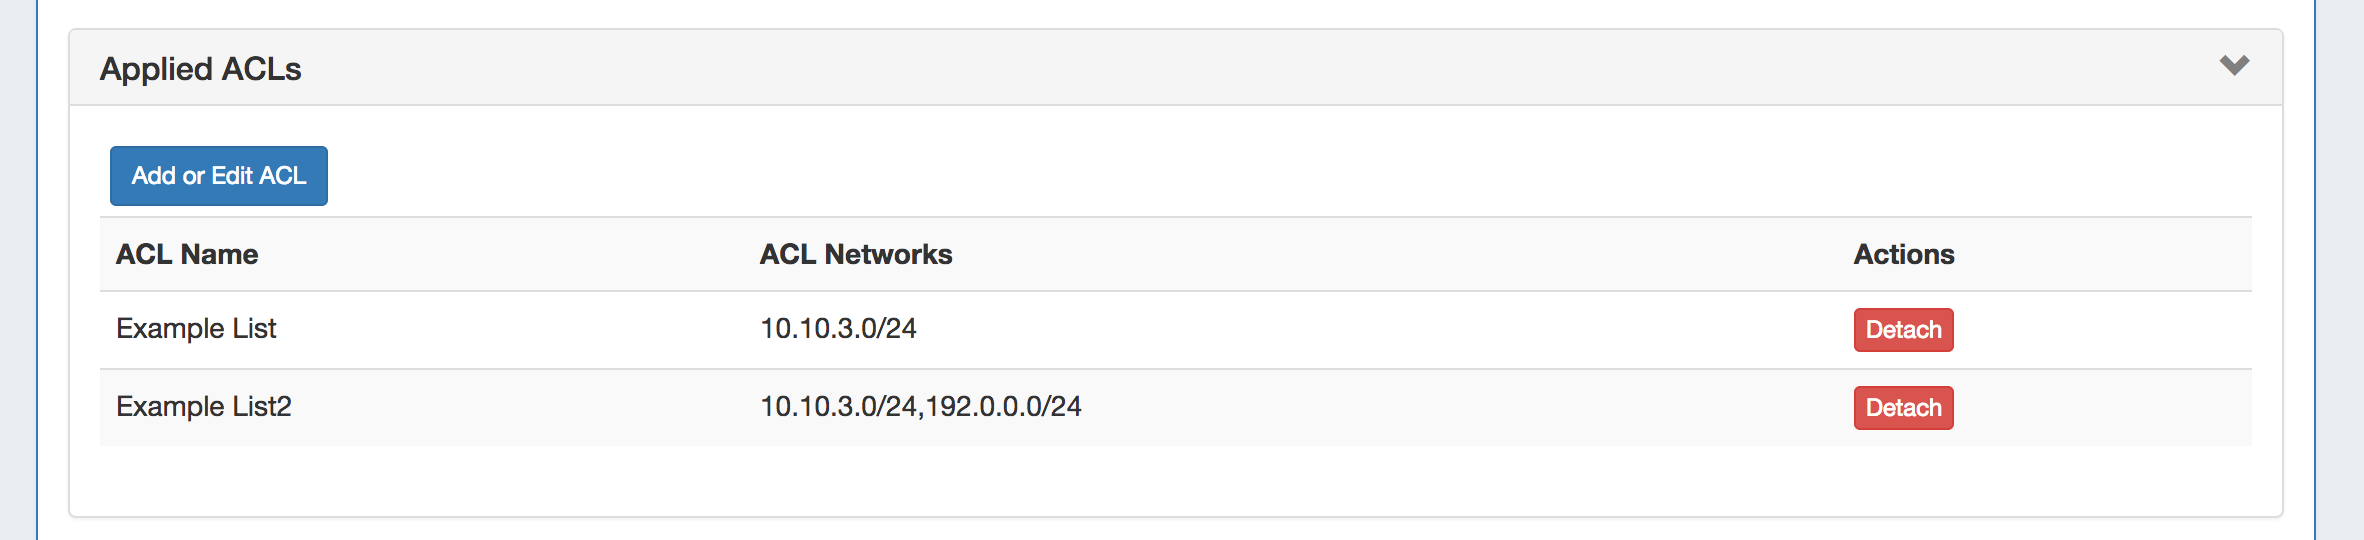
If ACLs already exist, they will be shown under this section.
To add a new list, click the "Add or Edit ACL" button.

If no ACLs currently exist, the dialog will only show inputs for ACL Name and ACL Networks - enter a Name and Network and click "Save Changes".

If previous ACLs exist, a selector will be be available for "Existing ACL:".
Since we are creating a new ACL, just keep this at the default value ("Choose Existing ACL or create a new one"), and enter in the Name and Network(s) for the new ACL. Separating multiple CIDRs with a comma (,).
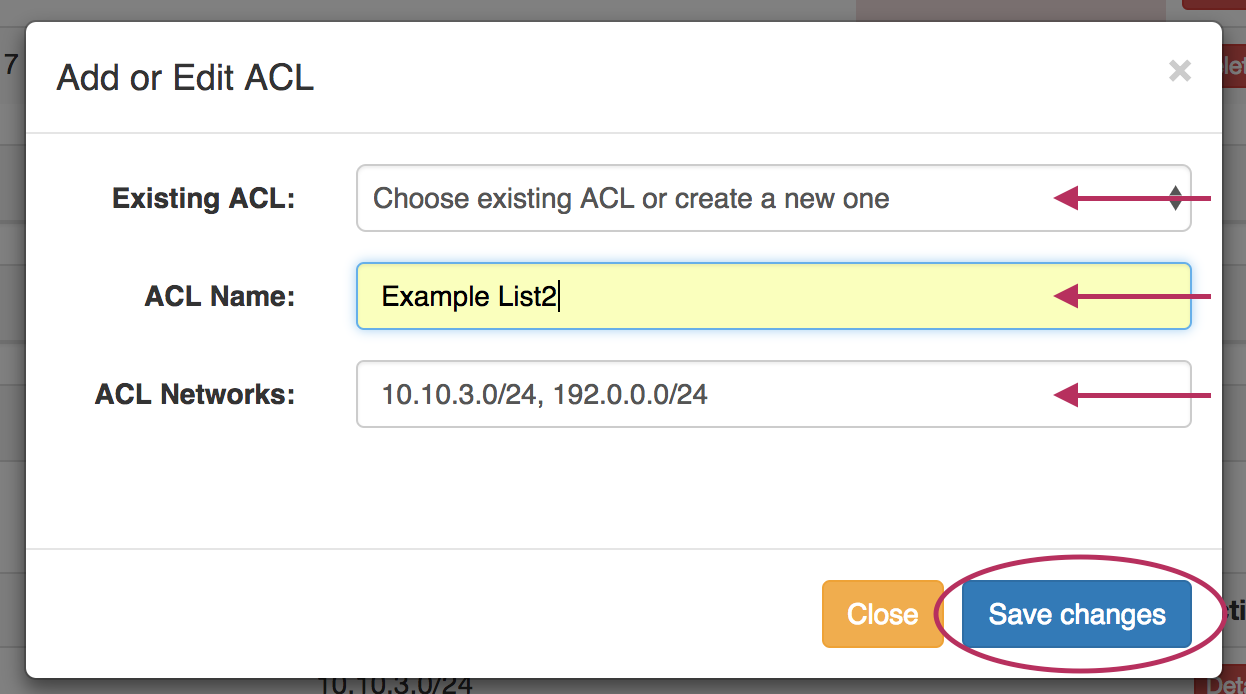
When done, save the ACL by clicking "Save changes". The new ACL will be added to the Group's Applied ACL list.
Edit an ACL
ACLs may be edited similarly to how they are created. Click the "Add or Edit ACL" button under the "Applied ACLs" module for the DNS Group.
Select the ACL you wish to edit from the "Existing ACL" Selector. Then, edit the Name or Network fields as desired.
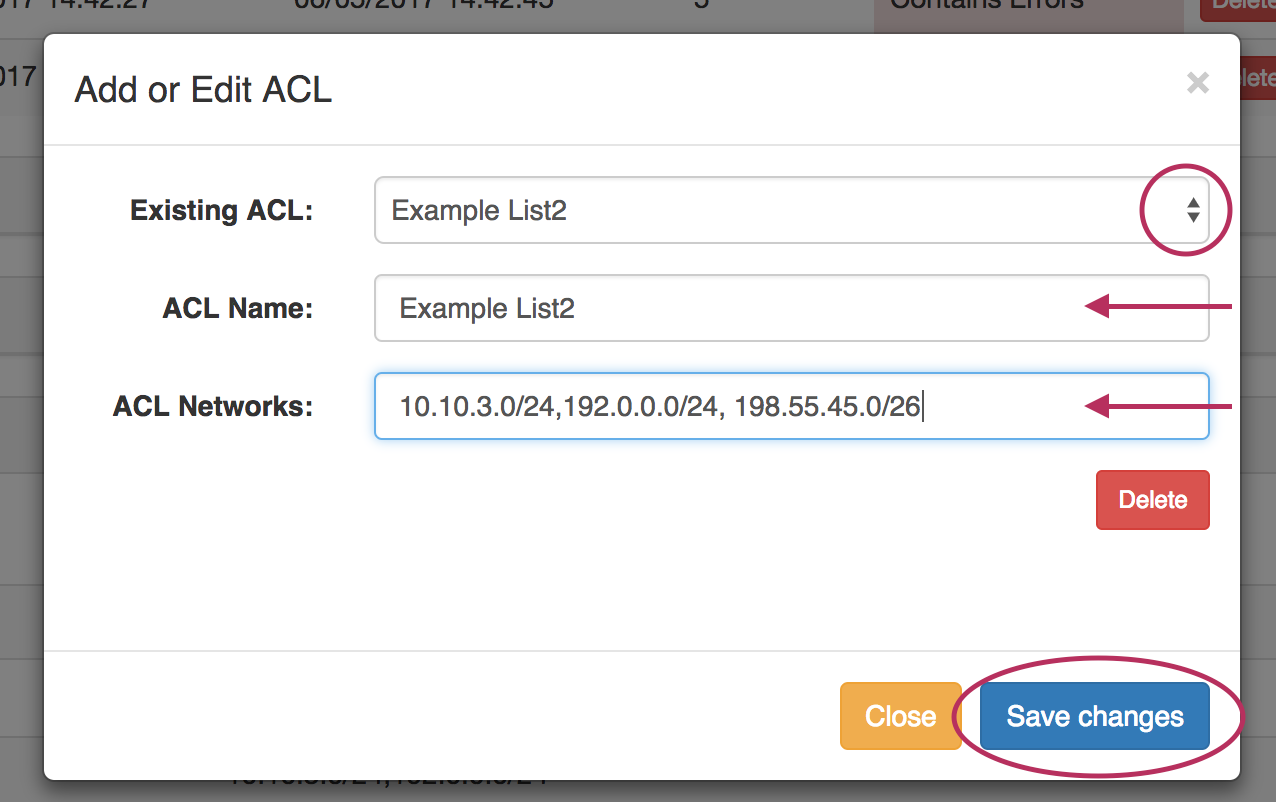
When done, click "Save Changes".
Detach an ACL from a Group
Detaching an ACL removes it from the Group, but the ACL will still exist in ProVision for re-use in other Groups.
To detach an ACL, expand the "Applied ACLs" section under the desired Group, and click on the "Detach" button under the "Actions" column.

The ACL will be removed from under the Group, but will remain in other Groups it exists under, as well as be selectable from the "Add ACL" window.
Delete an ACL
ACLs may be deleted through the "Edit ACL" interface. Click the "Add or Edit ACL" button under the "Applied ACLs" module for the DNS Group.
Select the ACL you wish to delete from the "Existing ACL" Selector. Then, click the red "Delete" button under the Networks field.
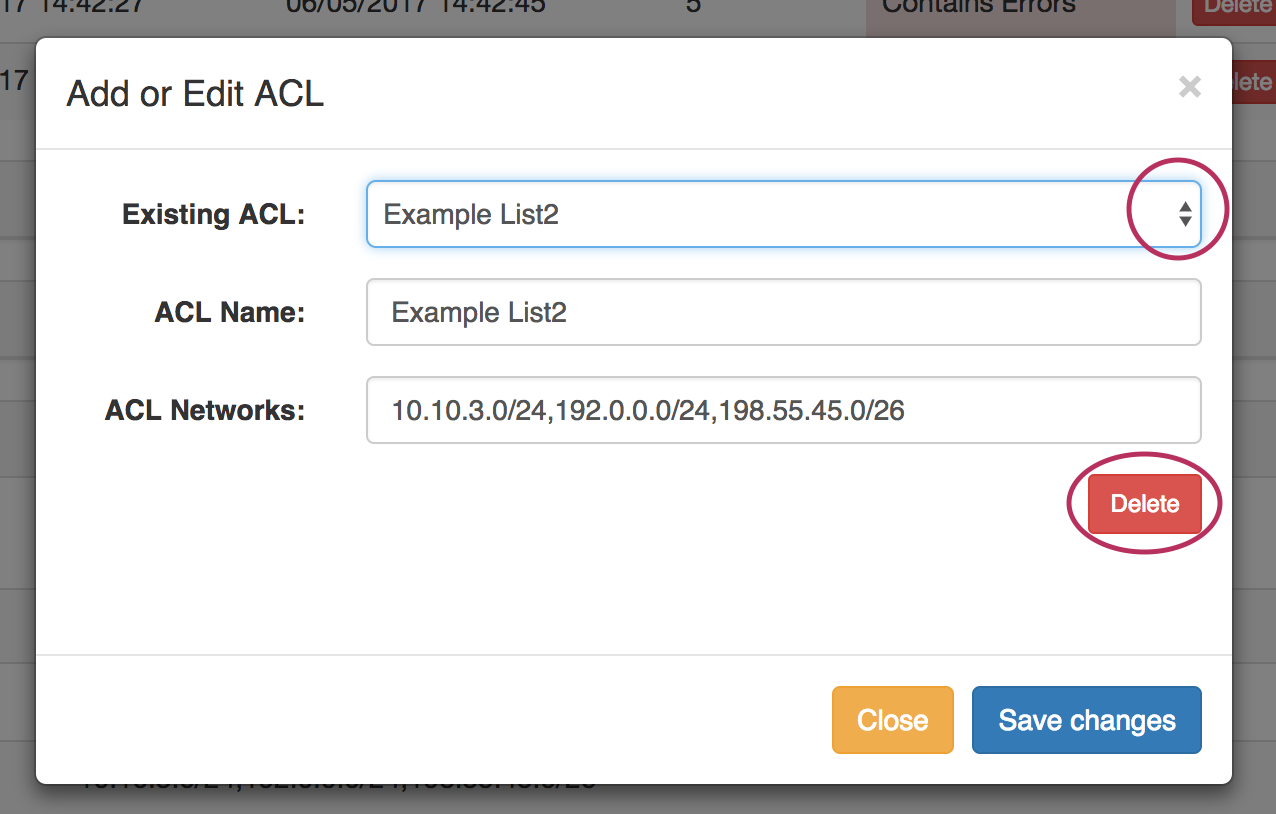
The ACL will be permanently deleted, and will no longer show under any Groups to which it has been attached, nor show in the "Existing ACLs" list.
Add an existing ACL to another Group
Existing ACLs may be added to as many Groups as desired. If ACLs already exist in ProVision, clicking the "Add ACL" button will give an additional option to "Create New".
To select a previously created ACL, turn the "Create New" toggle to the "OFF" position.
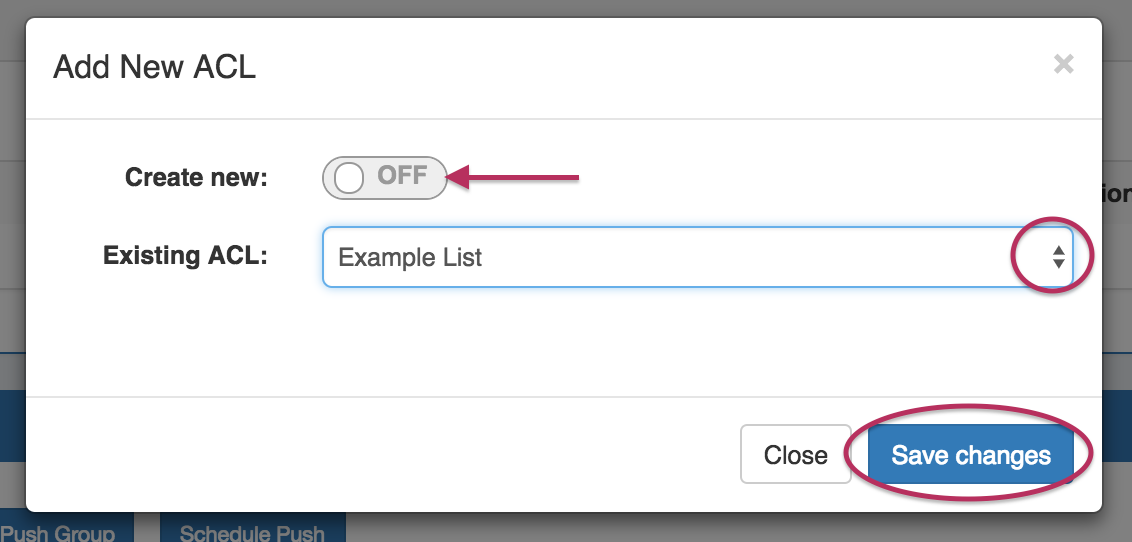
An "Existing ACL" list appears. Select the desired existing ACL from the list, and then click "Save changes" when done.
Additional Information
For more information on DNS Groups, Servers, and Zones, see:
Working with DNS Zones - Common Tasks
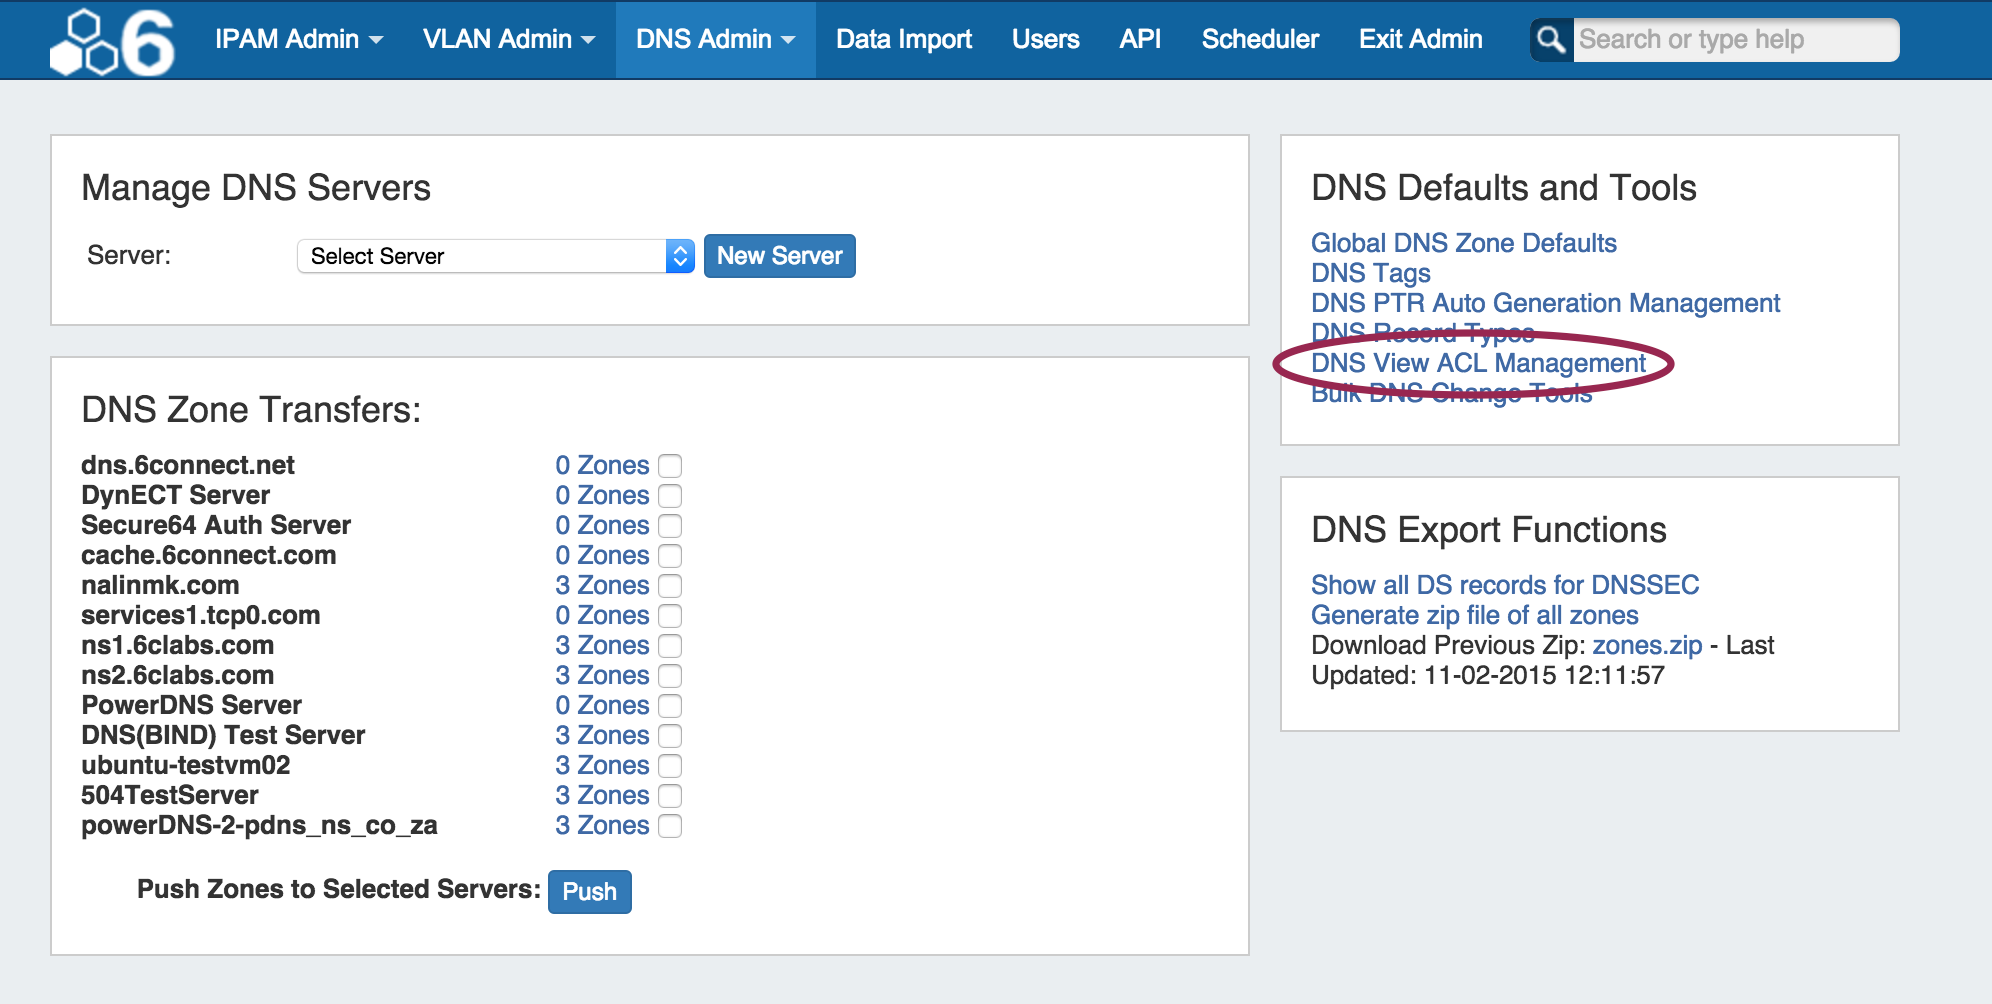
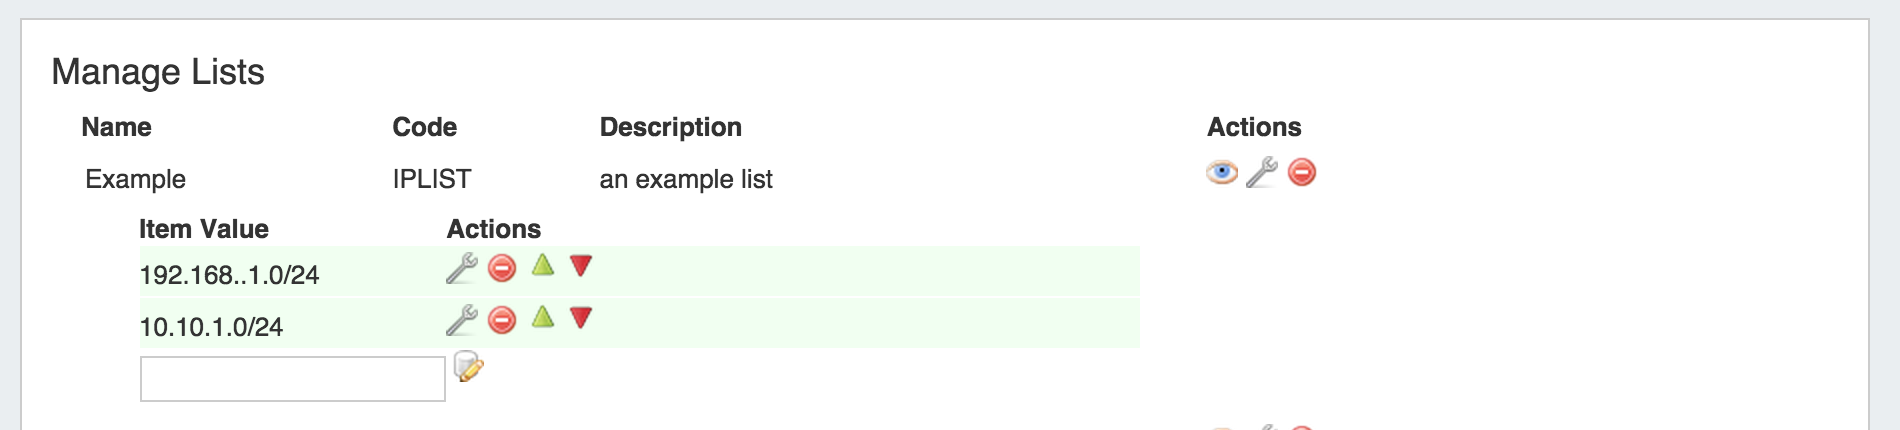
The List manager is accessed from the DNS Admin tab. Click on the "DNS View ACL Management" link under DNS Defaults and Tools. It is also available under the DNS Admin dropdown menu.
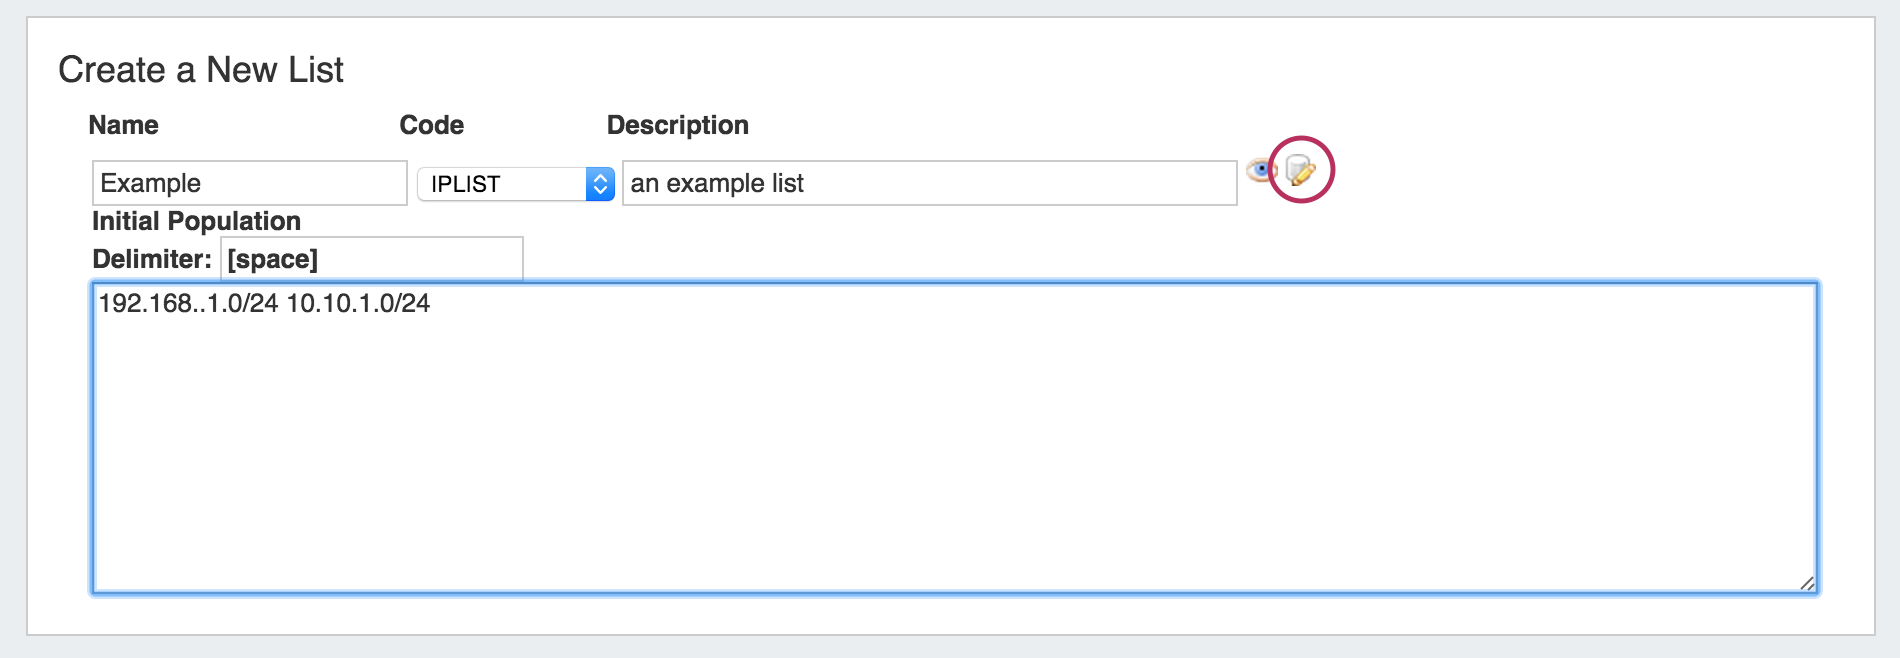
You will be presented with the options to Create a New List and also Manage Lists. To create a list, enter in the descriptive information and ensure that the Code dropdown is marked "IPLIST".

Press the Eye icon and you will be presented with en editing area to populate IP data including an option for the data delimiter (you can also do this from the Manage Lists section). Click on the Pencil icon to save your changes, the List will then be moved to the Manage Lists section below.
The List will now be available from the Manage Lists display area and can now be assigned to a Server View.
Define and Assign a View to the DNS Server
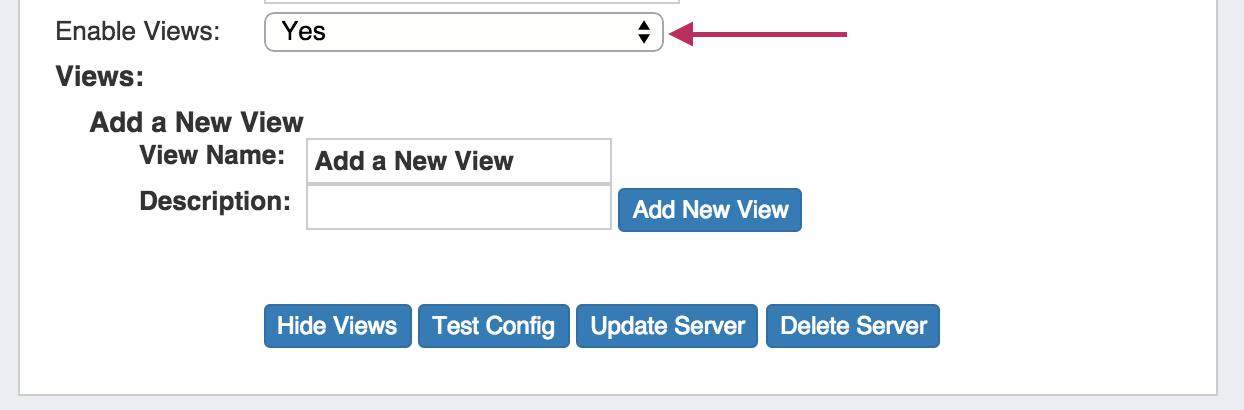
In the Admin screen, go to the DNS Admin Tab.
Under "Manage DNS Servers", select a server and check "Enable Views". You will then have the option to define a View.
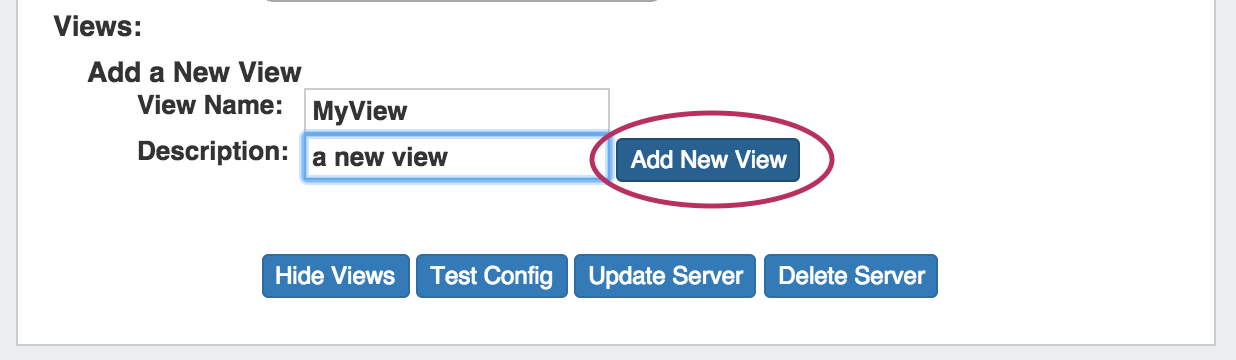
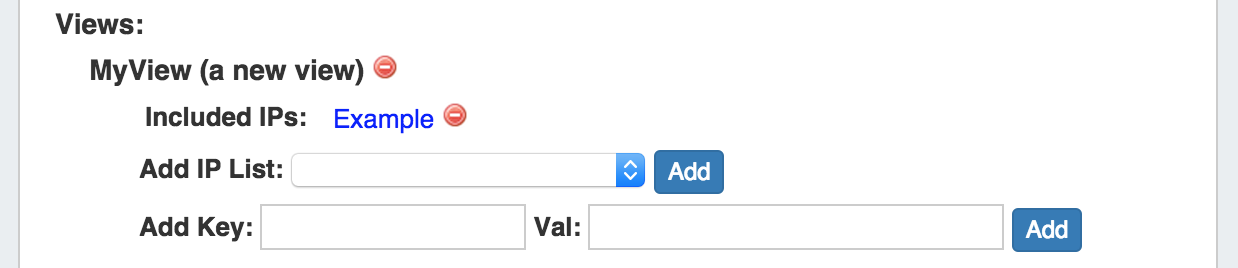
Enter identifying information for the View you are creating and click the "Add New View" button.
Once the View is created, you can select the IP List that you want to assign to this View from the dropdown menu, and then press the "Add" button. Here, we have selected our "Example" list to add.
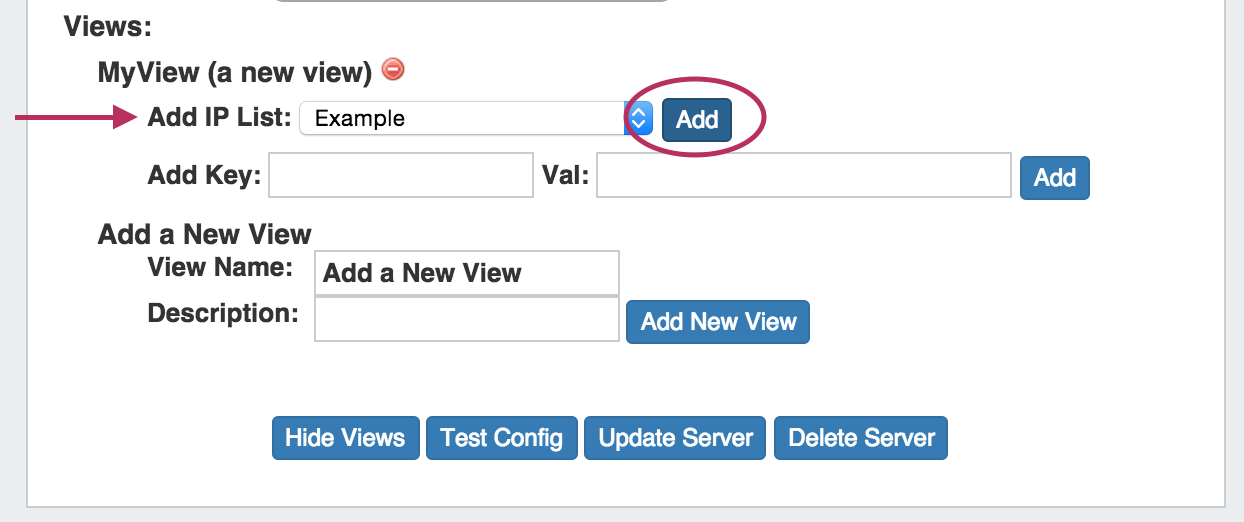
Assigning other Directives
With the IP List assigned, you can either assign additional Key/Value pairs or add another IP List to apply to the View.
| Info | ||
|---|---|---|
| ||
For example, if you wanted to allow recursion, you would simply enter "allow-recursion" as a Key, with a Value of "on". |
Assign a View to a DNS Zone Record
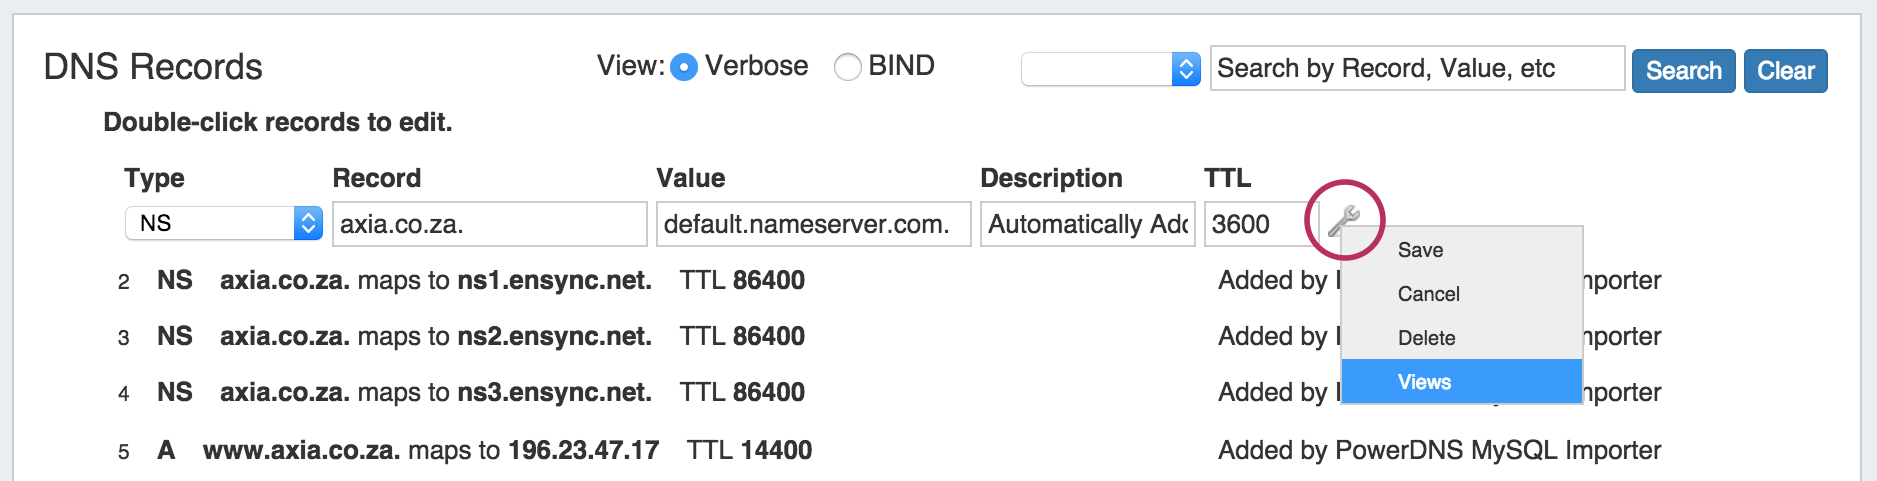
When viewing a DNS Zone, ensure that the Zone is linked to a the server with a DNS View enabled. Then, under the "DNS Records" section, double-click on the zone record to edit it. Click on the Action Menu (wrench icon) and select "Views".
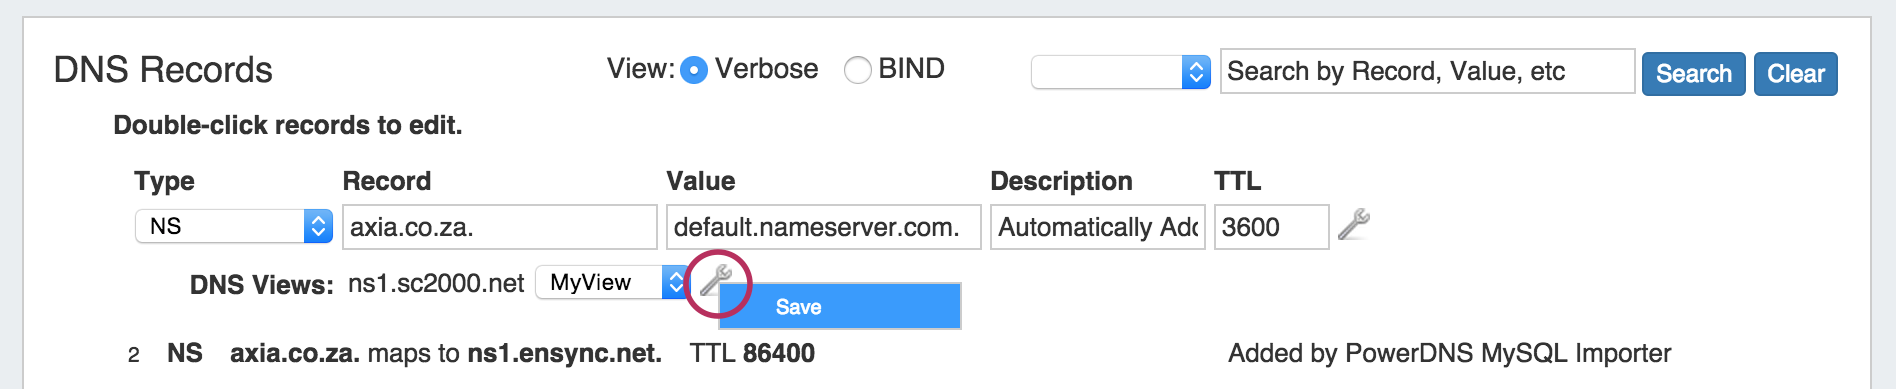
It will bring up the DNS Views menu where you can select the View from the dropdown menu to apply to the zone record. Click on the Action Menu (wrench icon) and select "Save" to save your changes.
Push the zone out like normal and the View should be applied as expected. You can also preview the zone from the "Show Zone" area of the screen that will be visible once you push the zone out successfully. This will also display the History for the zone if a rollback is necessary.