...
What are Gadgets?
Gadgets display on the Resource Entry page, providing information or actions for various ProVision modules. They are best described as self contained webapps; widgets but with more power. Gadgets can have their own fields, HTML templates, and even accompanying scripts and stylesheets. They can interface with the API to display simple information such as the resource Section, or they can perform much more complex functions, such as IP assignment in the IPAM Gadget.
...
| Expand | |||||
|---|---|---|---|---|---|
| |||||
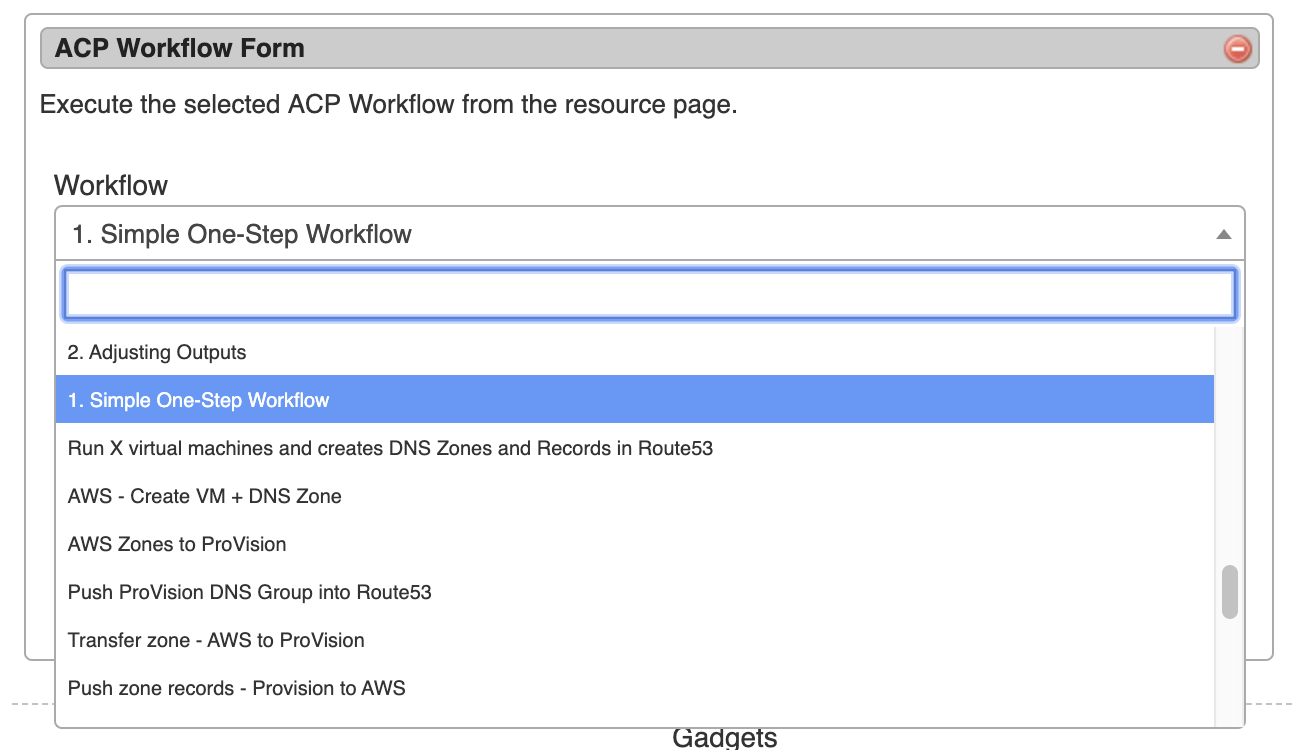
Setting up ACP Access in ProVision Before using the ACP Workflow Gadget, you must set the ACP URL and user credentials in Admin → Admin Preferences. 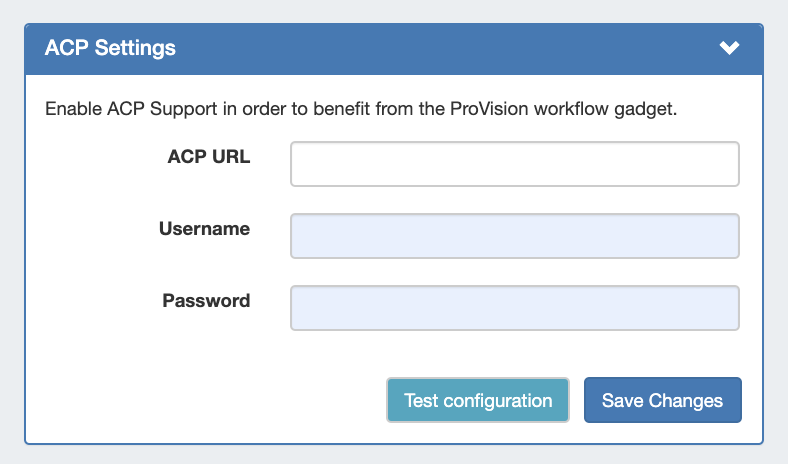 Enter the ACP URL for a licensed ACP instance, then provide the ACP Username and Password for the user that should be used to execute Workflows. To verify the account, click "Test Configuration" - you will be notified whether the account is valid. When done, click "Update". After setup, the ACP Workflows Gadget will Gadget will load with the available Workflows from your ACP instance, and can be configured to select which Workflow and inputs you wish to use. Configuring the ACP Workflow Form The ACP Workflow form is access from the Edit Section page, under "Manage Gadgets". Once ACP settings have been added to Admin Preferences, the "ACP Workflow Form" Gadget can be added to a Section, and Workflows from the associated ACP instance will be available to select. containing fields to select the desired Workflow to Run, Title, and map input options.
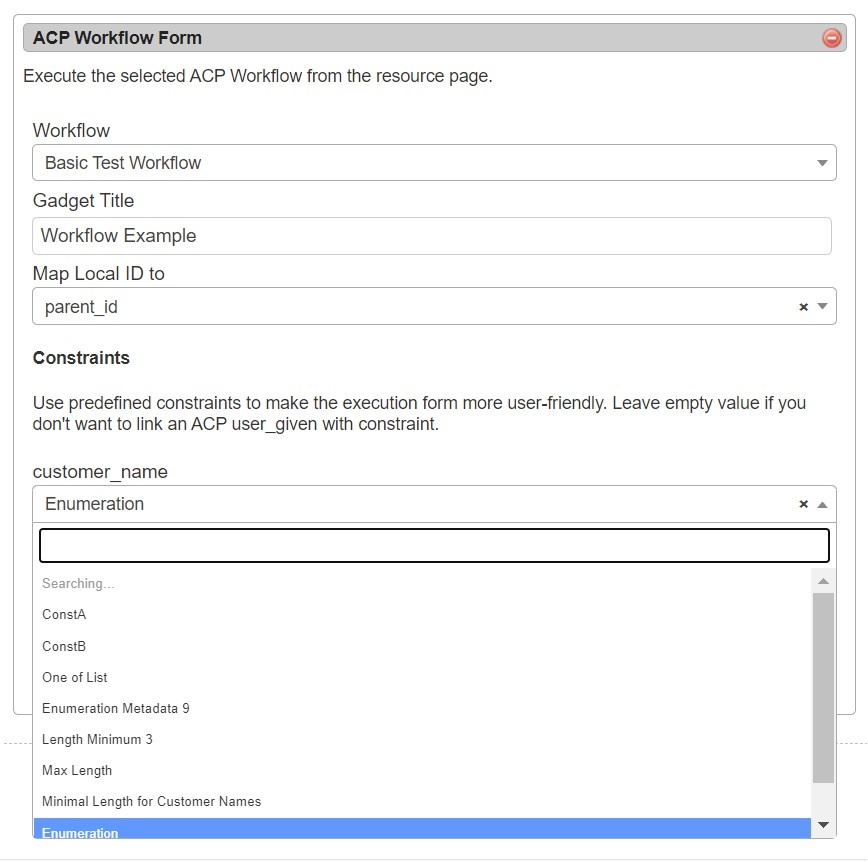
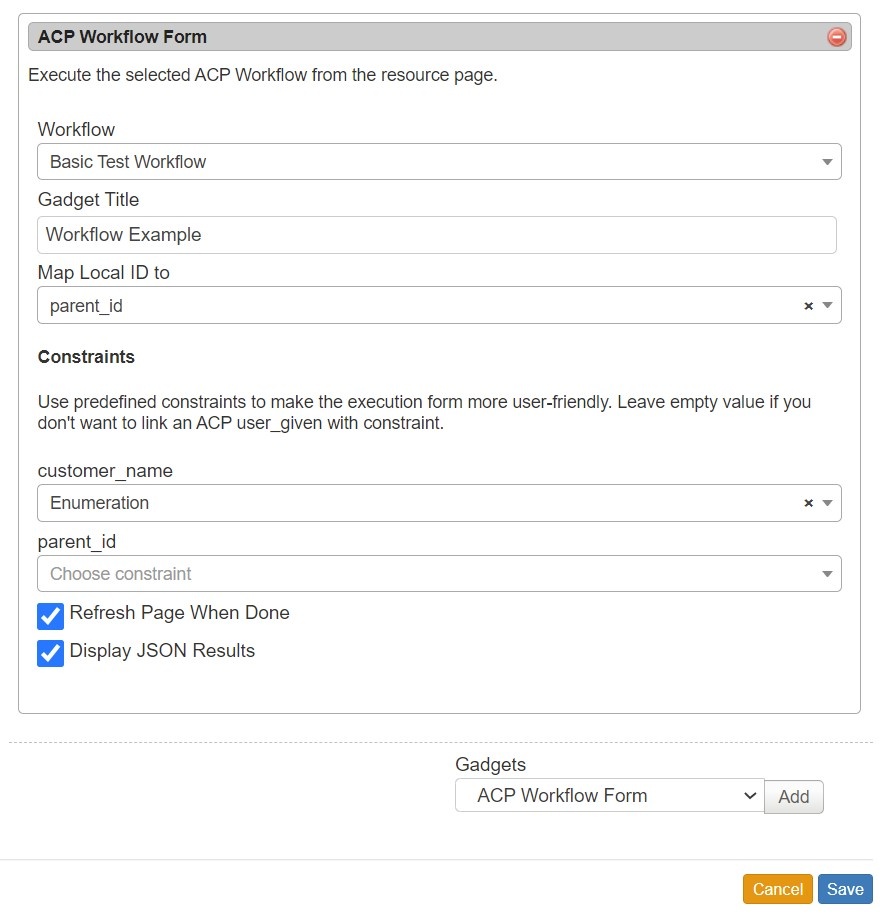
Select a Workflow, then edit the title to display on the gadget and map input options. Input options will vary according to the selected Workflow. Registered constraints can be applied to default input fields. See Constraints for more details.
You may also choose to refresh the page once the workflow execution is complete, and/or show JSON results.
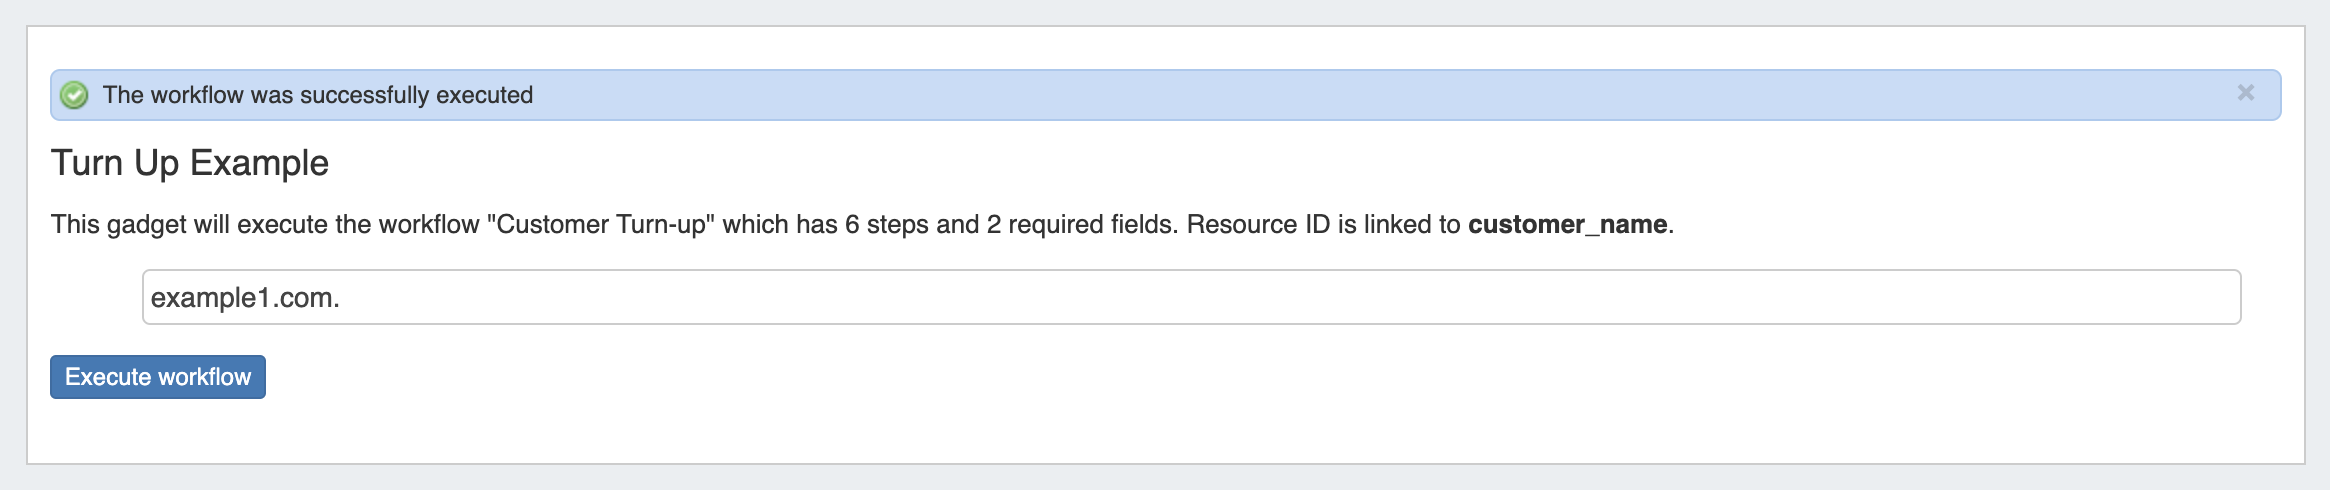
Multiple Forms may be added to a Section, in order to run additional Workflows or option settings. When complete, click "Save". Working with the ACP Workflow Form Once enabled, the Gadget will show on the resource page for any resource of the section type. Input the field data necessary for the Workflow - here, it's adding a hostname - then click "Execute Workflow" to process the chain of workflow calls.
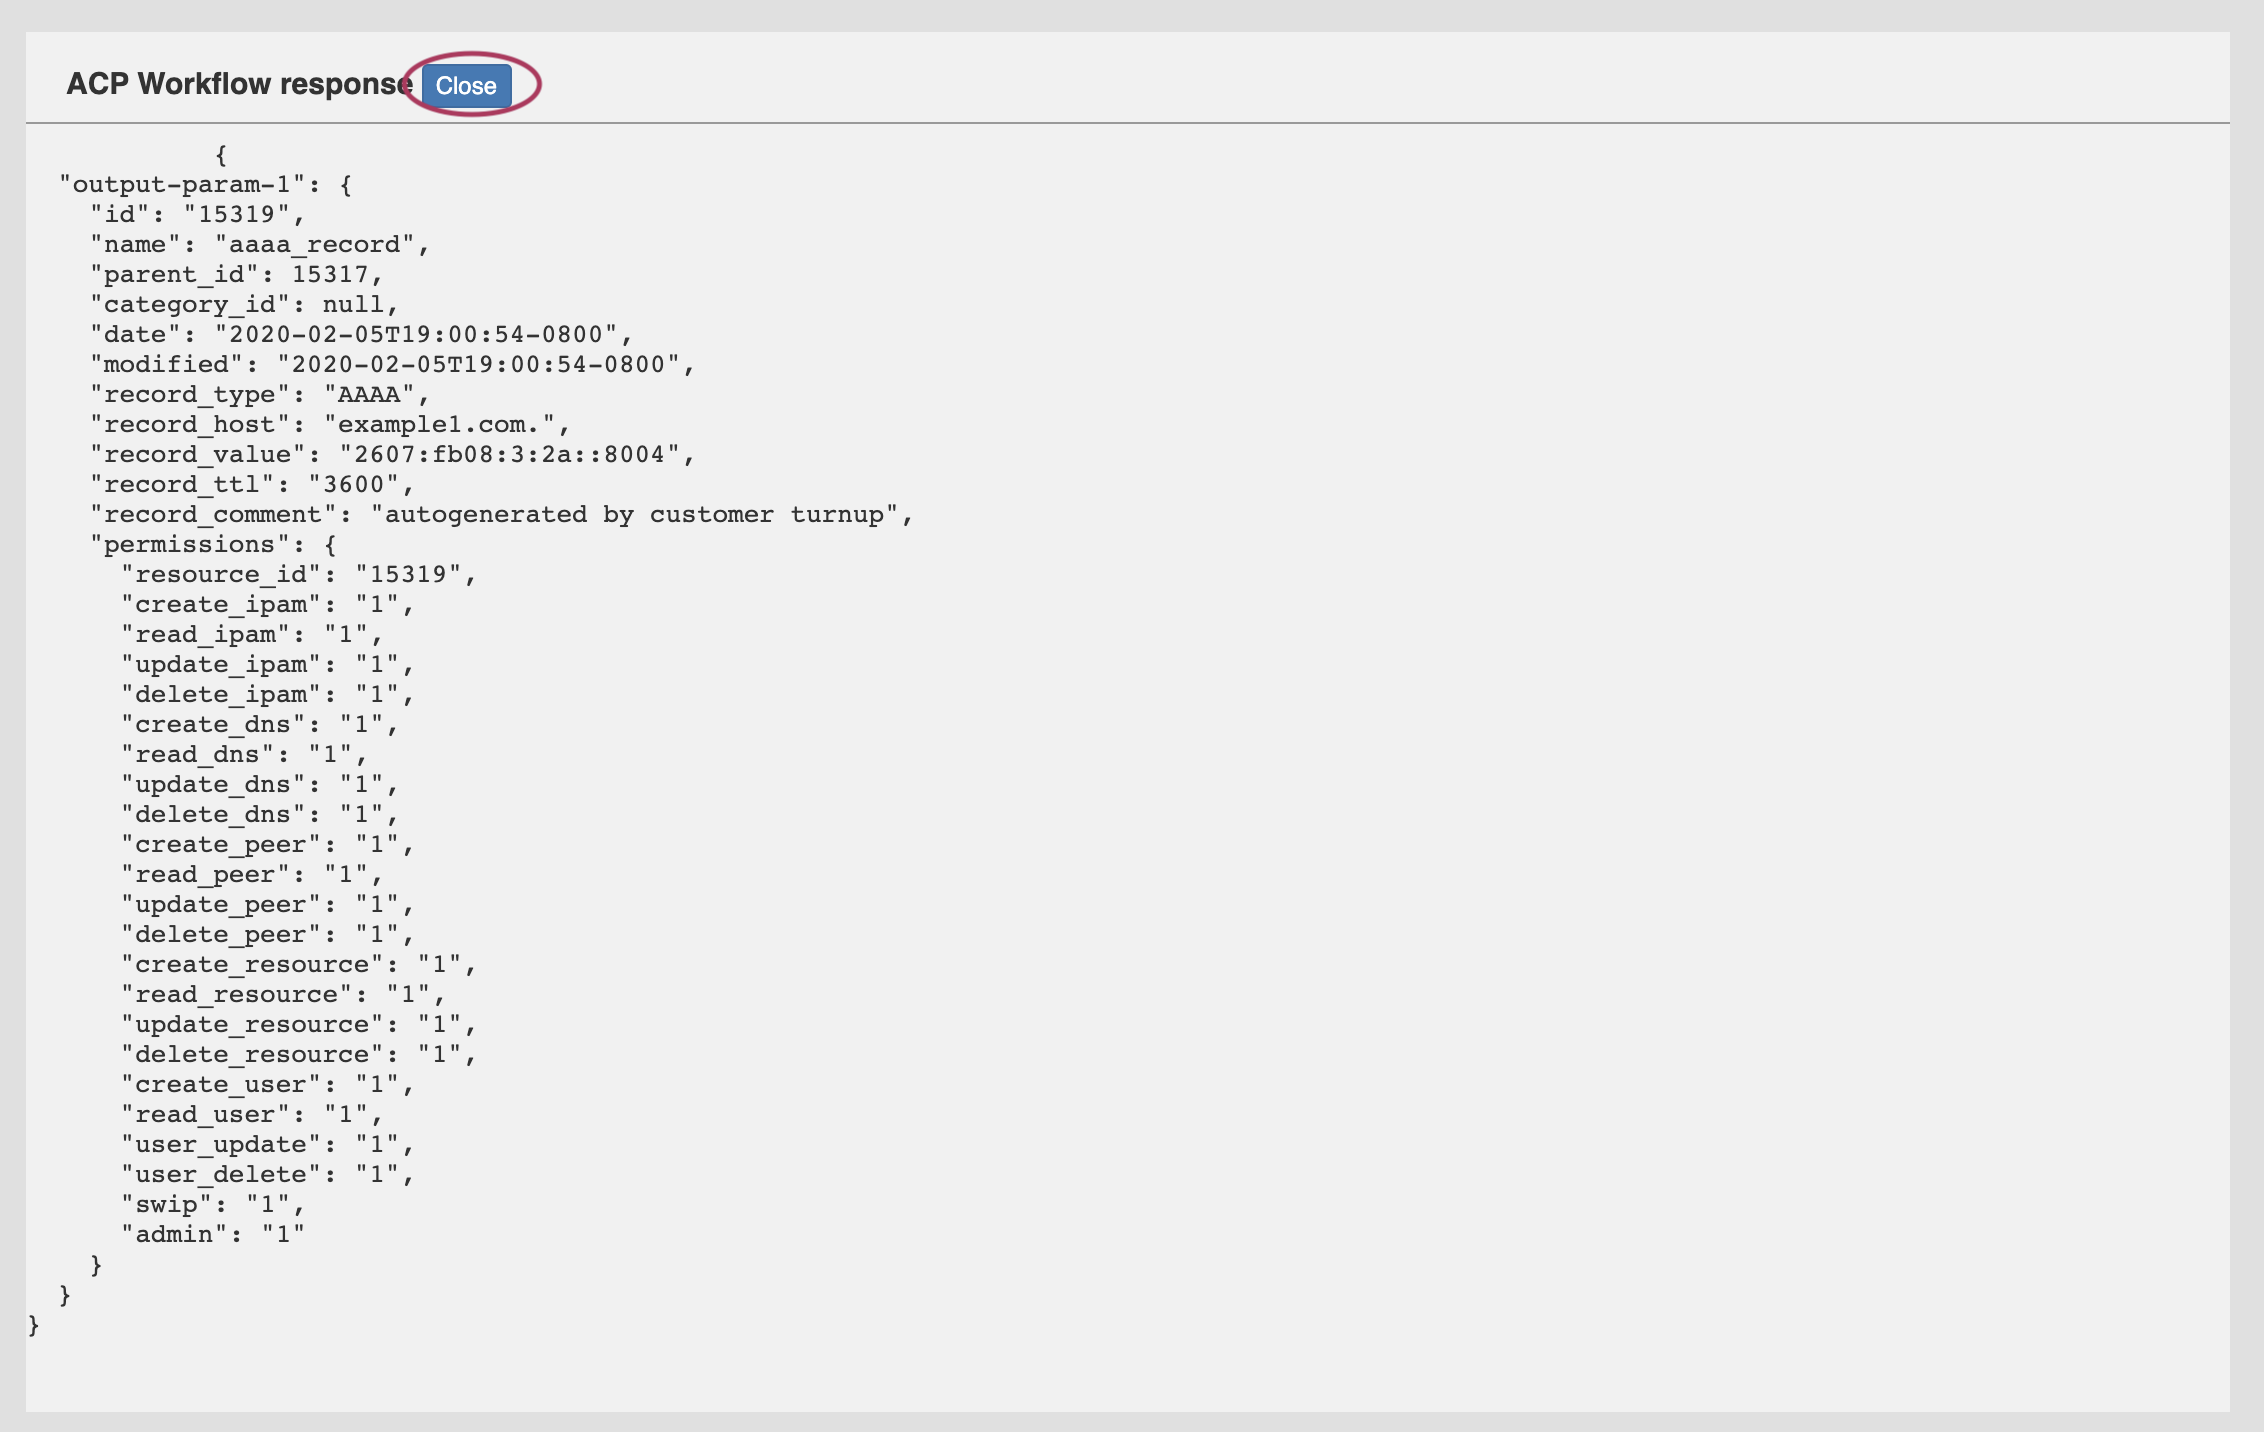
If "Display JSON Results" has been enabled, a display modal will appear showing the JSON response of the executed workflow.
When done reviewing the response, click "Close". If the page has not refreshed, you will see a message informing you whether the Workflow has successfully executed.
In this example, a "Customer Turn-Up" Workflow was selected (created in ProVision's ACP product) that performed six functions with one button click. The successful "Execute" for "Customer Turn-Up" created a new customer resource entry, assigned IPv4 and IPv6 blocks to them, created a DNS zone for the hostname, and lastly created 'A' and 'AAAA' records for the zone. |

...
The DHCP Server Management Gadget should be used with the "Server" Section.
When initally initially added to the section, it will show in the "Off" configuration:
...
DNS
This gadget is used on the Resource Holder Section type. The DNS Gadget shows zones that have the current Resource Holder set as their parent, and provides links to the zone's View Zone page.

To go to the View Zone page, you may either click on the zone name, or click on the Action Menu (wrench icon) and select "View Zone".
For more information on DNS functions and managing zones, refer to the documentation for the DNS Tab.
DNS Autogenerator
The DNS Autogenerator Gadget uses the Hostname field (6c-hostname-fqdn) of the Resource to generate a list of DNS forward and reverse zone entries based on the blocks assigned to the Resource in the IPAM Gadget It will generate a list of potential zone records - just select the ones you want to create, save the changes and you are ready to push the zones.
...
First, ensure that the Feld Gadget has been added to the section - see "Adding Gadgets to a Section" at the top of this page, or go to Customizing Sections for detailed instructions.
Then, fields must be enabled and added to the Resource's Section in Section in order to be used in the Field Gadget.
...
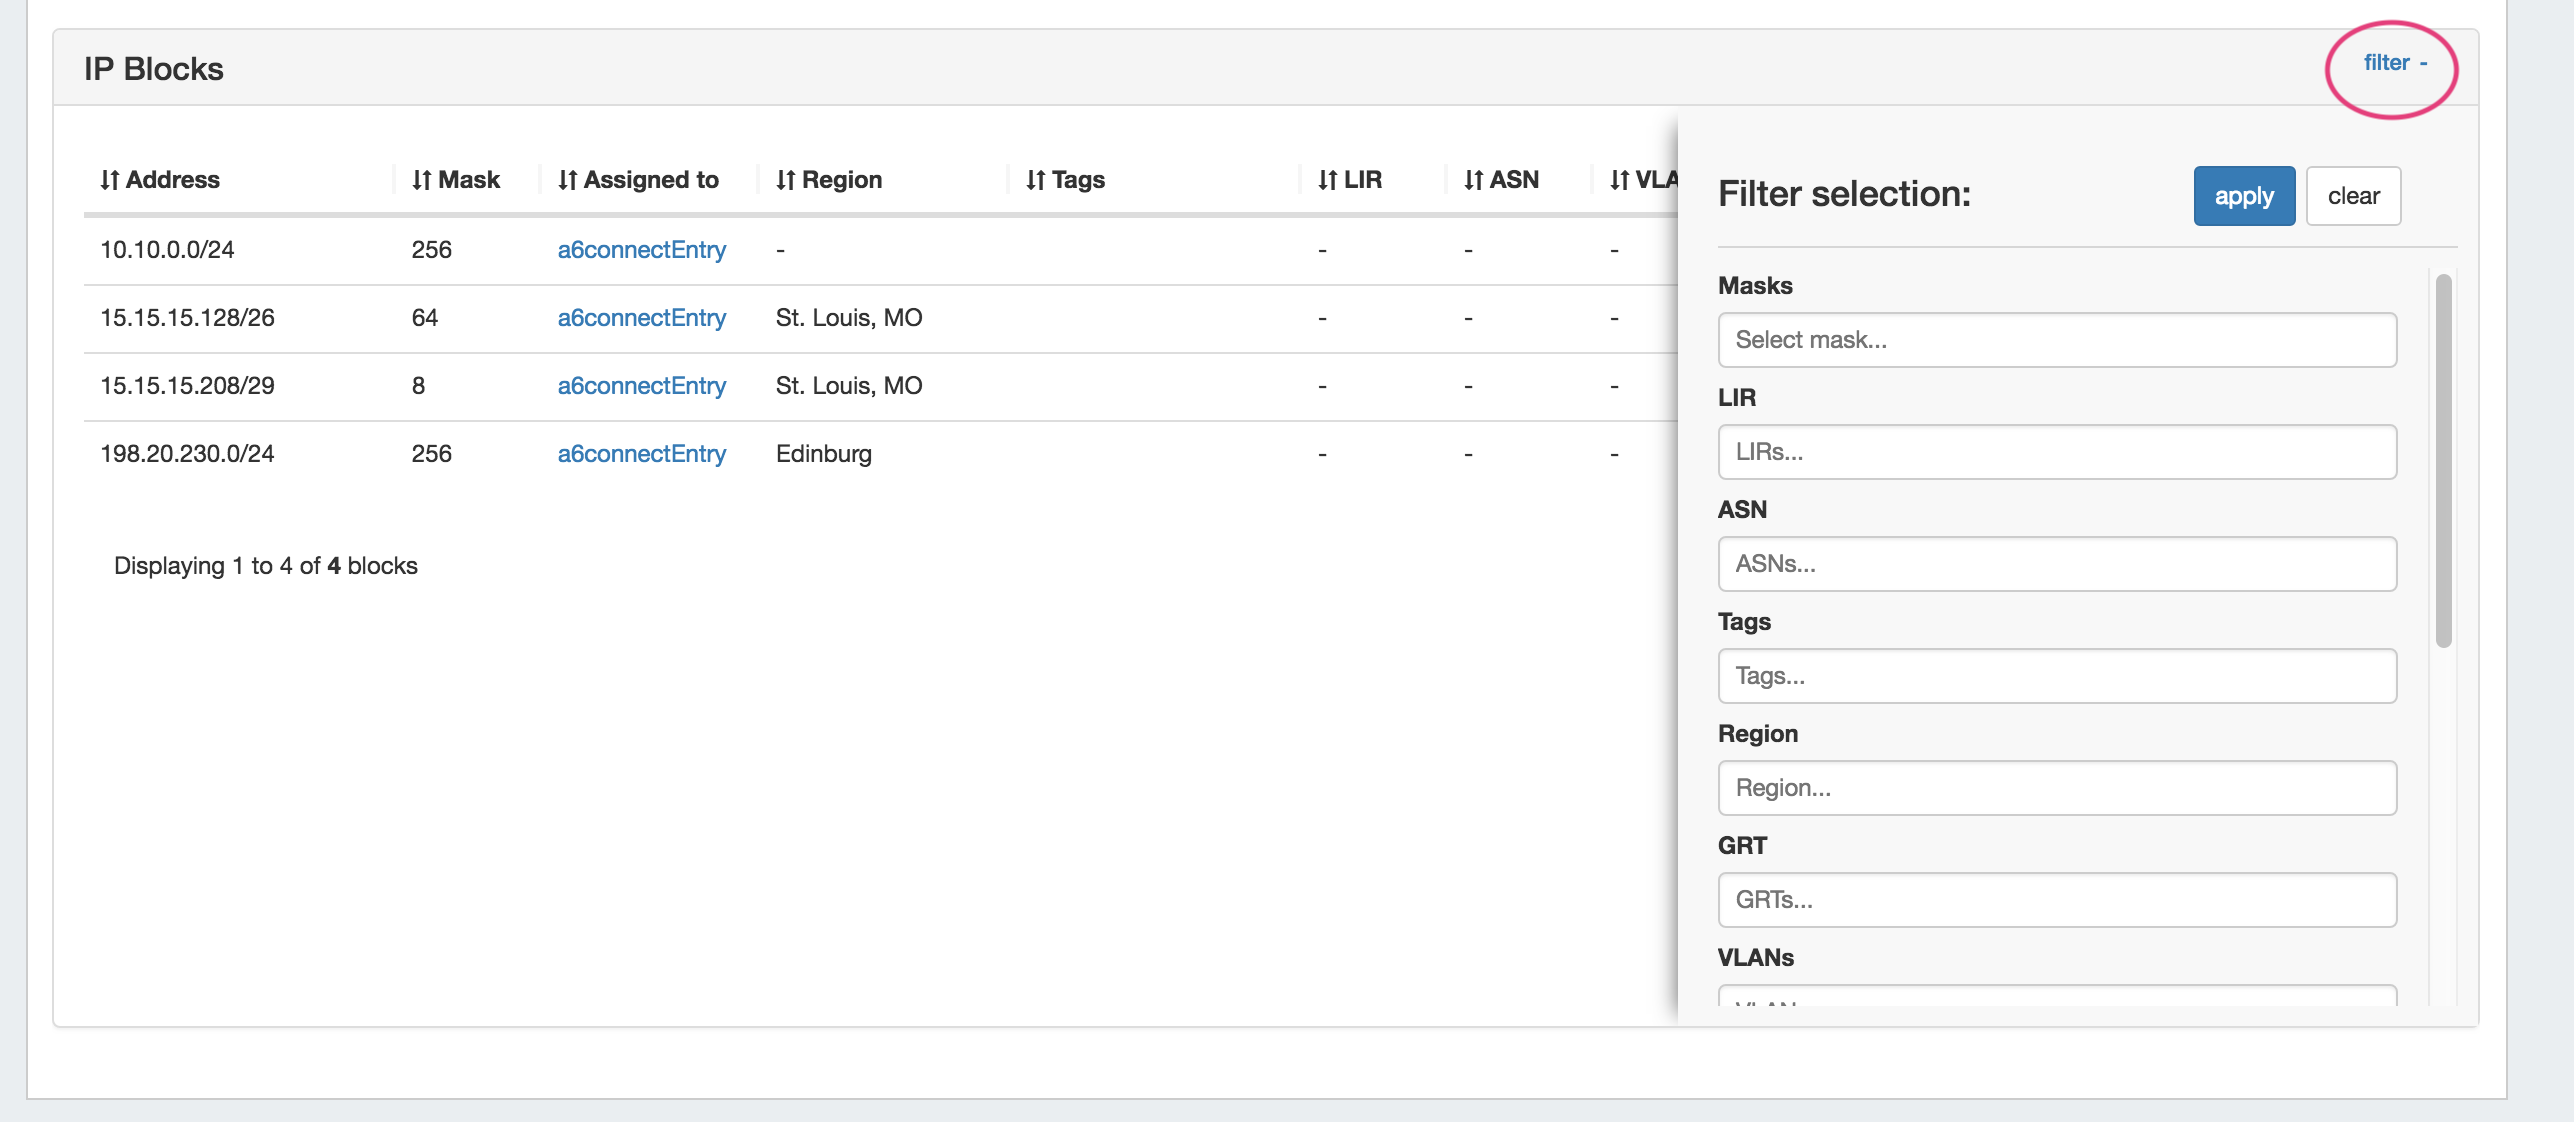
For more information on assigning and managing blocks, see Working with IP Blocks - Assigning IP Space.
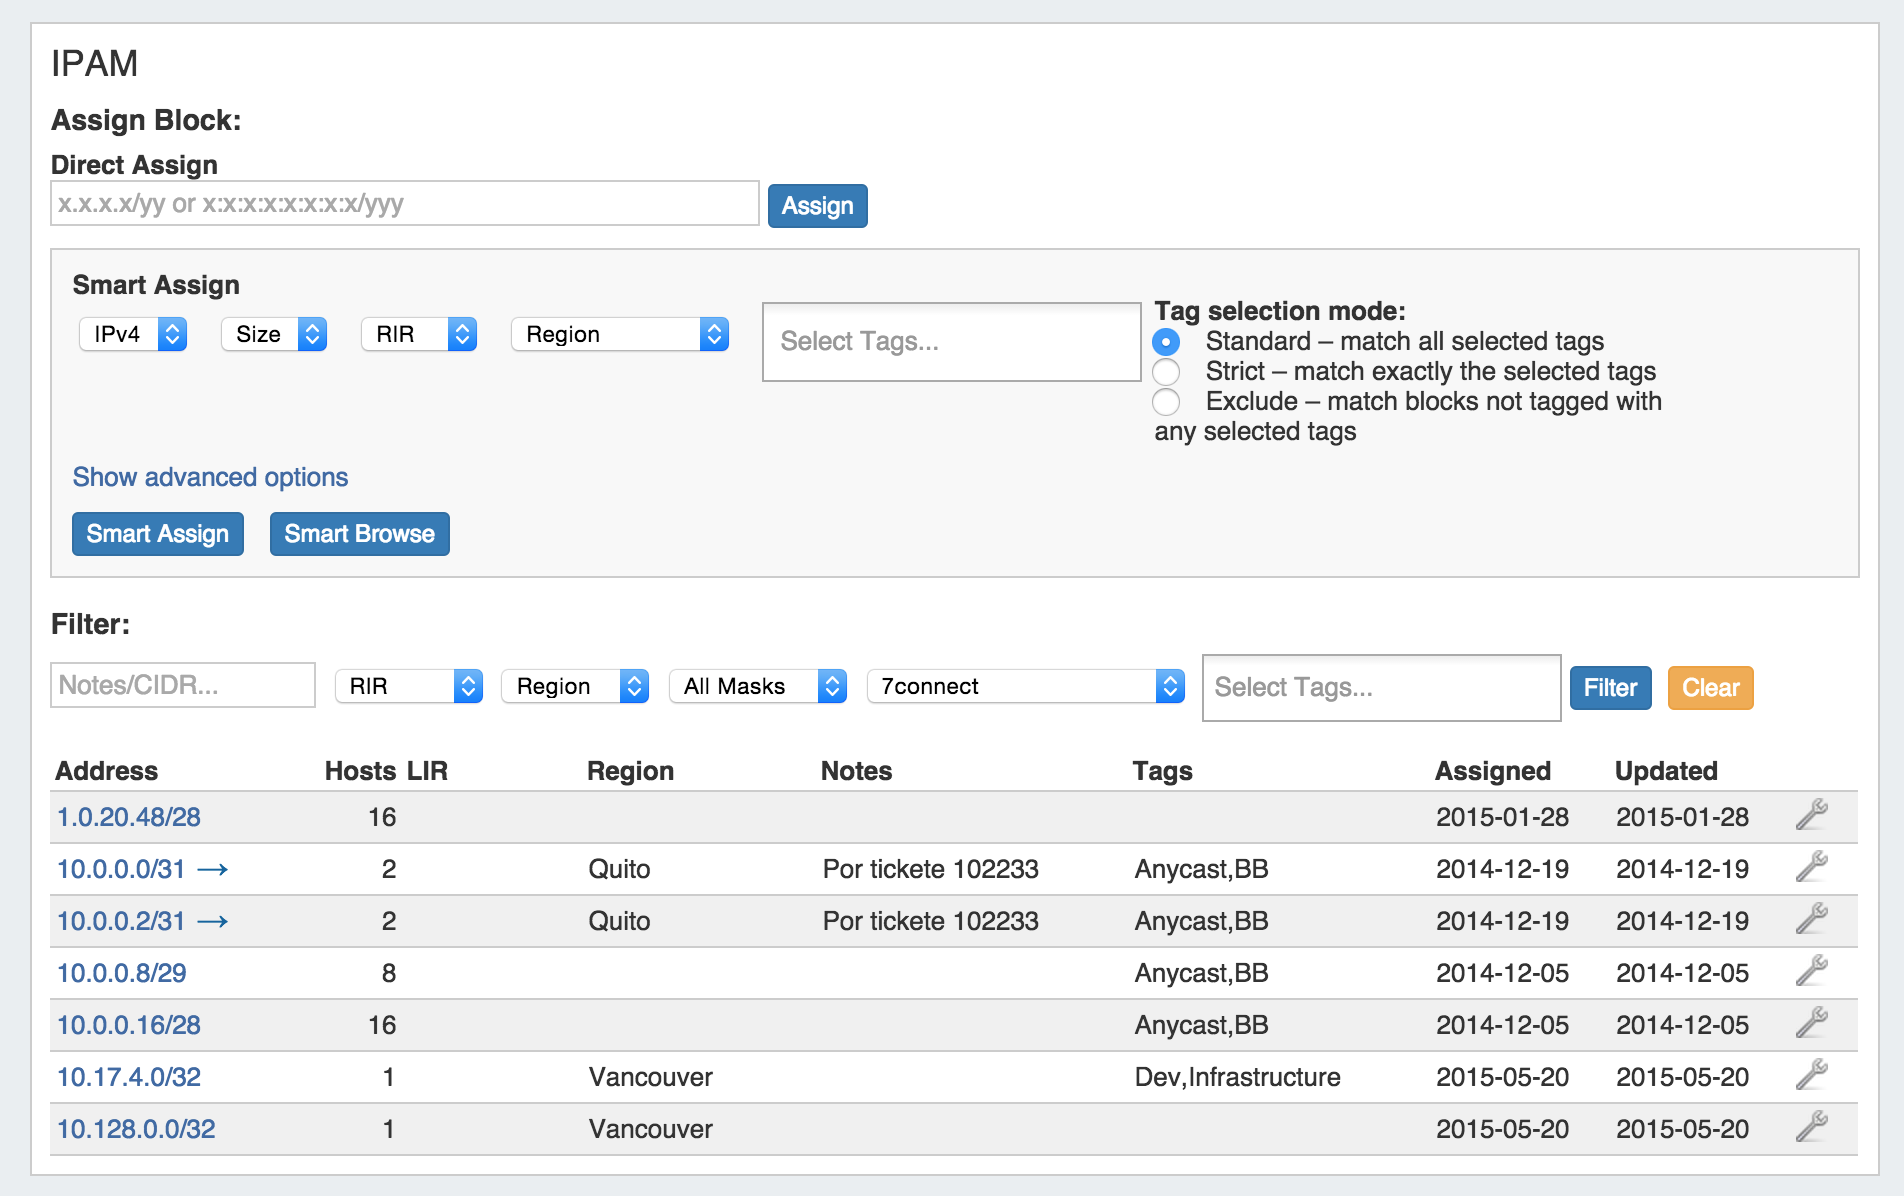
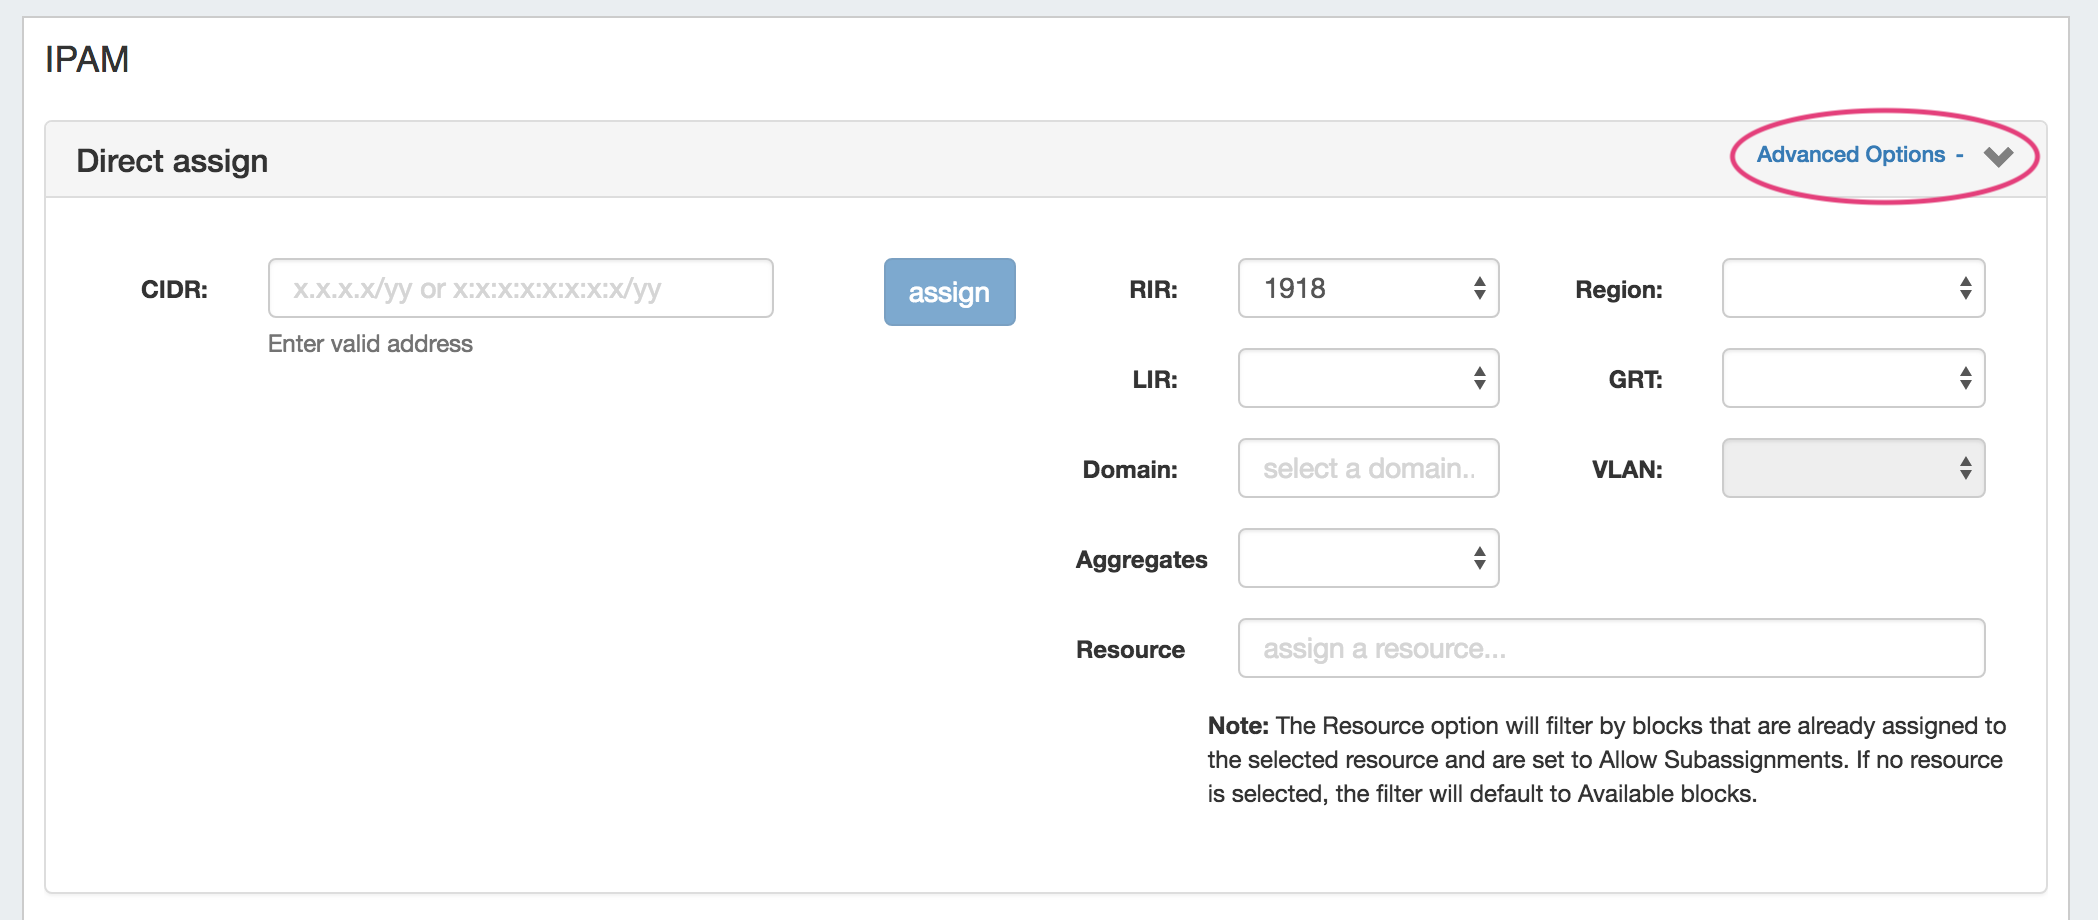
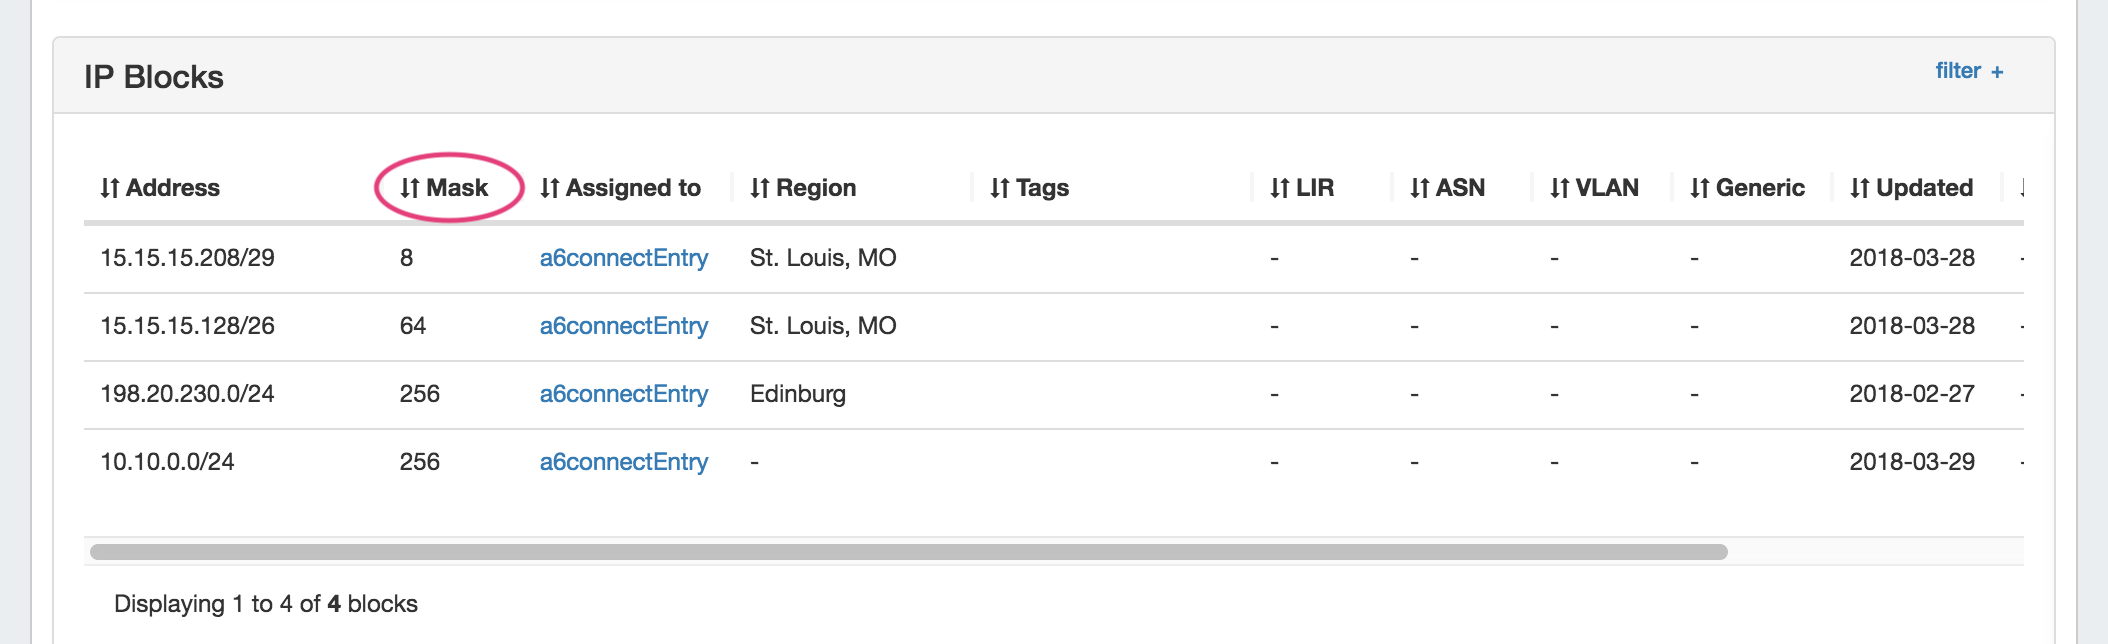
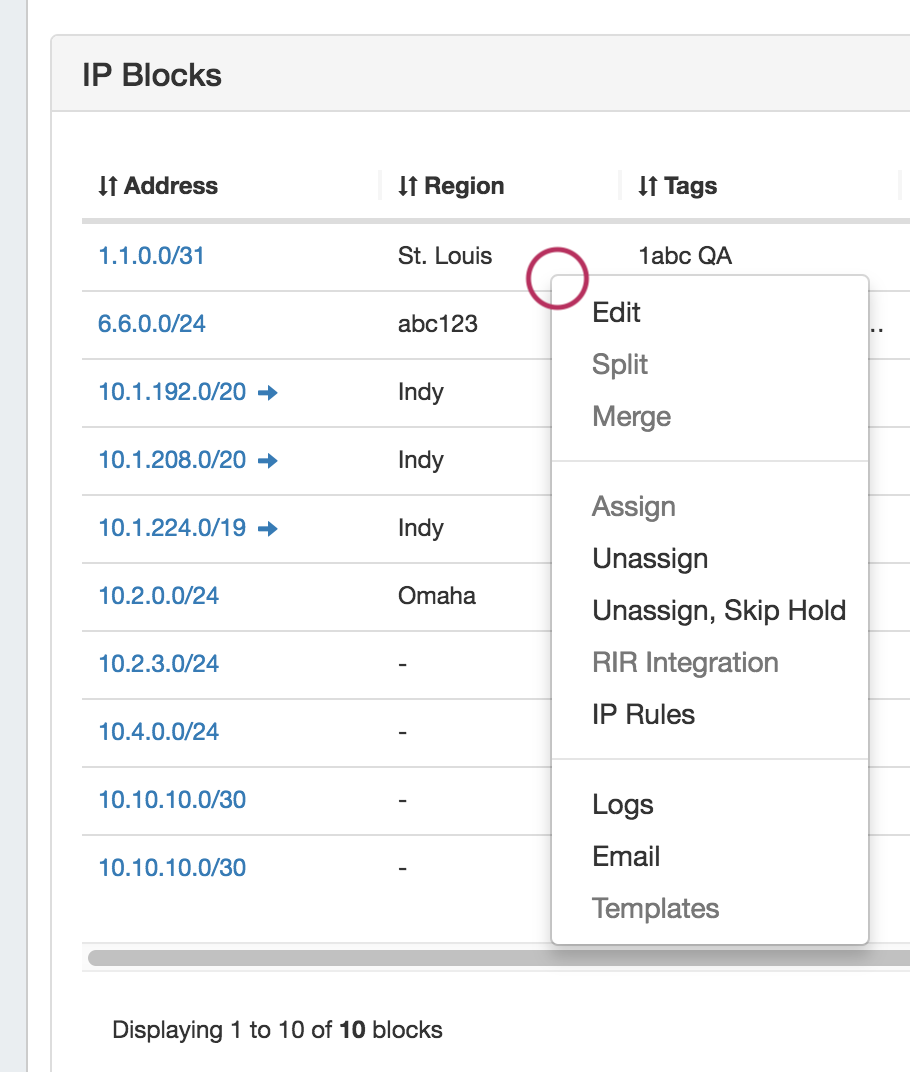
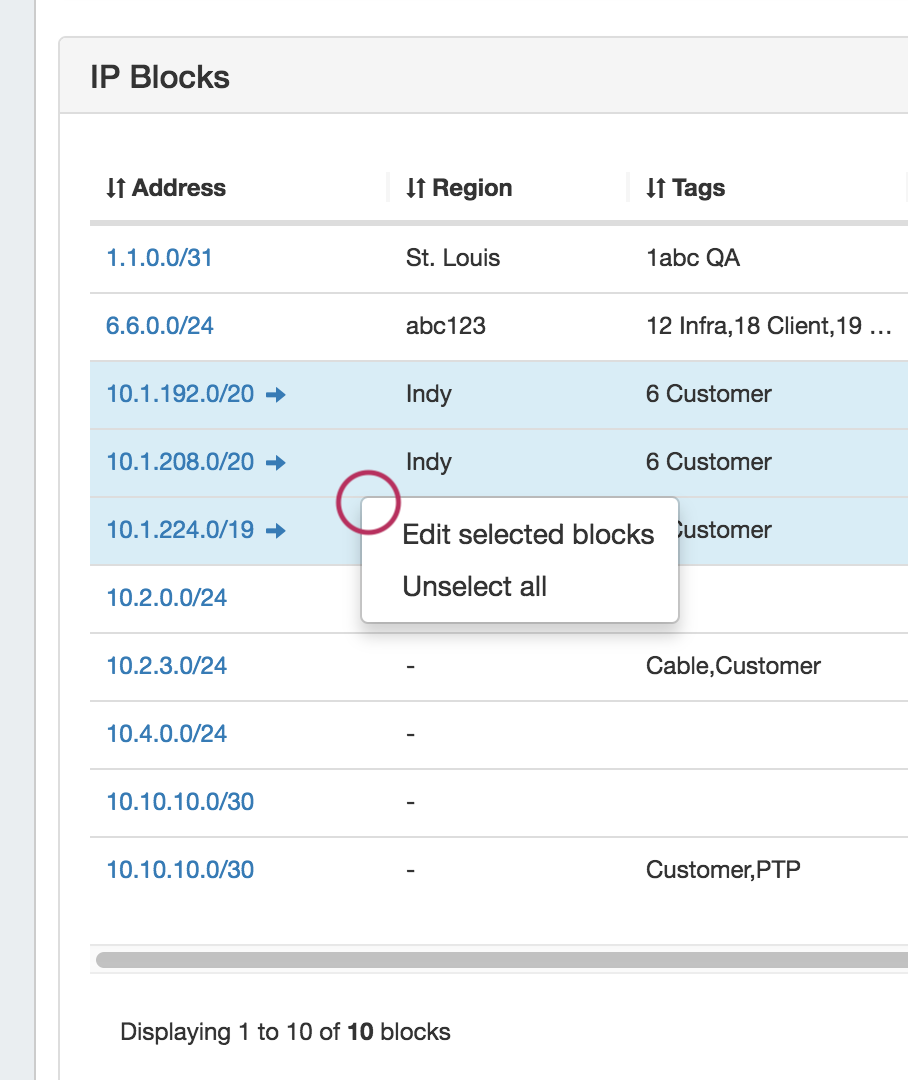
IPAMv2
The IPAMv2 Gadget is used on the Resource Holder Section type, and allows you to view, assign, and manage blocks for that resource. As of ProVision 7.0.0, it replaces the previous IPAM Gadget.
...
| Expand | ||
|---|---|---|
| ||
Using this gadget, you can:
For more information on assigning and managing blocks, see Working with IP Blocks - Assigning IP Space. |

Notes
The Notes Gadget is a simple text area box, where you can save text notes relevant to the Resource.
...
For additional information on Peering, see Peering v2.
Peering Sessions
This Gadget is used on the Router Section type. From here, new sessions may be added by clicking on the "Add Session" button, then entering session information into the "Create New Session" page.
...
For additional information on Peering, see Peering v2.
Peering VRFs
The Peering VRF Gadget allows you to add VRFs from a router's Resource Entry page.
...
Continue on to the following pages for additional information on Working on Working with Resources in Resources in Provision:
...