Working with Peering Exchanges
...
From this tab, you can access exchange settings to set ASN / Peering DB info, view the current exchange list and peer status, and view details for each exchange.
| Table of Contents |
|---|
IXs Overview
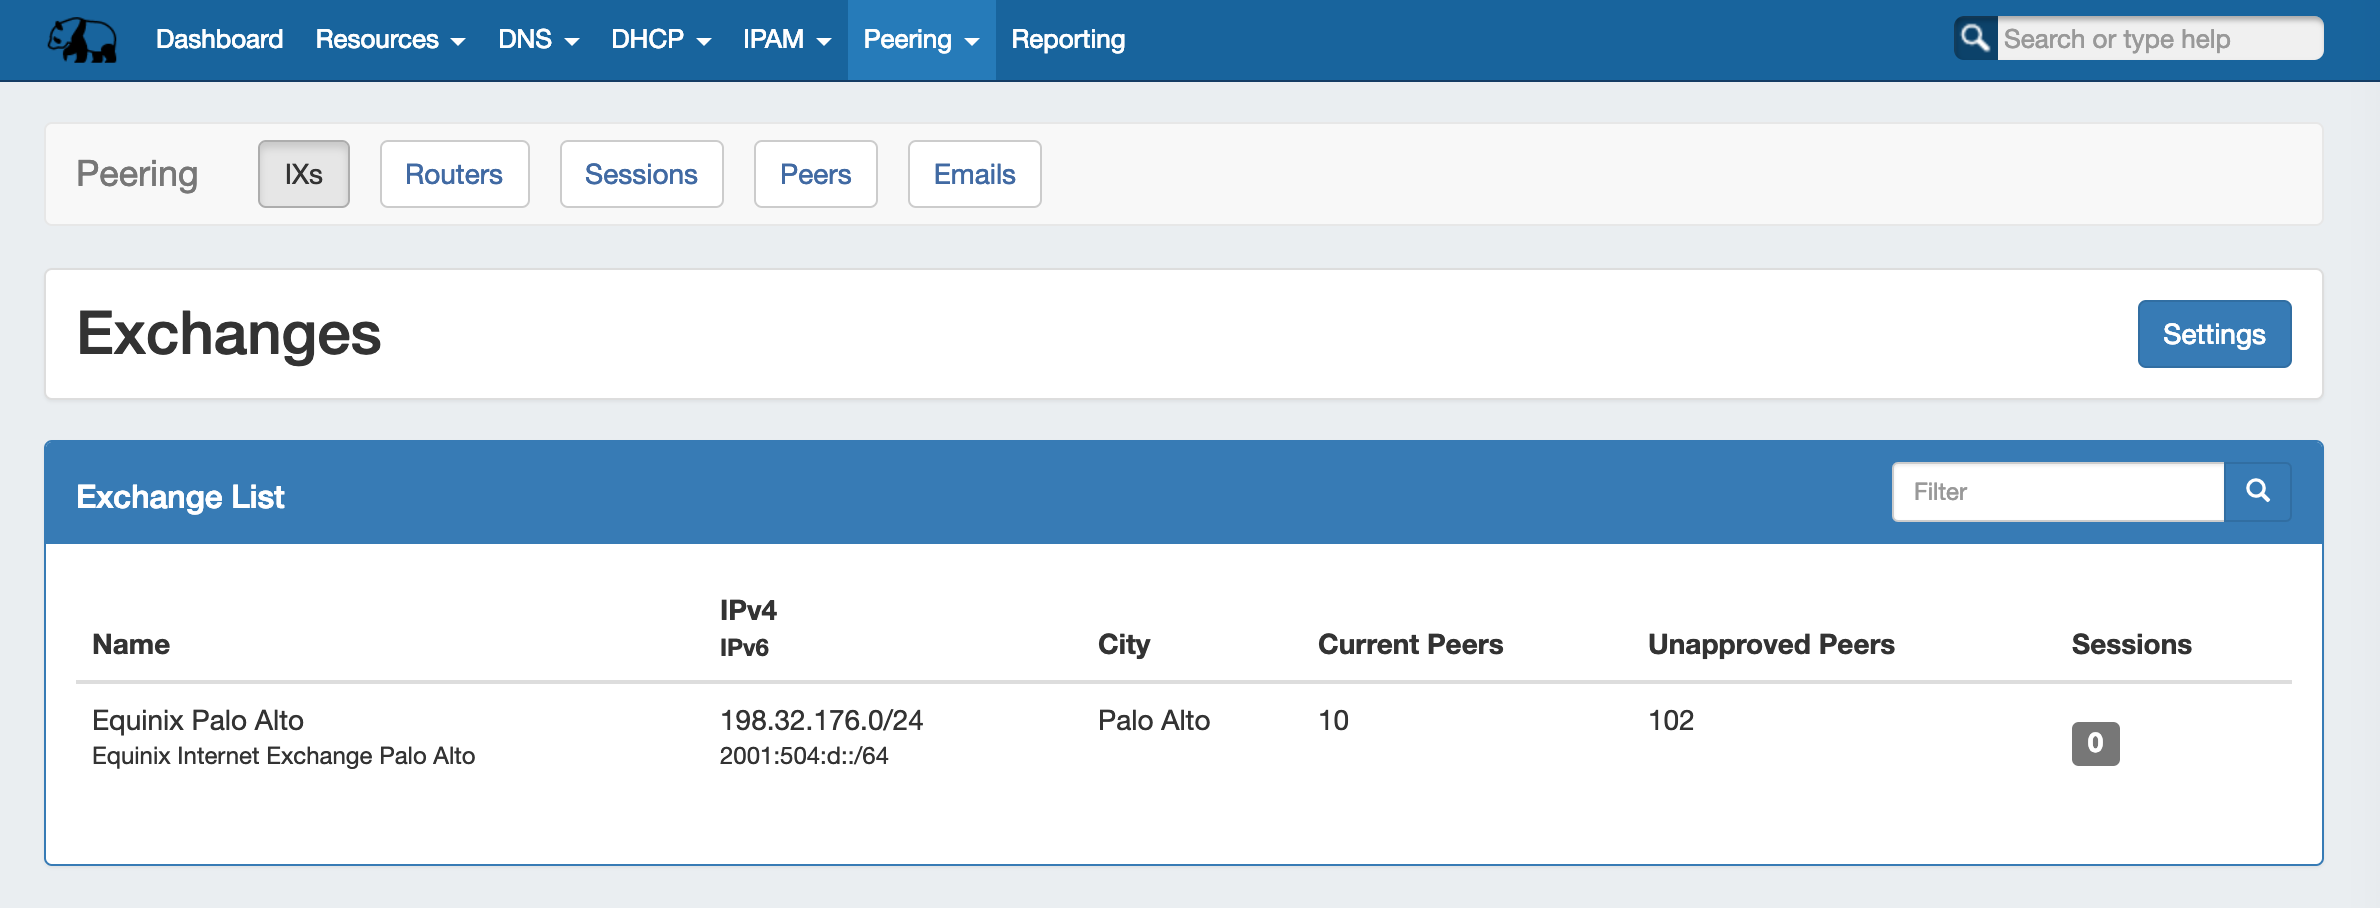
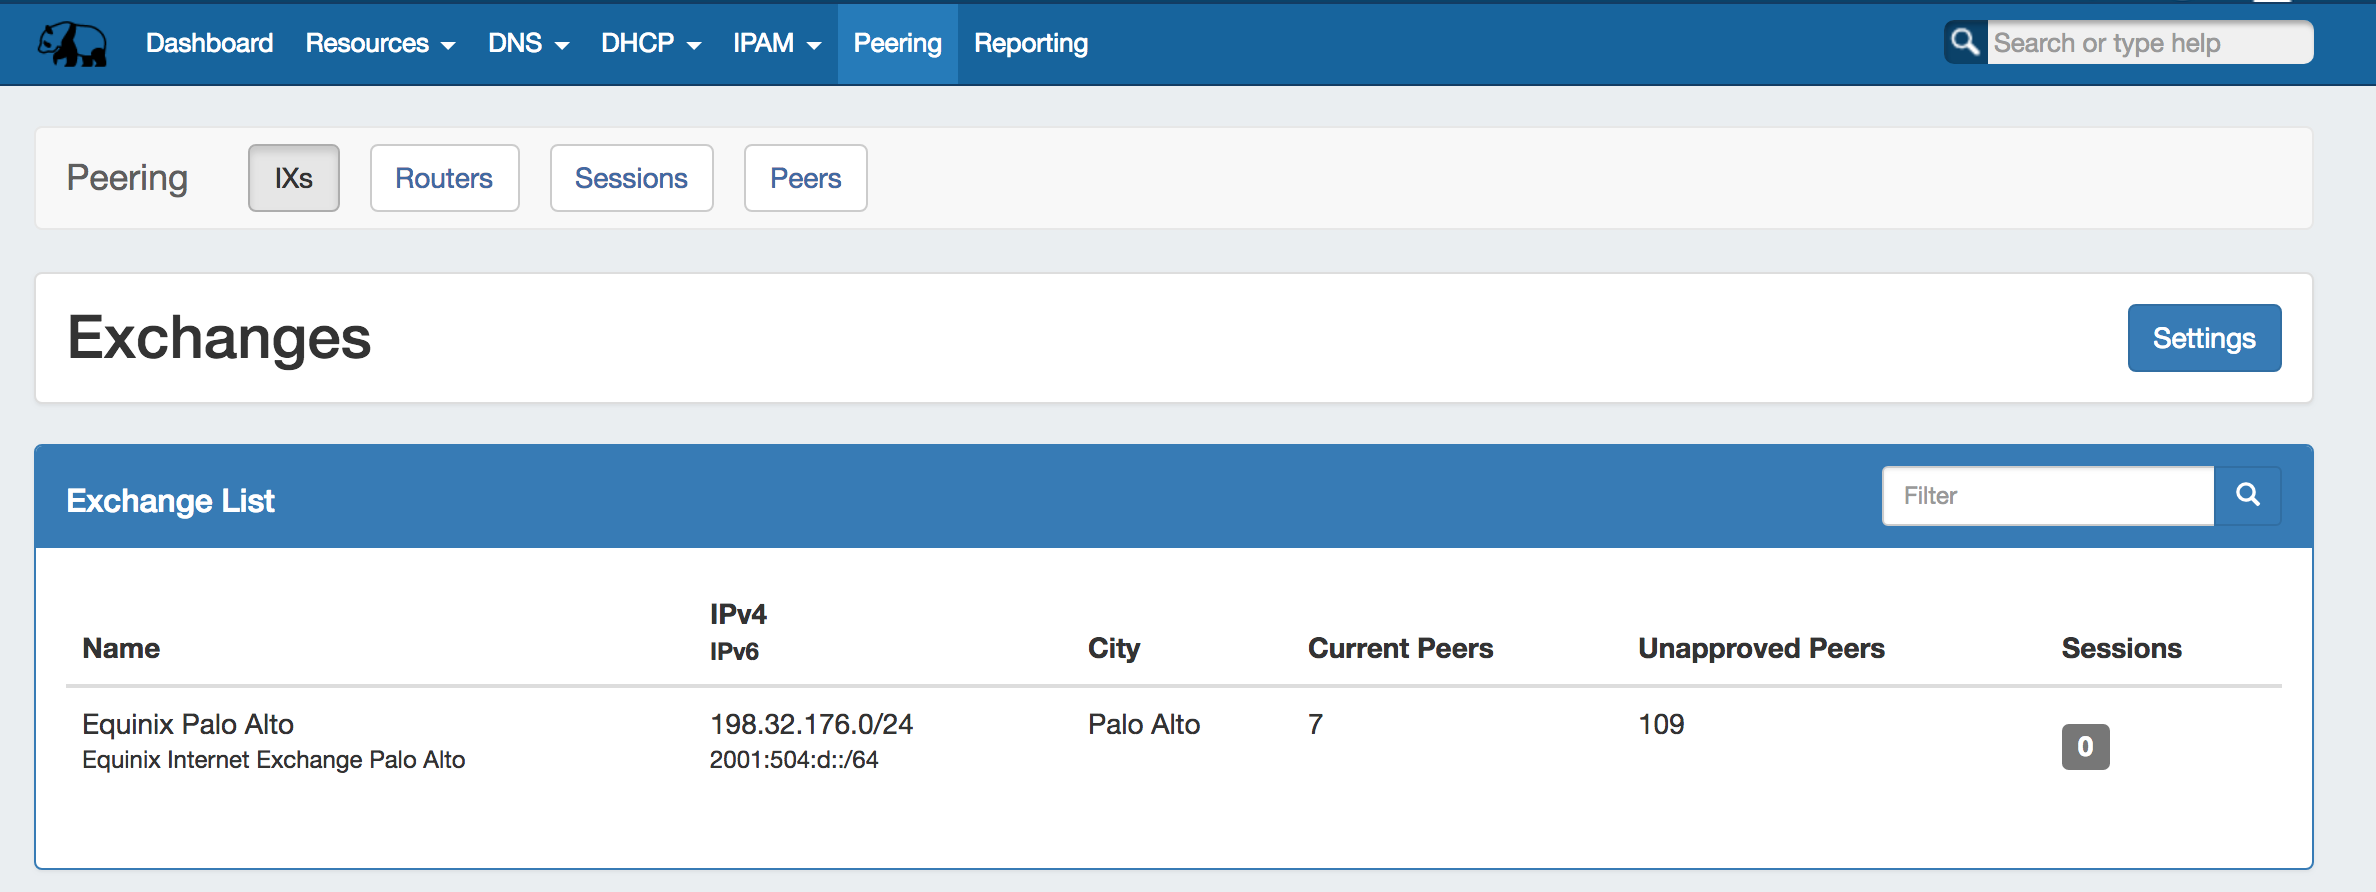
The Exchanges subtab shows features the list of exchanges current currently set in ProVision, with IP type, city, peers, and active session counts.
Exchange Settings
ASNs and PeeringDB account settings may be edited by clicking Clicking the "Settings" in the IXs or Exchanges pages, or by going to ProVision's Admin settings page.Button opens the Exchange Settings page.

Here, you can add or remove ASNs, add or edit PeeringDB account settings:
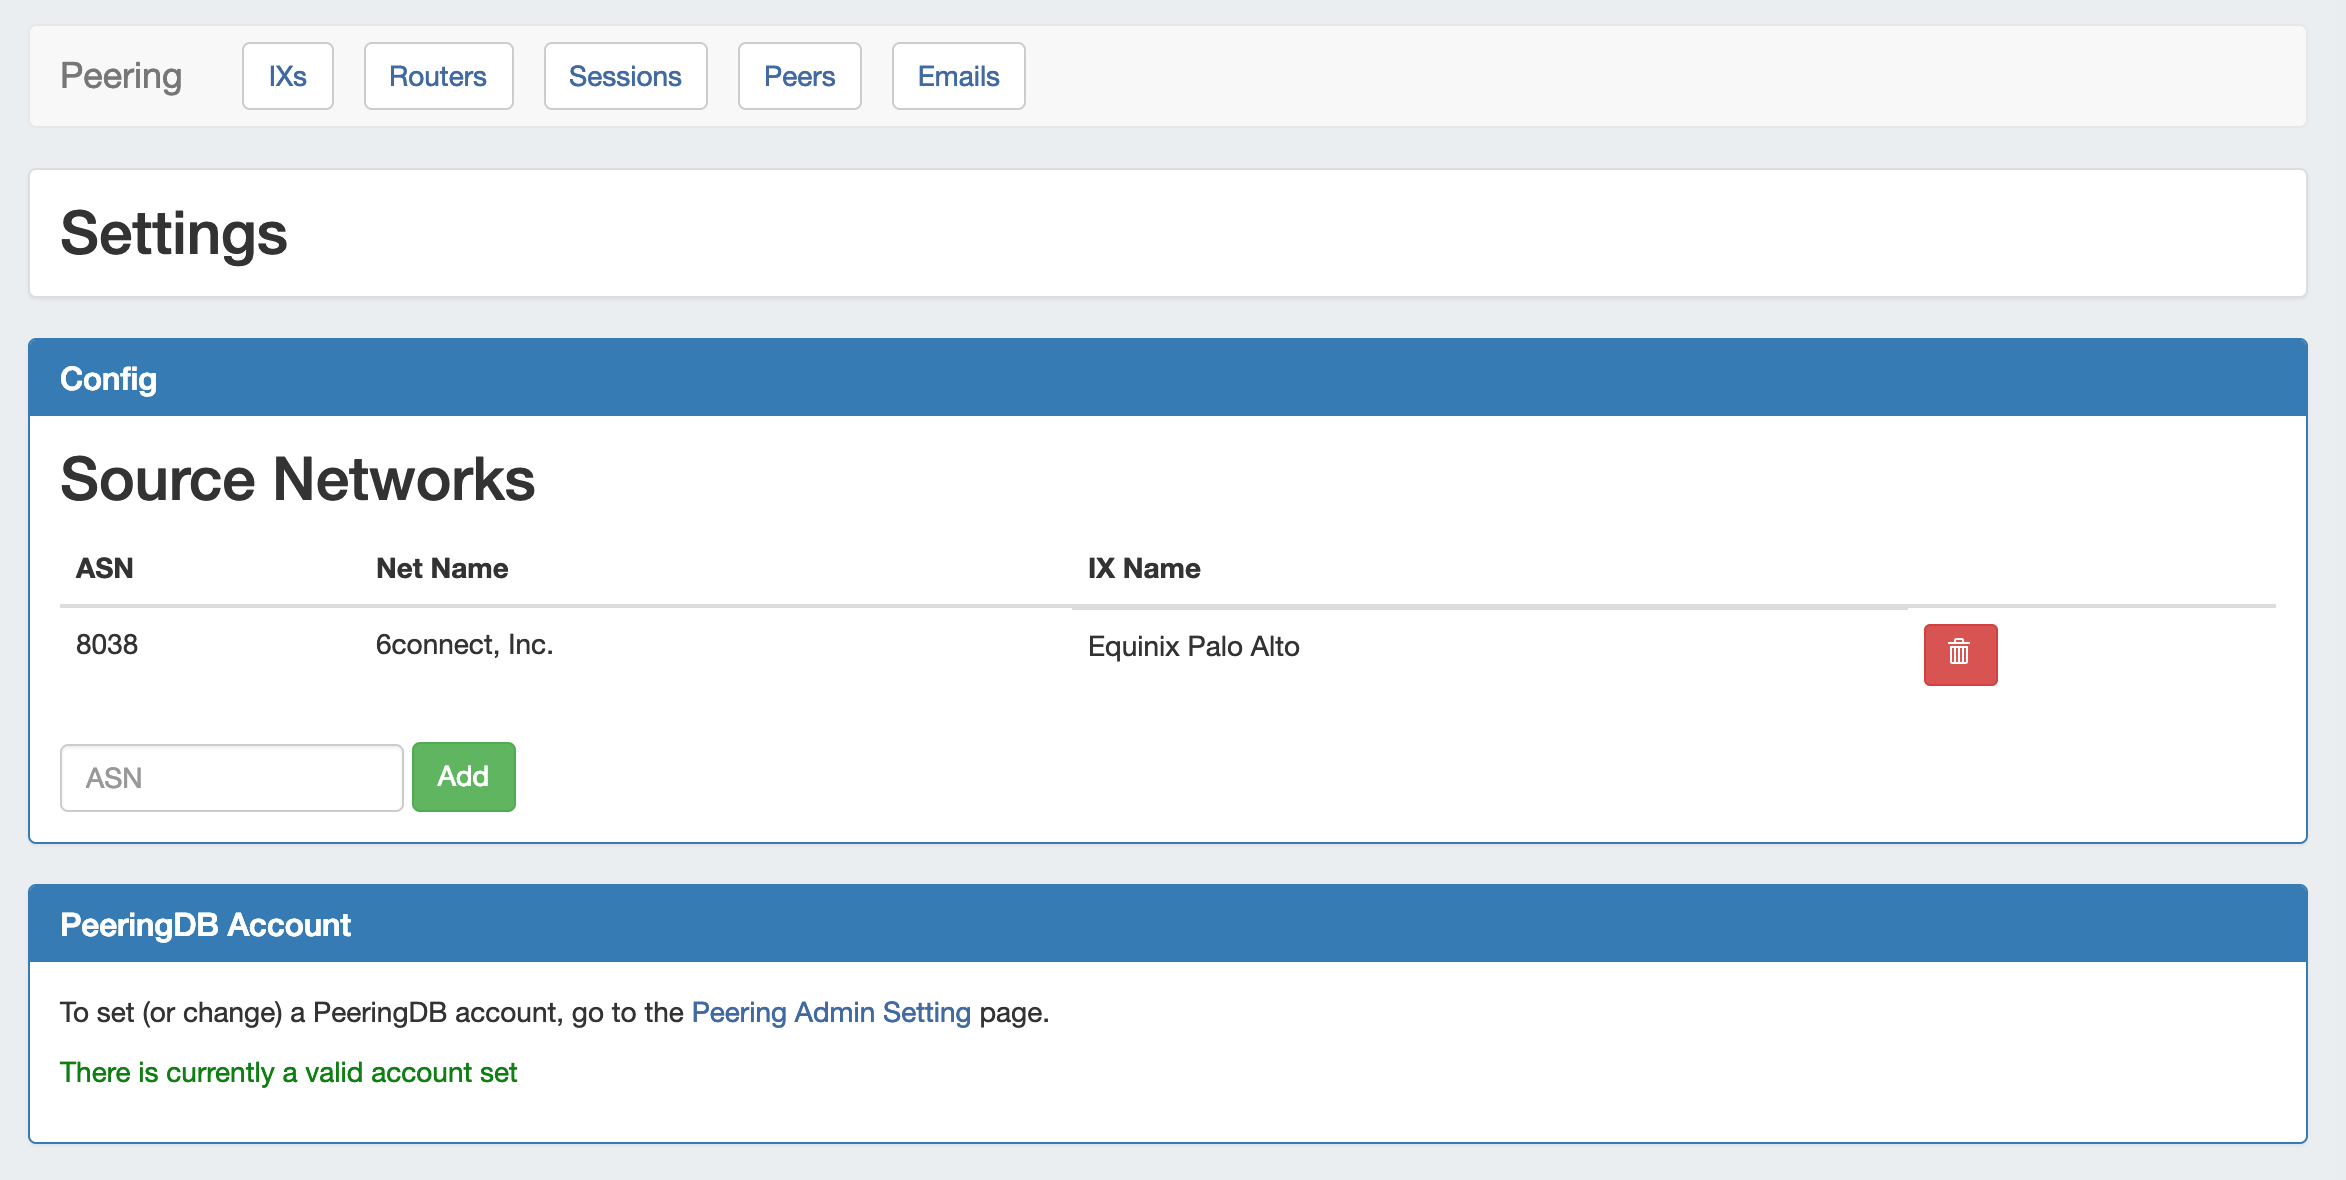
ASNs
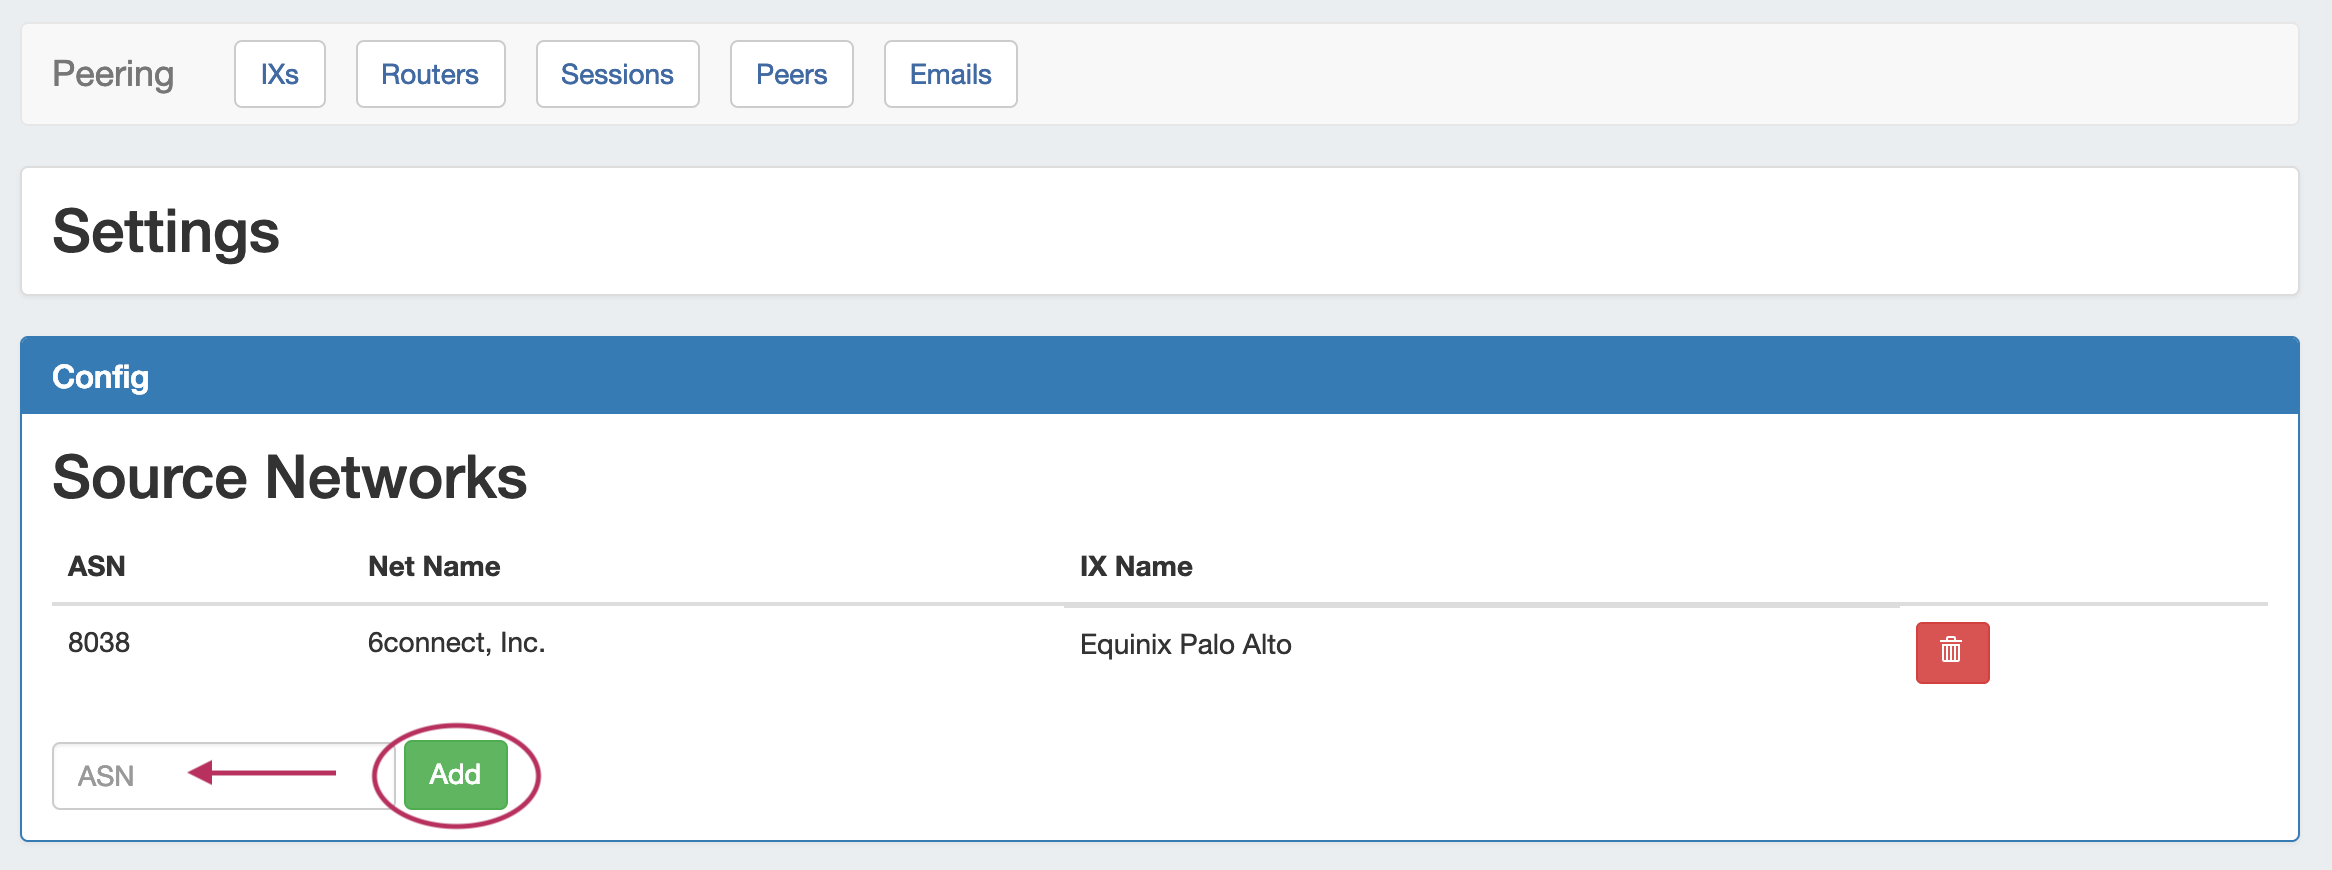
- Add an ASN by typing a valid ASN into the Config - ASN box, and then click "Add".
- Delete an ASN by clicking the red "Delete" icon for the row under Source Networks
...

- .
PeeringDB Account
If a valid PeeringDB account is already set, a message will display confirming the valid account.

If no account is set, or the current account is invalid, follow the link to the Peering Admin Settings page to test and add a PeeringDB account.
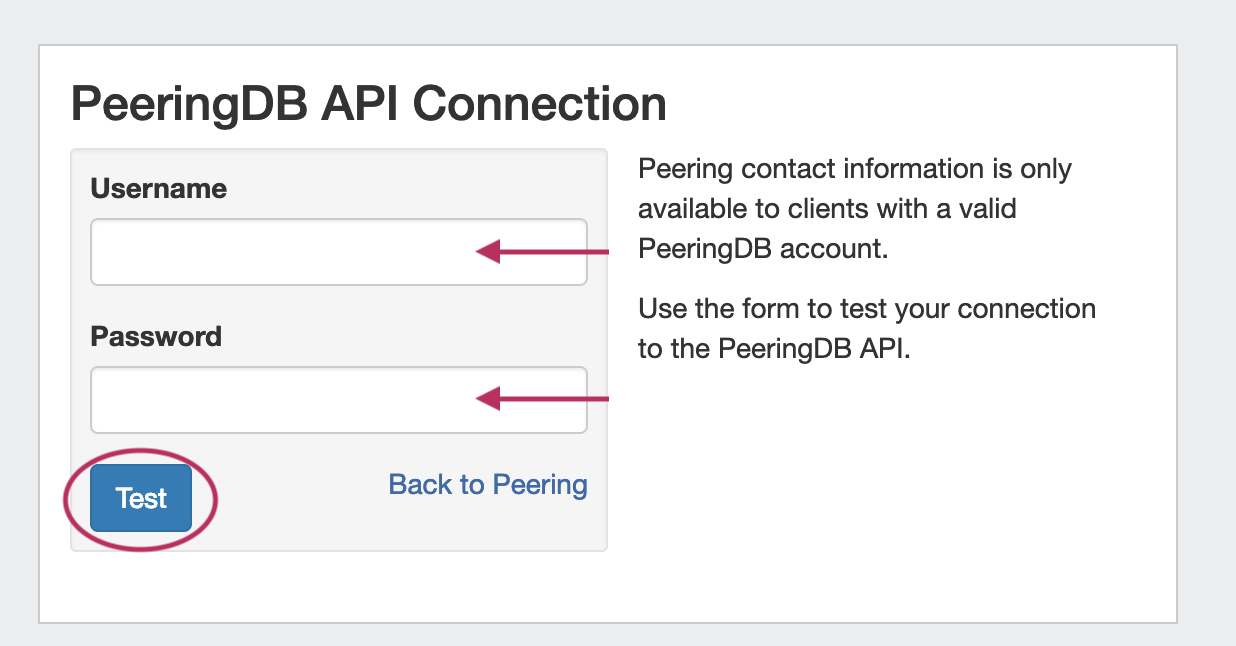
Enter the PeeringDB credentials and click "Test". If the account is valid, an option will appear to add it to ProVision.
...
Exchange Details
Clicking on an exchange in the exchange list will bring up an exchange details page, where Exchange Details, Session Details, and Exchange Communications may be viewed and managed.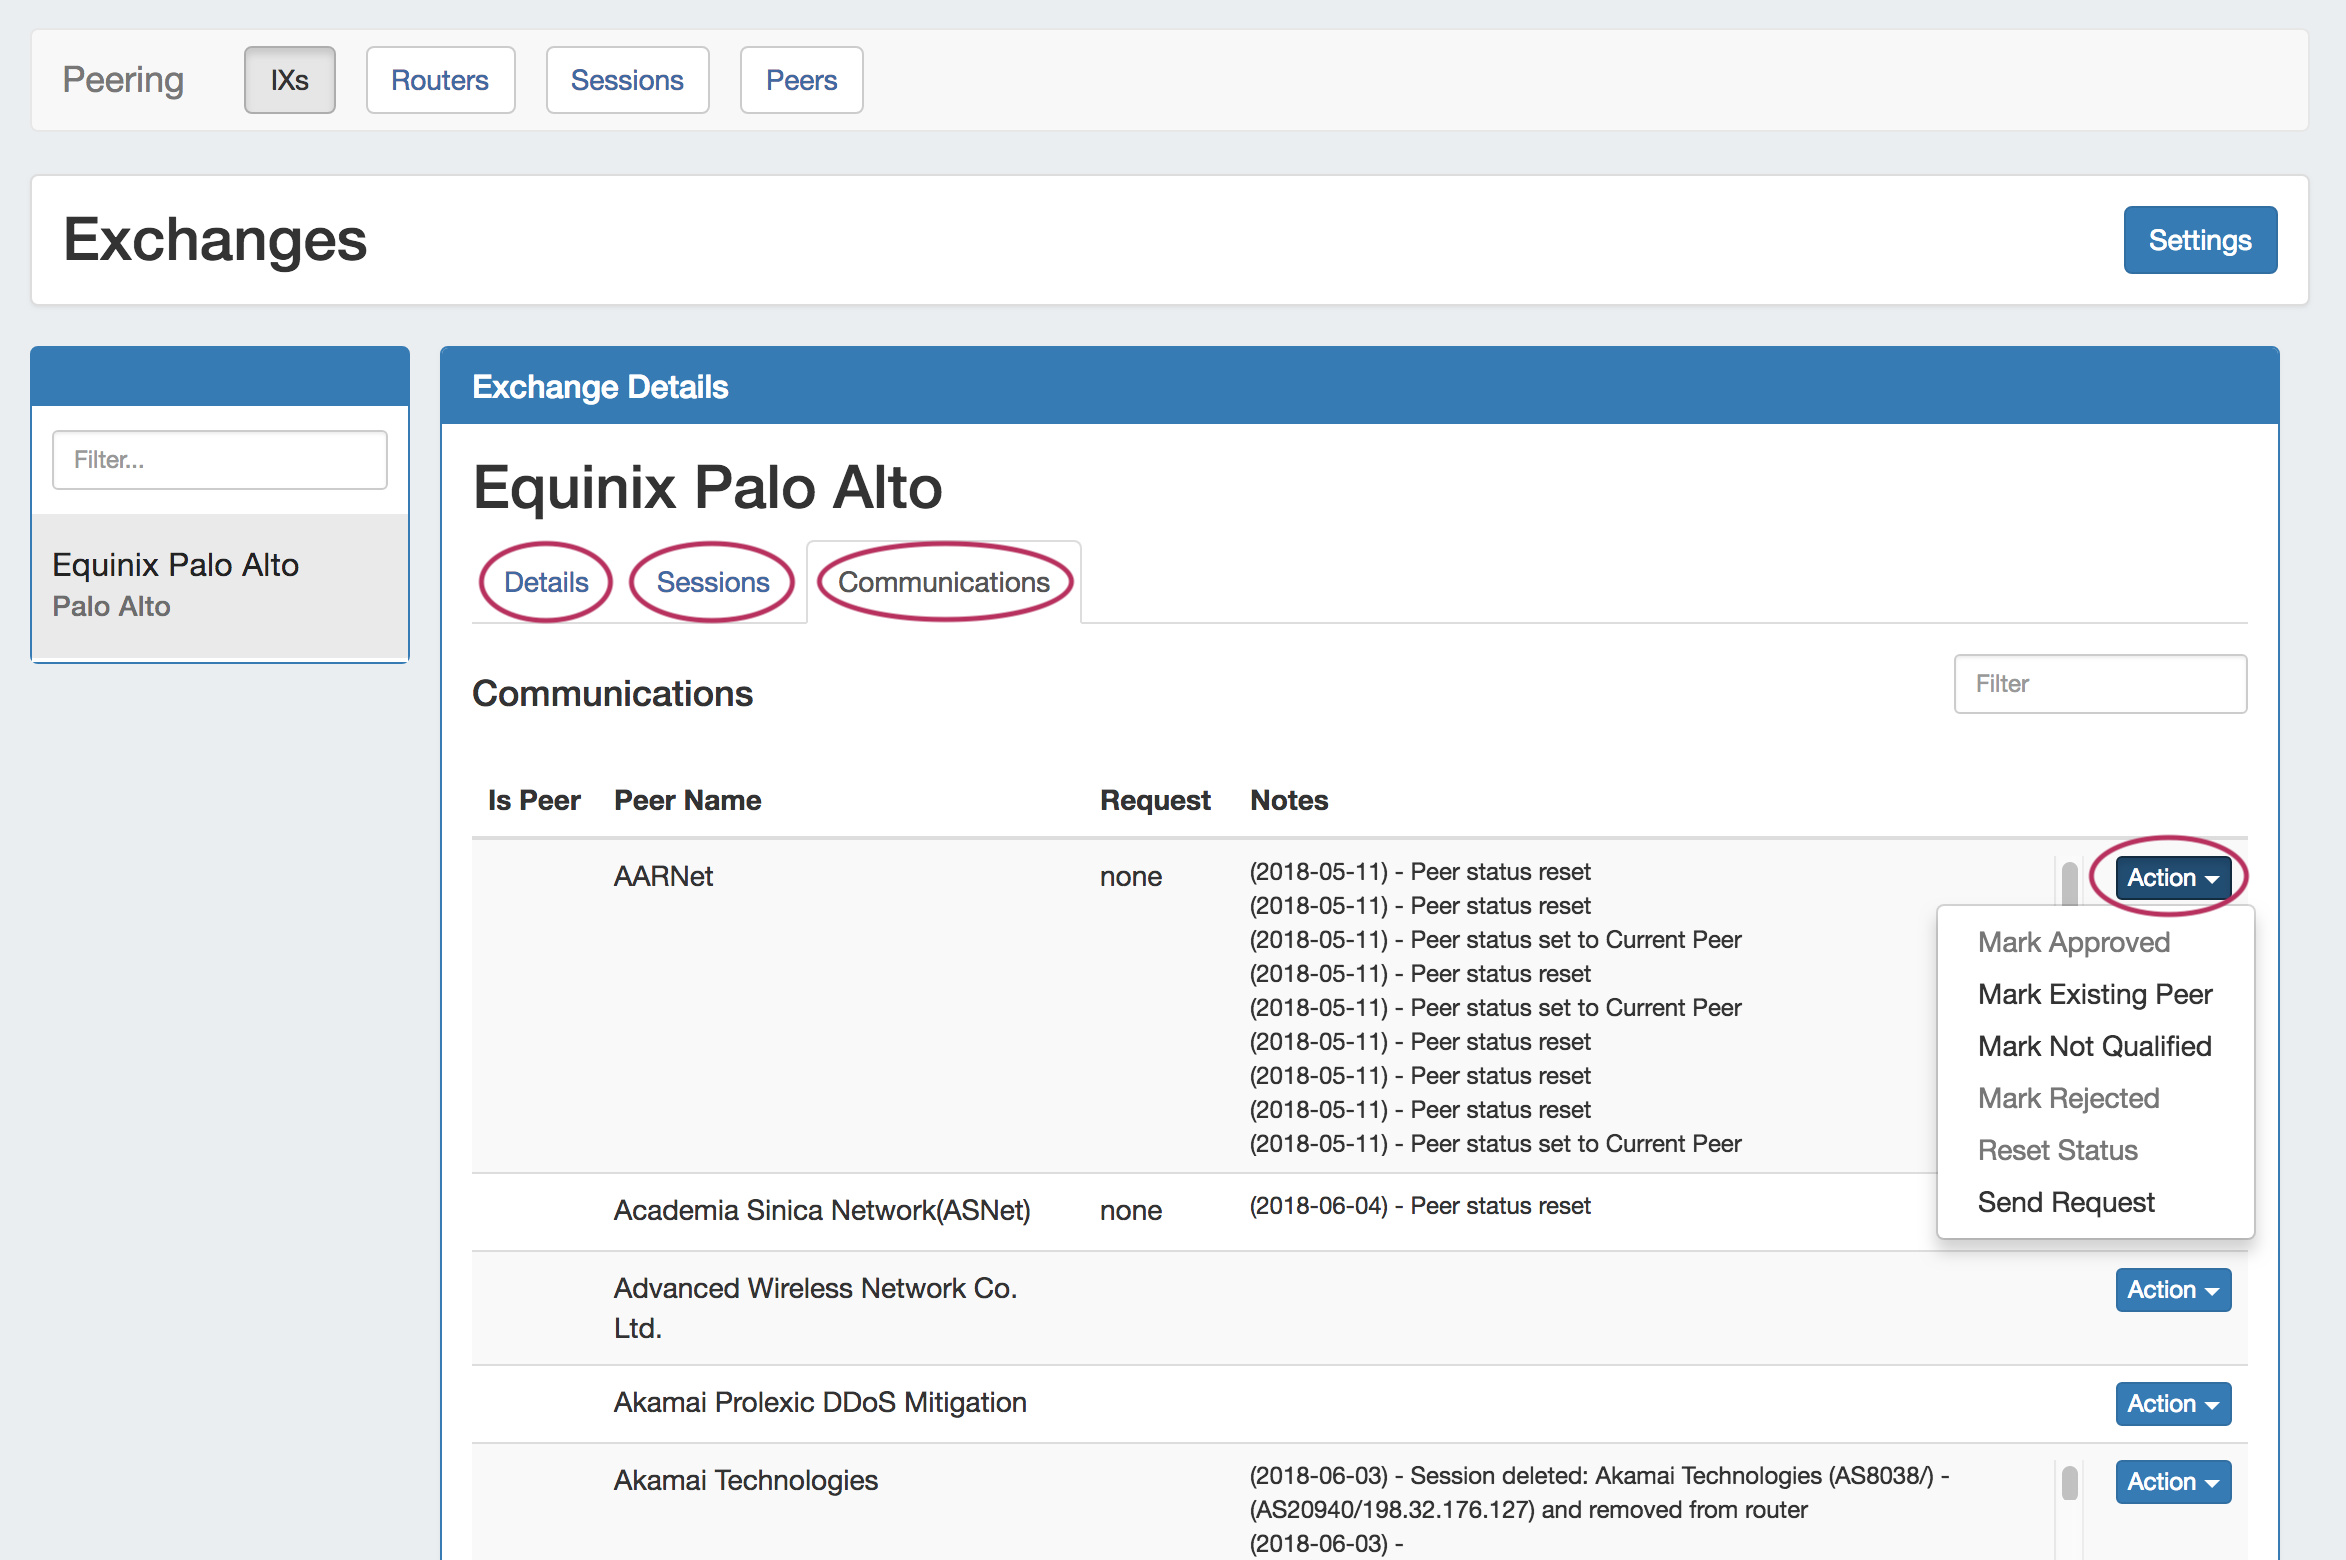
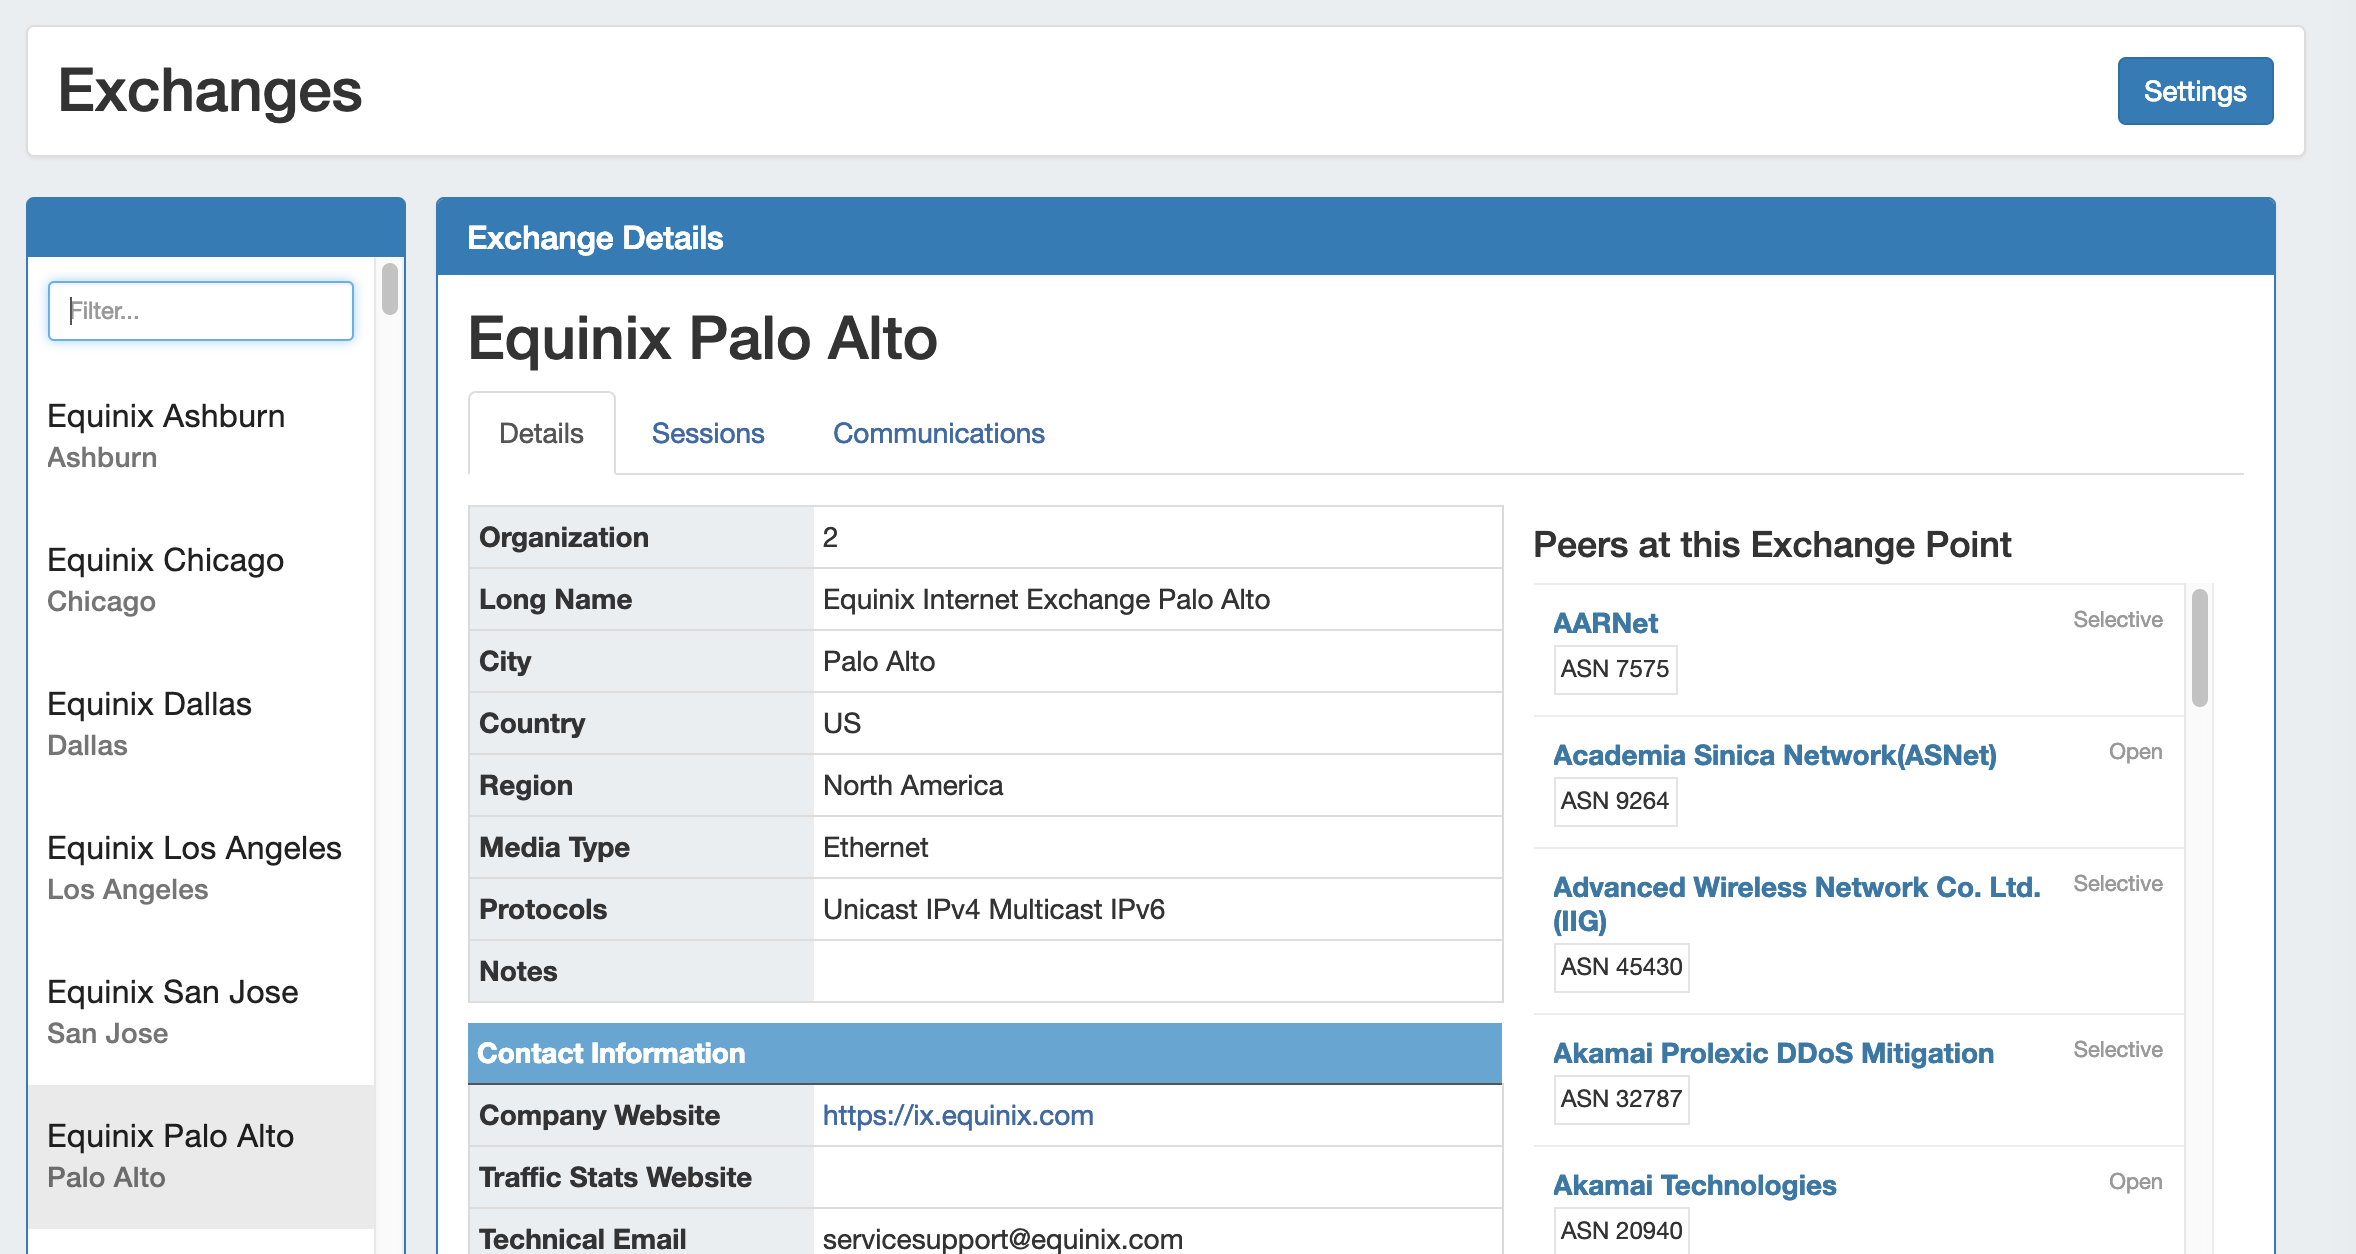
The "Settings" button takes you back to the Exchange Settings page.
The left side of the page displays a filterable list of all exchanges currently added to ProVision - to narrow the list down, simply type the first few letters of the exchange name into the "Filter" box, and click on your desired exchange to view its details.
Exchange Details Tab:
The exchange details tab provides general information about the exchange, obtained from PeeringDB.
It includes organization information, contact information, LAN, and a list of Peers at the exchange point.
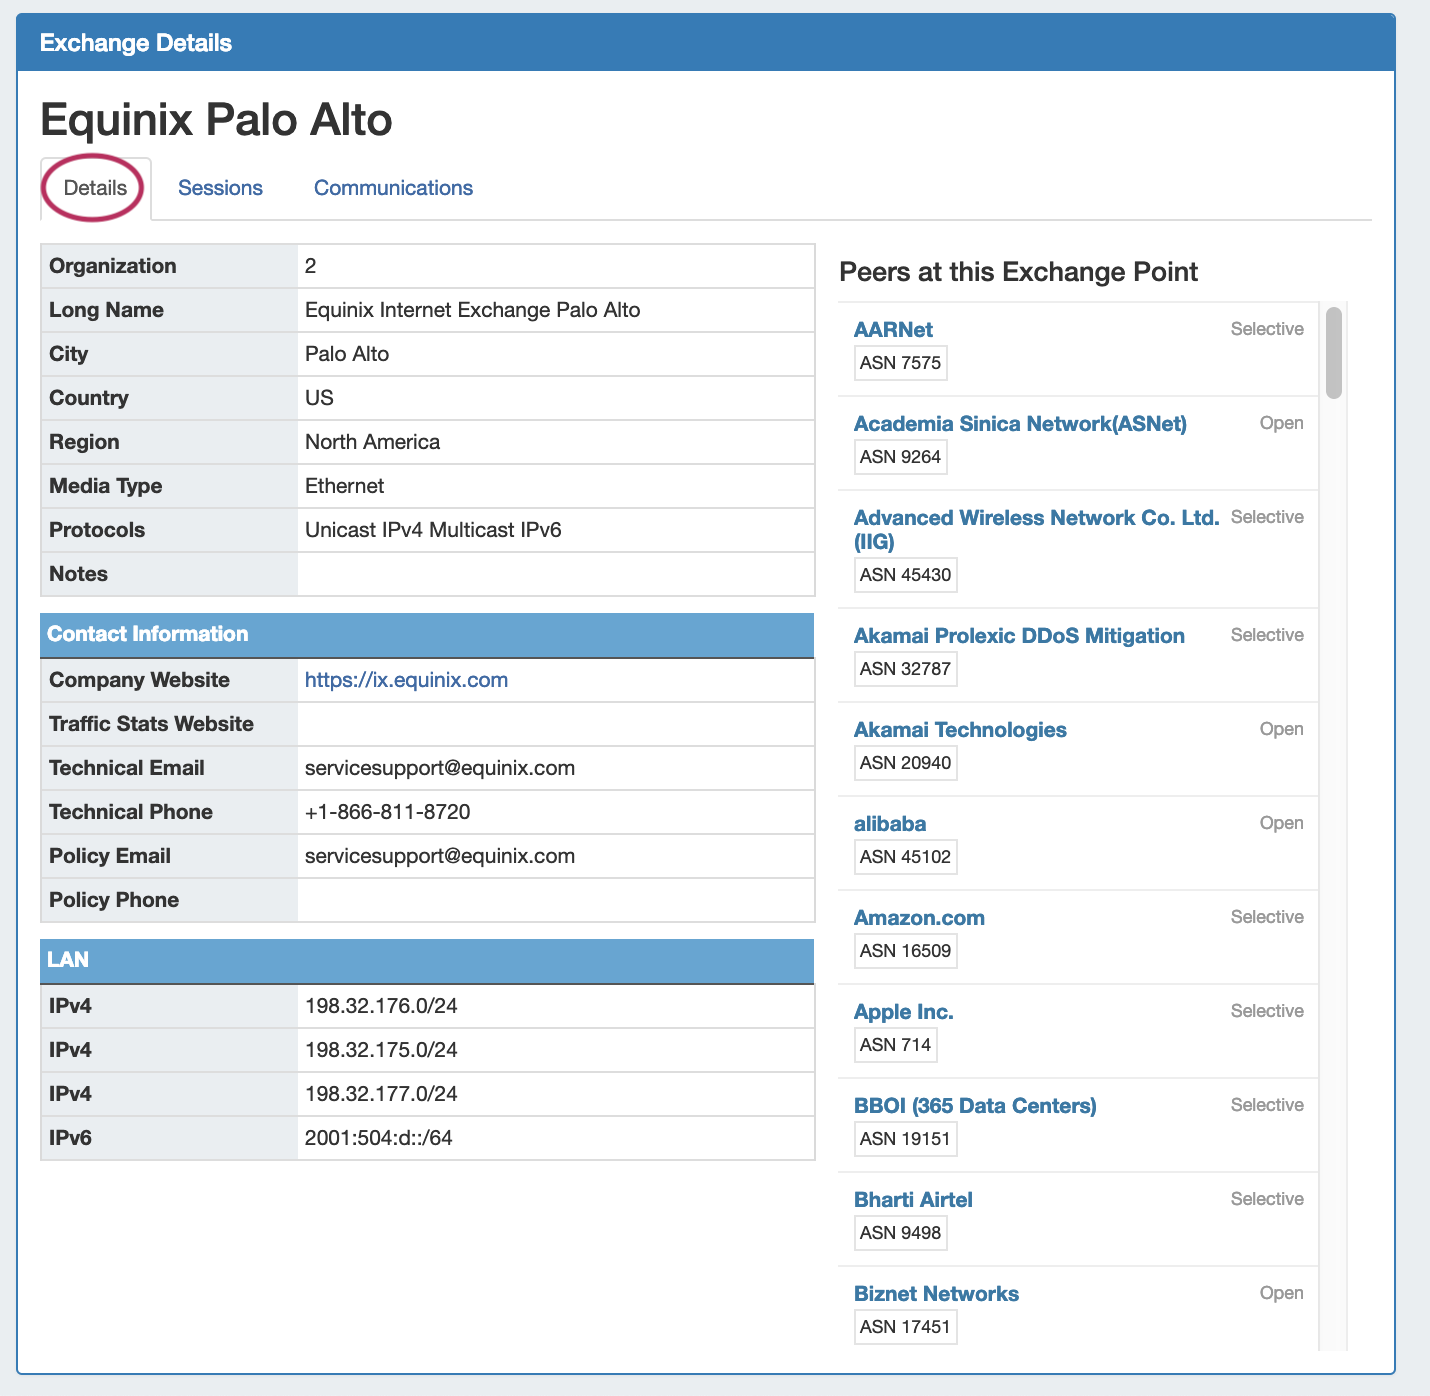
Clicking on the name of any peer in the under the "Peers at this Exchange Point" list will open the Peer Details page.
Exchange Sessions Tab:
The sessions tab lists ProVision sessions associated with the exchange, detailing the ASN, IP, Router, Peer Group, and session state.
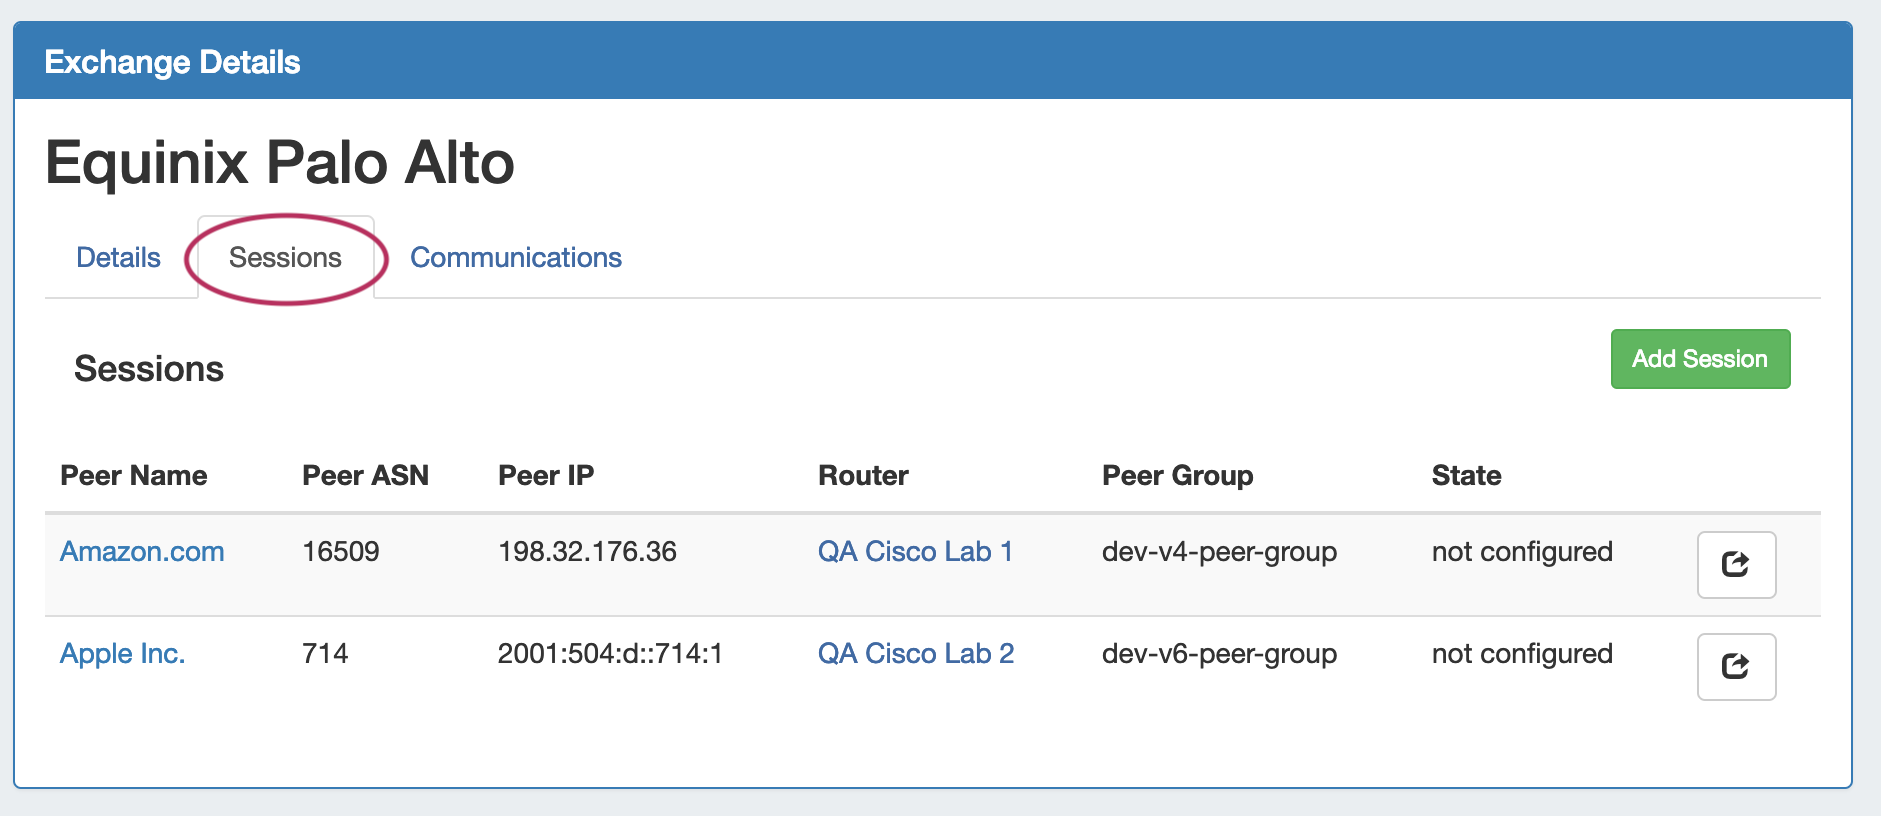
From here, you may add sessions, or click on a session to go to the session's details page:
- Add sessions to this exchange by clicking "Add Session".
- Click on the Peer Name to go to the Peer Details page for that Peer.
- Click on the Router Name to view Router Details.
- Manage the session by clicking on the "GoTo" Arrow button at the right side of the list to open the Session Details.
Communications Tab:
The Communications tab is where you can manage communications actions and mark status of peers.
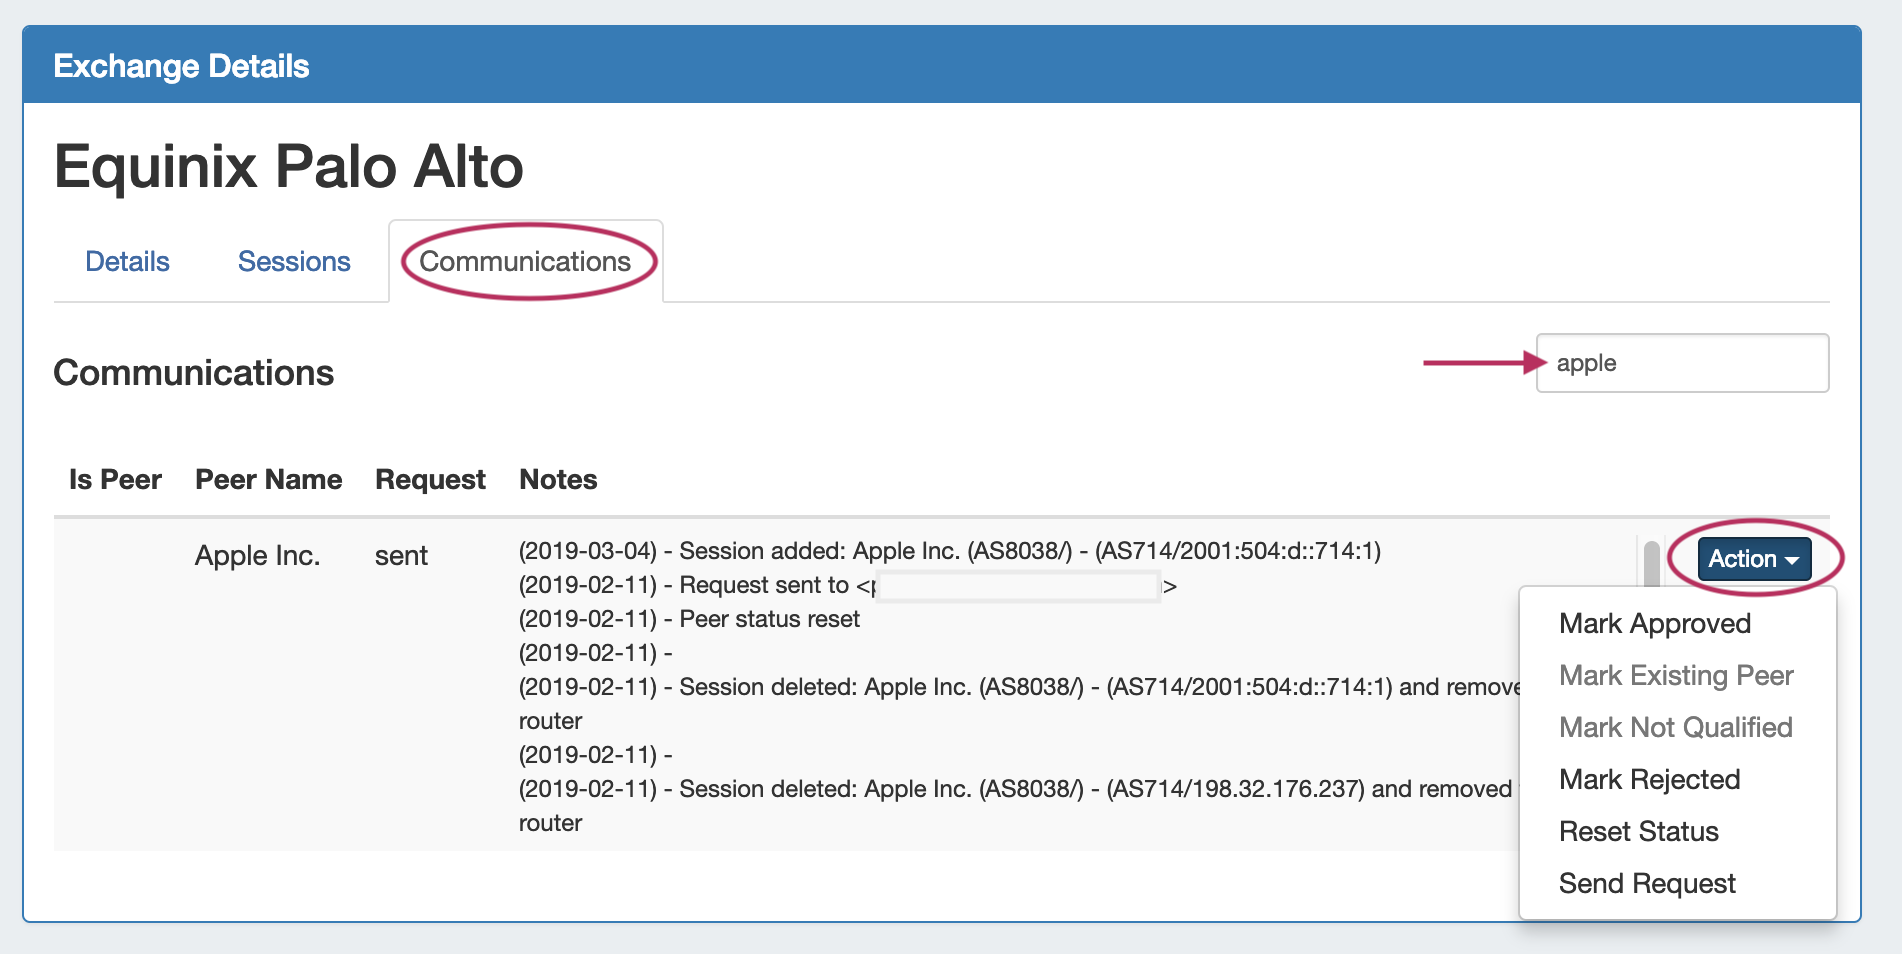
Filter the Communications list by typing the peer name into the filter box at the top left.
Available communication and status options are available in the Action Menu - available actions are dependent on current status, so not all actions are available at all times.
Menu Actions
Mark Approved: Marks the peer as approved. Available after receiving a request response.
Mark Existing Peer: Marks a peer as an existing one and removes the email request options.
Mark Not Qualified Peer: Marks a peer as "not qualified" and removes the email request options.
Mark Rejected: Marks the peer as rejected. Available after receiving a request response.
Reset Status: Resets the status of the peer, opening up the options to mark peer as existing, not qualified, or to send email requests.
Resend Request: Resends the peering request.
Send Request: Sends an initial peering request email to the peering coordinator. The email template pre-populates data based on peeringdb data (To address, Subject line and Peering exchange information). You have the chance to edit the email prior to sending.
Actions taken from this menu will be logged and display in the "Notes" field of the Communications list. If a Peering Email account is set up in ProVision and used to send Peering Requests from this menu, the emails will be accessible in ProVision in the Peering → Emails Tab → Sent Folder. See Peering Emails for additional information.