...
Expand title How to hide menu tabs... Step 1: Open the Menu Customization File
Using the Command Line Interface (CLI), navigate to your instance's "assets" directory, located at: "/var/www/html/[instance name]/assets"
Code Block language bash cd /var/www/html/[instance name]/assets

Open the menu customization file, "menu.json" in vi, or another text editor:
Note: Depending on available user permissions "sudo" may or may not be required.
Code Block language bash sudo vi menu.json

Step 2: Find the Tab in menu.json
When you view menu.json, tabs and their drop down sub-menu options are visible in a hierarchy organized by menu type.
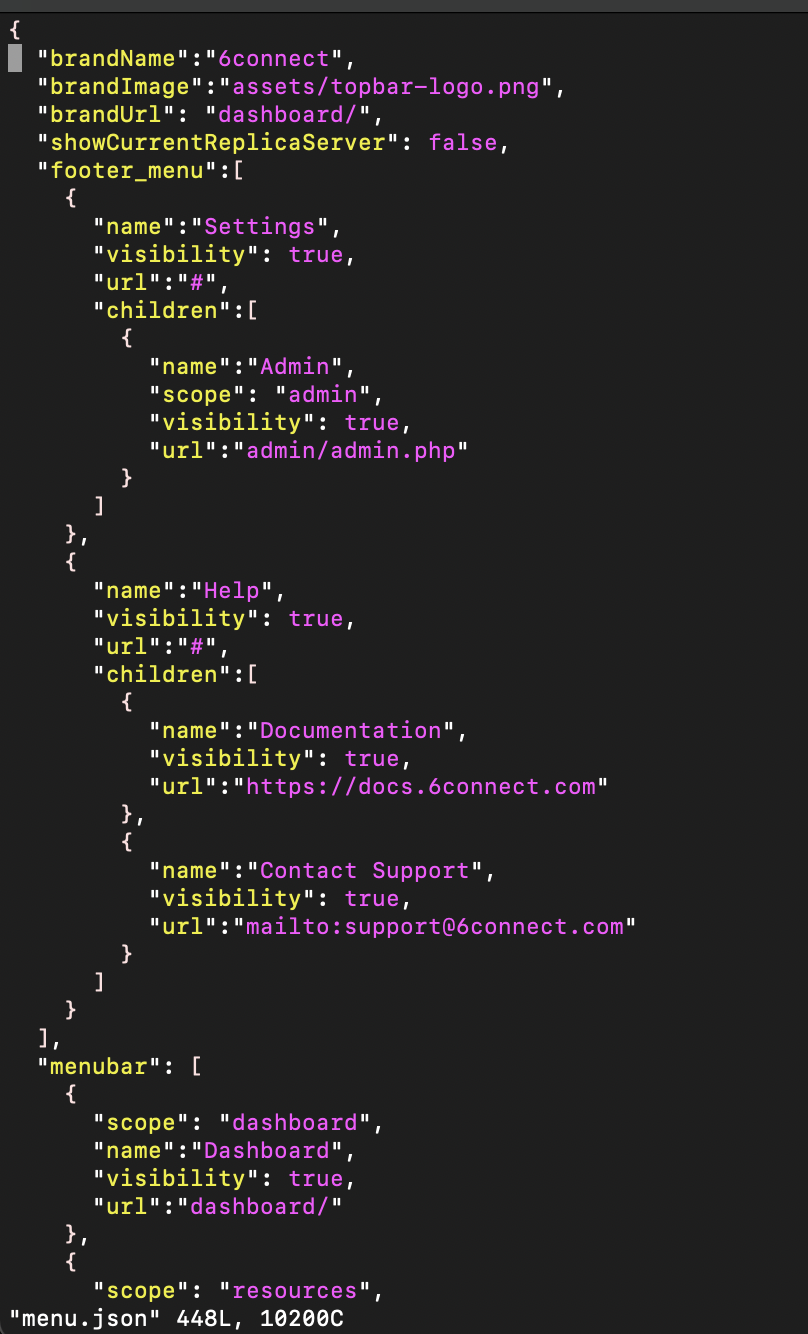
In order, the three top menu levels are:
- "footer_menu", containing settings for the Settings and Help menus
- "menubar", containing settings for the standard provision navigation tabs
- "admin_menubar", containing settings for the admin area navigation tabs
Under each menu grouping, on the second level of the hierarchy, is each main menu tab.
Each tab has properties for name, visibility, url, and tab children.
The third level, under "children" for a tab, lists the drop-down menu options available for the tab. Each child menu option has the same available properties, and can likewise be edited.
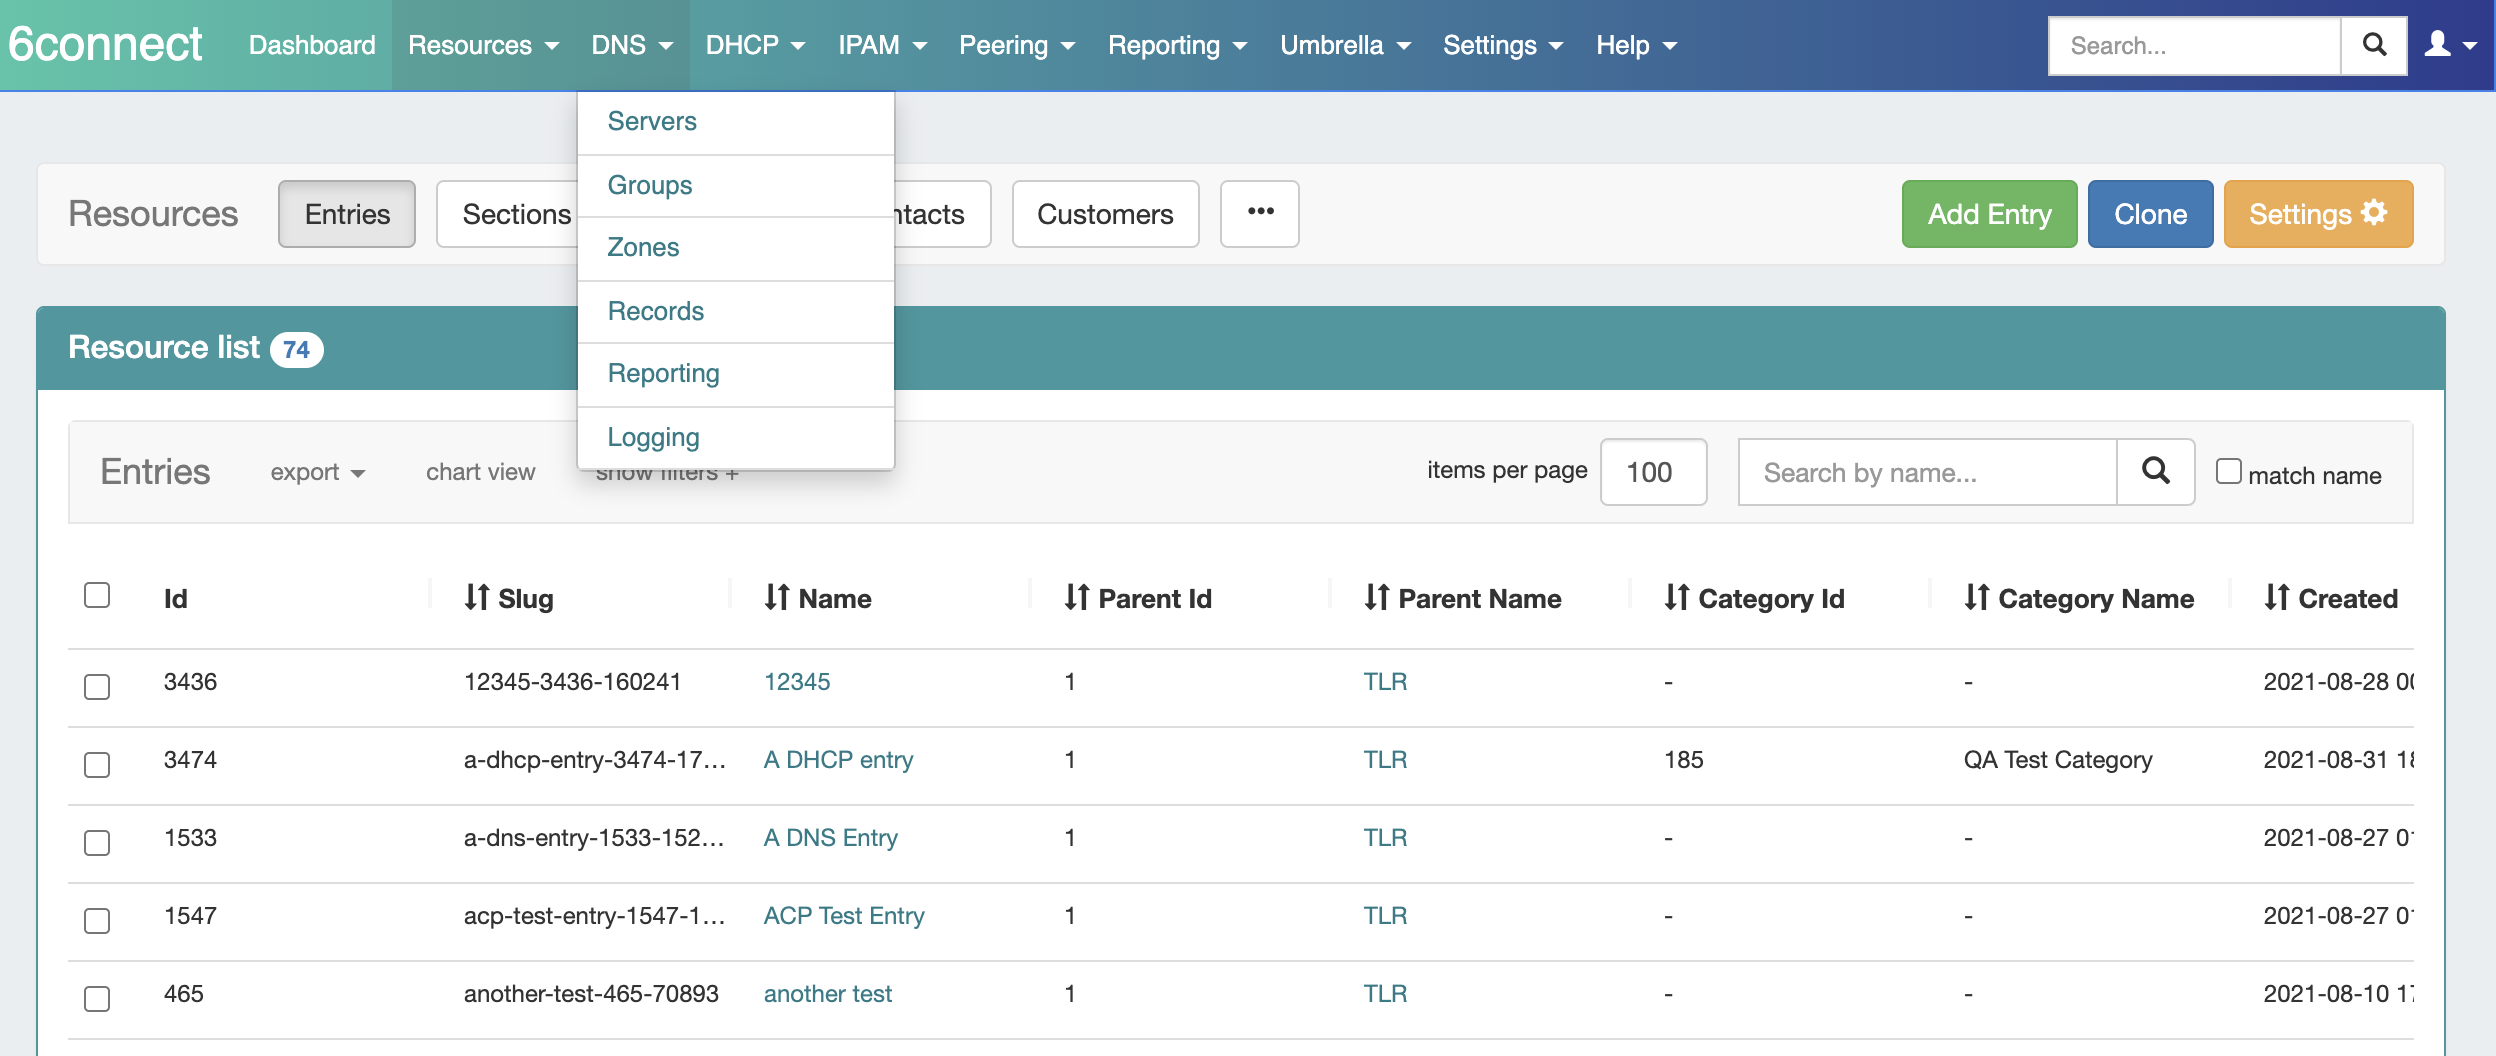
Since we are wanting to hide the "IPAM" tab in the standard area of ProVision, we need to scroll down to the "menubar" navigation grouping, and then find the second level tab with name "IPAM".
Step 3: Change the Tab Visibility
Once you find the desired tab to hide, enter edit mode, then change the "visibility" property from "true" to "false" (do not include the quotes, and be sure to retain the trailing comma).
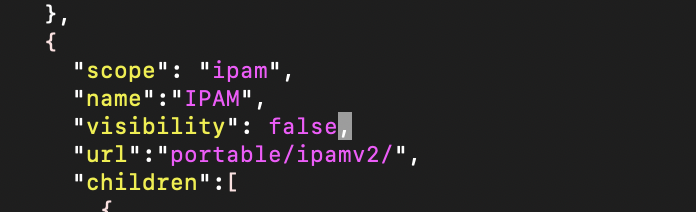
Save/write your changes to the file and exit.
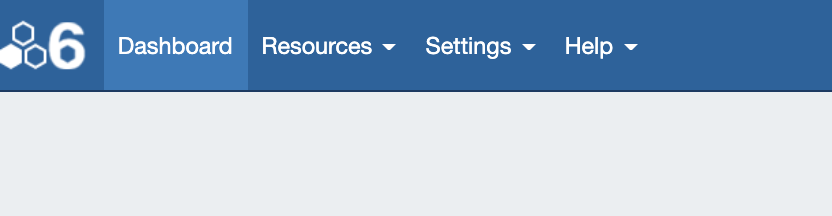
Step 4: View the Updated Navigation
Clear your browser cached image files, and log into ProVision.
The updated navigation should be apparent, in this case with "DNS", "DHCP", "IPAM", "Peering", and "Reporting" tabs no longer visible.
...
Expand title How to enable a custom theme... Step 1: Create a Theme file
To customize the default theme and change how the application looks with CSS, you’ll need to add your own stylesheets or edit an existing theme file. If you edit an existing theme file, we recommend making a copy of the existing file and keeping it as a backup file (.BKP).
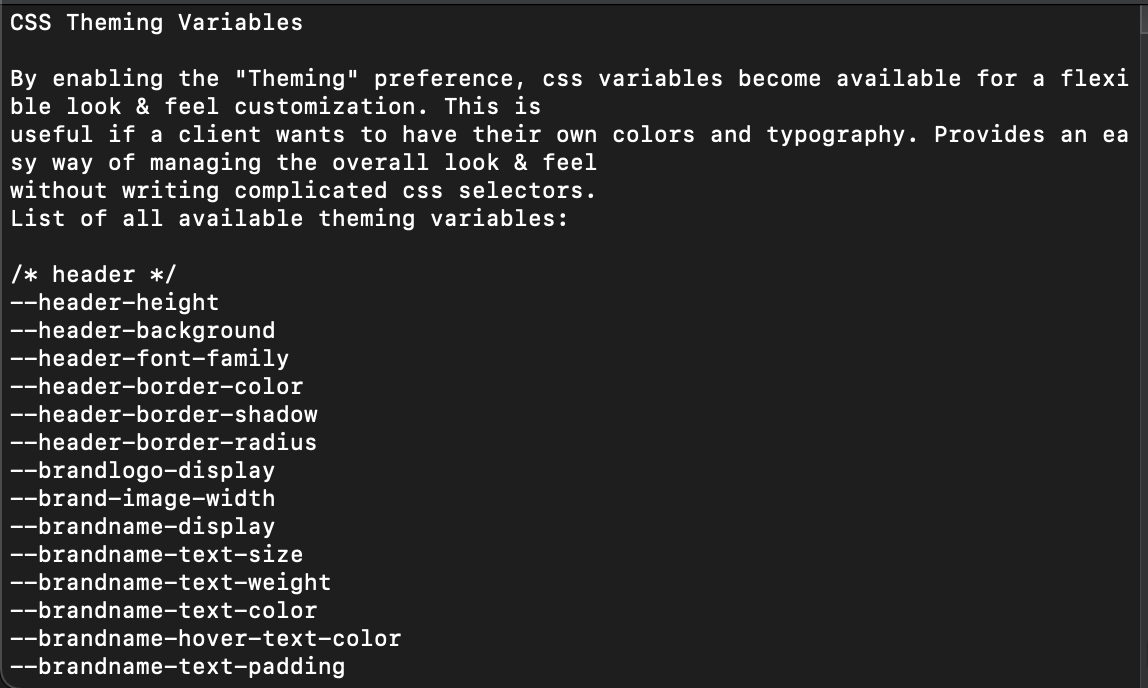
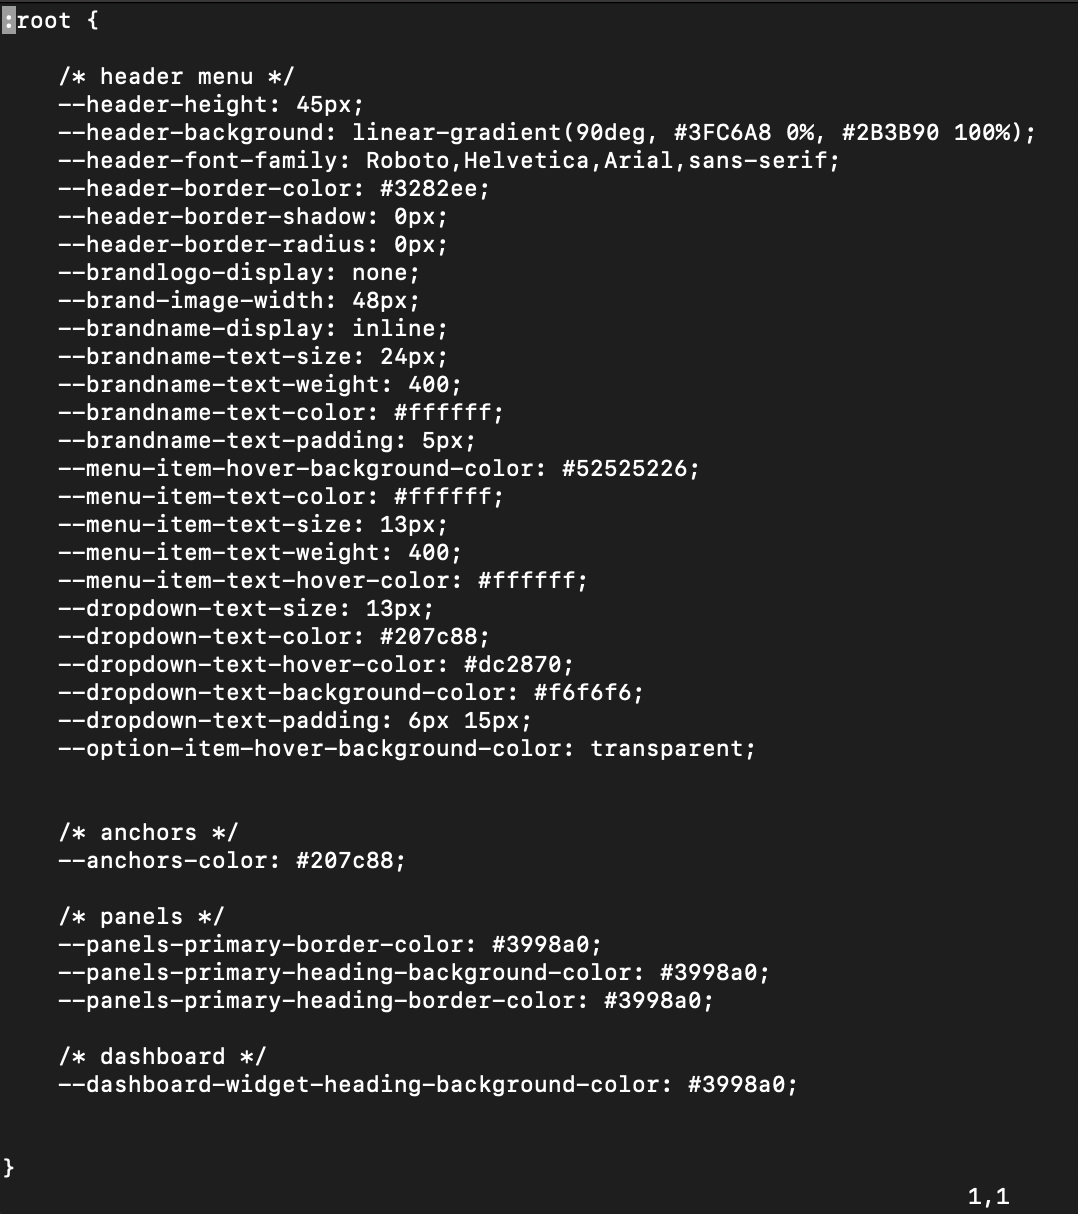
The best practice is to manage your customizations in a new css file, using the information provided in the README.txt file under [ your instance directory ]/assets/css/custom (as seen below).

The README.txt file provides basic instructions as well as list of all available theming variables that may be used for a custom theme.
In this example, we'll create a simple teal theme using some of these variables, which focuses on color and font changes to the top navigation menu, panels, and dashboard:
Once you are done, save your custom stylesheet file(s) into the assets/css/custom directory, like this:
└── assets/
└── css/
└── custom/
├── custom-theme-one.css
├── custom-theme-two.css
└── custom-theme-three.css
Make sure that any files used for the intended theme use the .css extension, and any separate theme or backup theme files are changed to the .BKP extension.
In our example, we are using "custom-theme-simple.css" as our new primary theme file:
Step 2: Enable Theming in ProVision
Log into ProVision, and go to the User dropdown -> "User Preferences" → "Appearance".
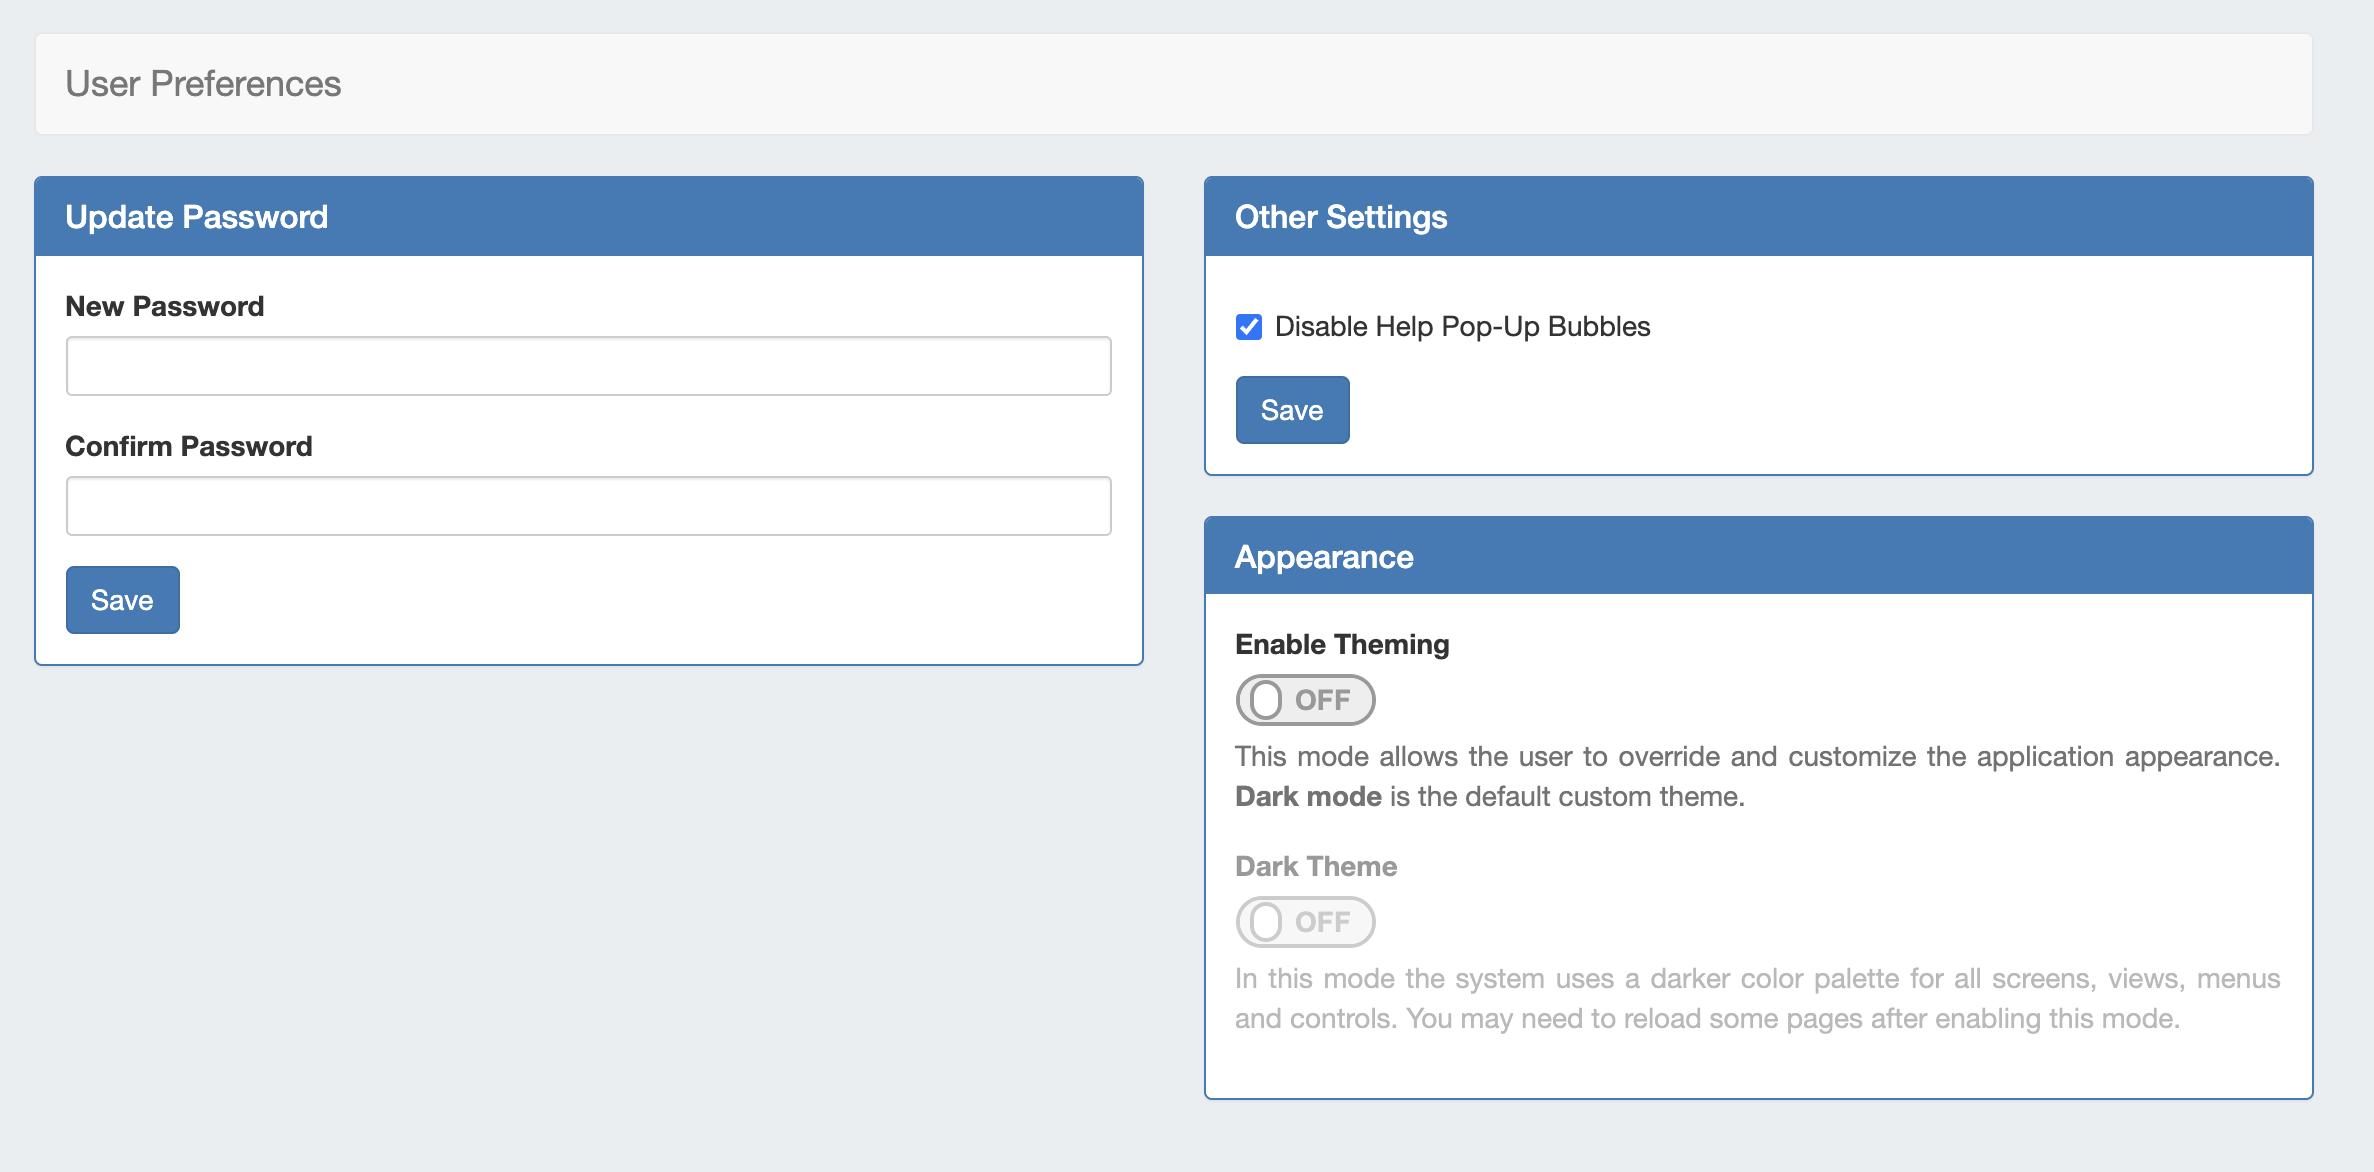
Under "Enable Theming", turn the toggle to the ON position, and verify that "Dark Theme" is turned to OFF (otherwise, Dark Mode theming will overwrite the custom theming files).
Once you're done, refresh the page and the custom theme should be visible. In some cases, you may need to empty your browser's cached images and files, and "Hard Refresh".
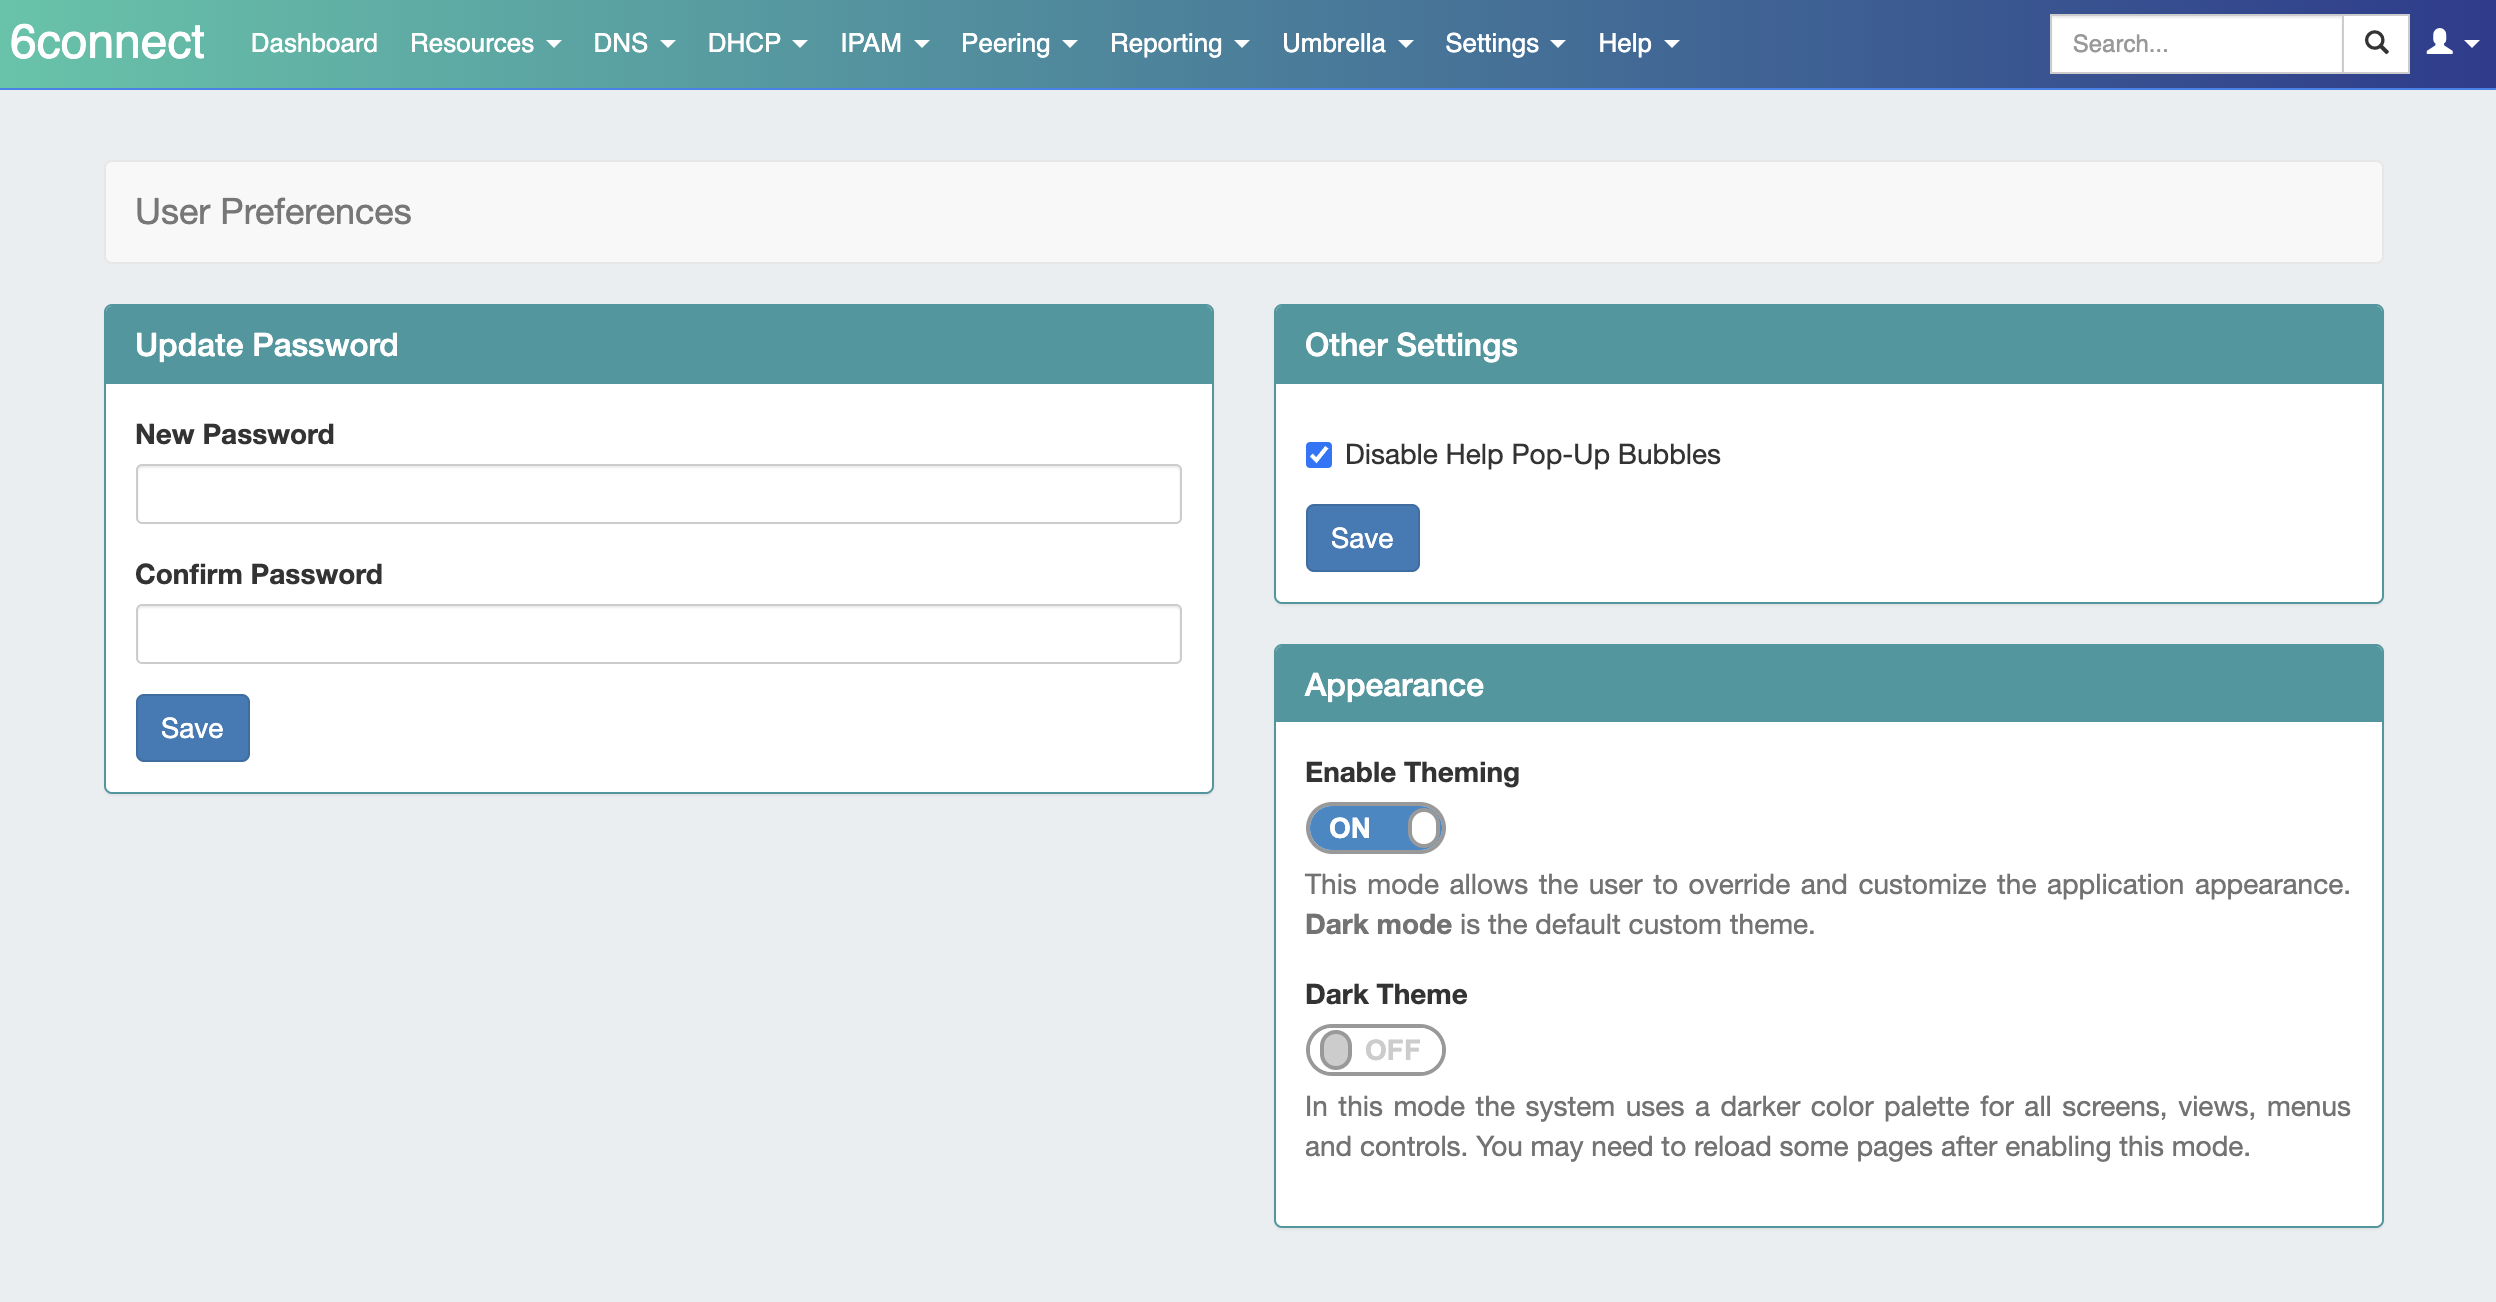
Here, we can see the new theme has changed the color and font of the top navigation menu, menu dropdowns, and panels.
...
6connect Global Commander ™️
GC-1: Integration of 6connect Global Commander ™️
6connect Global Commander ™️ is a new add-on module for 6connect ProVision which allows a network architect to visualize the complete IP landscape across a large, decentralized, heterogeneous organization. As companies grow larger they will naturally acquire distinct IT departments which operate with their own tools and their own rules. Viability into these sub-organizations is often difficult, leading to situations where IP resources are unused by one department when they are critically needed in another.
...
| Expand |
|---|
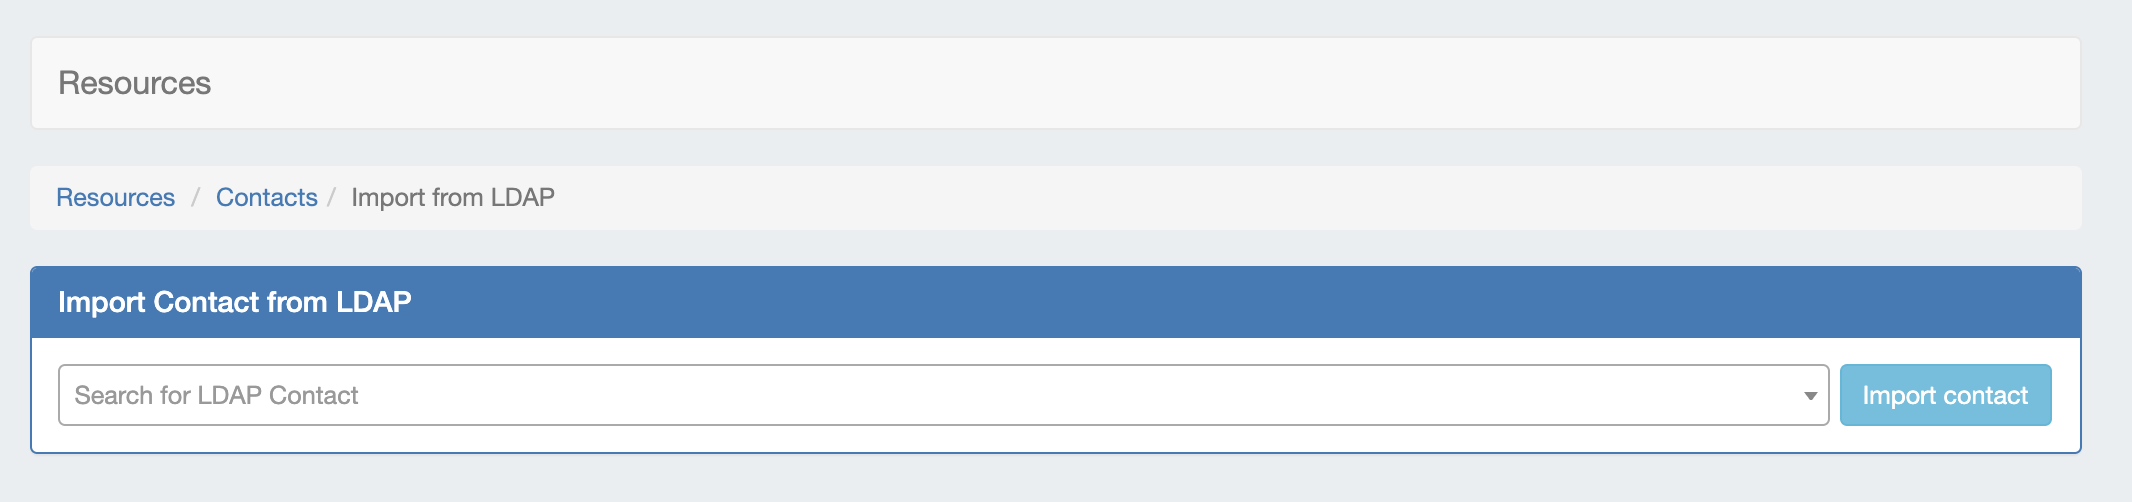
IM - 4135: Added "Import from LDAP" to the Contacts List options From the Resource Tab → Contacts List, click "Import from LDAP" at the top of the list.
From there, search for the desired LDAP contact (Note: The LDAP server must be enabled and set up in Admin Settings → Auth → LDAP with admin credentials in order to connect and import the contact). When done, click "Import contact". The LDAP contact will be available to assign in the Contact Gadget and will show in the Users List.
IM - 4492: Added Scheduler task "LDAP - Sync LDAP Contacts" to support LDAP Contacts. This task updates imported LDAP users with any changes made on the LDAP server. This task must be manually created at the desired interval in order to automatically update the user based on the server information. |

MySQL Replication Monitor:
IM - 3936: Added MySQL Replication monitoring to Admin Settings.
MySQL Replication Monitor displays the enabled/disabled status of replication, and periodically checks the replication state and displays the result in Admin Settings.
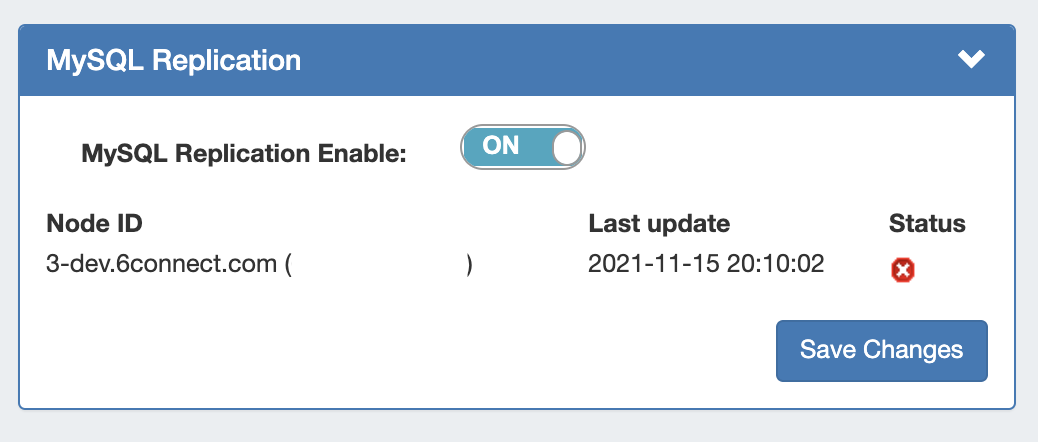
Note: The associated "MySQL Replication Monitor" Scheduler task must be created for the desired interval in order for the monitor to execute. See Scheduler Tab updates, below, or the the Scheduler for details on setting up tasks.
Scheduler Tab Updates
Various improvements have been made to the Scheduler Tab:
...
Added new tasks to support new features:
- IM - 3940: ACP - Run Workflow: Runs the selected ACP Workflow at the scheduled time. Requires an ACP license and ACP settings successfully configured under Admin → Settings → ACP Settings.
- IM - 4492: LDAP - Sync LDAP Contacts: Connects to the LDAP server set up in Admin Settings → Auth → Authentication Options -> LDAP and updates imported LDAP users with any changes.
- IM - 3936: MySQL - Replication Monitor:Runs the MySQL Replication Monitor and provides status information when "MySQL Replication" is enabled under Admin Settings → Application → "MySQL Replication".
- IM - 3942: DNS - Queue Push:If "Enable DNS Push Queue" is set to ON in Admin → DNS → Push Settings, this task must be created in order for the scheduler to run at the desired interval to execute the queue.
...