...
| HTML |
|---|
<div id="google_translate_element"></div>
<script type="text/javascript">
function googleTranslateElementInit() {
  new google.translate.TranslateElement({pageLanguage: 'en'}, 'google_translate_element');
}
</script>
<script type="text/javascript" src="//translate.google.com/translate_a/element.js?cb=googleTranslateElementInit"></script> |
Importing BGP Sessions

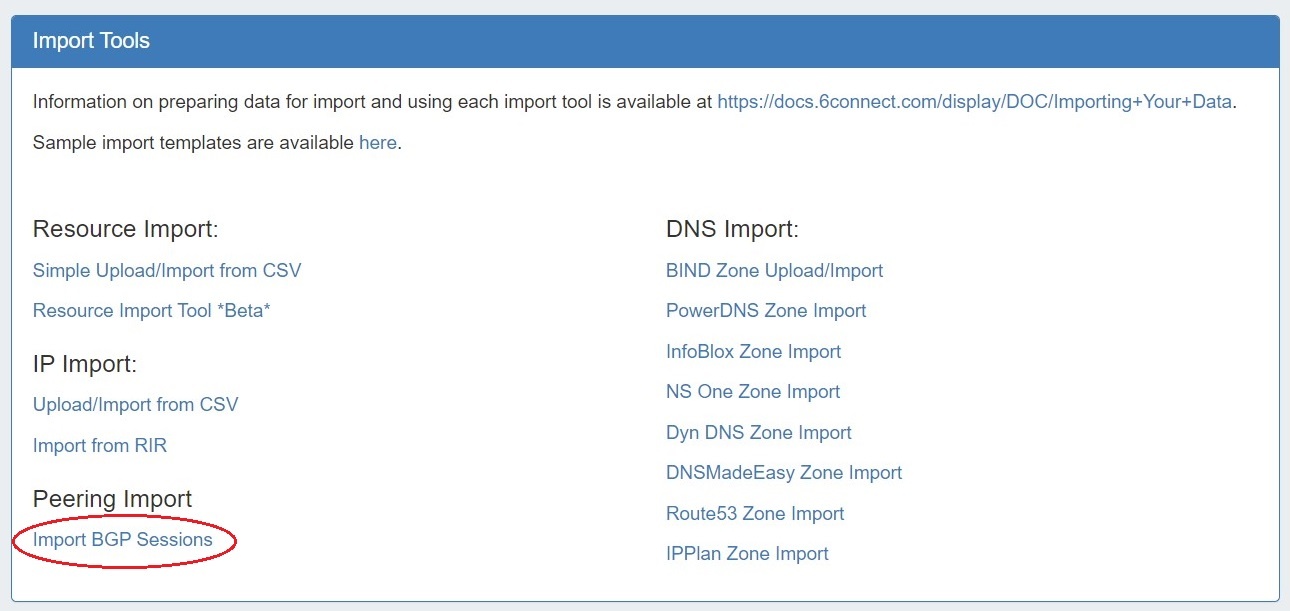
Importing peering sessions requires Admin-level permissions, and is accessible only from the Admin section of ProVision.
...
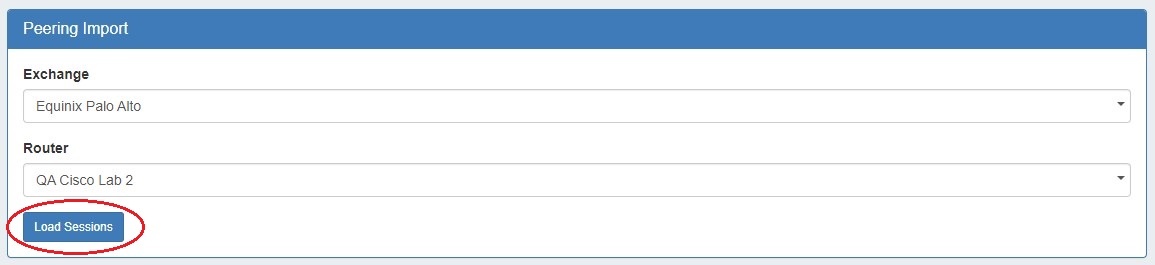
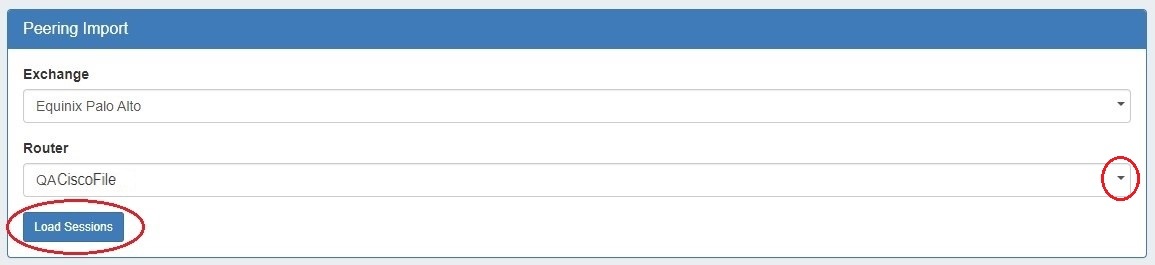
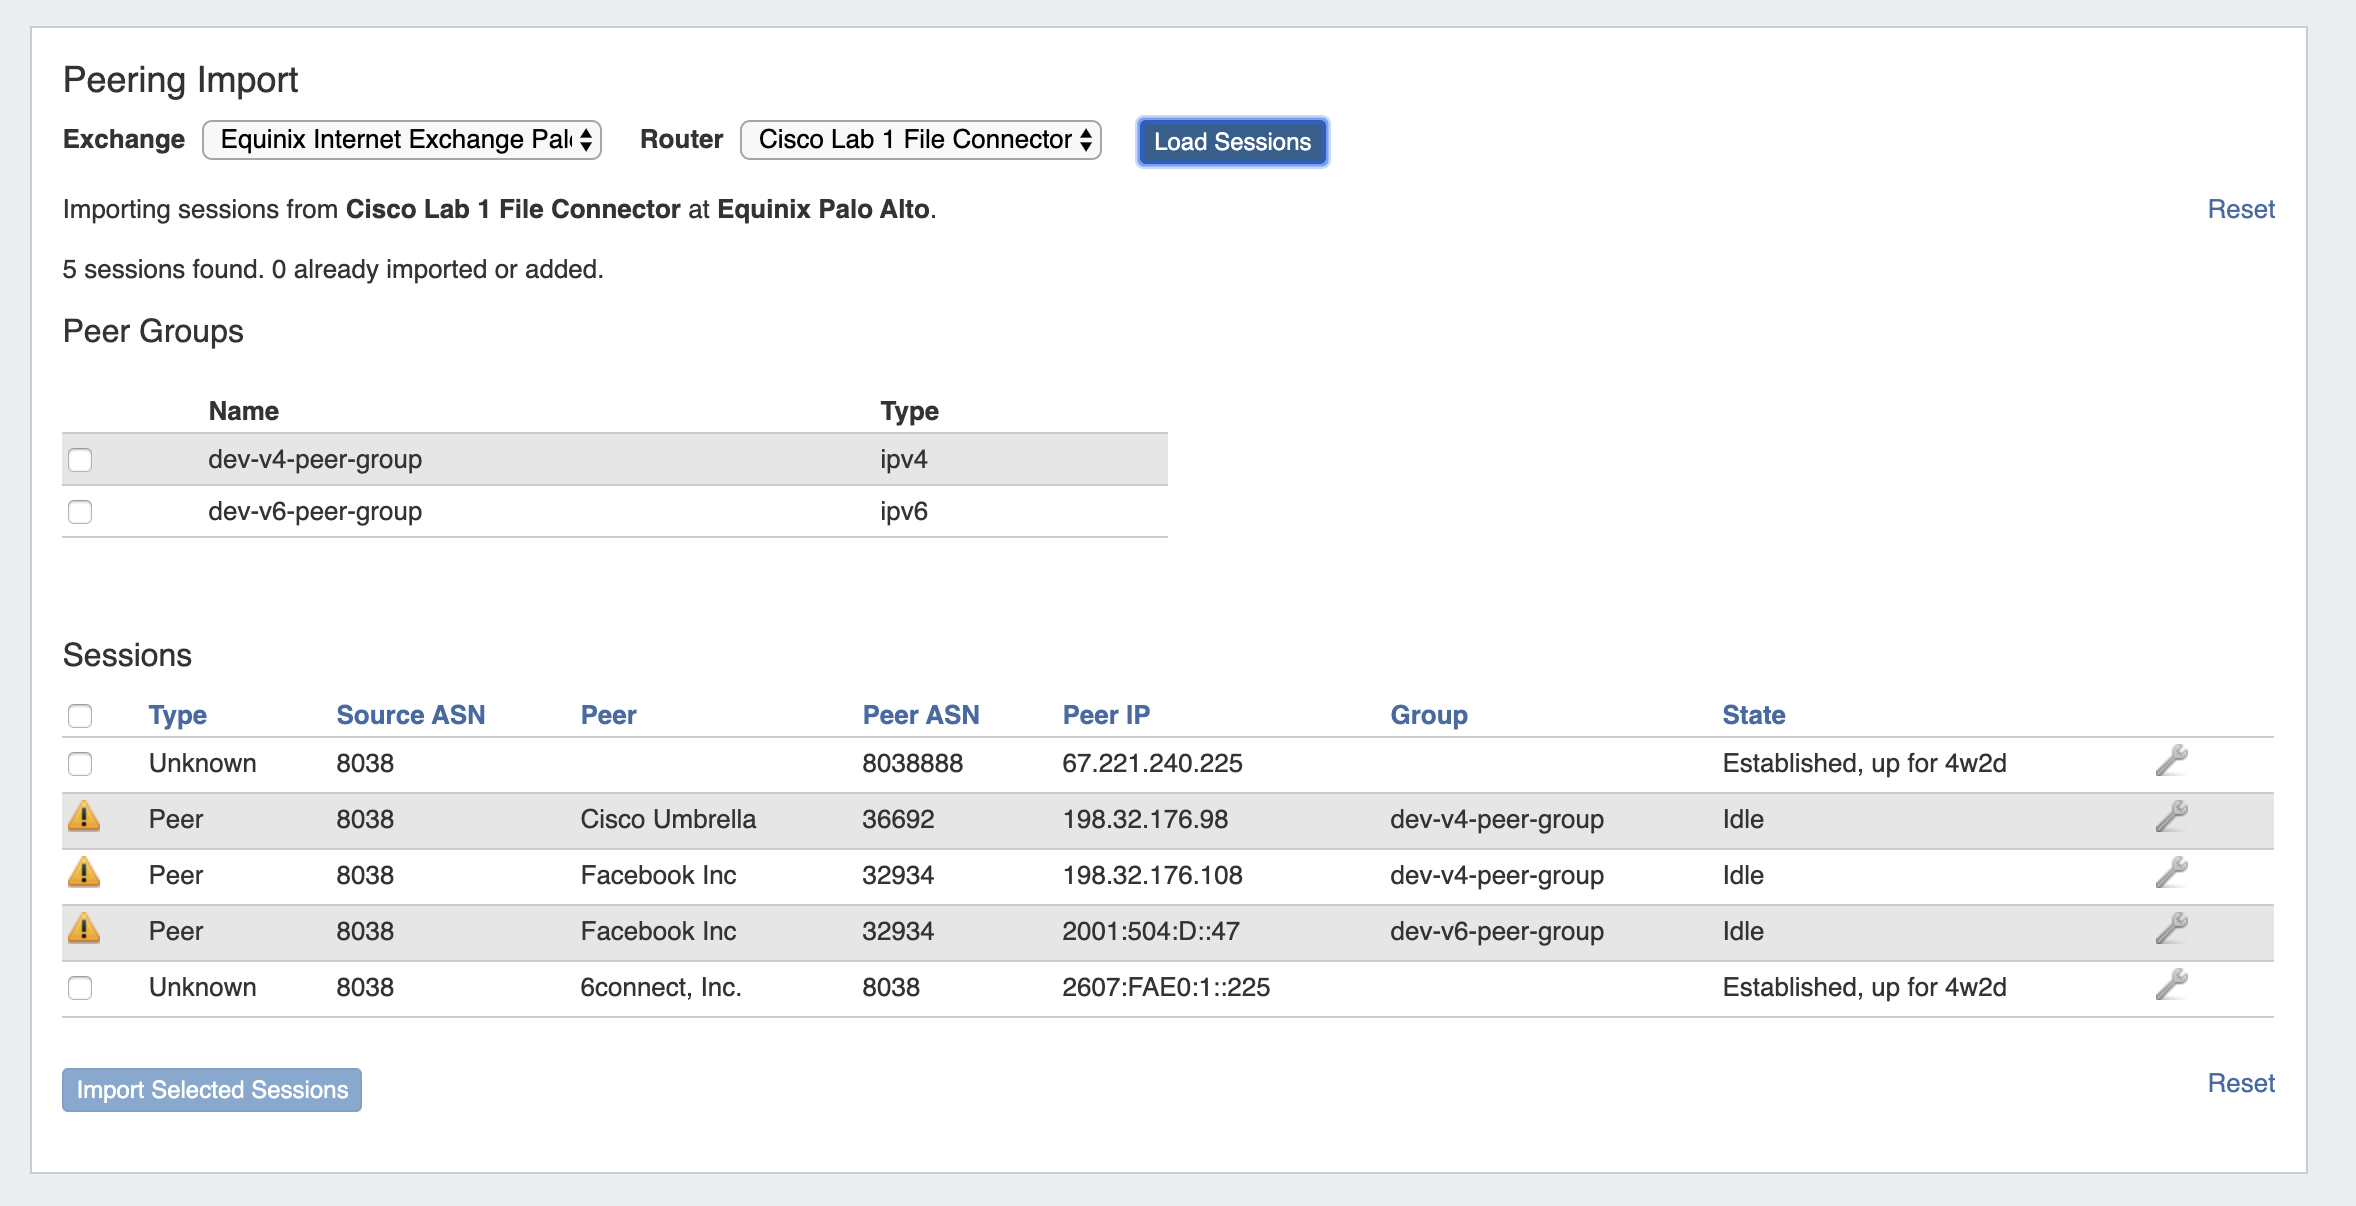
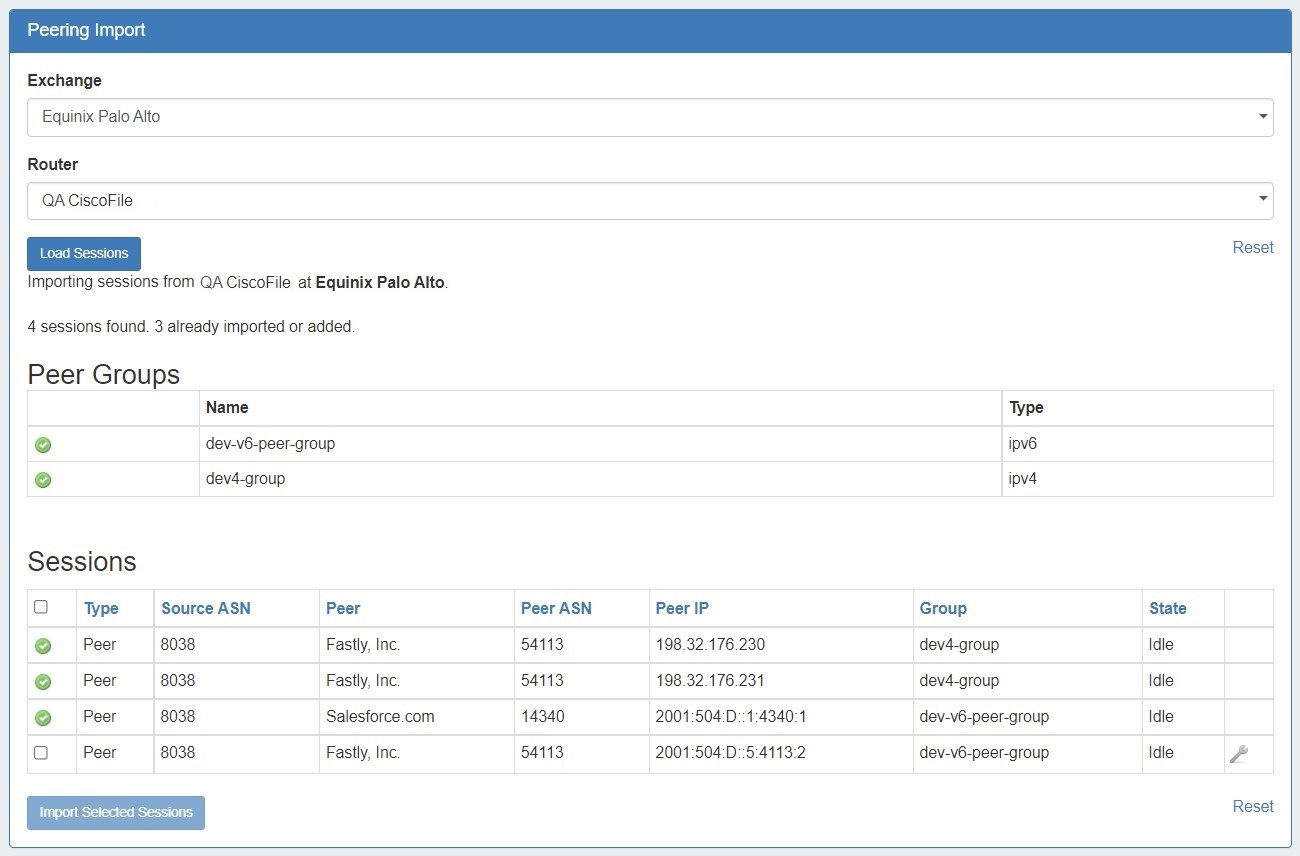
First, select the desired exchange and router. Routers with Logical Systems information will show up as the router name with the Logical System info in parenthesis (e.g. "Juniper (test)"). Then click "Load Sessions".

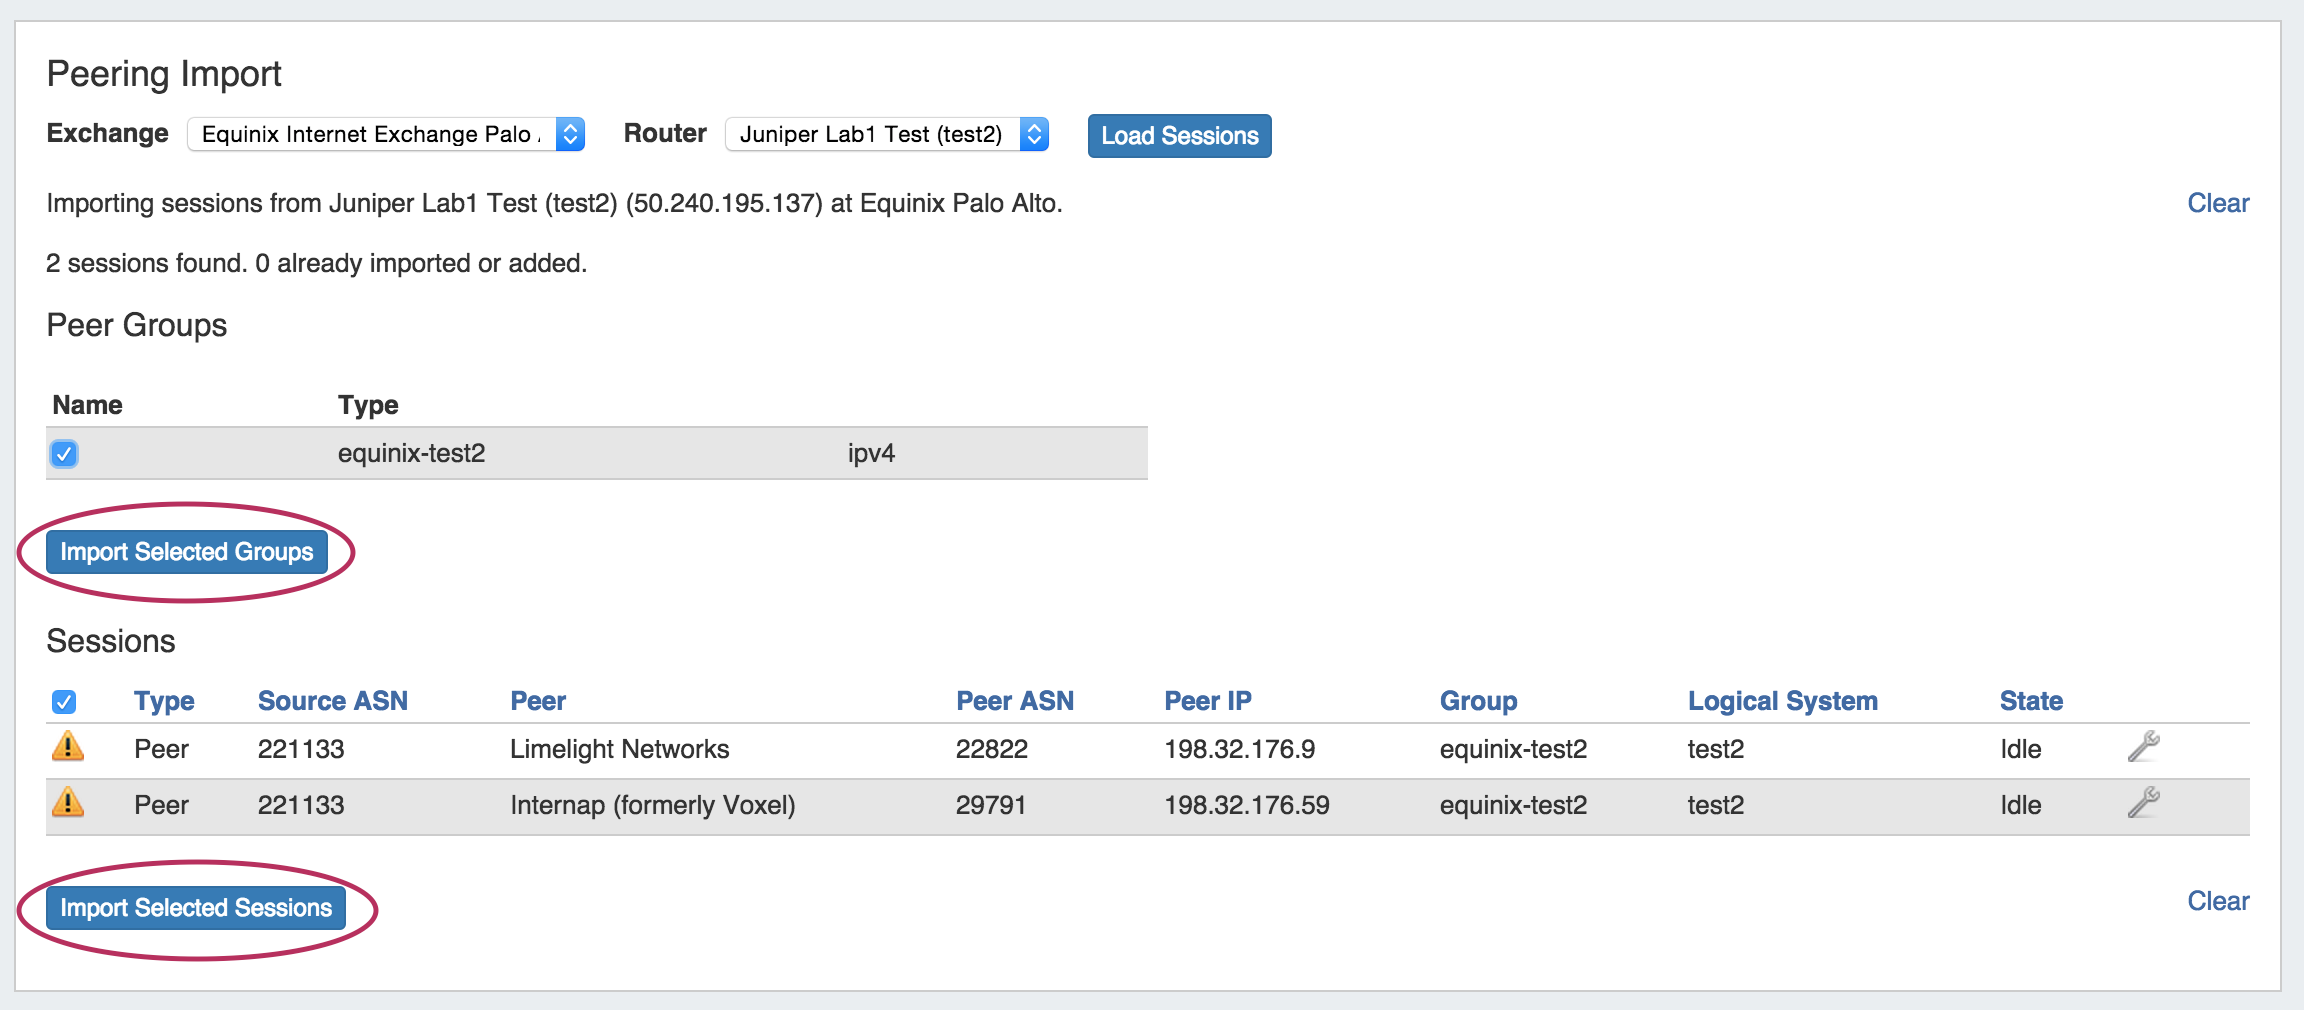
Peer Group and Sessions will then display below your selections.
...
If edits need to be made to the session prior to import, click on the wrench icon to open field edits.


Make the changes to desired field(s), then click "Done" to save your changes and proceed to importing.


Select Groups and Sessions
...
Successful imports will then display with a green check mark at the beginning of the row.
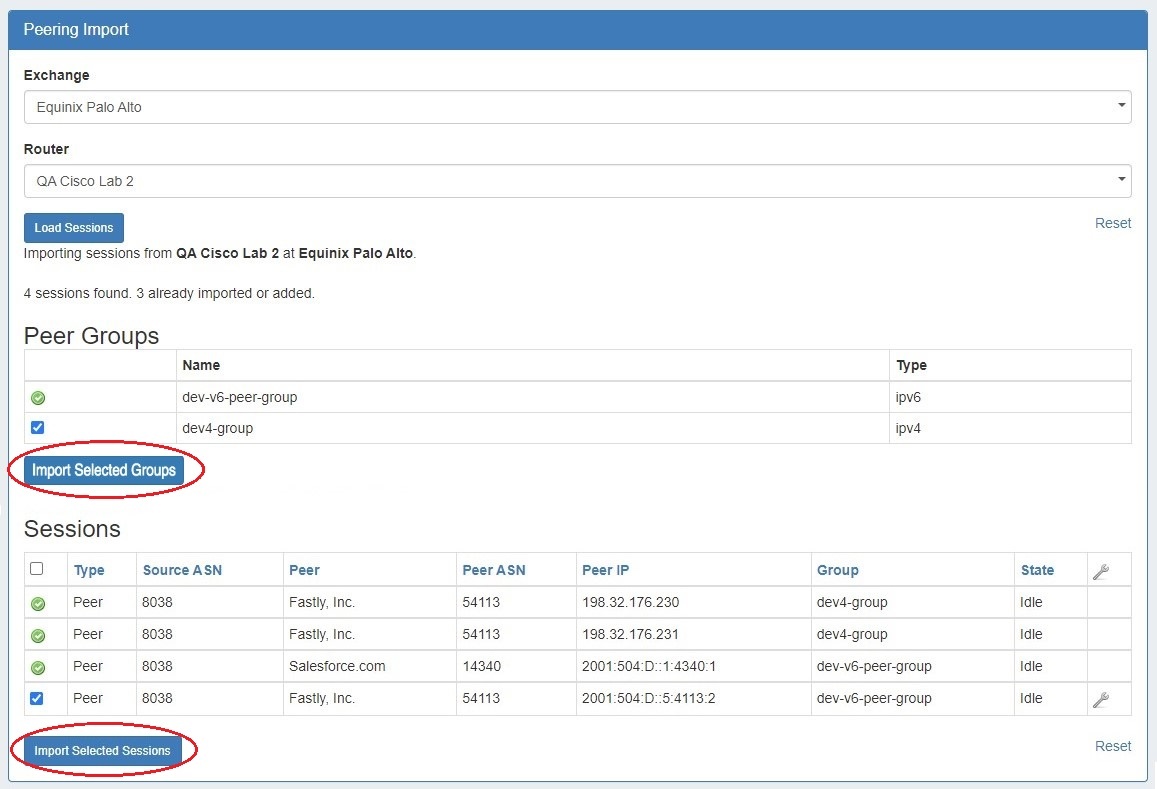
Once imported, you can manage and configure your sessions from the Peering Tab.
...
Select the appropriate exchange, then the File Connector Router that you created.

Click "Load Sessions", and the sessions contained within the router data file will be available to review, select, and/or import into ProVision.
Via APIv2
The same import process may also be performed via APIv2, using the following information:
...