...
DNS Groups
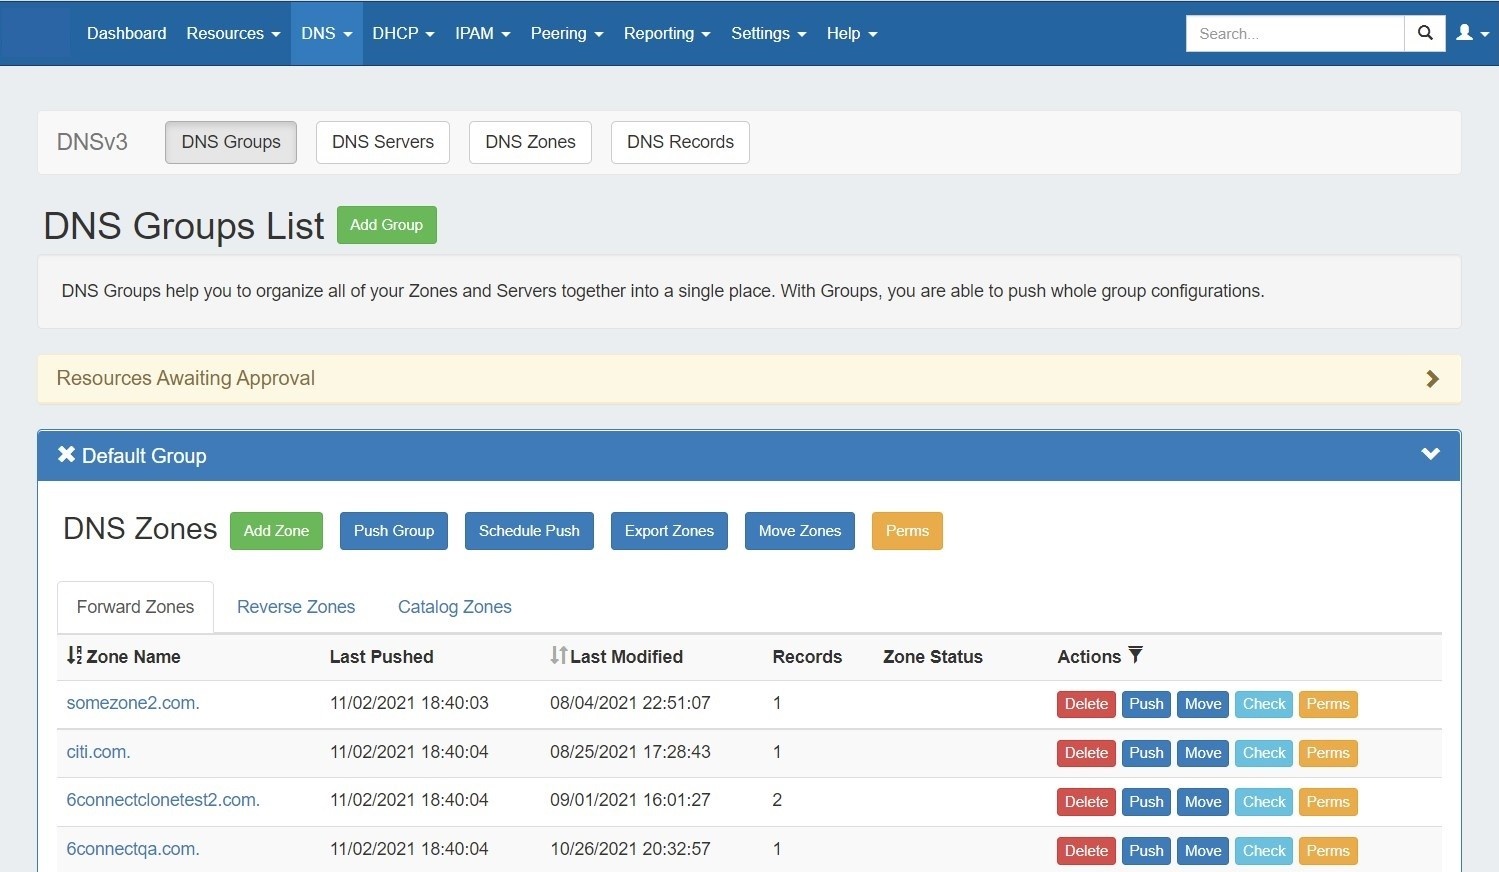
The DNS tab Groups List allows allows you to create, view, and manage groups of DNS Servers servers and Zoneszones. Using groups, you can configure and push selected combinations of zones at one time.
...
1) Add Group Button: Opens a dialog for creating a DNS Groupgroup
2) Resources Awaiting Approval Module - Group Level: Lists pending DNS Group group level Approval approval events either submitted by, or able to be approved/rejected by, the current user.
3) Group Container: The Group group container header shows the group name. Expand or close the group container by clicking on the expansion arrow ( > ) on the far right of the header. Clicking on the X will delete the Group group and all zones included in the group. Rename the group by clicking on the name, then typing the desired changes and clicking outside of the name.
...
9) Perms (Admin): Provides a shortcut for Admin users to change the group/user permissions for the DNS Groupgroup.
10) Resources Awaiting Approval Module - Zone List Level: Lists pending DNS Zone List level Approval approval events either submitted by, or able to be approved/rejected by, the current user.
11) Zone List: Forward and reverse zones included in the Groupgroup.
12) Forward / Reverse Zones Tabs: Shows zone list containing only forward or reverse zones, respectively.
...
21) Move: Moves the zone to a different Groupgroup.
22) Check: Performs a check on the zone, notifying the user if errors or warnings are present for the zone.
...
27) Catalog Zone Settings: Click on the header title or > to expand or collapse. Enable / Disable Catalog Zones. Enabling Catalog Zone exports all zones inside the Group group into a new catalog zone, so that slave servers can receive zone changes.
...
Working with DNS Groups
DNS Groups groups allow for organizing multiple zones together and linking those zones with one or more servers. Default nameservers, SOA values, and ACL's are set at the Group group level, so different Groups groups may have their own default values. Zones may be pushed individually, as a Groupgroup, or at the server level.
ProVision automatically designates a Default Group for zones to be imported or added to, as well as a "templates" group for holding pre-DNSv3 templates or to hold new zones created as templates. Creating additional Groups groups is completely optional.
Add a Group
DNSv3 automatically contains two Groups groups - one Default Group to contain existing or imported zones, and a Templates Group, containing zones mimicking DNS Templatestemplates. Additional Groups groups may be added or removed at any time, and zones may be freely moved or duplicated between different groups as needed.
To create a new Group, from the DNS Tab, select the DNS Groups sub menu. Then, click the "Add Group" button next to "DNS Groups List".
...
| Expand | ||
|---|---|---|
| ||
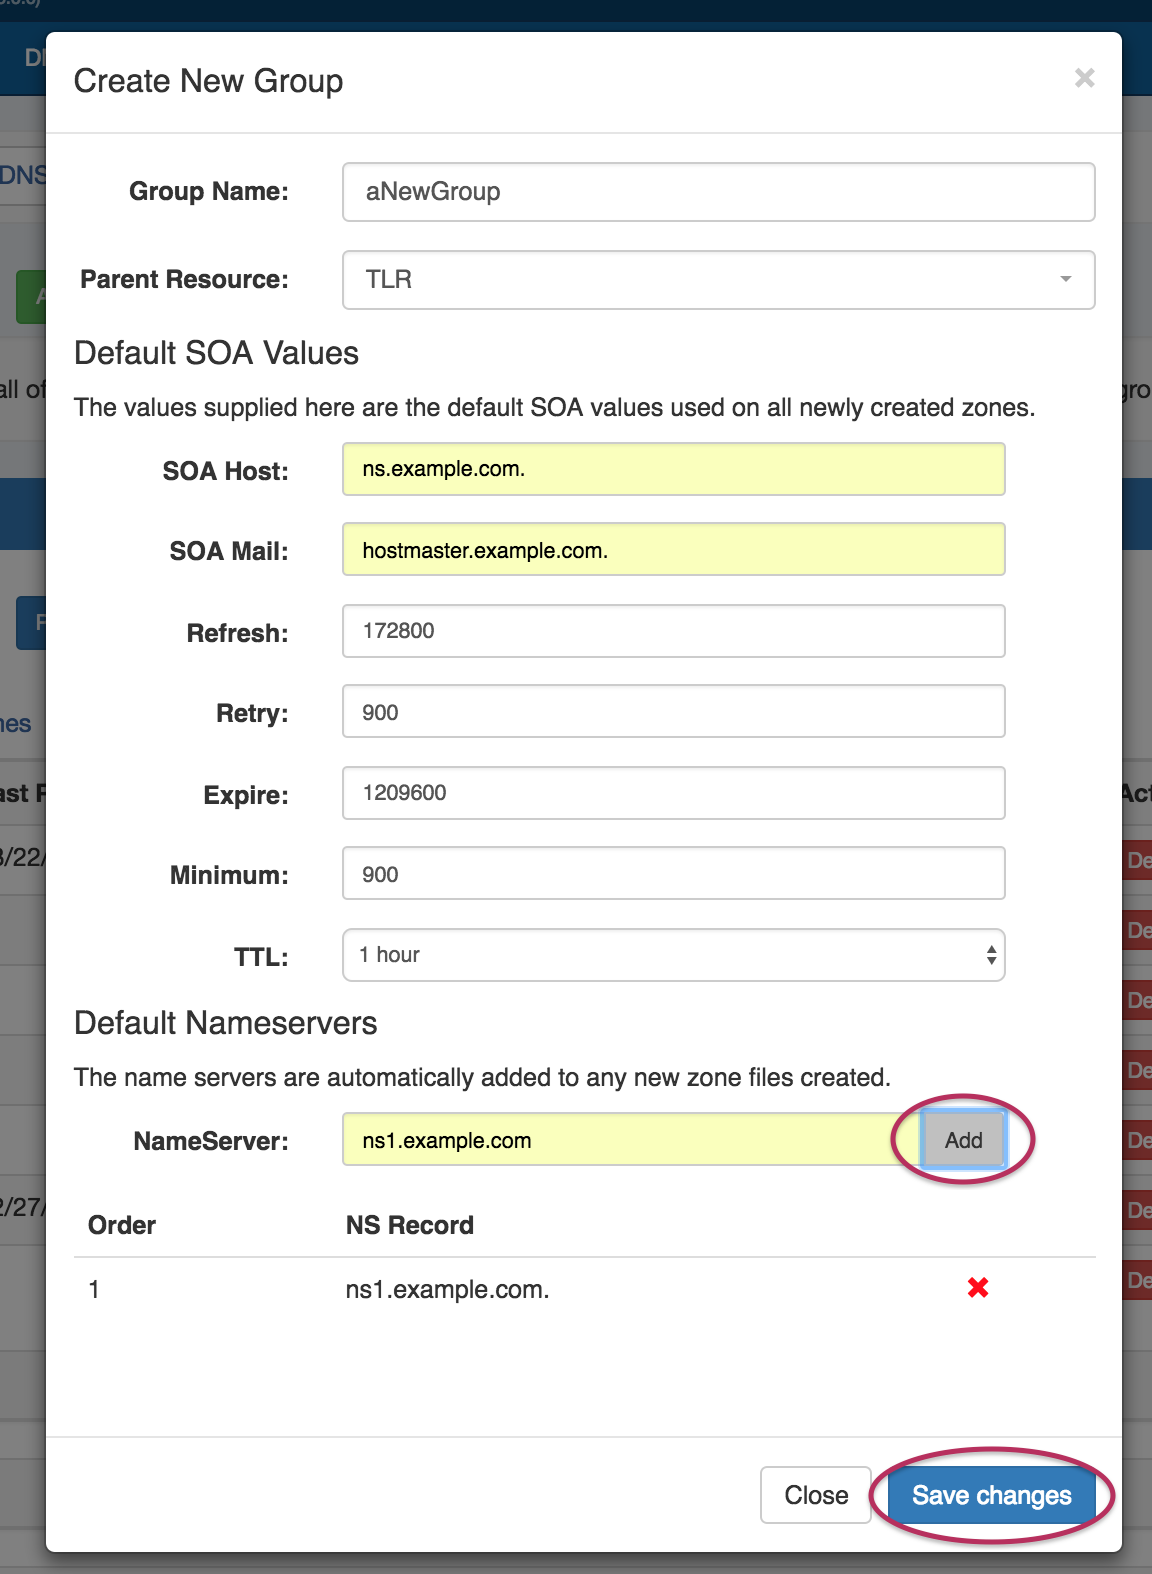
Create a GroupIn the "Create New Group" dialog, enter the desired Group Namegroup name, select a parent resource, enter the default SOA values, and add a default Nameserver (type the NS, then click "Add").
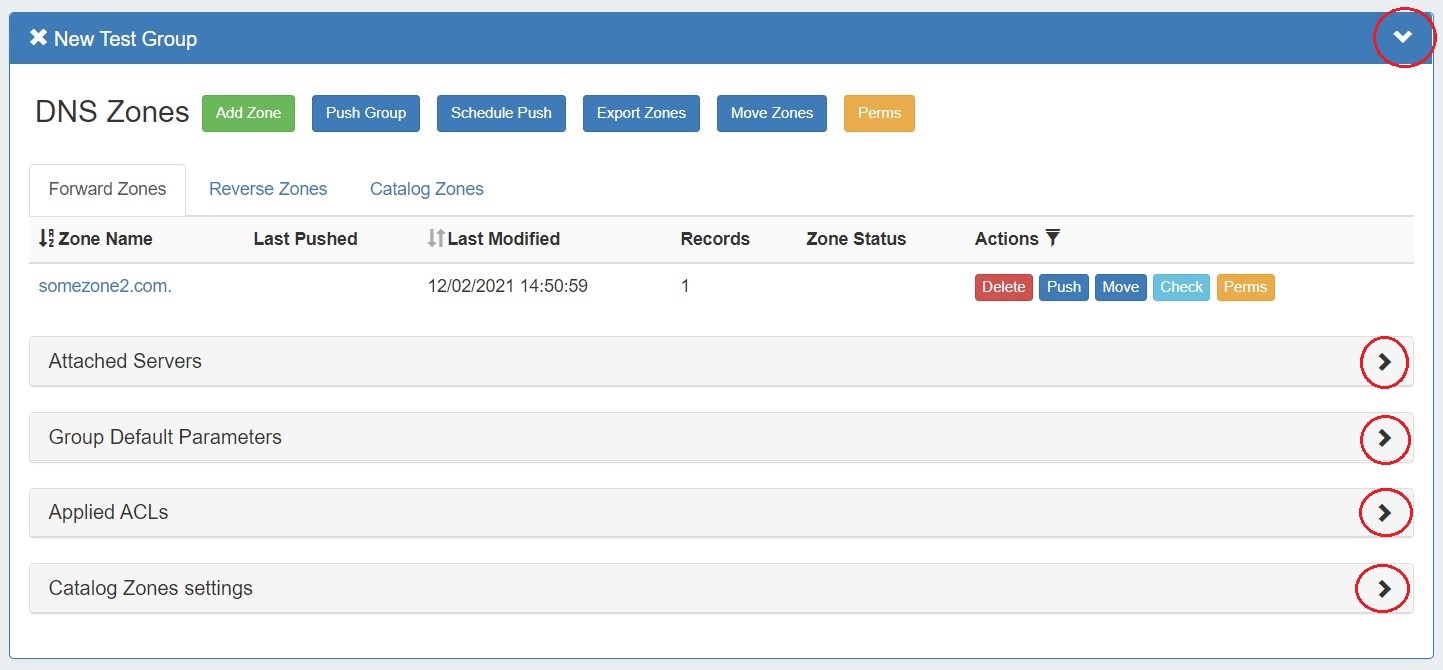
Click the "Save Changes" button when complete. The new group will be added to the DNS Groups List. Navigating a GroupOpen the Group group container for the new Group group by clicking on the expansion arrow at the top right corner of the header. Information for Attached Servers, Group Default Parameters, Applied ACLs, and Catalog Zones settings may also be viewed and edited by clicking on the expansion arrows for each section.
|
...
Edit a Group Name
Edit the name for a Group group by clicking inside the Groupgroup's Namename. A highlight box will appear around the name, and a cursor inside the box.
...
- TLR Admin permissions
- Full permissions on both the DNS Serverserver(s) and the Parent Resource parent resource set for the DNS Groupgroup
If either condition is met, the user may view and attach/detach the applicable server(s) to a Groupgroup.
| Expand | ||
|---|---|---|
| ||
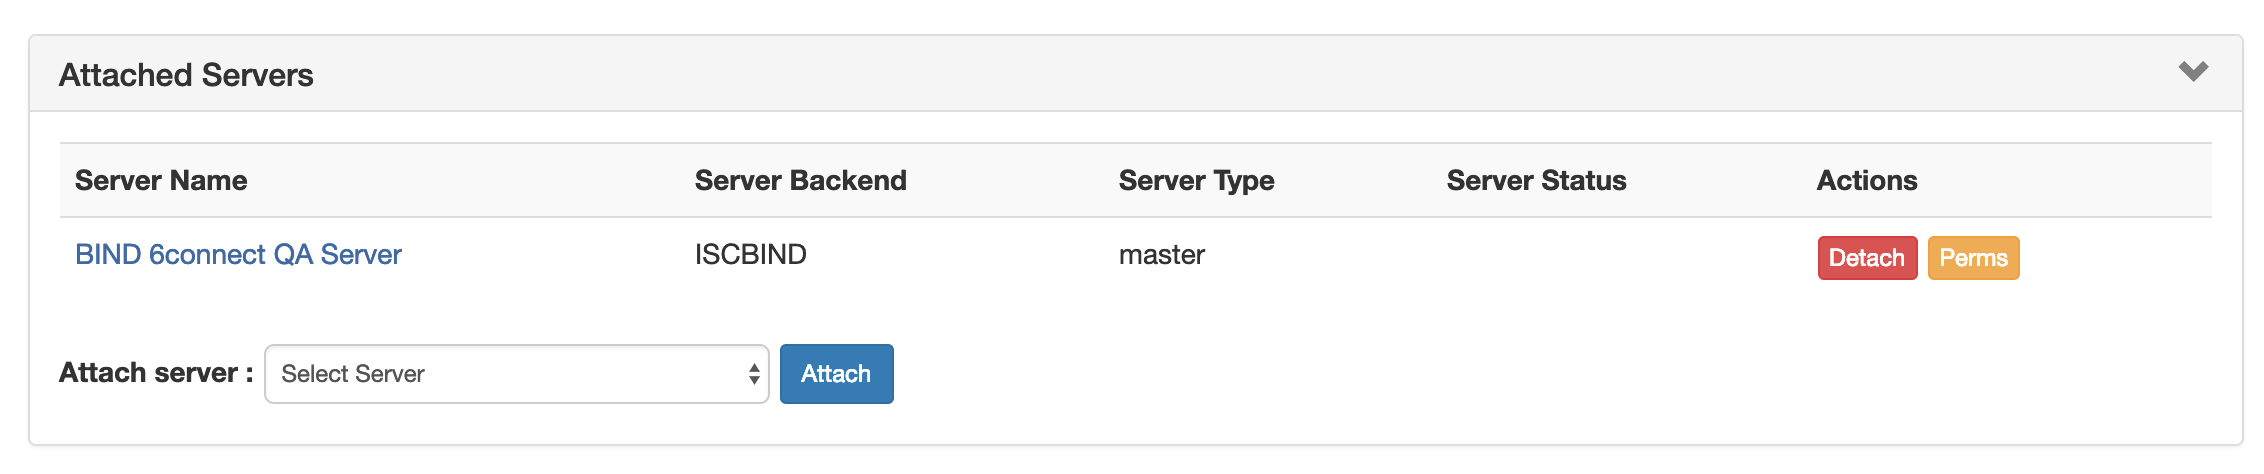
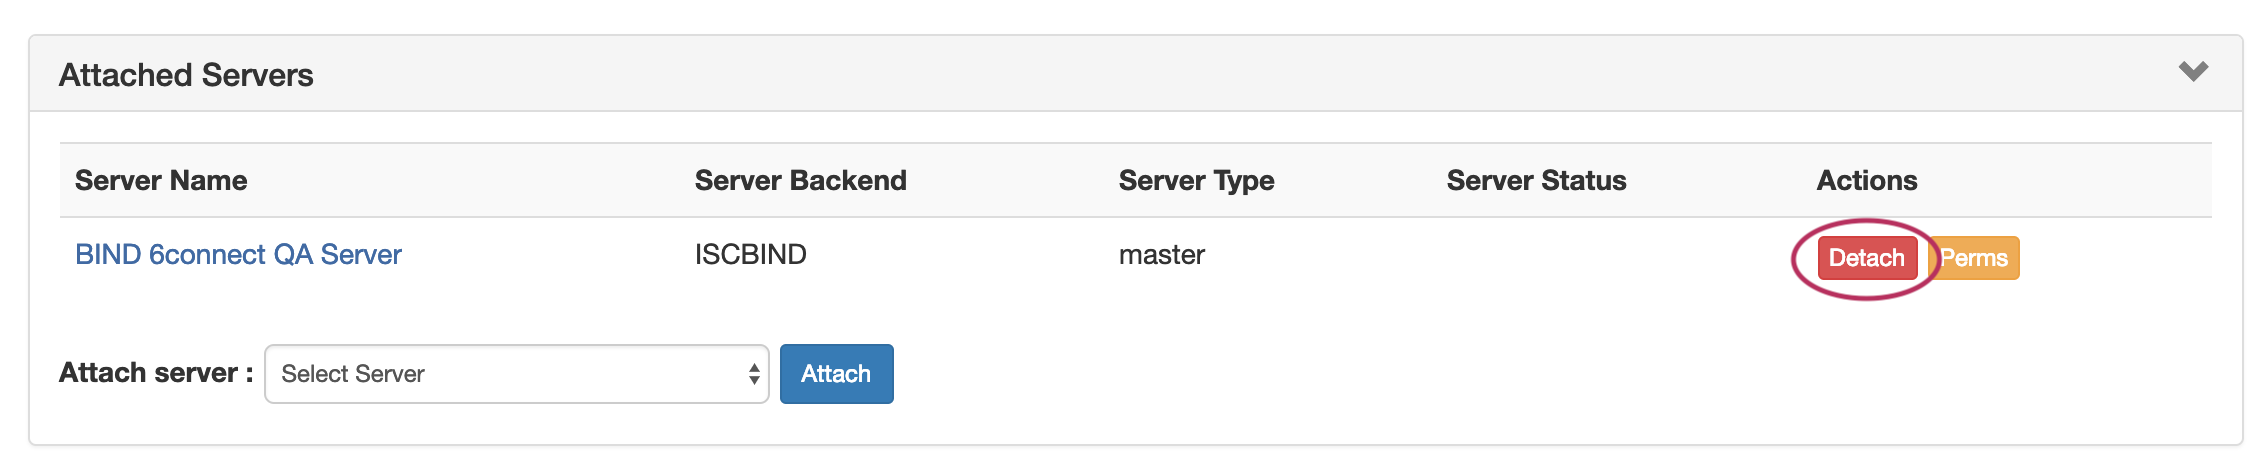
To attach a server, expand the "Attached Server" module, and click on the Attach Server list.
Select the desired server, then click "Attach".
The server is now attached to the group, and future zone and group pushes will be sent to the attached server.
From here, users have the option to Detach detach the server if desired, by clicking the "Detach" button. Admin users may edit pemissions for permissions for the server using the "Perms" button, if desired (see: DNS Tab DNSv3 DNSv3 Permissions for additional information).
|


Edit a Group's Default Parameter Values
Under the desired Groupgroup, expand the "Group Default Parameters" module by clicking on the expansion arrow.
...
Open the "Advanced Settings Inherited by the Zones" module by going to any DNS Group group and opening the "Group Default Parameters".
...
| Expand | |||||
|---|---|---|---|---|---|
| |||||
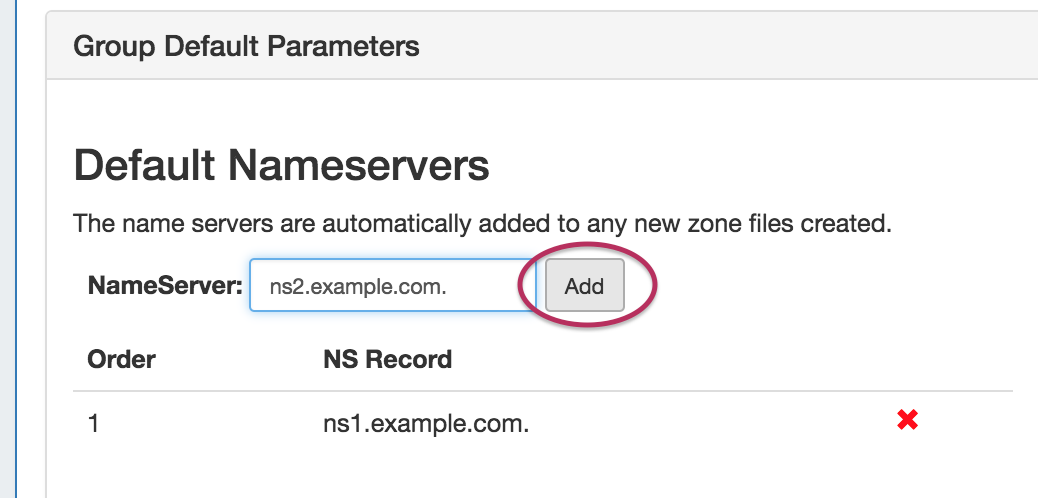
Change a Nameserver by typing the new NS record into the Nameserver box, then click "Add".
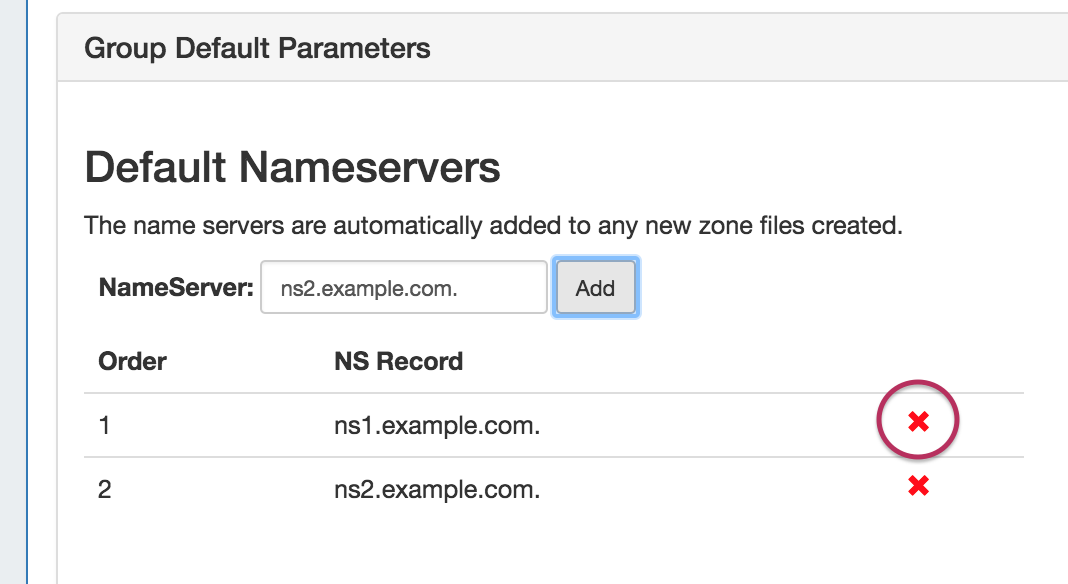
Delete the previous Nameserver by clicking on the red "X" to the right of the NS Recordrecord.
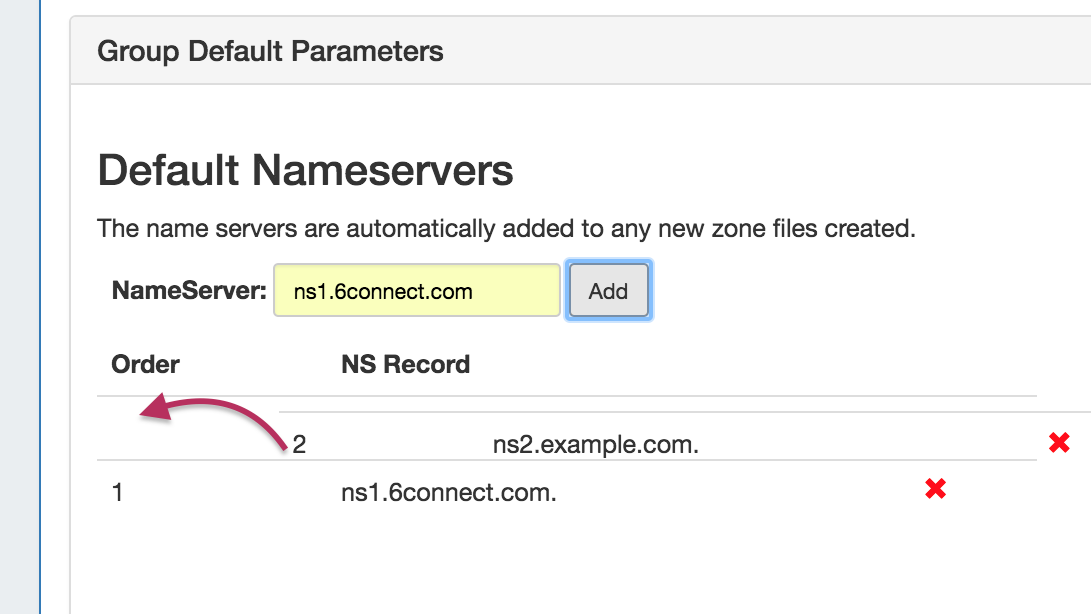
Change the order of multiple Nameservers by left-clicking (holding the mouse button down) over the NS Record record to move, dragging to its desired placement, then releasing the mouse button. The NS record will drop into its new location, with the order updated.
|
...
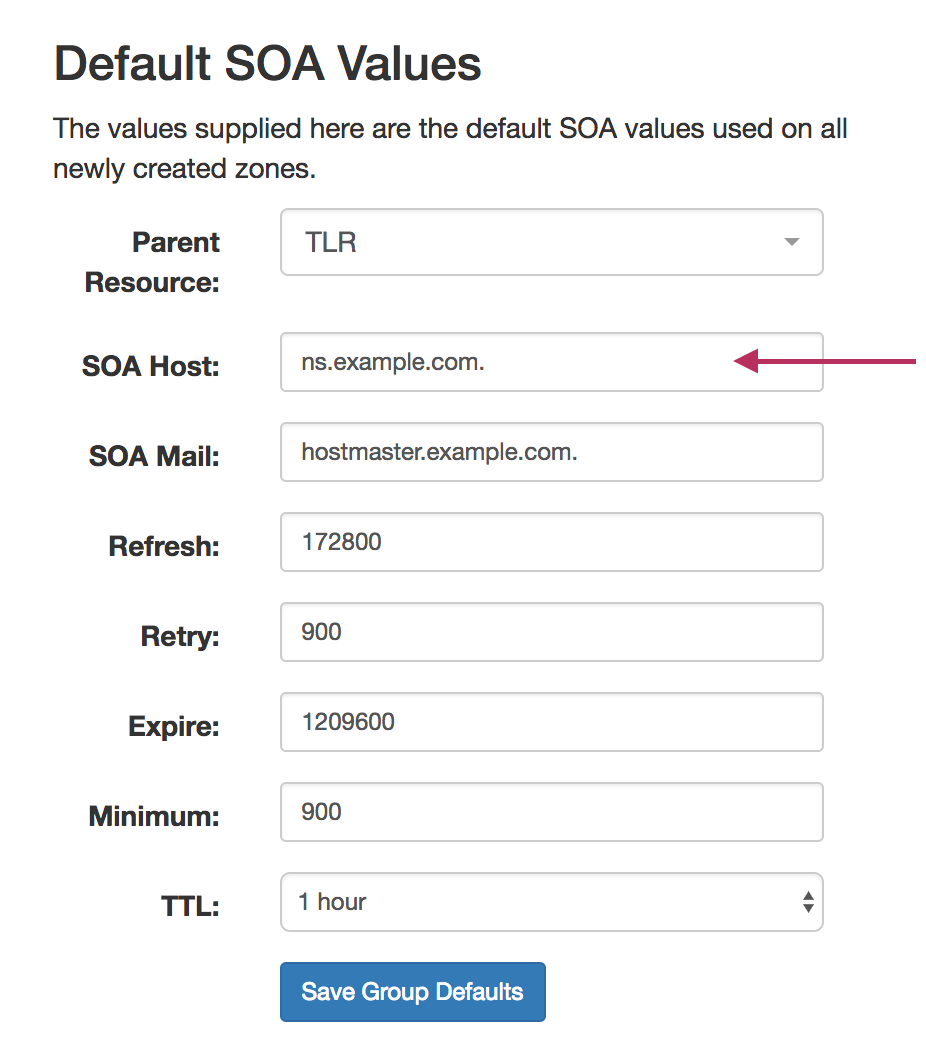
To edit the Default SOA values, simply click inside the value to be changed and type or select your new value. Be sure to also verify the desired Parent Resource parent resource for the Groupgroup, as the resource selected determines the Groupgroup's permissions.
Save Changes
...
Add Zones to a Group
To add a new zone to a Groupgroup, click the "Add Zone" button inside the desired Groupgroup.

Fill in the zone name, select a parent resource (by default, the Group group is selected), select a populate type, and fill in any optional fields.
...
- Under "Attached Servers", verify that the correct server is attached to the DNS Groupgroup.
- Under "Group Default Parameters" verify SOA Settings, Nameservers, and the Push Policy are set.
...
After verifying the attached server and group settings, manually push the Group group by clicking the "Push Group" button under the desired Groupgroup.

A DNS Push Status window appears, showing each zone in the Group group as it is pushed to the attached server. If successful, a green "Finished DNS Pushing Request" will appear as the final message. If errors occur, an error message will show with details on the issue. When complete, hit the "Close" button.
...
Scheduled pushes may be set up through the "Schedule Push" button for the Groupgroup.

| Expand | ||
|---|---|---|
| ||
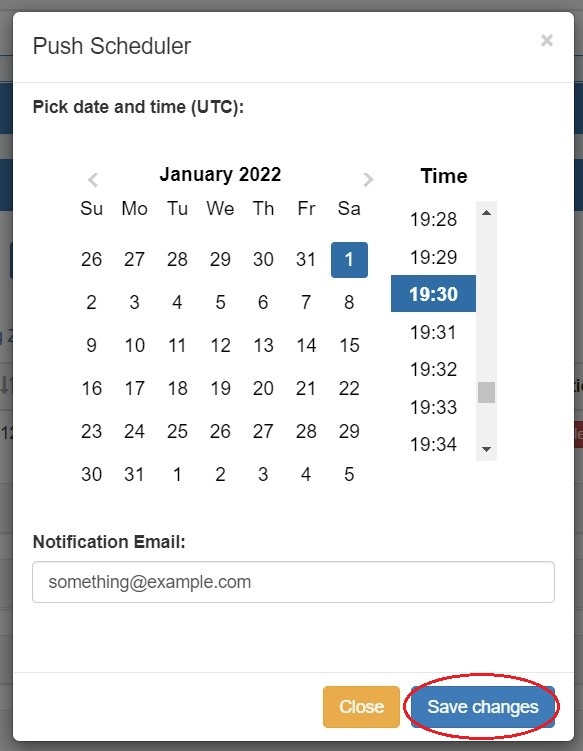
Click "Schedule Push" for the Groupgroup, then select a date, time (24 hour), add a notification email address, and click "Save changes".
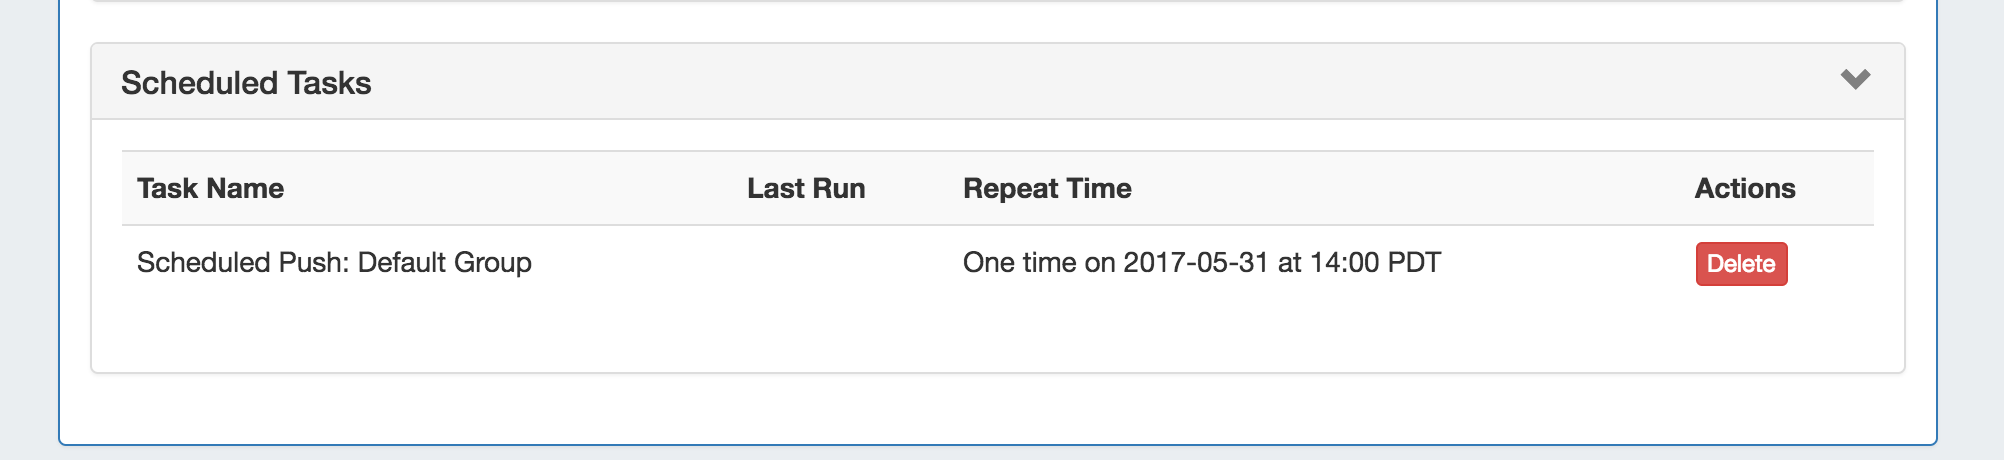
The Scheduled scheduled task will be shown in both the Group group details (under "Scheduled Tasks") and the Admin Scheduler task list.
The task may be deleted prior to running by clicking the "delete" button, but will automatically be removed once completed. |
...
Delete a non-Default Group by clicking on the "X" to the left of the Groupgroup's name in the DNS Groups List.
...
Export a Group
All zones under a DNS Group group may be exported to a .zip file by clicking the "Export Zones" button at the top of the Group group module.
The exported .zip file may be used with ProVision's BIND DNS Zone Upload / Import tool.

Move a Group
All zones under a DNS Group group may be moved to another group by clicking the "Move Zones" button at the top of the Group group module.

Using the Templates Group / Cloning Zones to a Group
...