...
| Expand | ||||||||||
|---|---|---|---|---|---|---|---|---|---|---|
| ||||||||||
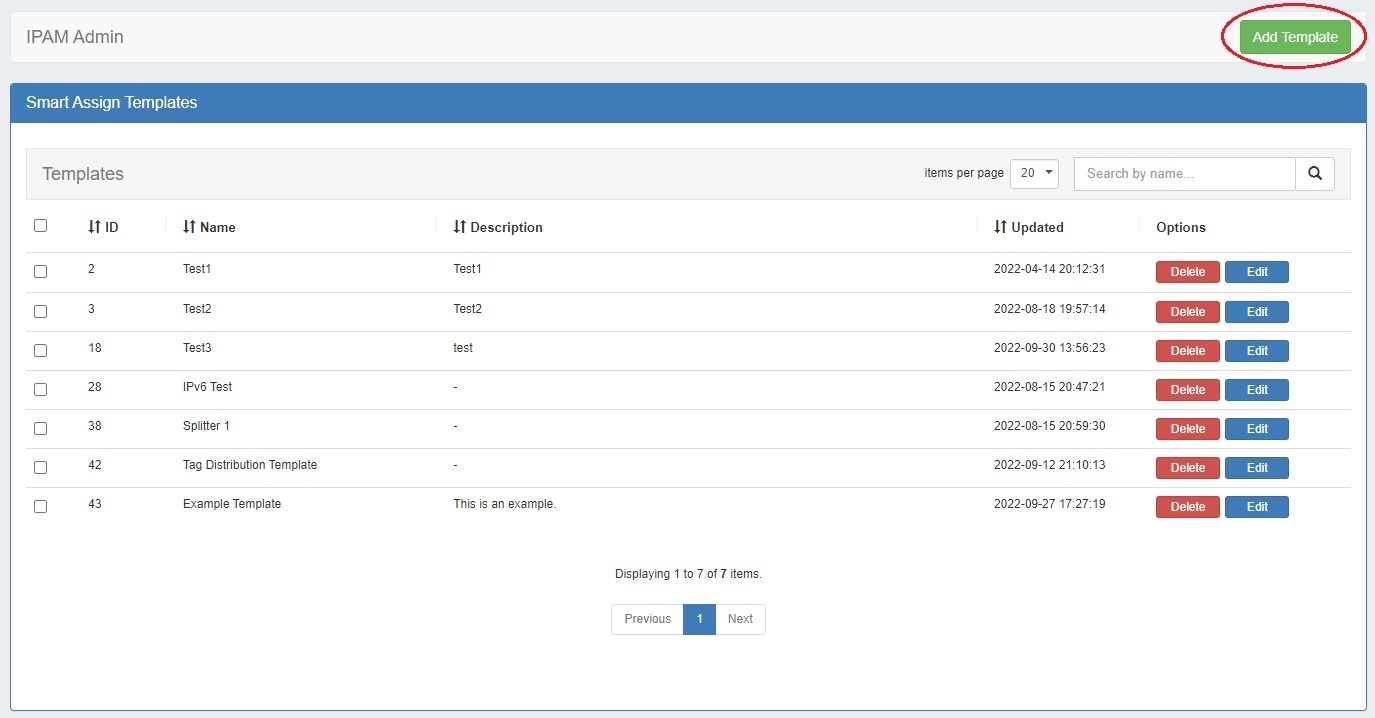
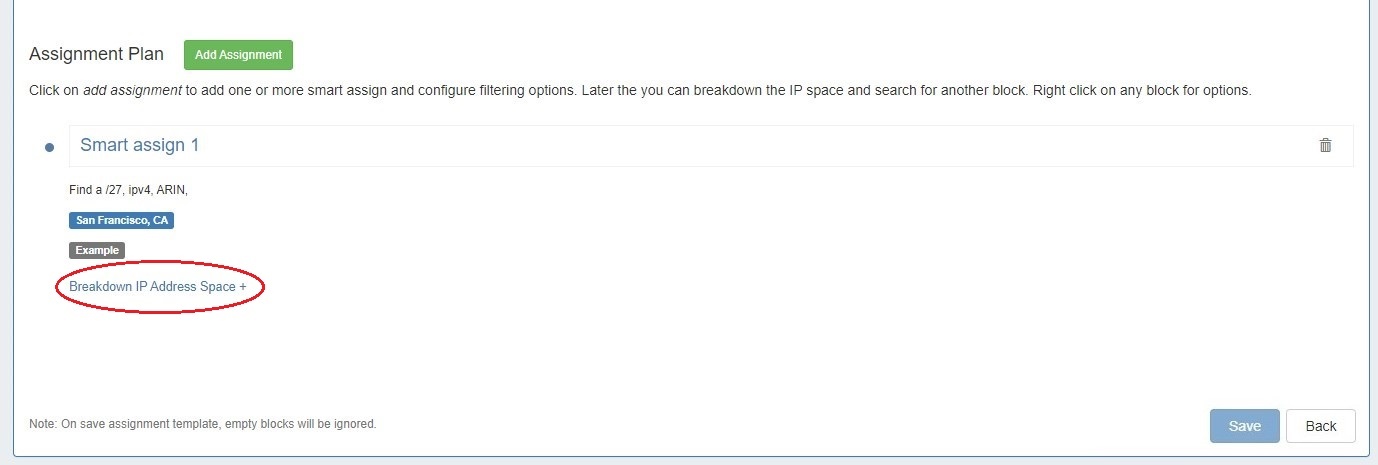
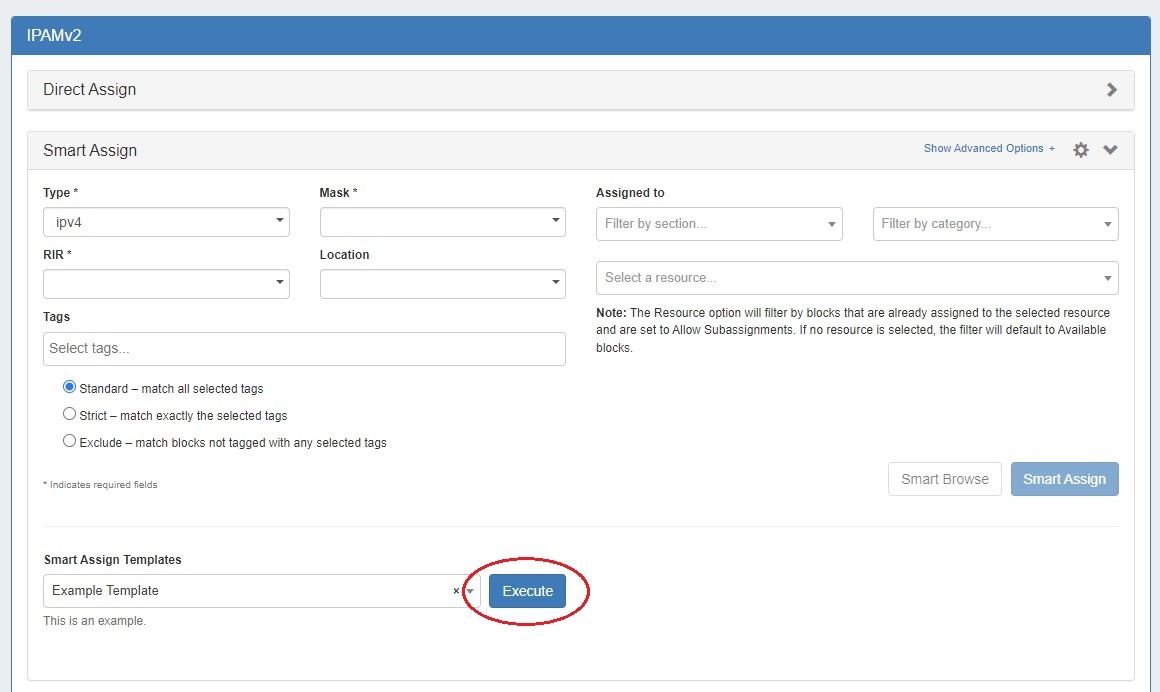
Creating a Smart Assign Template: To access Smart Assign Templates from the Admin section, select "Smart Assign Templates" from the IPAM Admin tab dropdown menu.
To create a new template click "Add Template" at upper right.
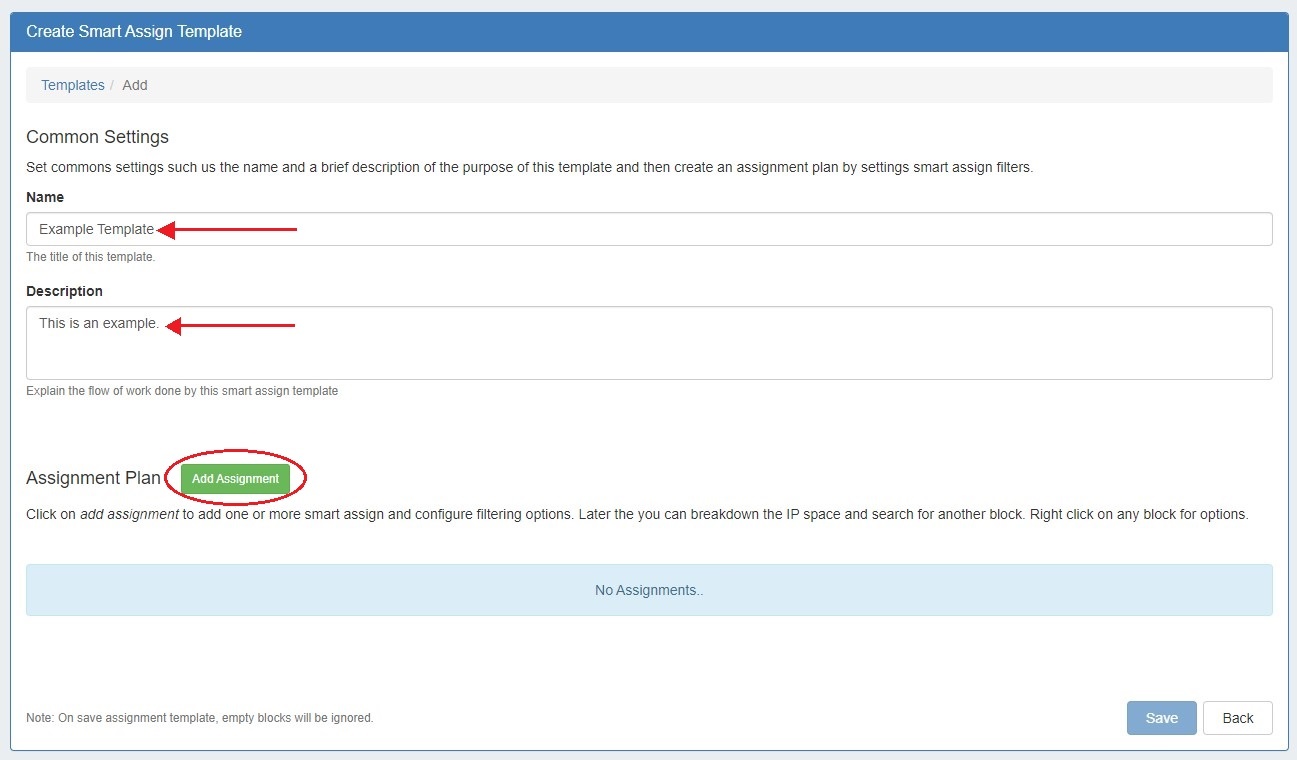
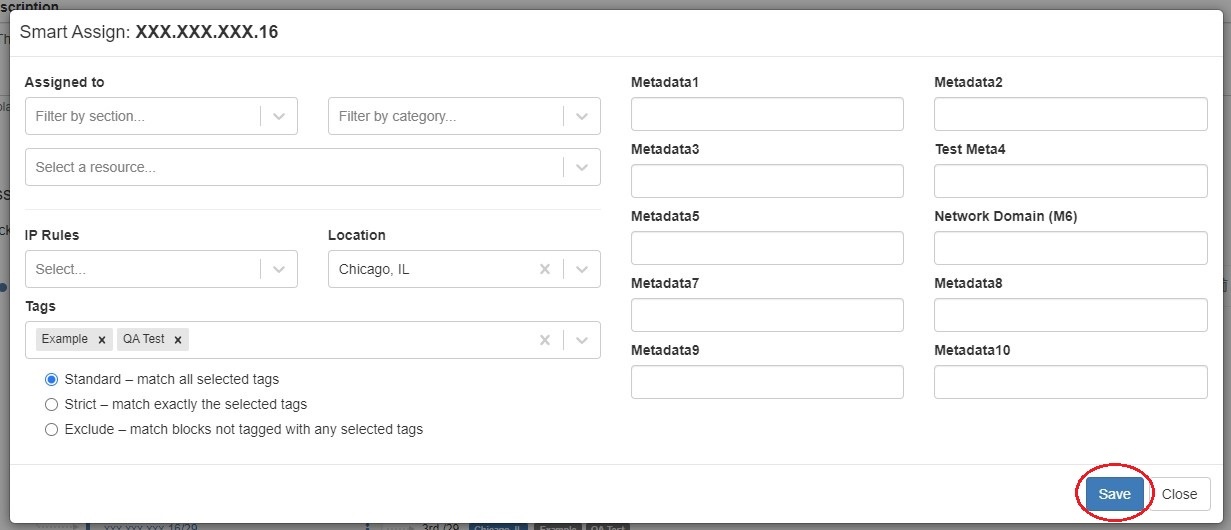
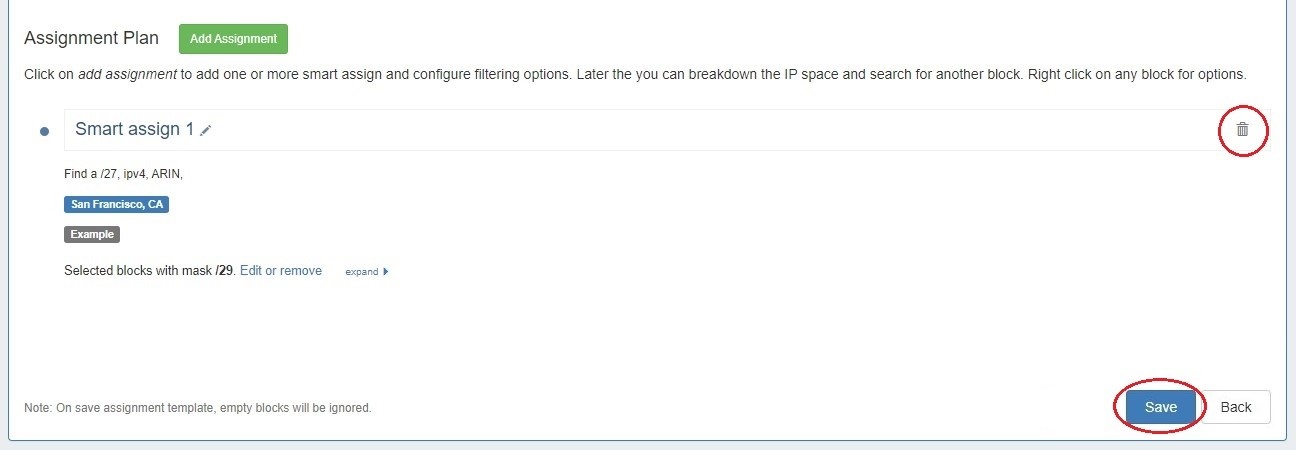
Enter a name and description for the new template then click "Add Assignment" to select Smart Assign criteria.
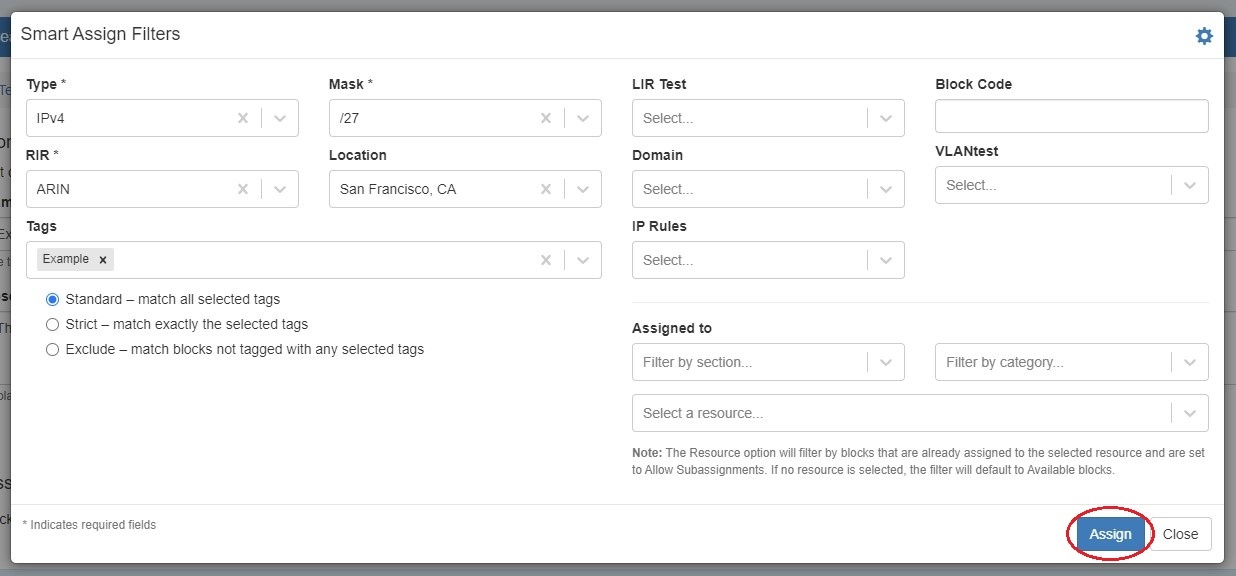
Select Smart Assign filter criteria and click "Assign".
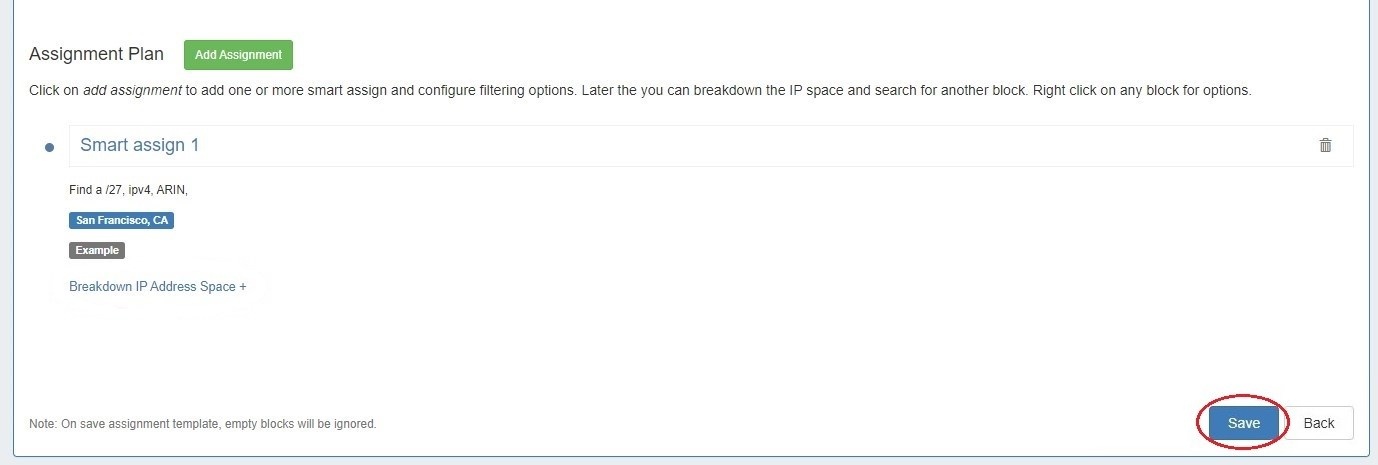
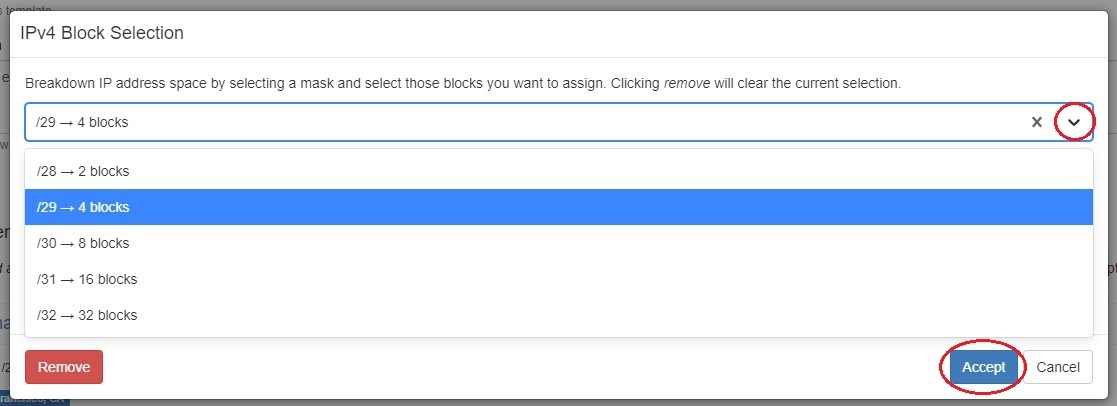
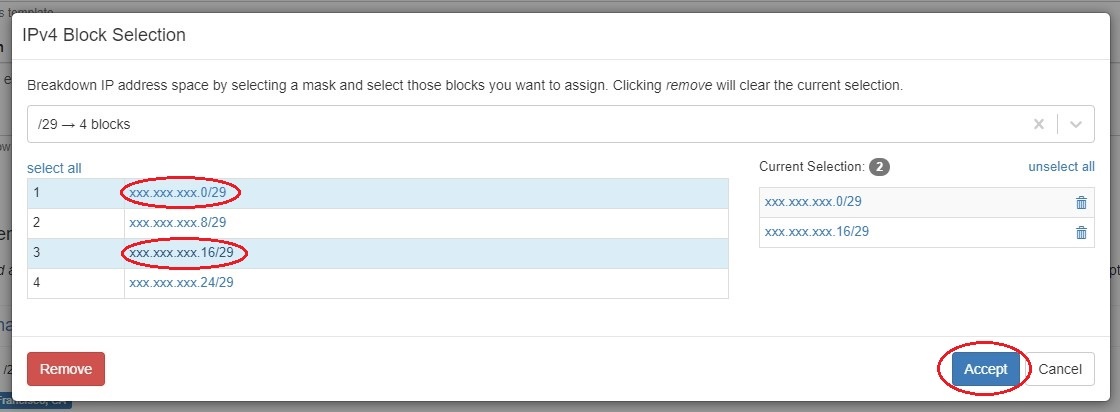
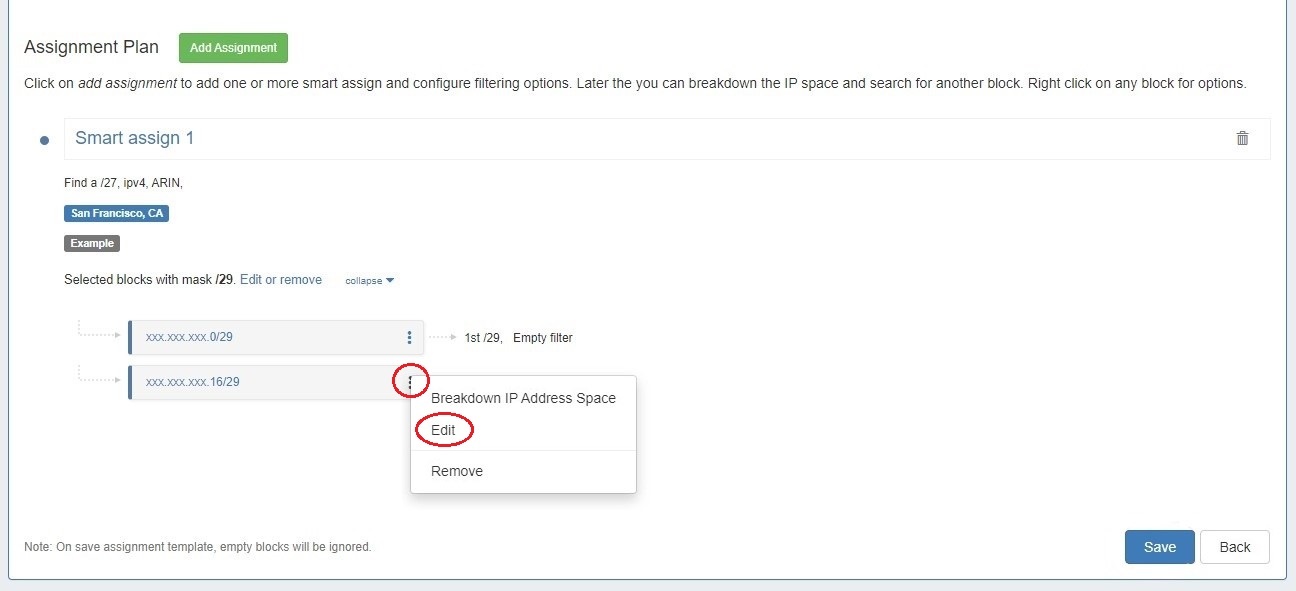
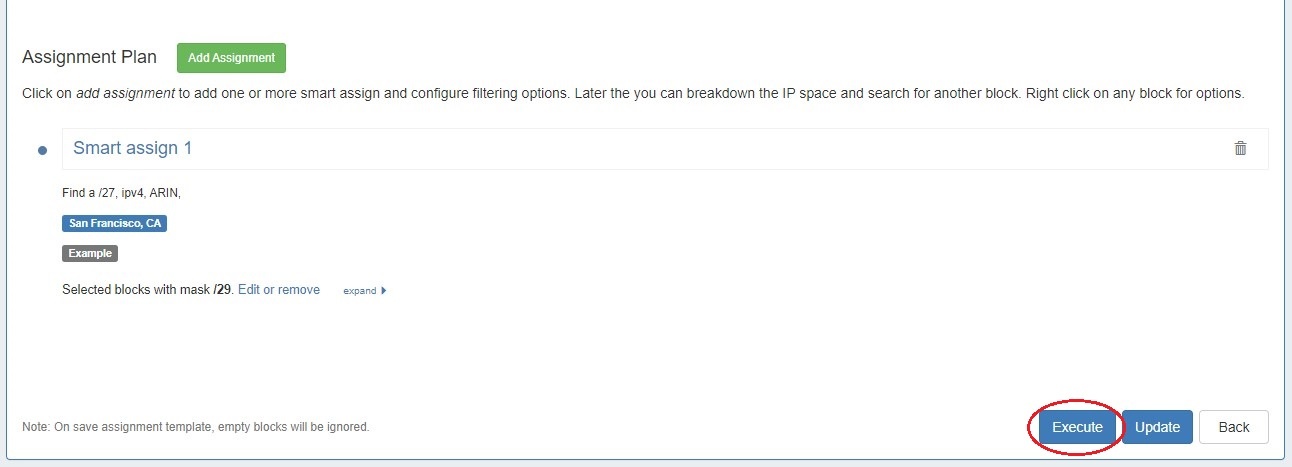
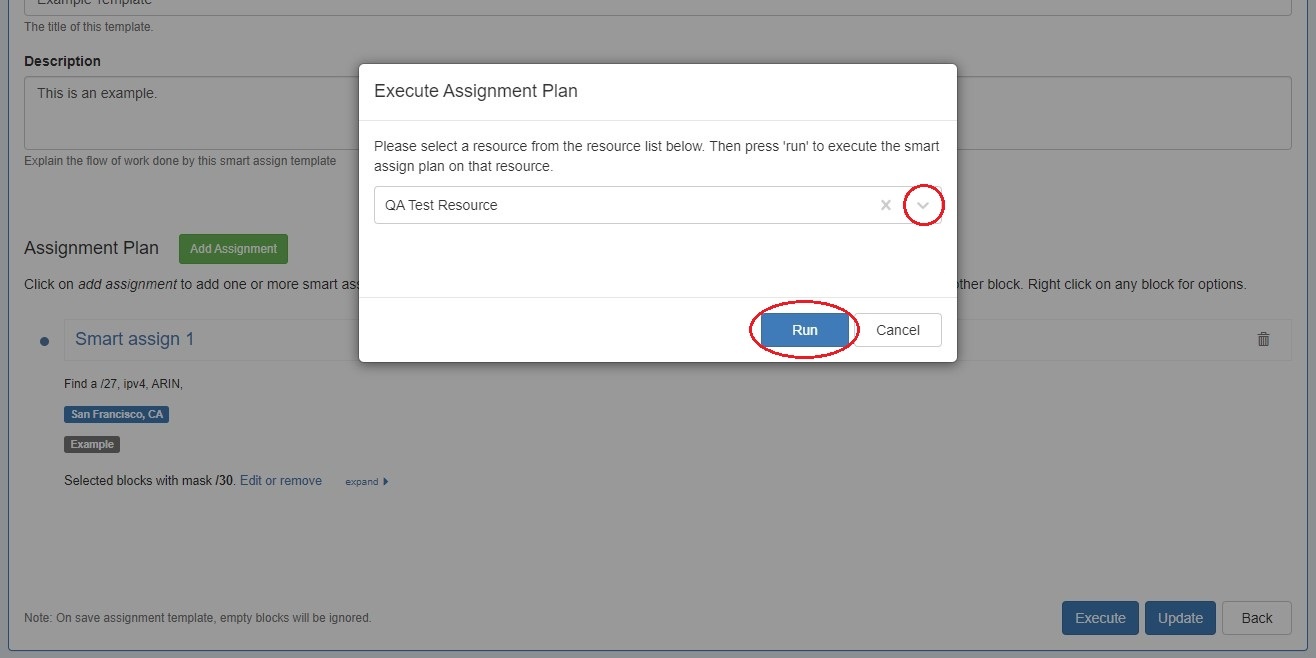
The template may be saved at this point by clicking "Save" at lower right. IP space may be broken down prior to saving or at a later time by editing the template.
|

IPAM Netblock Tree View
CFR - 251: Added "Netblock Tree" view to IPAM Manage
The "Netblock Tree" view in IPAM Manage displays the hierarchy organization of all Parent / Child blocks under that Top Level Aggregate. To open/close a parent block, click the expansion caret at the left side of the row.Note: Only blocks that also exist as leaf nodes in the Standard IPAM Manage view are editable in Netblock Tree view. , with levels denoted by assignment prefix.
Netblock Tree View displays the hierarchy organization of Parent / Child blocks under a Top Level Aggregate, but eliminates intermediate "bookkeeping" / allocated blocks, and prioritizes masks with assigned blocks. This provides a more effective view at the specific hierarchy levels used for assignments and management.
The Netblock Tree view detects which subnet masks have changes in assignments applied, and then automatically builds branches or displays individual addresses at those levels. This view includes the display of theoretical blocks which do not currently exist as ProVision objects, providing a more holistic working overview of the netblock structure.
While in Netblock Tree View, click on the expansion caret to expand / close a hierarchy branch parent block. Only blocks which exist in ProVision will be able to be edited or expanded.
Netblock Tree Logic:
- The top level at which an assignment exists denotes the top starting mask of the Netblock Tree View
- Proceeding down the tree, if one of the following conditions are detected, a new branch is created showing all blocks with a prefix at that level - regardless of of whether they exist as editable ProVision block objects.
- A change in assignment is detected (a block is assigned to a different resource than its parent )
- A manual split has been performed at the assignment level of a sibling/cousin block
- If no more changes in assignment are detected down the block tree, the lowest branch will display as containing individual addresses (/32s or /128s). The addresses may be both theoretical and those existing in ProVision.
- Expandable branches display with blue arrows, and denote that the block with that prefix also exists in ProVision → Block View
- Blocks and addresses which exist in ProVision will be editable in Netblock Tree View, but theoretical blocks at any level are not editable unless created in ProVision.
Expand the walkthrough below for a more detailed explanation the Netblock Tree View:
| Expand | ||
|---|---|---|
| ||
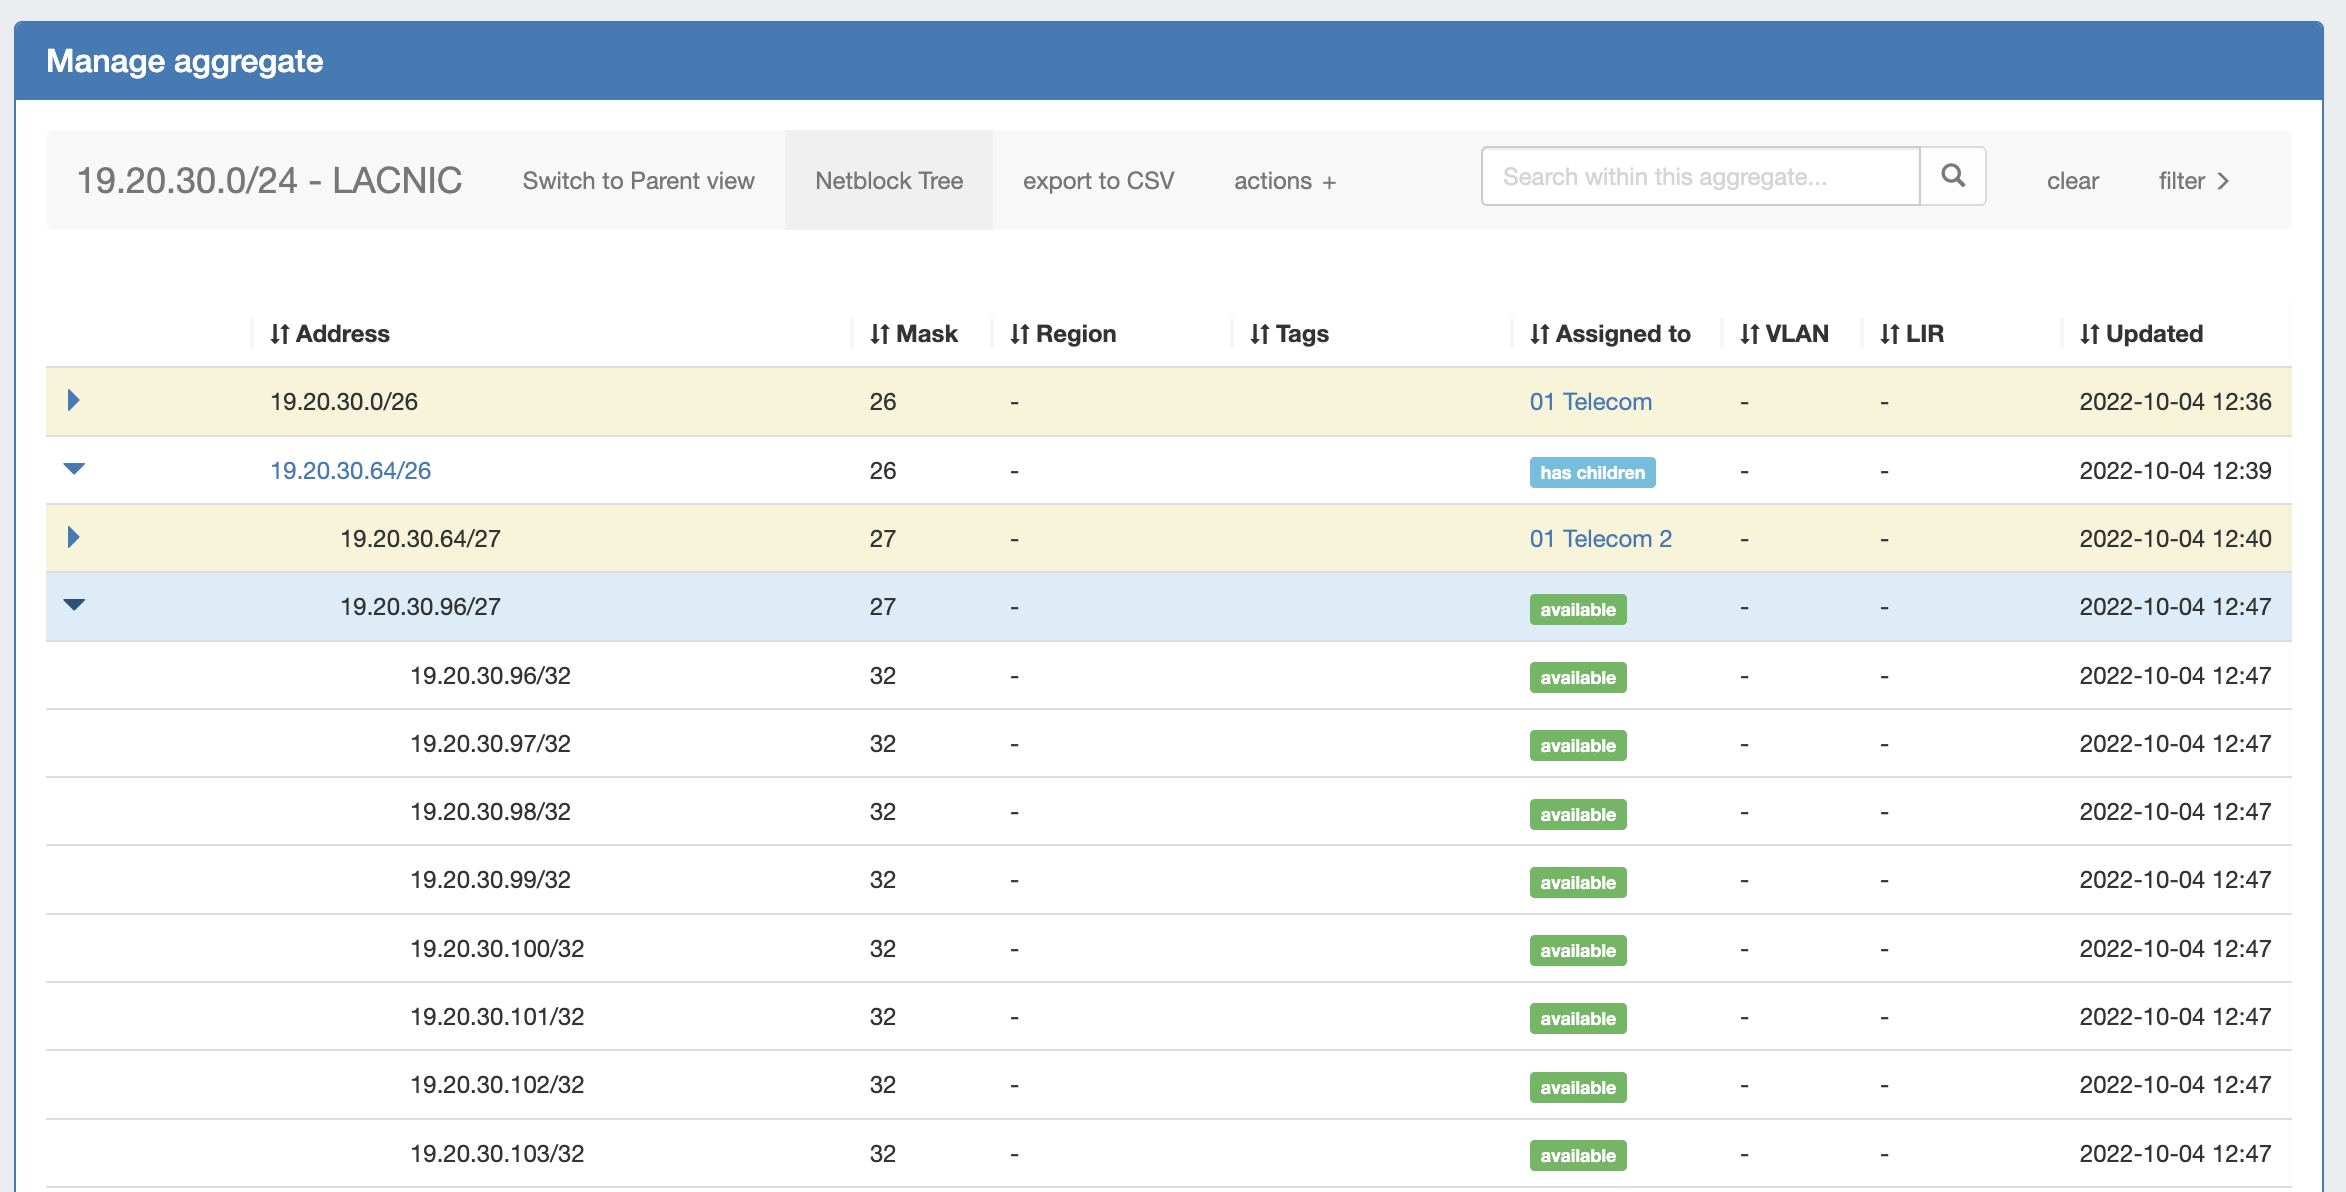
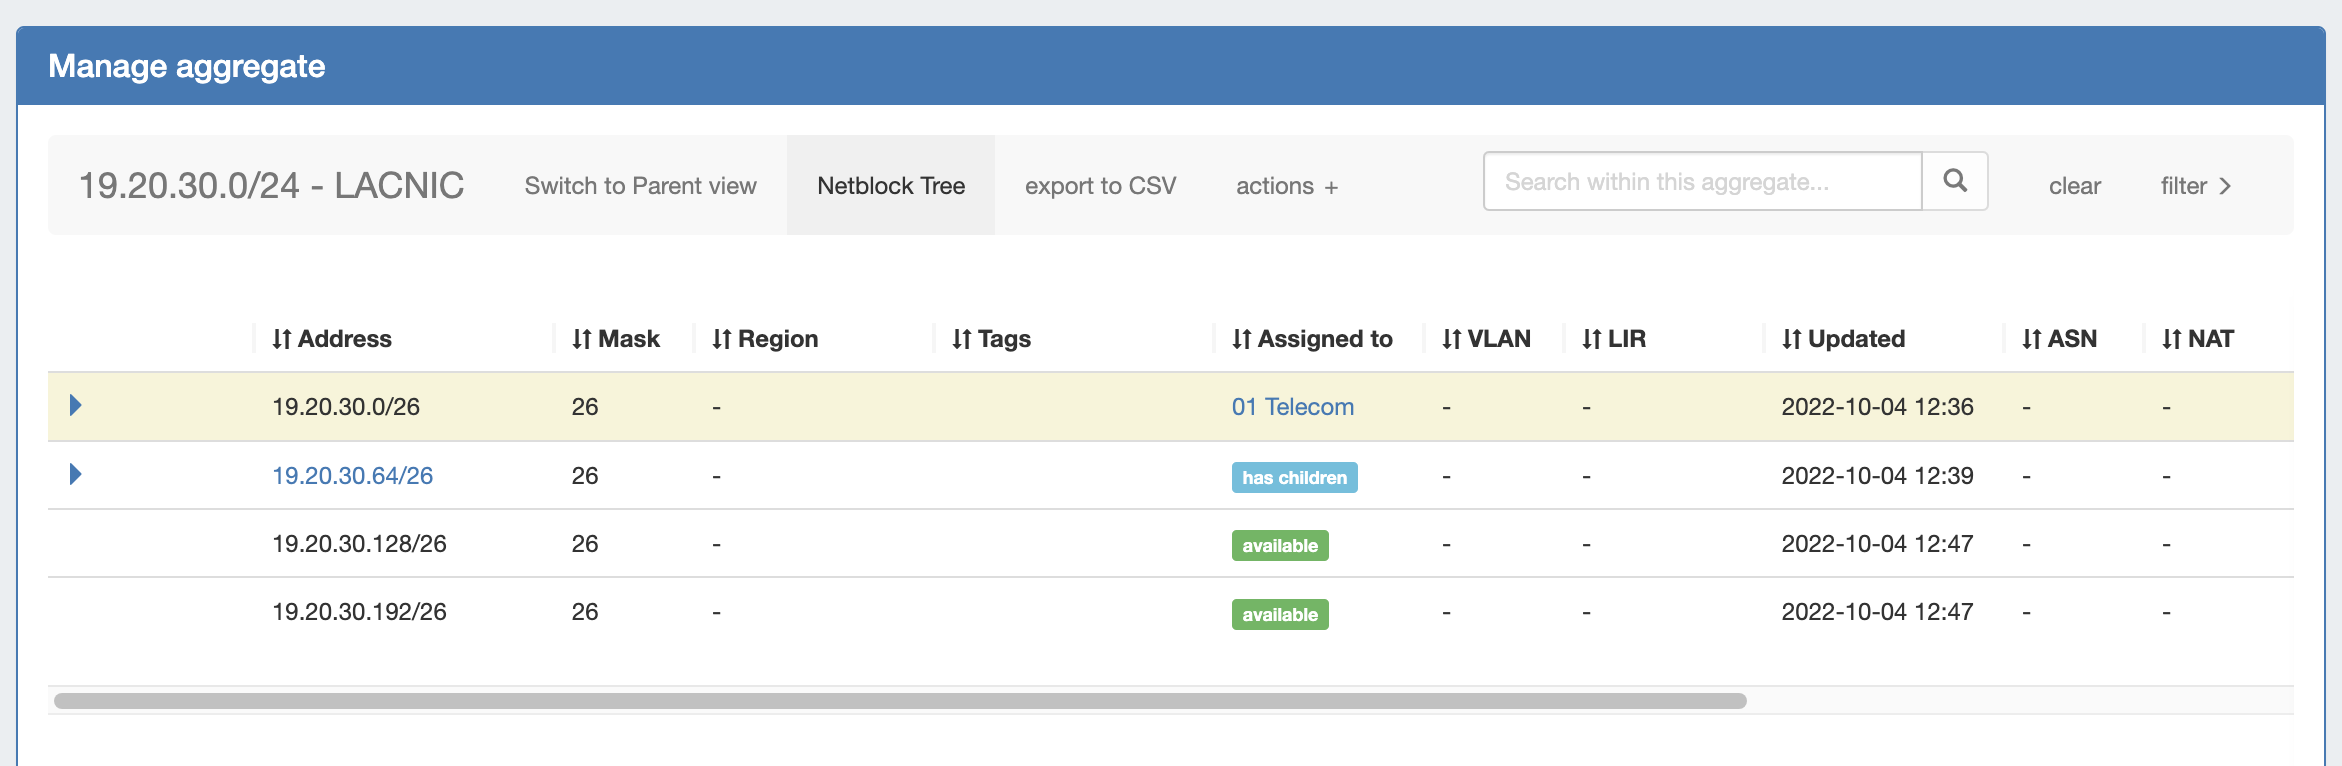
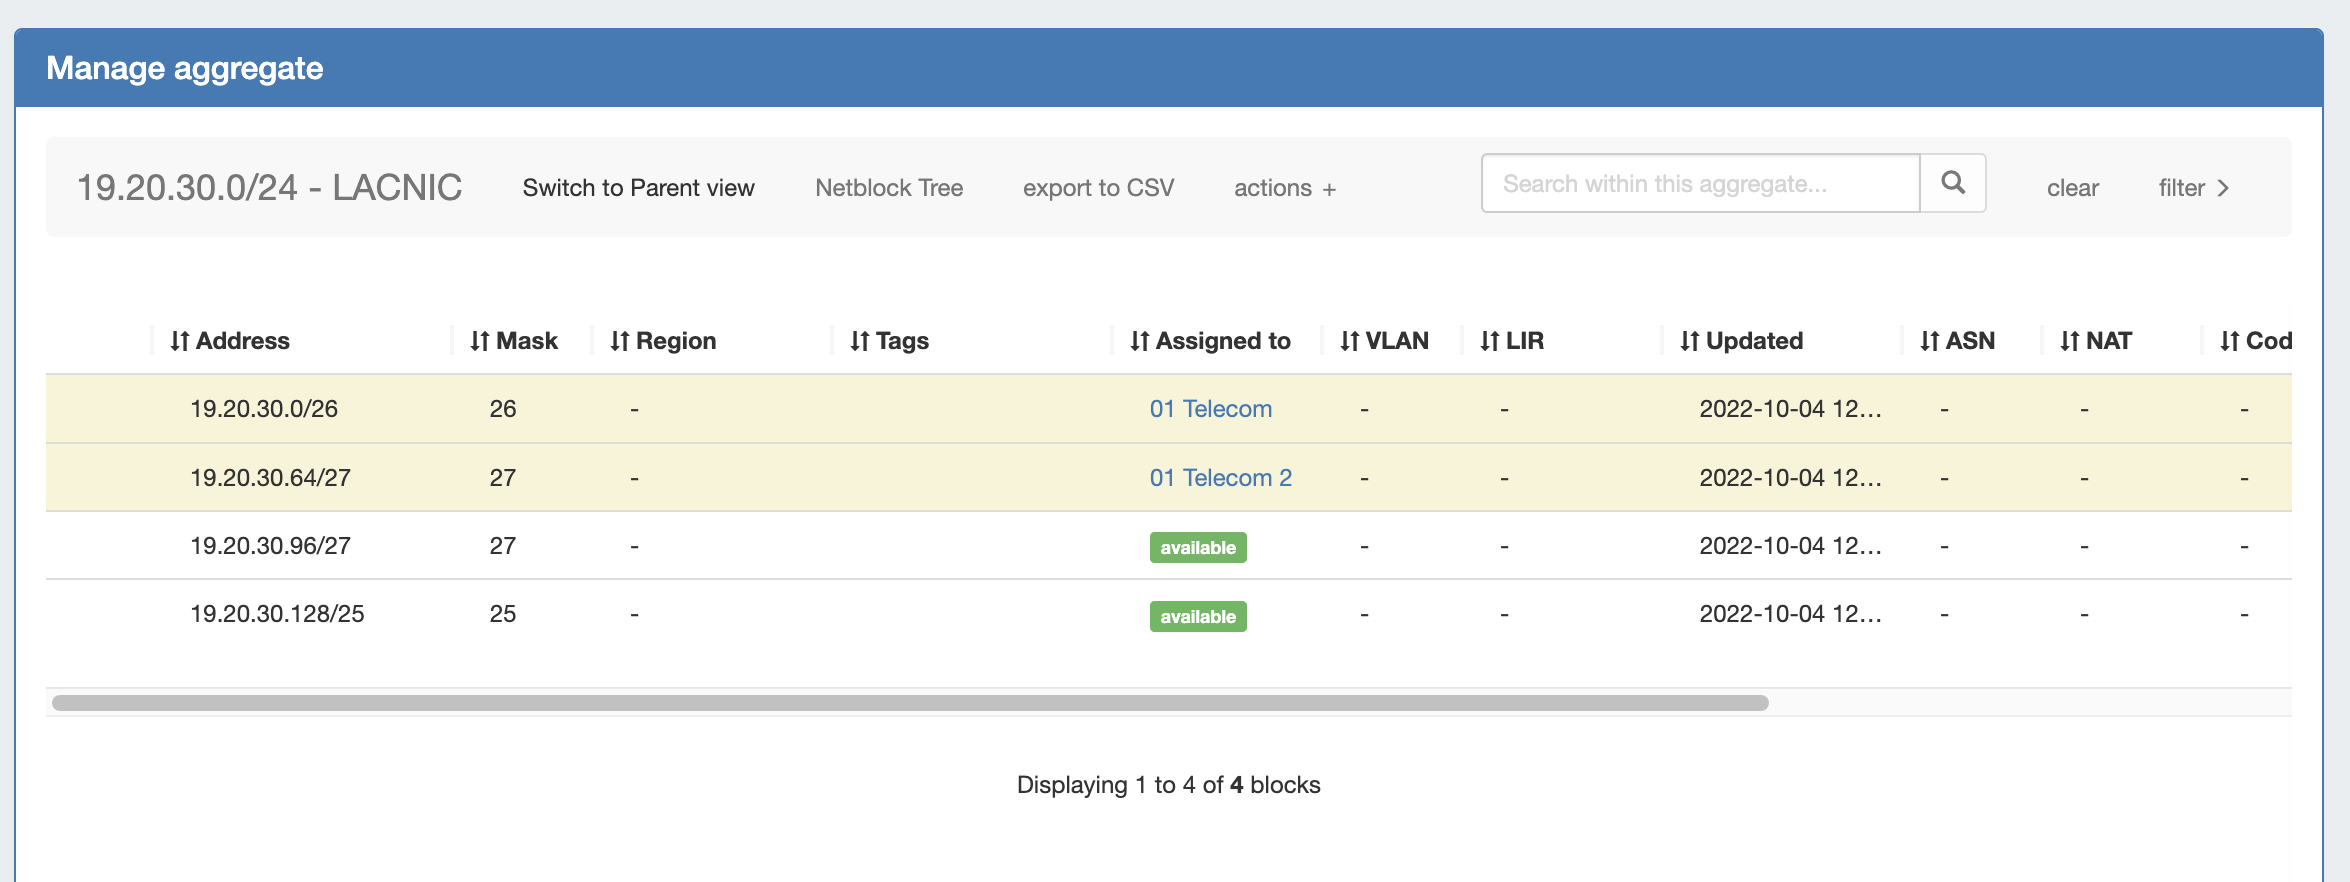
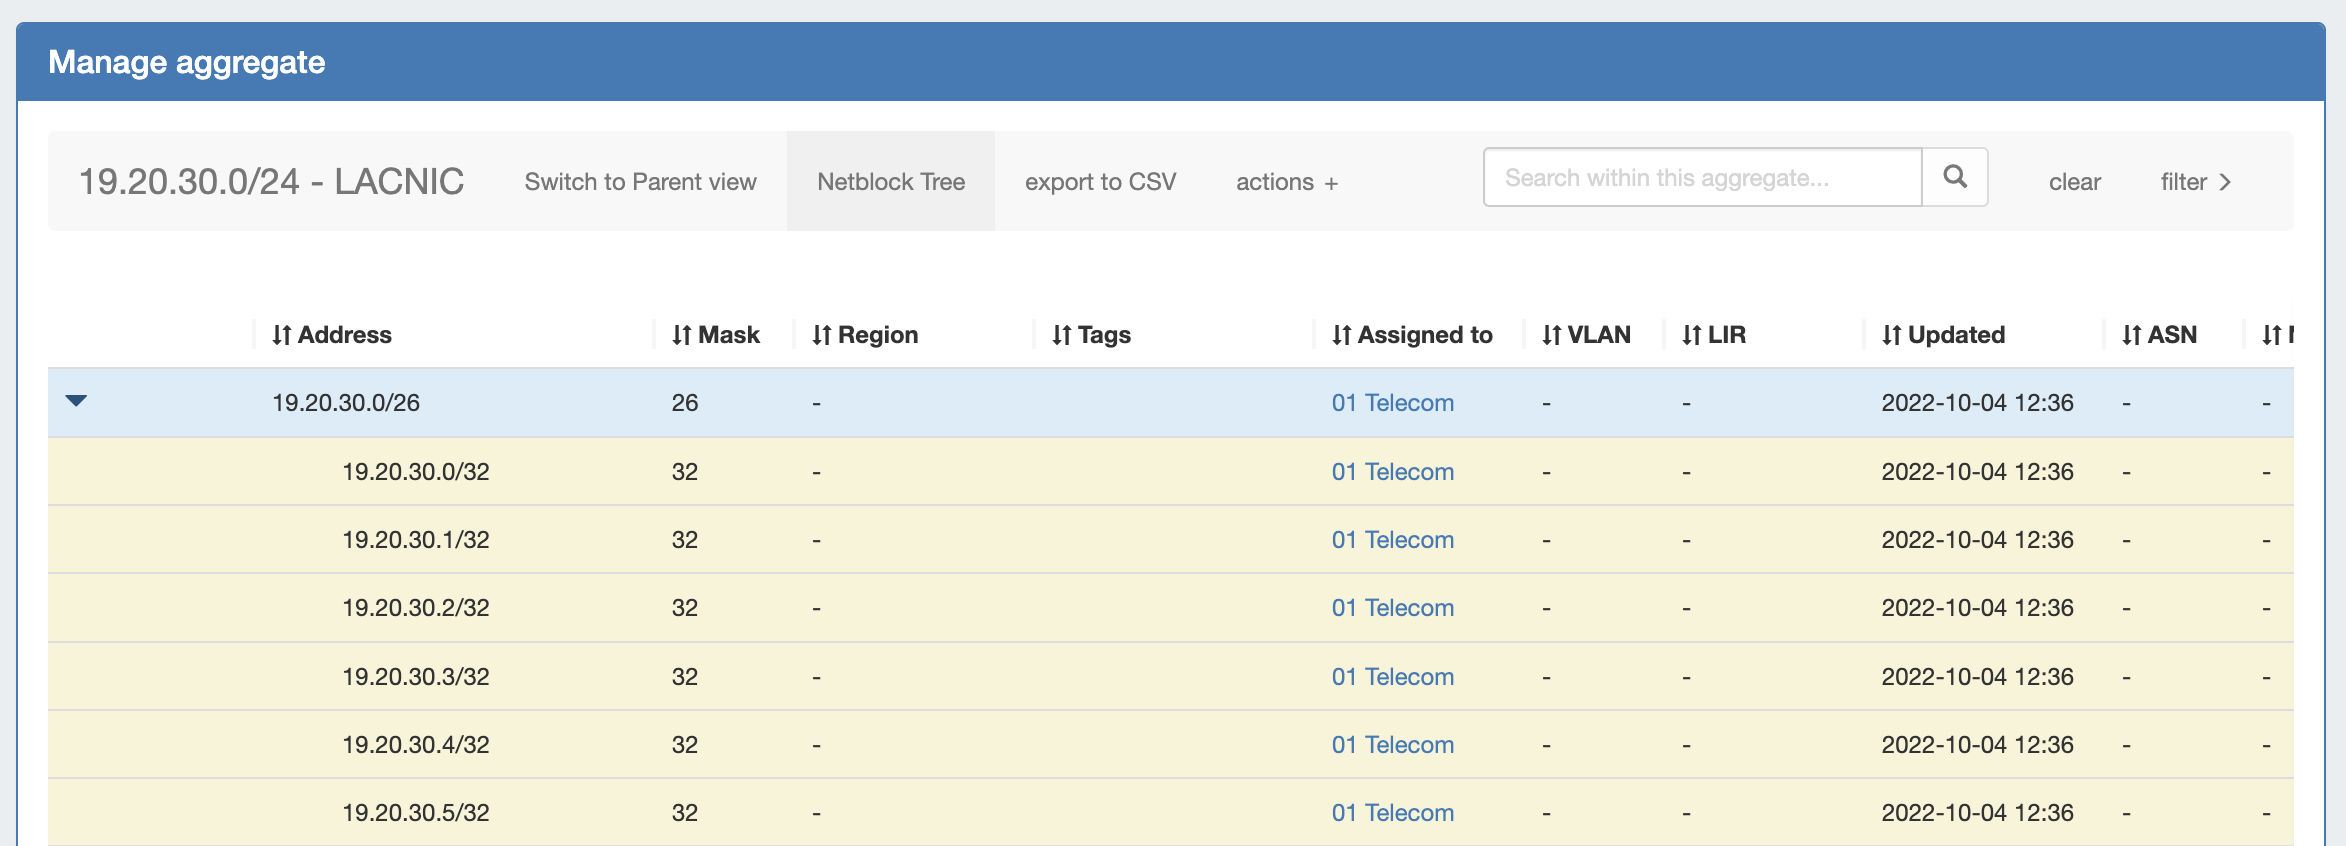
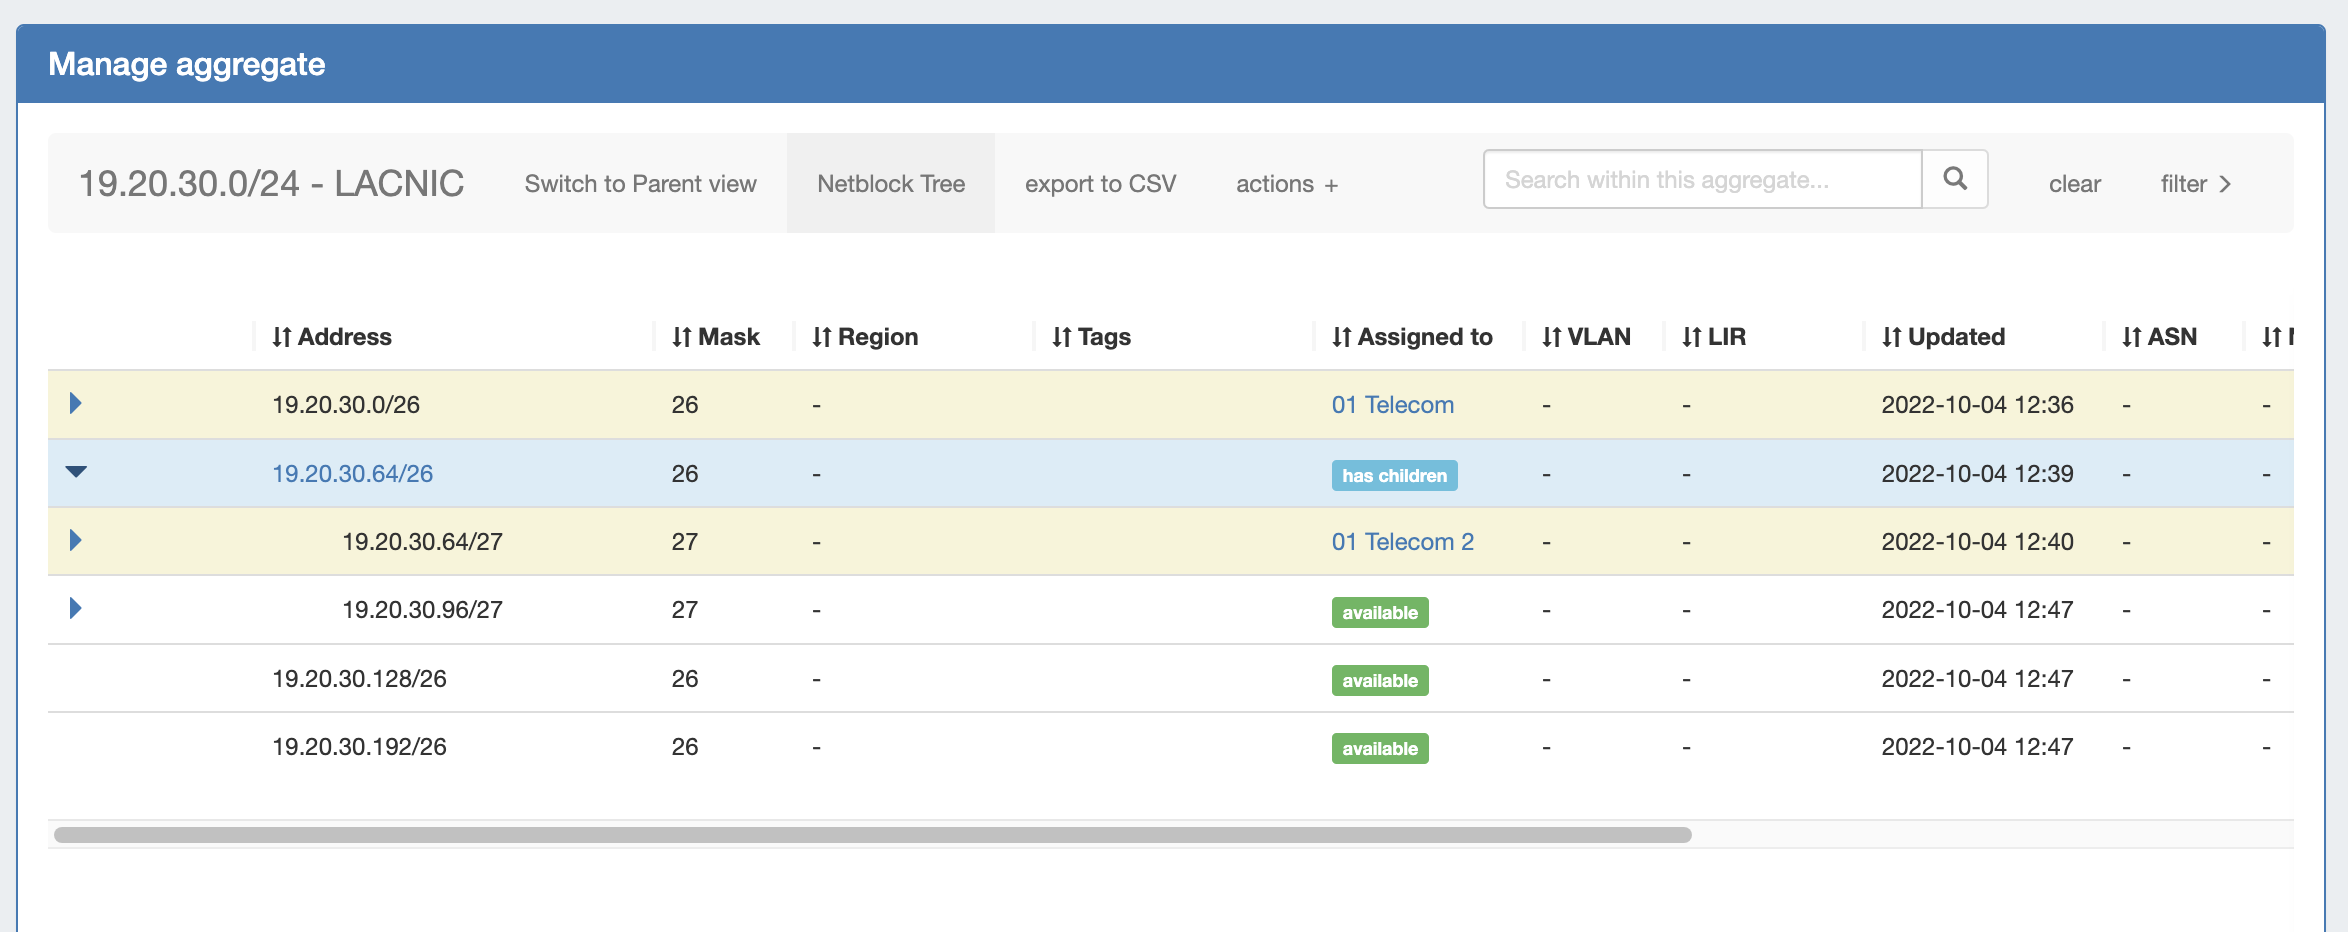
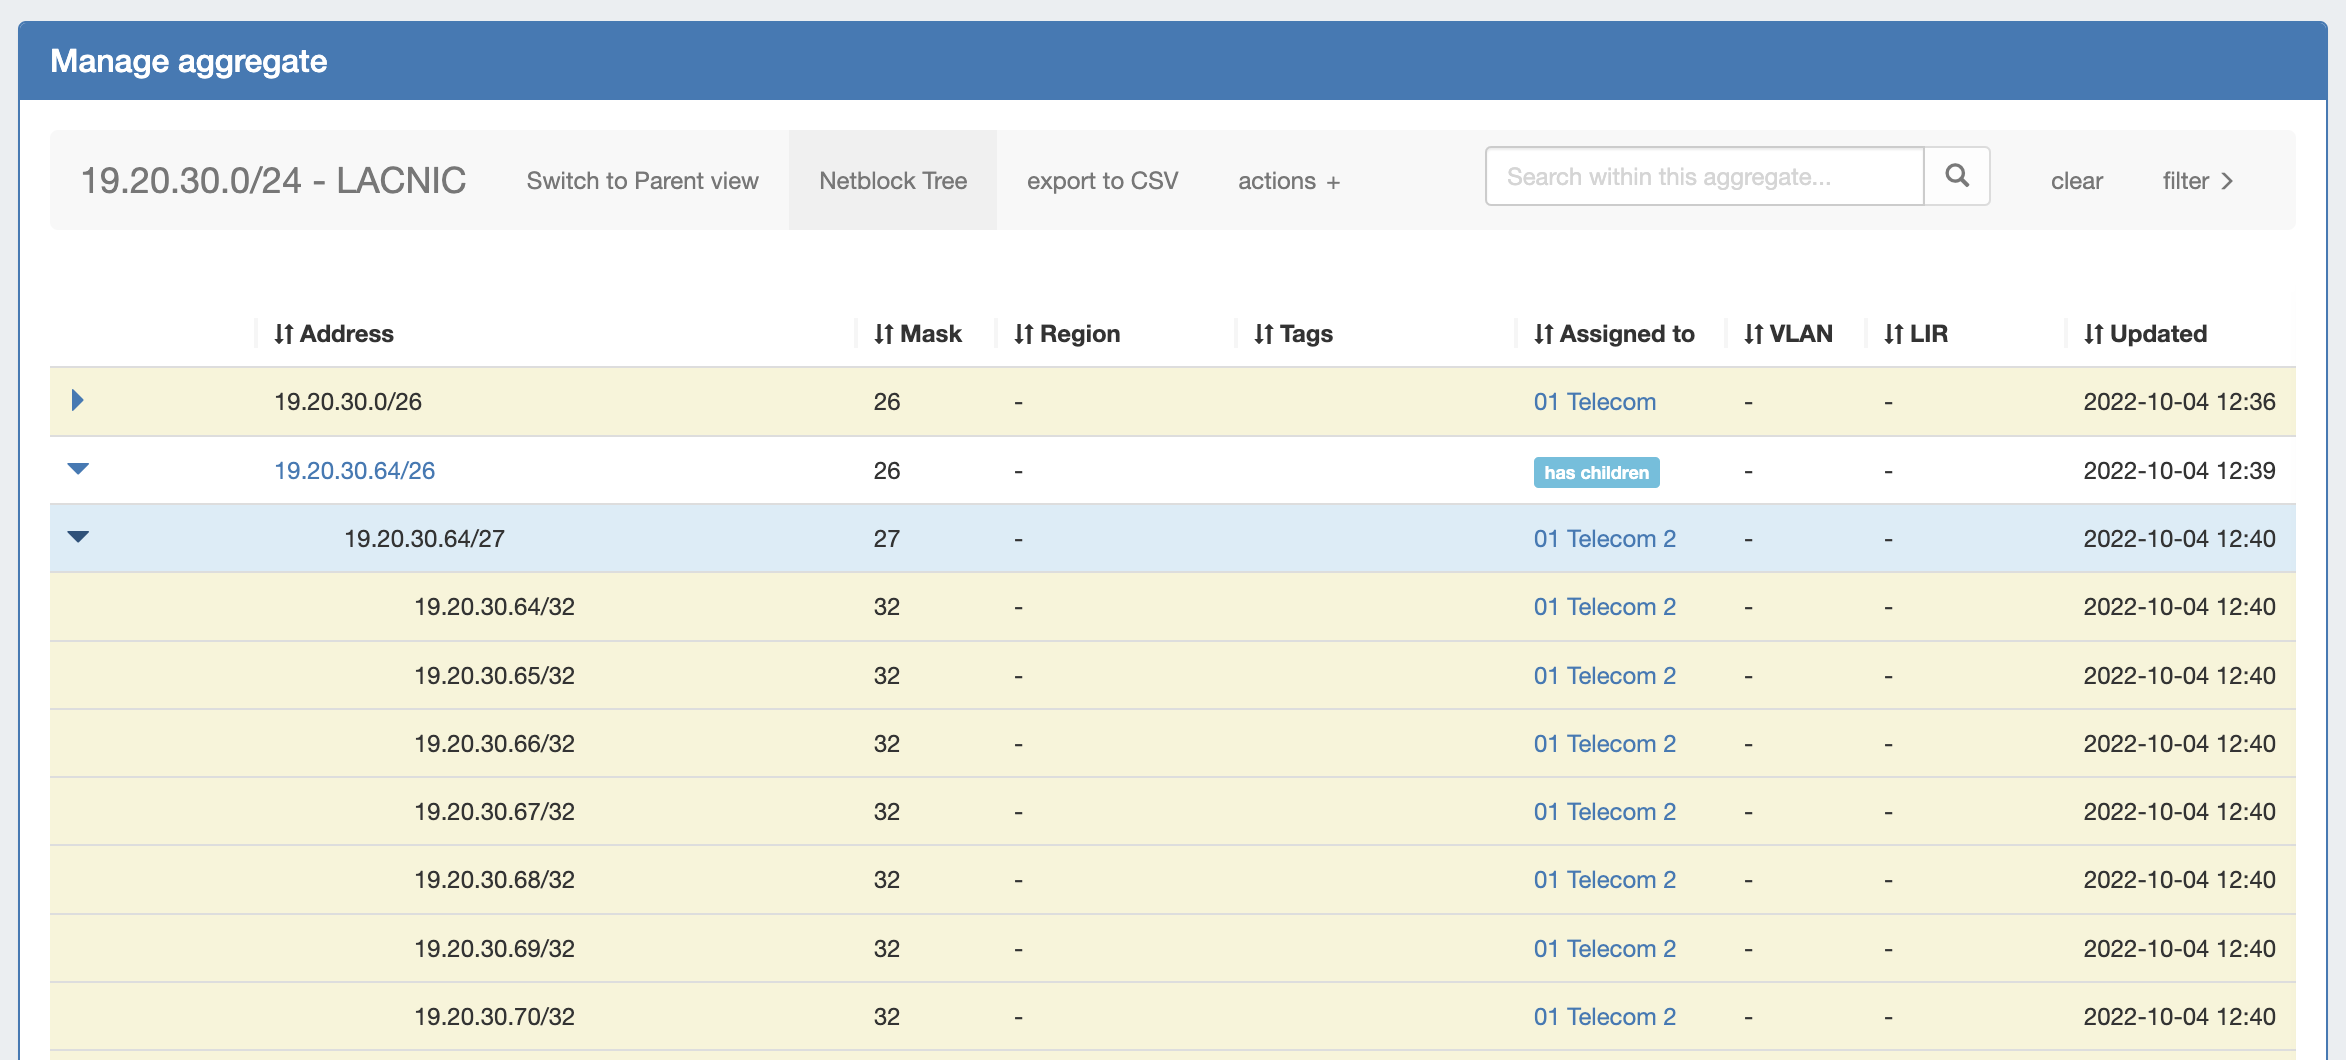
For a simplified example of the how Netblock Tree View displays compared to Block View, we will be using an example aggregate of 19.20.30.0/24 (assigned to "Available"). The standard Block View for this aggregate shows it has been split to contain a /25, a /26, and two /27s. The /26 and one of the /27s have been assigned to different resources. in Block View, we only see the lowest child blocks that exist in ProVision:
When we switch to Netblock Tree View (by clicking "Netblock Tree") we see only /26s in the top level of the view. This is because 19.20.30.0/26, assigned to '01 Telecom', is the first assigned block encountered. Netblock Tree View will ignore 19.20.30.0/25 and 19.20.30.128/25 because they are assigned to the same resource as 19.20.30.0/24 ('Available').
There are no (different) assignments under this 19.20.30.0/26. Thus, when you expand it you will see only /32 addresses. As these /32s have not yet been created in ProVision → Block View, they only exist as "theoretical" blocks and are not editable, but aid in viewing the totality of available addresses under that prefix.
If you would like these addresses to be assigned or editable in ProVision, you may split the /26 down to the desired number of /32 addresses using templates or manual splits. This will create the addresses in ProVision and allow those addresses to be edited.
Under those branches display individual /32 addresses, because the /27 is assigned.
However, if 19.20.30.128/25 is split into two /26s in ProVision, the previously theoretical blocks of 19.20.30.128/26 and 19.20.30.194/26 become 'real' objects, and will display as expandable and editable. |
Additional Features / Improvements
...