...
- RIR: The RIR associated with the aggregate / block.
- LIR: If LIRs are set up in IPAM Admin for the associated RIR, they will be selectable in this dropdown. See LIR Management and Use.
- Domain: The VLAN Domain to associate with the block. To set up domains in ProVision, see VLAN - Working with Domains.
- VLAN: VLAN information for the block, must have domain selected to view available VLANs.
- Generic: This is a customizable text field that can be used to track information specific to your needs. It can be filtered in the IPAM Manage screen. The header, display, and enable/disable settings for this field are set under IPAM Configuration in the IPAM Administration section.
- ASN: The ASN to associate with the block. ProVision auto-generates AS-Resources when an ASN is provided for the field in standard ASN format.
- Region: Select the region from the drop down menu. Regions can be added and customized in the IPAM Admin section of ProVision - see IPAM Administration and IPAM Parameters.
- Tags: Tags can be set under Edit Tags in the IPAM Administration section.
- Notes: Freeform text field for additional information you wish to capture.
- Resource: The resource assigned to the block. Click "Create and assign" to create a new resource to assign the block to if desired.
- NAT: The corresponding public or private block CIDR that is associated with the current block.
- Metadata1 - Metadata 10: User-defined text fields, as set in IPAM Administration Edit Columns.
- Allow Sub-assignments: When editing a block that has been assigned, toggling this setting to "On" allows for further subassignments, indicated by a blue arrow next to the assignment in the Manage screen. Note: Subassign status cannot be changed if a block has children.
- Propagate Attributes to Children: Toggle this setting to "On" when editing a parent block to carry through attribute changes to all children of that block for that edit (Only the changes made during that edit will propagate, instead of all values). This is not a persistent setting - it only applies to the specific edit you are in the process of making. To view parent blocks, and see which children would be affected, ensure that top level or all masks are selected in the Filter menu in the IPAM Manage screen. See Working with IP Blocks - Common Tasks for more informationview the aggregate / parent block in Parent View or set filters to "Select all masks".
| Info |
|---|
| Note: The VLAN of a child cannot be different from that of its parent, so for multi-level situations (Parent -> Child -> Grandchild), VLAN should be updated at the top tier parent level. |
...
Direct Assign is used when you know the exact CIDR that you wish to assign to the Resource. You can use "Simple" direct assign, for straightforward assignments of a CIDR to the Resource, or "Advanced", used in cases where duplicate blocks may exist and you need additional criteria to differentiate between them.
| Expand | ||
|---|---|---|
| ||
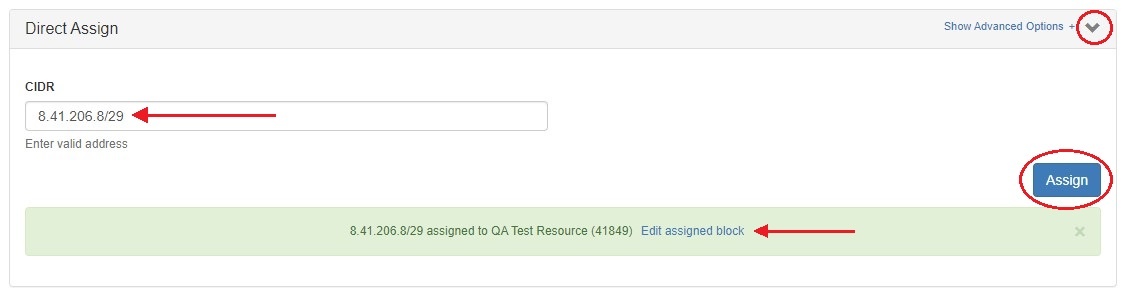
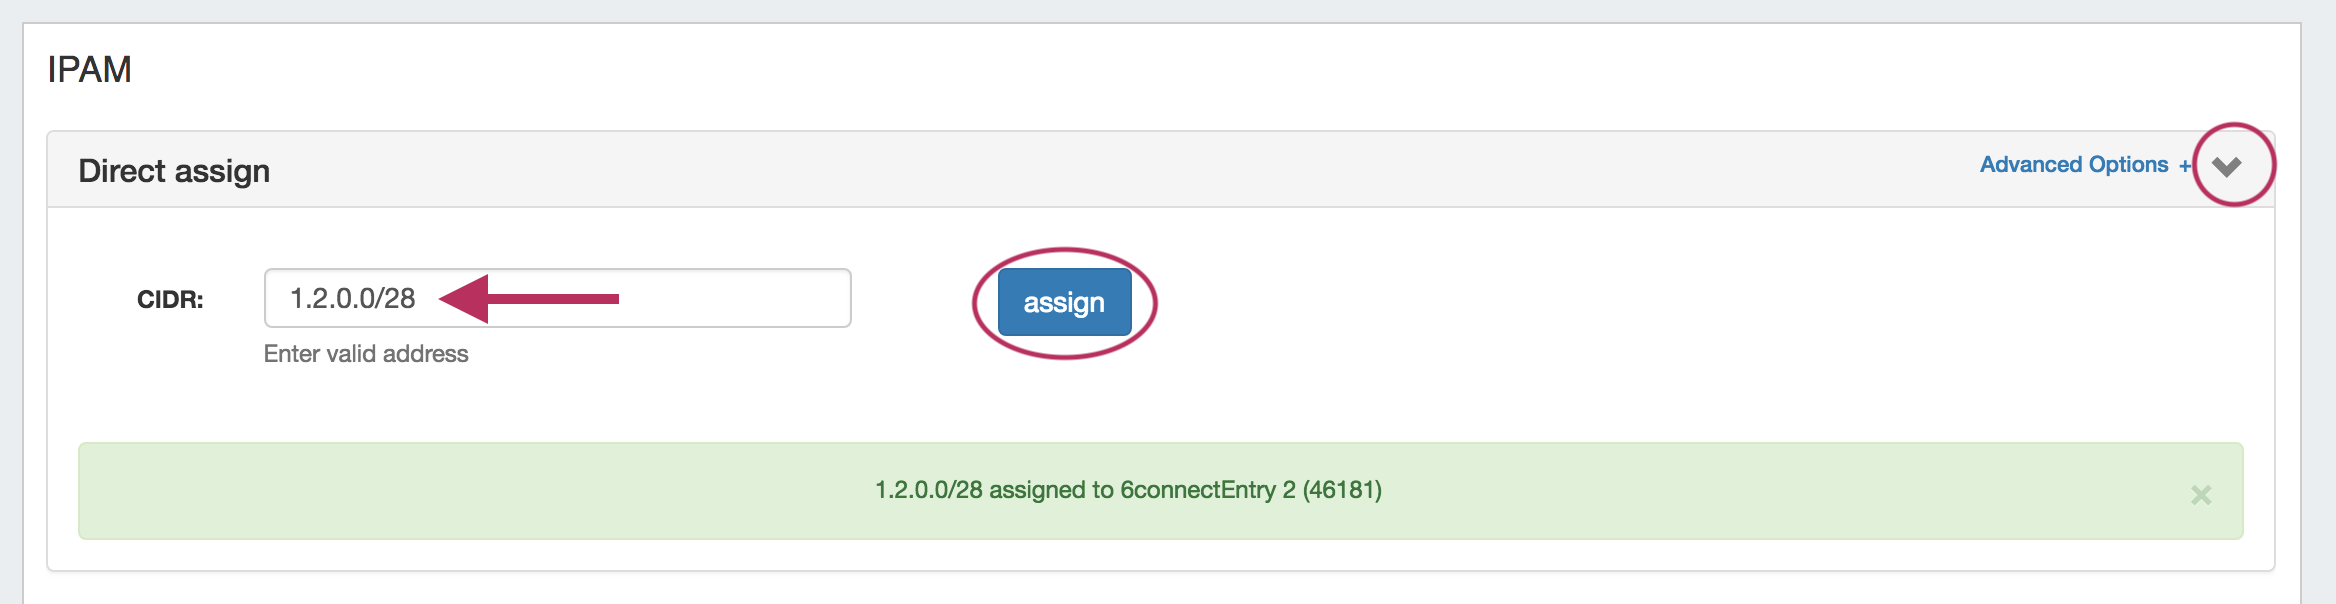
Simple Direct Assign: Expand the "Direct Assign" module of the IPAMv2 Gadget by clicking the "Expand" arrow on the right side of the header.
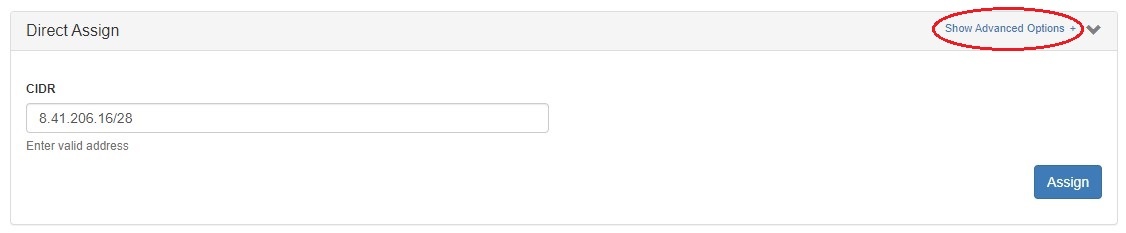
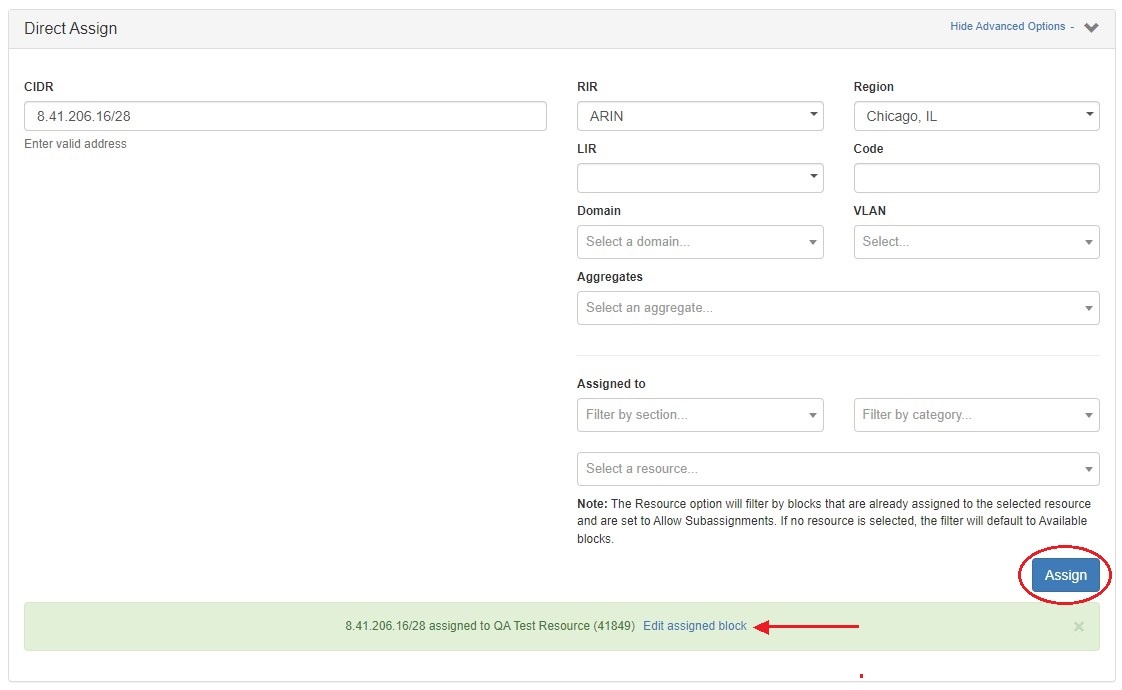
Advanced Direct Assign: A newly assigned block may be edited immediately by clicking "Edit assigned block" in the message bubble. Advanced Direct Assign: In In some cases, you make need the ability to further specify a block to direct assign - such as if you have duplicate 1918 blocks. The "Show Advanced Options" filters allow for further detail to be provided to ensure ProVision assigns the specific block that is intended. Expand the "Advanced Options + " link to the right of the "Direct Assign" module header.
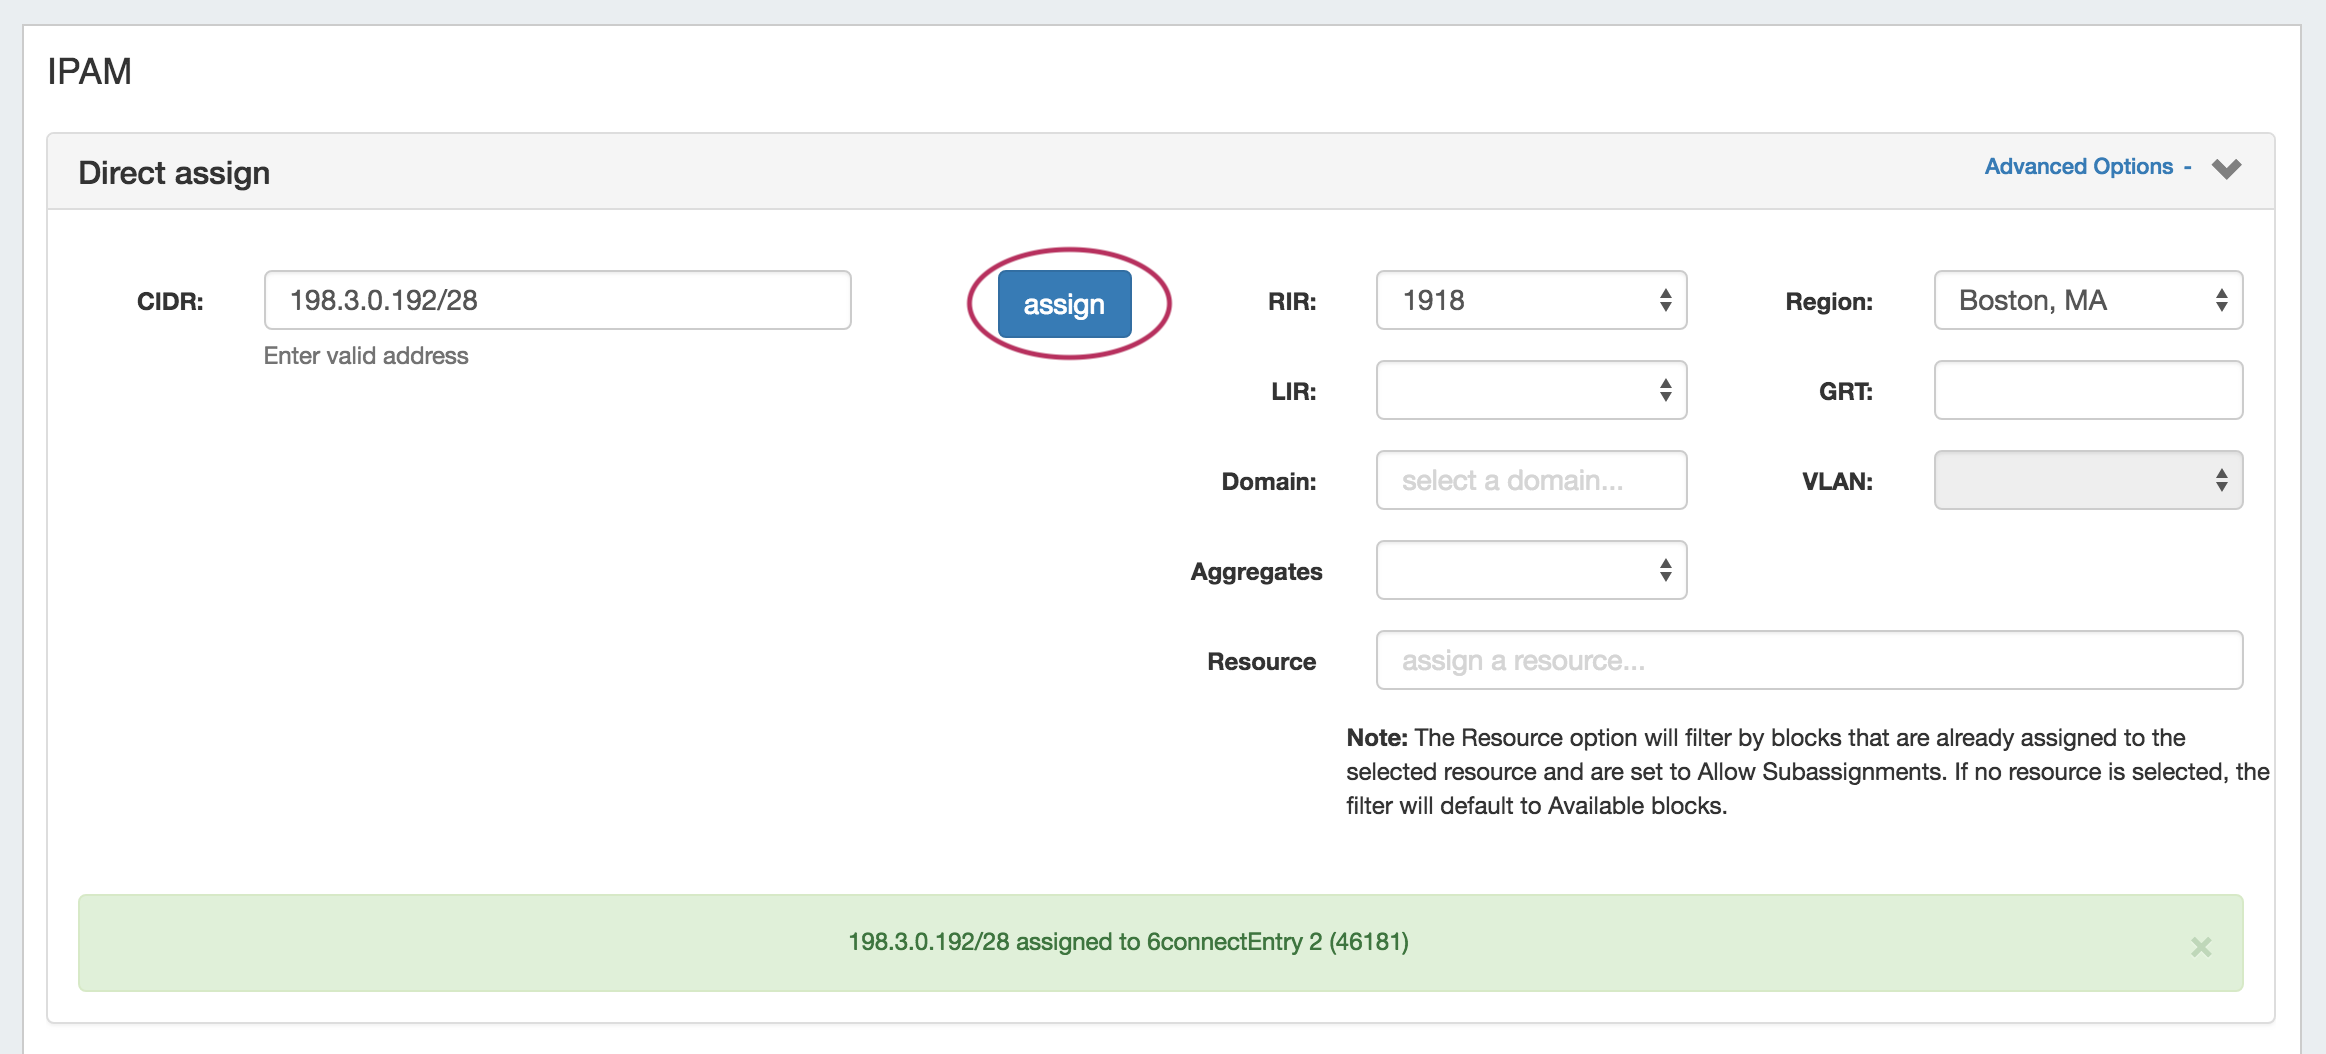
Then, add in the desired CIDR, and set your additional filter criteria, such as RIR, region, LIR, VLAN, and so forth. To assign a sub-assignable block, select the resource under which the block is allocated. Section and category options are available to filter the resource selector. When done, hit "Assign".
|

...
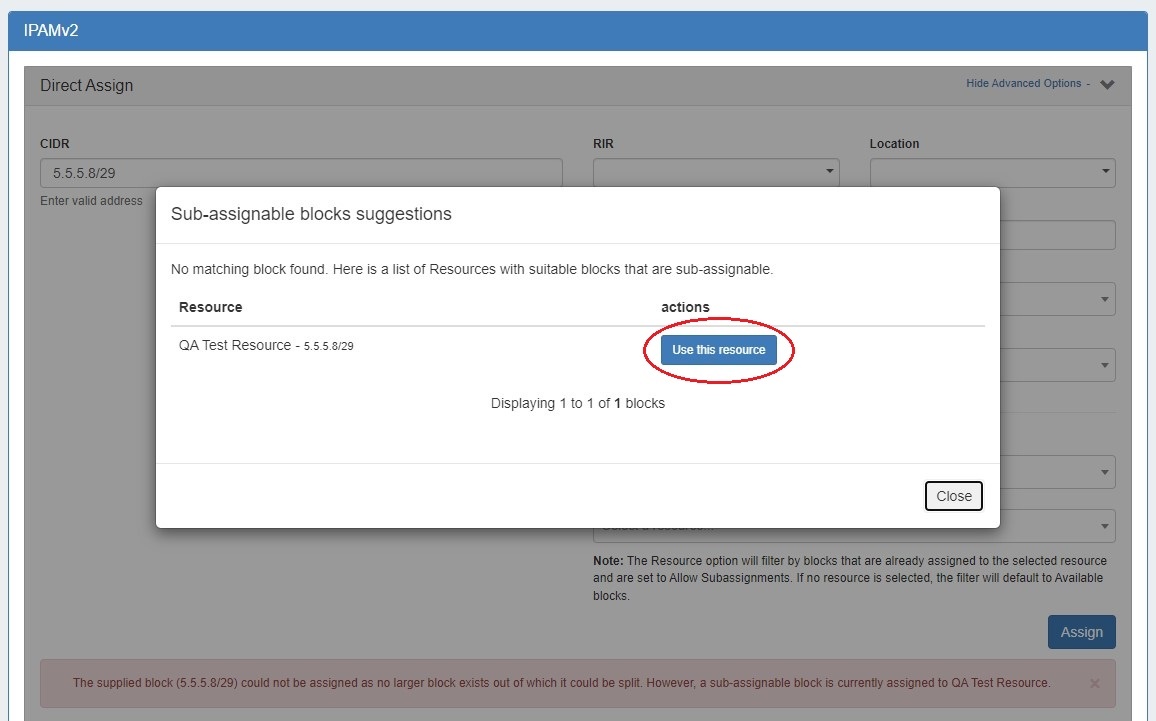
A newly assigned block may be edited immediately by clicking "Edit assigned block" in the success message bubble. If no available blocks are found meeting the Direct Assign filter conditions, but one or more subassignable blocks are found, a modal will inform the user and suggest resources with allocations that meet that criteria. To assign the suggested block, simply click "Use this resource".
|
Smart Assign / Smart Browse
Smart Assign and Smart Browse are used when you have criteria that you need to meet for the assignment, and any Smart Assign and Smart Browse are used when you have criteria that you need to meet for the assignment, and any block meeting that criteria is acceptable for assignment.
With Smart Assign, you enter criteria such as IP Type, Size, RIR, Region, and Tag information, then ProVision's automation will automatically assign a block meeting that criteria, if any exist. Smart Browse uses the same criteria, but provides a browsable list of blocks meeting that criteria for you to select from. Users can also save commonly applied Smart Assign / Smart Browse filter criteria for repeat use as Predefined Filters.
| Expand | |||||
|---|---|---|---|---|---|
| Expand | |||||
| |||||
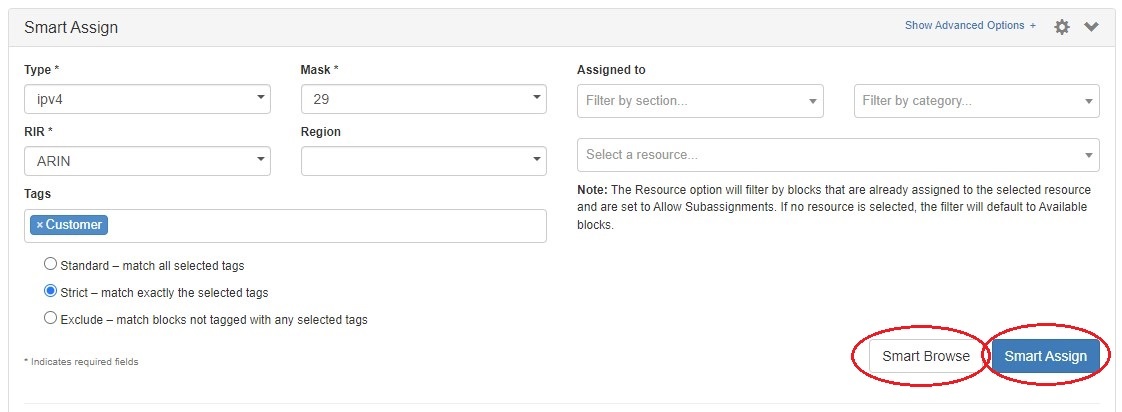
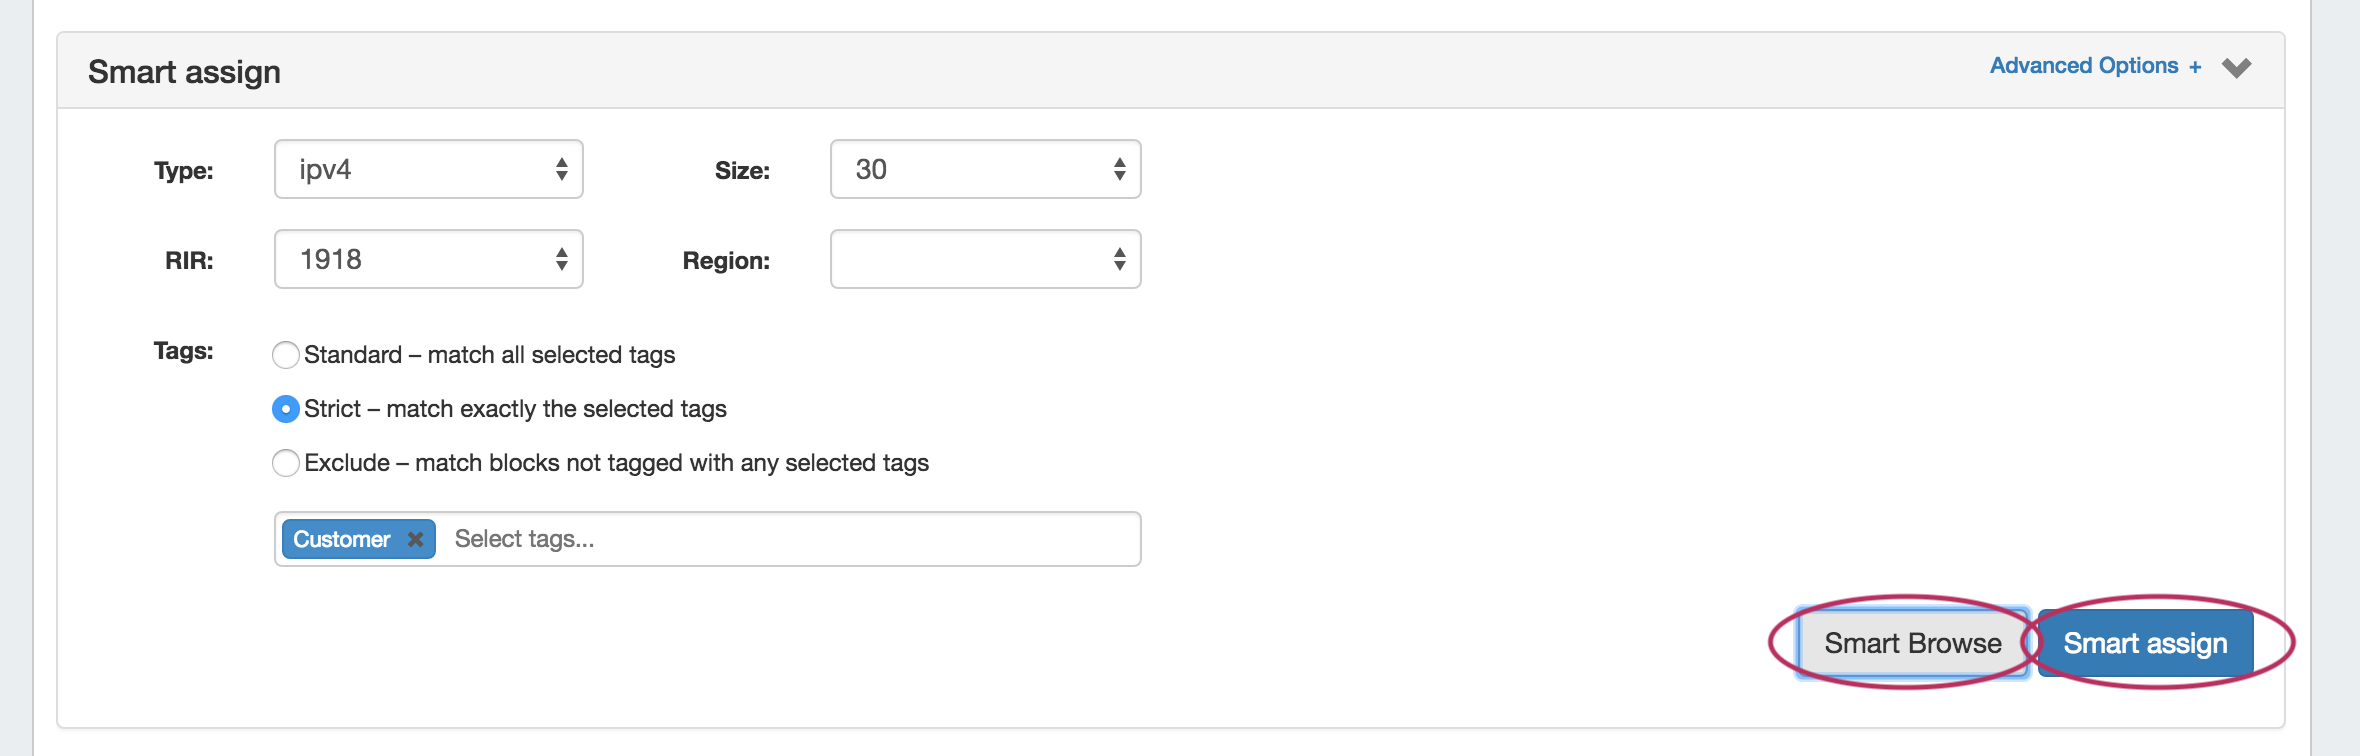
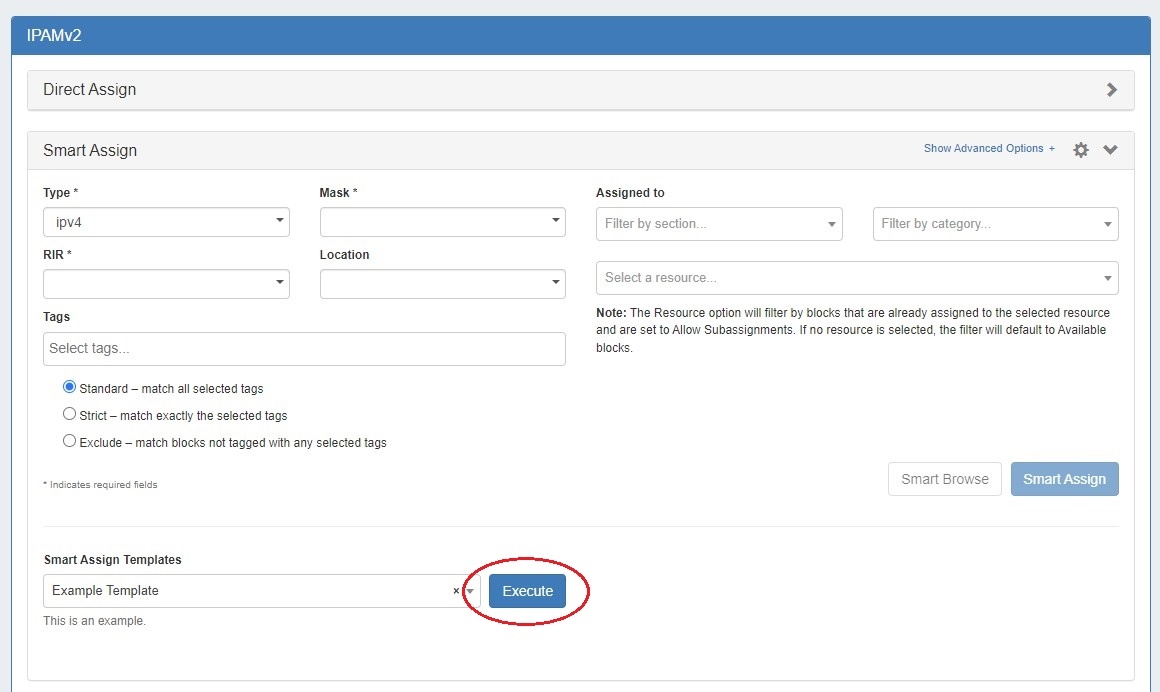
Expand the "Smart Assign" module in the IPAMv2 by clicking the expansion arrow in the right side of the Smart Assign header. For a basic assignment, enter at least the IP type, RIR, and block size. To assign a sub-assignable block, select the resource under which the block is allocated. Section and category options are available to filter the resource selector.
IP Tag filters are optional. IP Tag filters exist in three modes:
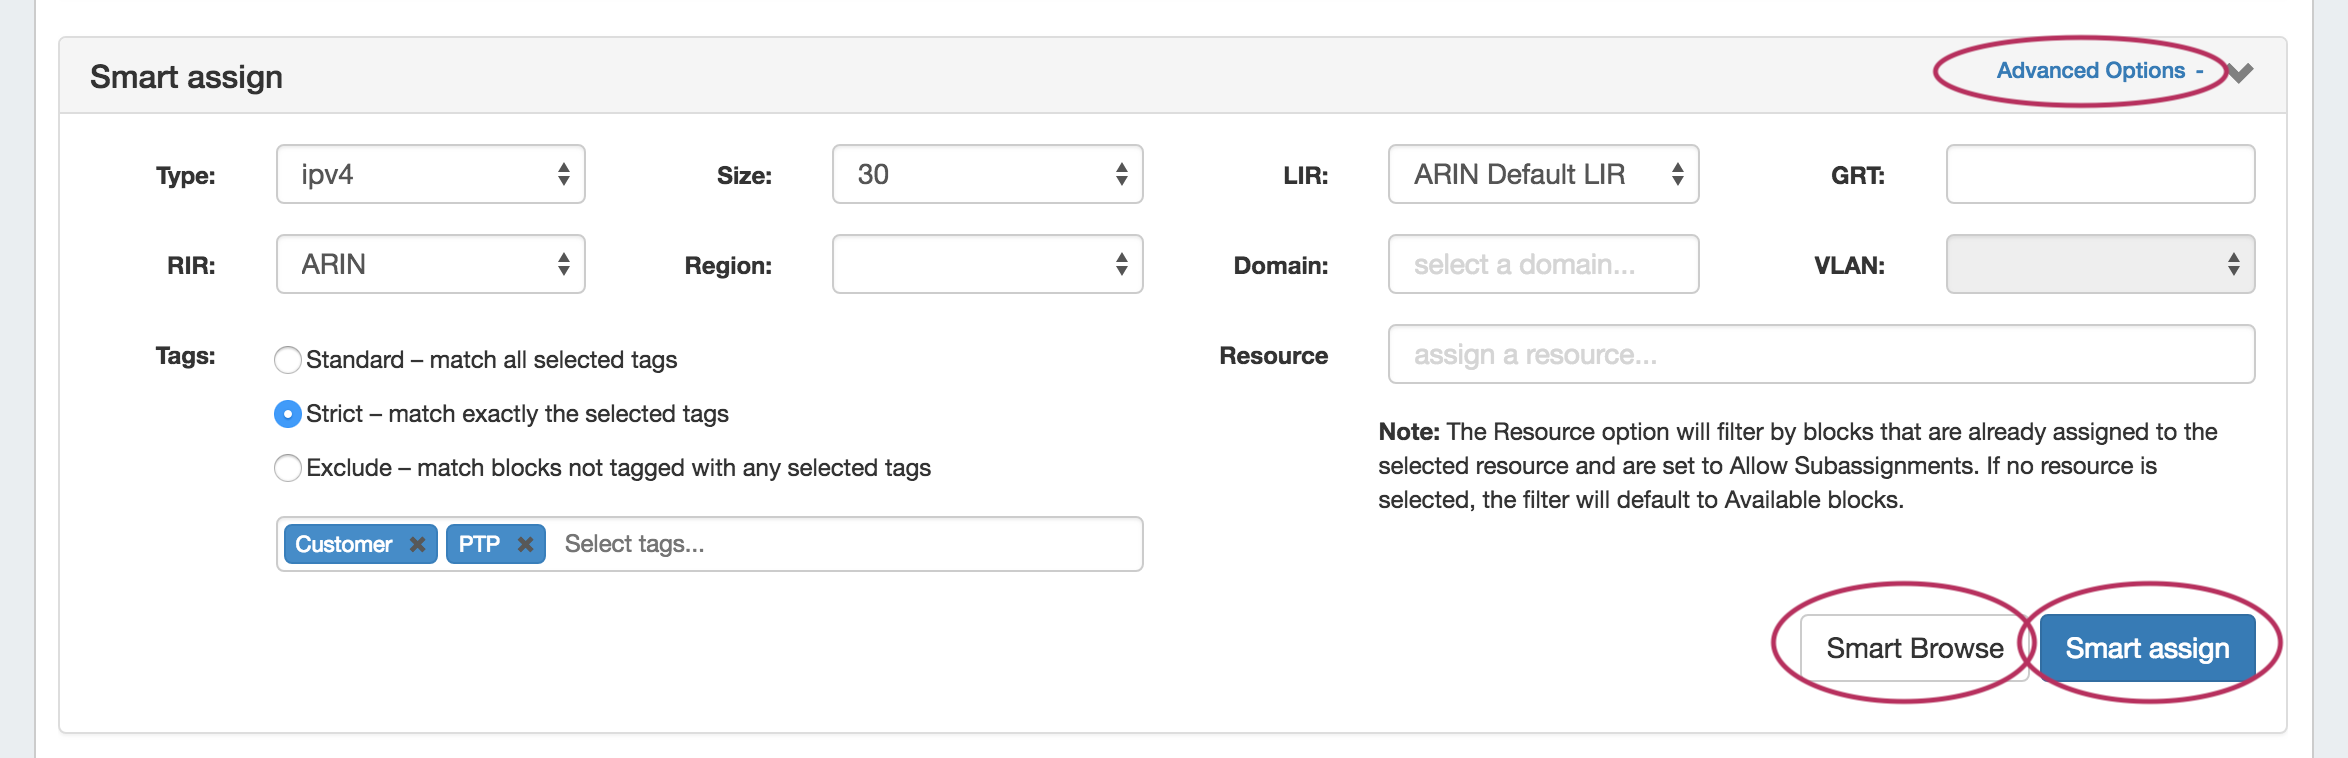
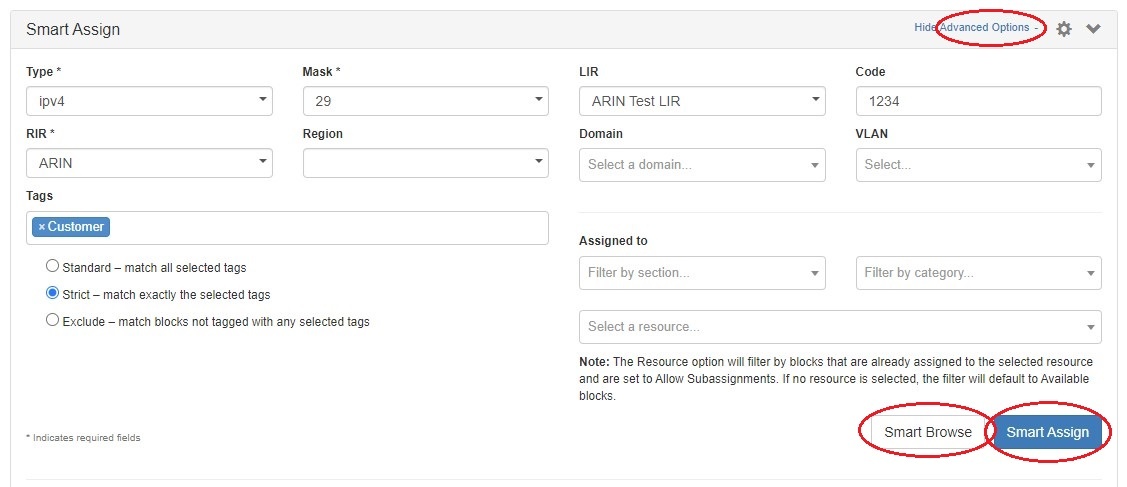
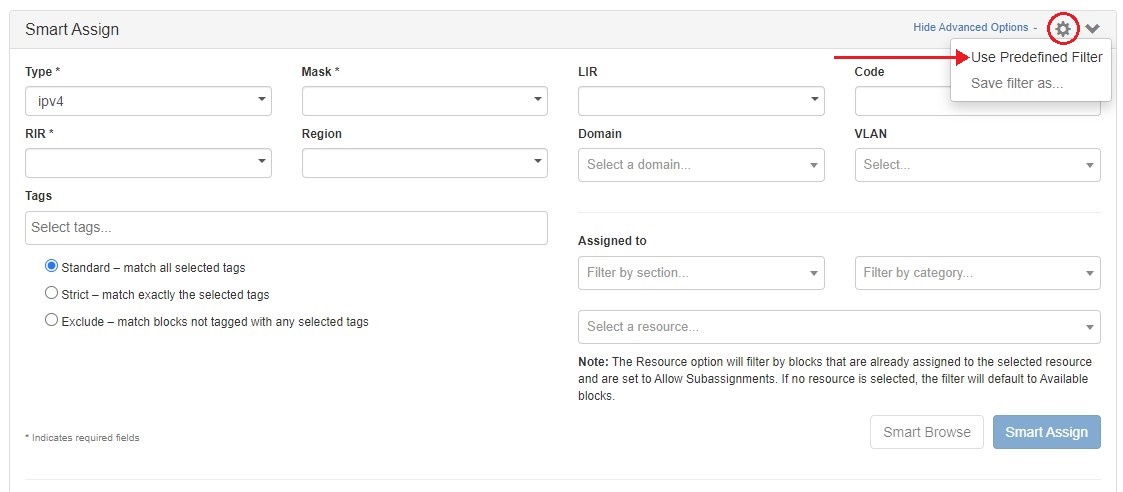
For Advanced Options, Click the "Show Advanced Options +" expansion link in the top right of the header. Additional filter criteria will be available to apply to both Smart Browse and Smart Assign.
Then click "Smart Browse" or "Smart Assign". For Smart Assign, you will receive a message indicating a successful assignment, or information regarding an error. If no blocks are available meeting the criteria, the message will say so. In this case, try removing one or more of your filter criteria and try again. As with Direct Assign, a newly assigned block may be edited immediately by clicking "Edit assigned block" in the success message bubble. For Smart Browse, a For Smart Browse, a screen will pop up showing blocks meeting your criteria. Browse to the block you want to assign, and click either "Assign this block", or "Assign from this block"(splits a larger block down).
to the block you want to assign, and click either "Assign this block", or "Assign from this block"(splits a larger block down). 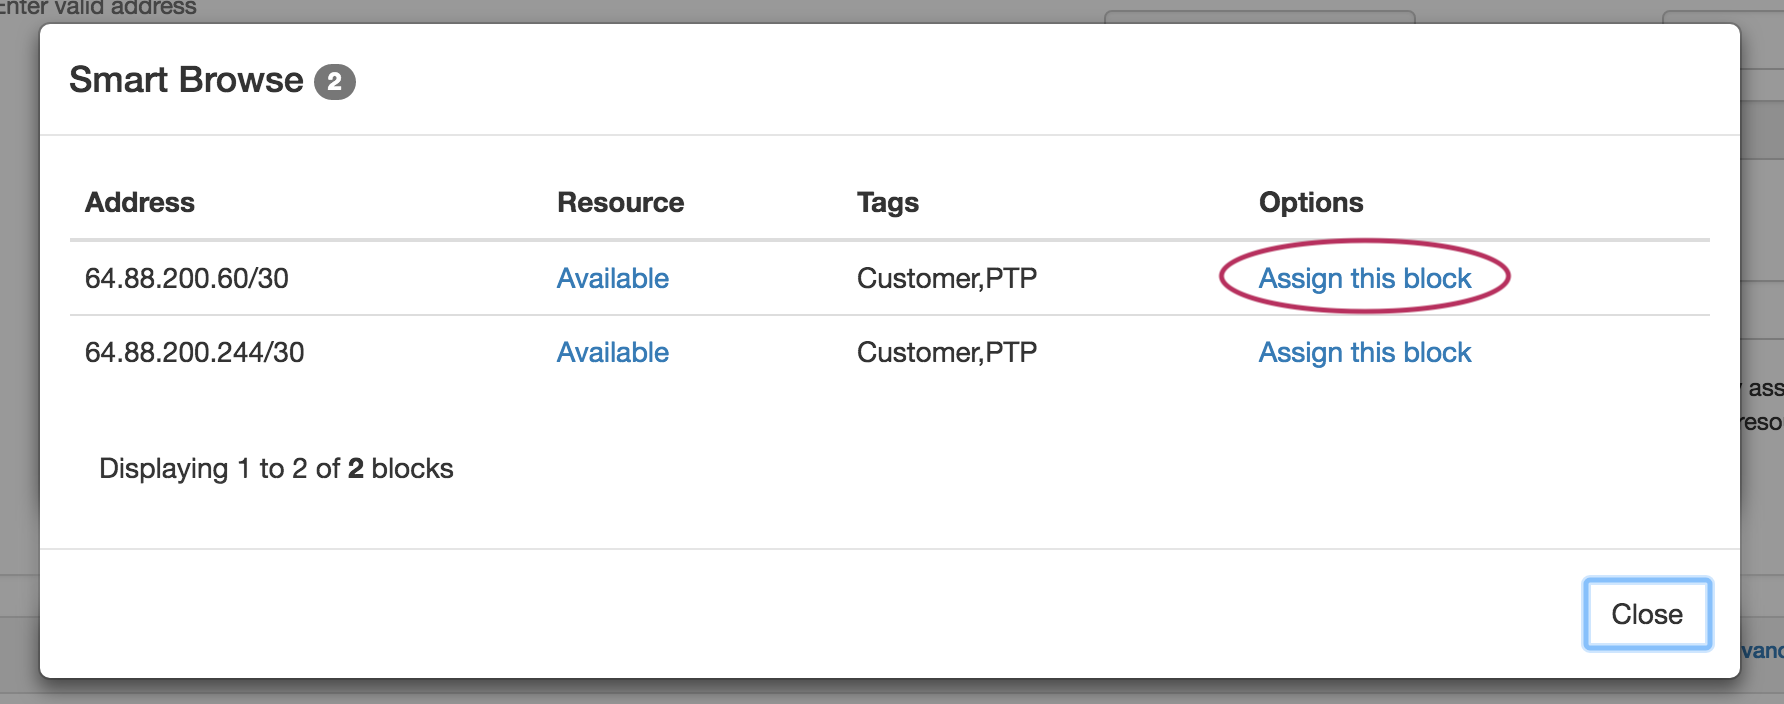 Successful assignments will be added to the "IP Blocks" list in the IPAMv2 Gadget, and are able to be managed in the IPAM Gadget, IPAMv2 Gadget, or IPAM Manage Screen. If no available blocks are found meeting the Smart Assign filter conditions, but one or more subassignable blocks are found, a modal will inform the user and suggest resources with allocations that meet that criteria. To assign the suggested block, simply click "Use this resource".
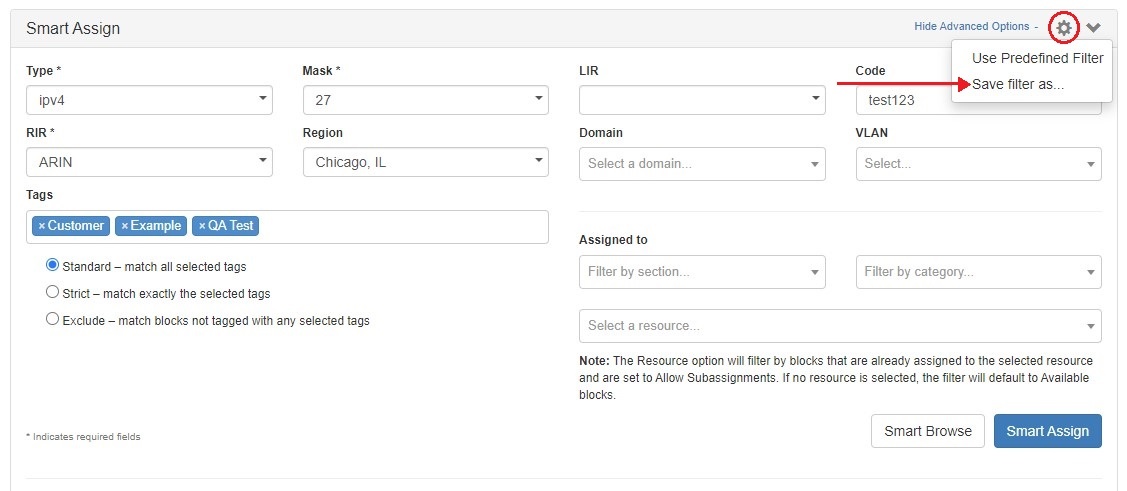
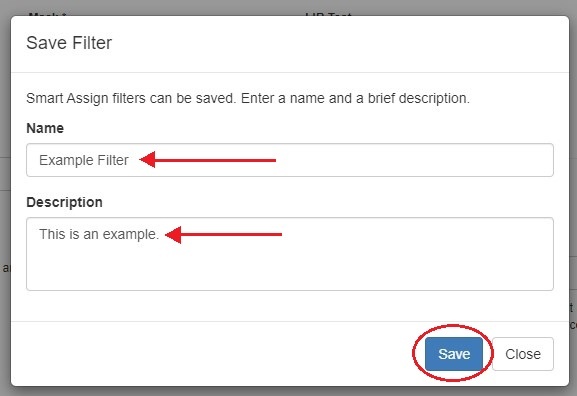
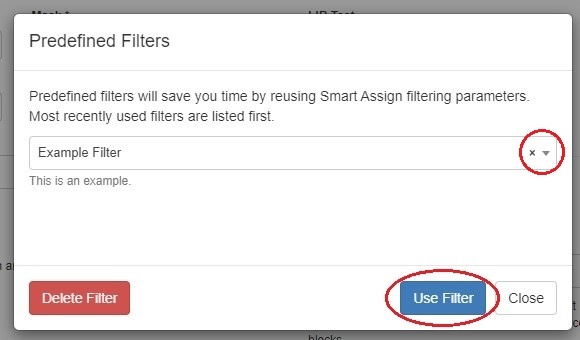
Predefined FiltersUsers can save Smart Assign filter criteria for repeat use by saving them as Predefined Filters, accessible through the gear menu at upper right of the Smart Assign section.
|
Manually Assign Space from IPAM Manage
...
Once the allow sub assignments box is checked , the block is set to the "allocated" status, and may be further split and assigned to other resourcesother resources, using IPAM Manage or the IPAM Gadget.
Split blocks may also be re-claimed to the originally assigned resource and re-aggregated. When "allow sub assignments" is checked, the block is counted as allocated, but not assigned - various statistics in IPAM, on the dashboard, and reporting will reflect this.
...
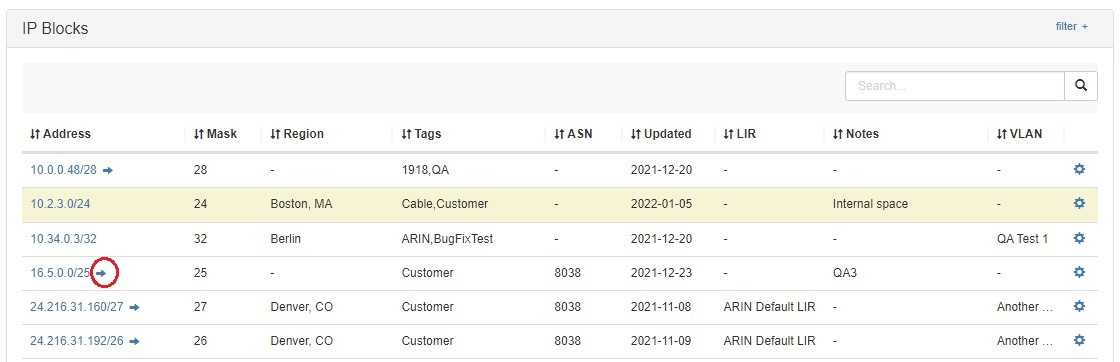
If a block is subassignable, a blue arrow will display in the "Assigned To" field in IPAM Manage.

In the IPAM gadget, subassignable blocks display a blue arrow in the 'Address' field.
In the IPAM gadget, subassignable blocks display a blue arrow in the 'Address' field.
Subassignable blocks will be offered as suggestions when assigning from Direct Assign / Smart Assign, if they meet the filter criteria but no available blocks are suitable.
You may also specifically select the resource allocated the block when entering Direct Assign / Smart Assign criteria, to specifically assign blocks under that allocation.
Unassign IP Space
When a block is assigned, you will have the option of unassigning the block from the resource and returning it to the Holding Tank.:
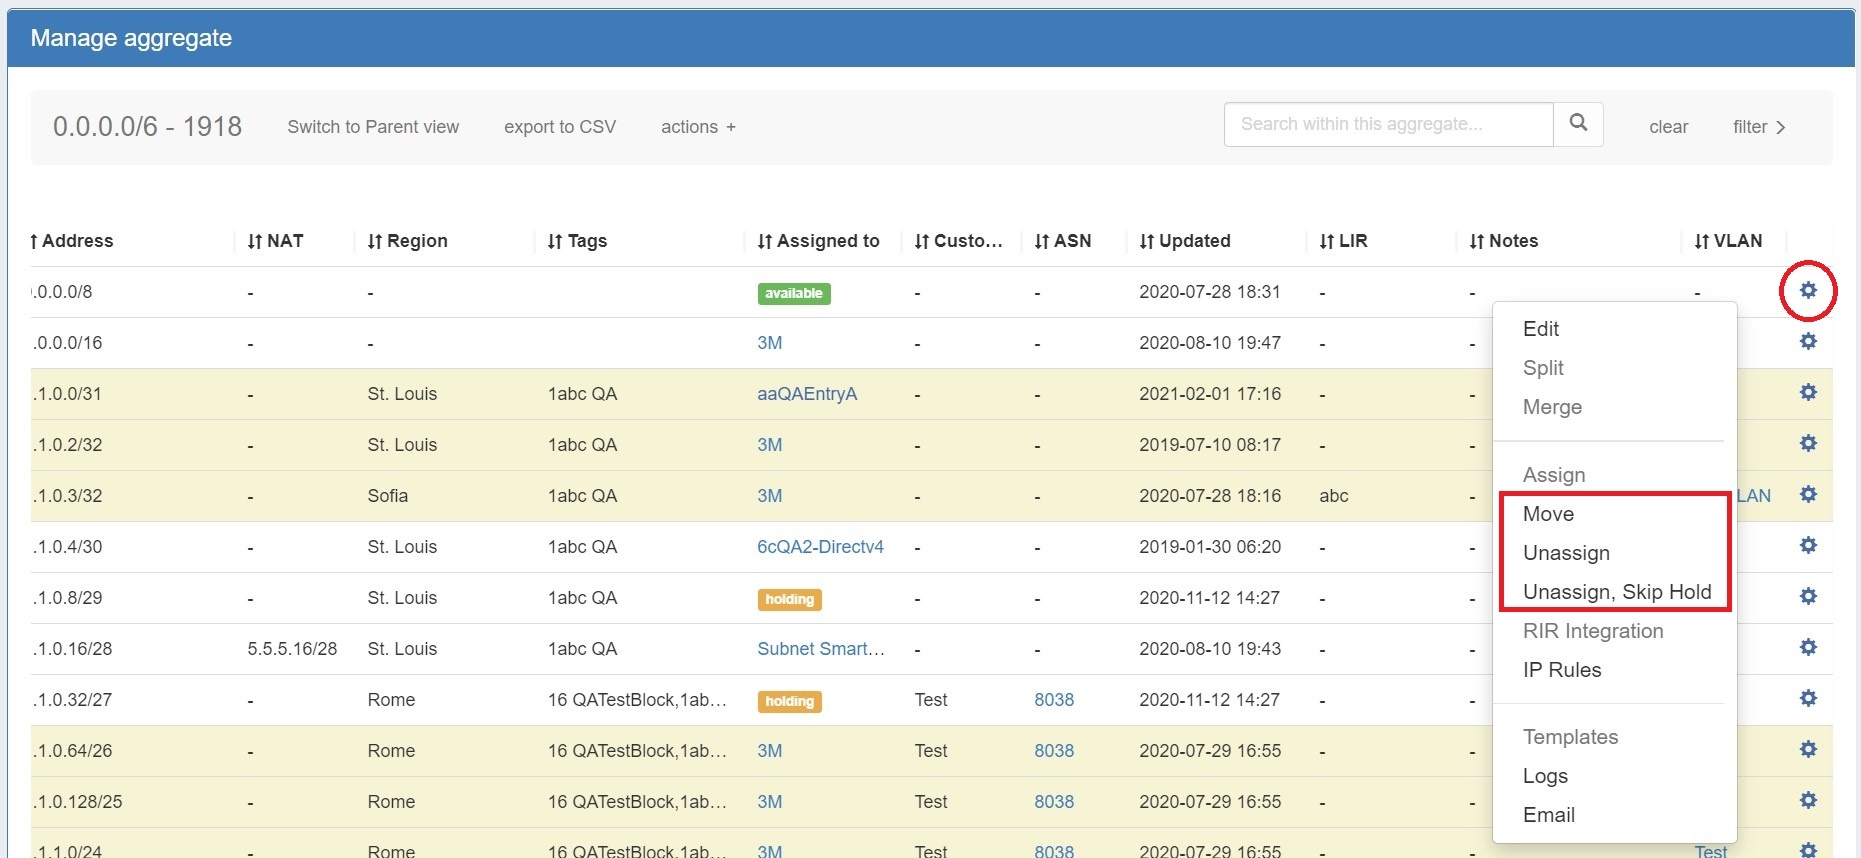
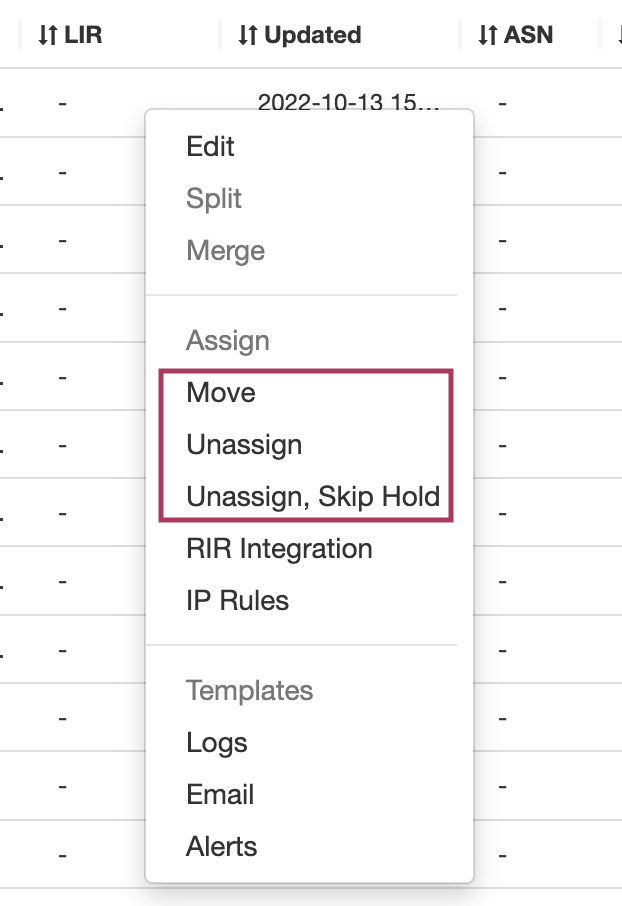
To unassign the block, simply open on the Action Menu for the block in either IPAM manage or the IPAM Gadget, and select "Unassign".
...
Another option is "Move", which moves the block from one resource directly to another without passing it through either available or holding status.
After unassigning blocks / skipping holding, newly available blocks will be merged upon next page refresh. Blocks which had been subassigned will revet back to the parent resource.
To return IP space in the Holding Tank to the Available Poolavailable pool, process the Holding Tank via the Admin screen under IPAM Admin (this will only process blocks that were have been present for the specified number of days). You may also manually move a block from Holding to Available by selecting "Unassign" for the block.
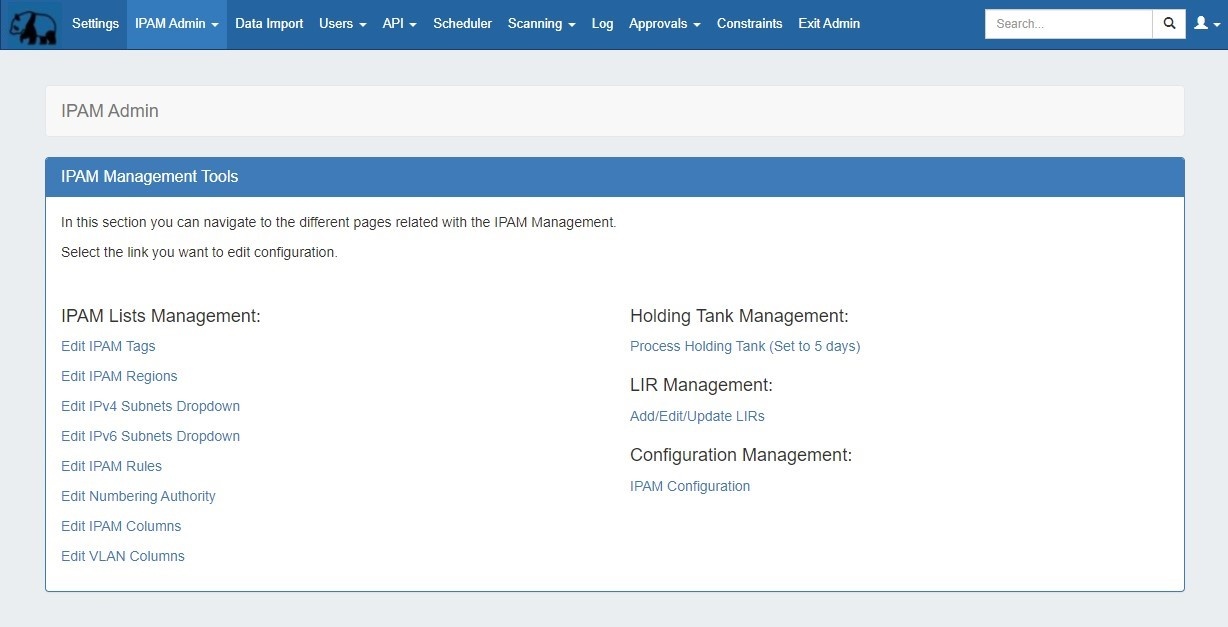
For more information on the Holding Tank, see Holding Tank Management.
...