...
For example, you may not need to track the console port for your virtual firewall, so you would simply not use that field for the "Virtual Firewall" section. This way you can still track the console port for your physical firewalls like normal.
| Table of Contents |
|---|
...
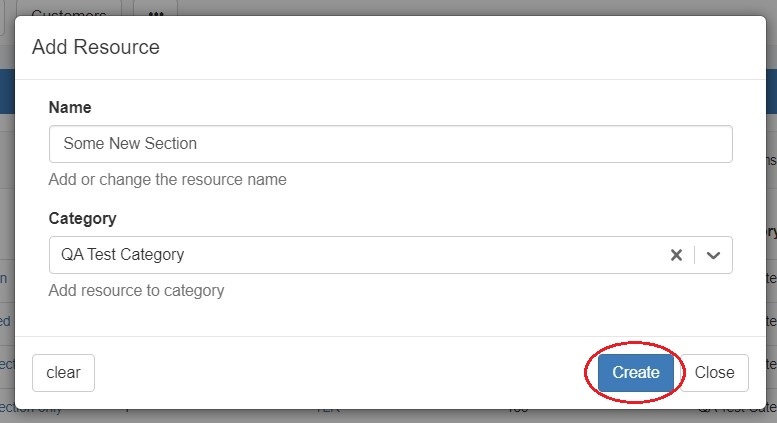
Create a New Section
Click "Add Section" from the Sections view button under the ResourcesTab
...
Create a new section by specifying a name and category. Then hit the "Create" button.
...
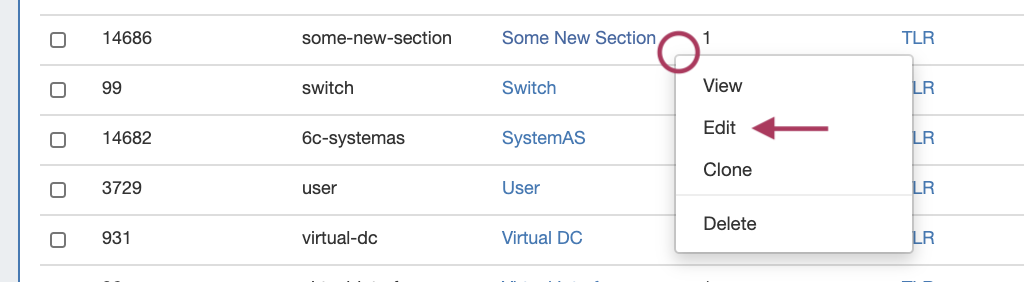
Edit a Section
There are two ways to access the edit section screen.
You can manage existing sections Manage existing fields and add custom fields for the selected section by opening the Action Menu for the section, then clicking "Edit".
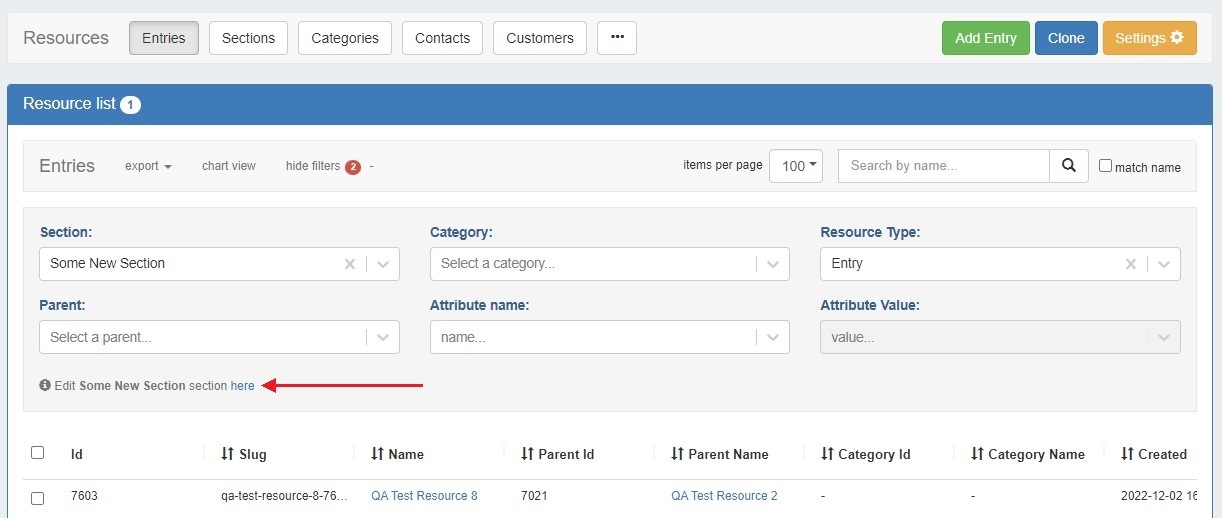
You can also access the edit screen from the section's entry list. Open the filter panel at top and click the link at the bottom.
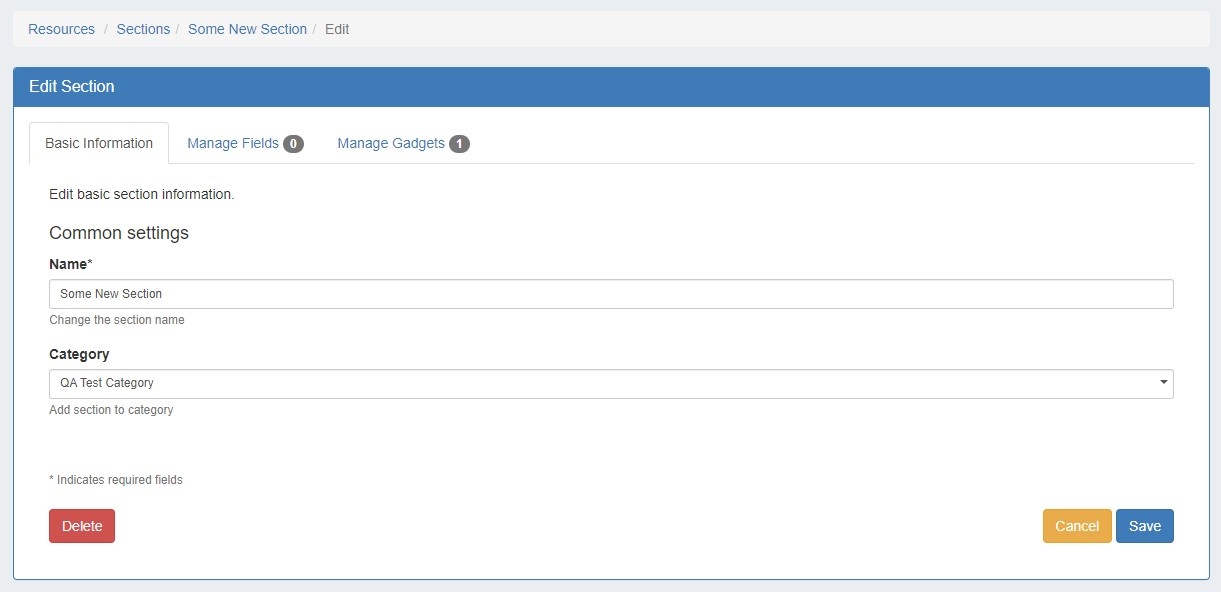
The edit section area is organized into three tabs: "Basic Information", to perform quick edits to the section name or category, "Manage Fields" to update or assign fields to the section, and "Manage Gadgets" to add, edit, relocate, or remove gadgets associated with the section.
Add Fields to a Section
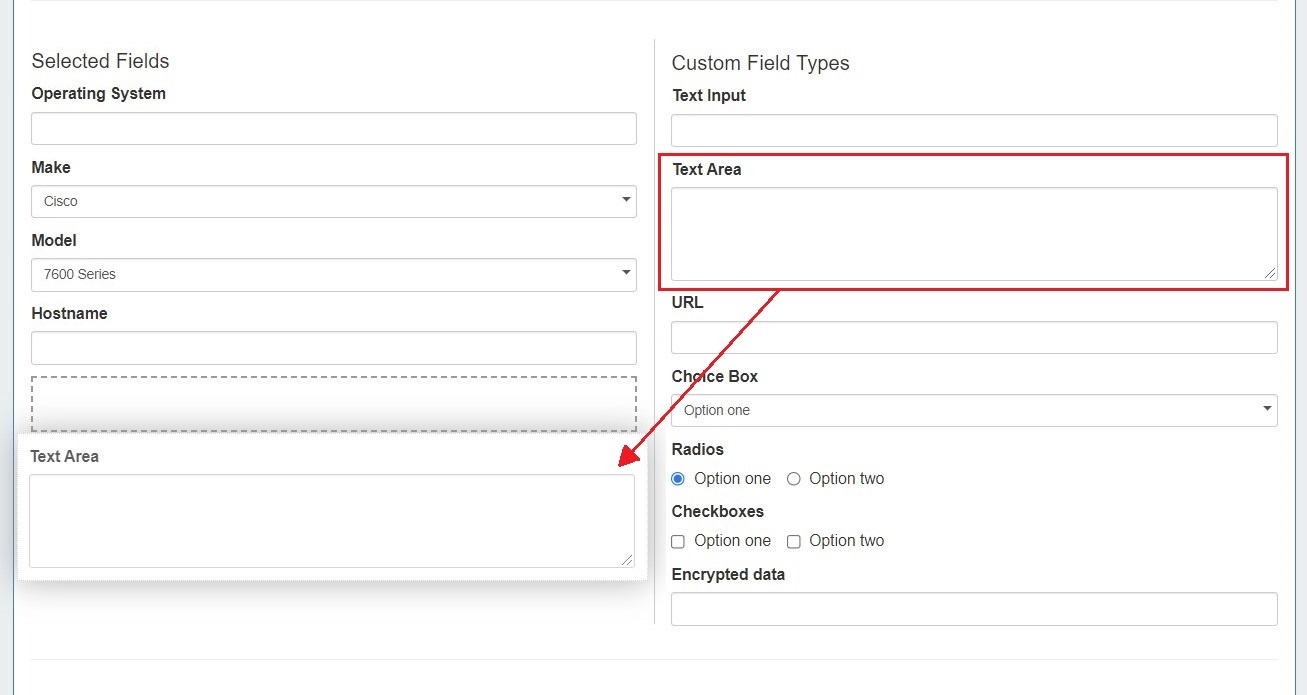
From the Manage Fields tab, you can add new custom fields of different types (text input, text area, choice box, radios, checkbox) by dragging and dropping the fields , encrypted) as well as using any existing fields that are available by clicking the + icon next to the field name. See the Customizing Fields page for more details.
Step 3: Edit Custom Field Data
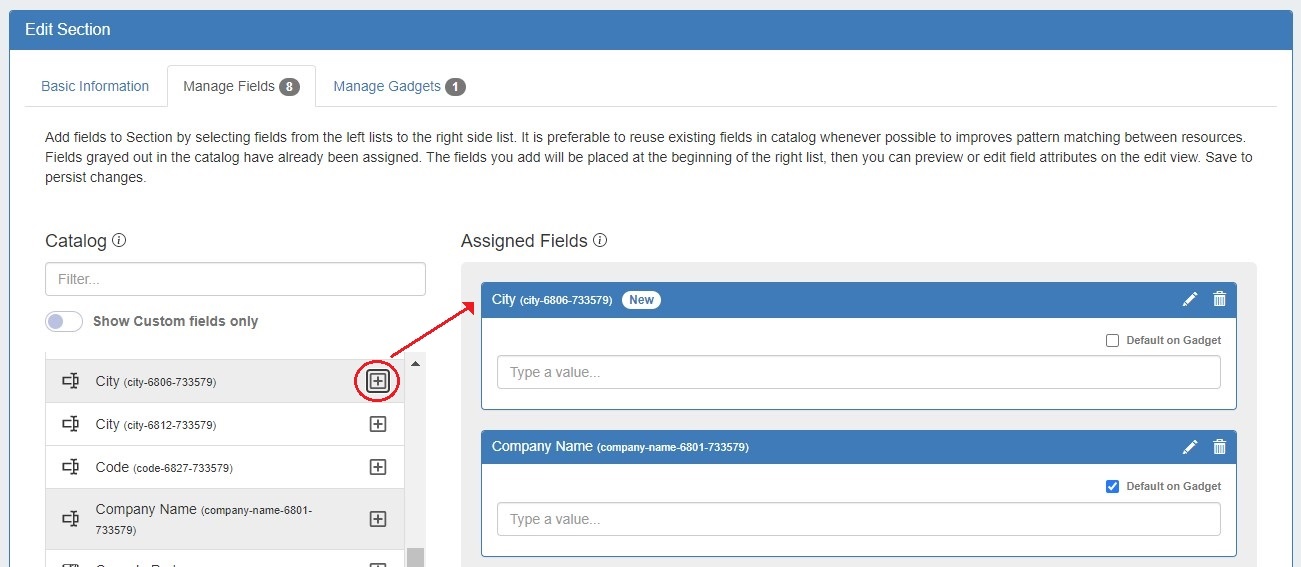
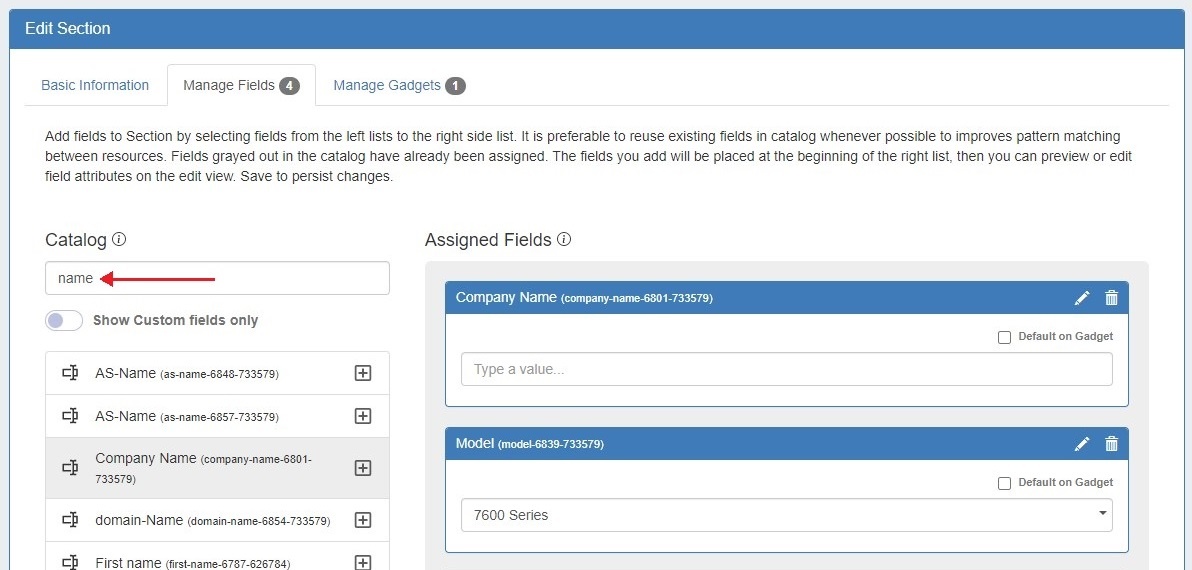
To search for an existing field, type a field name into the searchbox. Fields already added to the section are shaded grey. You may add duplicate fields to a section, but this is discouraged and a confirmation message will prompt you to confirm that you wish to add the duplicate field. To remove a field, click the delete (trash can) icon. This will remove the field from the "Assigned Fields" column, but the field will still exist for repeat use.
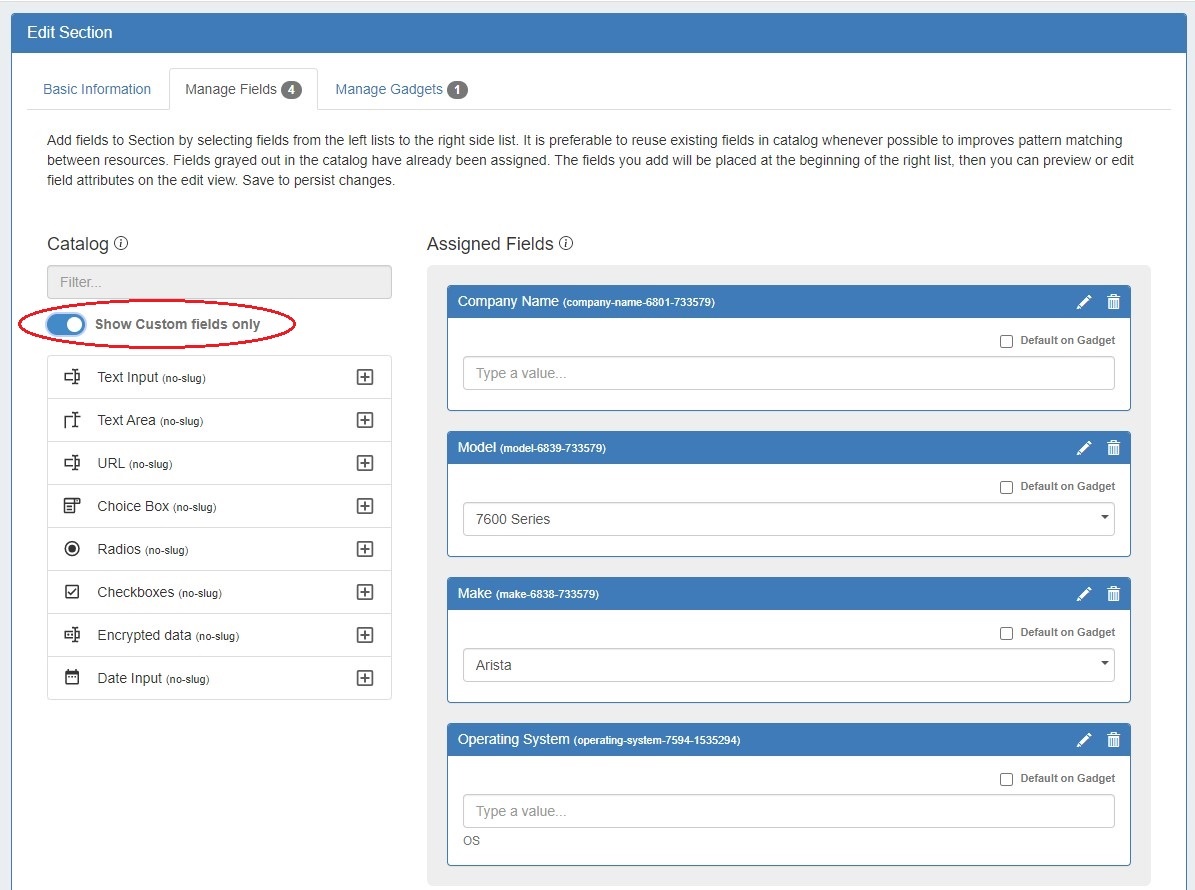
To view only unedited custom fields, enable the toggle below the searchbox. These are fields that do not technically exist yet. Once a blank field is added to a section and customized further (by editing the Field data), it will then have a slug and be added to the Field Catalog for reuse on other sections.
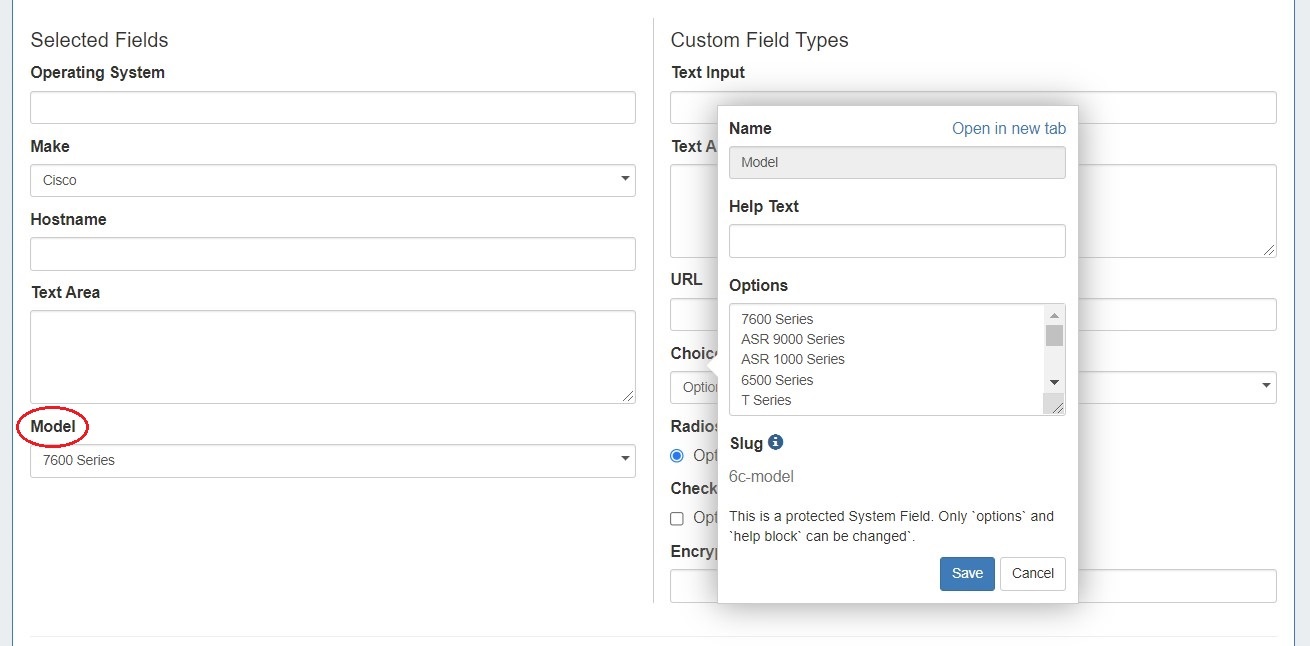
Edit Field Data
Once fields are added to a section, they Select the field name and you will get an editing window to modify the parameters of the field. Custom fields may be renamed and have other attributes updated , whereas protected system fields may have noted restrictions.by clicking on the edit icon.
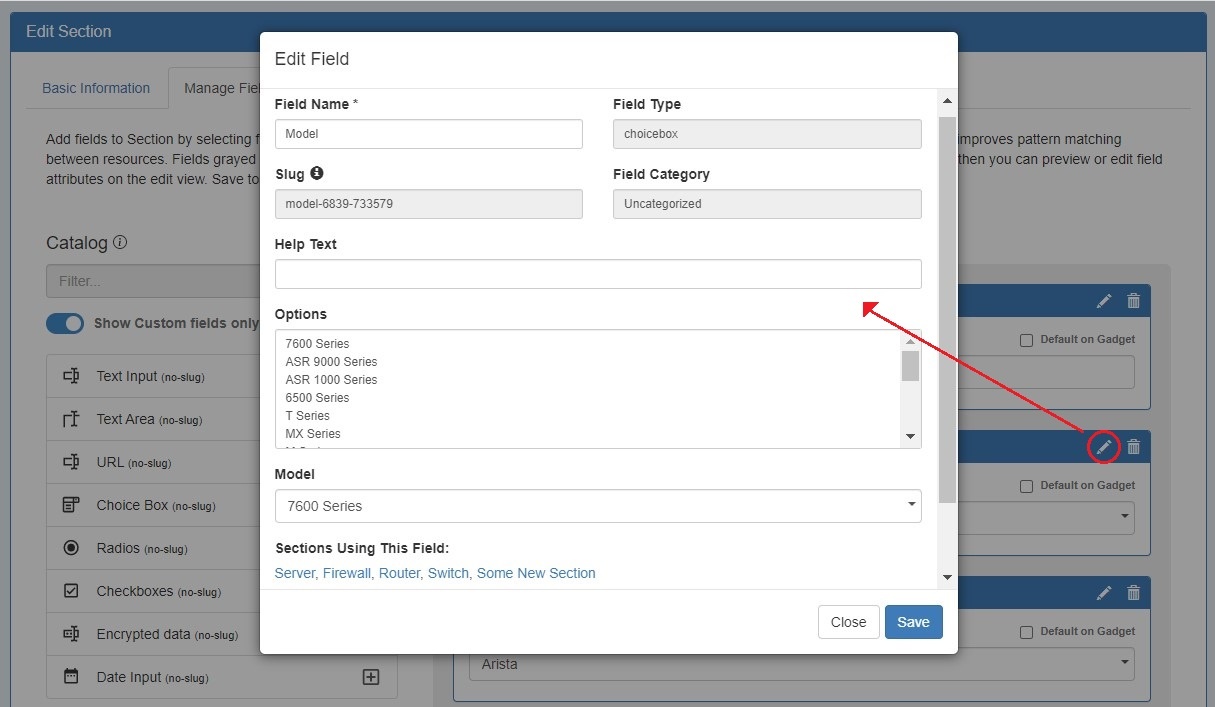
Any fields enabled here will be available to add to the field gadget, if desired.
Step 4: Add Gadgets to your Section
Designate Default Fields
Users can designate fields be auto-added to the Field Gadget for all resources assigned to a section by selecting the checkbox "Default on Gadget".
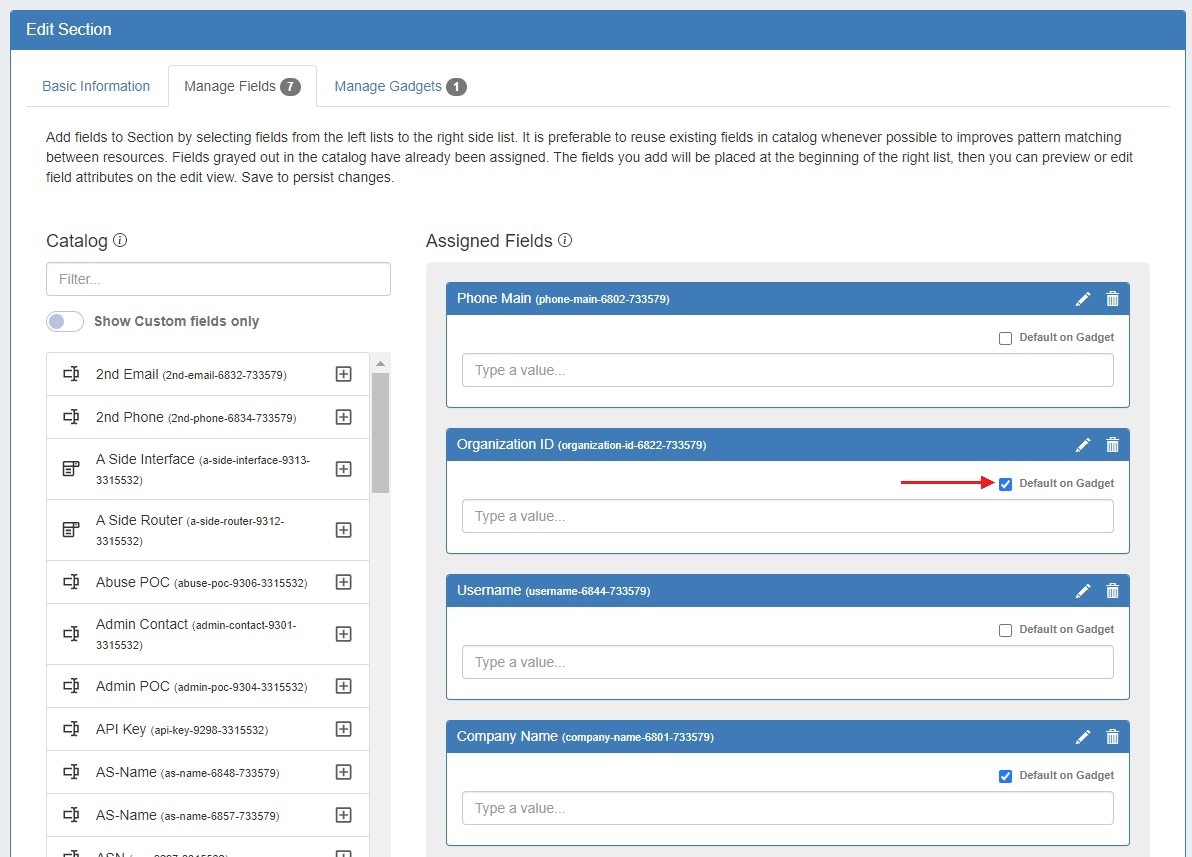
Default fields cannot be removed from the Field Gadget. Non-default fields will be available to add to the gadget on a per resource basis via the dropdown. See Working with the Field Gadget for more information.

Once you have added the desired fields to a section, click "Save" at bottom right.

Add Gadgets to a Section
Gadgets You will notice on this customization screen that you also have an area for gadgets. Gadgets are modules of additional functionality that can be added to the UI of a given resource. Simply From the Manage Gadgets tab, simply select the gadget you want to show for that section , and hit "Add Gadget".

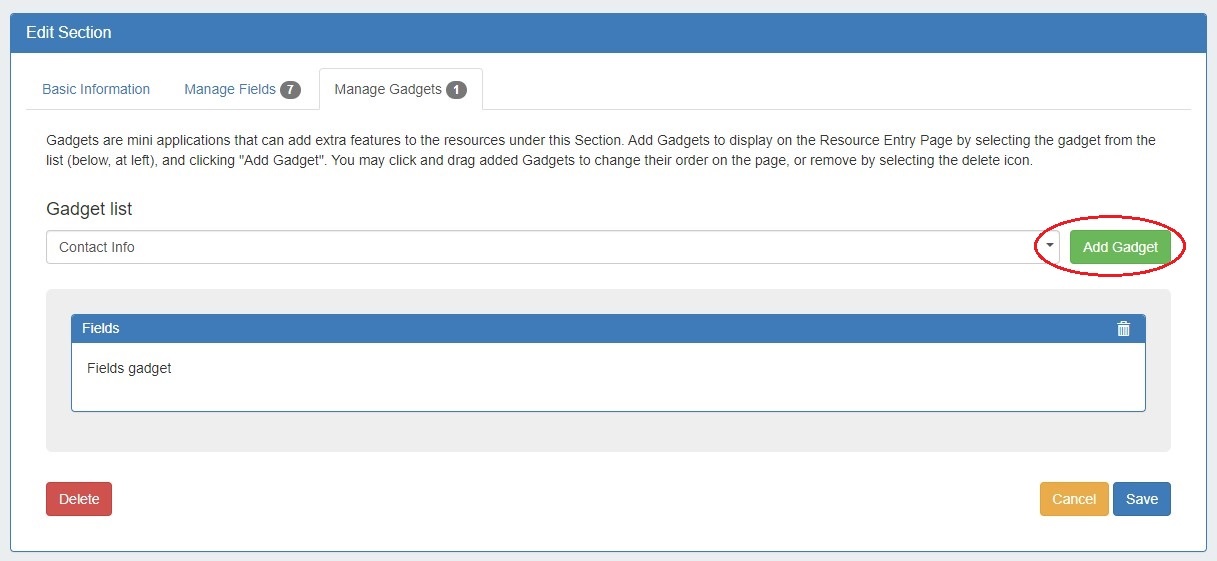
Once added, you may organize them by dragging into the order you wish them to appear on the page. You may also remove added gadgets by clicking the "delete" icon.
...
For a detailed list of gadgets and descriptions, see the Gadgets page.
| Warning |
|---|
The "Save" function for each tab is applied independently. If you add or remove fields in the "Manage Fields" tab, then move to the "Manage Gadgets" tab to add or remove gadgets, and then save from there; your gadget changes will be saved, but your field changes will not be saved. You must save from each tab to retain changes to each area. |
Additional Information
Continue on to the following pages for additional information on Working with Resources in Provision:
...