...
Click one of the options below for details:
Expand title How to set an ASN via the Admin Preferences Page... From the Admin Settings page, go to Peering -> Peering Settings.
Next to "ASN", enter the ASN(s) you want to track in ProVision.

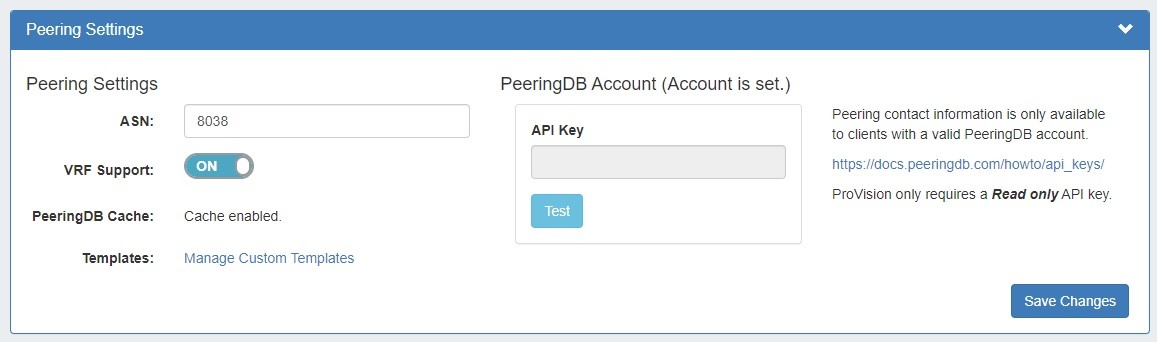
For multiple ASNs, separate each ASN with a comma (e.g. "1234, 5678").
When done, click "Save Changes" to save your changes.
Expand title How to set an ASN via the Peering Tab... From the Peering Tab, go to the IX's subtab and then click "Settings".

Peering Settings will display.
Under the "Config" section, you'll see a field to add an ASN - fill in the desired ASN(s), and click "Add".
...
Click one of the options below for details:
Expand title How to set PeeringDB Credentials via the Admin Preferences Page... From the Admin Settings page, go to Peering -> Peering Settings.
The current PeeringDB Account status will display next to "Peering DB Account".
To set or change the account, Enter enter the PeeringDB account username and passwordAPI Key, then hit "Test" - the connection will be tested. If successful, you can then save the credentials. When you are done, click "Save Changes".
Expand title How to set PeeringDB Credentials via the Peering Tab... From the Peering Tab, go to the IX's subtab and then click "Settings".
Peering Settings will display.
Under the "PeeringDB Account" section, you will see account status instructions to set or change the Peering DB Account.
Click on the "Peering Admin Settings" link to go to the PeeringDB API Connection page to test and set the account.

This opens the PeeringDB API Connection page.
Enter the PeeringDB account username and passwordAPI Key, then hit "Test" - the connection will be tested. If successful, you can then save the credentials.
Additional Options for Local Installations
...
| Expand | |||||||||||||
|---|---|---|---|---|---|---|---|---|---|---|---|---|---|
| |||||||||||||
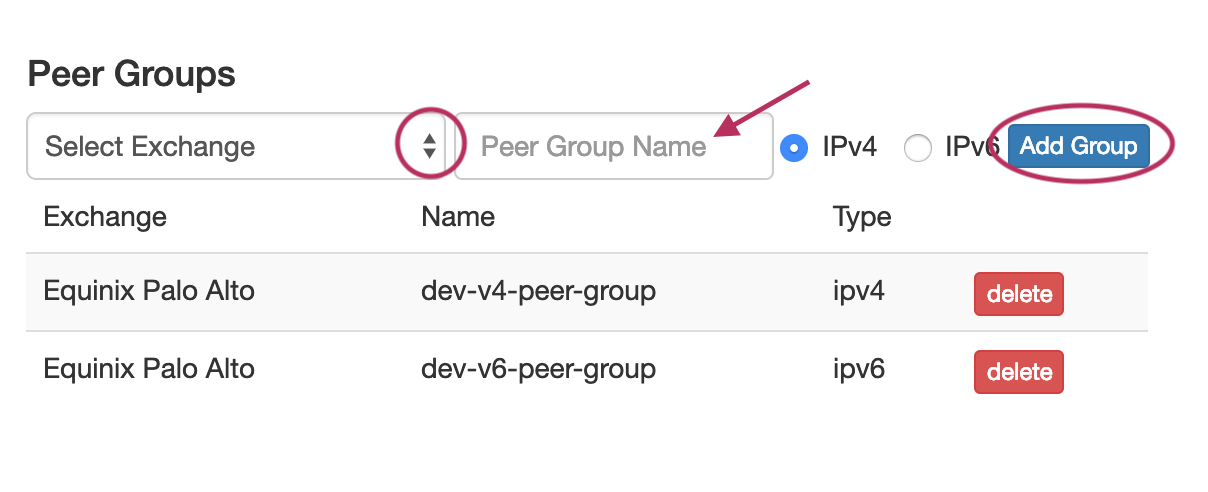
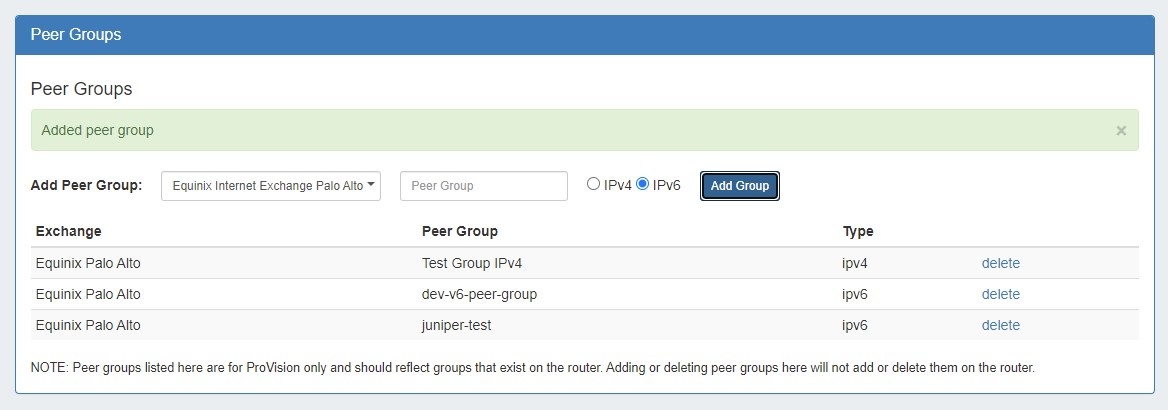
1) Add Router(s)Adding a router is the fundamental base and first step of working with peering in ProVision. Routers may be added through the "Add Router" button in the Peering Tab. For a detailed breakdown of this task, see Peering Routers. 2) Add Peer GroupsAssociating the router with a peer group is necessary to link the router to a particular exchange. You may add the Peer Group information either in the "Router Details" page in Peering, or in the Peer Group Gadget prior to adding sessions.
3) Add Session(s)After Routers and Peer Groups have been set up, the next step is Adding Sessions to ProVision. You may add a new session through the "Add Session" button in the Peering tab, or you may Import Sessions from an existing router. Importing sessions requires Admin level permissions, and is accessed through the Data Import Tab in the Admin section of ProVision. 4) Configure SessionsOnce a session has been added, you will see it in the session list. For a newly added session, the status will show as "Not Configured". There are a few options to configure sessions:
5) Manage CommunicationsOnce a session has been added with a peer, you will see the peer listed Peer List under the Peers tab. You'll also be able to manage communications from Exchange Communications. You will see the list of Peers, their ASNs, Name, Request Status, Notes (log), and the Action Menu (wrench icon). From here, you may send peer requests, mark peer status, and view notes on previous actions. The available options and flow depends on the Peer Status and whether a request is Outgoing or Incoming.
6) Repeat for new Routers, Sessions, and Peers.To add additional Routers, Sessions, and Peers repeat steps 1, 2, or 3, and manage your newly added sessions and peer communications similarly with steps 4 and 5. |
...