| HTML |
|---|
<div id="google_translate_element"></div>
<script type="text/javascript">
function googleTranslateElementInit() {
  new google.translate.TranslateElement({pageLanguage: 'en'}, 'google_translate_element');
}
</script>
<script type="text/javascript" src="//translate.google.com/translate_a/element.js?cb=googleTranslateElementInit"></script> |
InfoBlox Zone Import
The ProVision "InfoBlox Data Import InfoBlox " option imports InfoBlox DNS zones using a provided Host, Username, and Password. It It pulls all zones on the InfoBlox LOCAL grid and adds them to a designated DNS Group. It is advised to create a DNS Group prior to the import with default parameters and NS records to be inherited by the imported records.
...
Review the existing DNS Groups in the DNS tab, and create a new DNS Group if necessary. See Working with DNS Groups for details on editing or creating DNS Groups.
...
Although it is not strictly necessary to have the InfoBlox server created in ProVision prior to import, creating or verifying the server at this point gives you an opportunity to test the connection and attach the InfoBlox server to the DNS Group selected in step 1.
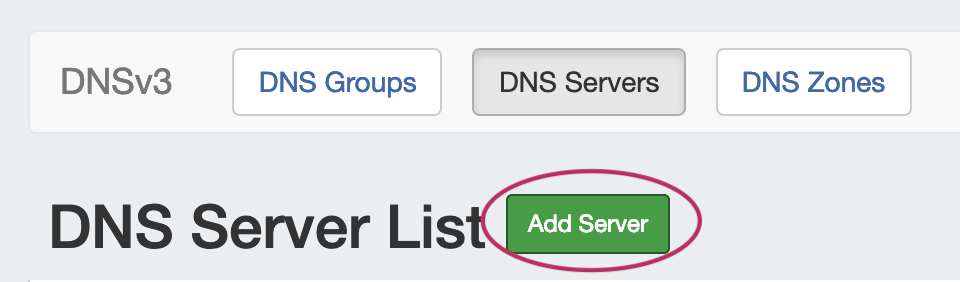
Go to the DNS Tab, DNS Servers section, and either verify that the desired server is shown in the server list, or click the "Add Server" button to create a new InfoBlox server.
If creating a new server, ensure that "InfoBlox" is selected for the DNS Service.
...
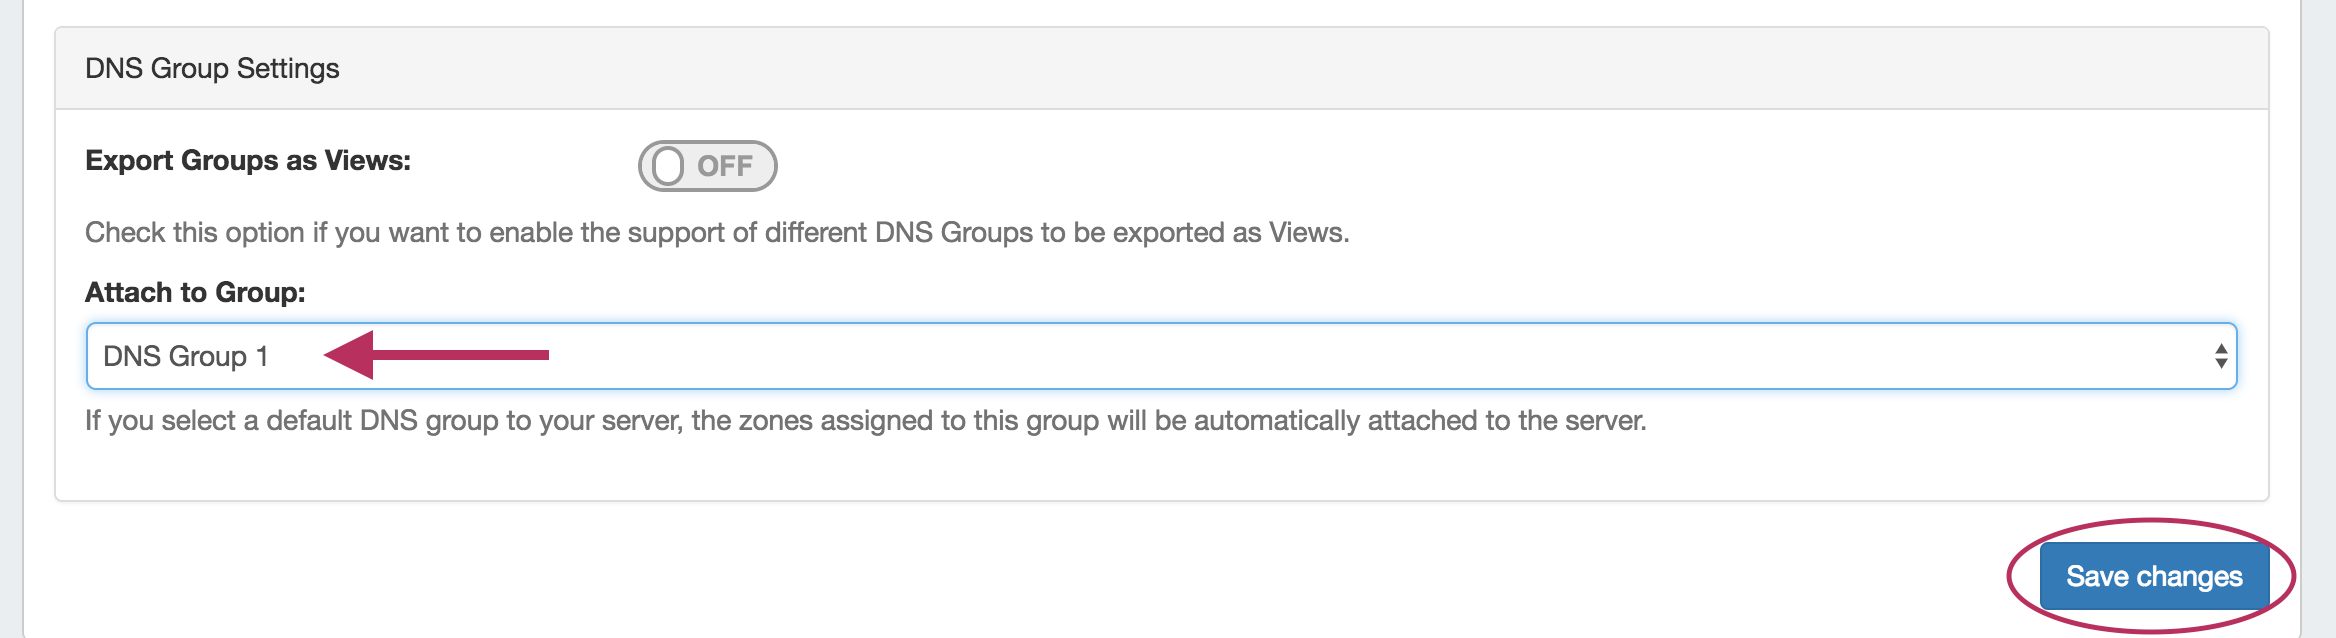
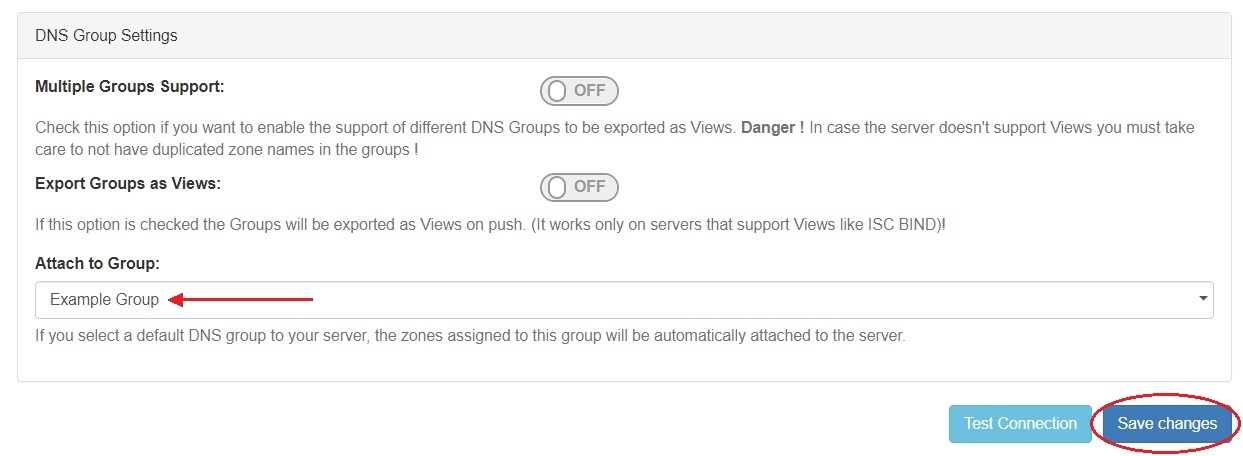
Under the "DNS Group Settings" section of the server detail page, ensure that the DNS Group from step 1 is selected as the server's Attach to Group setting, and click "Save changes".
Step 3: Import your InfoBlox zones
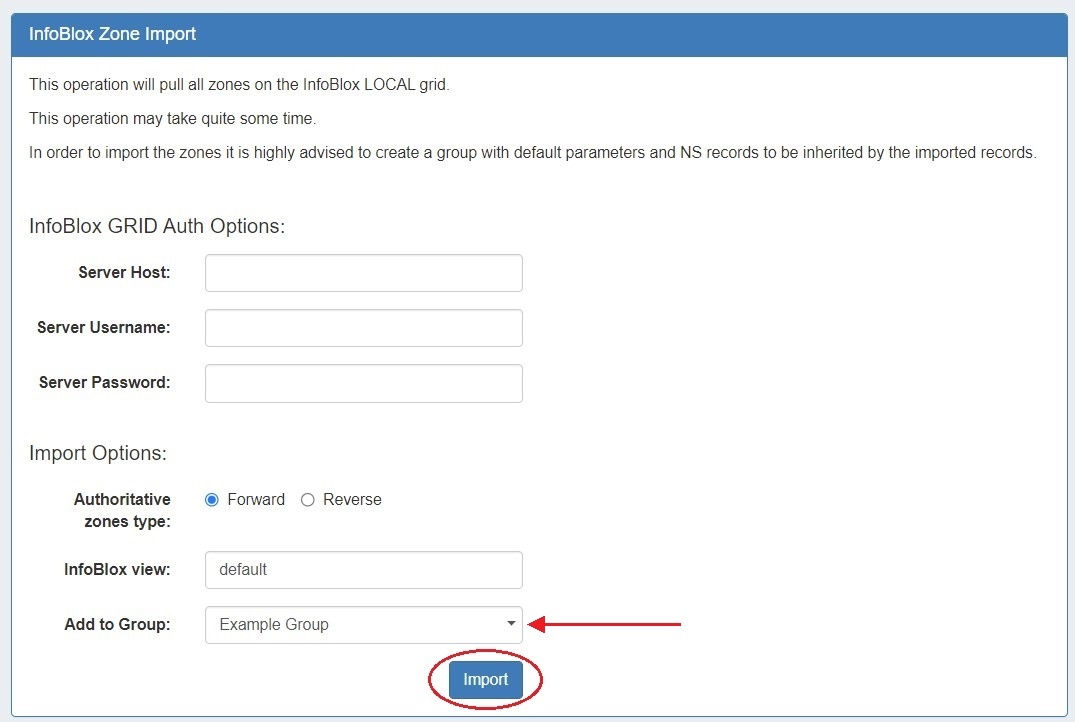
Once server setup has been verified, navigate to the Data Import Tab in the Admin section. Select the "InfoBlox Zone Import" link.

Then, enter the InfloBlox server Host, Username, and Password. Select Forward or Reverse zone type, the InfoBlox view, and the ProVision DNS the DNS Group to add the zones to.
Once all information has been entered, click the "Import" button.
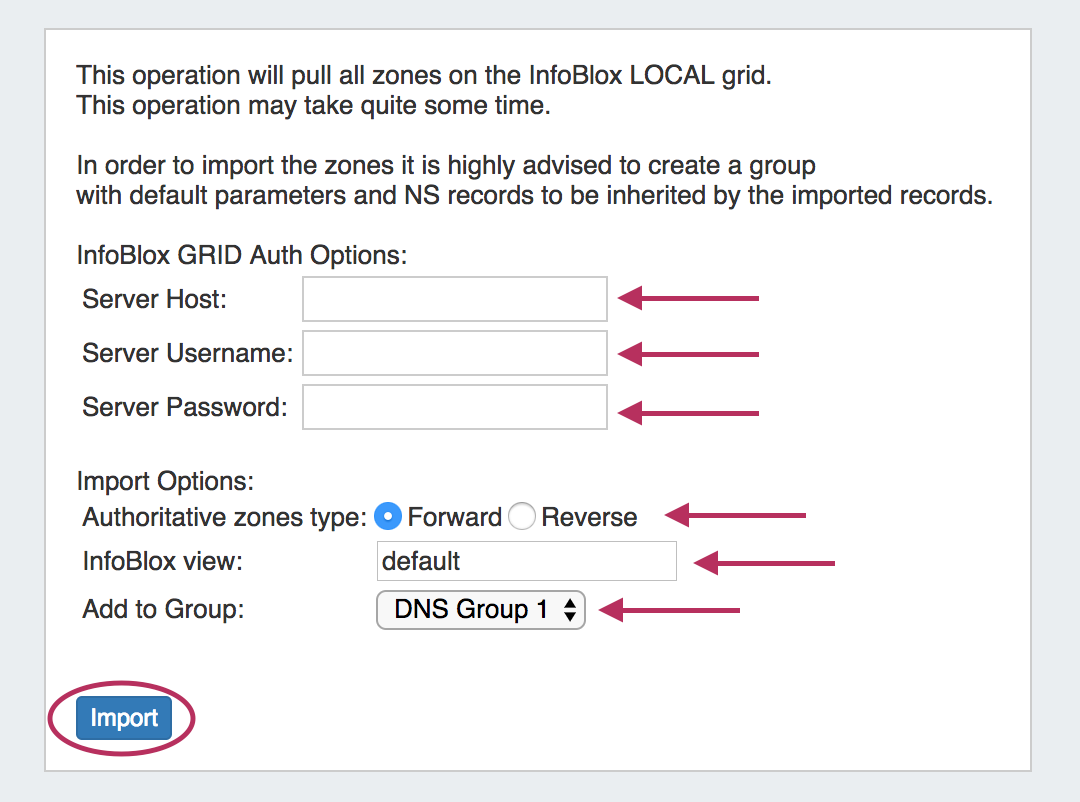
The import may take a couple of minutes. If errors occur, they will show under the Pull in Progress message.
...
Verify the zones by exiting the Admin area of ProVision, clicking on the DNS tab, and reviewing the zones under the Group previously selected for the import.