IP Block Management

Managing IP Blocks
...
| Expand | ||
|---|---|---|
| ||
IPAM Manage Features
IPAM Manage is accessed from: the
In IPAM Manage, you can:
|
| Expand | ||
|---|---|---|
| ||
IPAM Gadget Features
The IPAM Gadget is accessed from the Resource Entry Page → IPAM Gadget, once it has been enabled for the section. Here, you can:
Both IPAM Manage and the IPAM Gadget have customizable column names, order, and visibility, as well as options for user-defined meta columns (for details on setting up customization of the IPAM Manage / IPAM Gadget block list, see IPAM Parameters → Edit Columns). |
...
| Table of Contents |
|---|
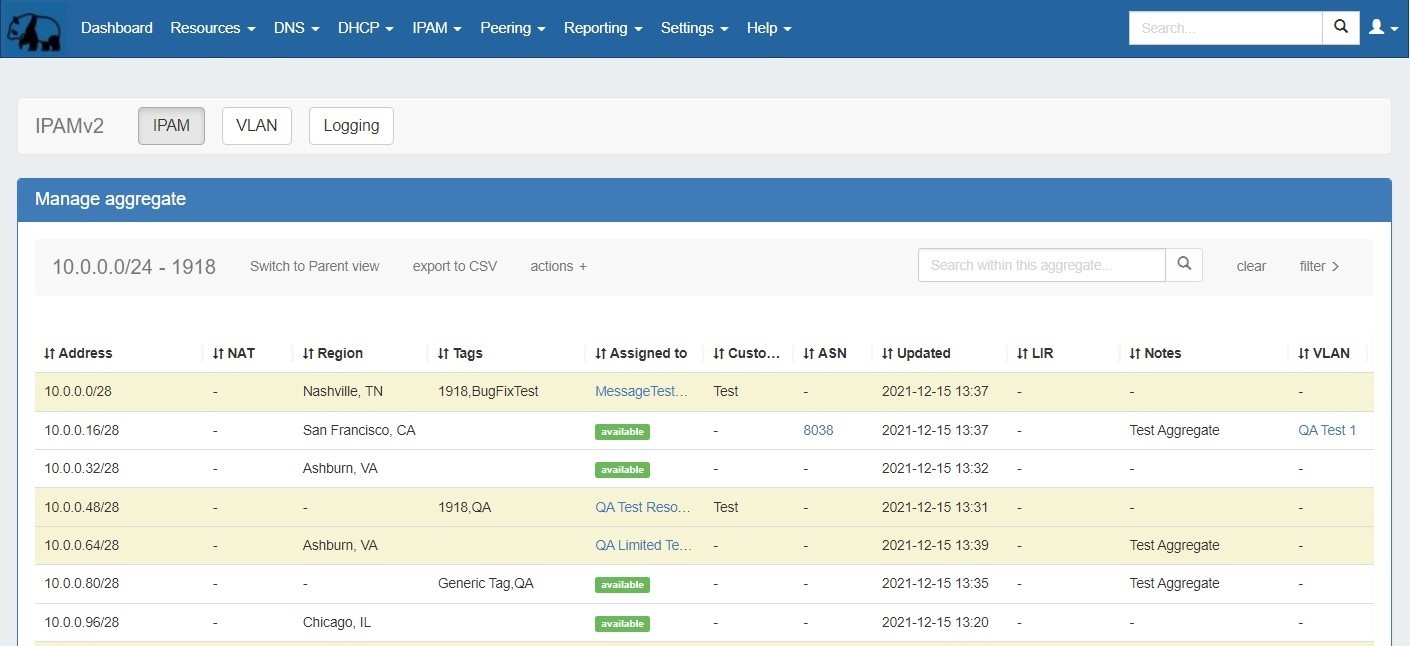
Working in IPAM Manage
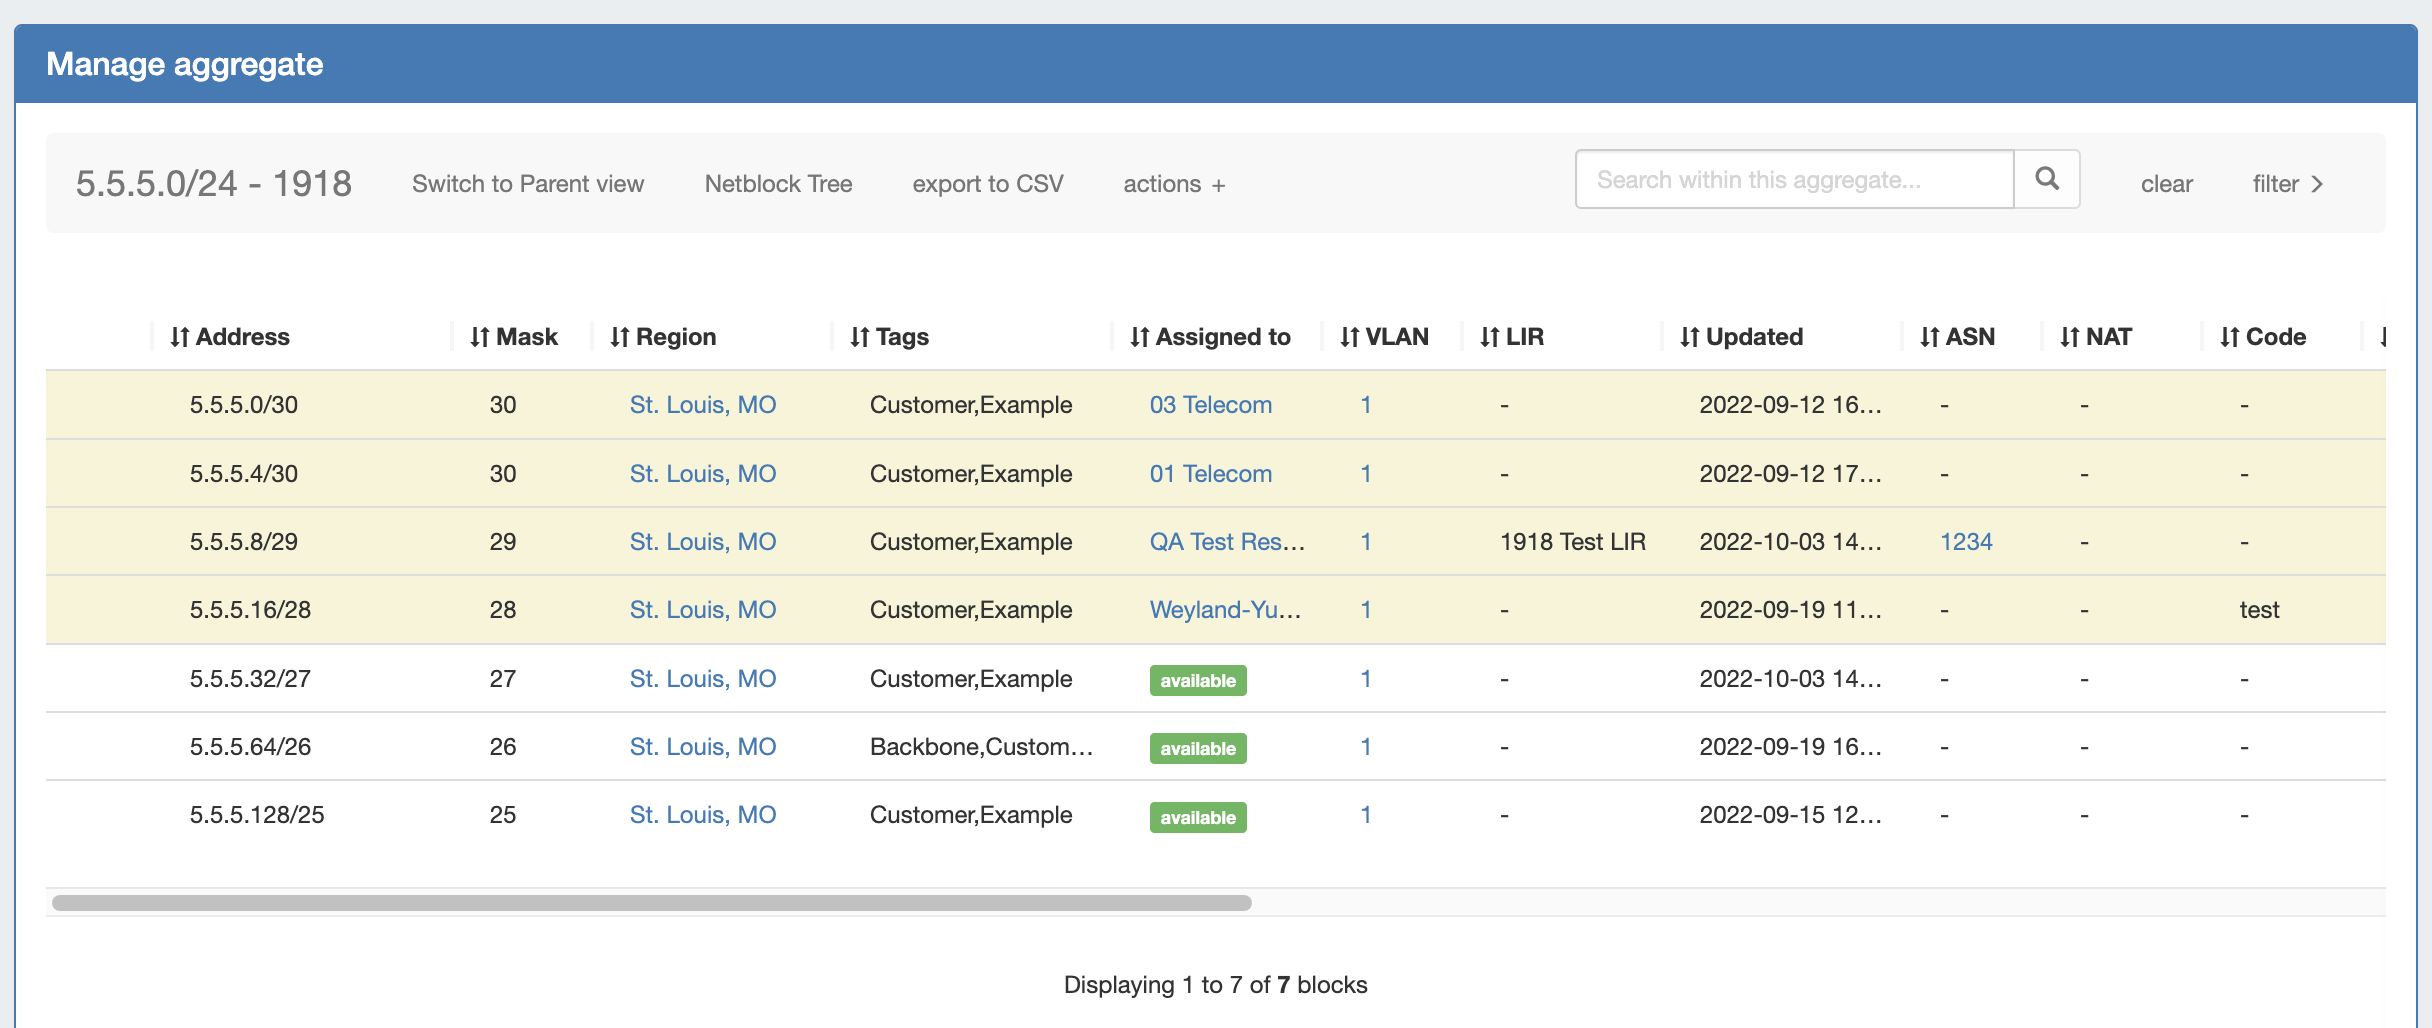
In IPAM Manage, you can manage aggregate level actions, such as Split , Clean Up, Alerts, and Export, as well as viewing and managing individual blocks. In IPAM Manage - Advanced, aggregate-level actions are not available.
...
Open the IPAM Manage screen for a block or aggregate by:
- Searching for the block in the Global search, and clicking on the resulting CIDR
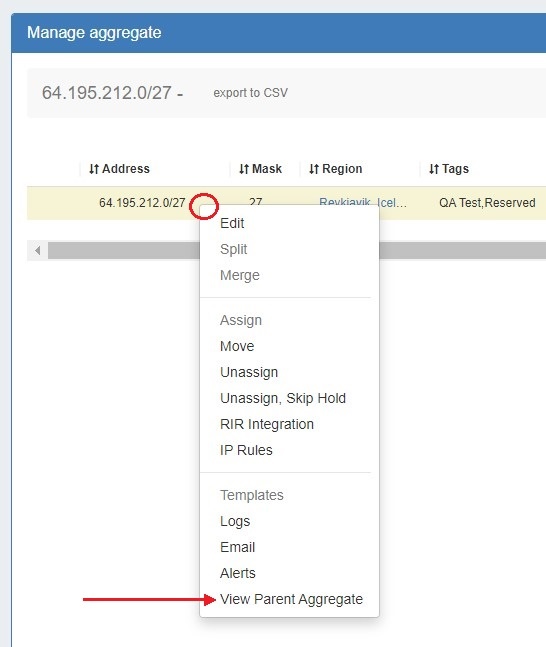
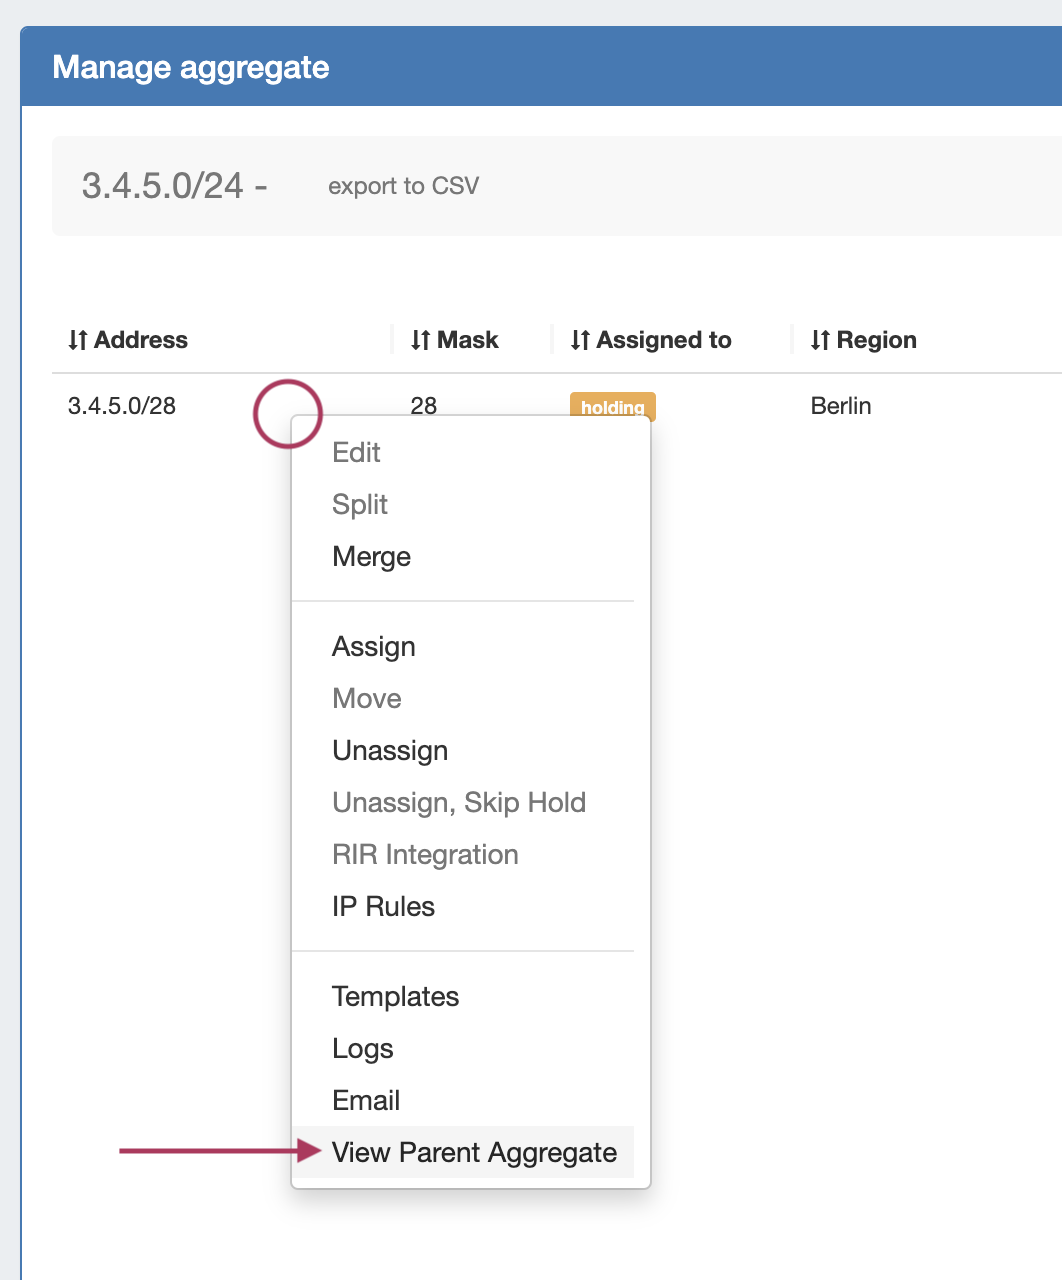
View the parent aggregate for a Global search / IPAM search result by right clicking to open the action menu for the block, then select "View Parent Aggregate".
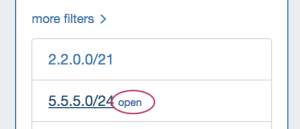
- Clicking the "Open" link in the aggregate blocks list from the IPAM tab.
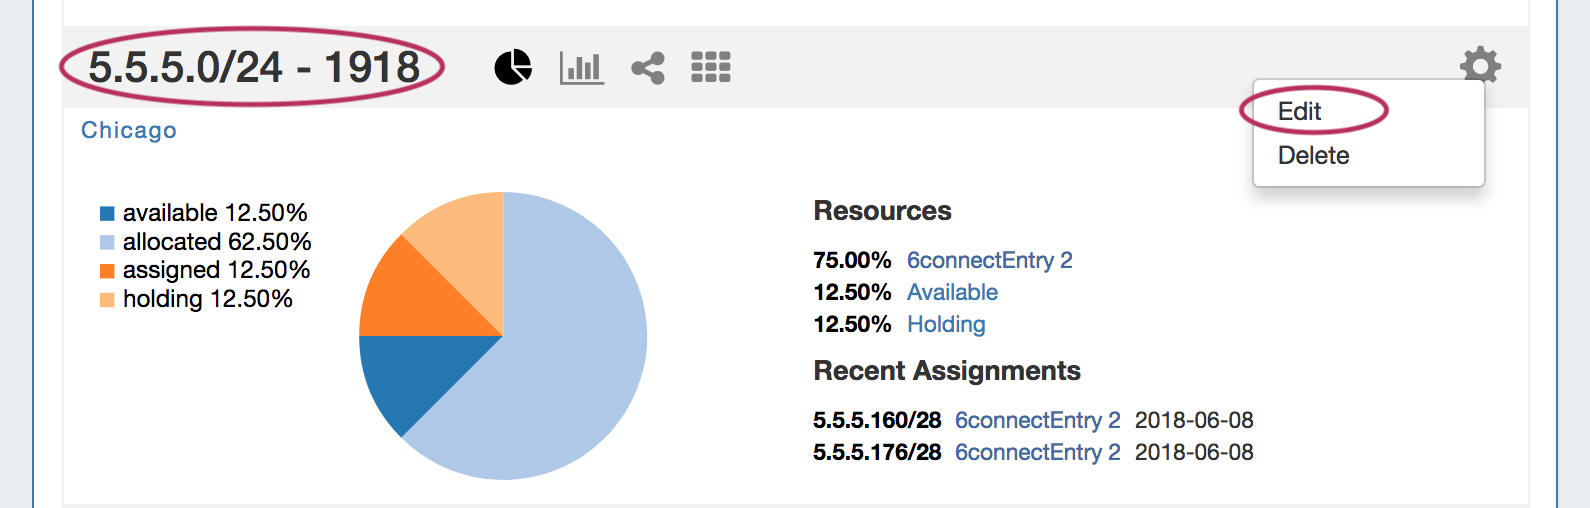
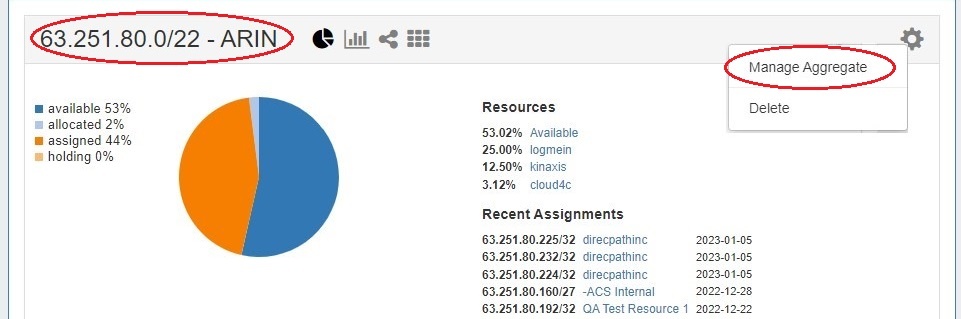
- Clicking on the CIDR header of the Aggregate Block Host Utilization module, or selecting "EditManage Aggregate" from the module's Gear Icon from the the IPAM tab.
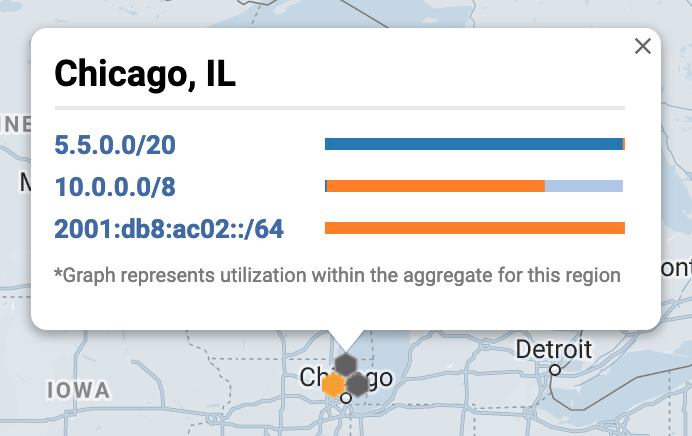
- Clicking on the CIDR displayed in the IPAM Map - Aggregates view.
...
| Info |
|---|
When working in IPAM Manage - Advanced, be aware of the following:
|
...
|
IPAM Manage Views
There are multiple view options in IPAM Manage to view and/or edit blocks: Block View, Parent View, and Netblock Tree.
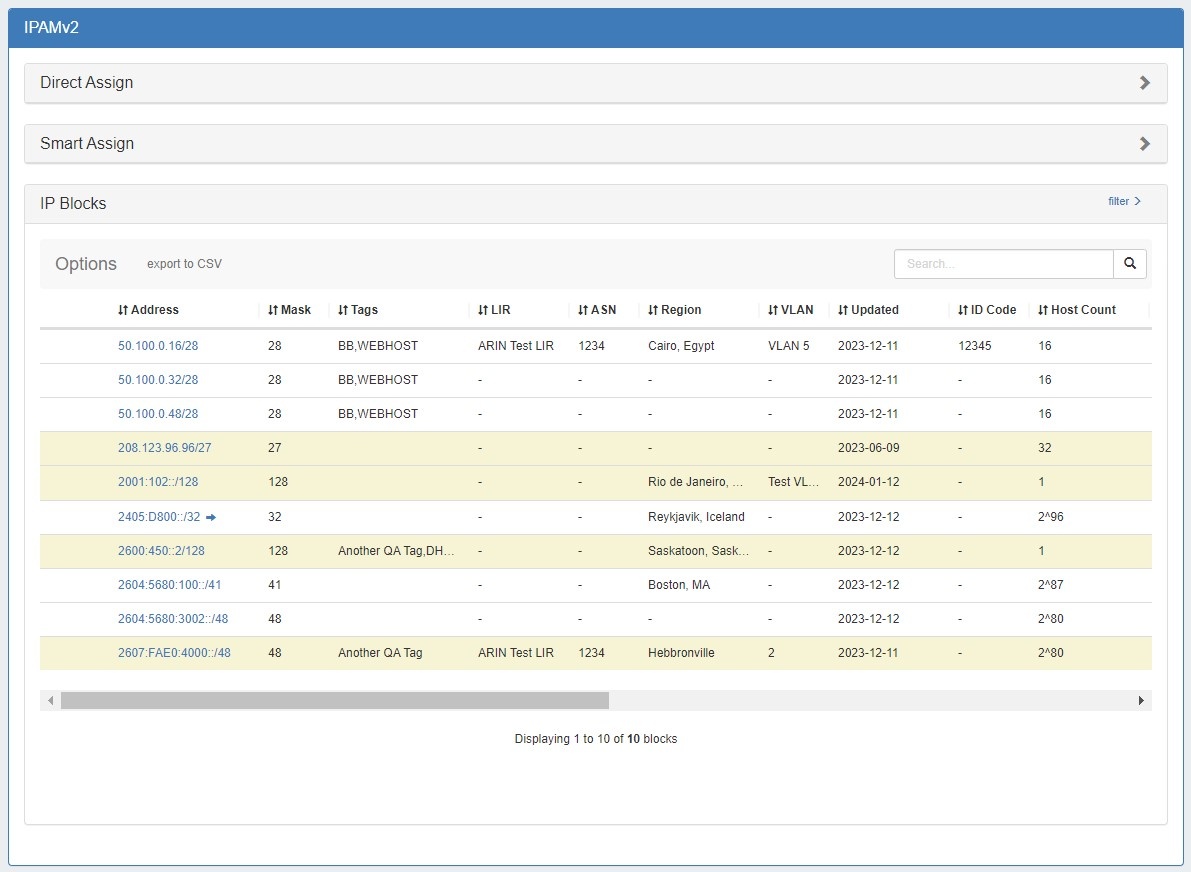
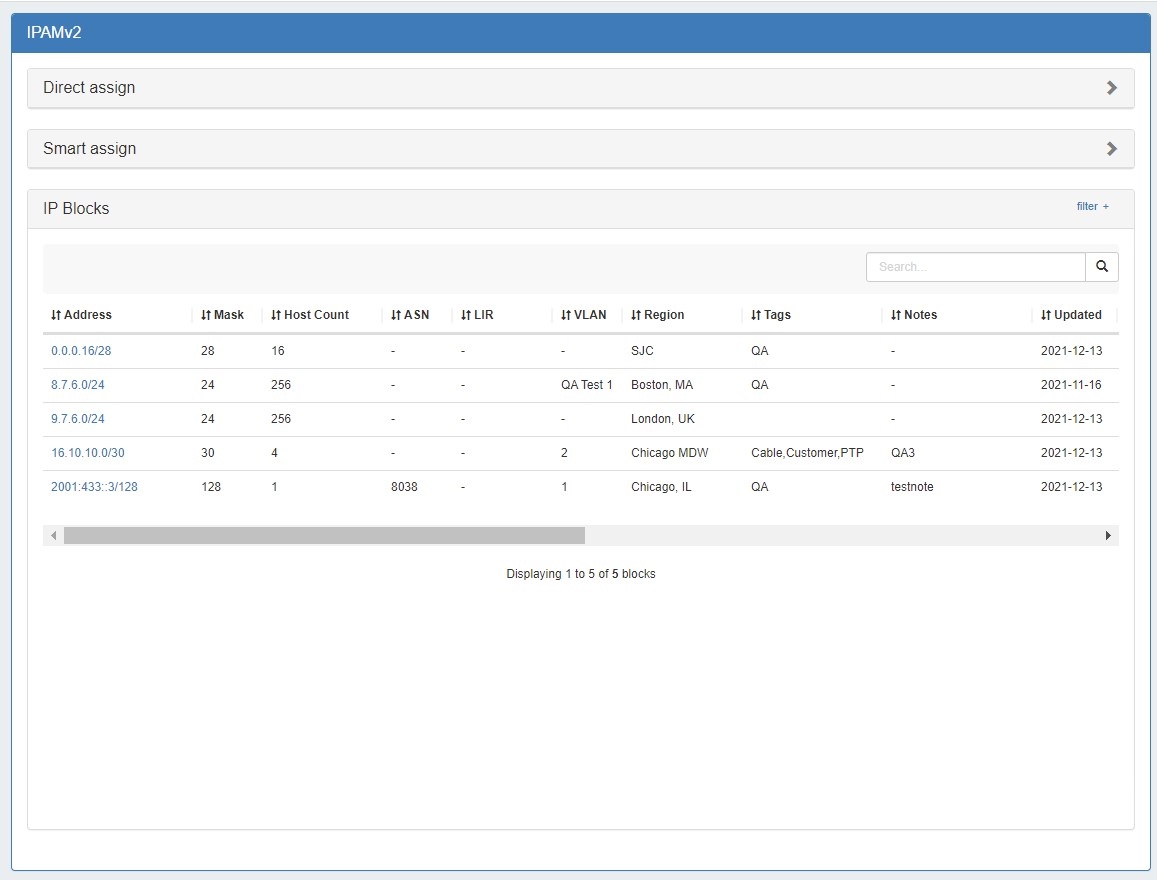
Block View (Default)
Block View is the default IPAM Manage Aggregate screen. Block View displays only the lowest level leaf nodes of aggregates / blocks that exist in ProVision. In this view, all blocks displayed are ProVision objects able to be edited or managed.
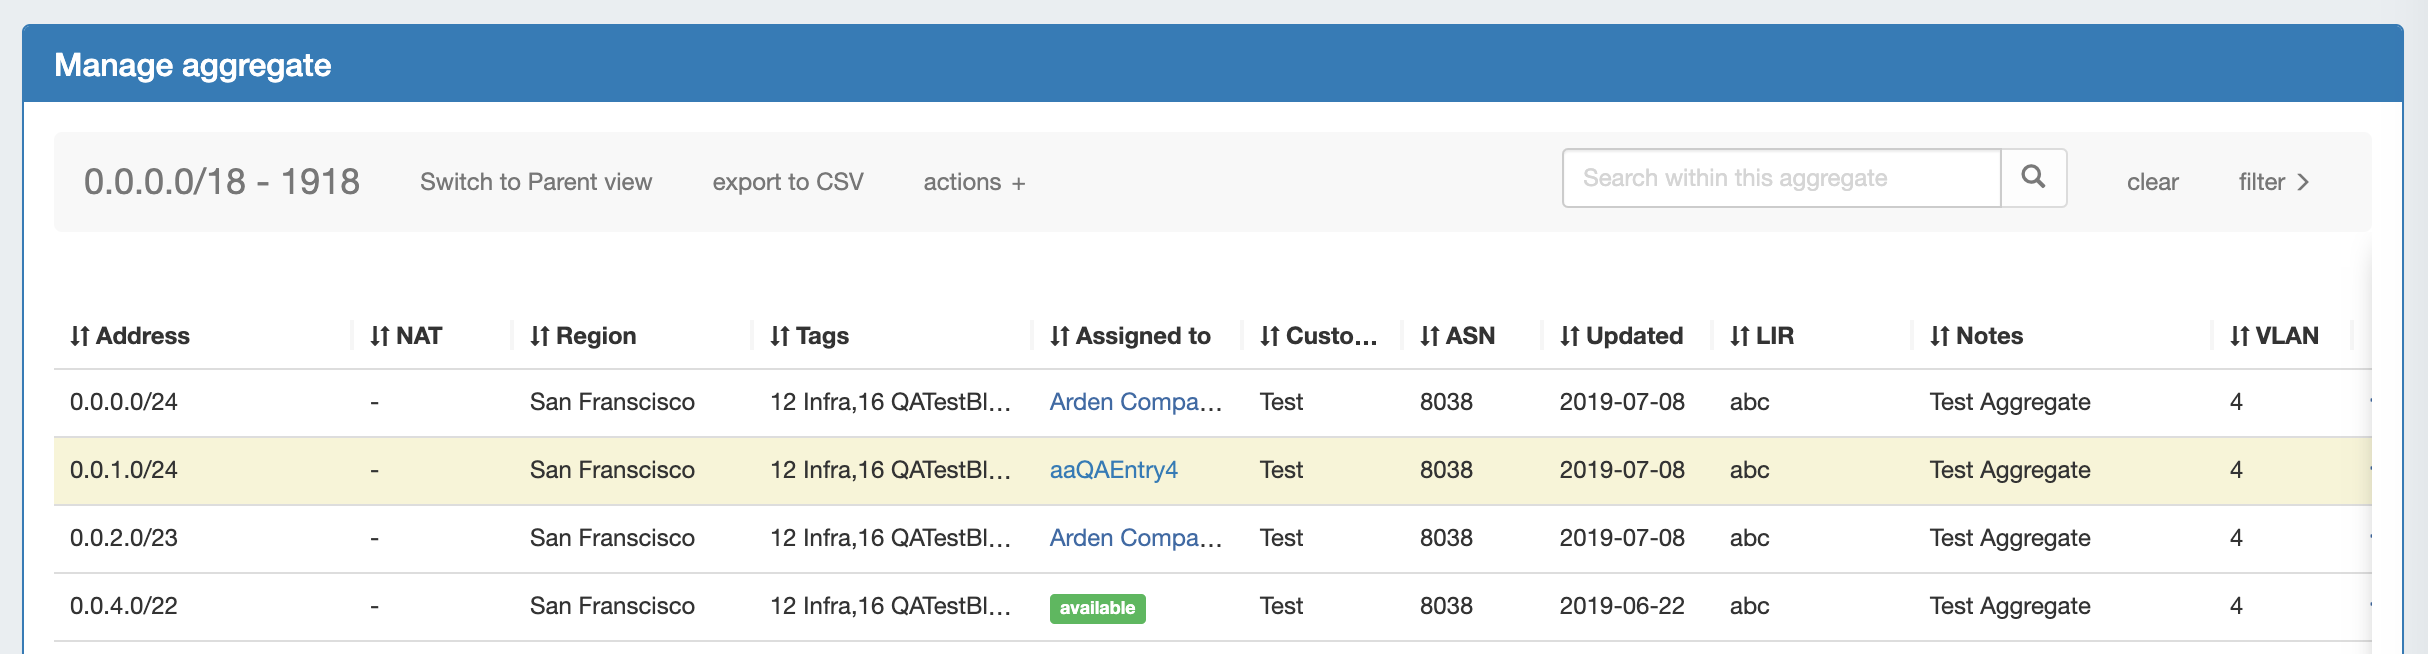
Parent View / Blocks Tree
Parent View shows both low level child blocks and the parent blocks that contain them.
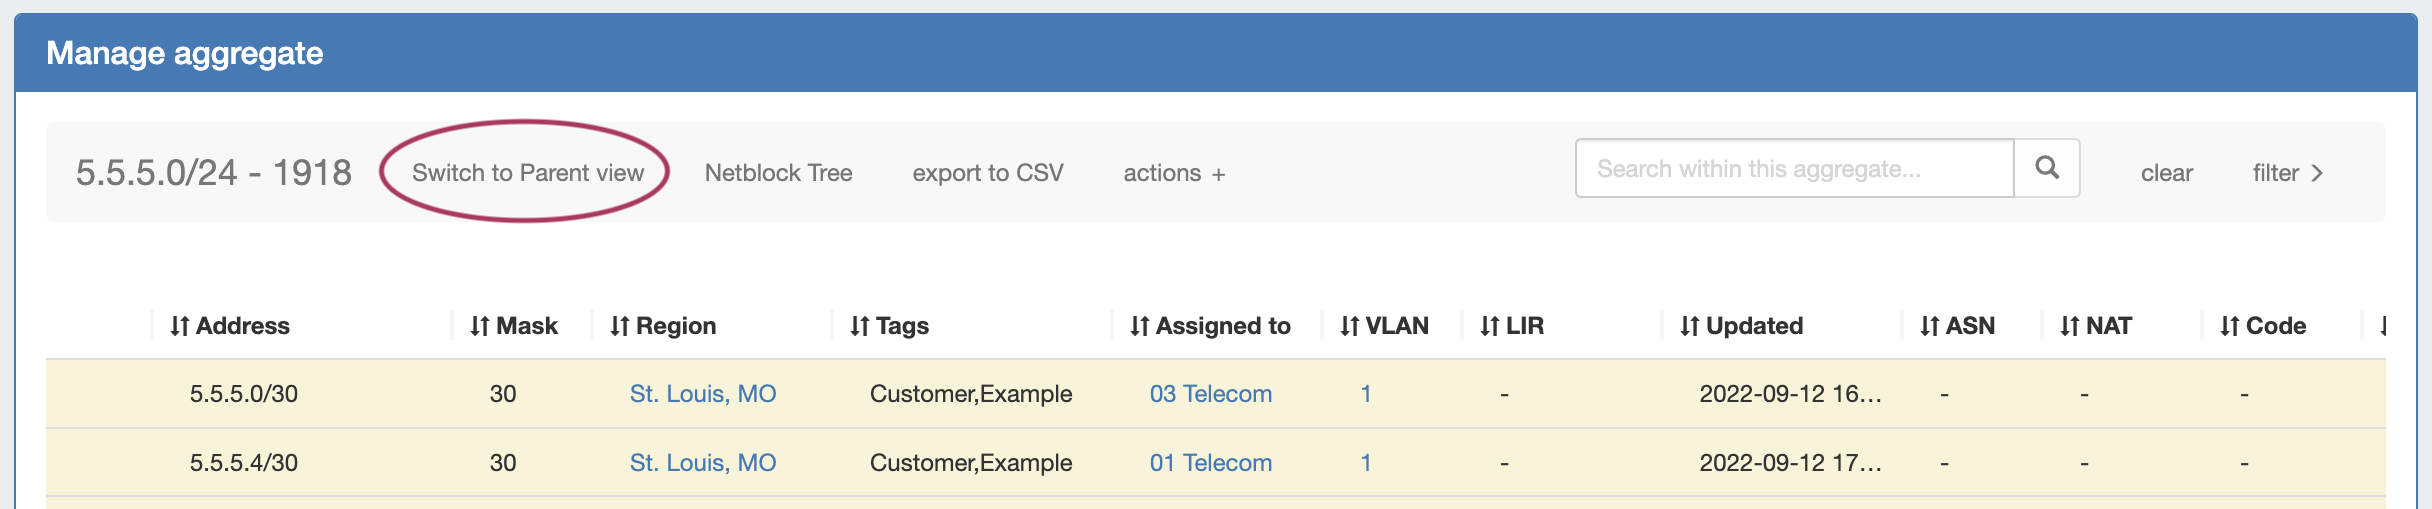
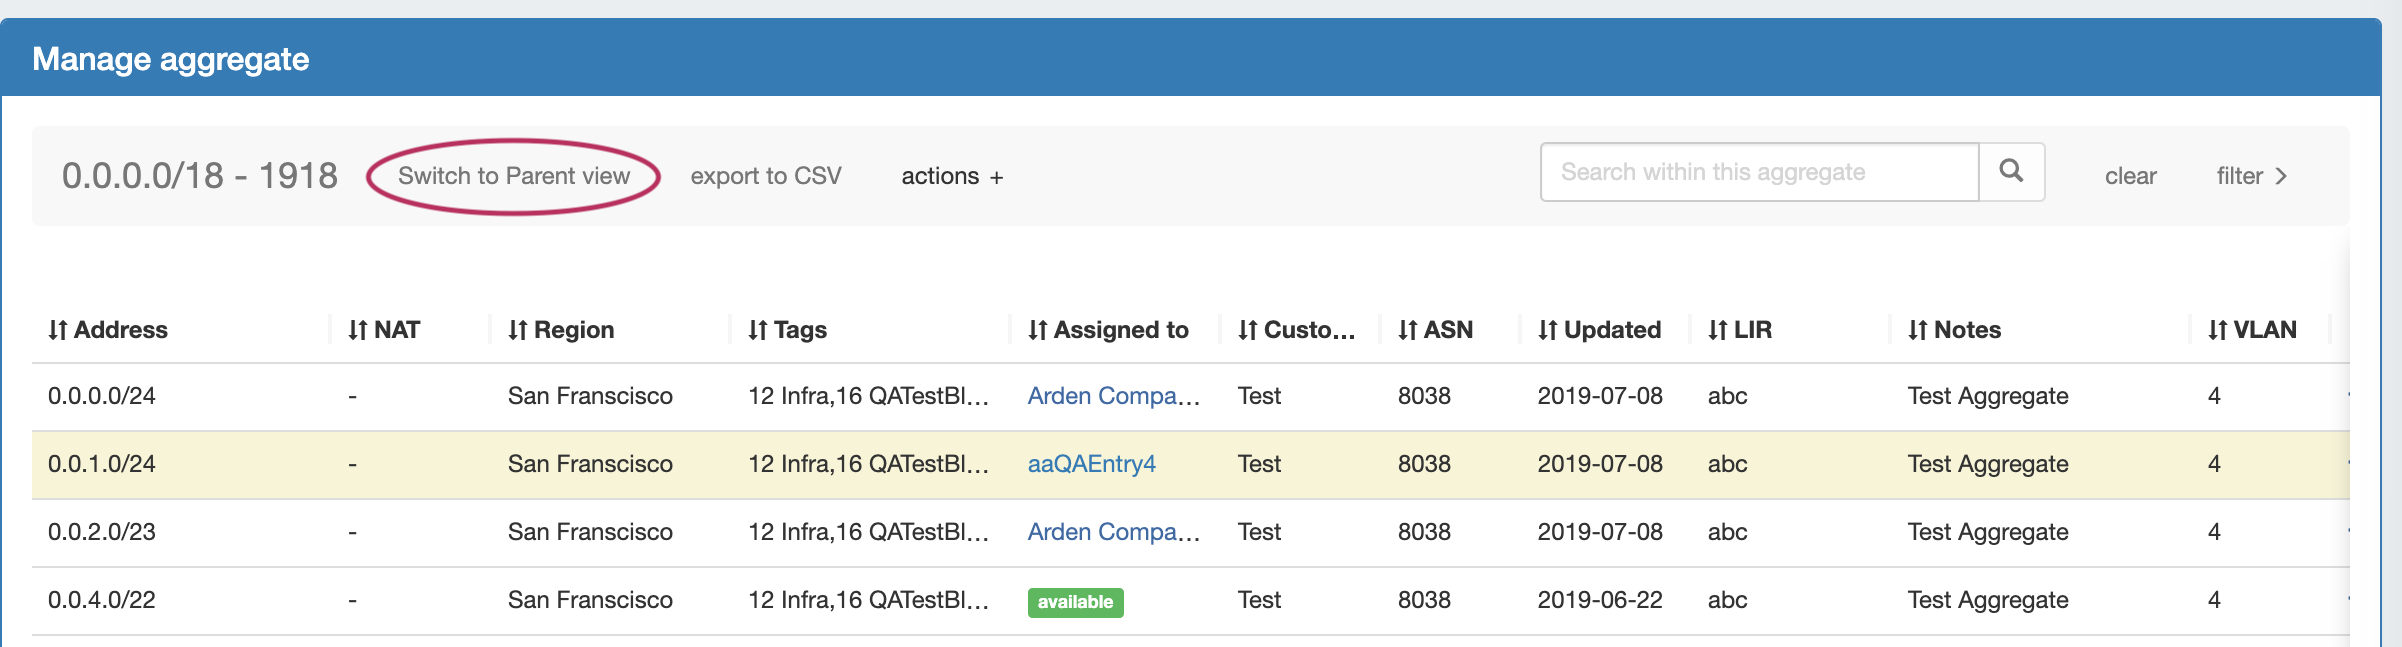
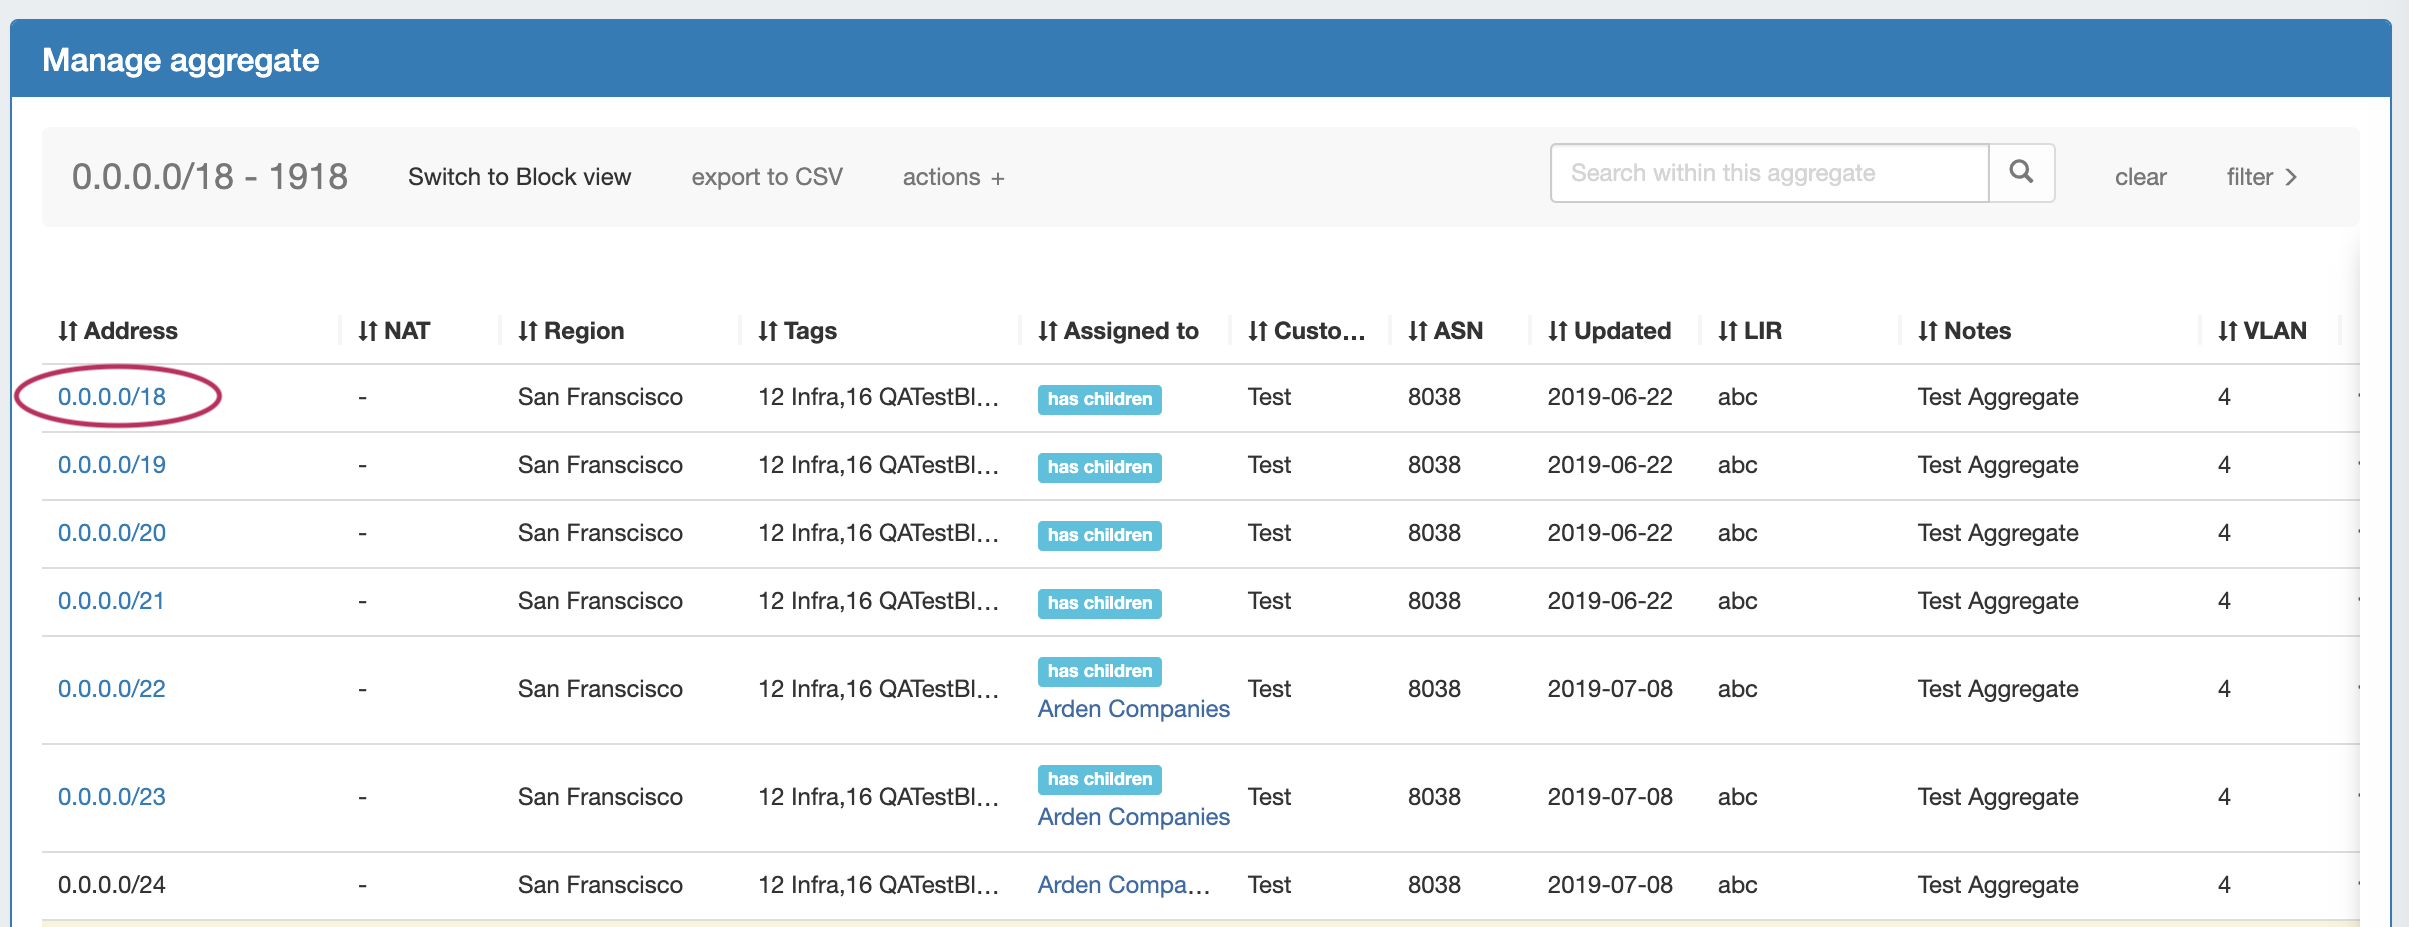
While in Manage aggregate, view parent blocks / IP block hierarchy, click on "Switch to Parent View" at the top of the block list.
You may also enter Parent View via the "Filter" menu, by checking the "Select All Masks" checkbox and clicking "Apply", to show all masks and parent blocks.
Parent Blocks are distinguished by having a CIDR address link, and displaying a blue bar denoting "Has Children" under the "Assigned to" column.
Both Parent and Child blocks may be edited in this view.
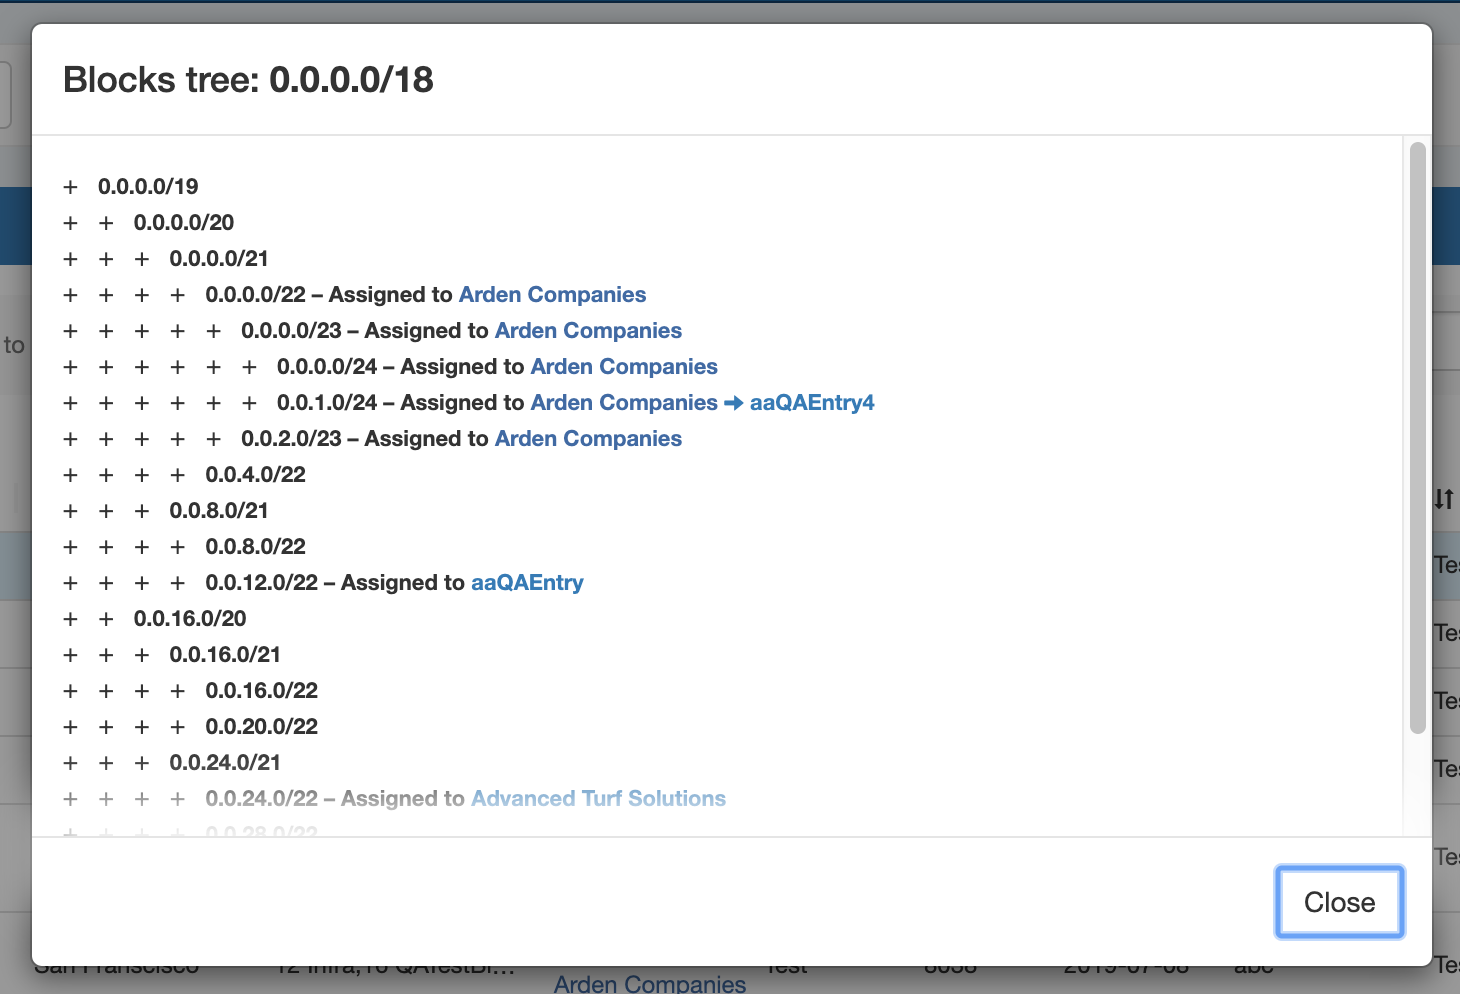
Clicking on the Parent Block blue CIDR link will display the Parent View Blocks Tree, providing a simplified hierarchy view.
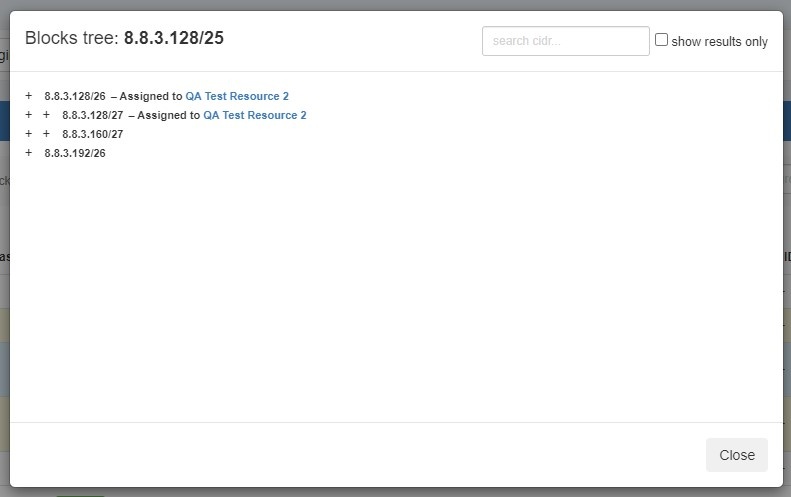
To search blocks by CIDR use the searchbox at upper right. This will highlight the specific block. For larger trees, you can limit the view to search results only by enabling the checkbox for "show results only".

Netblock Tree
Netblock Tree View displays the hierarchy organization of Parent / Child blocks under a Top Level Aggregate, but eliminates intermediate "bookkeeping" / allocated blocks, and prioritizes masks with assigned blocks. This provides a more effective view at the specific hierarchy levels used for assignments and management.
The Netblock Tree view detects which subnet masks have changes in assignments applied, and then automatically builds branches or displays individual addresses at those levels. This view includes the display of theoretical blocks which do not currently exist as ProVision objects, providing a more holistic working overview of the netblock structure.
While in Netblock Tree View, click on the expansion caret to expand / close a hierarchy branch parent block. Only blocks which exist in ProVision will be able to be edited or expanded.
Netblock Tree Logic:
- The top level at which an assignment exists denotes the top starting mask of the Netblock Tree View
- Proceeding down the tree, if one of the following conditions are detected, a new branch is created showing all blocks with a prefix at that level - regardless of of whether they exist as editable ProVision block objects.
- A change in assignment is detected (a block is assigned to a different resource than its parent )
- A manual split has been performed at the assignment level of a sibling/cousin block
- If no more changes in assignment are detected down the block tree, the lowest branch will display as containing individual addresses (/32s or /128s). The addresses may be both theoretical and those existing in ProVision.
- Expandable branches display with blue arrows, and denote that the block with that prefix also exists in ProVision → Block View
- Blocks and addresses which exist in ProVision will be editable in Netblock Tree View, but theoretical blocks at any level are not editable unless created in ProVision.
Example Walkthrough:
| Expand | ||
|---|---|---|
| ||
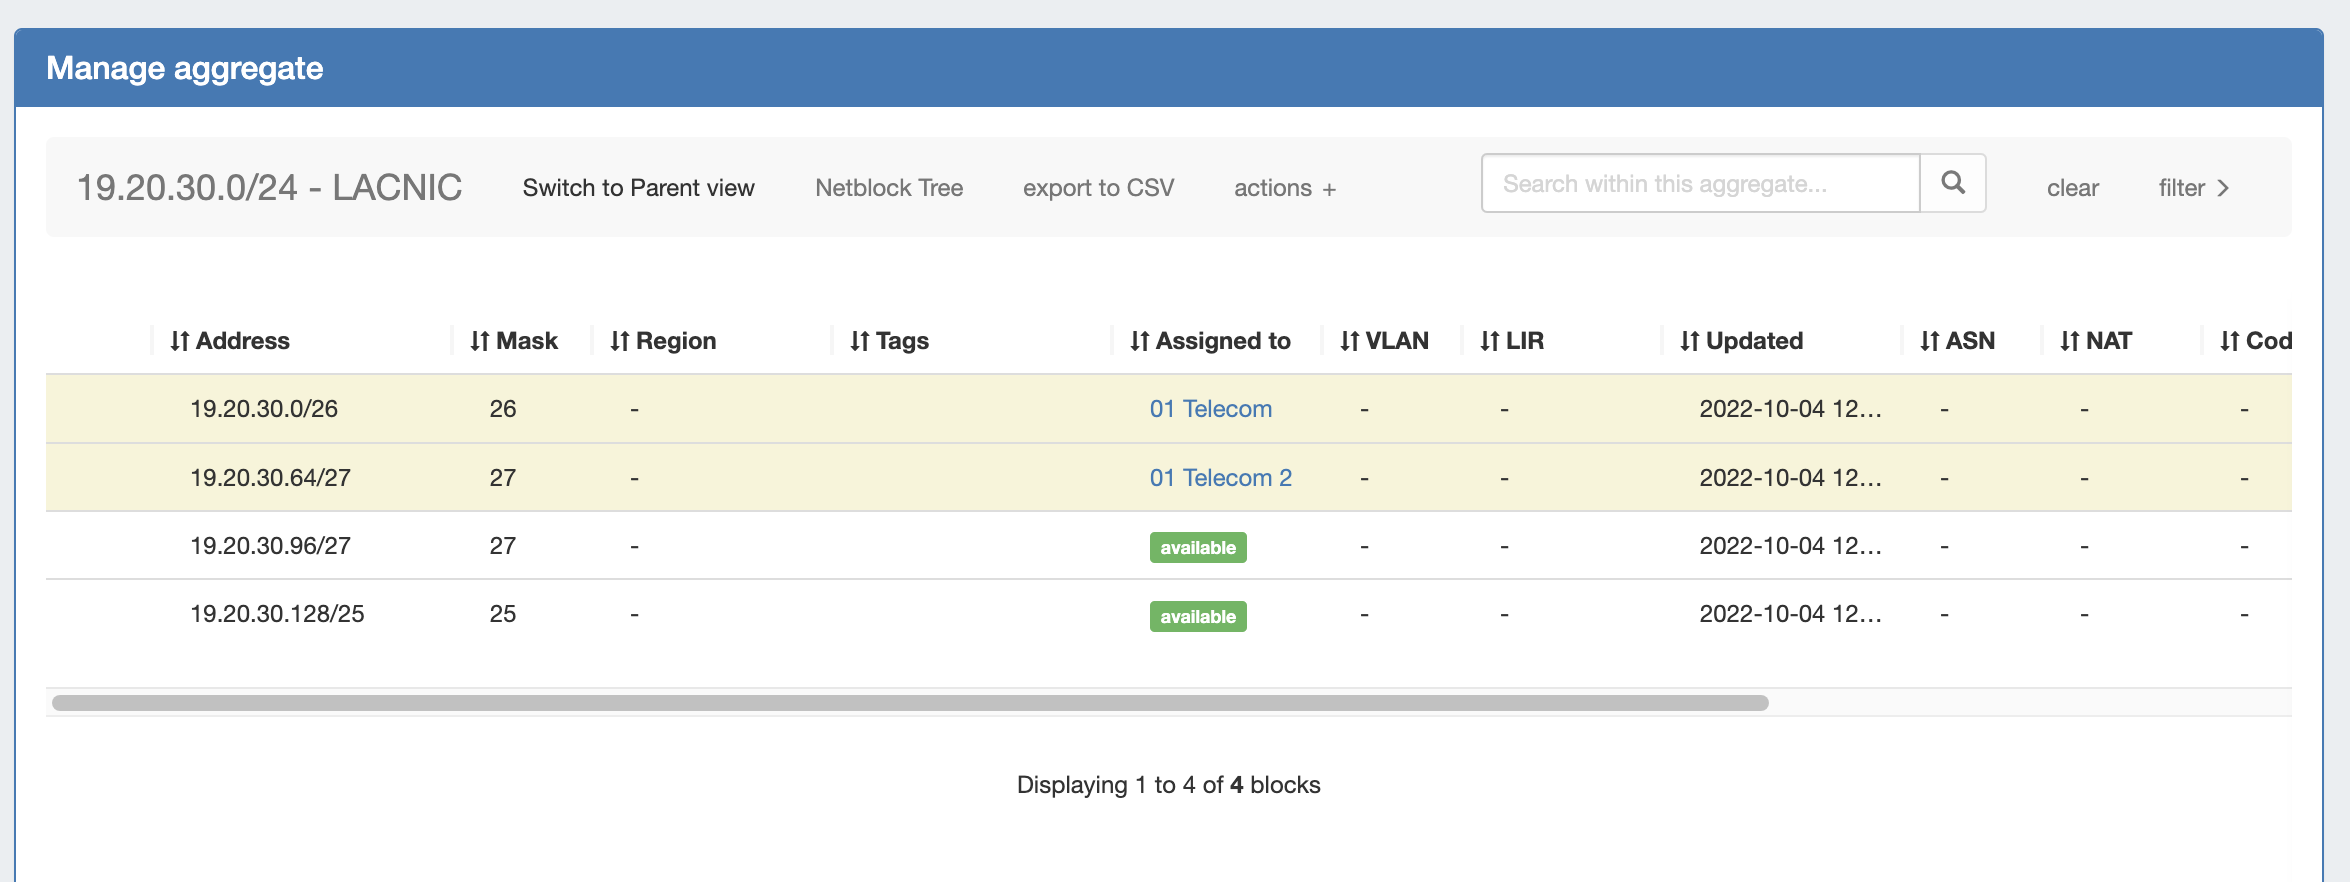
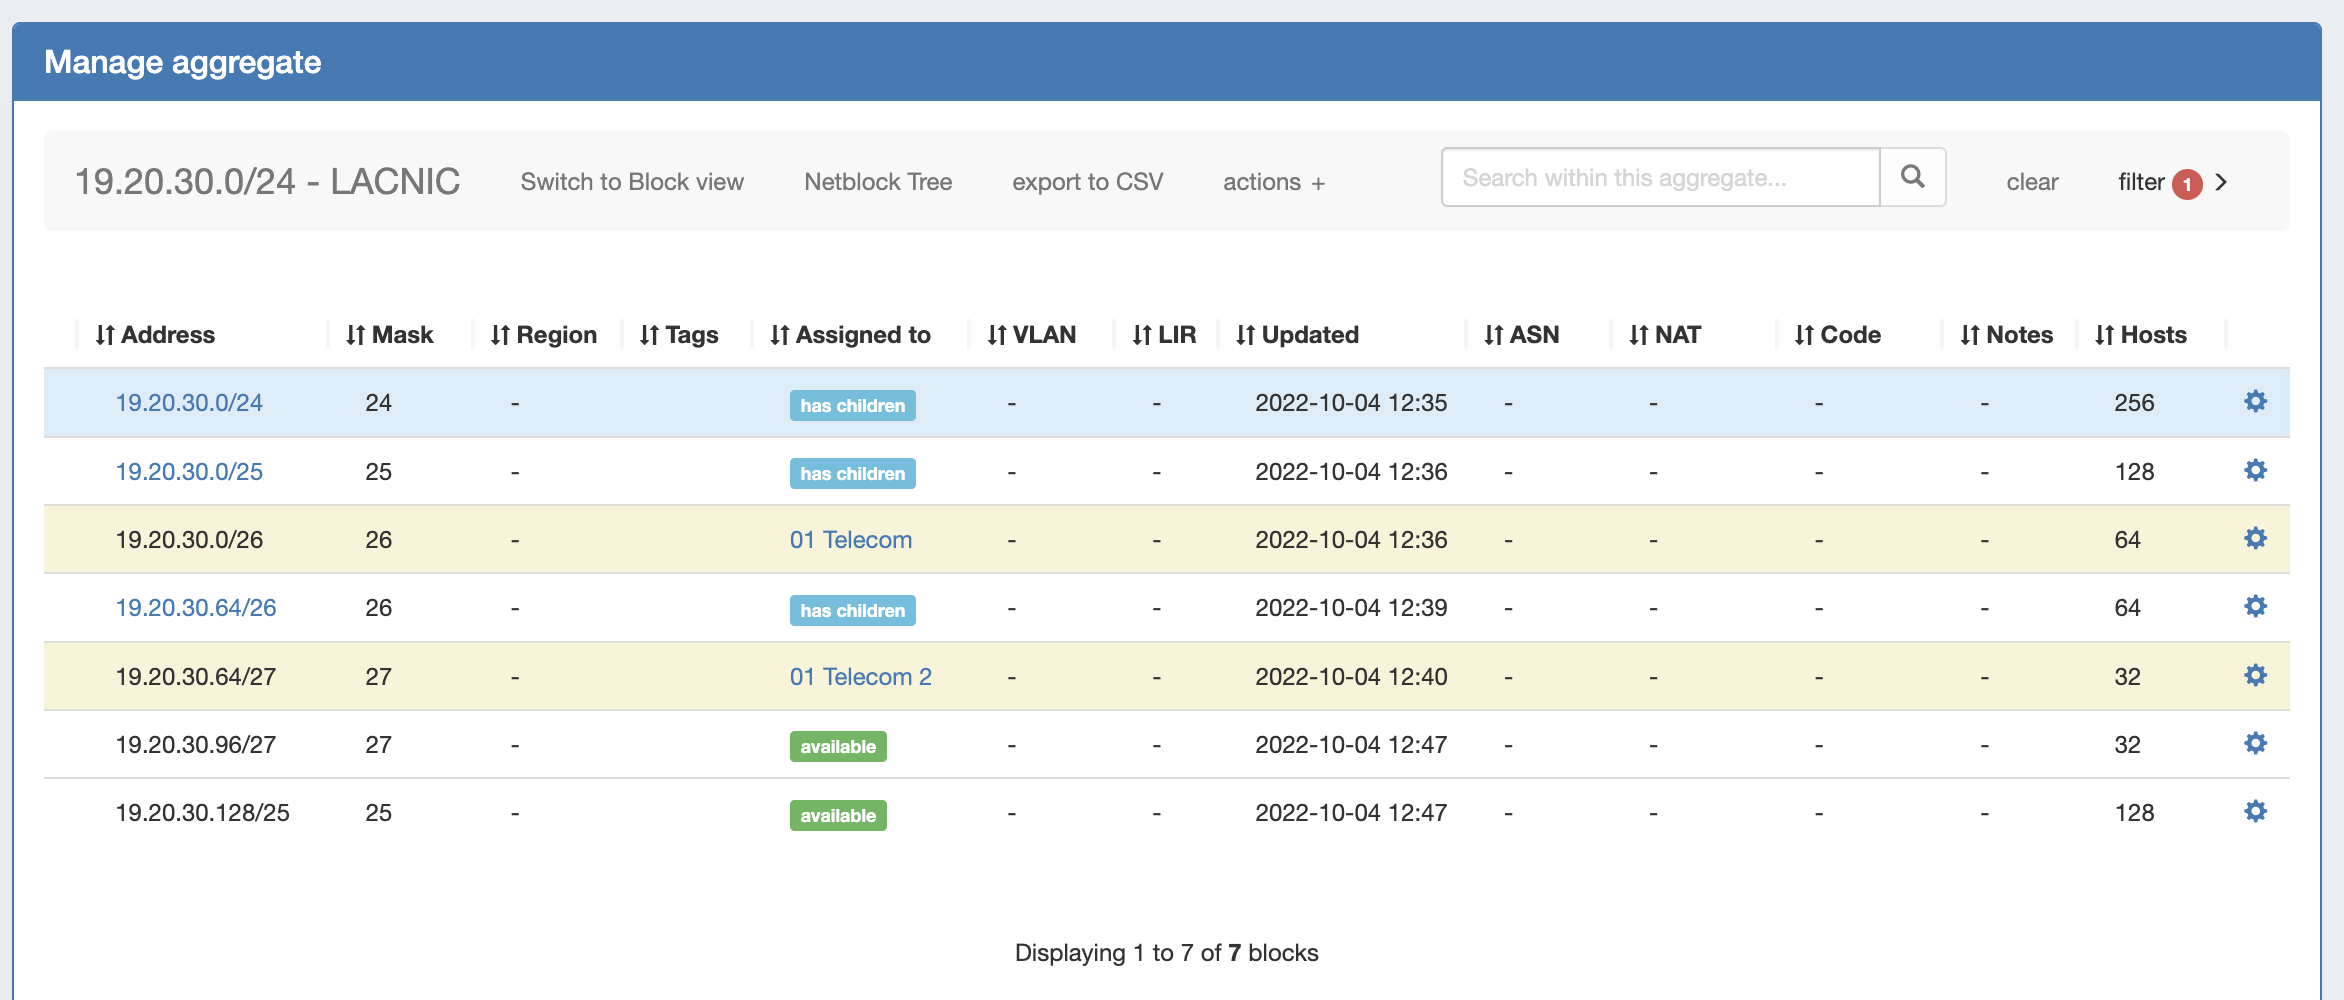
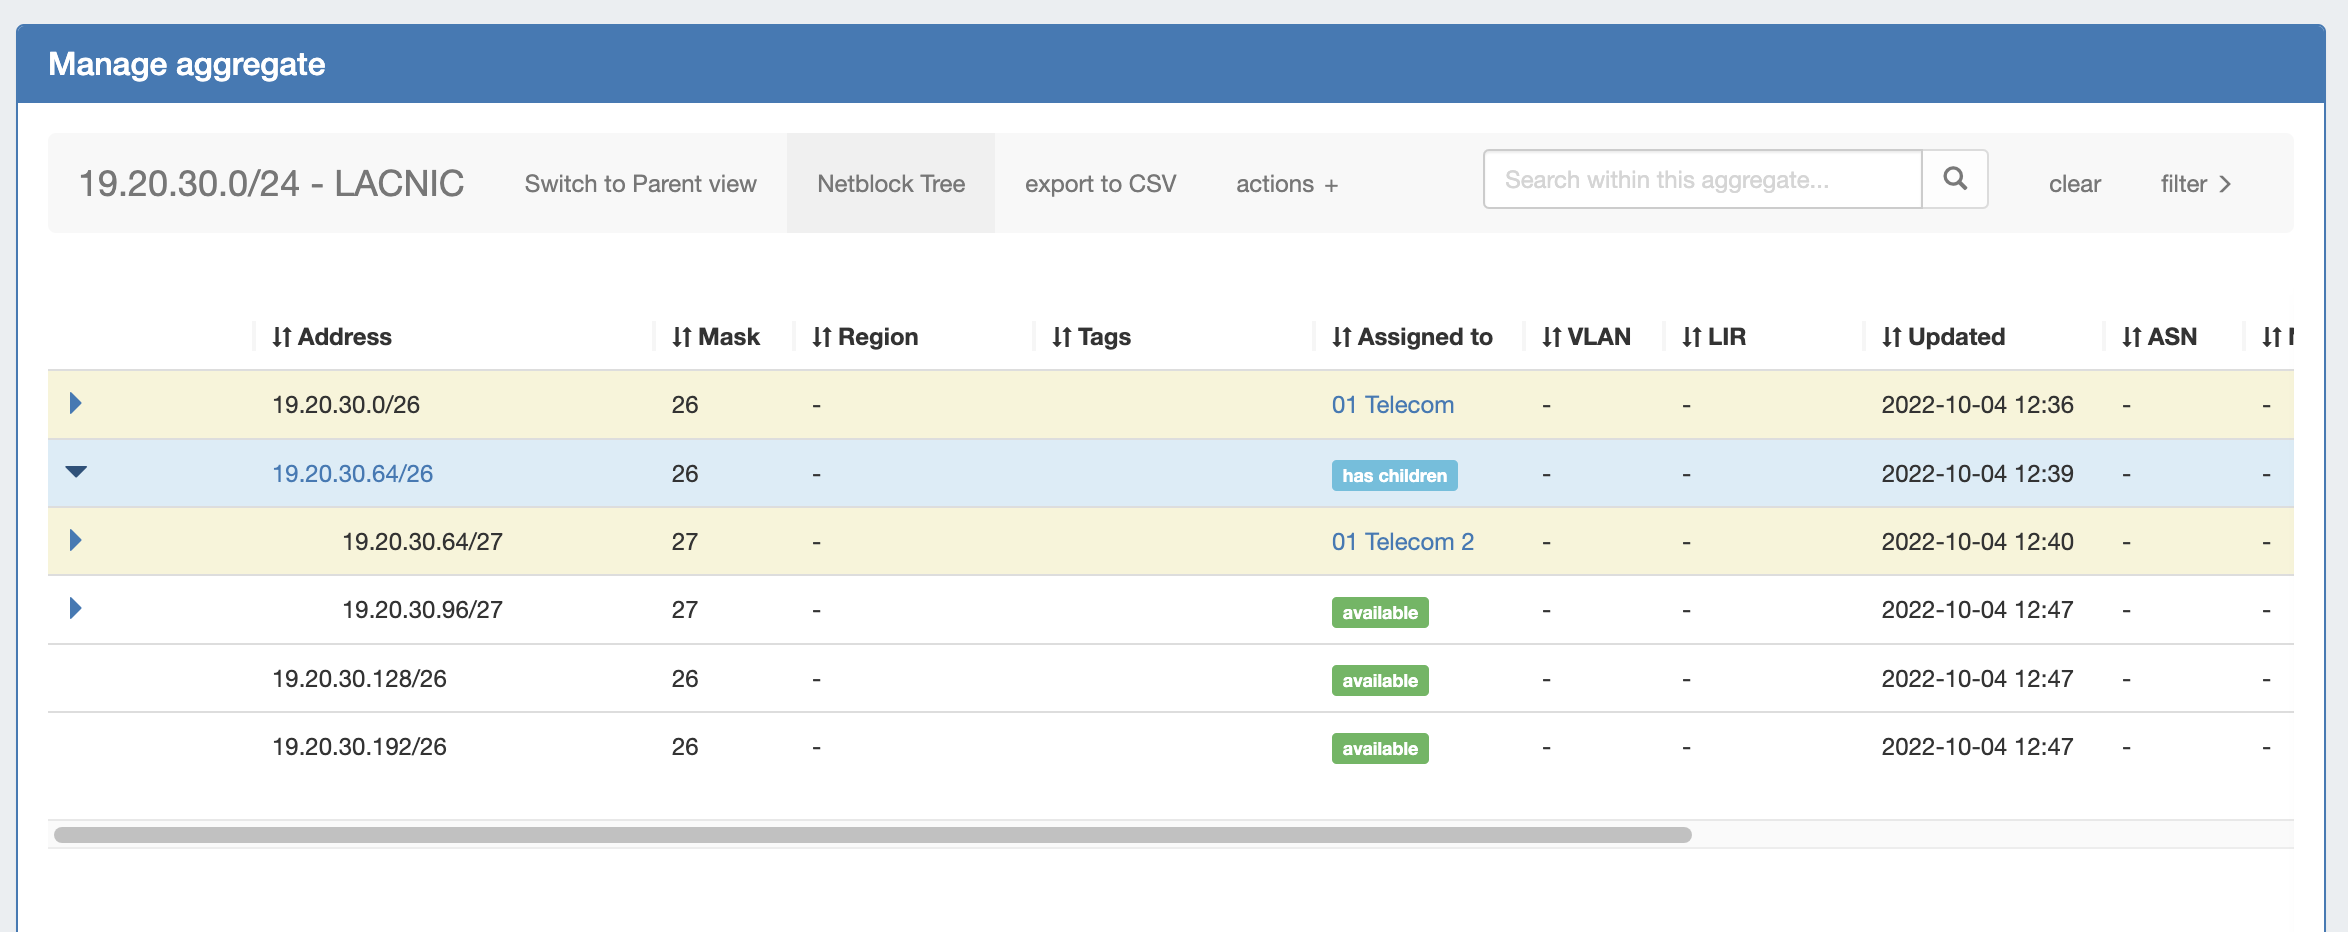
For a simplified example of the how Netblock Tree View displays compared to Block View, we will be using an example aggregate of 19.20.30.0/24 (assigned to 'Available'). The standard Block View for this aggregate shows it has been split to contain a /25, a /26, and two /27s. The /26 and one of the /27s have been assigned to different resources. In Block View, we only see the lowest child blocks that exist in ProVision:
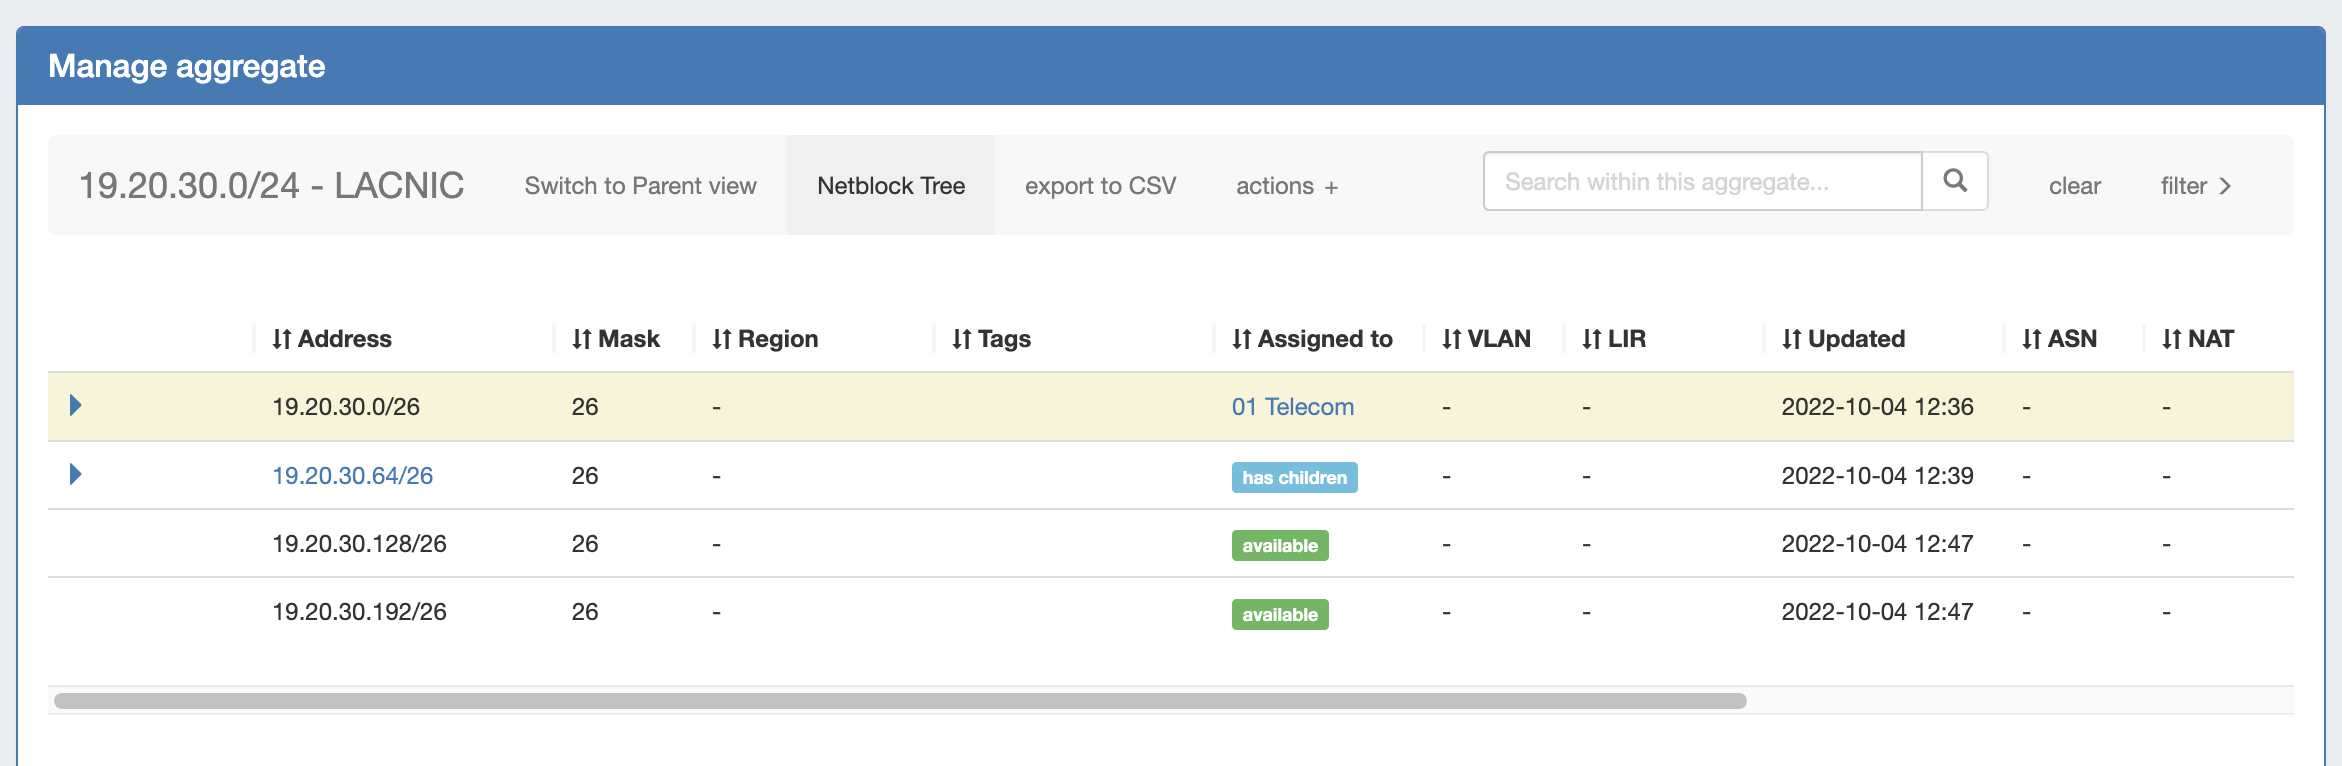
When we switch to Netblock Tree View (by clicking "Netblock Tree") we see only /26s in the top level of the view. This is because 19.20.30.0/26, assigned to '01 Telecom', is the first assigned block encountered. Netblock Tree View will ignore 19.20.30.0/25 and 19.20.30.128/25 because they are assigned to the same resource as 19.20.30.0/24 ('Available').
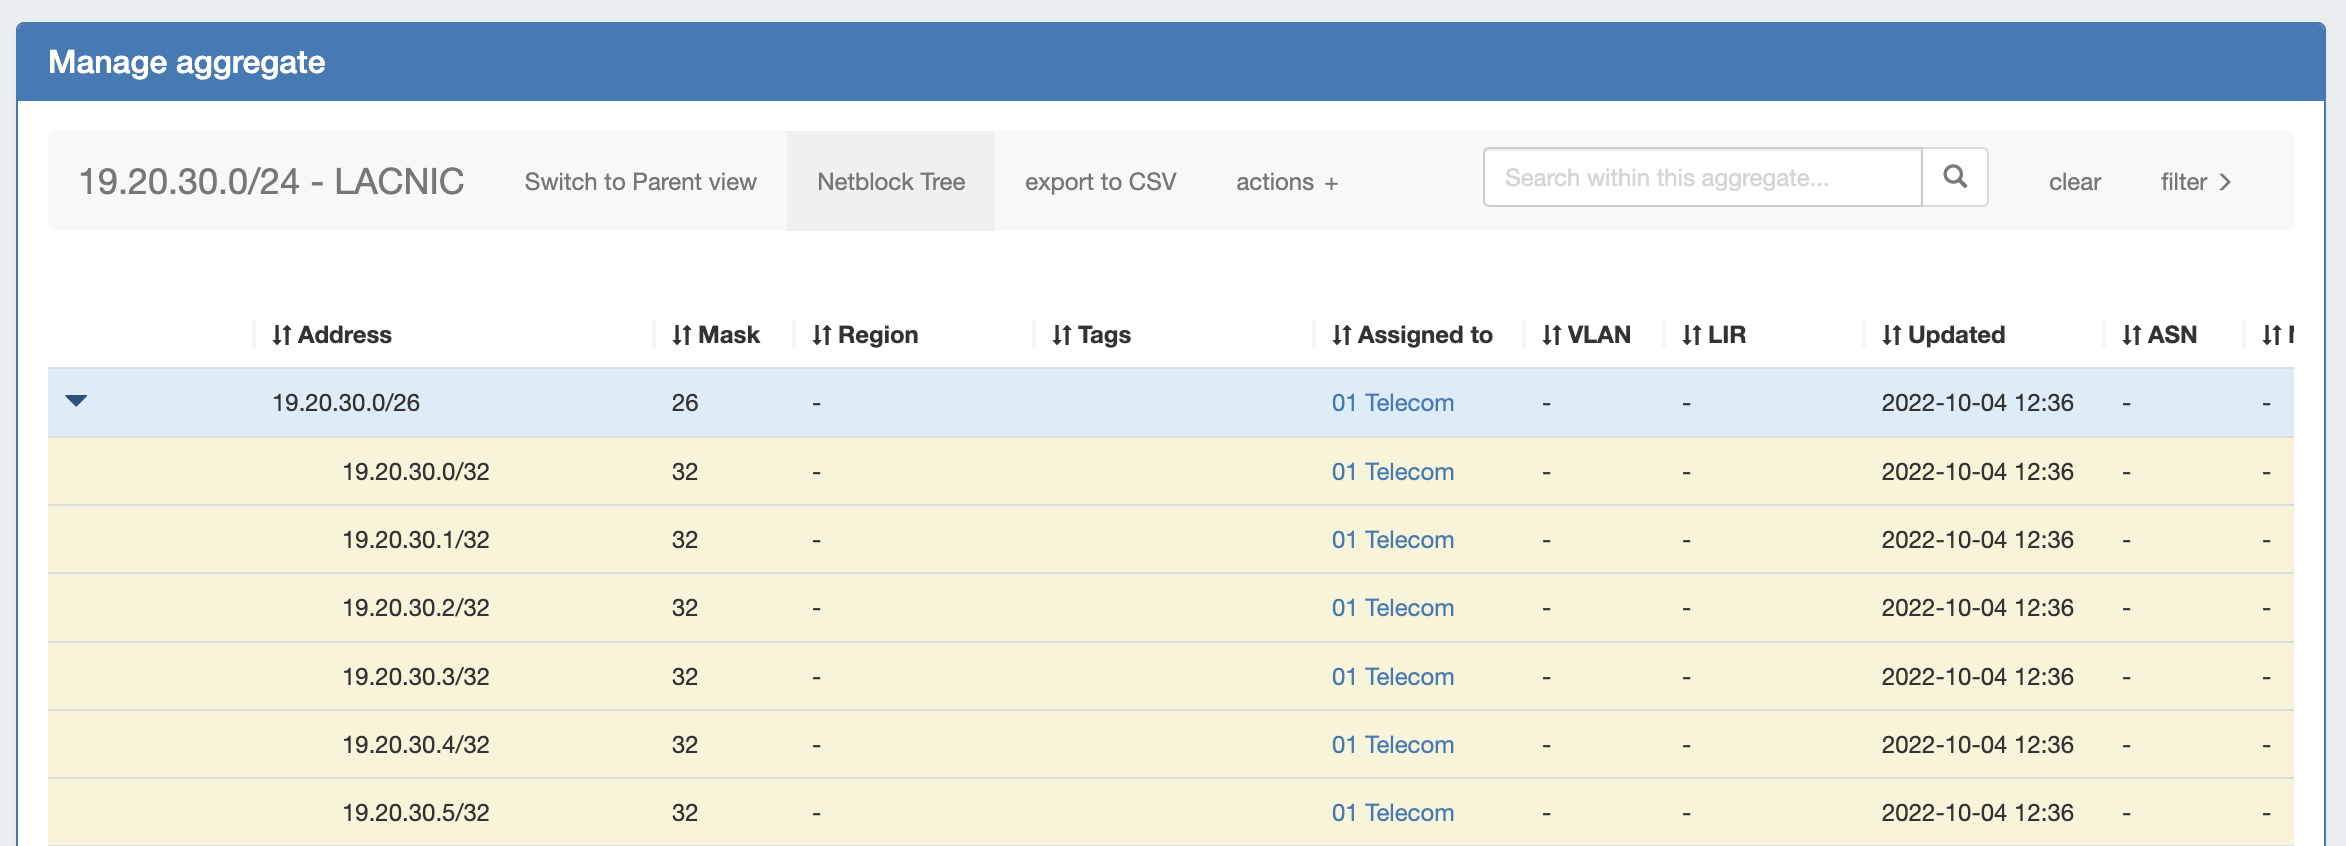
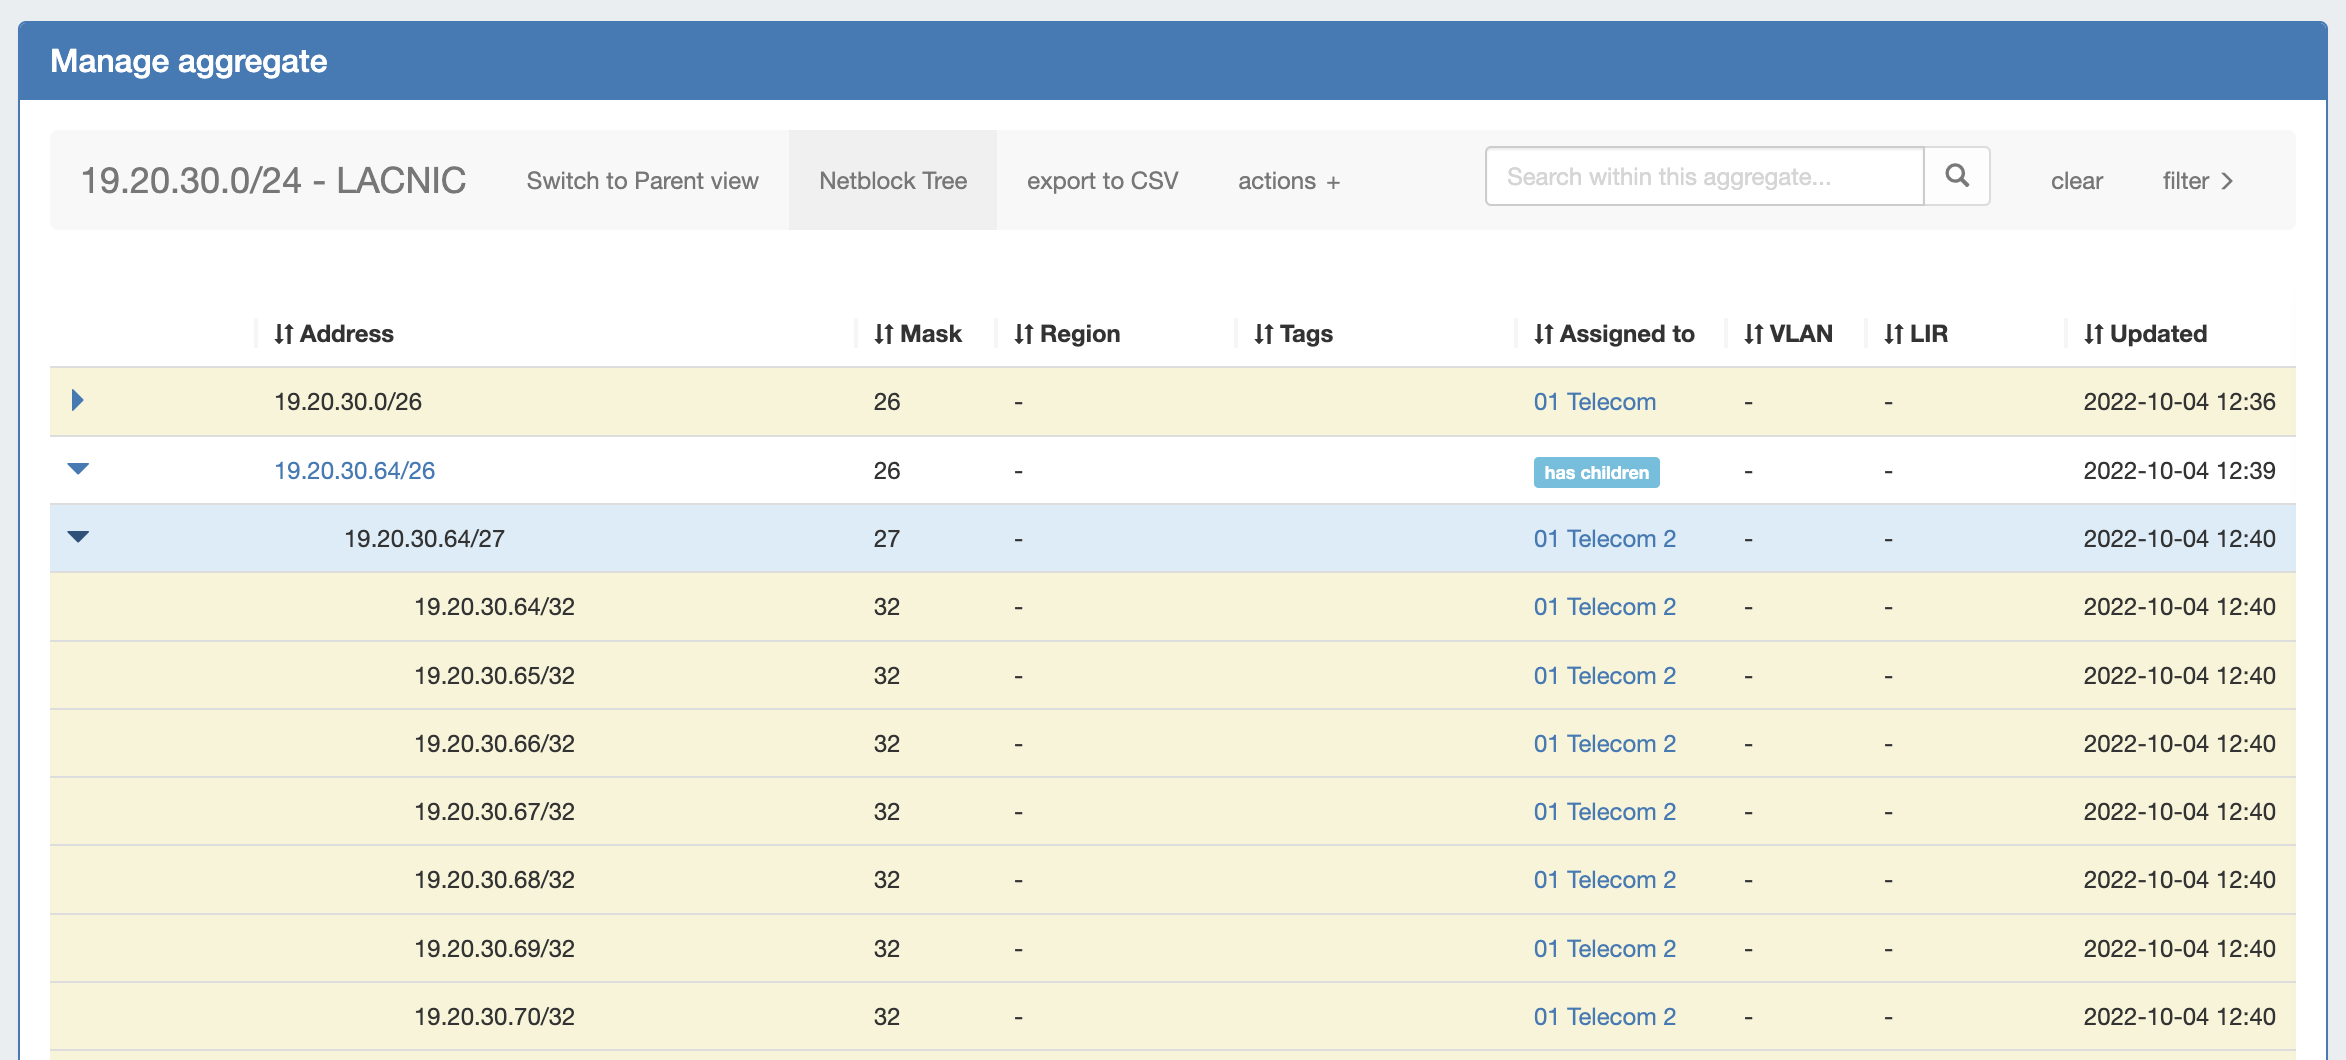
There are no different assignments under this 19.20.30.0/26. Thus, when you expand it you will see only /32 addresses. As these /32s have not yet been created in ProVision → Block View, they only exist as "theoretical" blocks and are not editable, but aid in viewing the totality of available addresses under that prefix.
If you would like these addresses to be assigned or editable in ProVision, you may split the /26 down to the desired number of /32 addresses using templates or manual splits. This will create the addresses in ProVision and allow those addresses to be edited.
Under those branches display individual /32 addresses, because the /27 is assigned.
However, if 19.20.30.128/25 is split into two /26s in ProVision, the previously theoretical blocks of 19.20.30.128/26 and 19.20.30.194/26 become 'real' objects, and will display as expandable and editable. |
Working in IPAM Manage Views
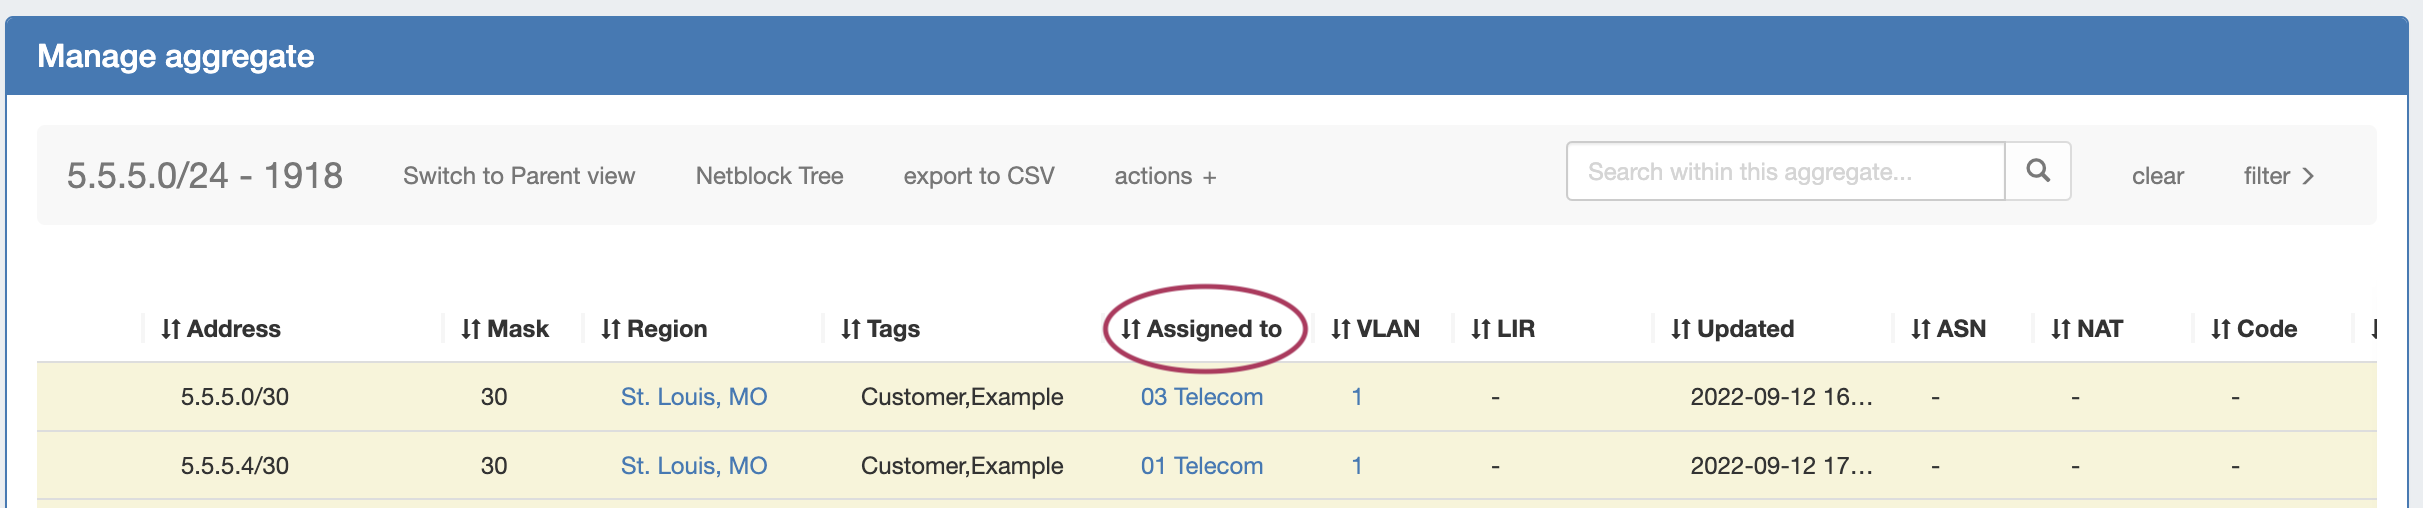
Sort Blocks
Sort the IPAM Manage blocks list by clicking on any column name the in list with the up-down arrows icon (↓↑).
The list will sort between ascending and descending order for that field.

Filter / Search Blocks
Filter the block list in IPAM Manage by toggling the "Filter +" link in the top right corner of the aggregate header. 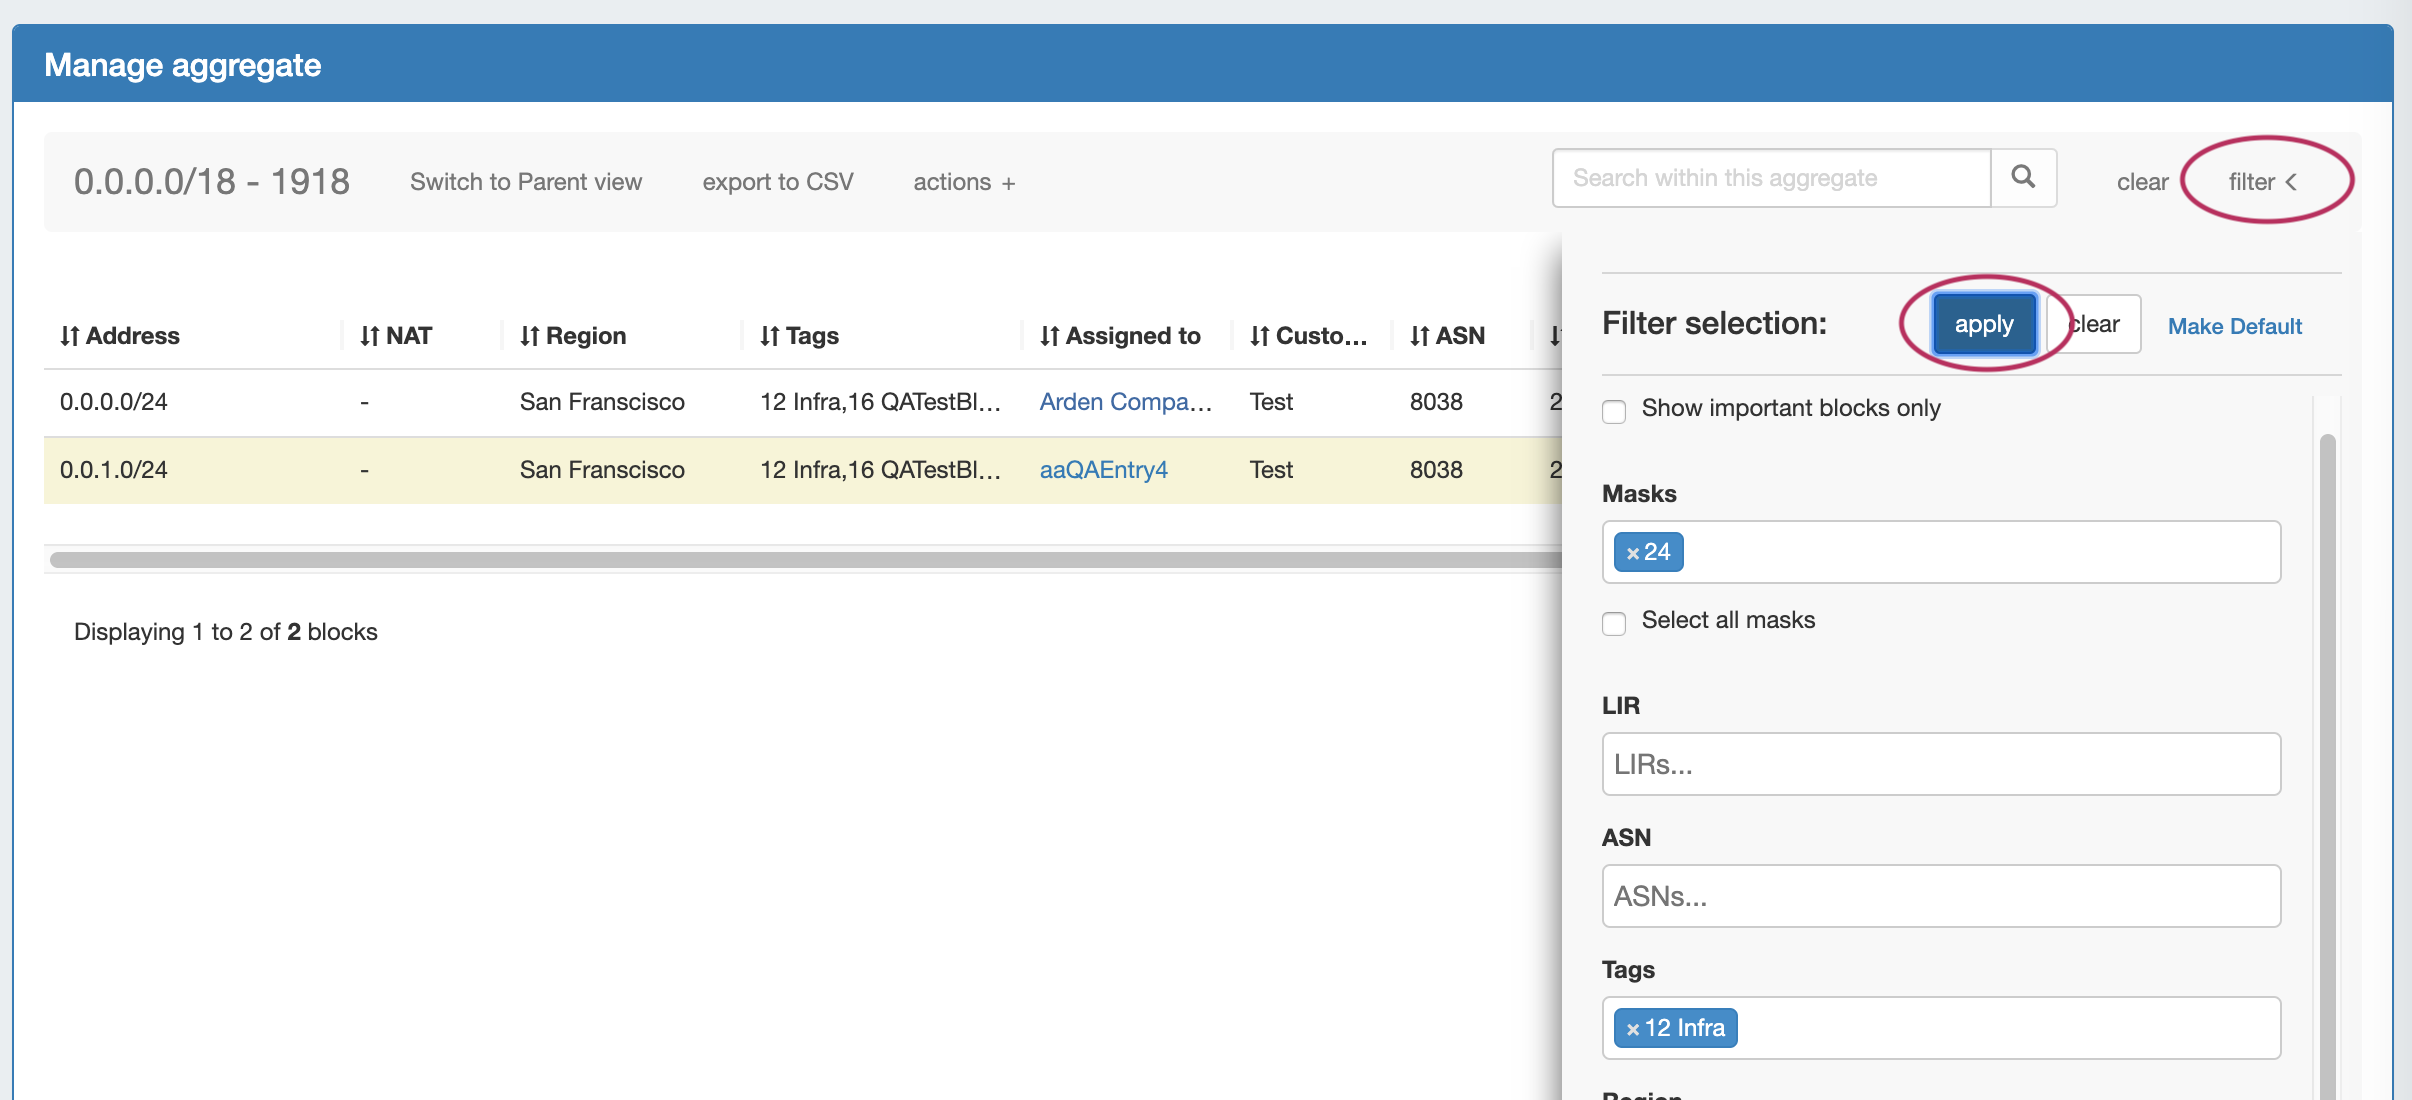
A flyout will appear with filter criteria options. Select or type the option under your desired field, and hit "Apply". A red filter flag indicates the number of filters applied to the list. When done, click "clear". To hide the filter flyout, just click the "filter -" link again.
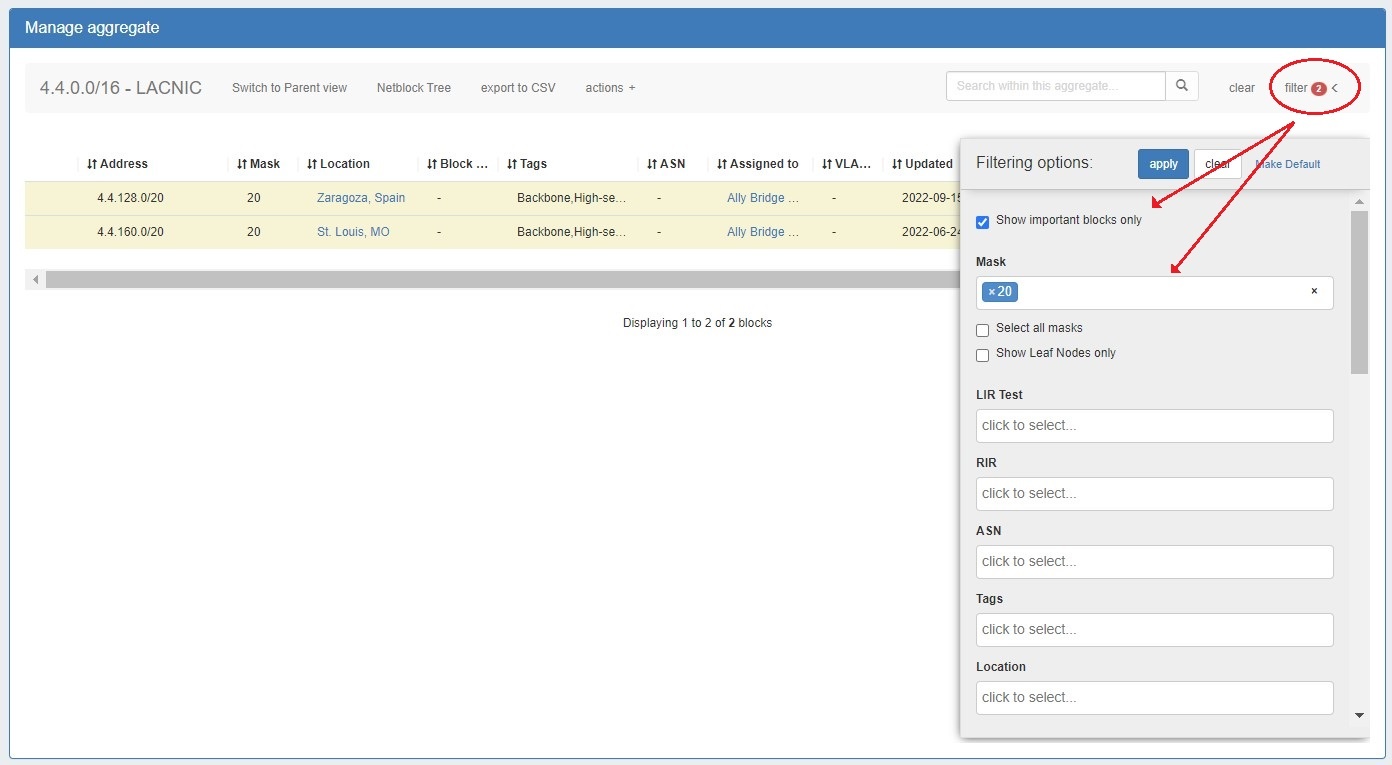
Once a filter(s) has been applied, click on "Make Default" and the filtered block list will be saved as the default view for that aggregate. A red filter flag indicates the number of default filters applied to the list.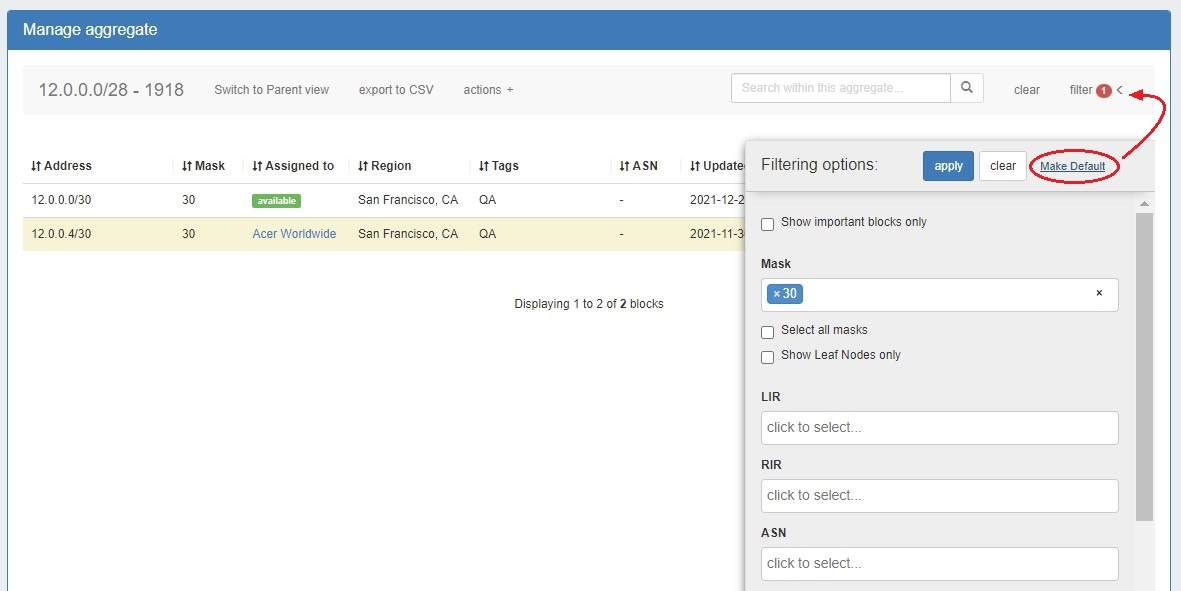 When a filtered view is saved as the default the filter flag will continue to display.
You may also search for a specific block entering a full or partial CIDR, assigned resource name, or other search term into the search box at the top of the list.
View Parent Blocks / Hierarchy Tree
After using Global or IPAM Advanced search for a specific child block, you can view the parent block for your result by right clicking to open the action menu, then selecting "View Parent Aggregate".
While in Manage aggregate, view parent blocks / IP block hierarchy, click on "Switch to Parent View" at the top of the block list.
You may also enter Parent View from the "Filter" menu, by checking the "Select All Masks" checkbox and clicking "Apply".
Once all masks are enabled to view, the block list changes to include the "Parent" blocks, showing all masks throughout the assignment tree.
A parent block with children will show "Has Children" in the column where assignment status is shown, its immediate child resource (if applicable) and the block CIDR will show as a clickable link.
Clicking on the CIDR for a block that has children will open "Block Tree" view, showing the hierarchy of blocks and their assignments.
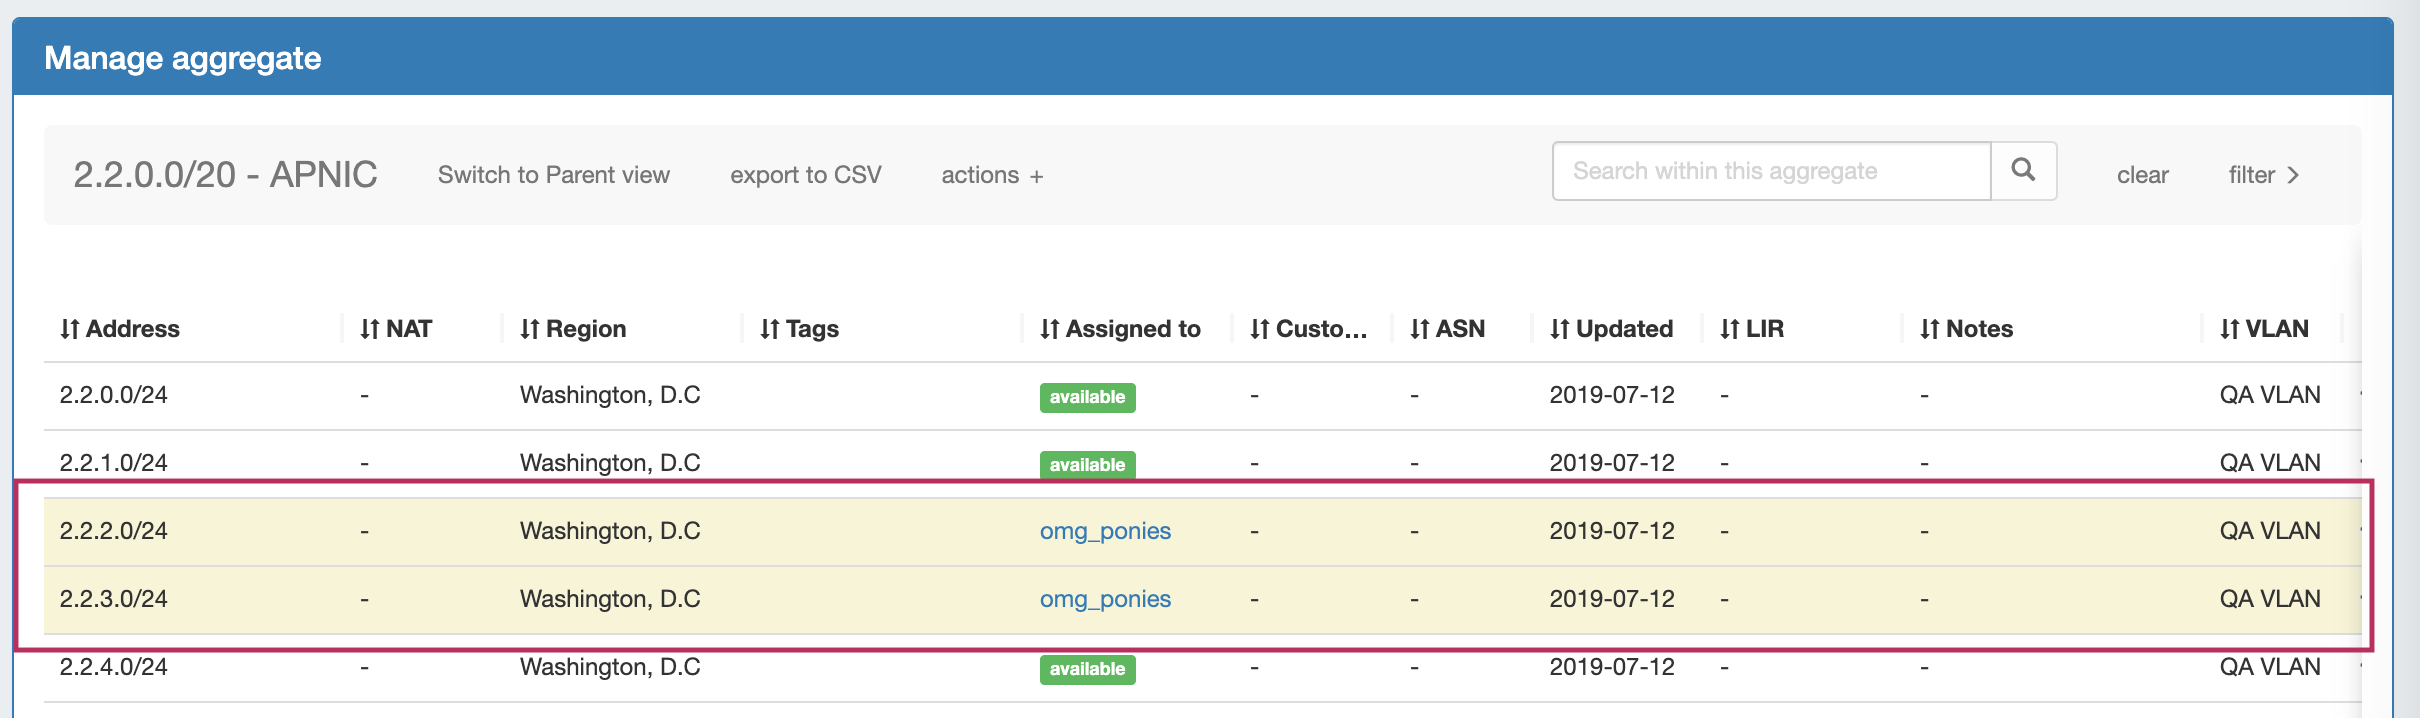
Important Blocks
"Important" IP blocks display with a yellow background highlight. By default, any block that has been manually assigned, unassigned, or had other high-level manual interactions performed will be automatically marked as "Important".

Blocks may Blocks may be manually marked or unmarked as "Important" from either the "Edit Block" interface (by opening "Edit" for the or from the API.
To edit the important flag, open Edit block, then selecting select / deselect the toggle for "Mark this block as important"), or from the API , and save your changes.
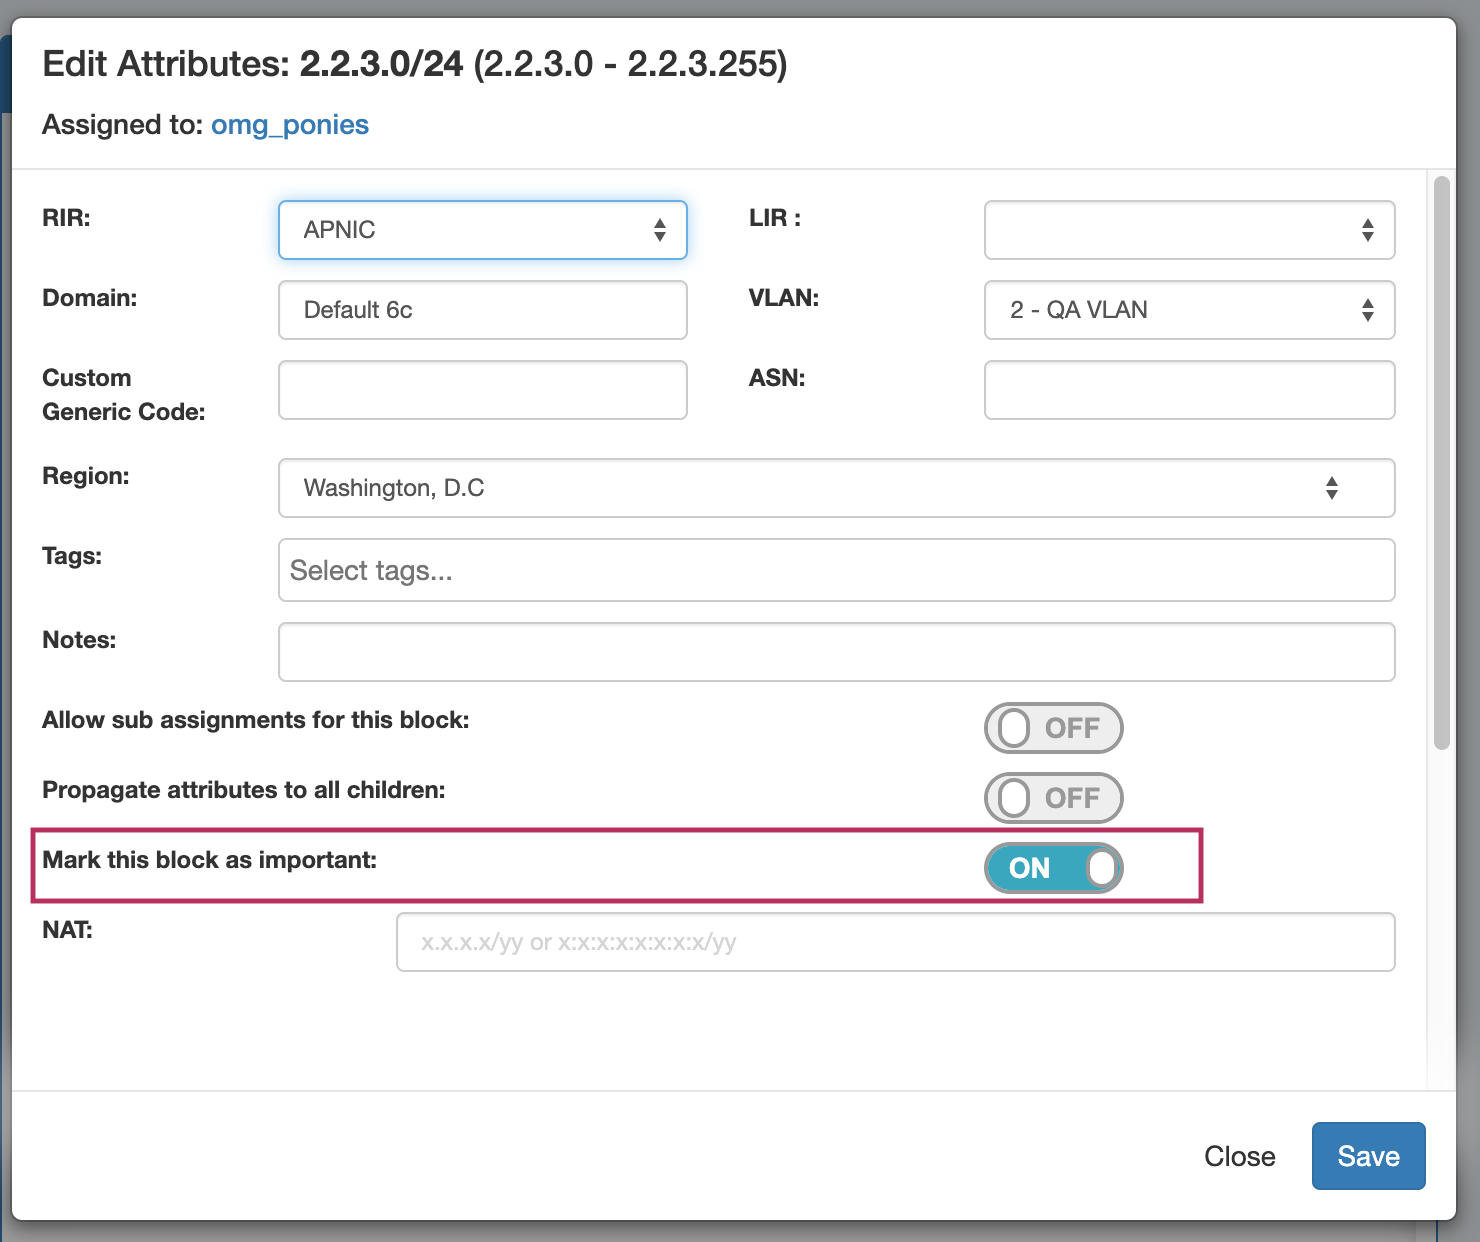
If multiple blocks are selected with mixed "important" statuses, then the toggle will display in the "Off" position.
To update all selected blocks to flag as important, switch the toggle to "On", and save changes. To switch all to the "Off" position, you may either toggle all blocks to "On", save changes, then switch all blocks back to "Off" and re-save, or adjust your selection to only include the blocks that need the Important Flag removed. (Tip: Use the list filter to show only "important" blocks!)
...
For details on some common tasks to perform with IP Blocks, see the next section: Working with IP Blocks - Common Tasks.:
Additional Information
For additional information on working with the IPAM system, see the following areas:
...