...
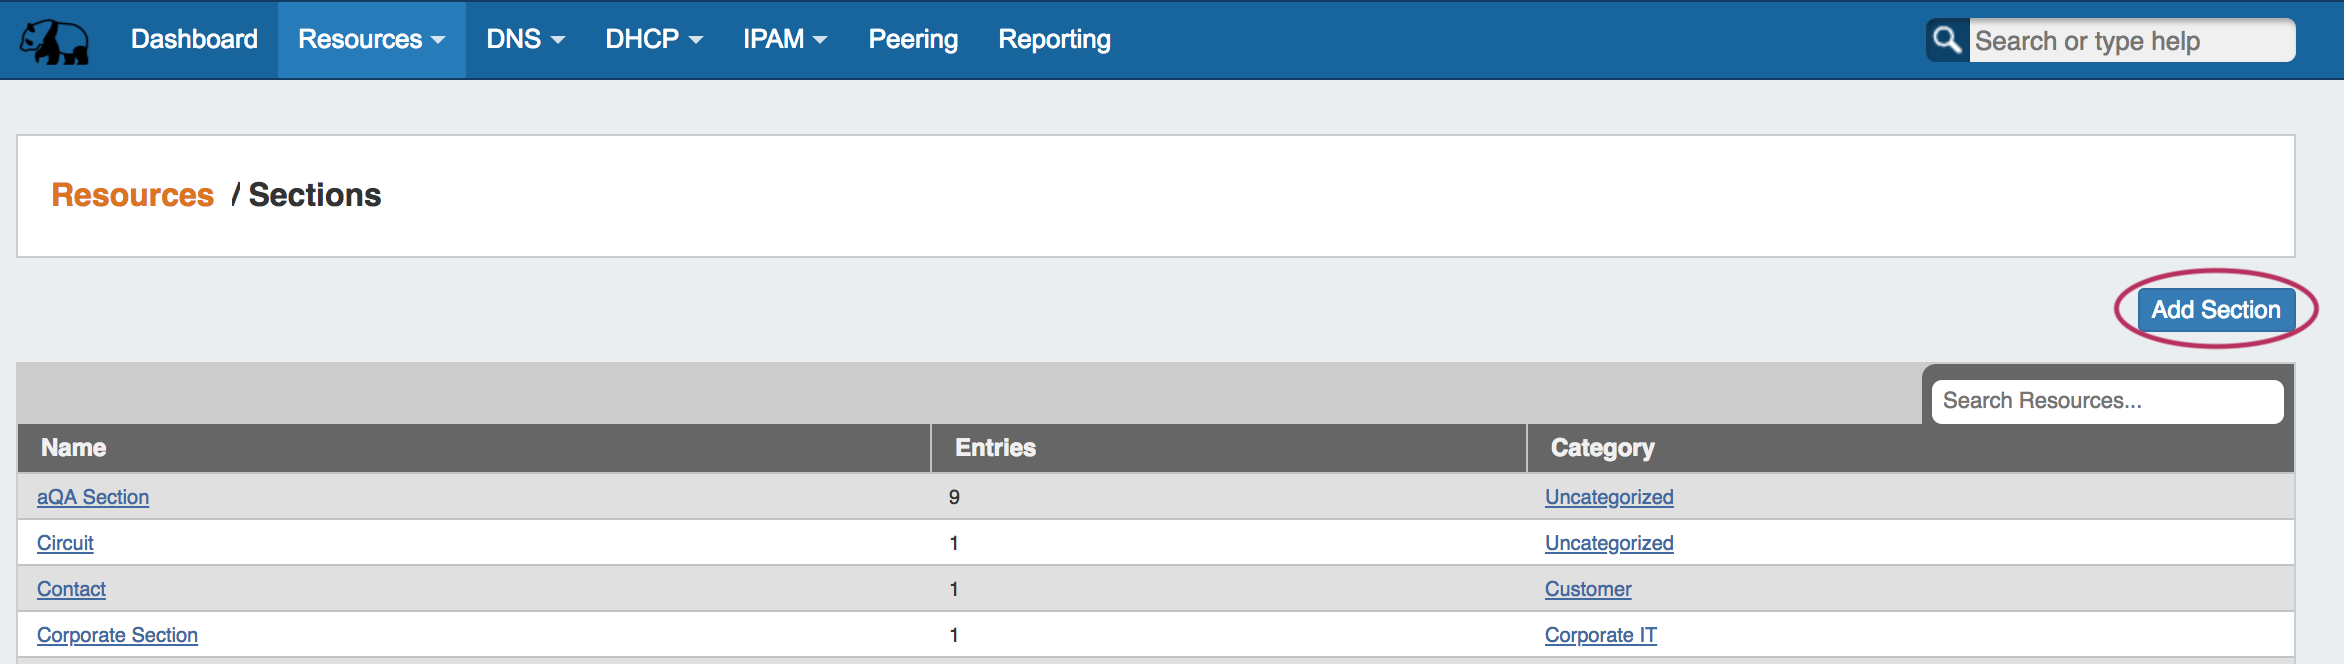
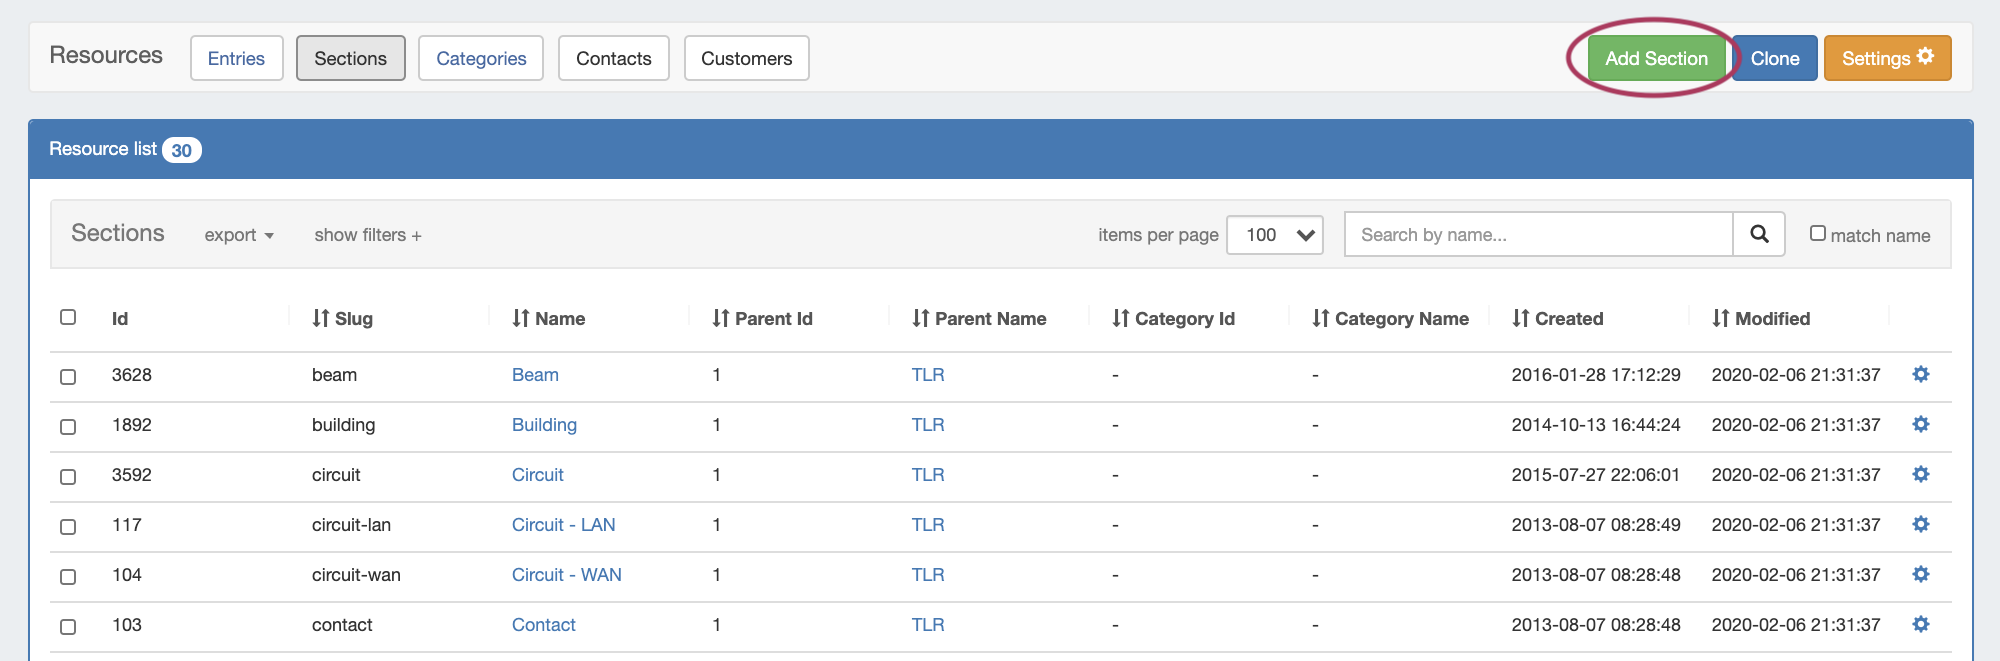
Click "Add Section" from the Sections sub-tab view button under the Resources Tab
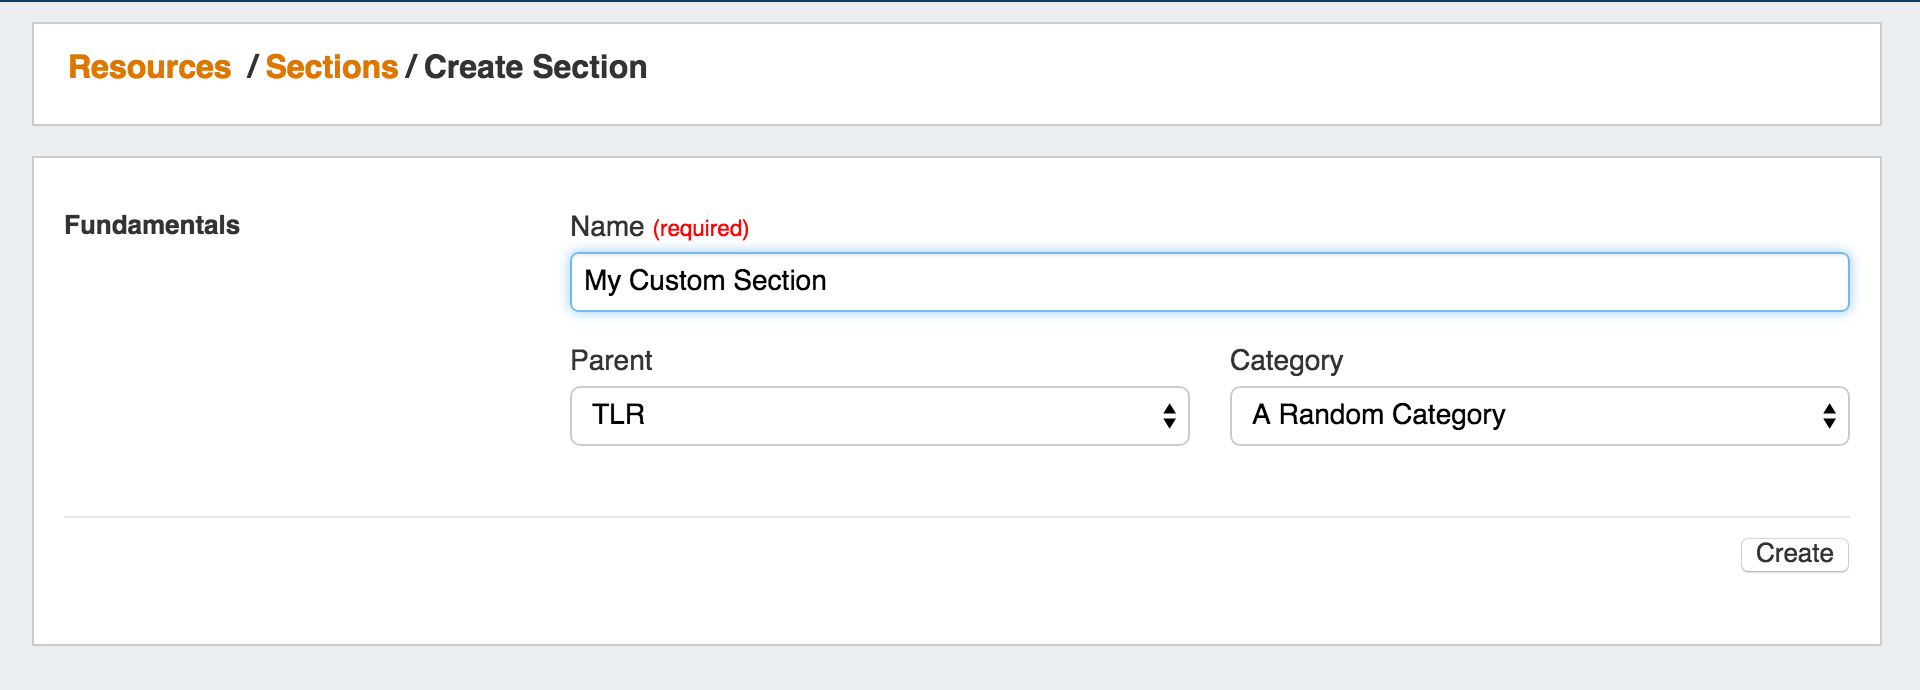
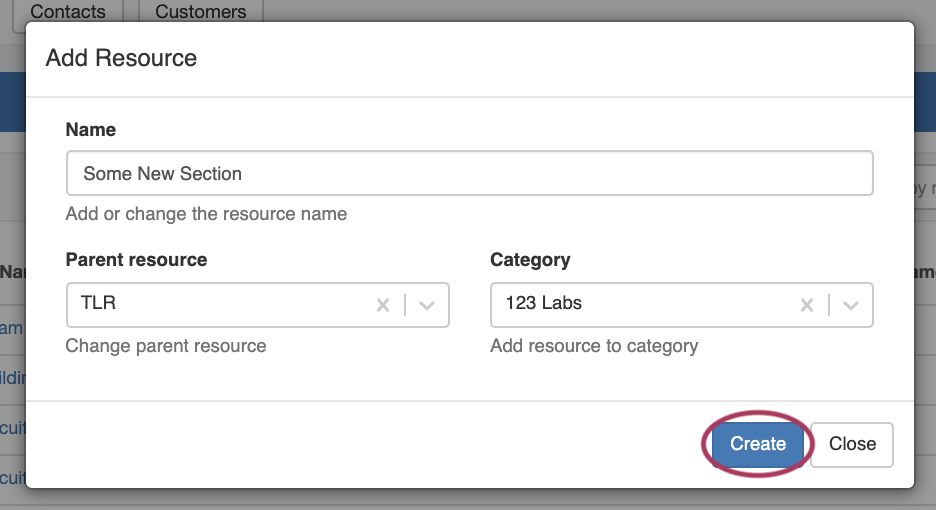
Create a new Section by specifying a Name, Parent, and Category. Then hit the "Create" button.
Step 2: Add a Custom Field to a Section
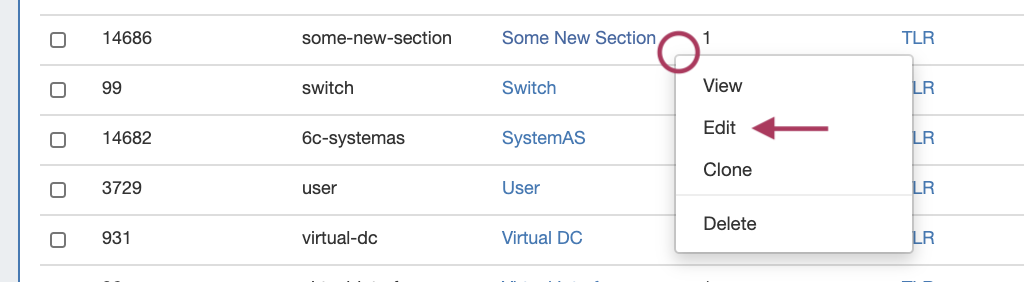
Manage existing fields and add custom fields for the selected Section by opening the Action Menu for the section, then clicking "Edit Section".

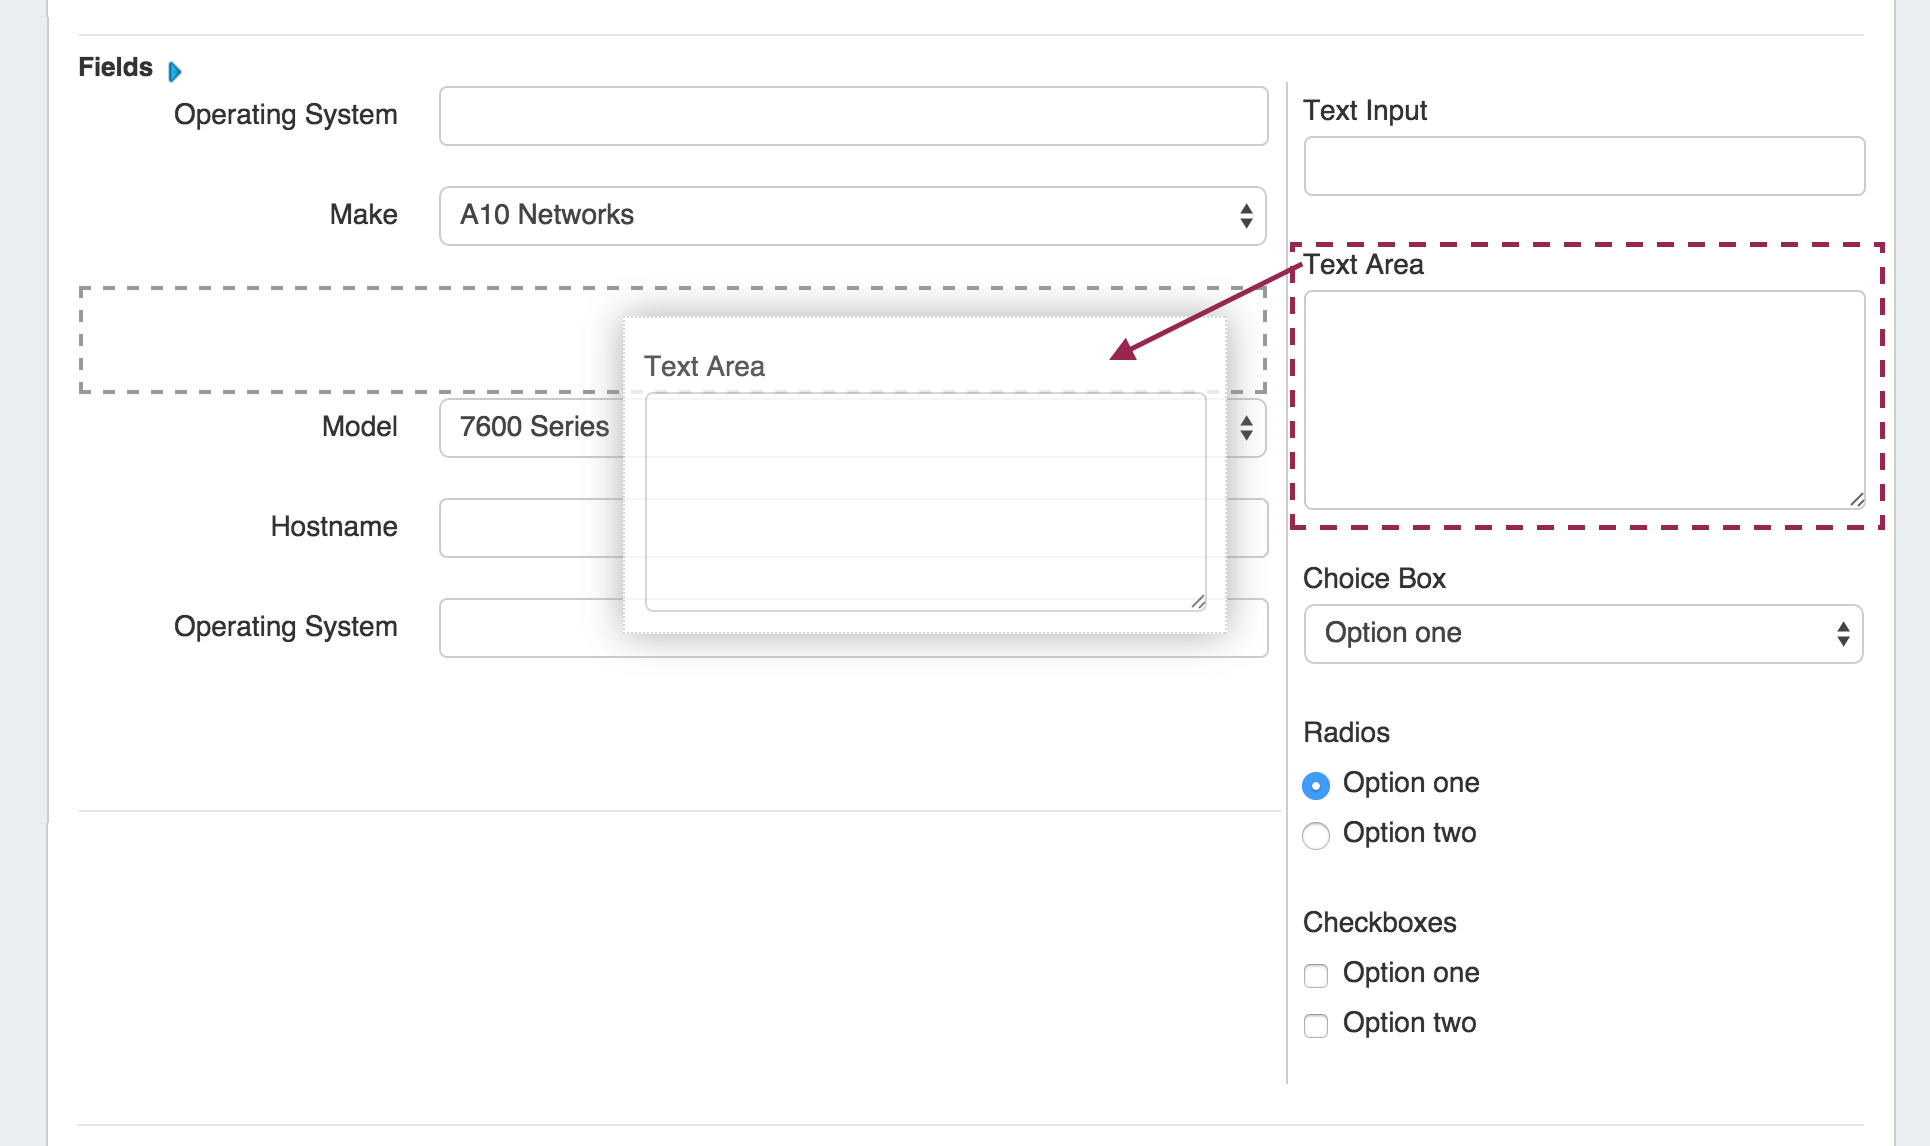
Add existing or Custom Fields for your Section. You can add new Custom Fields of different types (text input, text area, choice box, radios, checkbox) by dragging and dropping the fields as well as using any existing fields that are available. See the Customizing Fields page for more details.
Step 3: Edit Custom Field Data
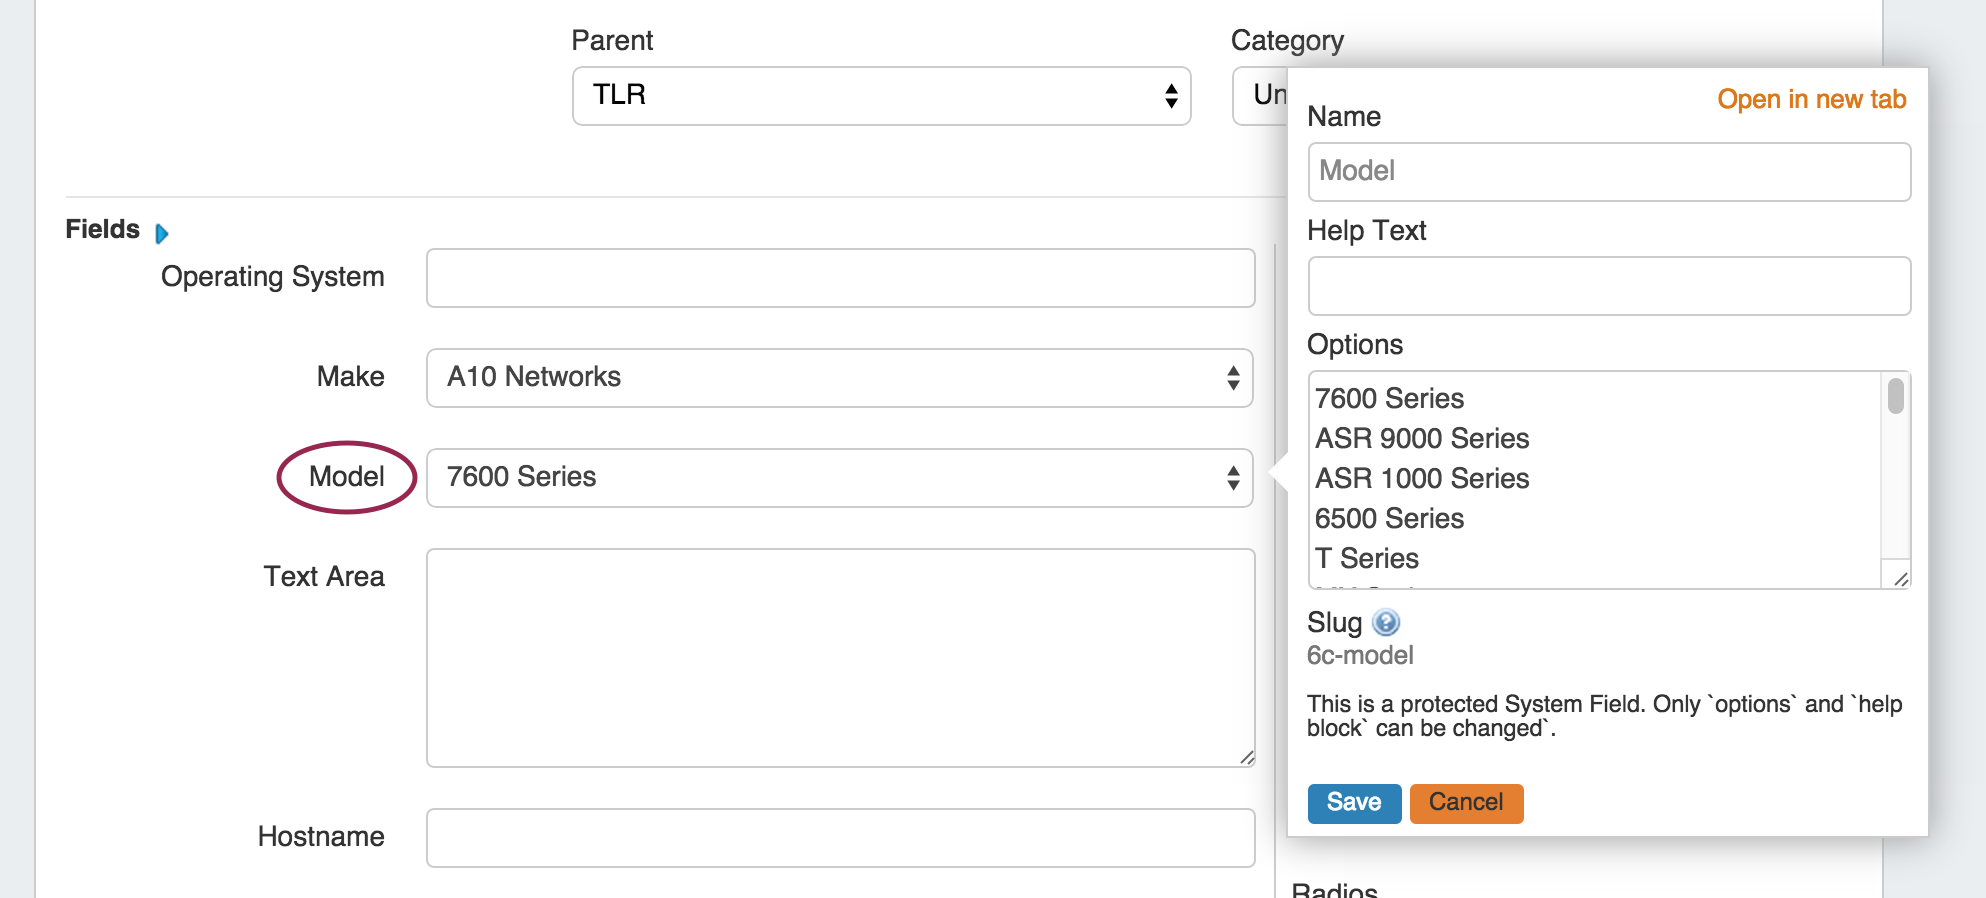
Select the field name and you will get an editing window to modify the parameters of the field. Custom fields may be renamed and have other attributes updated, whereas protected system fields may have noted restrictions.
Any fields enabled here will be available to add to the Field Gadget, if desired.
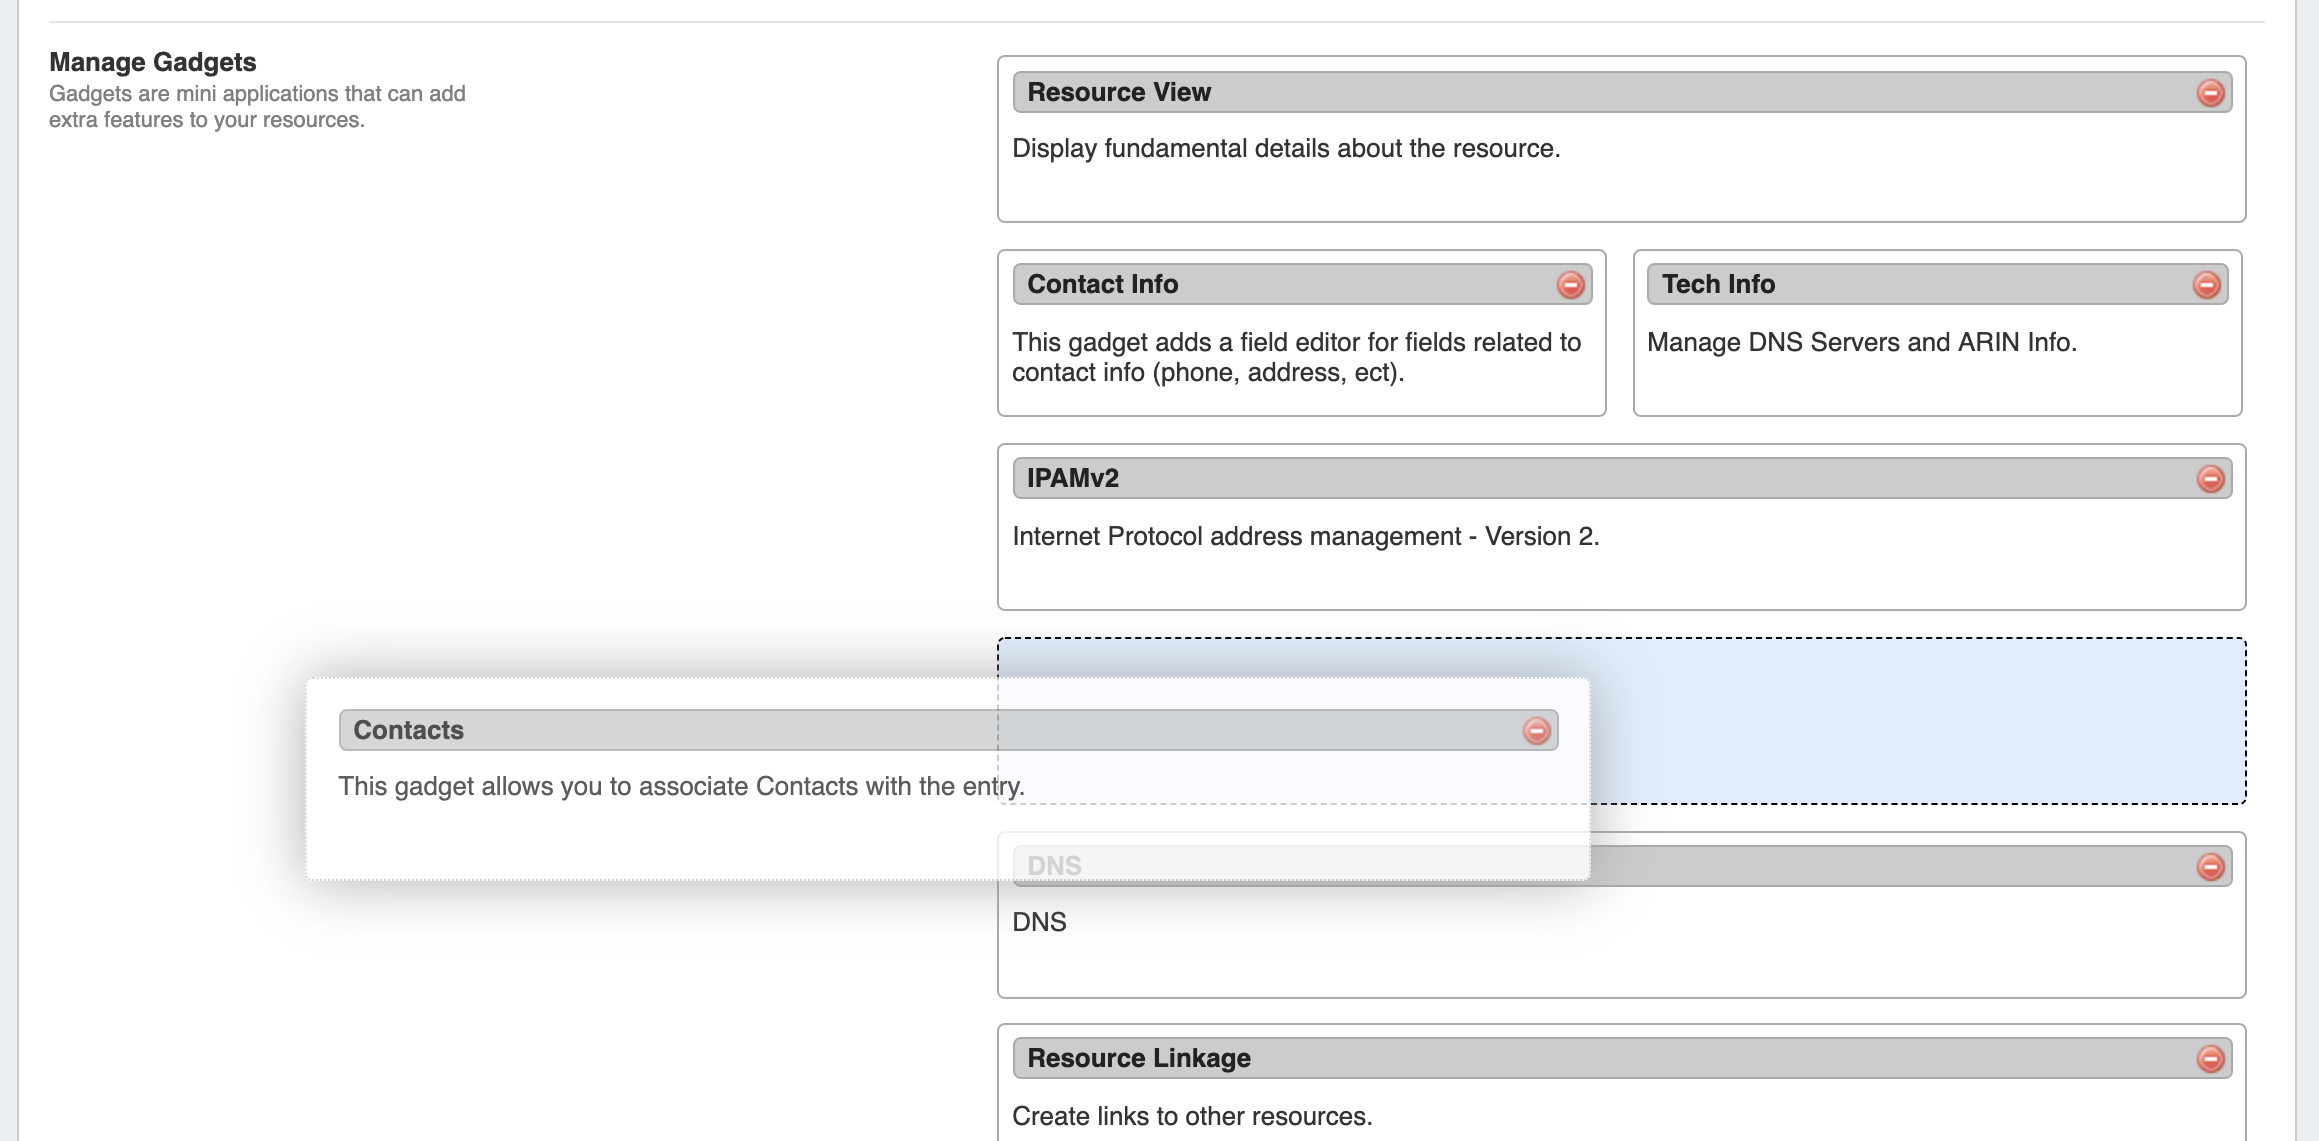
Step 4: Add Gadgets to your Section
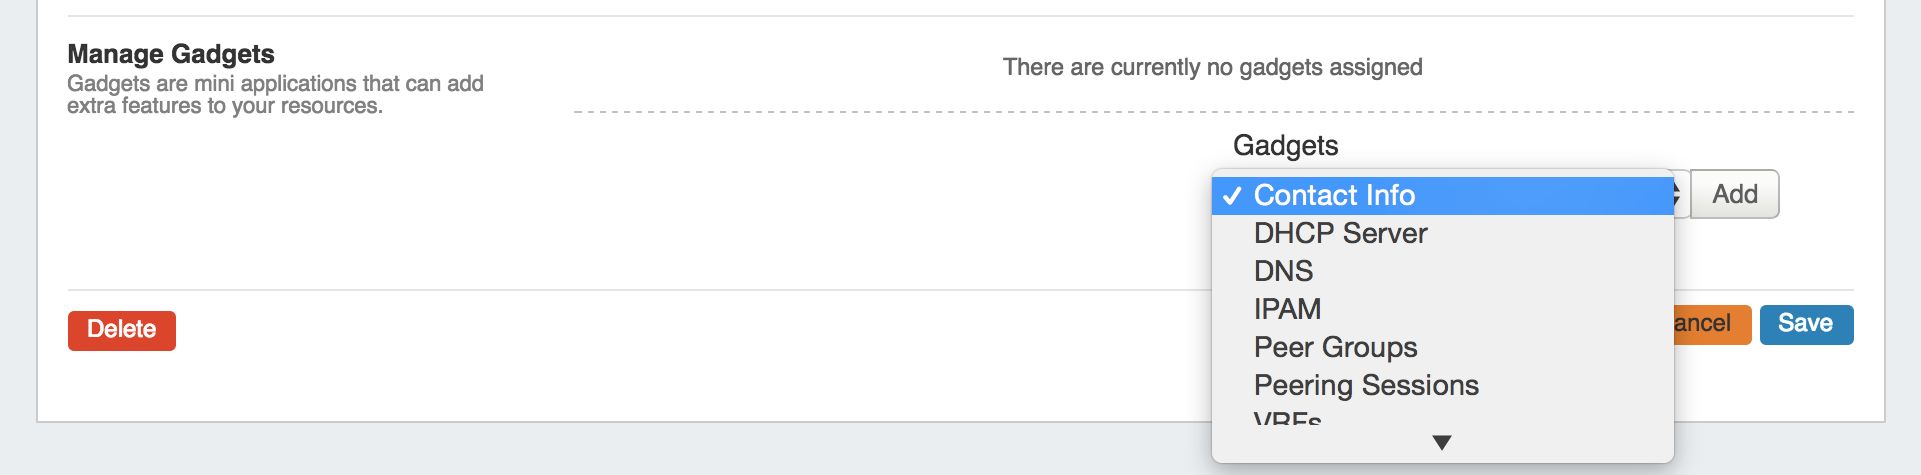
You will notice on this customization screen that you also have an area for Gadgets. Gadgets are modules of additional functionality that can be added to the UI of a given Resource. Simply select the Gadget you want to show for that section, hit "Add", then organize .
Once added, you may organize them by dragging into the order you wish them to appear on the page. You may also remove added Gadgets by clicking the "delete" icon.
When done, click "Save".
Once added to the Section, Gadgets will be visible for all Resources of that Section.
For a detailed list of gadgets and descriptions, see the Gadgets page.
...