...
| HTML |
|---|
<div id="google_translate_element"></div>
<script type="text/javascript">
function googleTranslateElementInit() {
  new google.translate.TranslateElement({pageLanguage: 'en'}, 'google_translate_element');
}
</script>
<script type="text/javascript" src="//translate.google.com/translate_a/element.js?cb=googleTranslateElementInit"></script> |
ProVision 7.2.0
ProVision 7.2.0 is a major release with new features, improvements and bug fixes.
...
Contact 6connect at info@6connect.com to schedule a demo or get more information.
New Features
...
IPAM NAT Support
NAT tracking is now supported in ProVision IPAM.
NAT IPAM Metadata
IM/CFR -146: Added NAT association support to IPAM
...
| Expand | ||||||||||||||||||||
|---|---|---|---|---|---|---|---|---|---|---|---|---|---|---|---|---|---|---|---|---|
| ||||||||||||||||||||
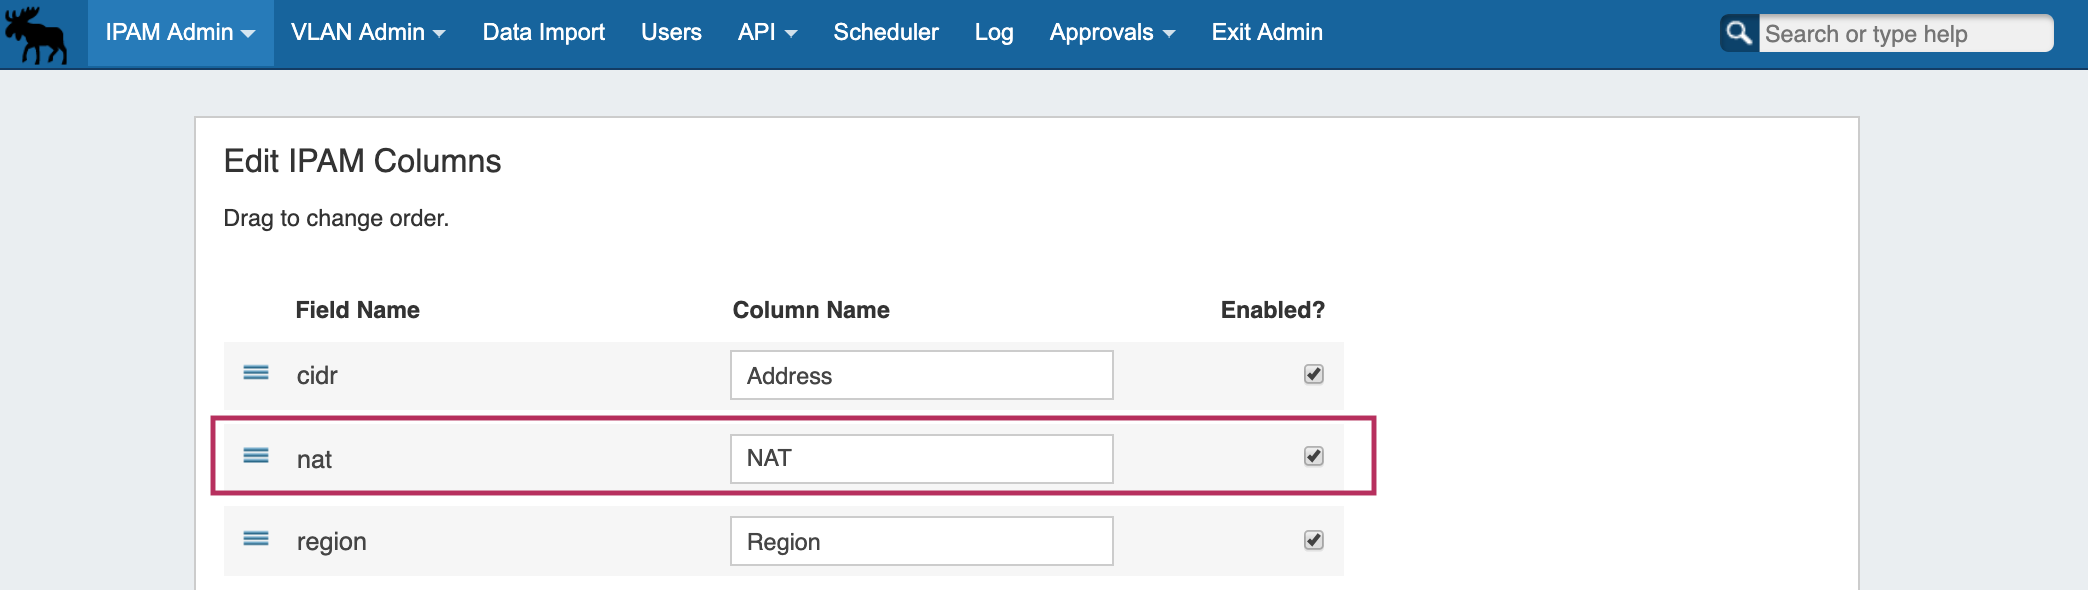
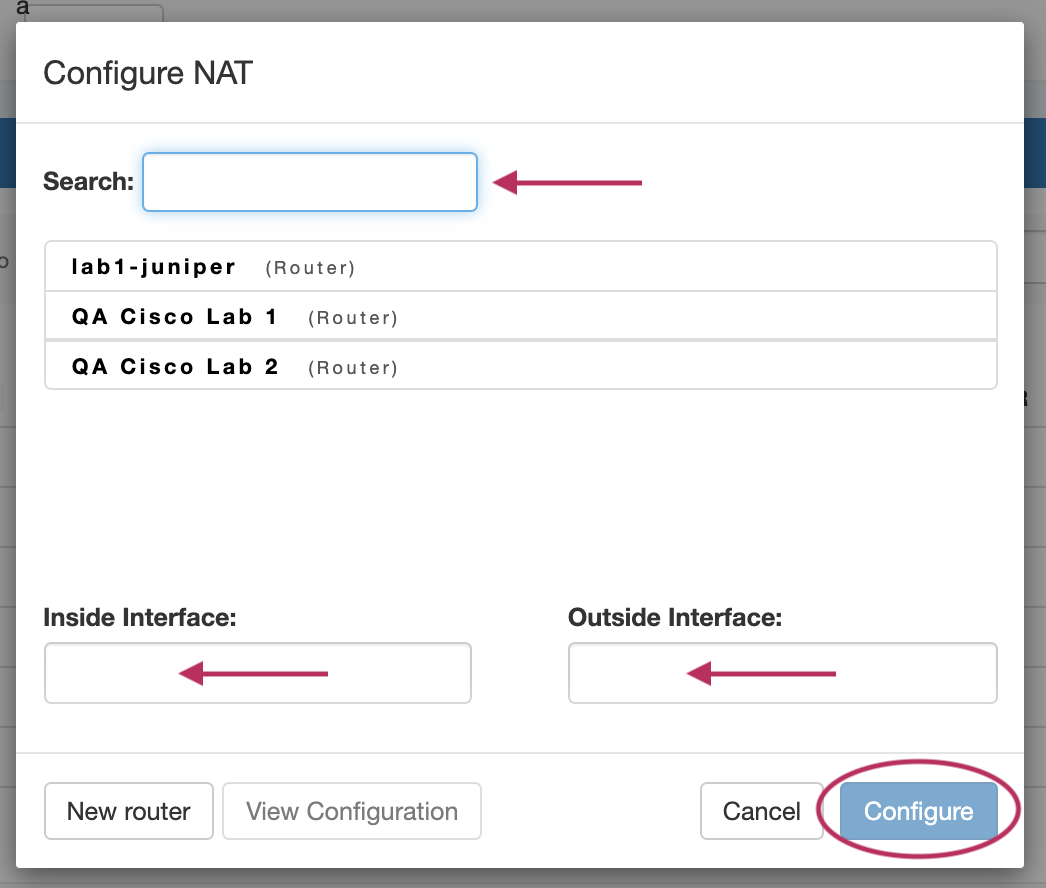
Enable NATEnable the NAT field by navigating to IPAM Admin → Edit IPAM Columns.
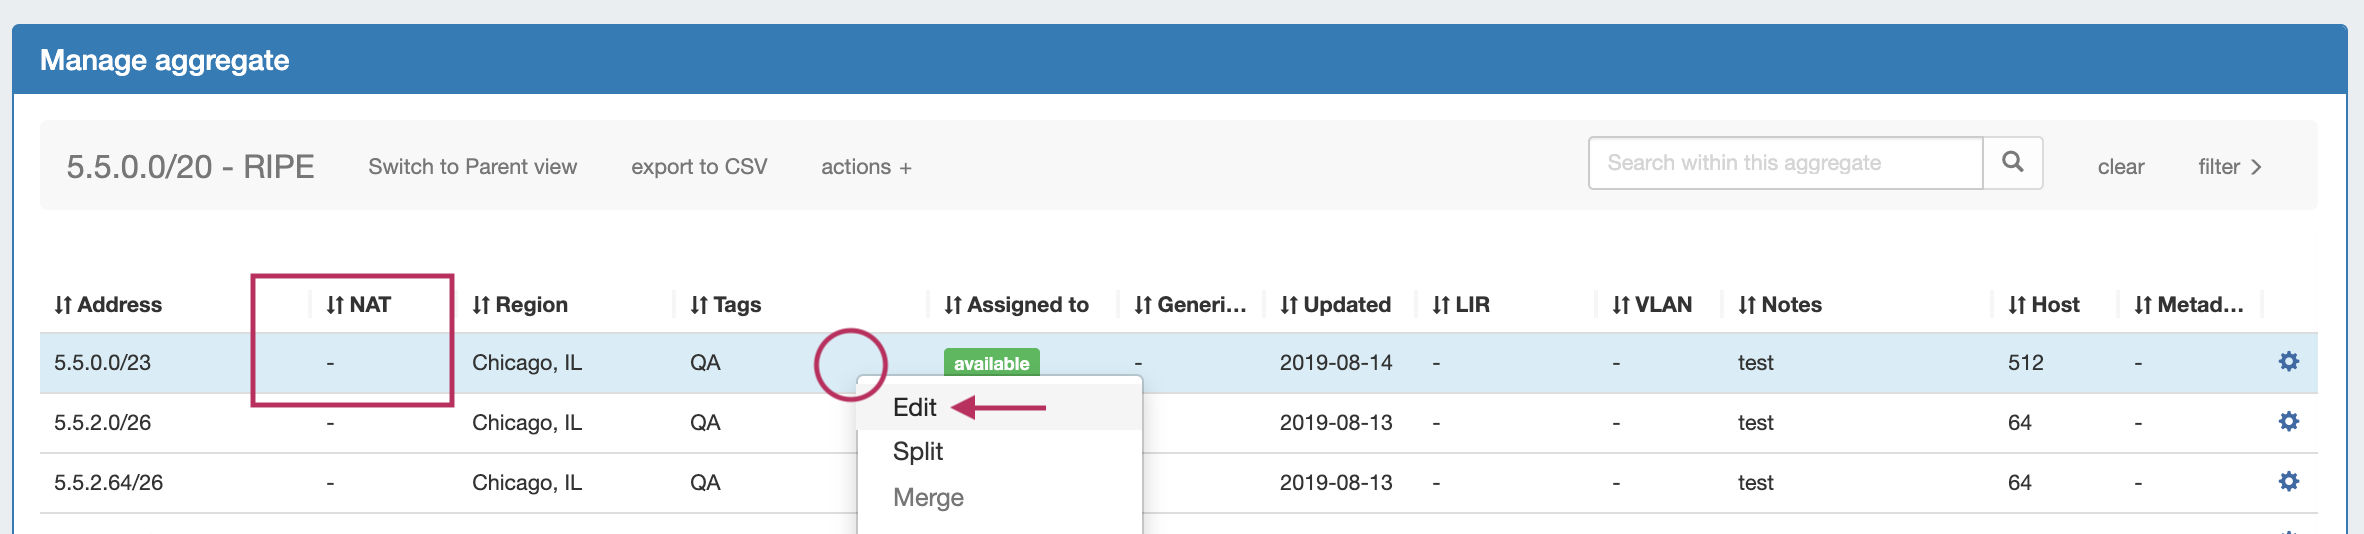
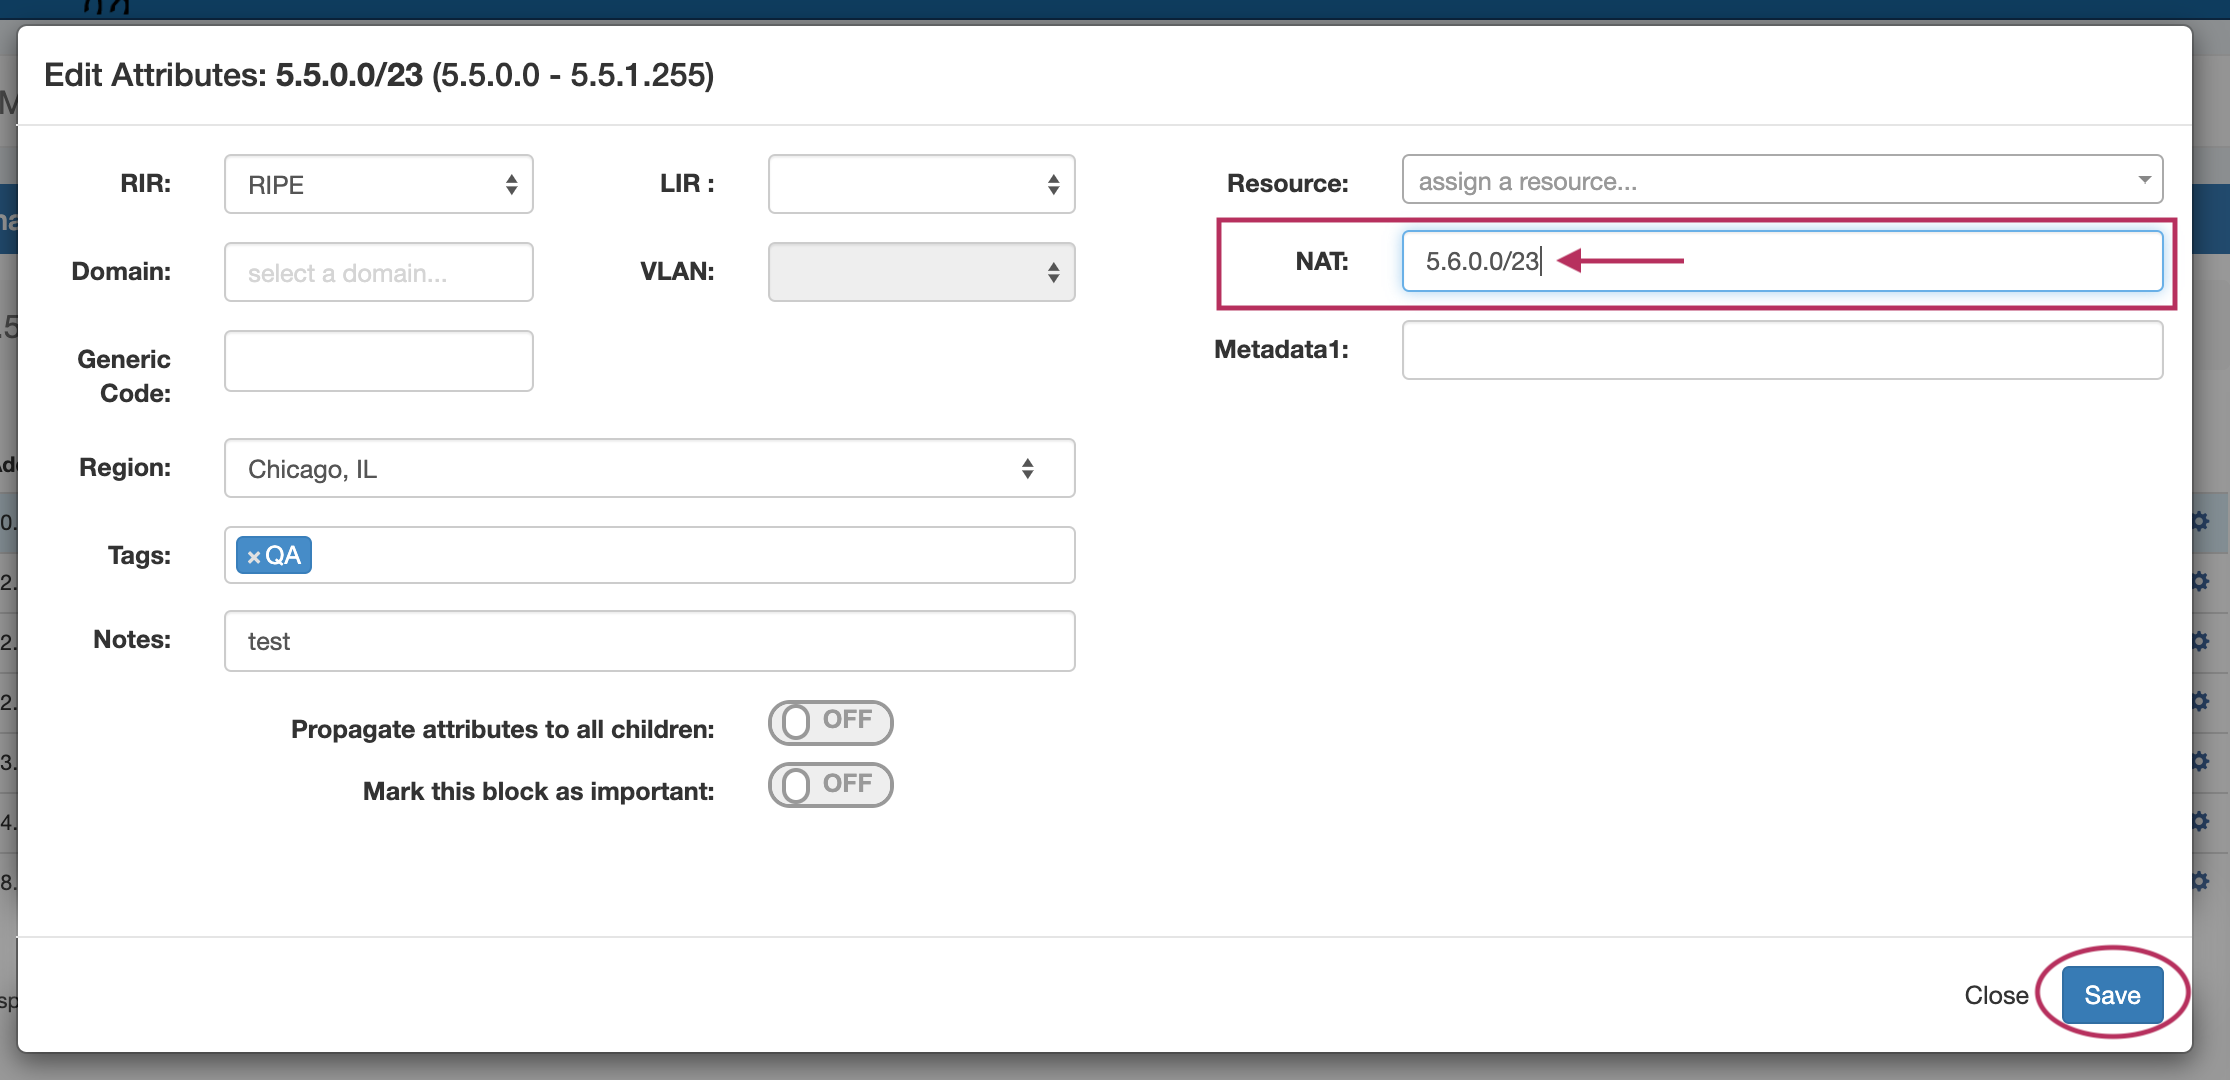
Create NAT AssociationEnsure that the two appropriate IP Aggregates (one public, one 1918 private space) containing the desired blocks to NAT have been added into ProVision. (See: Working with IP Aggregates)
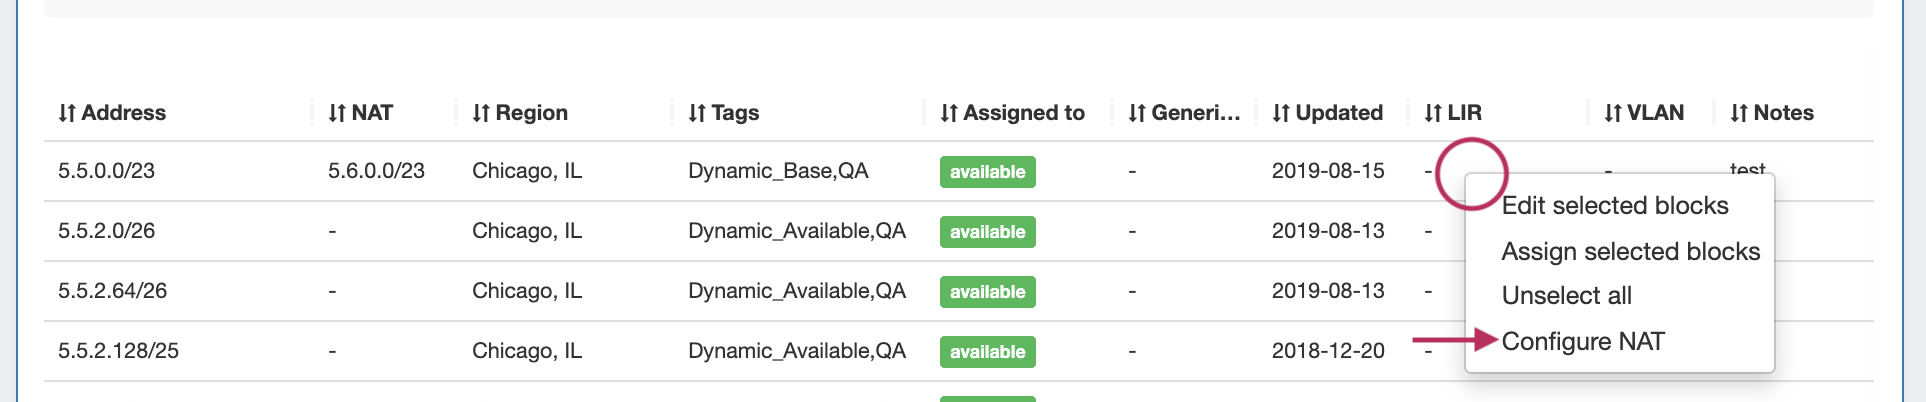
Configure NAT to Router(s)In the IPAM Manage Action Menu, select "Configure NAT" for the NAT'ed block(s).
|


NAT/ Scheduler: Rotate Dynamic IPs
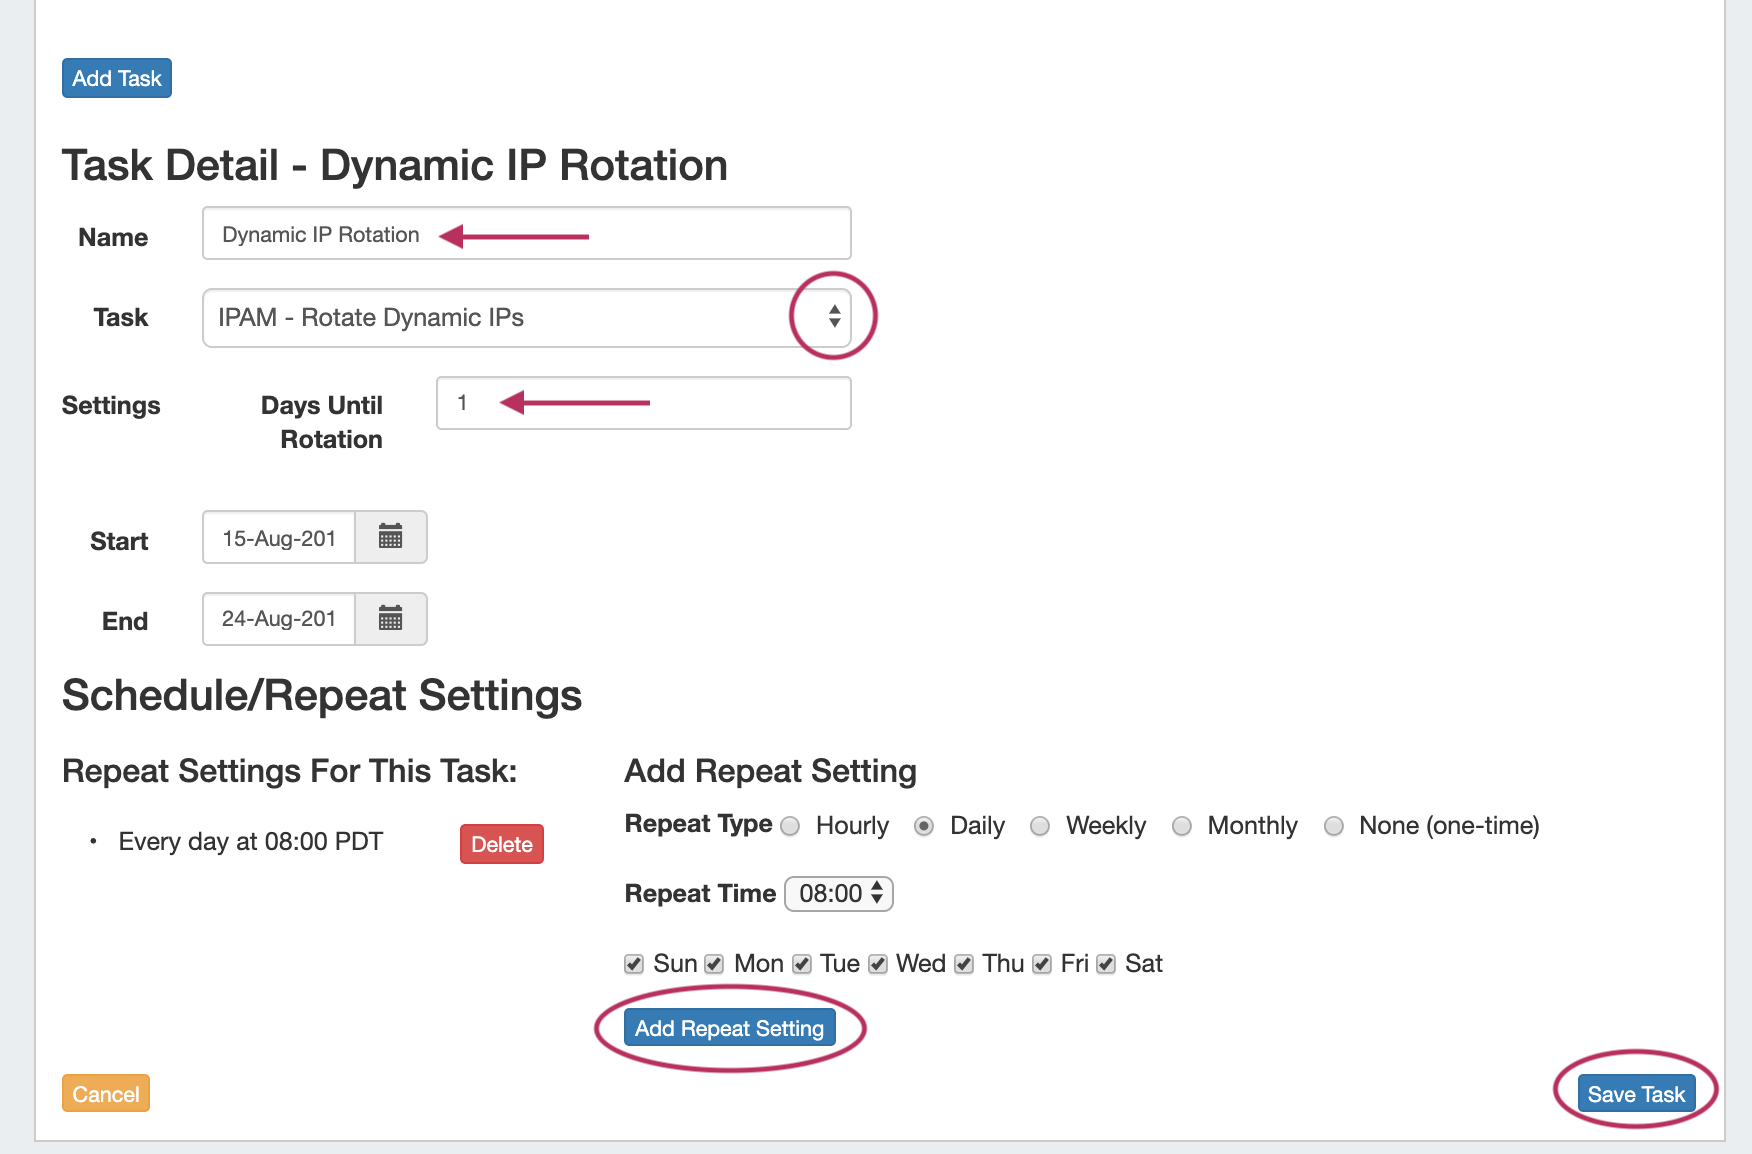
IM/CFR - 3373: Added a Scheduler Task, "Rotate Dynamic IPs" for rotation of NAT IP Assignments
...
| Expand | ||||||||||
|---|---|---|---|---|---|---|---|---|---|---|
| ||||||||||
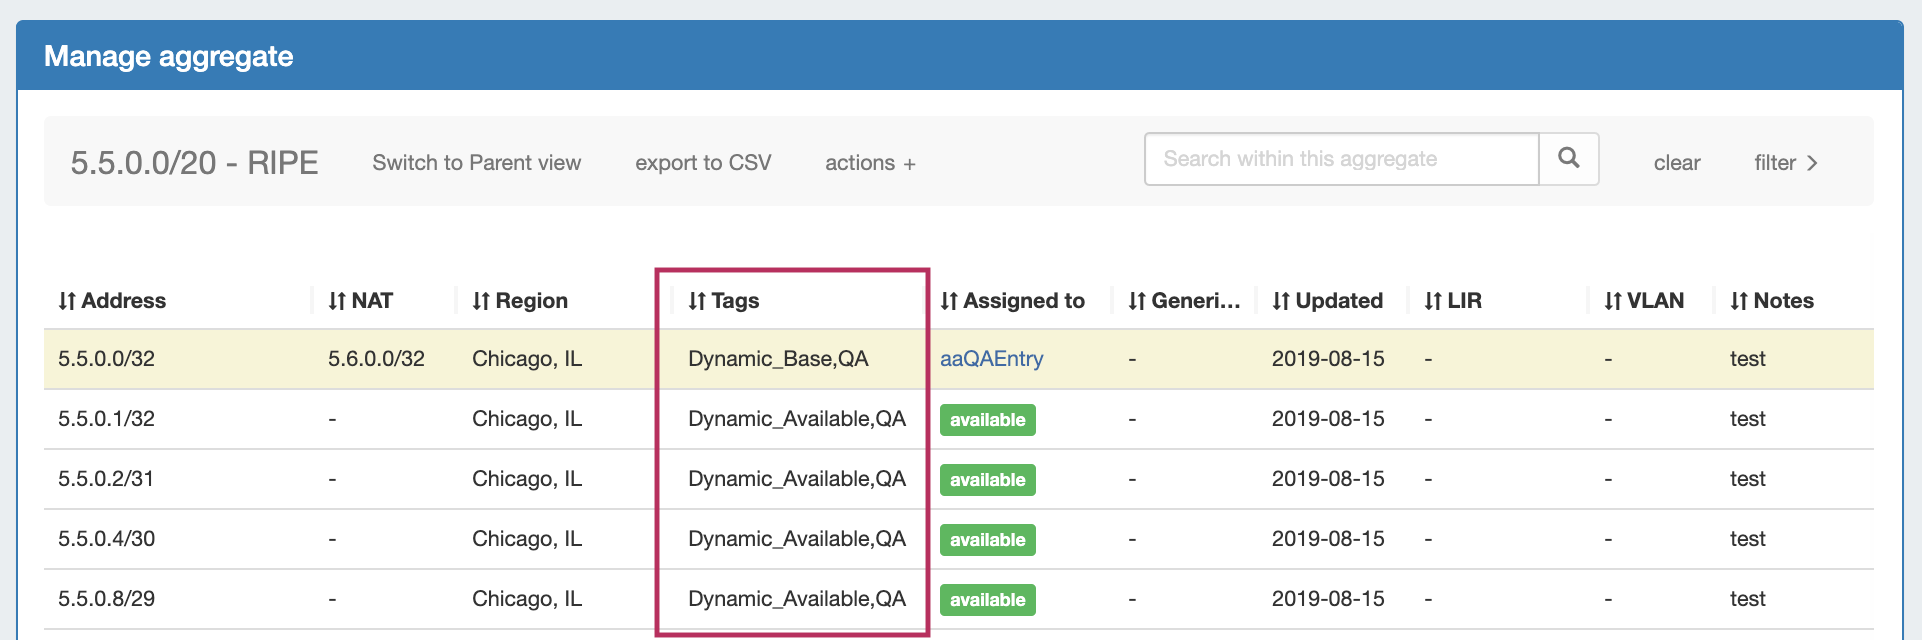
Before you BeginBefore setting up NAT Dynamic IP Block Rotation, ensure the follow has been completed:
Add Dynamic Tags to BlocksAfter NAT blocks and aggregates have been set up in ProVision with sufficient size, matching IPAM tags, and NAT metadata, you can identify which blocks to use for dynamic rotation by adding the "Dynamic_Base" and "Dynamic_Available" tags.
Set up Scheduler TaskGo to Admin → Scheduler, Add the scheduler task "IPAM - Rotate Dynamic IPs".
|
Numbering Authority
IM/CFR - 3322: Added "Numbering Authority" system to IPAM Admin to generate custom-configured number sequences
...
With Numbering Authority, you can create new numbering domains, track which values have been handed out, free values no longer in use, generate the next sequence value, and associate keys-value pairs to a number value. Numbering Domains may be used with ProVision's APIv2 to generate numbers for use within ProVision instances or custom applications.
Available Domain Types
Four numbering domain types are available in Numbering Authority: Sequential, Multi-Range, UIUDv4, and IPv6 Sparse Allocation.
...
Determines the next IPv6 block to assign to evenly distribute assignments throughout the provided range. Used with the IPAM IPv6 Aggregate Sparse Allocate function. See: Working with IP Aggregates Applications: ProVision IPv6 Sparse Allocation
Working with Numbering Domains
See below for additional information on creating Numbering Domains and using domain actions. Information may also be viewed at Working with IP Aggregates and IPAM Parameters.
...
| Expand | ||
|---|---|---|
| ||
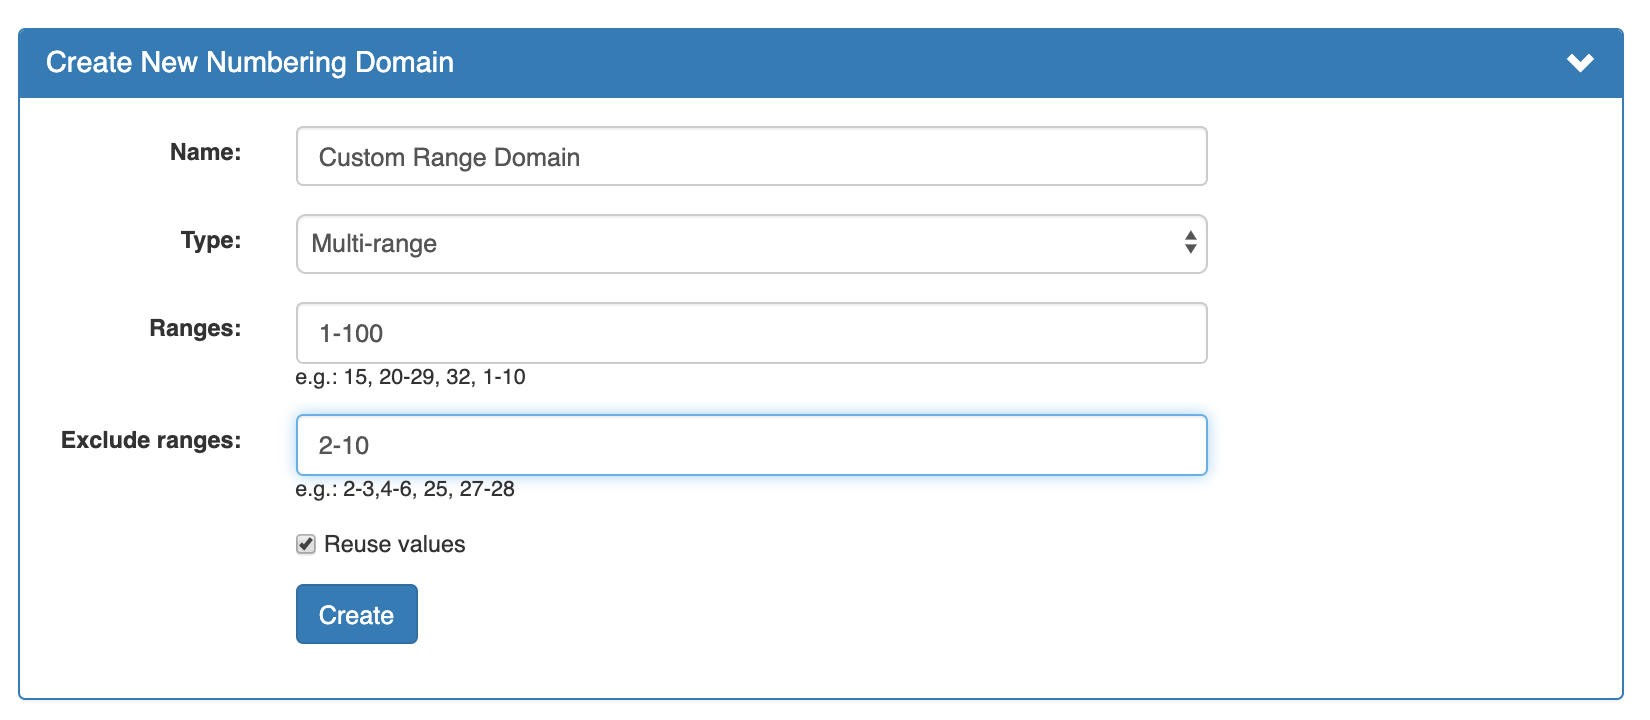
Create a Numbering DomainGo to Admin → IPAM Admin, and select the "Numbering Authority" page. Create a new numbering domain by expanding the "Create New Numbering Domain" section, then typing in a name for the new domain and selecting a domain type.
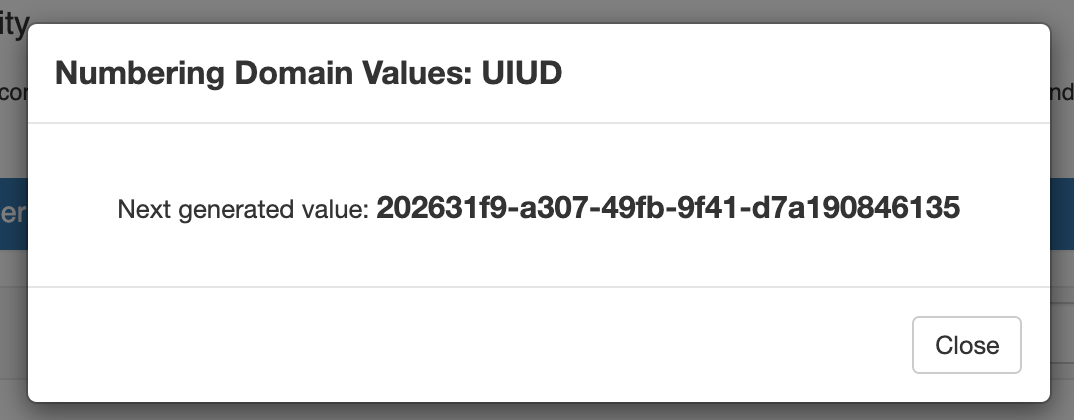
Enter information for the specific domain type, if necessary, and select whether to allow number reuse. When done, click "Create". Number Domain ActionsOnce a numbering domain is created, you may perform the following actions: Get Next Value:Gets the next value in the domain, adds it to the list of used domain values (assigns to the domain), and displays that value to the user.
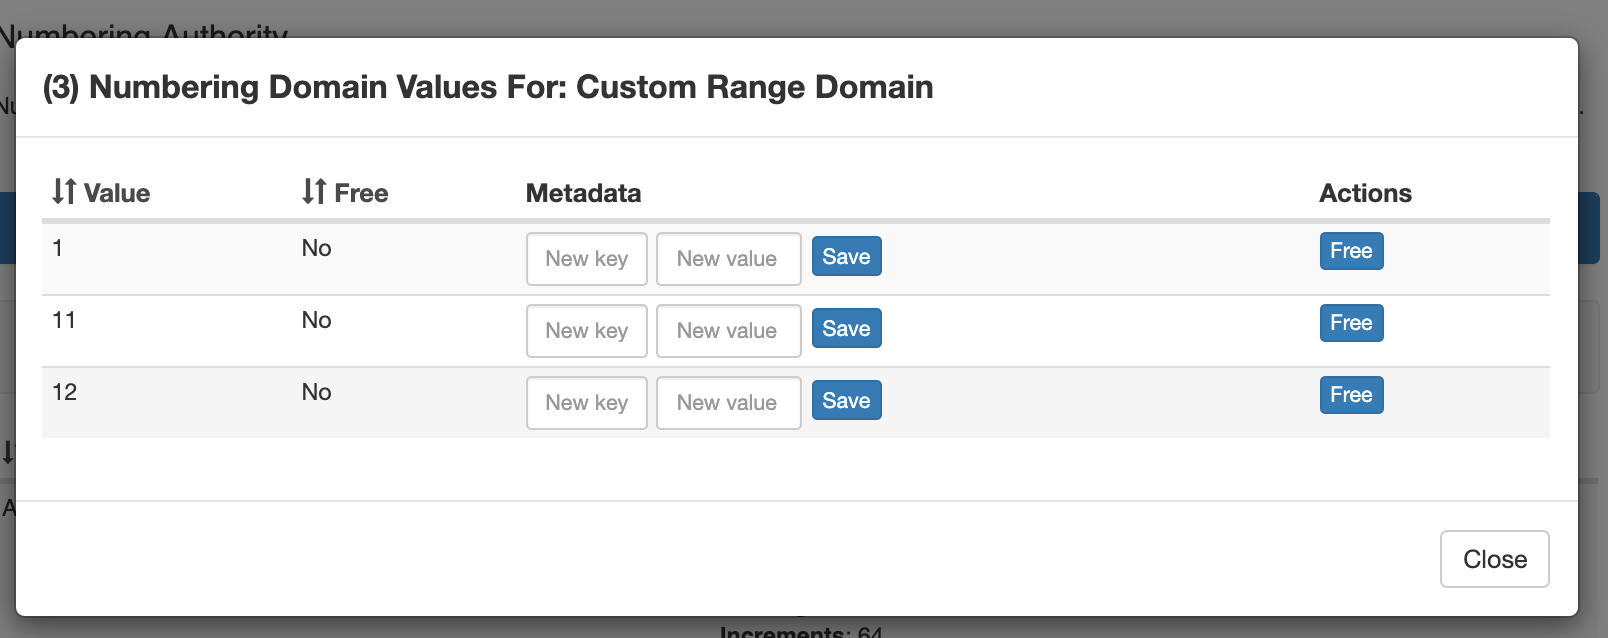
View Assigned Values:View values that are assigned to the domain, view used/free status, free assigned blocks, and save key-value metadata to values. |
IPAM IPv6 Sparse Allocation
IM/CFR - 3322a: Added "Sparse Allocation" assignment for IPv6 blocks
...
| Expand | ||
|---|---|---|
| ||
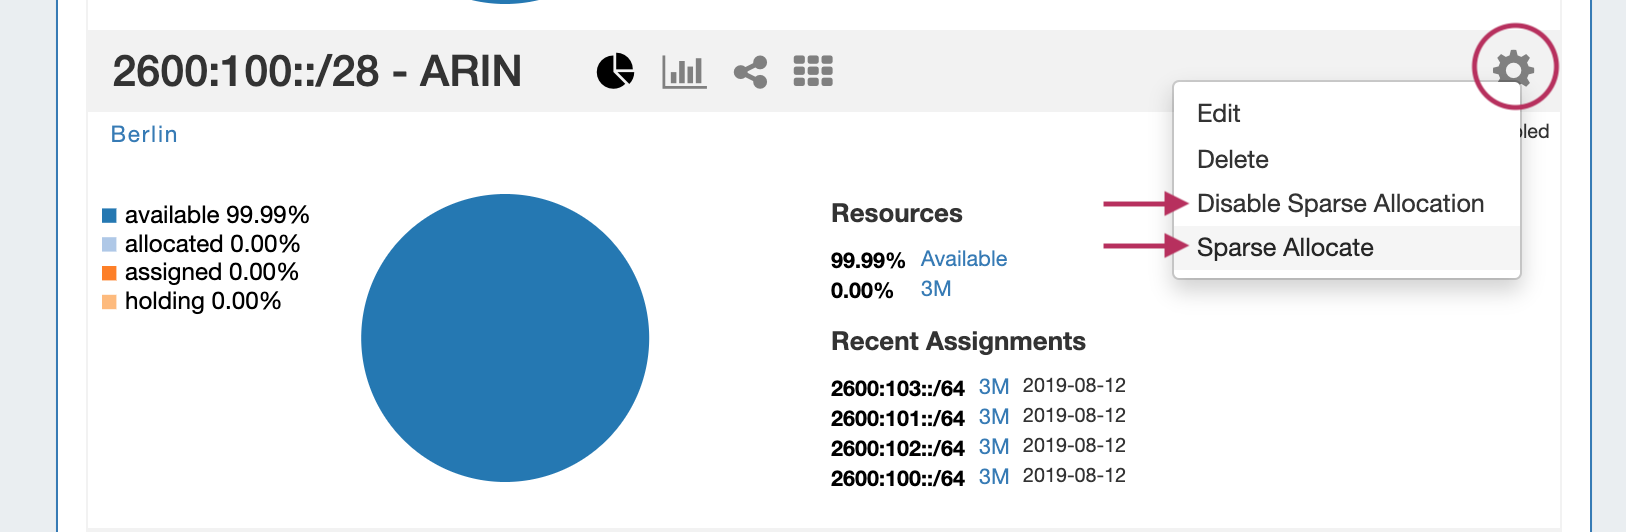
Sparse Allocation options are accessed from the IPv6 Aggregate's Action Menu. From here, you can enable/disable Sparse Allocation for the aggregate, or Sparse allocate assign the next generated IP block.
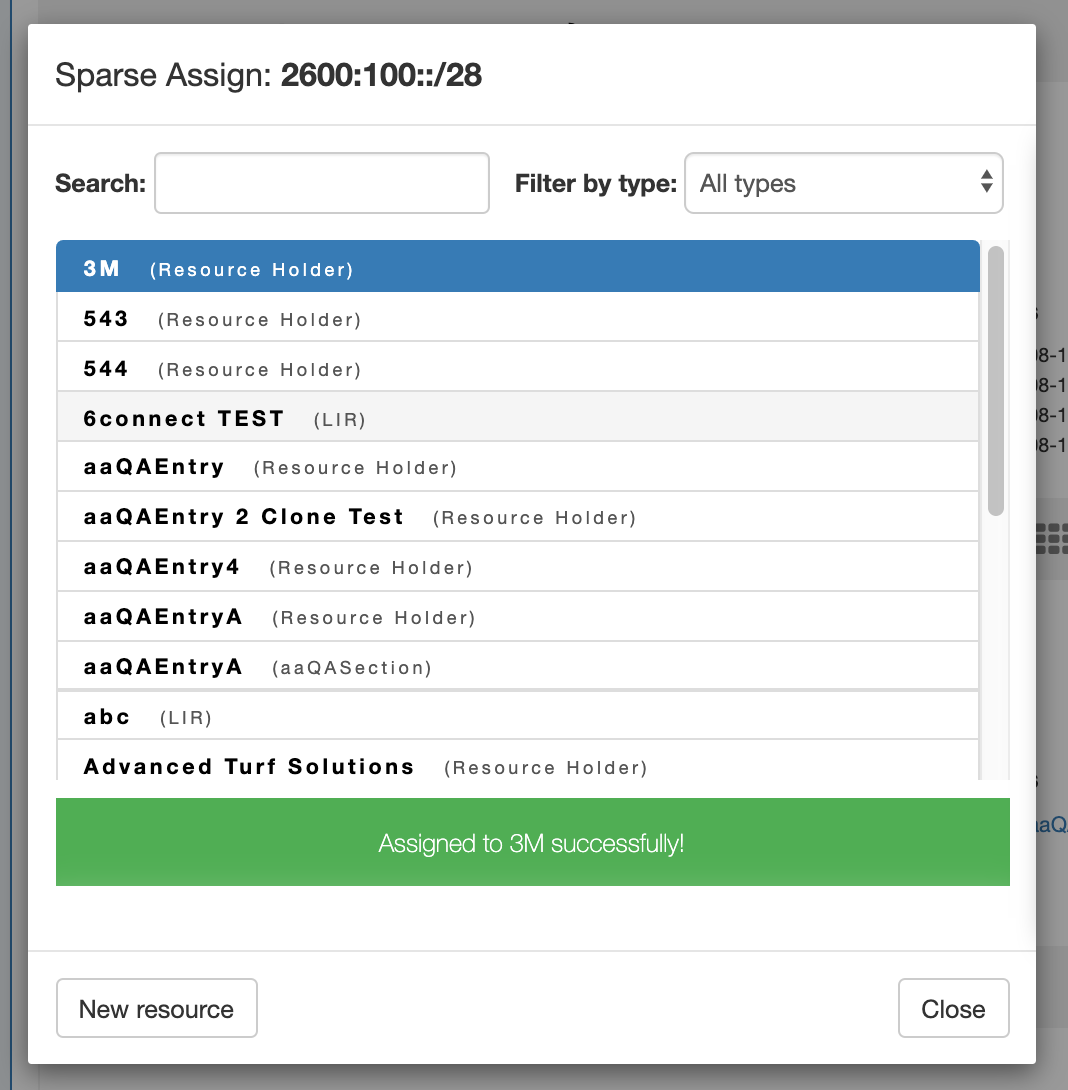
Assign the next IP generated by selecting "Sparse Allocate". Then, select the resource to assign (or create a new one) and click "Assign".
|
Resource Field Gadget
IM - 3347: Added the "Resource Field Gadget"
...
| Expand | |||||
|---|---|---|---|---|---|
| |||||
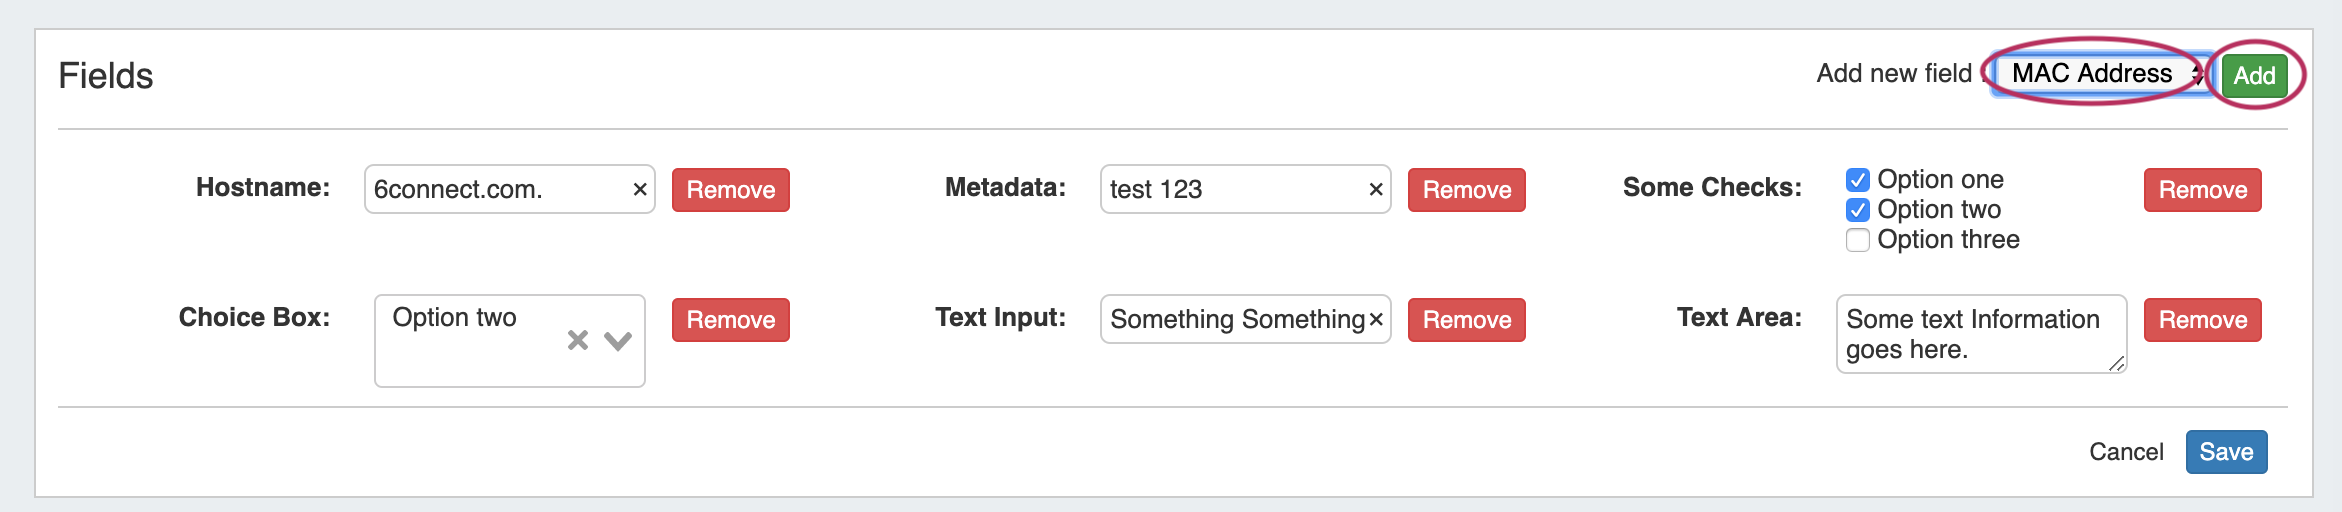
Before You BeginFields must be enabled and added to the Resource's Section before they can be used in the Field Gadget. Fields enabled in a Section (pictured below) will be available to add to the Field Gadget for any Resource of that Section.
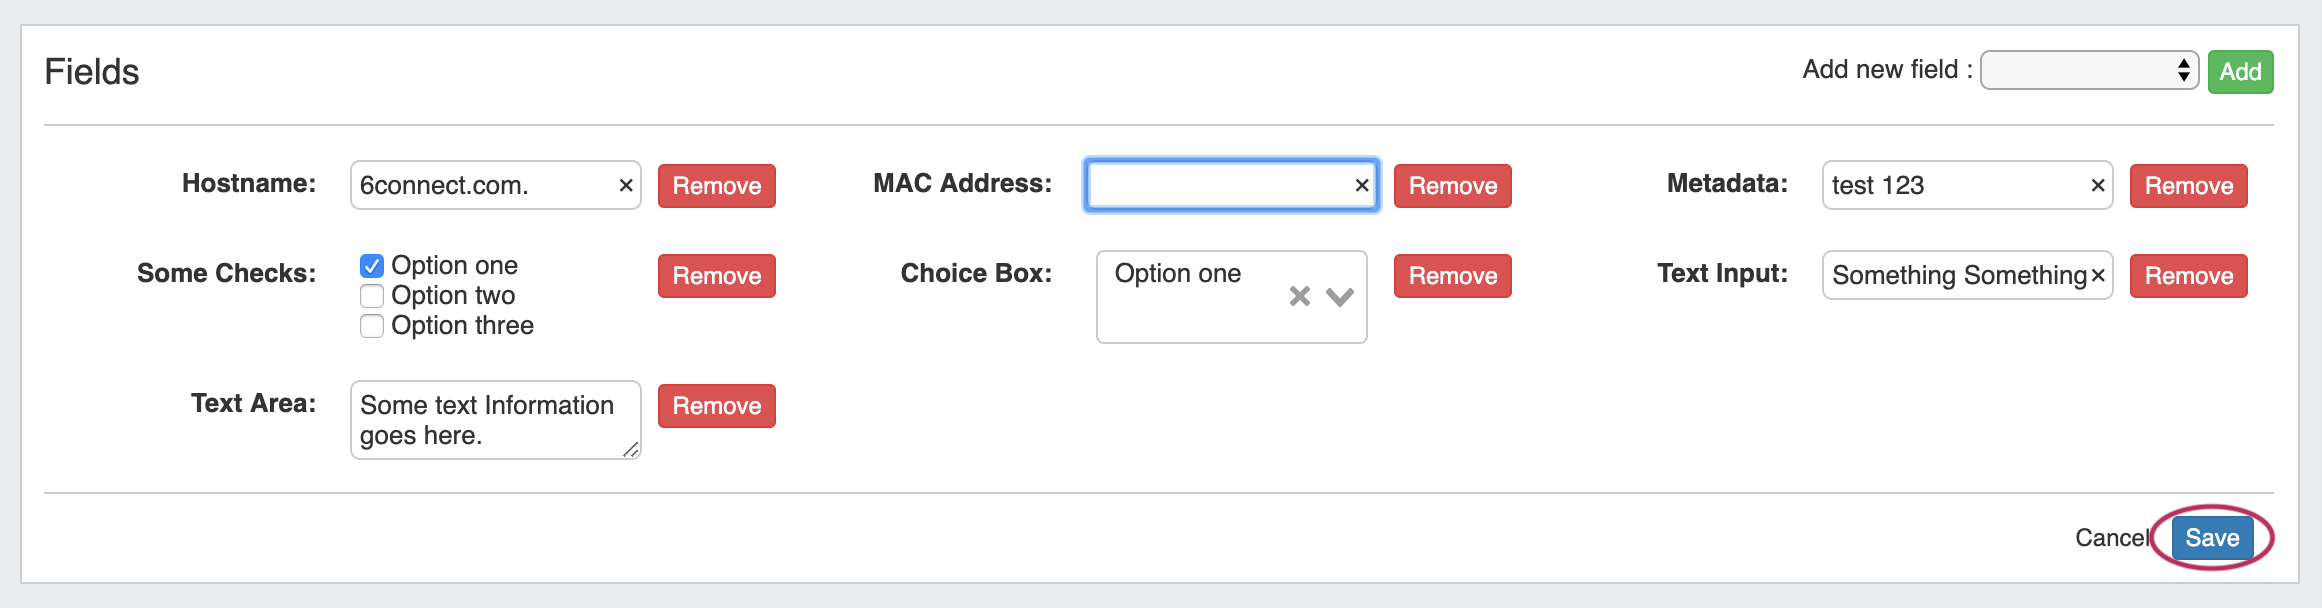
Working with the Field GadgetOnce fields have been enabled for a Section, they will be available to select in the "Add New Field" dropdown. To Add fields, click the "Edit" Button at the bottom right corner of the Field Gadget. Then, next to "Add New Field:", select one of the available fields from the dropdown, and click "Add".
Once added, the field will be available to edit or remove. Edit field value(s) as desired, then click "Save".
|

DNS Records List
CFR - 151: Added a new DNS Records sub-tab under the DNS Tab
...
| Expand | ||
|---|---|---|
| ||
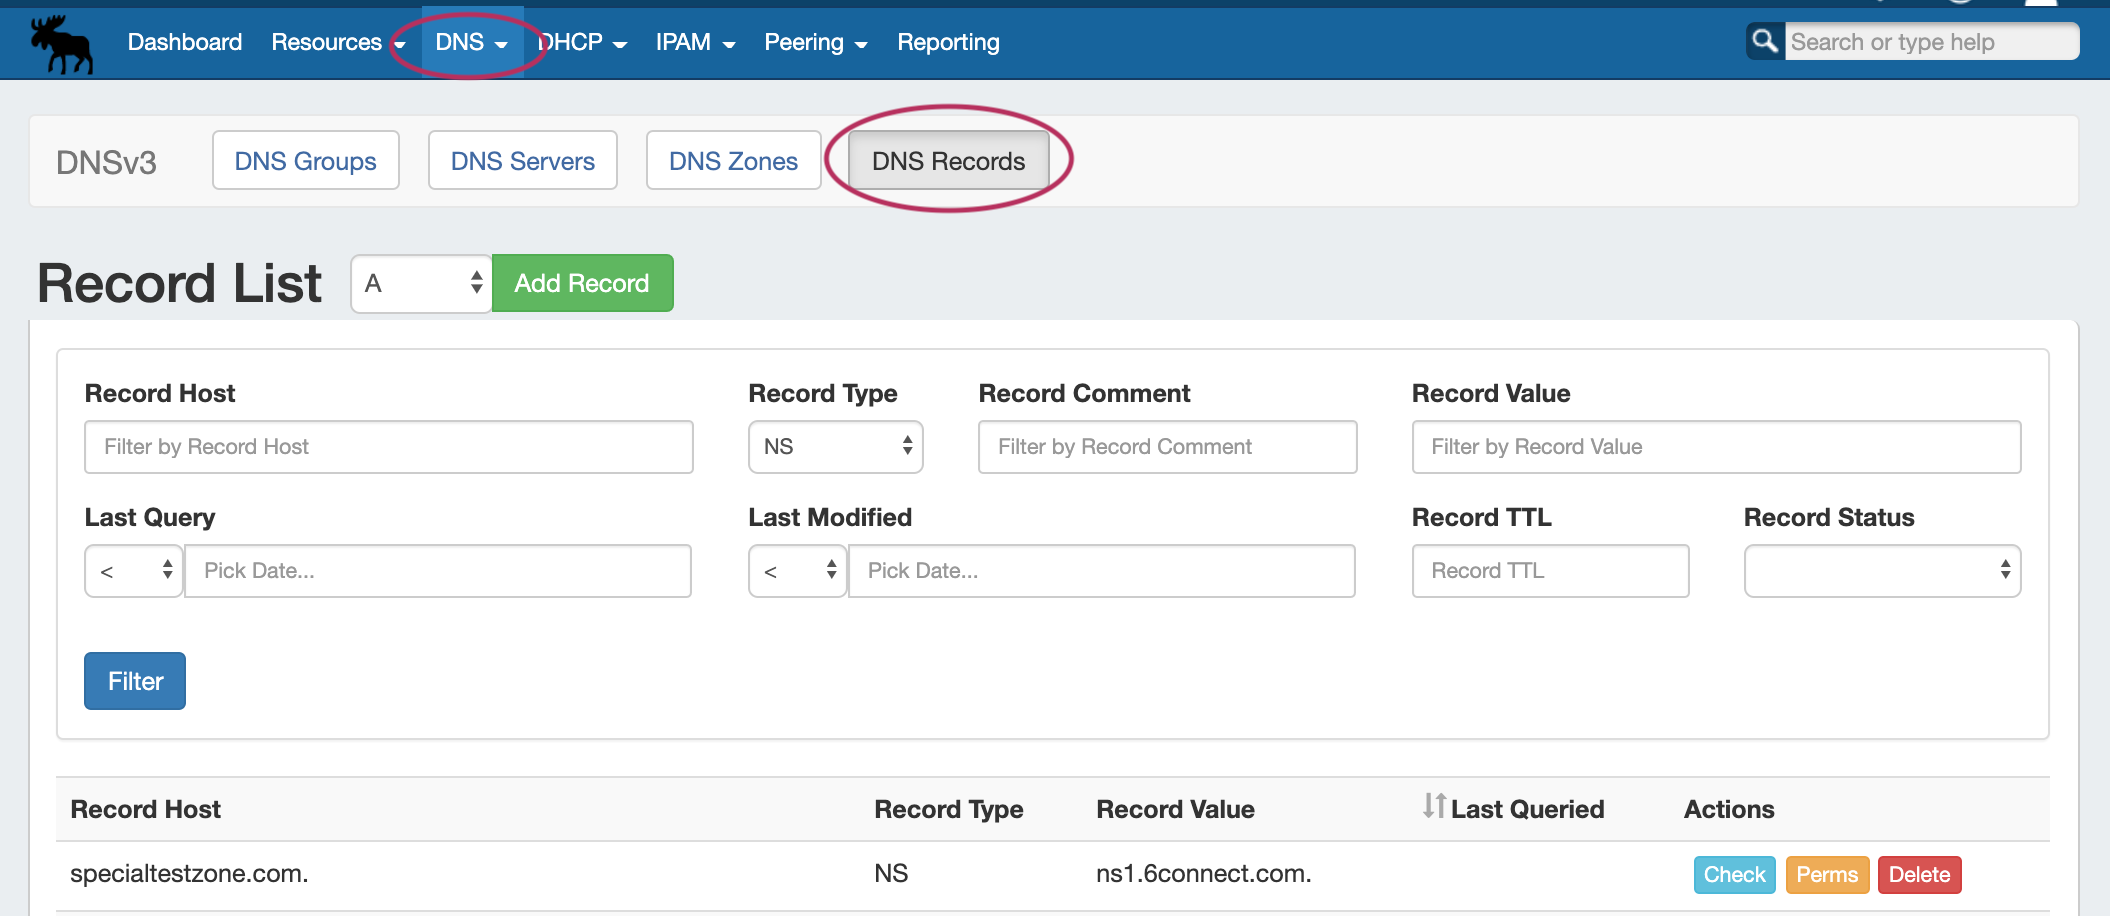
From the DNS Tab, click on the "DNS Records" sub-tab button, or select it from the DNS dropdown menu. All DNS records available in ProVision displays in a single Record List, along with Host, Type, Value, and Last Queried information.
Filter RecordsSearch for specific records by filtering by Host, Type, Comment, Value, Last Query, Last Modified, Record TTL, or Status. After entering your filter criteria, click "Filter".
Work with RecordsFor each record, you may:
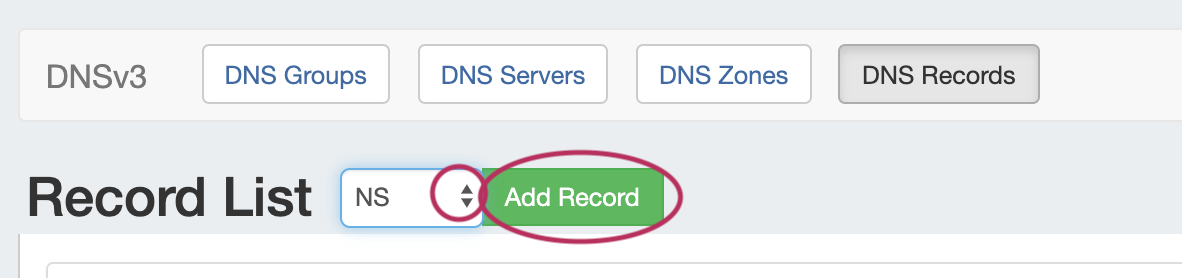
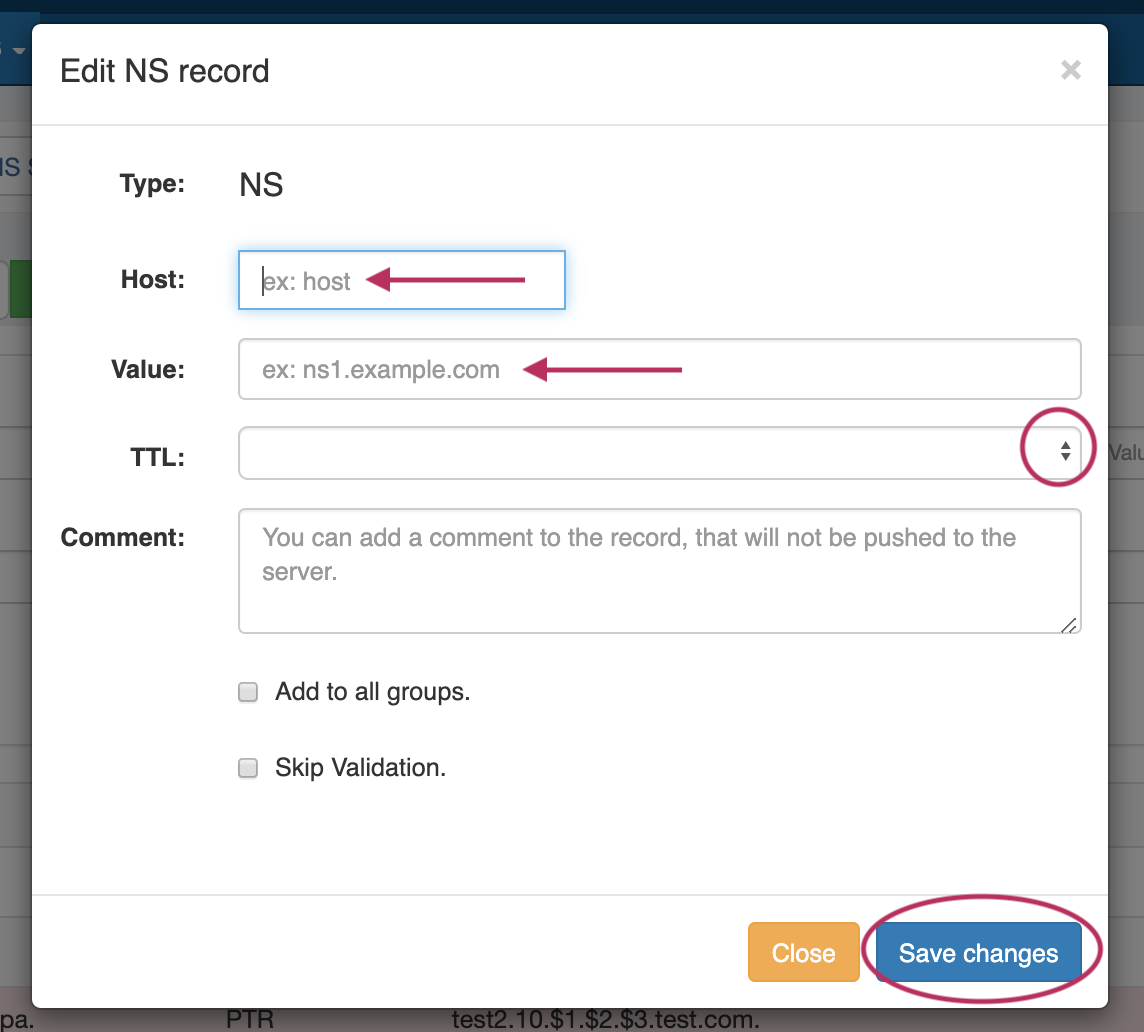
Add a New RecordNext to "Record List", select the desired record type, then click "Add Record".
Enter the record information for the record type. When done, click "Save Changes".
|


Licensing
IM - 3356: Added a ProVision Licensing Management Page to Admin Settings
...
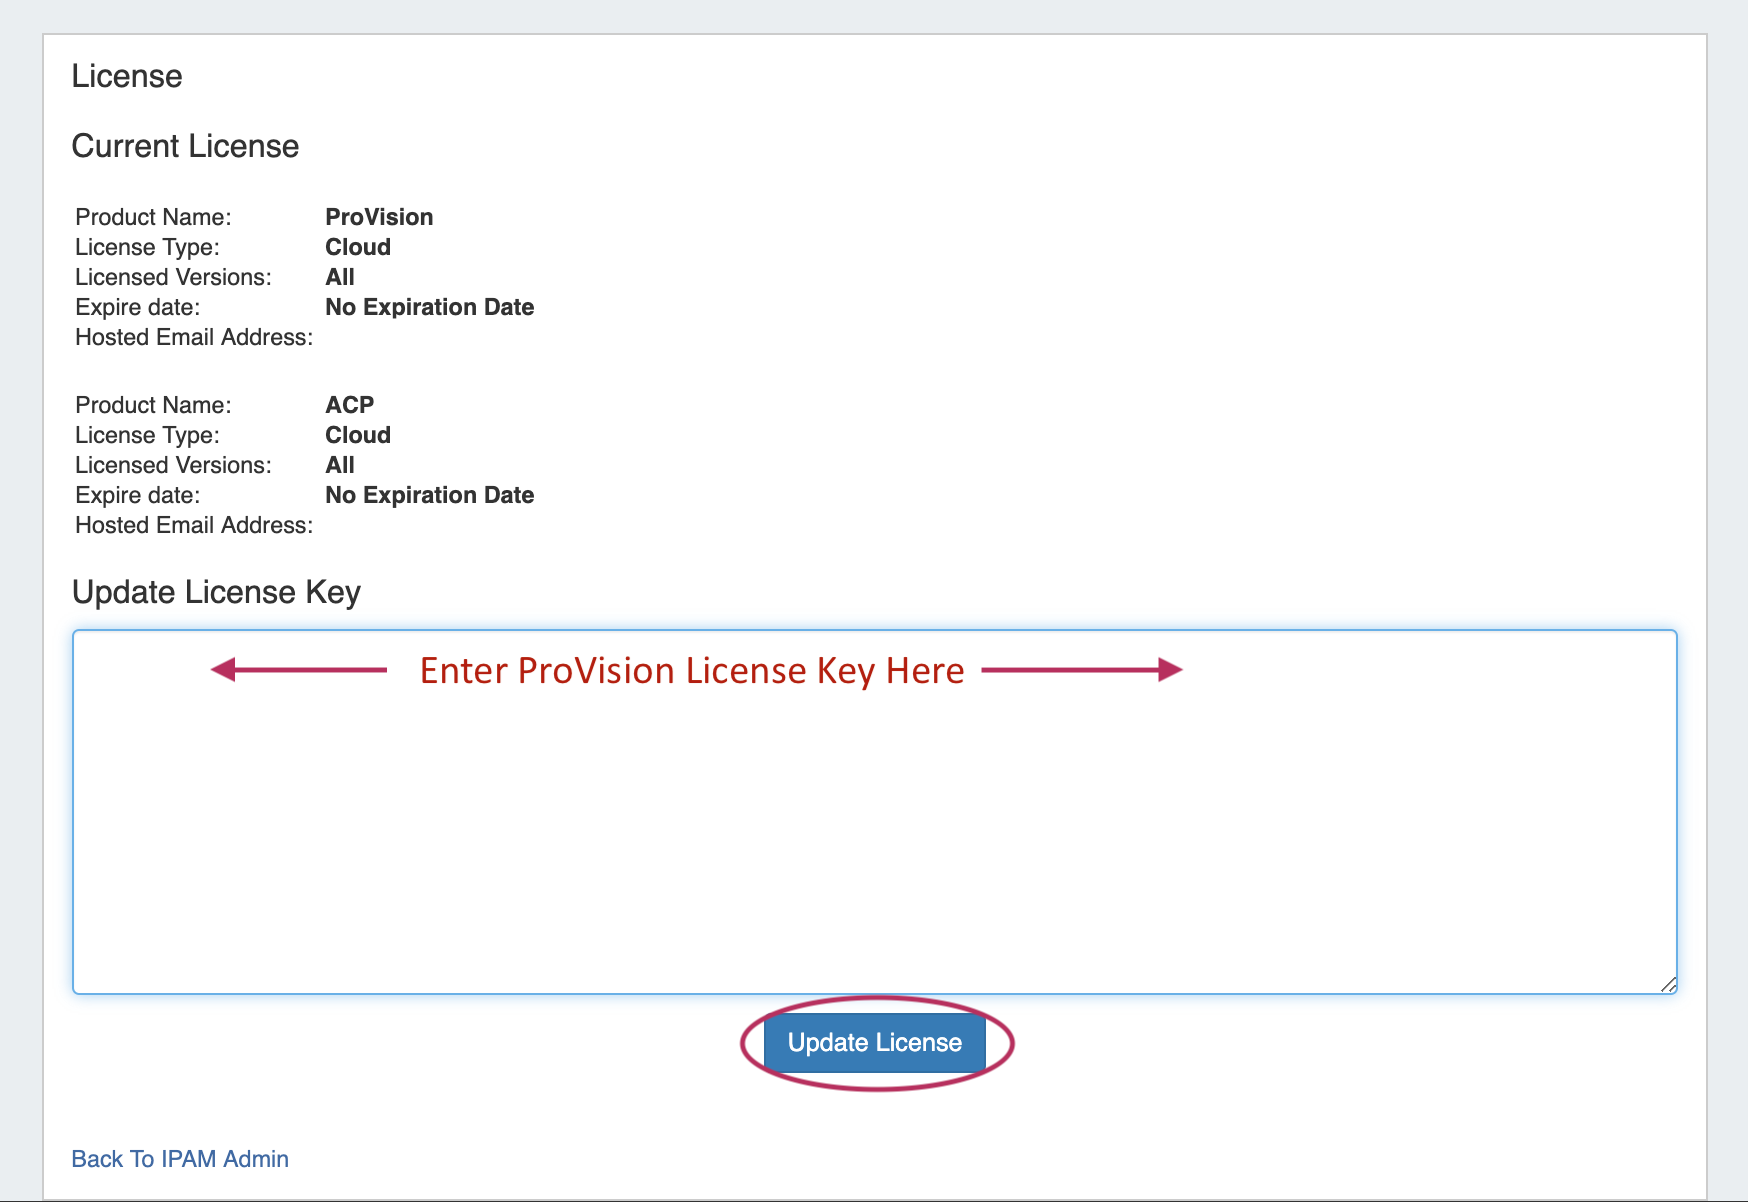
To add/update a License Key, paste the key provided into the "Update License Key" box, and click "Update License".
Additional Features / Improvements
...
IPAM Improvements
Multiple improvements have been made to the IPAM Manage interface, including:
'Important' Blocks
IM/CFR - 3301: Added the ability to mark a block as "Important".
...
Blocks may be manually marked/unmarked as "Important" from the "Edit Block" interface or API.

Parent View Updates
IM - 3308: Added toggle link to "Switch to Parent View" in IPAM Manage
...
We now help you out by giving examples for "power of 2"!
Approvals Multi-Assign
IM - 3303: Added the ability to assign multiple groups to an approval action.
...
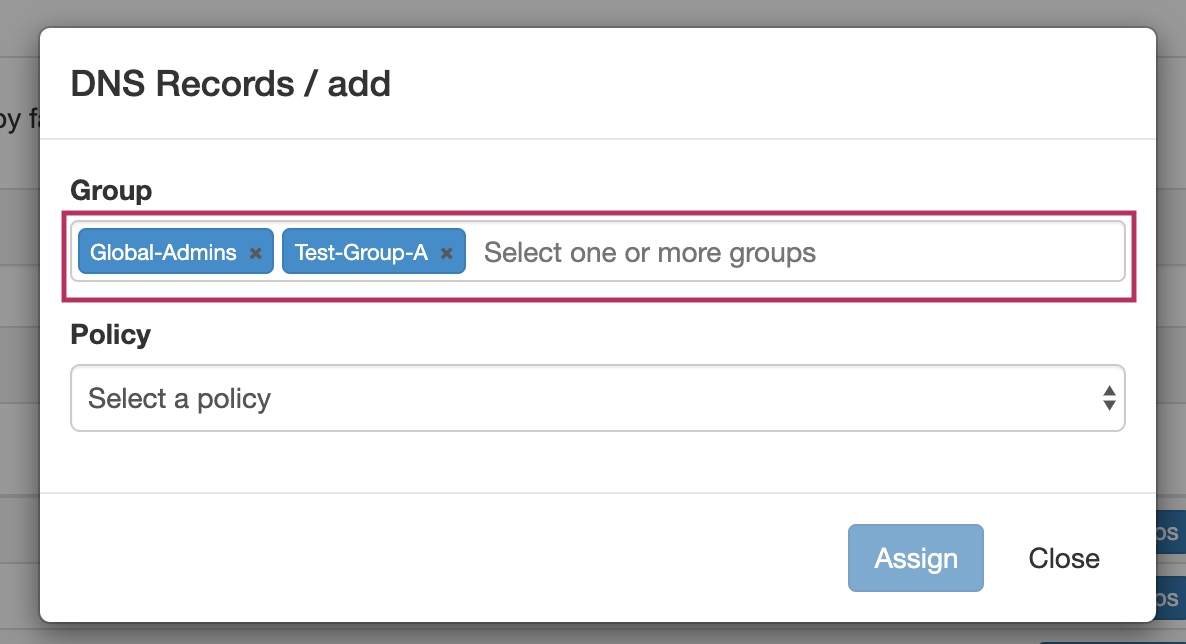
For any Action, click "Assign Group", then select one or more Groups to apply the action policy to.
Peering Improvements
Local Peers
IM / CFR - 3289: Added "Local Peer" options to ProVision Peering
...
| Expand | ||||||||||
|---|---|---|---|---|---|---|---|---|---|---|
| ||||||||||
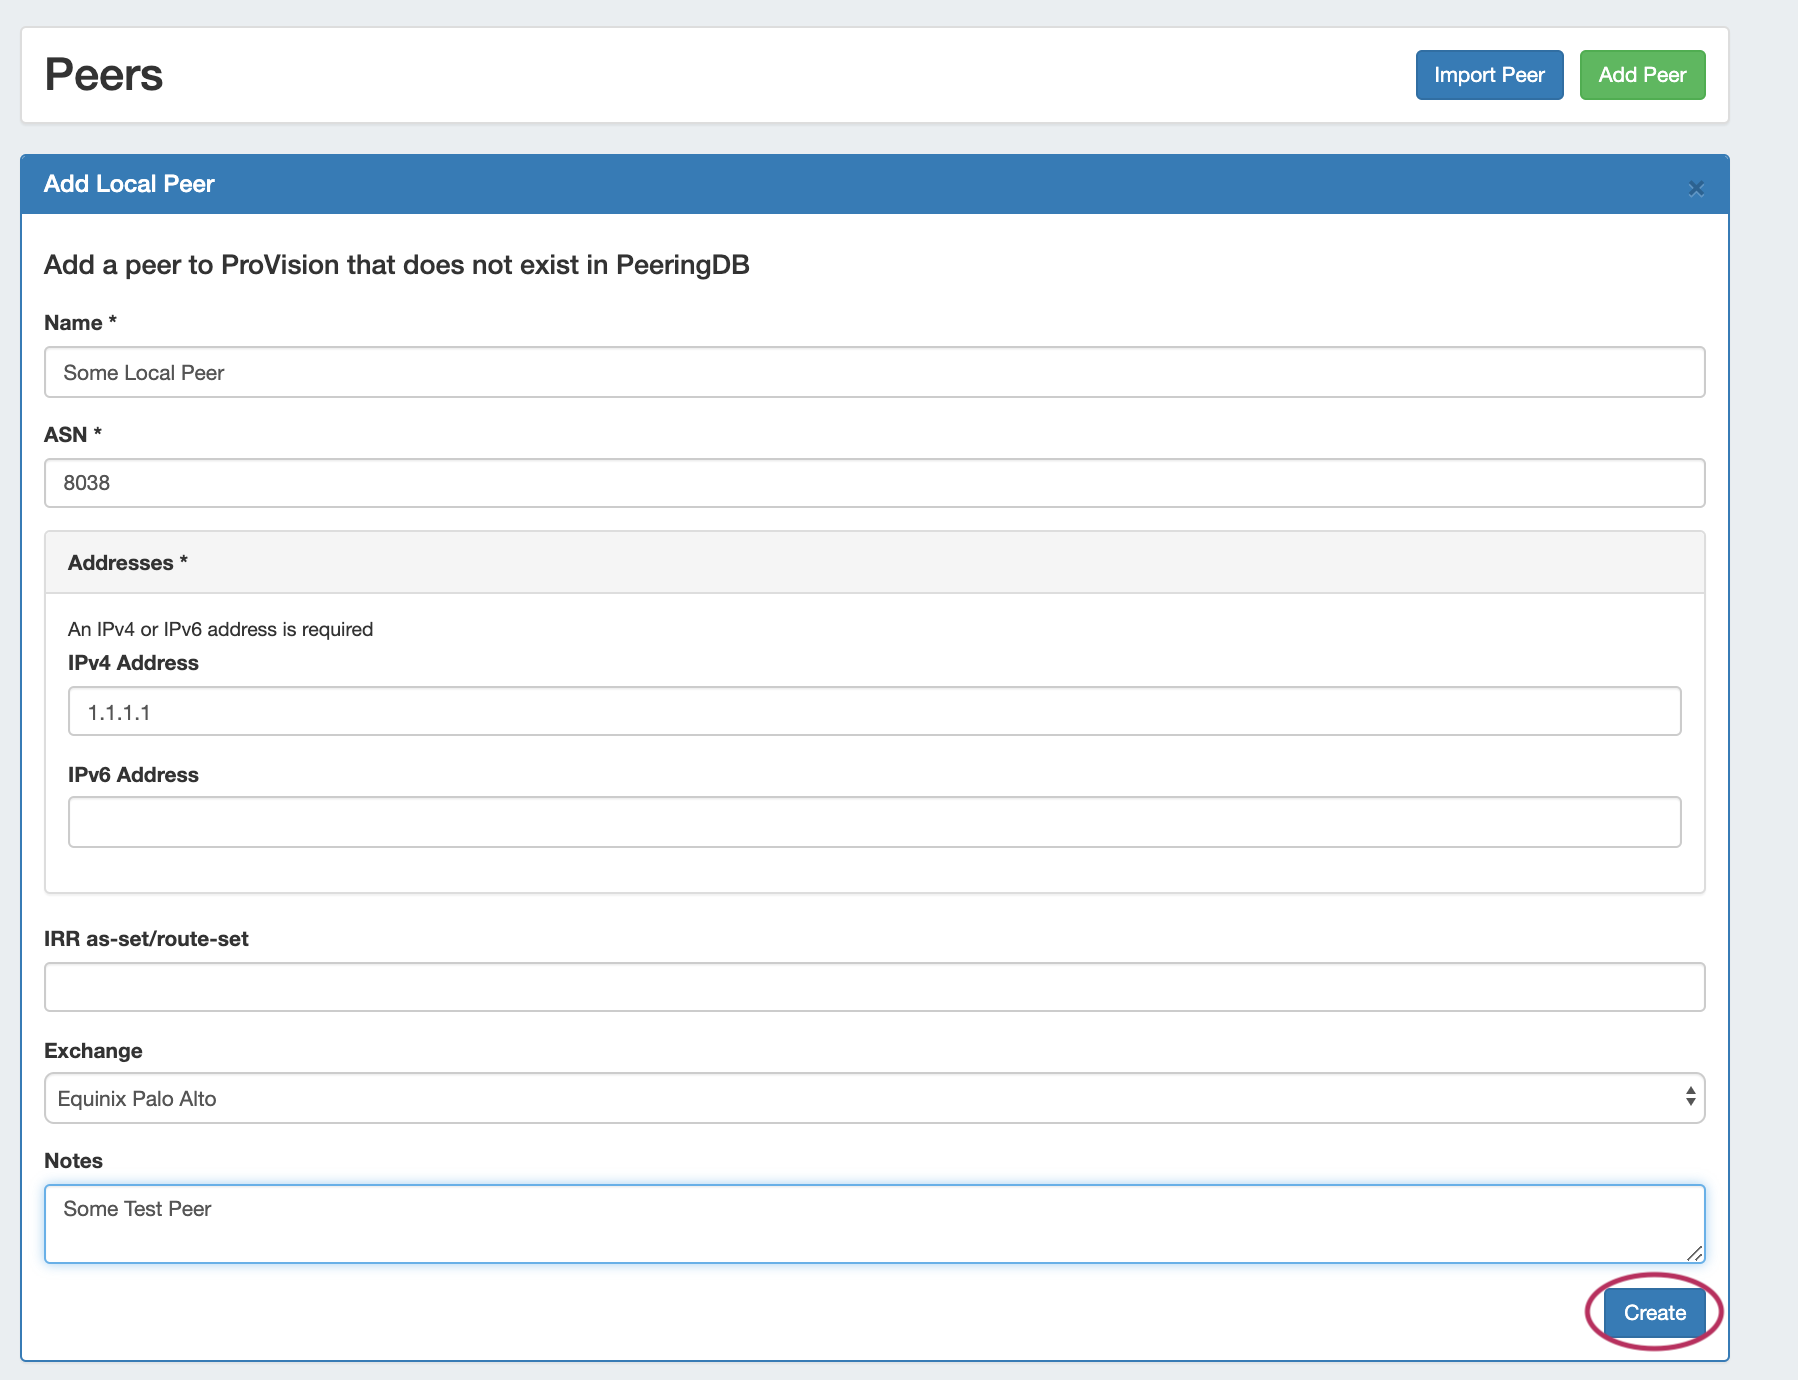
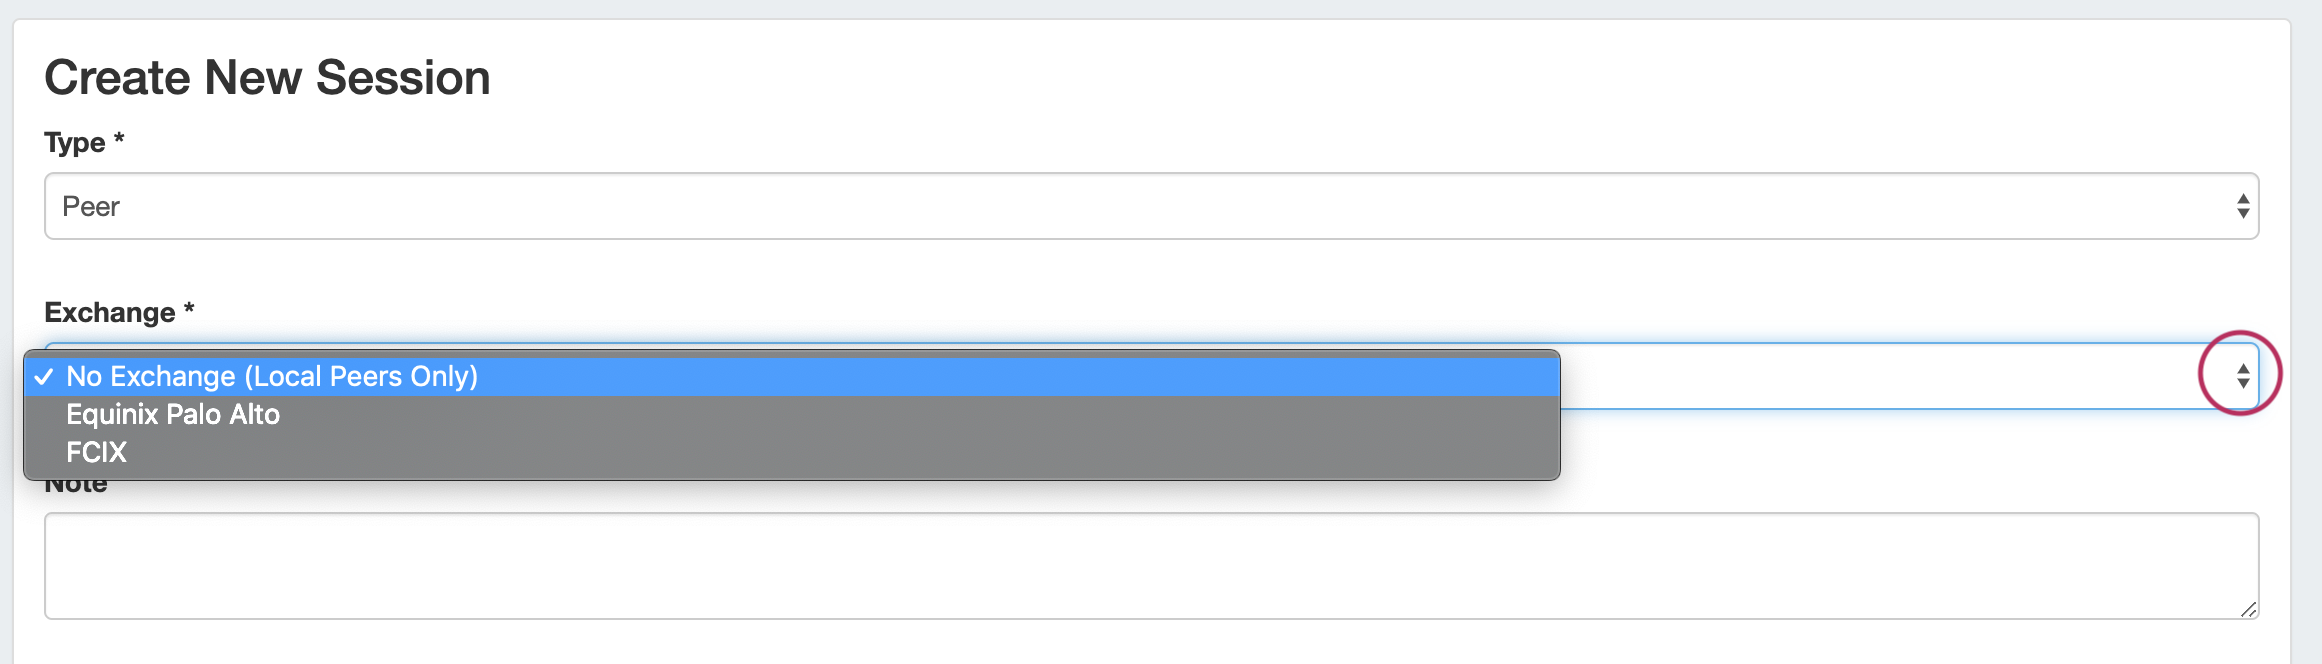
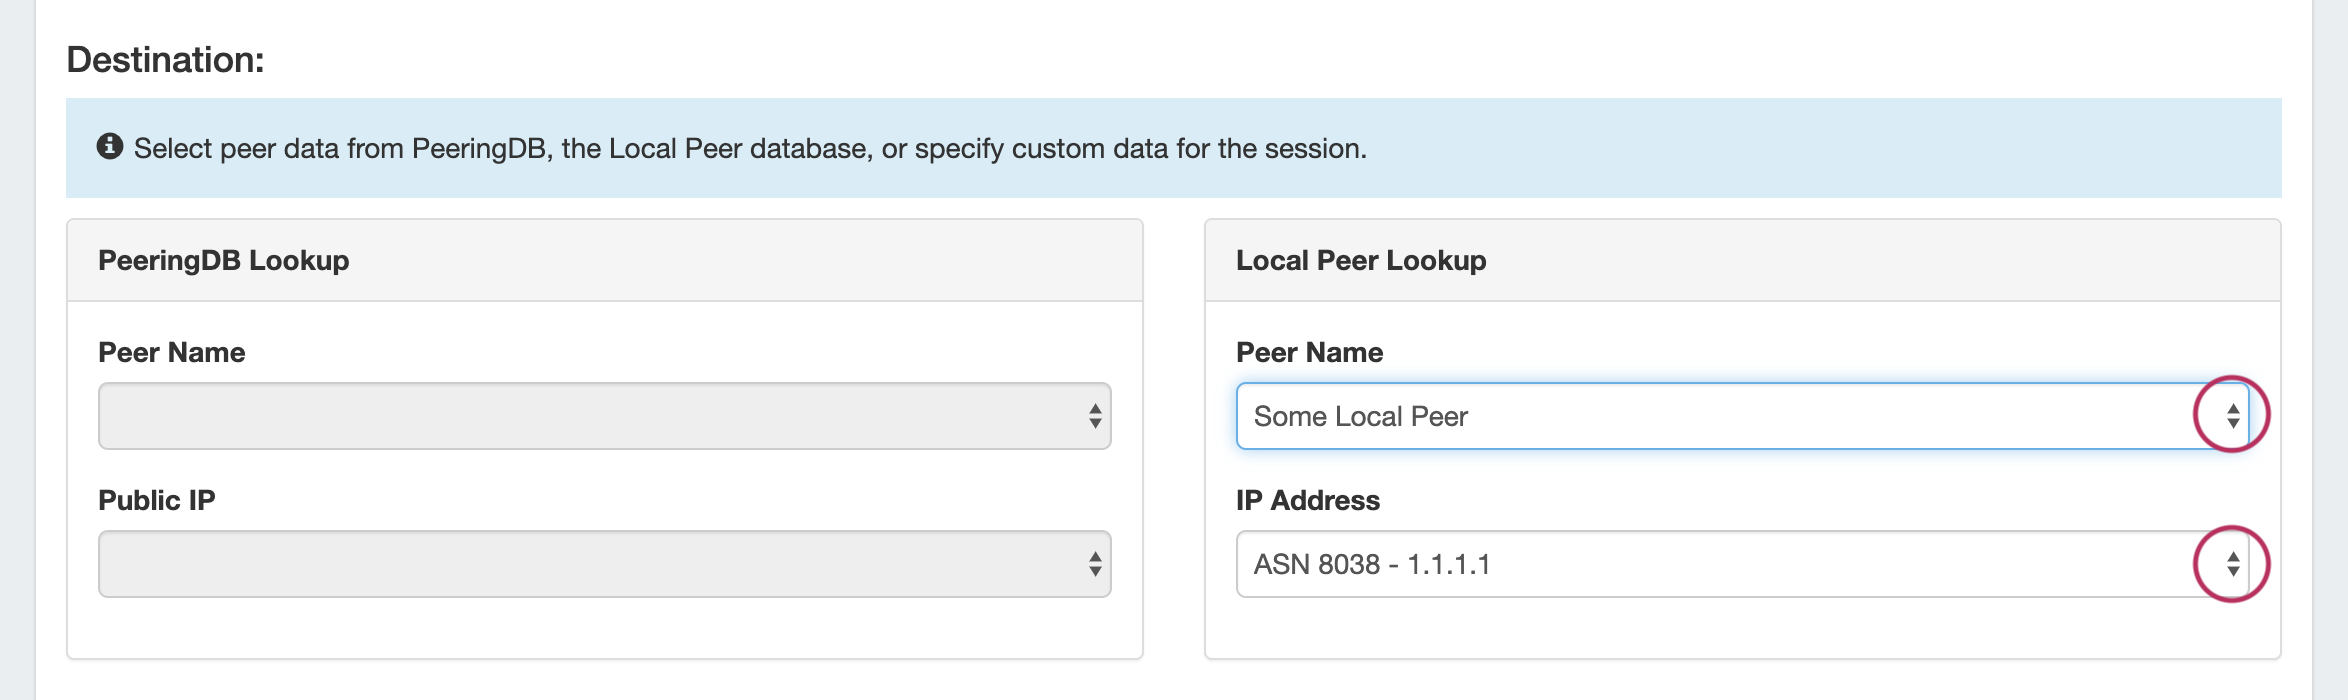
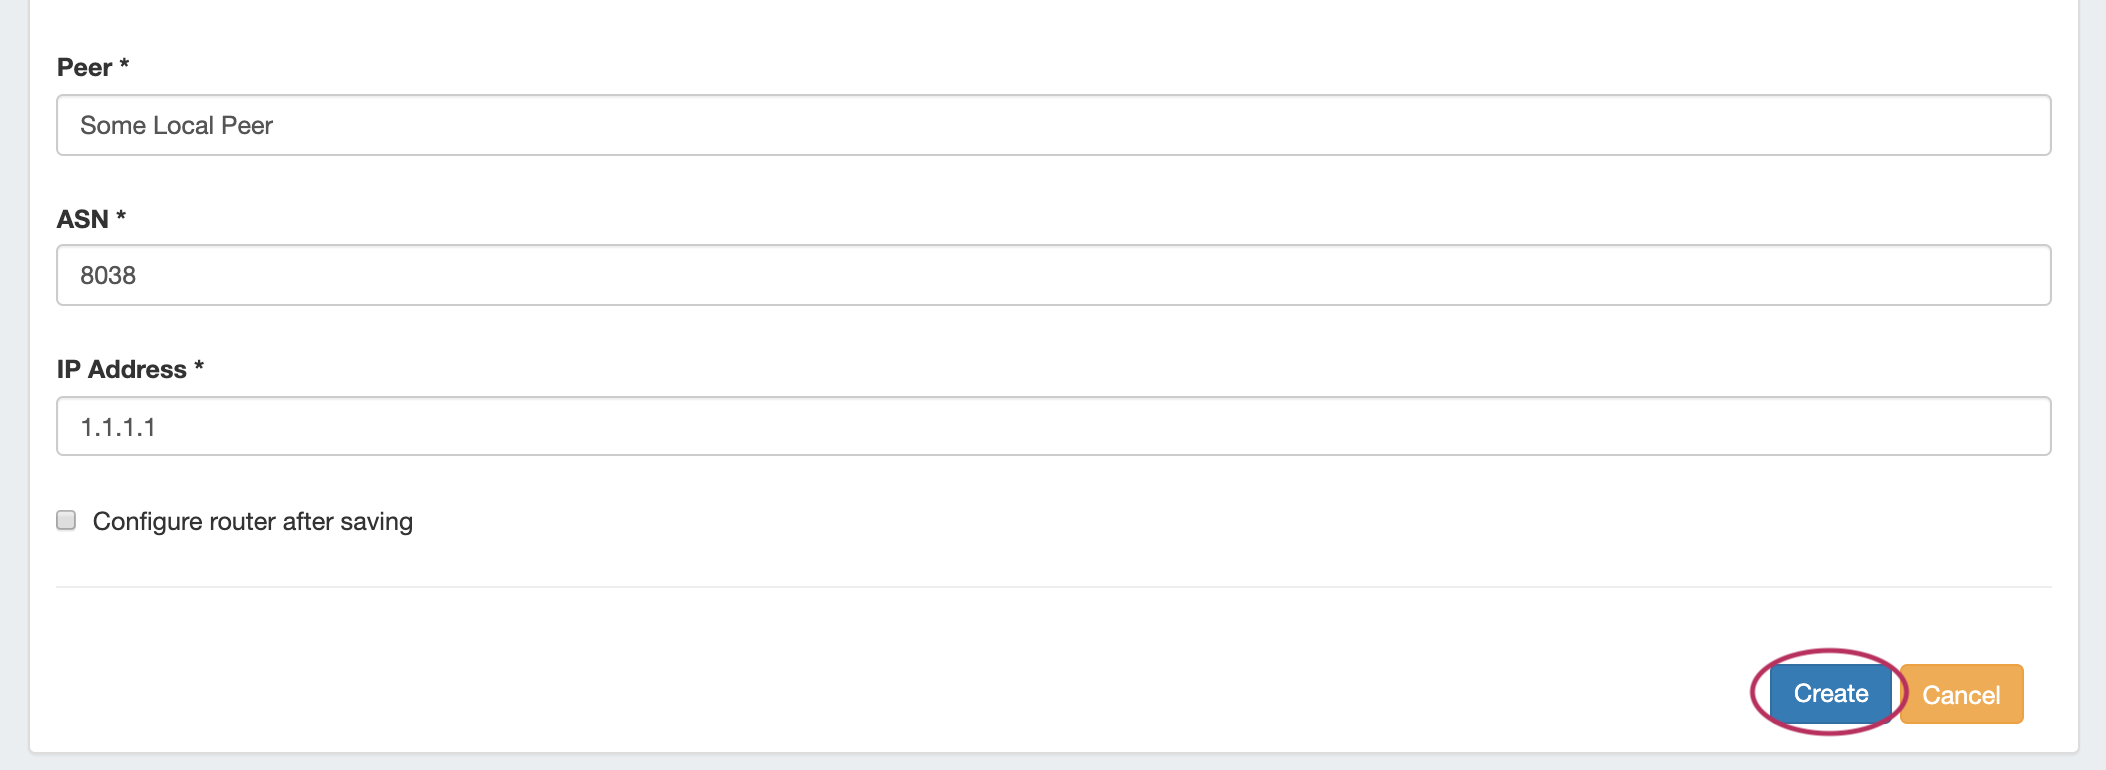
Add a Local PeerAdd a new local peer by going to the Peering Tab → Peers subtab, and clicking "Add Peer".
Create a Session Using a Local or Custom PeerYou may use existing Local Peers when creating a new session, or create a new custom Peer from the Create Session page.
|


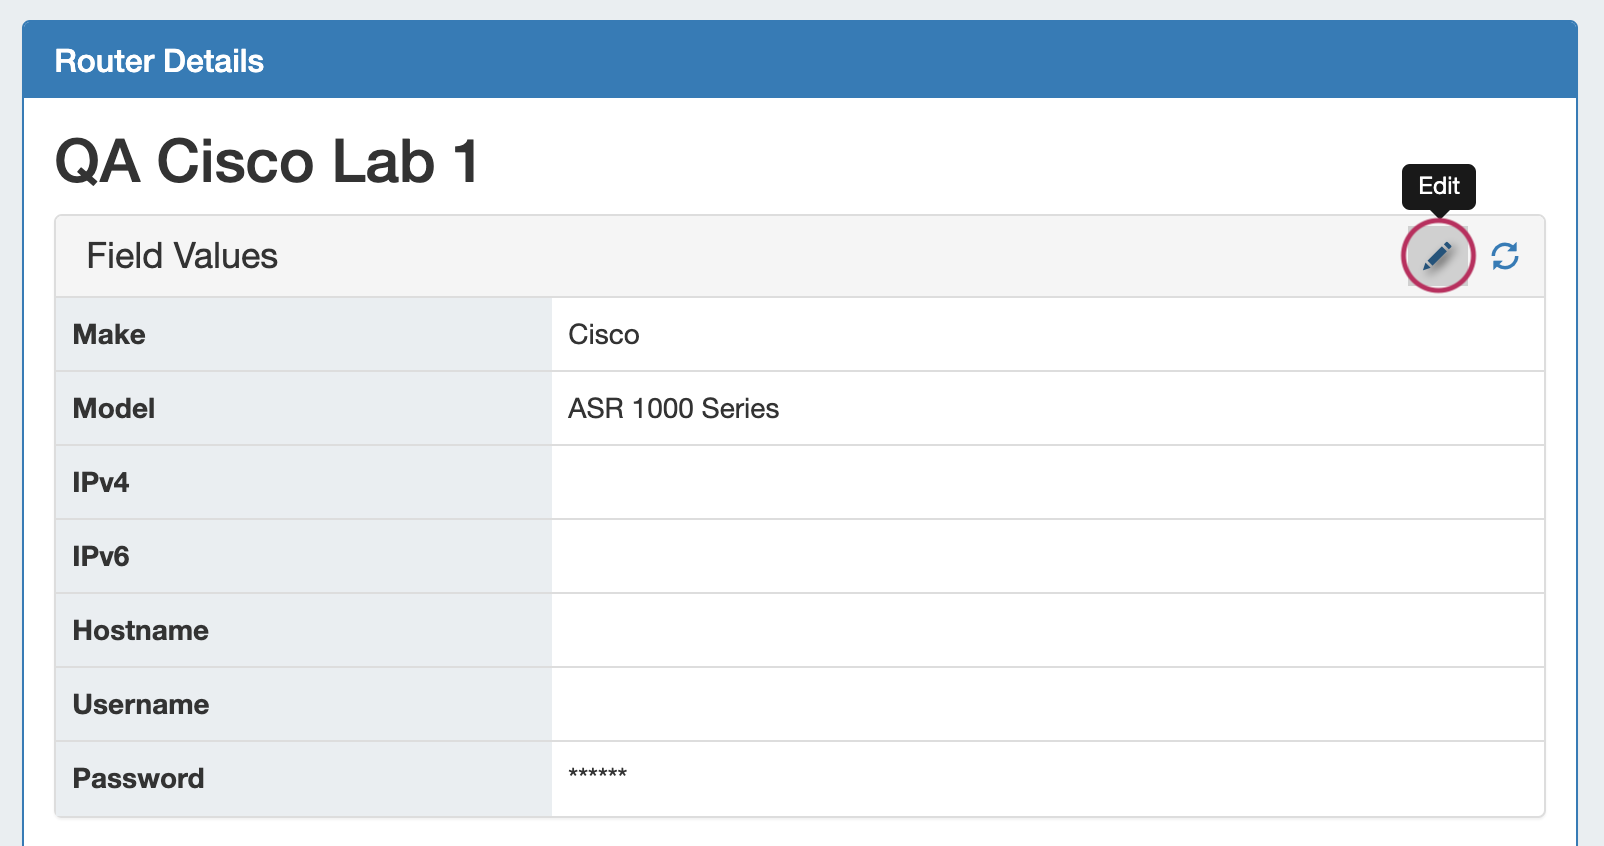
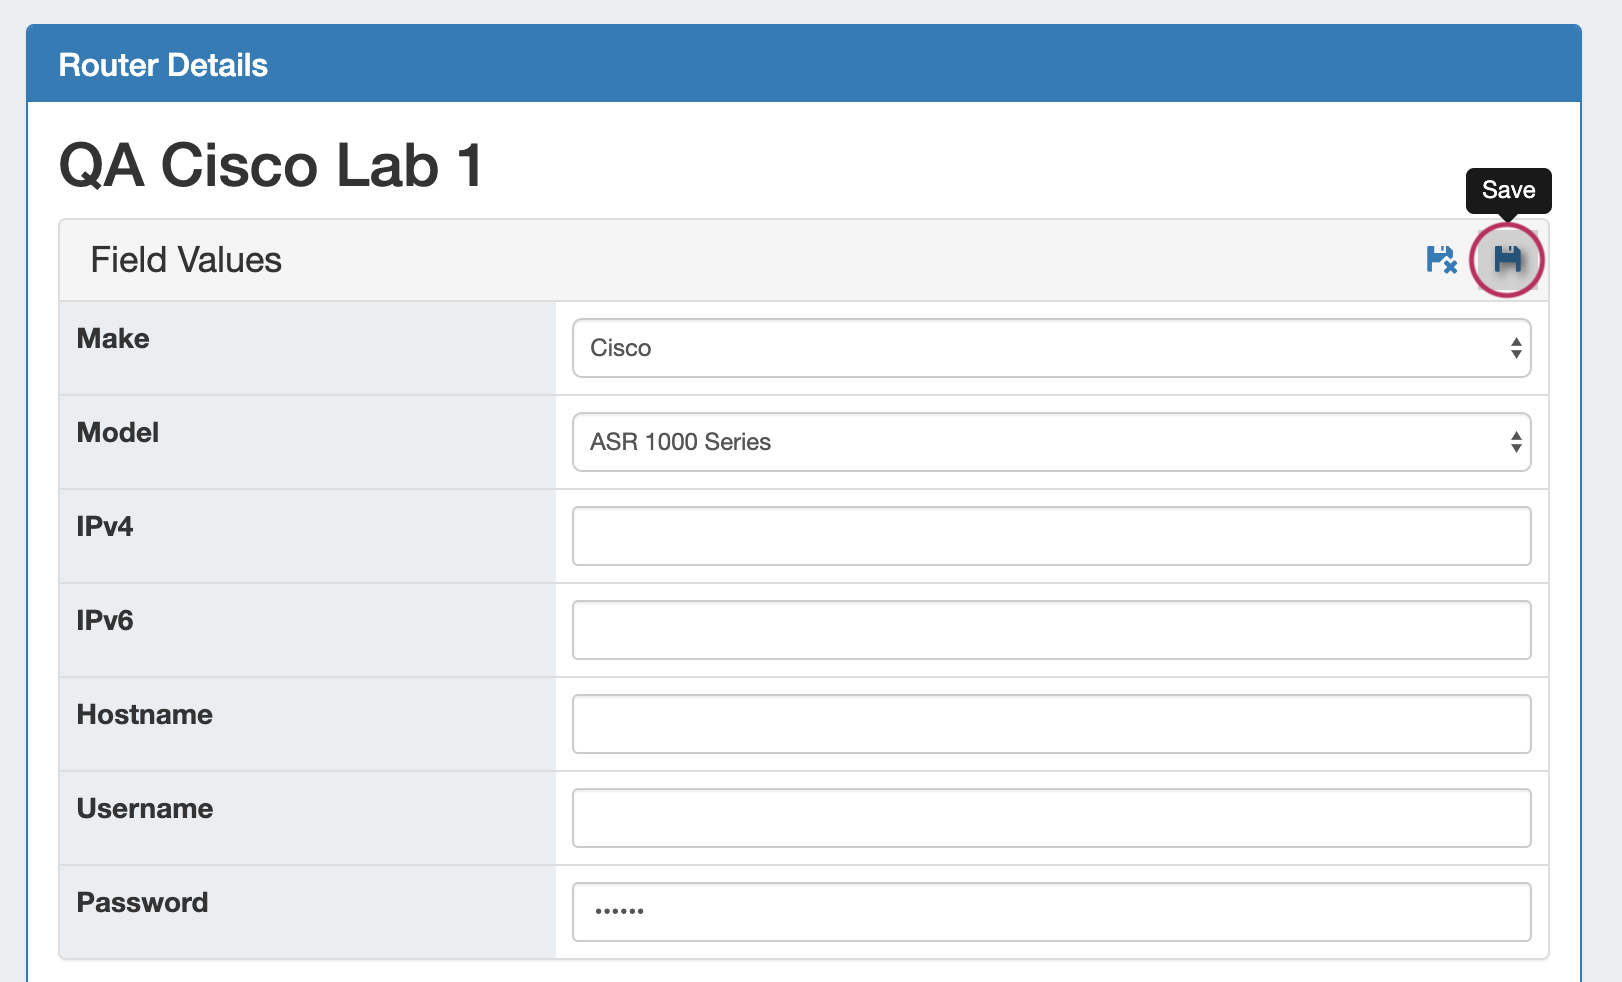
Expanded Router Edit
IM-3327: Added the ability to edit router information directly from the Peering → Router Details page.
...
| Expand | ||
|---|---|---|
| ||
To edit a router field, click the "Edit" icon (pencil), and input the desired change.
When complete, click the "Save" icon.
|
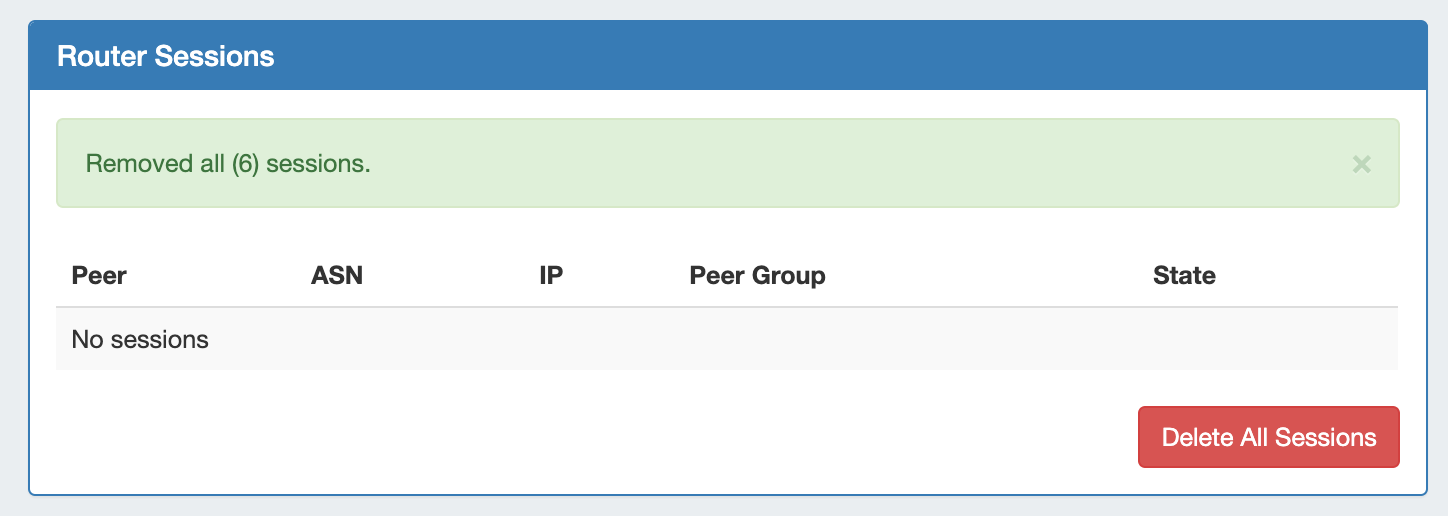
Improved Messaging
IM - 3429: Added Success/Fail Messaging to Peering → Router Sessions "Delete All" button.
APIv2 Updates
Follow endpoint links for detailed APIv2 Swagger documentation, updated once each release is live.
IPAM Generate DNS
IM - 2940: Added APIv2 endpoint: POST /ipam/netblocks/generate_dns
...
| Expand | ||||||||||||||||||||
|---|---|---|---|---|---|---|---|---|---|---|---|---|---|---|---|---|---|---|---|---|
| ||||||||||||||||||||
|
IPAM Soft Merge Netblock
IM-3275: Added APIv2 endpoint: PATCH /ipam/netblocks/{id}/soft_merge
...
| Expand | ||||||||||||||||||
|---|---|---|---|---|---|---|---|---|---|---|---|---|---|---|---|---|---|---|
| ||||||||||||||||||
|
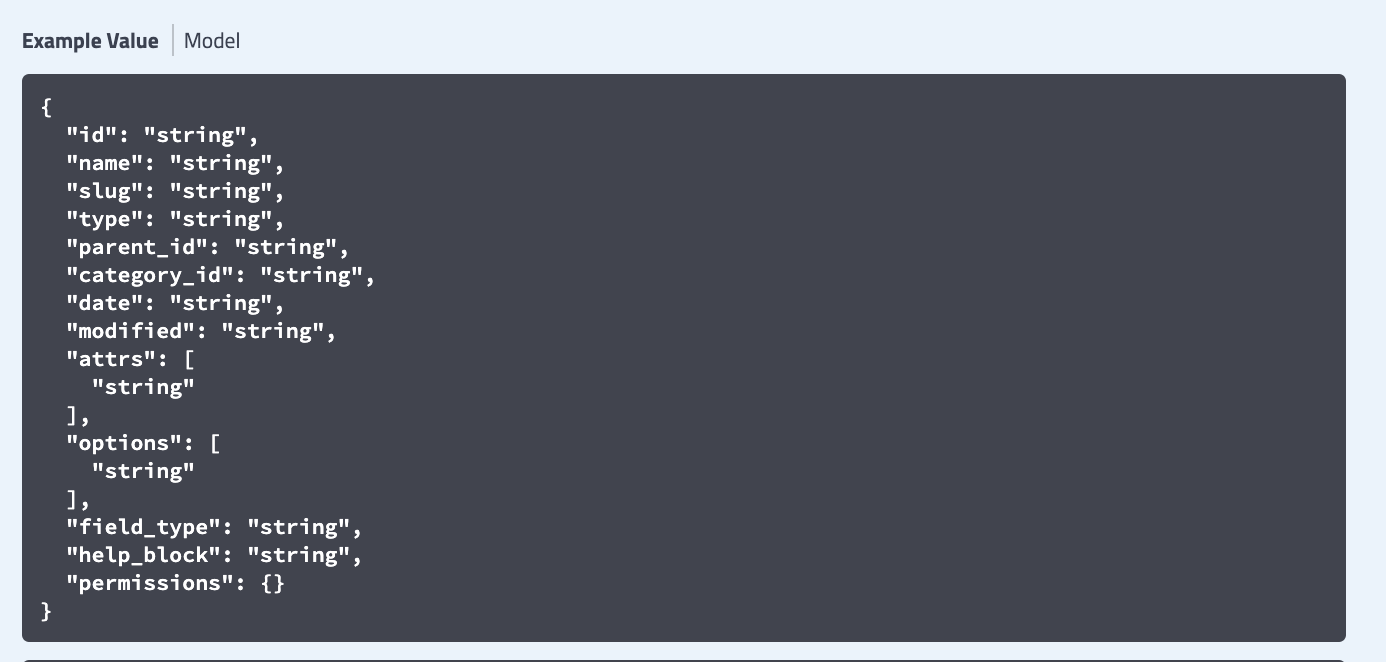
Resource GET Attribute Updates
IM-xxxx: Updates to APIv2 endpoint: GET /resource/
...
| Expand | ||
|---|---|---|
| ||
|

Bug Fixes/Minor Improvements
...
IM - 2124: Updated IPAM to support aggregates of 0.0.0.0/n
...