...
| Expand | ||
|---|---|---|
| ||
Add the Encrypted Data Field to a SectionTo add an Encrypted Data field to a section from the edit section page, drag and drop the field from the Custom Fields column. Multiple fields may be added. 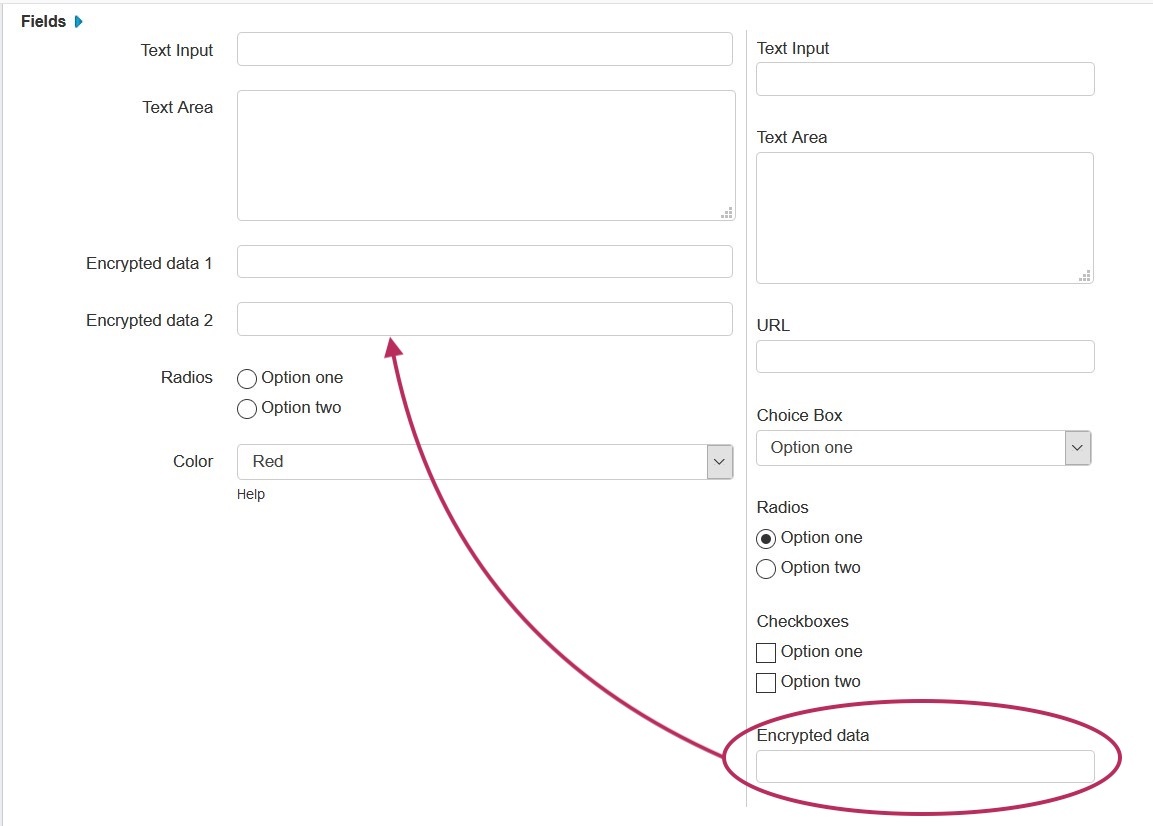 Select the field name and you will get an editing window to modify the parameters of the field. Custom fields may be renamed and have other attributes updated. See Customizing Fields page for more details.
Add to the Field GadgetOnce the Encrypted Data field is enabled it can be added to the Field Gadget on the Resource Entry page. Click edit, select the field from the drop down menu, and click add.
Enter desired data and click save. Data entered in the field is obscured with a Decode button that will convert the data to plain text when clicked. Only users with update permissions on a resource are able to view the plain text when the Decode button is clicked.
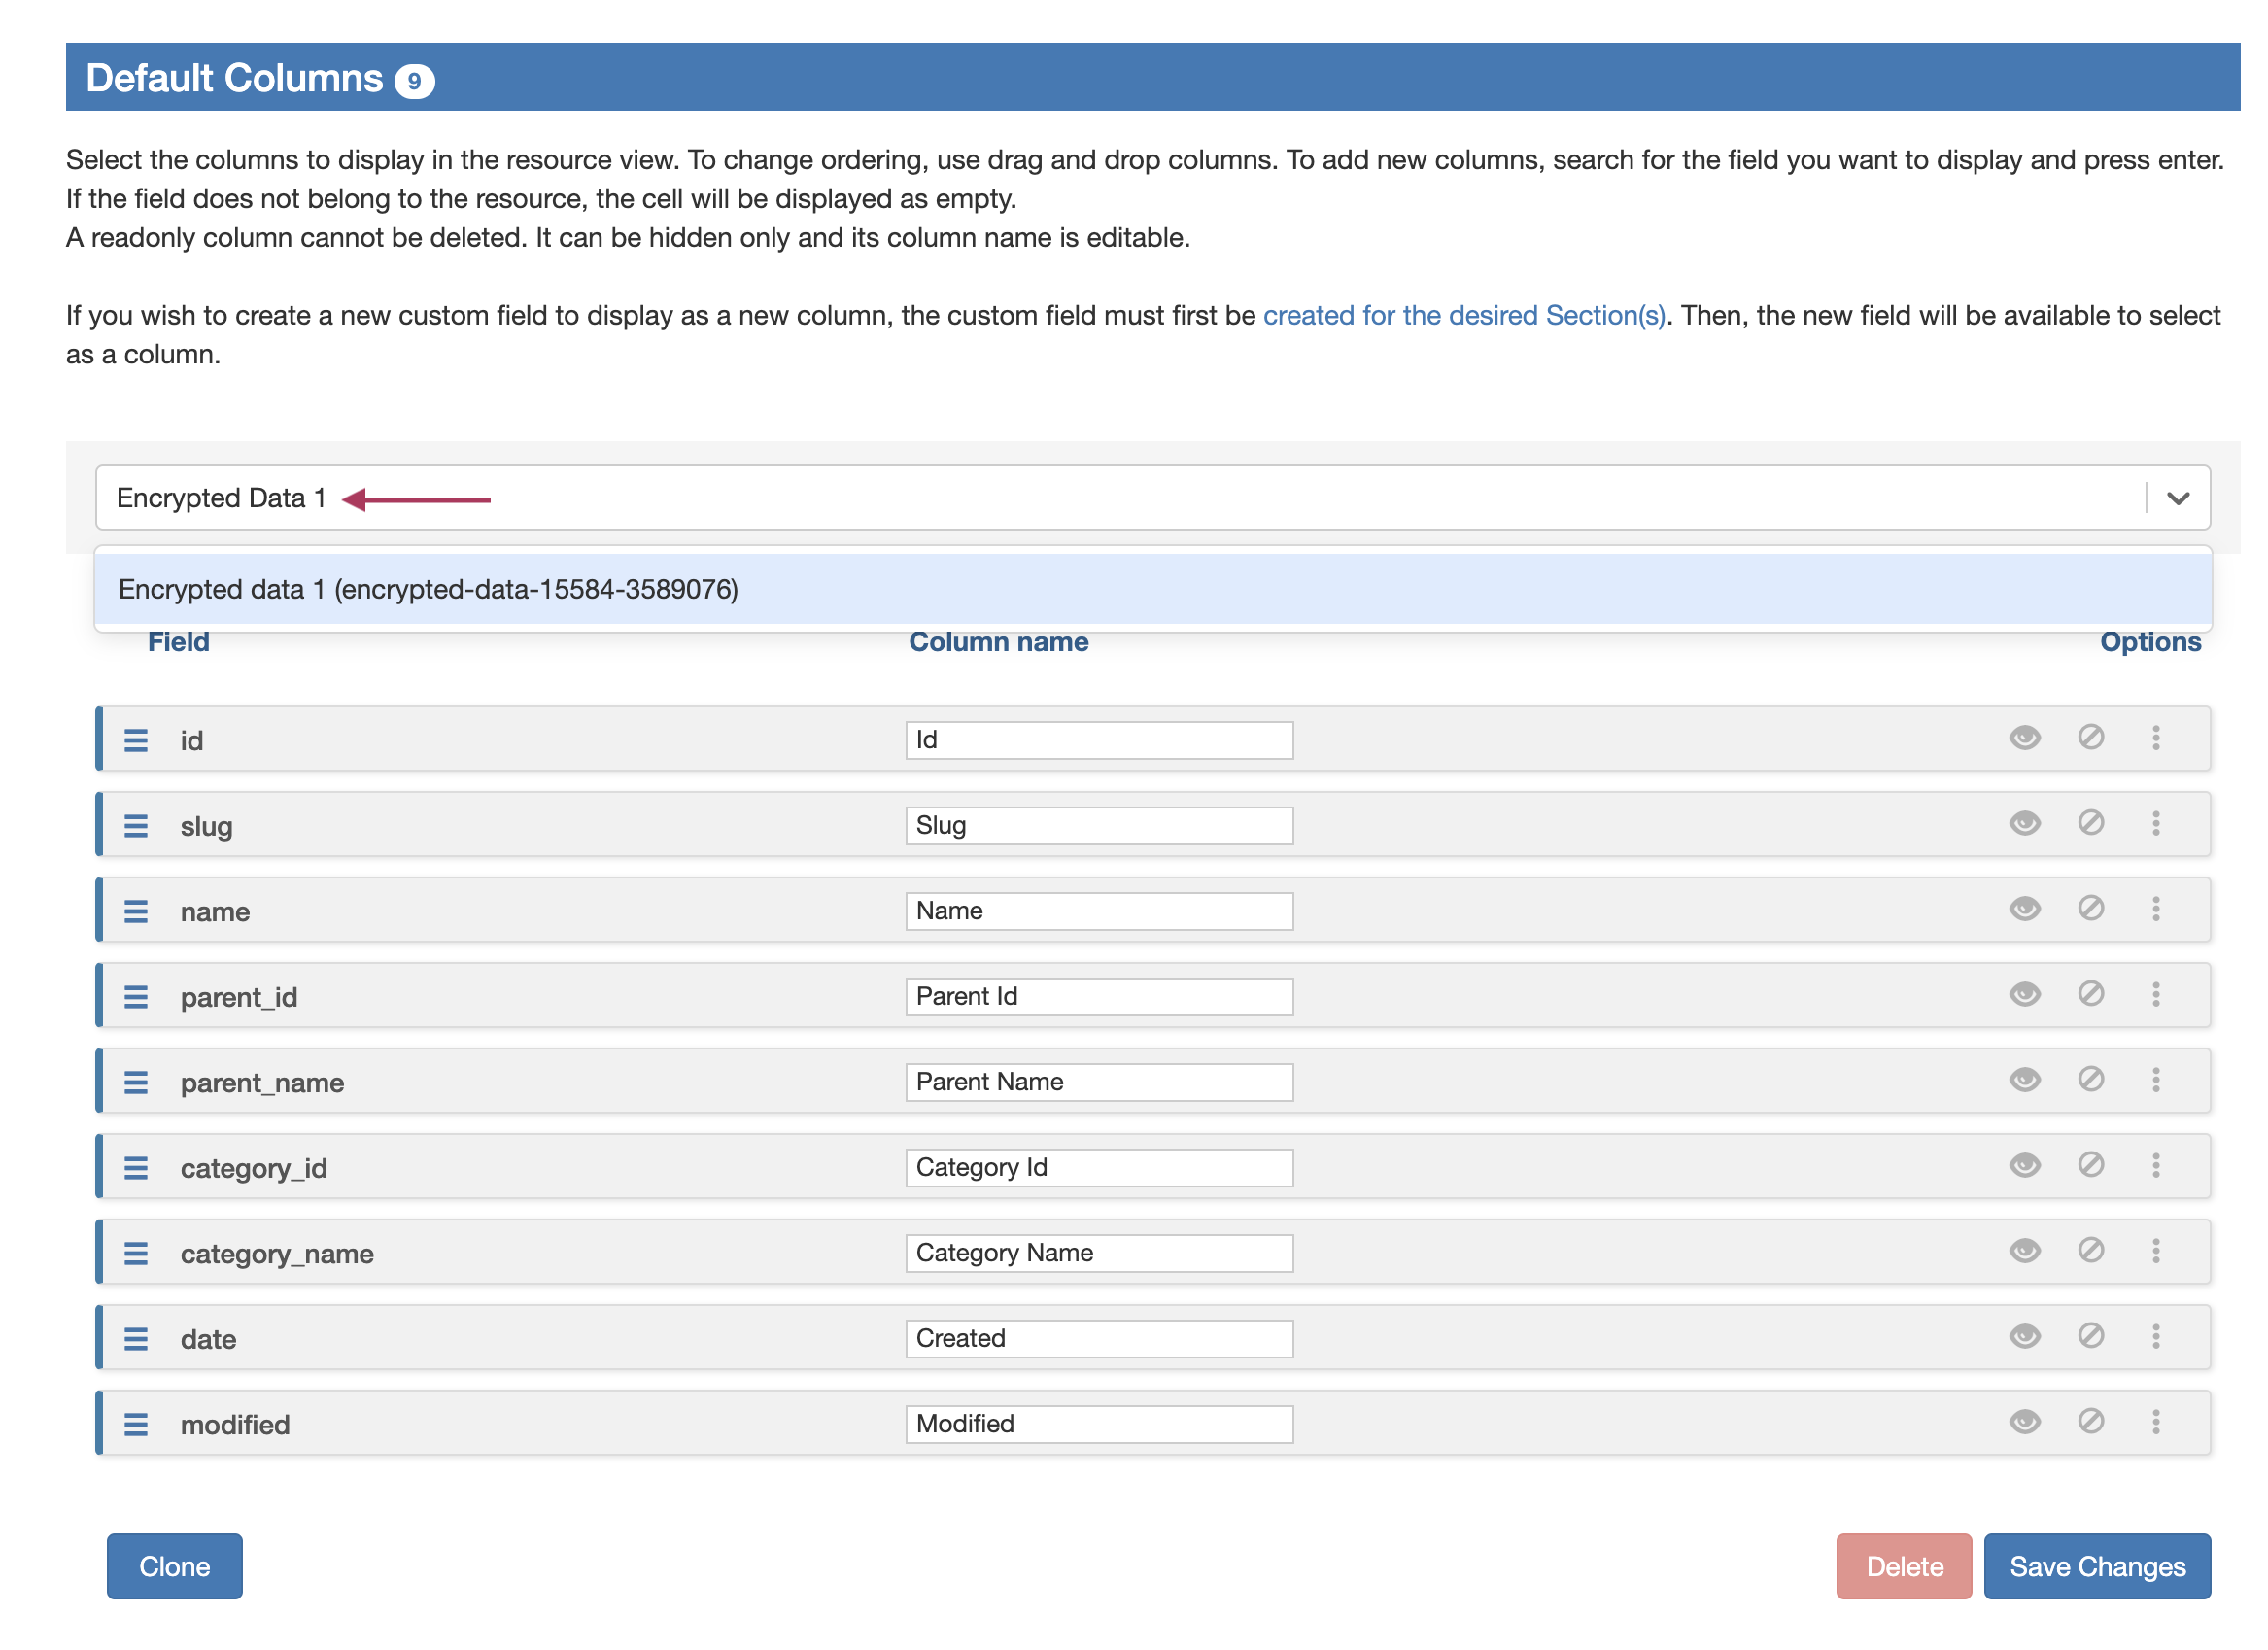
Add to the a Resource List ViewEncrypted Data fields can be added to custom resource list columns, from the Resource Tab → Settings page, under "Default Columns".
In the "Select Field" input box, click and search for the field name. The added field will show highlighted in red (with visibility toggled off) at the bottom of the list. To toggle column visibility on or off, click the "eye" icon on right side of the field row.
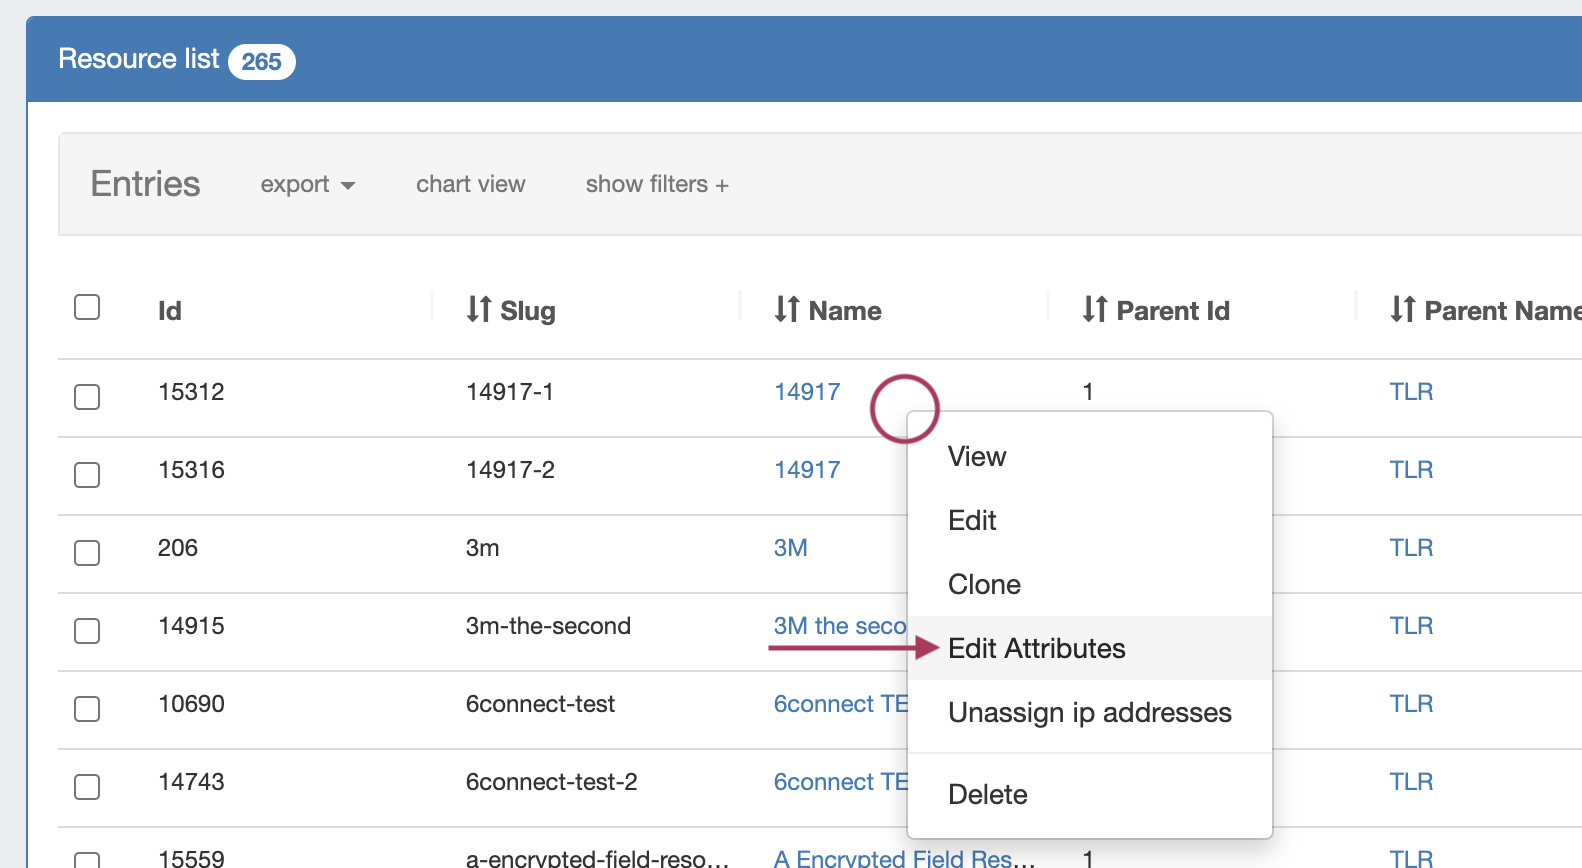
When done, click "Save Changes" at the bottom right side of the page. Viewing from the Resource ListEncrypted data can be viewed from a resource list by right-clicking on a resource and selecting "Edit Attributes".
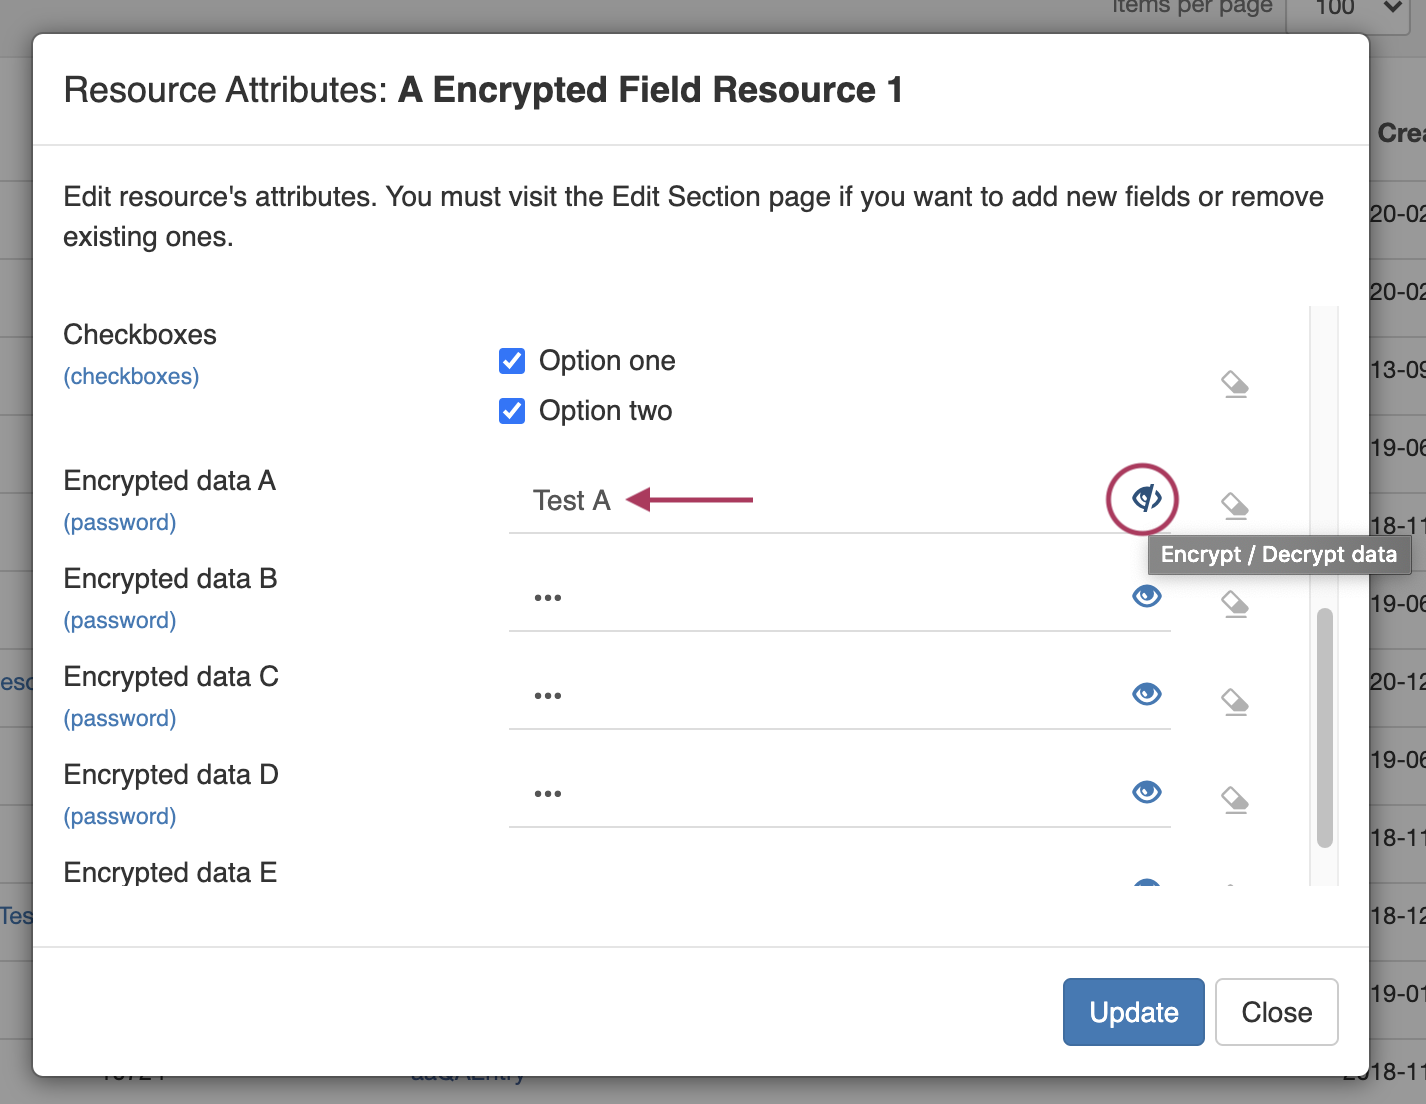
To encrypt/decrypt the field, click the "eye" icon on right side of the field row. Note: You will only be able to decrypt the field if you have appropriate update permissions on the resource.
|


...