ProVision 8.0.0 is a major release with new features, improvements, and bug fixes.
| Table of Contents | ||
|---|---|---|
|
Contact 6connect at info@6connect.com to schedule a demo or get more information.
| Warning | |||||||||||||||
|---|---|---|---|---|---|---|---|---|---|---|---|---|---|---|---|
Software Requirements:ProVision 8.0.0 includes updated software dependencies. Please ensure that local installations can meet the following dependencies prior to upgrading to ProVision 8.0.0. Base Software Needed (v 8.0.0 +) :
|
| Note | ||||||
|---|---|---|---|---|---|---|
PeeringDB URL Update (March 2022):Previous versions of PeeringDB allowed authenticated requests to Customers updated to v8.0.2 and later do not need to take any action and are not affected. Local customers using versions 8.0.1 or earlier, and who are using Peering (or wish to start using Peering), should perform the following update(s) as applicable to their situation: A) Existing local customers who already have their peeringdb account details saved in Provision should update PEERINGDB_URL in globals.php to:
B) Customers who wish to begin using Peering (thus, do not already have saved peeringdb account details) will not be able to add their account via the GUI prior to v8.0.2. An attempt to do so will fail the "valid account test", which uses a hardcoded string value. Instead, affected users must do both of the following: B1) Save peeringdb account details using the API:
B2) Update PEERINGDB_URL in globals.php to:
|
| HTML |
|---|
<div id="google_translate_element"></div>
<script type="text/javascript">
function googleTranslateElementInit() {
  new google.translate.TranslateElement({pageLanguage: 'en'}, 'google_translate_element');
}
</script>
<script type="text/javascript" src="//translate.google.com/translate_a/element.js?cb=googleTranslateElementInit"></script> |
ProVision 8.0.0 is a major release with new features, improvements, and bug fixes.
| Table of Contents | ||
|---|---|---|
|
Contact 6connect at info@6connect.com to schedule a demo or get more information.
| Warning | ||||
|---|---|---|---|---|
Software Requirements:ProVision 8.0.0 includes updated software dependencies. Please ensure that local installations can meet the following dependencies prior to upgrading to ProVision 8.0.0. Base Software Needed (v 8.0.0 +) : | Required | Link | Operating System | Ubuntu 20 or Centos 8 |
| Apache | Apache 2.4 | http://httpd.apache.org/ | ||
| PHP | PHP 8.0 / 8.1 | http://php.net/downloads.php | MySQL | MySQL 8.x | http://www.mysql.com/downloads/
New Features
...
Theming
ProVision 8.0 includes a complete UI refresh with an eye towards flexibility and accessibility. GUI themes can be set on a per-user level, including the much-requested "dark mode" to help alleviate eyestrain. In addition, we now provide several methods of customizing the entire product, which will allow for additional company branding and fine control over what areas of the product are visible and what are not.
...
Expand title How to hide menu tabs... Step 1: Open the Menu Customization File
Using the Command Line Interface (CLI), navigate to your instance's "assets" directory, located at: "/var/www/html/[instance name]/assets"
Code Block language bash cd /var/www/html/[$your instance name]/assets

Open the menu customization file, "menu.json" in vi, or another text editor:
Note: Depending on available user permissions "sudo" may or may not be required.
Code Block language bash sudo vi menu.json

Step 2: Find the Tab in menu.json
When you view menu.json, tabs and their drop down sub-menu options are visible in a hierarchy organized by menu type.
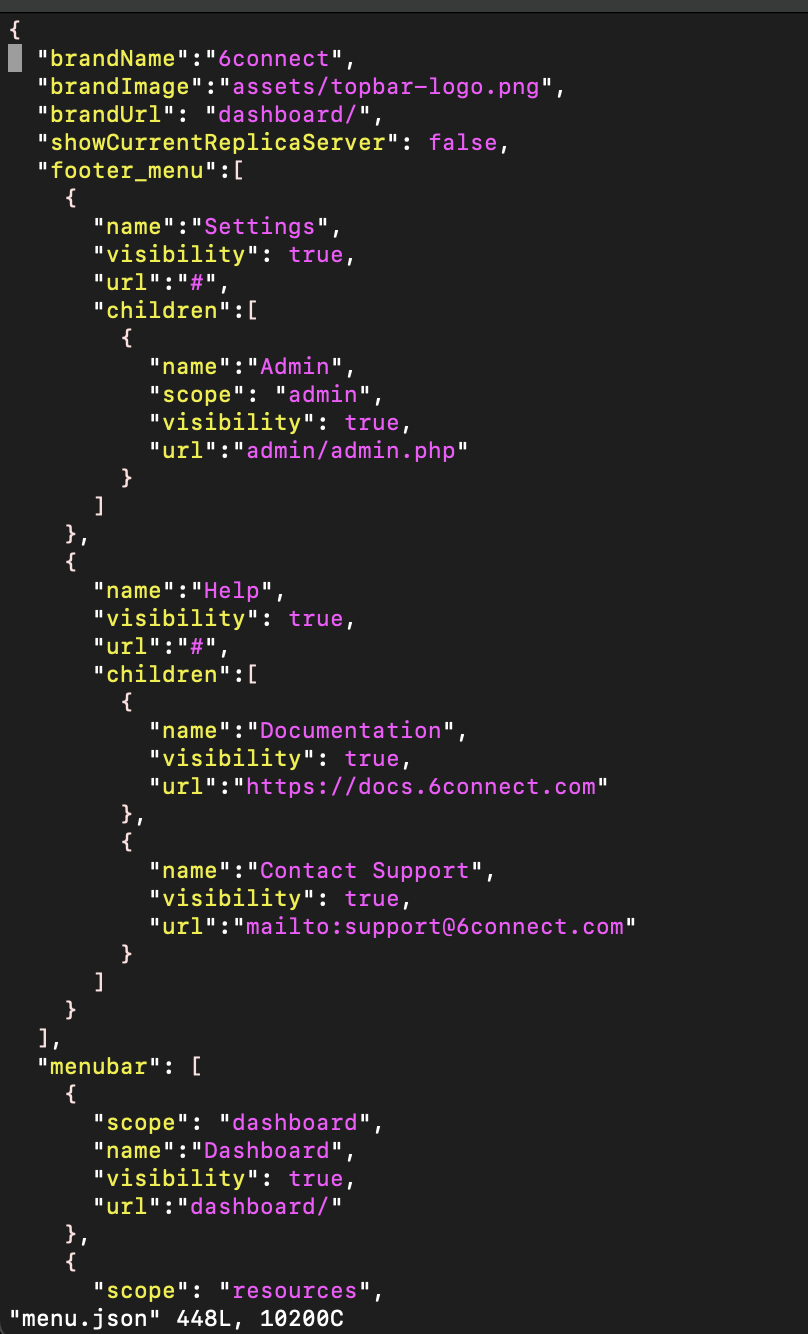
In order, the three top menu levels are:
- "footer_menu", containing settings for the Settings and Help menus
- "menubar", containing settings for the standard provision navigation tabs
- "admin_menubar", containing settings for the admin area navigation tabs
Under each menu grouping, on the second level of the hierarchy, is each main menu tab.
Each tab has properties for name, visibility, url, and tab children.
The third level, under "children" for a tab, lists the drop-down menu options available for the tab. Each child menu option has the same available properties, and can likewise be edited.
Since we are wanting to hide the "IPAM" tab in the standard area of ProVision, we need to scroll down to the "menubar" navigation grouping, and then find the second level tab with name "IPAM".
Step 3: Change the Tab Visibility
Once you find the desired tab to hide, enter edit mode, then change the "visibility" property from "true" to "false" (do not include the quotes, and be sure to retain the trailing comma).
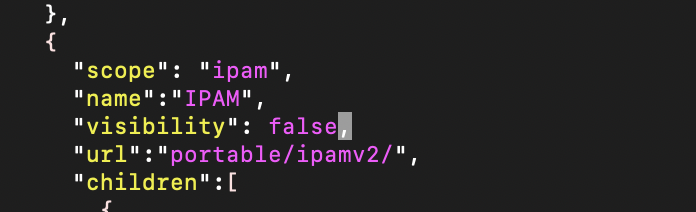
Save/write your changes to the file and exit.
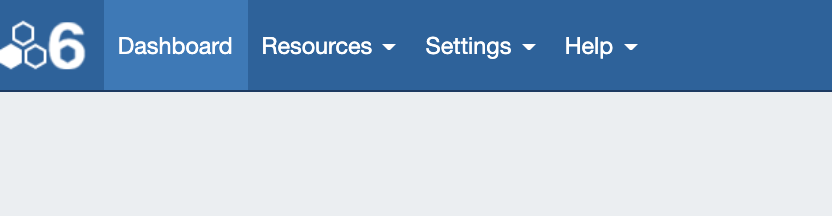
Step 4: View the Updated Navigation
Clear your browser cached image files, and log into ProVision.
The updated navigation should be apparent, in this case with "DNS", "DHCP", "IPAM", "Peering", and "Reporting" tabs no longer visible.
...
Expand title Change the logo image... Tip title Tip - Before You Begin Have your logo file ready to save into ProVision (png., .jpg, etc) ahead of time, and verify that the logo design is visible at small sizes, 48px or 64px wide.
There are no set size limitations, however ProVision will set the image to 48px wide by default.
This size property can be adjusted in the custom css theme files by searching for the the css property: "--brand-image-width", and adjusting the pixel width accordingly.
Step 1: Save your desired logo into ProVision
Using the Command Line Interface (CLI), save the desired logo image file (here, "panda.png") to your instance's "assets" directory, located at: "/var/www/html/[instance name]/assets"
Code Block language bash cd /var/www/html/[$your instance name]/assets
Step 2: Open the Menu Customization File
Open the menu customization file, "menu.json" in vi, or another text editor:
Note: Depending on available user permissions "sudo" may or may not be required.
Code Block language bash sudo vi menu.json
Step 3: Change the brandImage Reference
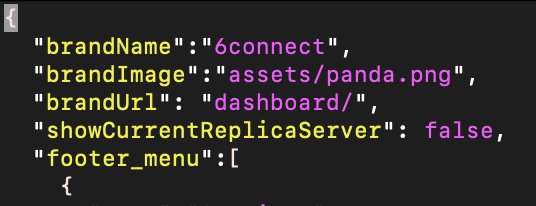
At the top of the file, look for the "brandImage" attribute. By default, it should read "assets/topbar-logo.png".
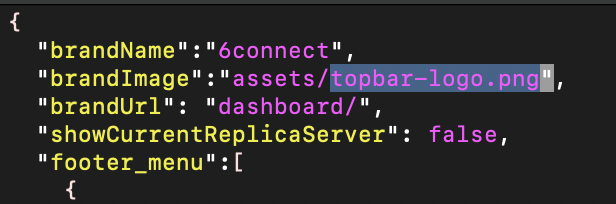
Edit the menu customization file to change the "brandImage" property to the new image name, here "assets/panda.png".
If needed, you may also update the "brandName" property to reflect your company or brand to match the new logo.
Save/write your changes to the file and exit.
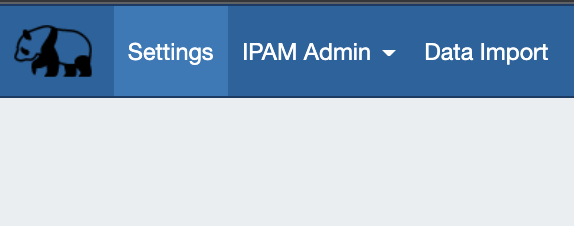
Step 4: View the New Logo
Clear your browser cached image files, and log into ProVision. The new logo image should be visible on the left side of the navigation menu.
...