...
Working with Groups
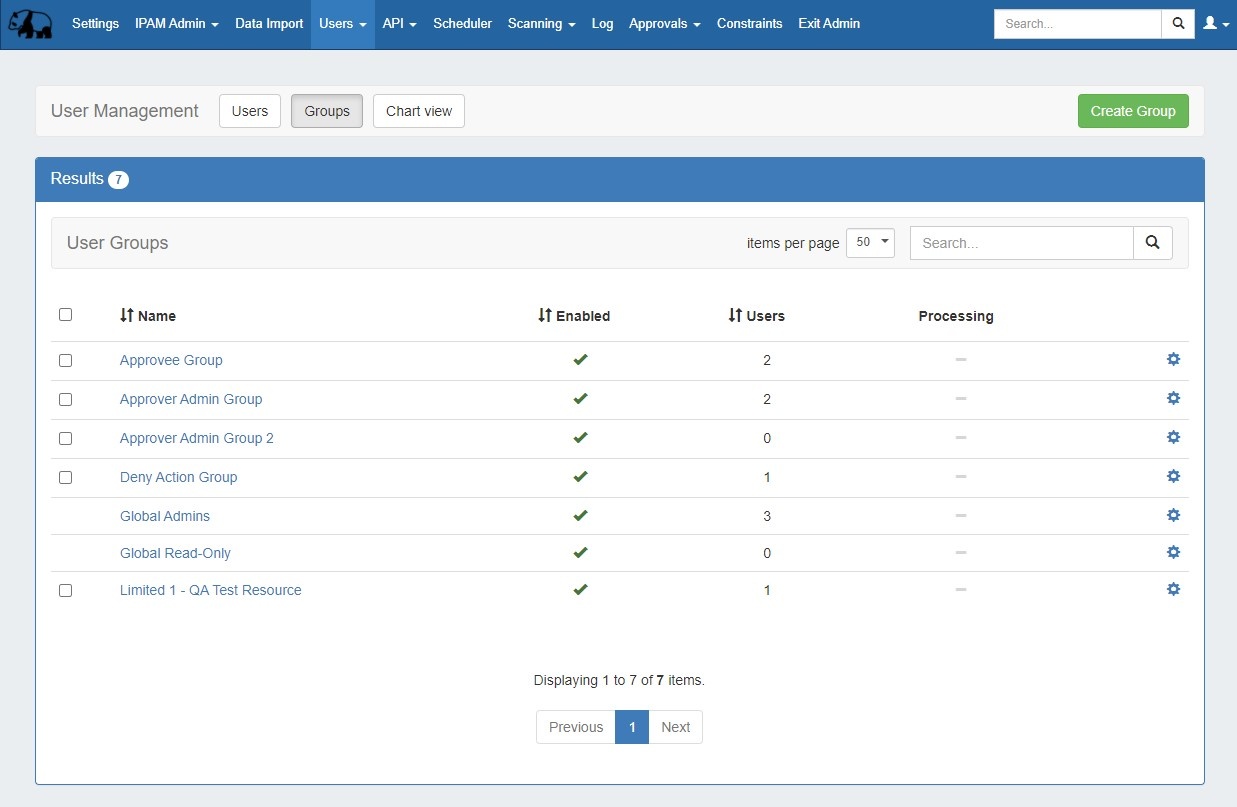
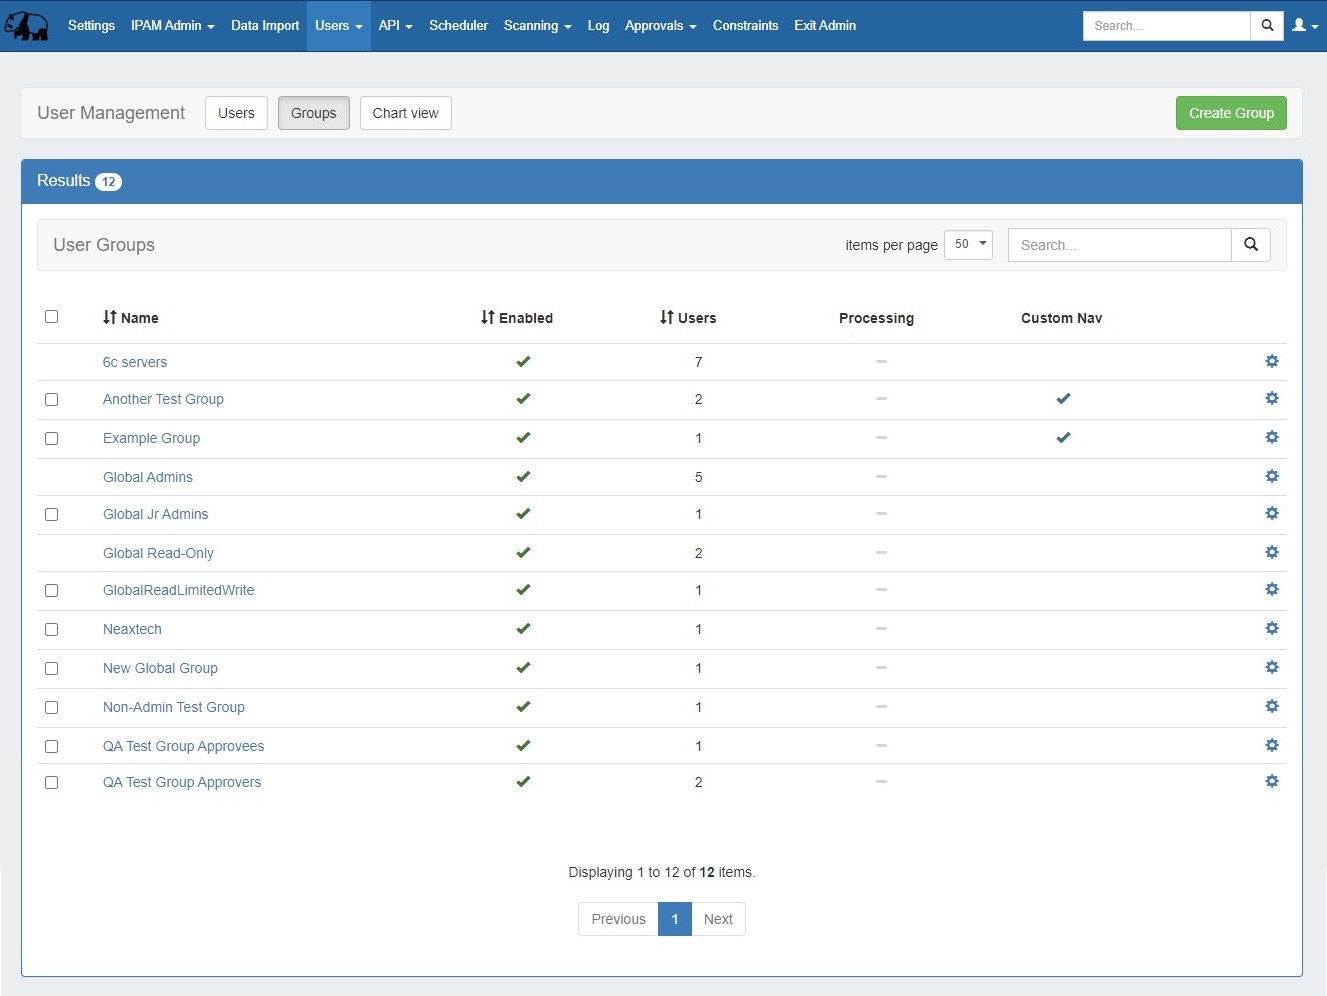
Users and Groups are managed from the Admin area of ProVision, under the Users tab. The Users tab contains three sub-tabs: Users, Groups, and Chart View.
...
| Table of Contents |
|---|
Groups List Overview
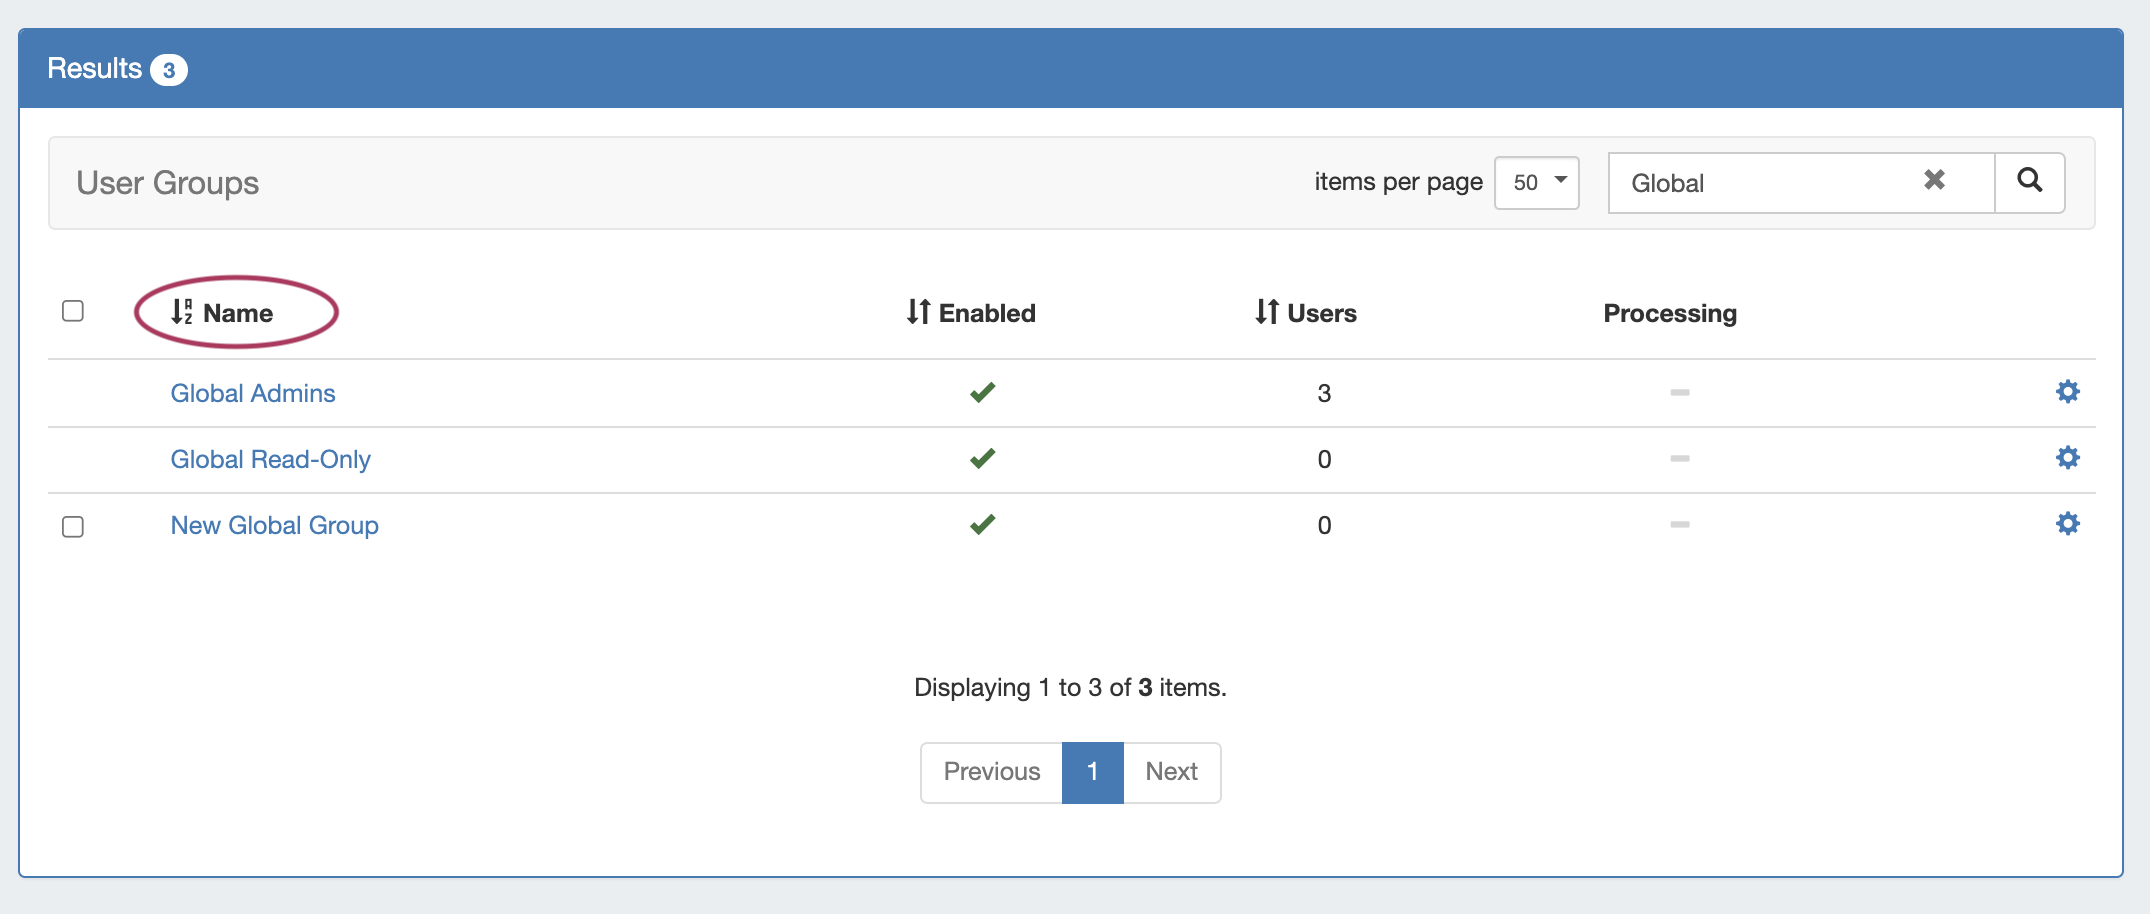
When viewing the Groups List, the following is shown:
- Selection checkbox: The checkboxes on the the left side of the user may be used to multi-select groups to delete
- Name: The group name. Click on the name to view group details.
- Enabled: Whether a group is enabled
- Users: The number of users associated with the group
- Processing: While group edits are being processed, an indicator will show under the processing column until changes have been propagated throughout the instance
- Custom Nav: Whether a group has a custom navigation enabled
- Gear Icon (Action Menu): Right Click on the gear icon (or anywhere on the user row) to open the action menu for the group
Groups List View Options
...
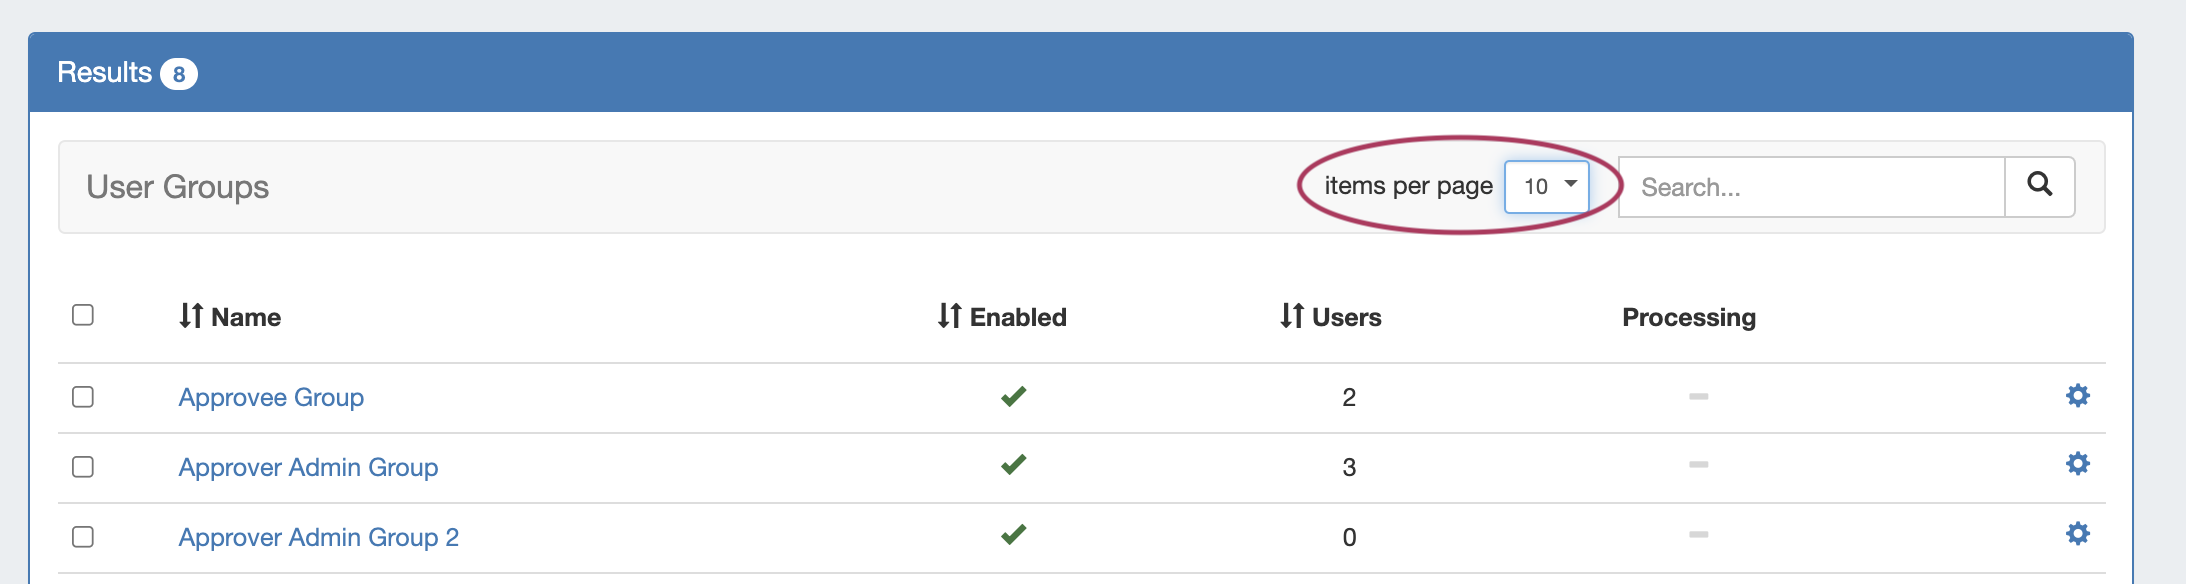
Items per page
Select the "items per page" filter to limit the number of groups displayed at one time. Any additional users will be displayed on following pages.
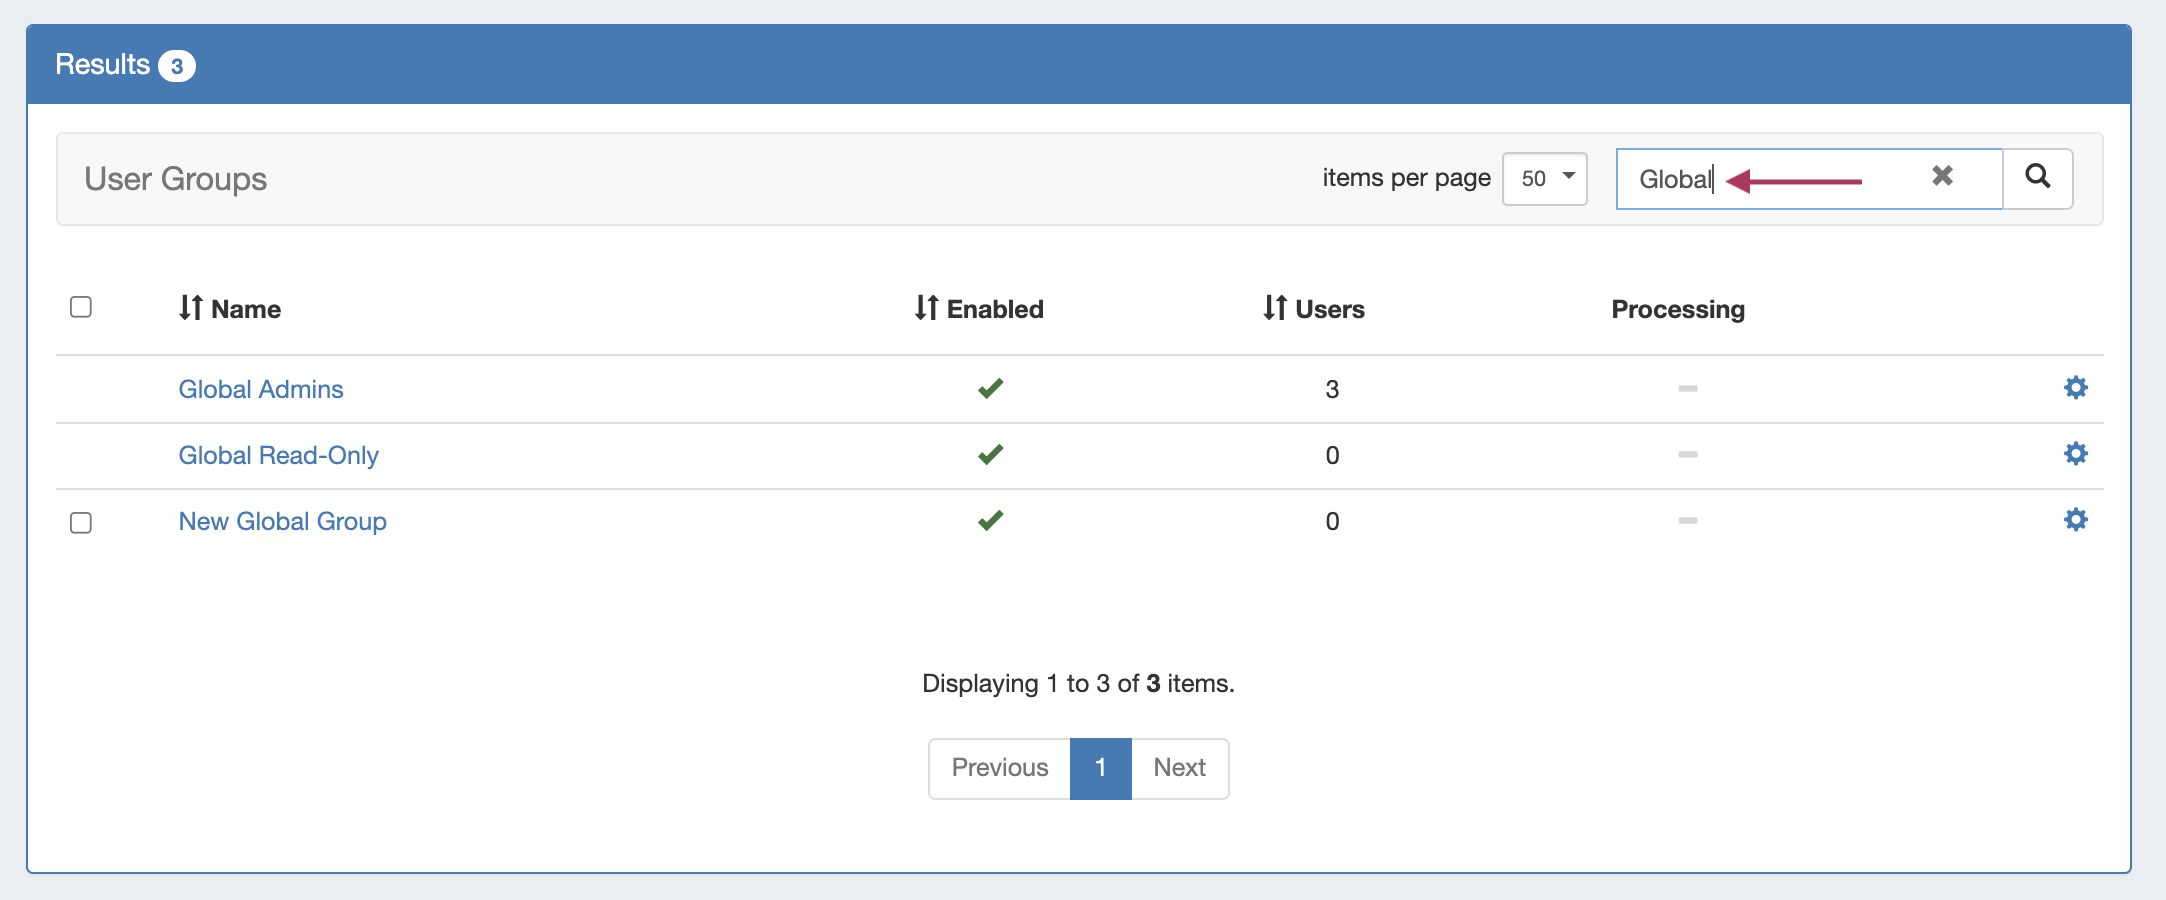
Search
Filter the list for a specific group name by typing all or part of the name in the search box.
Sort
Sort columns into ascending/descending order by clicking on the column header for any column with an up/down arrow (⇅)
Groups Permissions Overview
...
A Group has four elements associated with it:
- Users: The Users that are assigned to the group, and will be limited by the selected permissions.
- Resources: Resources access may be set to Global TLR (applies to all resources), or to the level of individually selected resources.
- Functional Area: The ProVision functional area (IPAM, Resources, Peering, etc) for the selected resource(s) that permissions are set under.
- Permission Level: Create, Read, Update, and Delete (C/R/U/D) permissions may be set under each functional area for each resource selected.
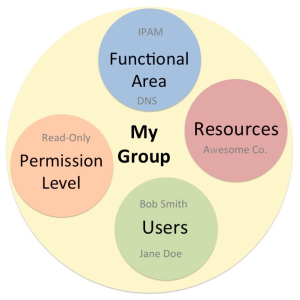
In the example above, the group “MyGroup” allows the users Bob Smith and Jane Doe to only read IPAM and DNS data for the Resource “Awesome Co”.
...
| Info | ||
|---|---|---|
| ||
Permissions are inherited based on the hierarchy of the objects, unless you specify a different permission! |
...
Create a Group
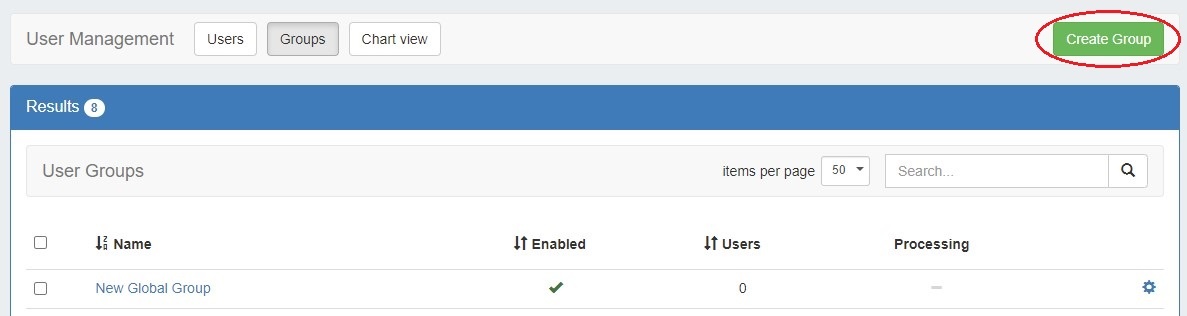
New groups can be created by ProVision administrators by clicking the green "Create Group" button at the upper right of the Groups page.
The following fields are available to use:
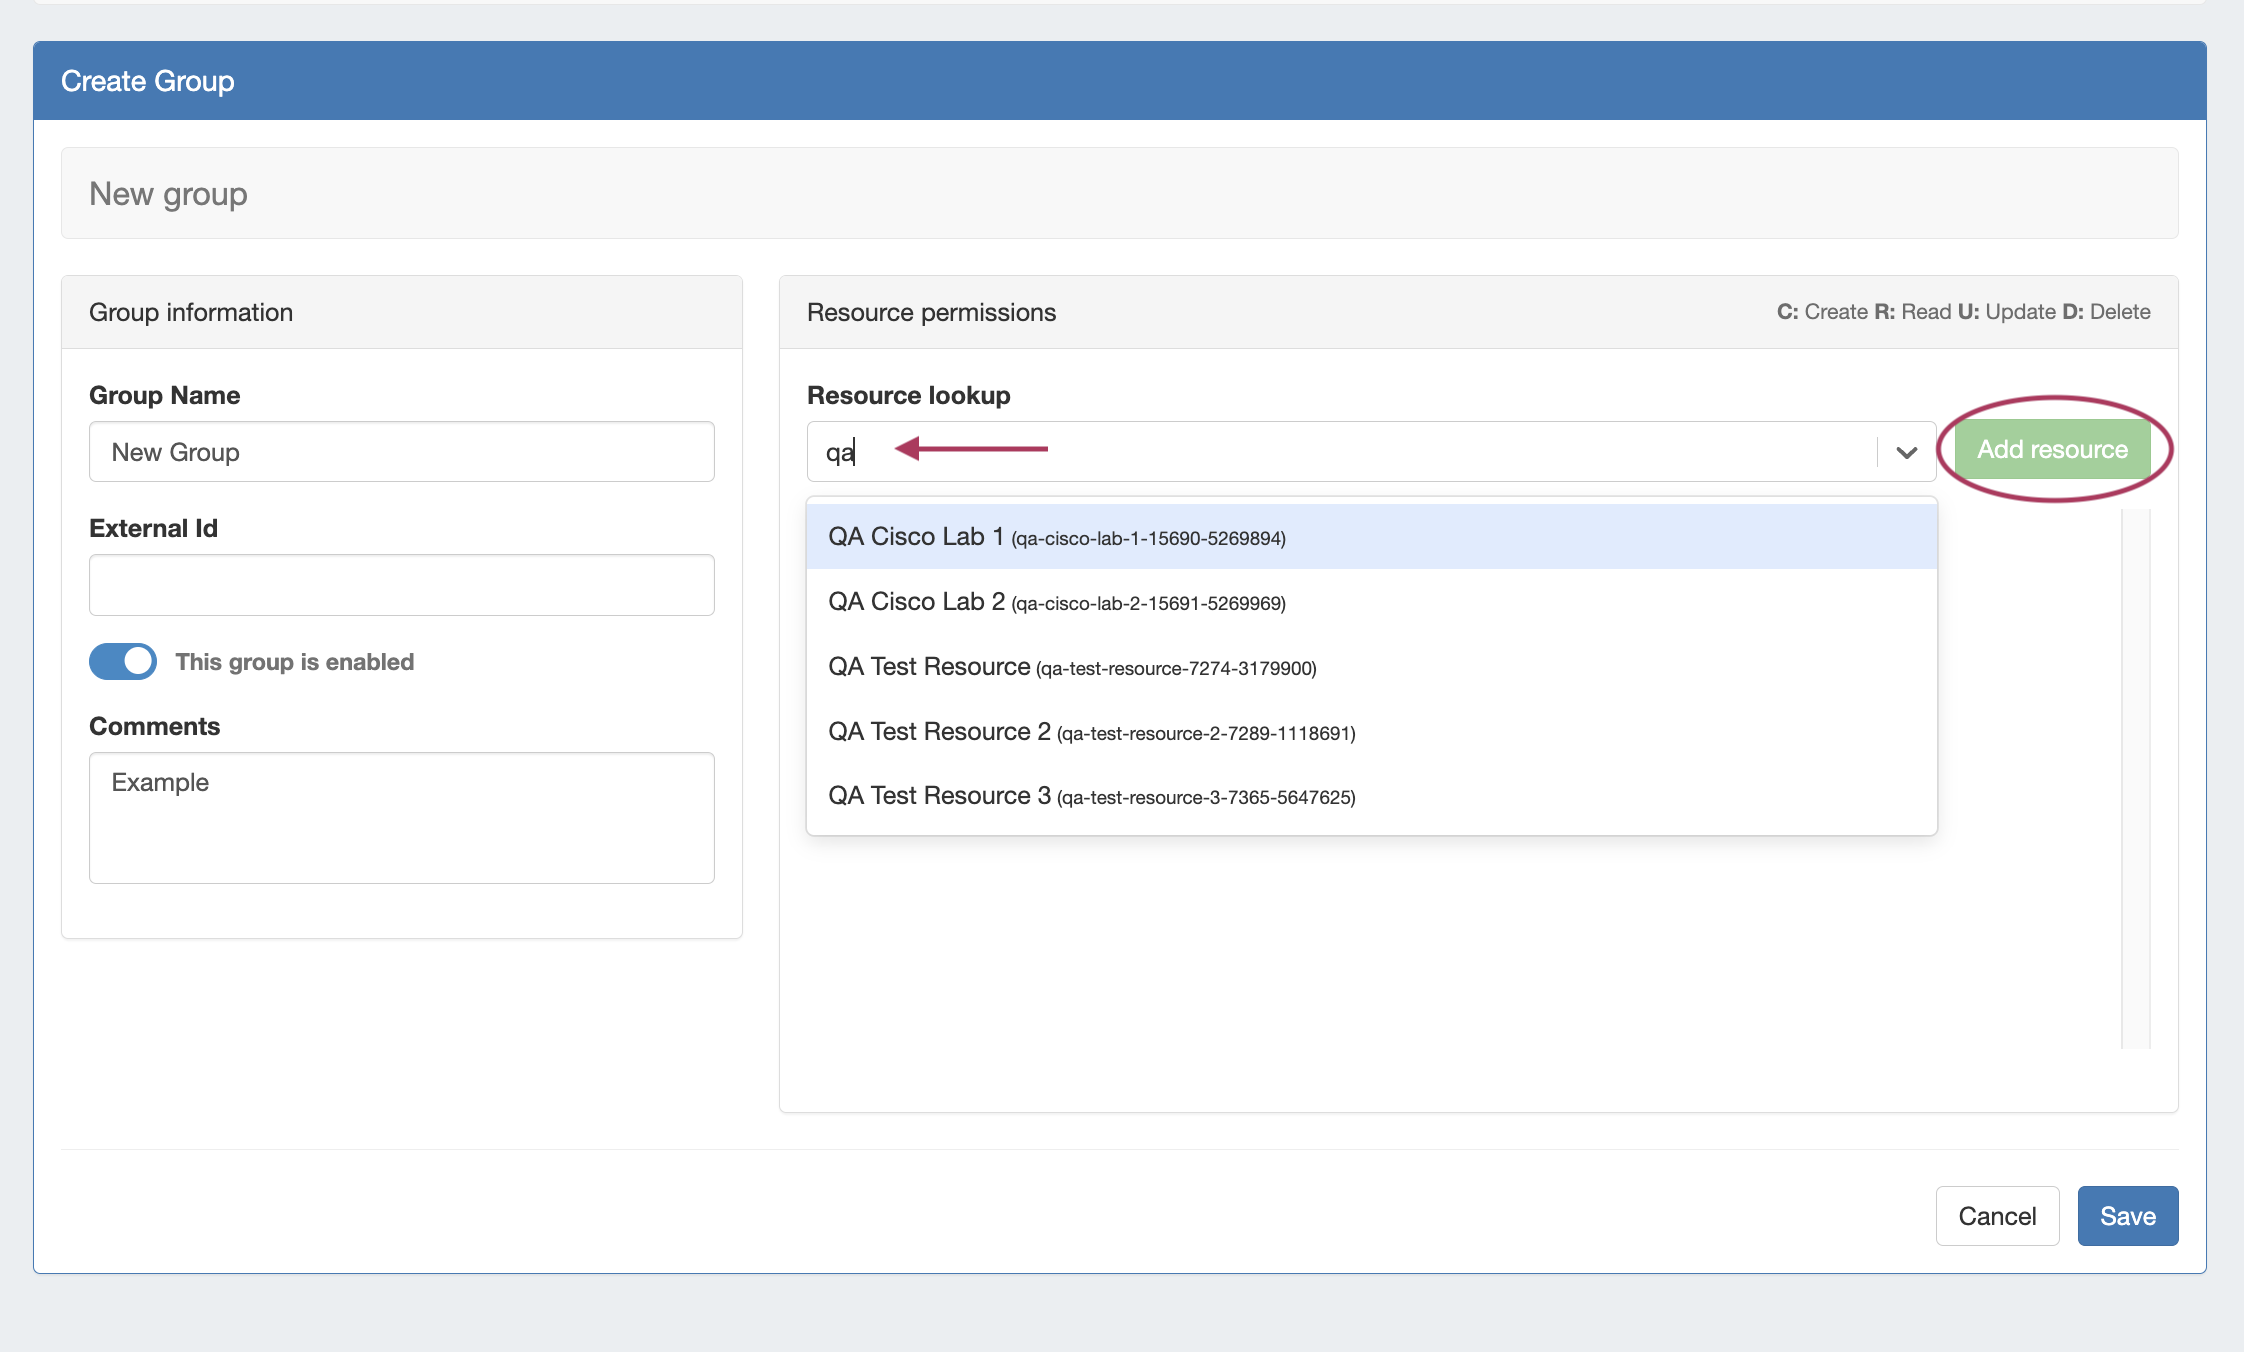
- Group Name: Enter in the desired group name
- External ID: External Group name / ID for correlating ProVision's Group Name with external servers (such as SAML / Azure) that have a non-customizable group ID
- Enable Toggle: Toggle on/off to enable or disable the group
- Comments: Freeform text comments on the group
Add in the name of the new group, at minimum, and any other desired fields.
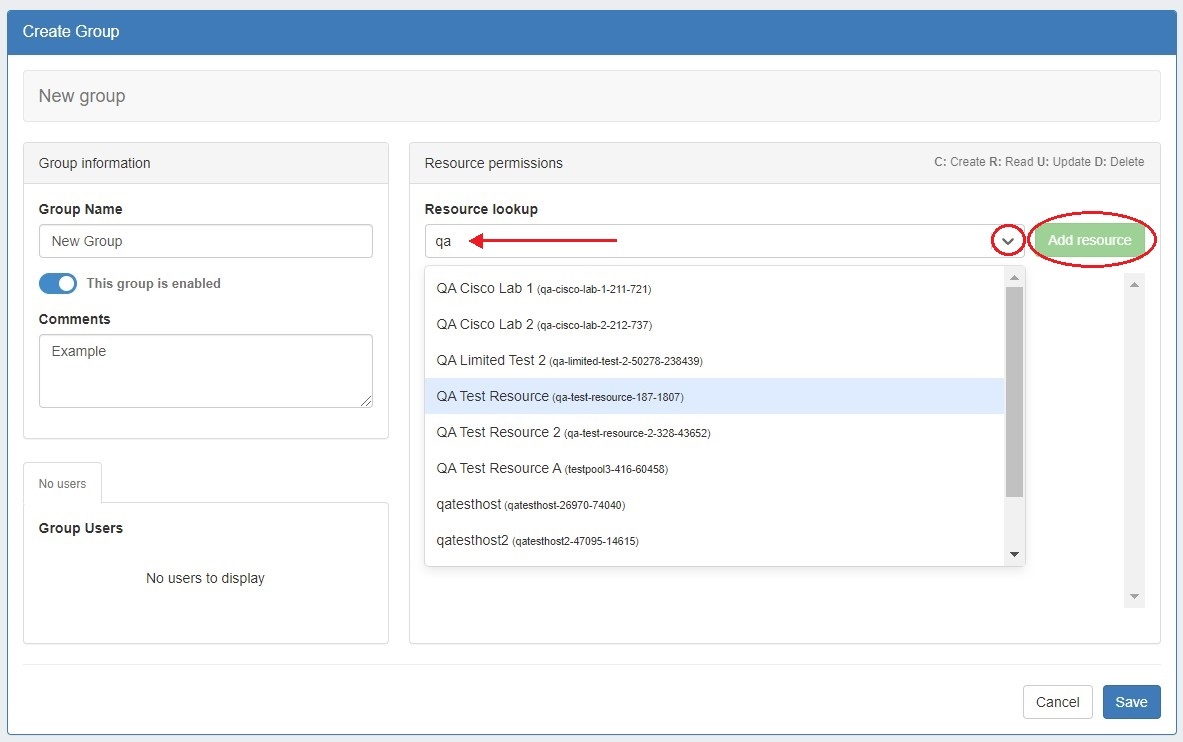
Set the permissions for that group by selecting the resource(s) from the Resource lookup dropdown menu, and clicking the "Add resource" button, and checking .
The Resource will be added to the permissions list, where you may select the functional areas and specific C/R/U/D permission that you want accessible for each area.
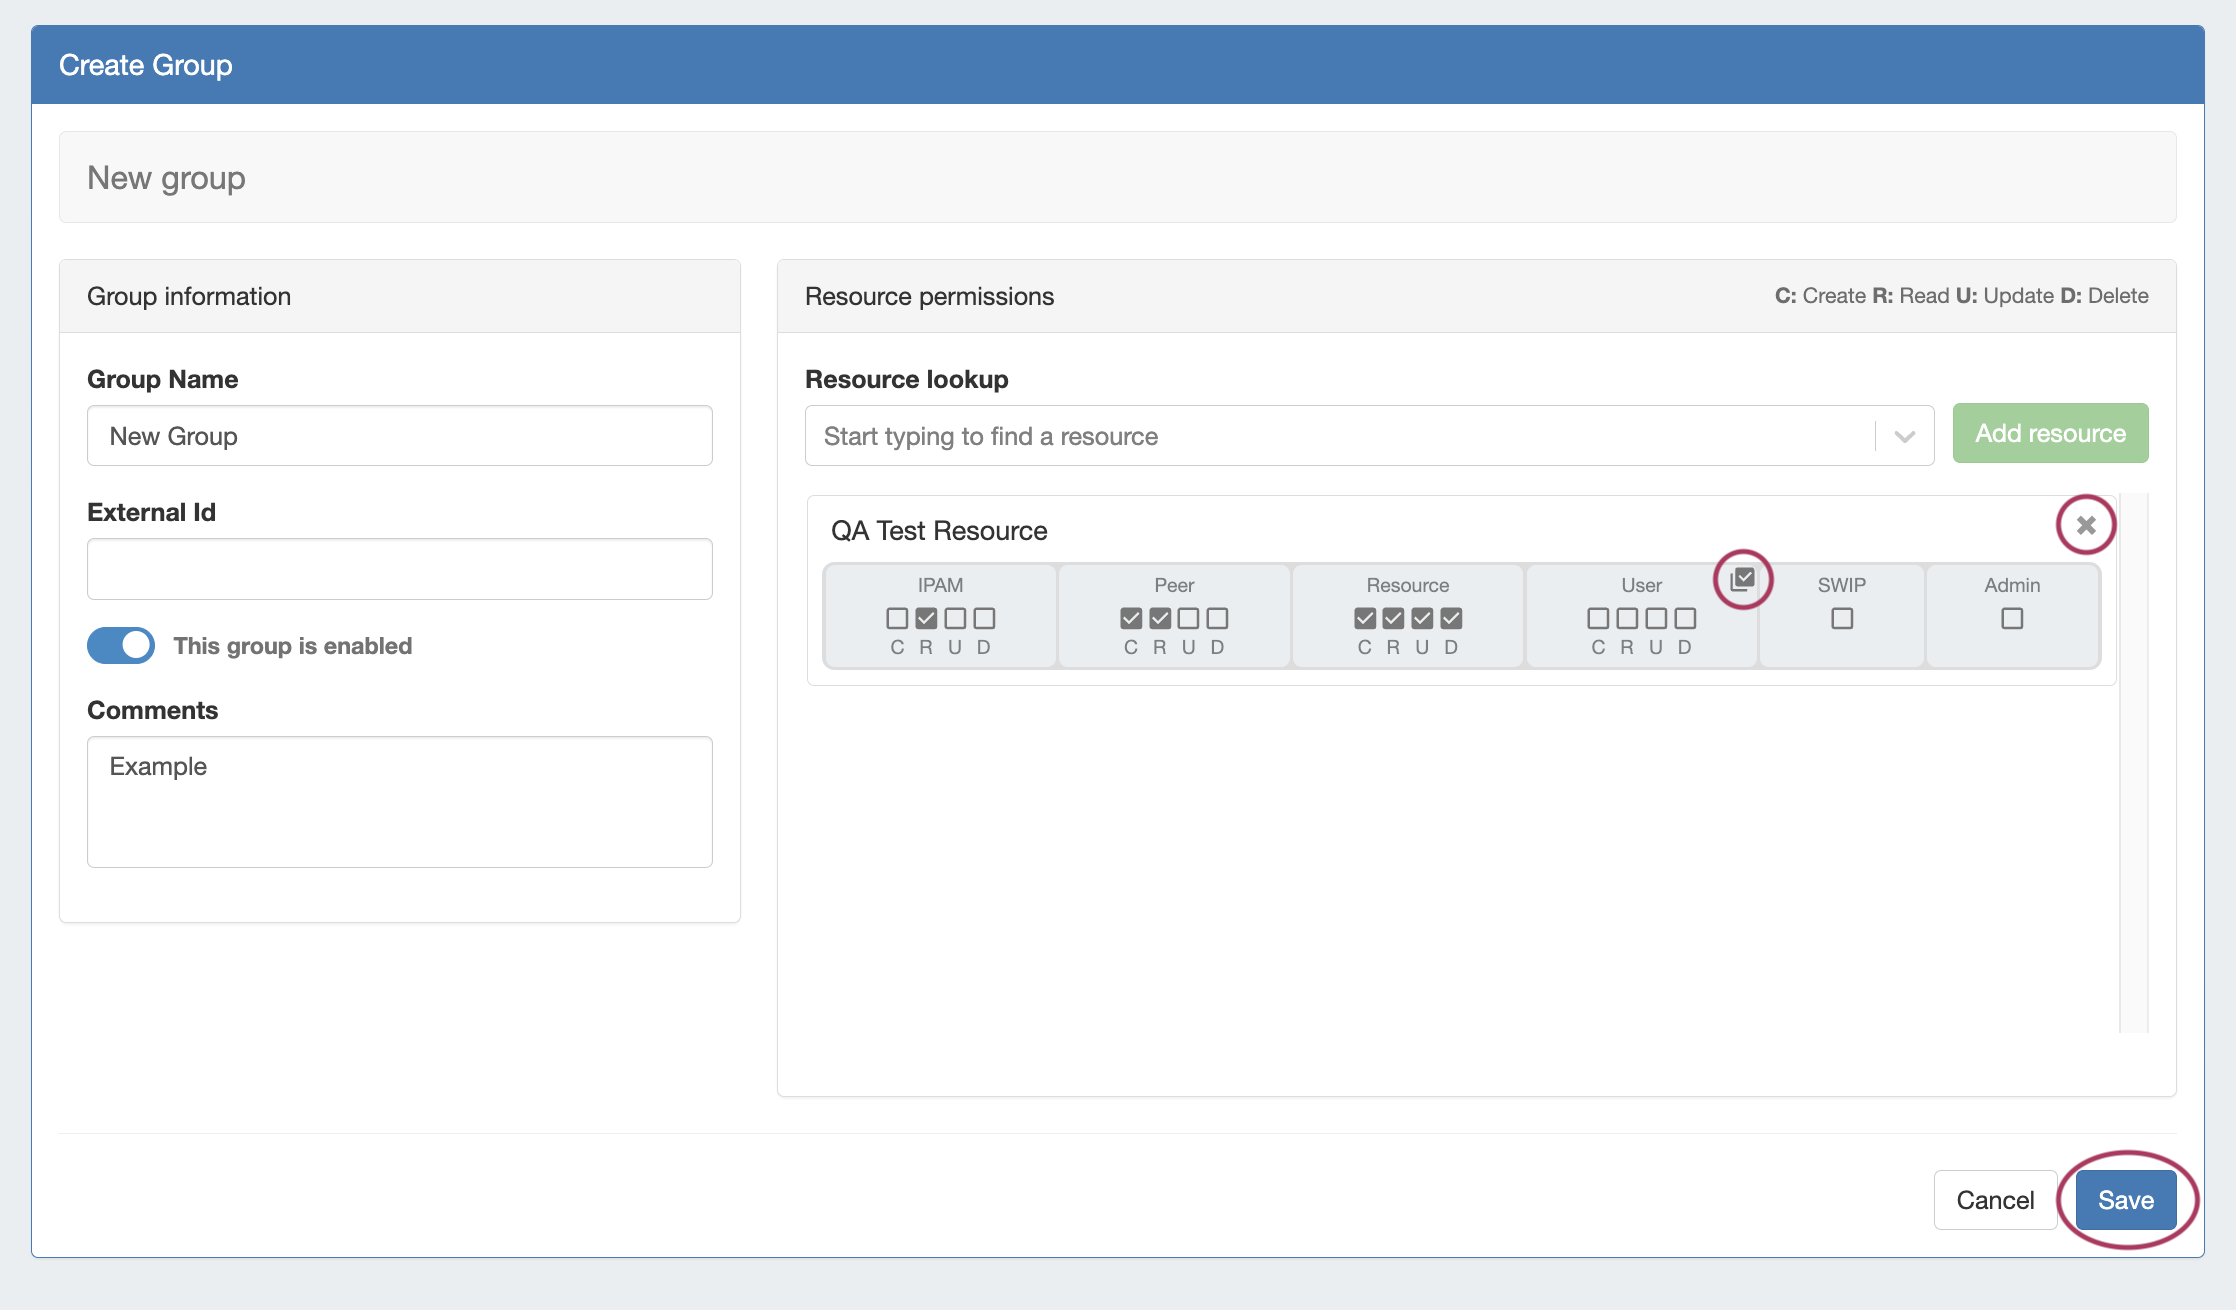
You may select all C/R/U/D permissions by By clicking the checkbox in the upper corner of a permissions box you can select all the checkboxes in that section.
To delete a Resource from the permissions list, simply click the "x" icon in the upper right corner.
Click "Save" when done.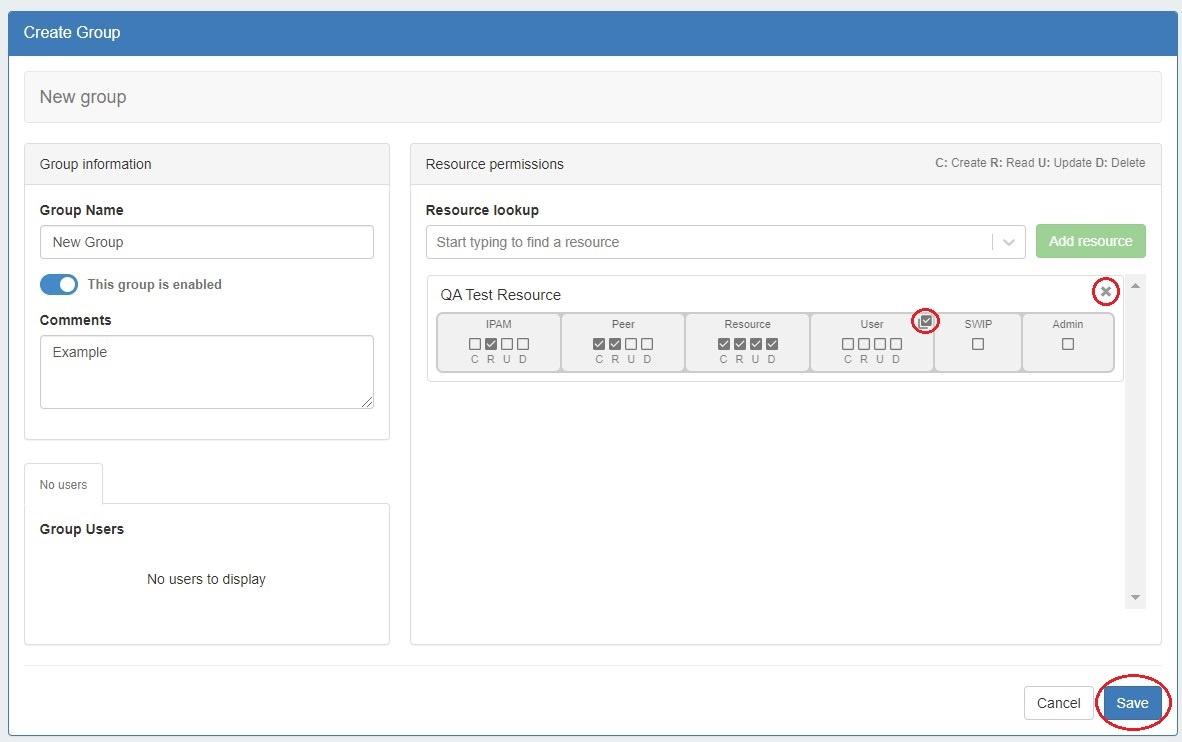
In the example below, we make a group called "Some Example Group", whose users we want to be able to access two resources: An Example Resource, and An Example Resource 2.
...
Click "Save" when complete.
After adding the group, you can add users to the group by selecting the group when editing a user account or from the "Manage Users" section when editing a group.
Edit a Group
To edit a group's information click on the Action Menu (gear icon) for the group and select "Group Details" or click on the group name.
...
This will bring up the Edit Group screen. From here you can edit the group name or comment, add or remove users from a group, or change resource permissions for the group. 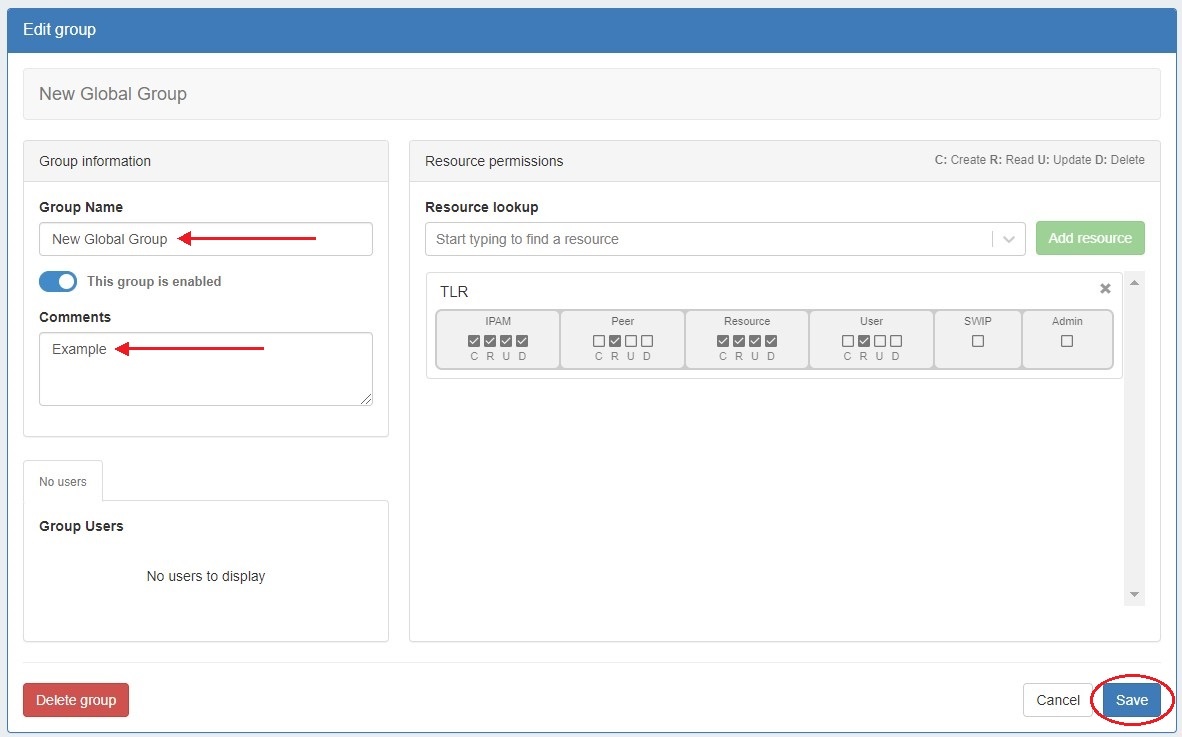
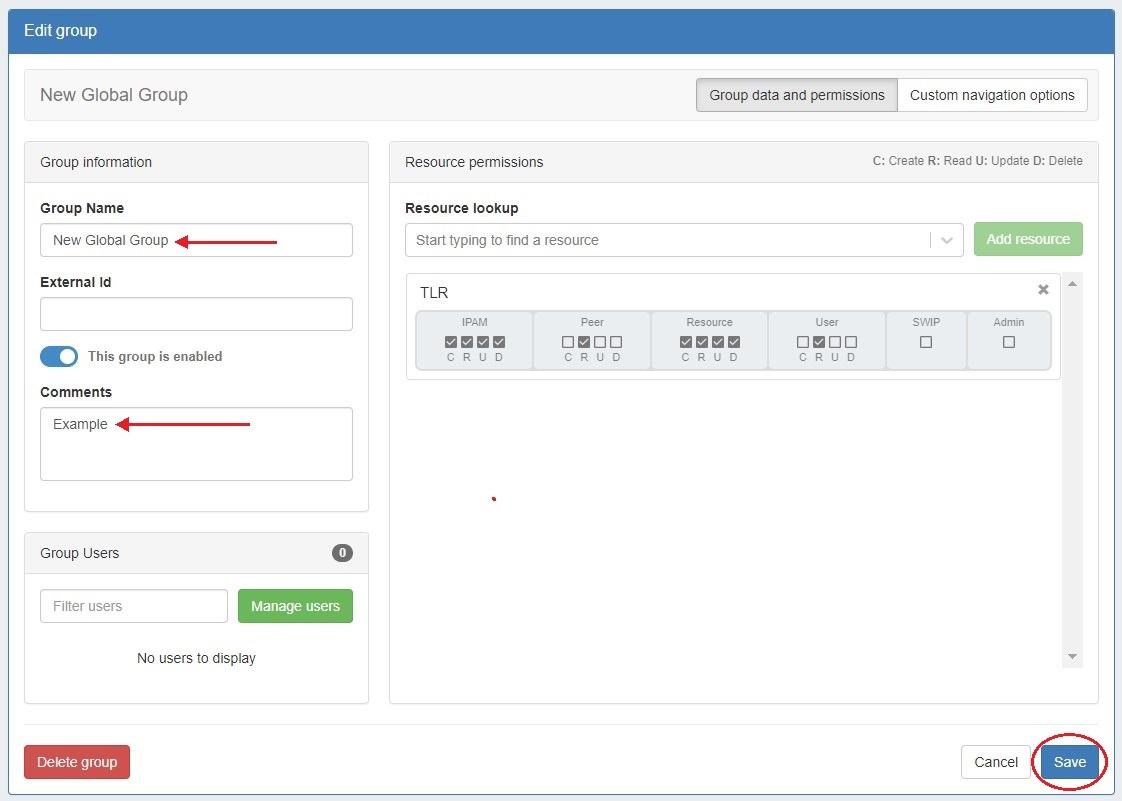
Remember to hit "Save" when done.
Manage Group Users
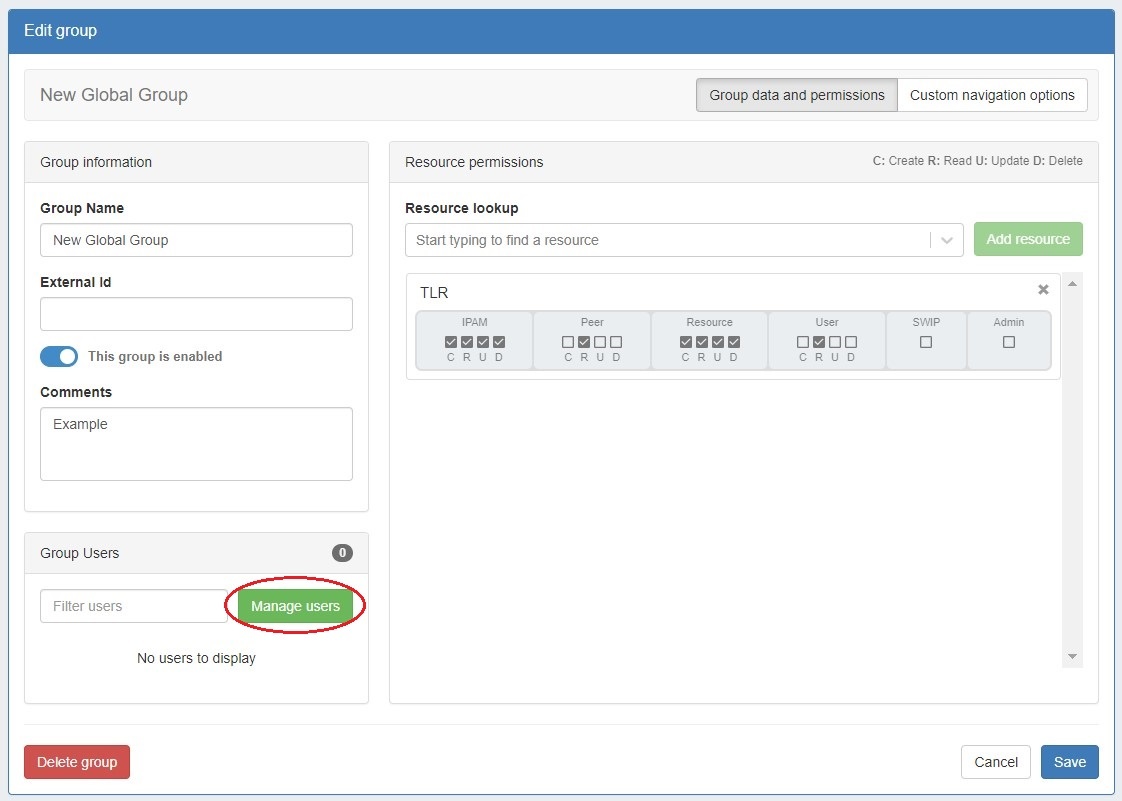
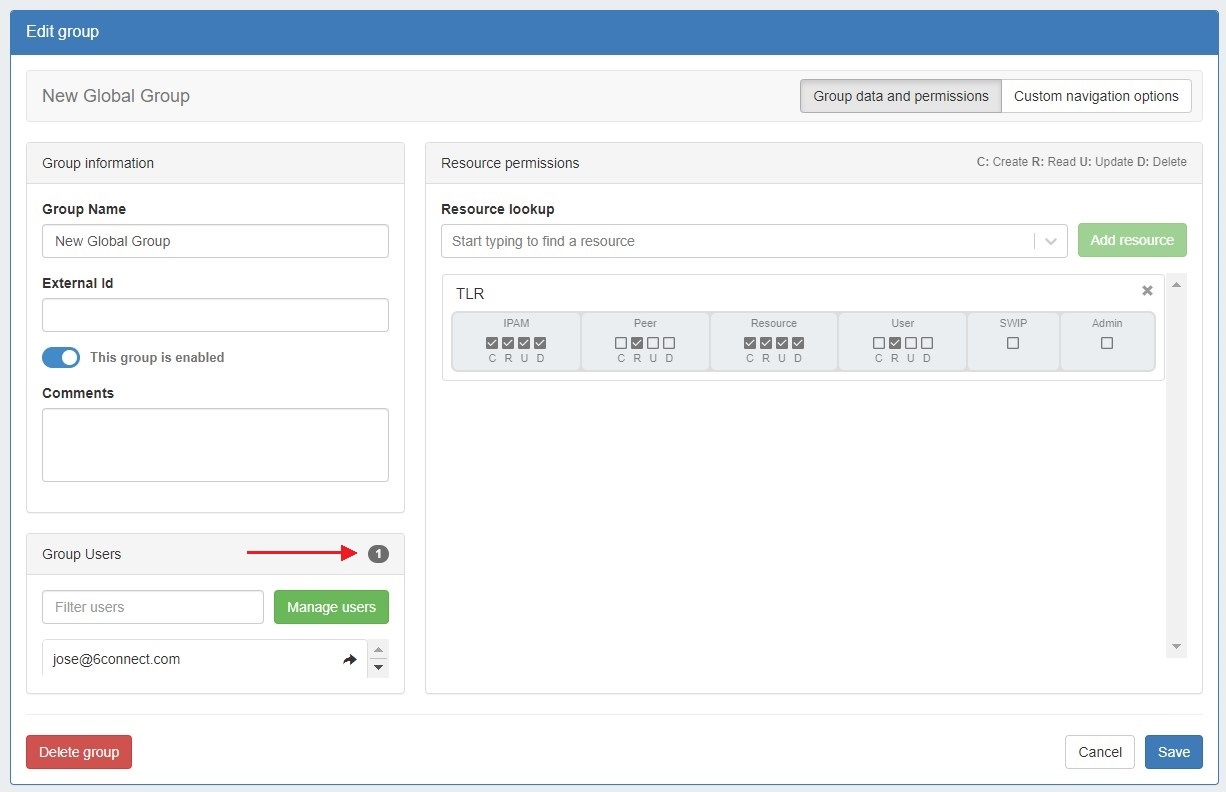
To add or remove users from the Group Details page, click the "Manage Users" button in the Group Users section.
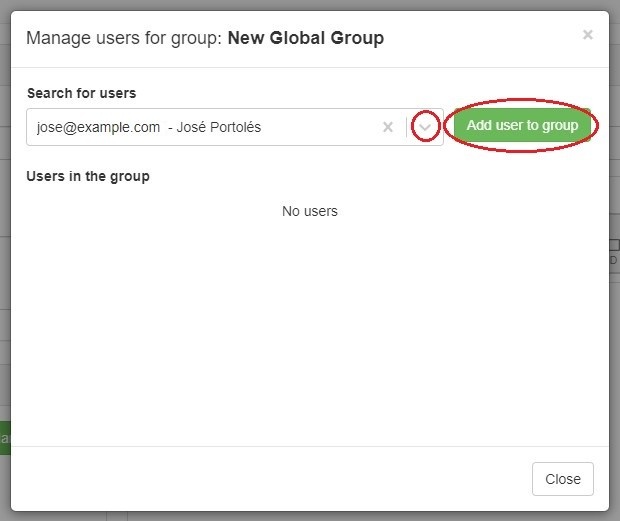
Select a user from the dropdown and click "Add user to group".
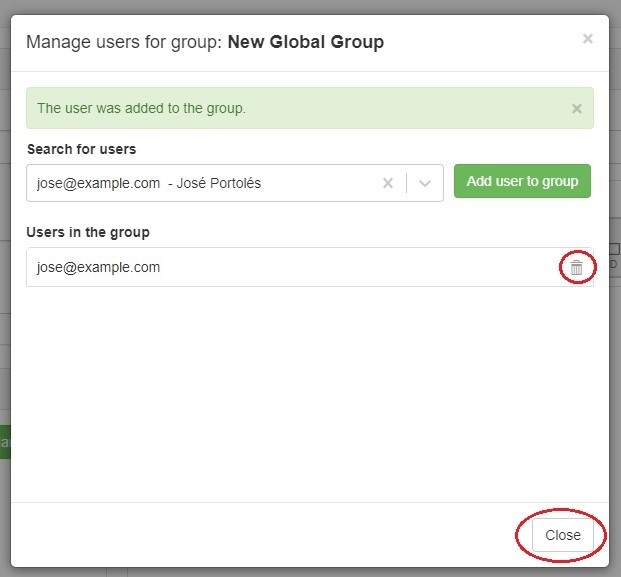
The selected user will then appear on the list of users below. You may remove a user by clicking the delete icon.
Users added to a group are listed in the Group Users section. Click the arrow next to a user name to go to the User Details screen.
Delete a Group
To remove a group from the Groups list, click on the Action Menu (gear icon) for the user and select the "Delete group" option.
...
| Info |
|---|
Note: Users cannot edit or delete permissions for the Group to which they currently belong, unless they are also a member of the default Global Admin Group. |
Customize Group Navigation
Admins can select which tabs and subtabs are viewable to users based on their assigned user groups. From the Group Details page, select "Custom navigation options" at upper right.
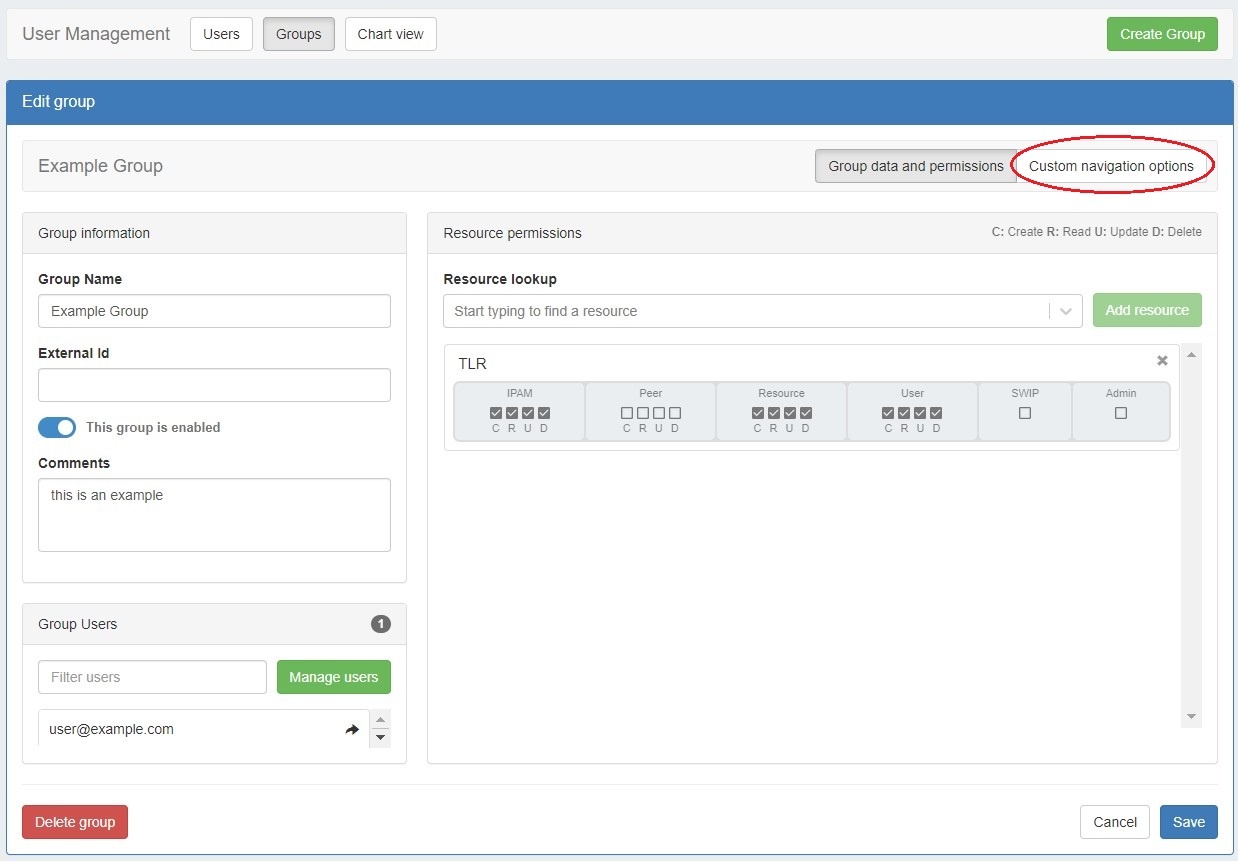
Enable the custom navigation selector and a menu of navigation links will appear. Use the eye icons to hide links from view of users in the group. For example, this group has no Peering permissions (as seen in the above image). Via custom navigation options you can simply hide the entire Peering tab from view for this group of users.
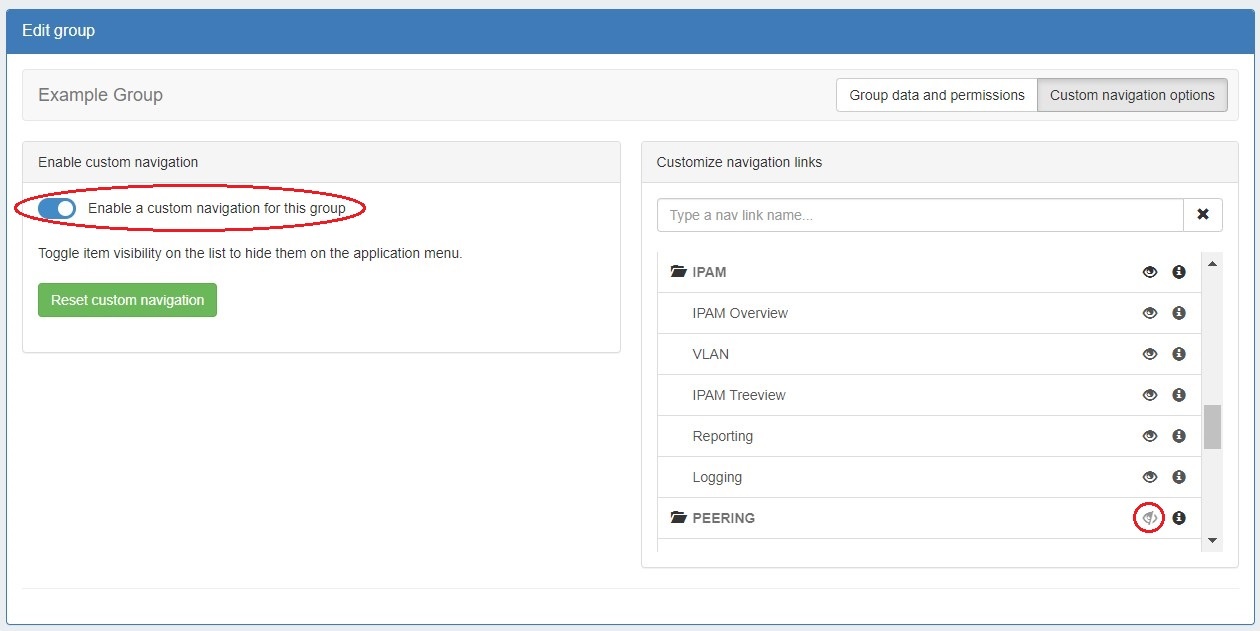
Use the eye icon to enable a tab again or use the "Reset custom navigation" button to reset the whole menu and start again.
| Info |
|---|
Remember, if users are part of multiple groups, they may still see tabs hidden from only one of the groups to which they belong. |
| Note |
|---|
Custom navigation only controls visibility. User permissions are set through the permissions module in the "Group date and permissions" section of Group Details. Using a custom navigation setting does not confer or deny any additional permissions. |
Additional Information
For more information on Users and Groups, see the following areas:
...