| HTML |
|---|
<div id="google_translate_element"></div>
<script type="text/javascript">
function googleTranslateElementInit() {
  new google.translate.TranslateElement({pageLanguage: 'en'}, 'google_translate_element');
}
</script>
<script type="text/javascript" src="//translate.google.com/translate_a/element.js?cb=googleTranslateElementInit"></script> |
Simple Upload / Import from CSV
The Simple Upload / Import from CSV tool is used if you have a simple .csv file with customer / contact information, such as Name, Address, Billing Address, Phone numbers, POC, etc. It is accessed from the Data Import Tab from the Admin section of ProVision.
To import your customer / contact information, follow the following steps:
...
Be sure to review "Preparing Data for Import" on the Importing your Data page before you begin. Verify that your .csv is correctly parsed and cleanly formatted with your customer/contact information (using your choice of choice of the available field list shown below), and is UTF-8 encoded for best results.
...
All other fields are optional.
| Info |
|---|
Note: Resource Import from .csv currently only supports the columns above. For importing additional data, please see the Resource Import Tool, or contact support for details on import services. |
Step 1: Create a new Resource / Customer Import Job
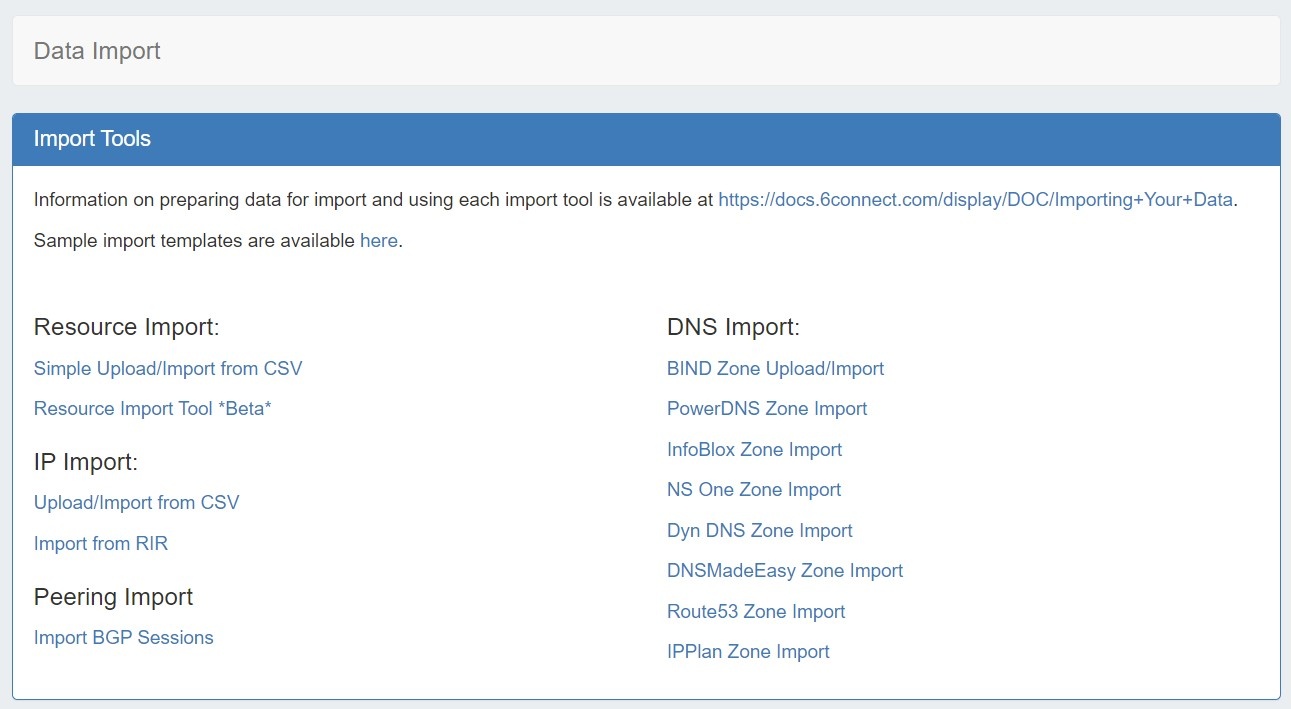
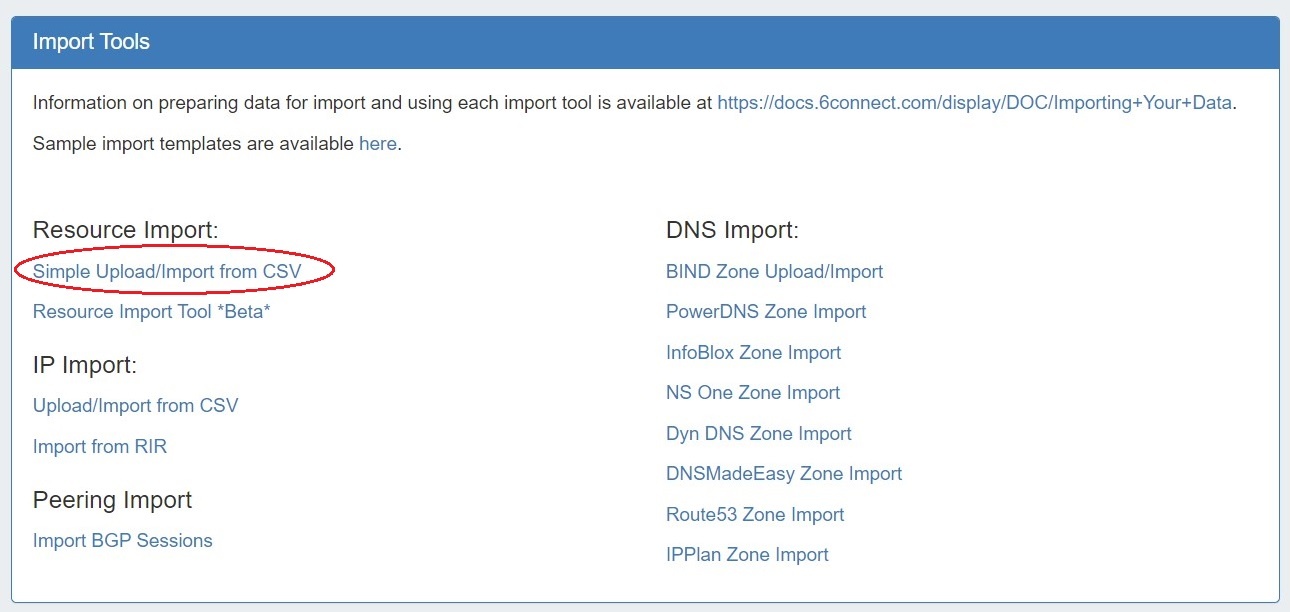
Navigate to the Data Import Tab from Import Tab from the Admin button. Select "Simple Upload / Import from CSV" under "Resource Import".
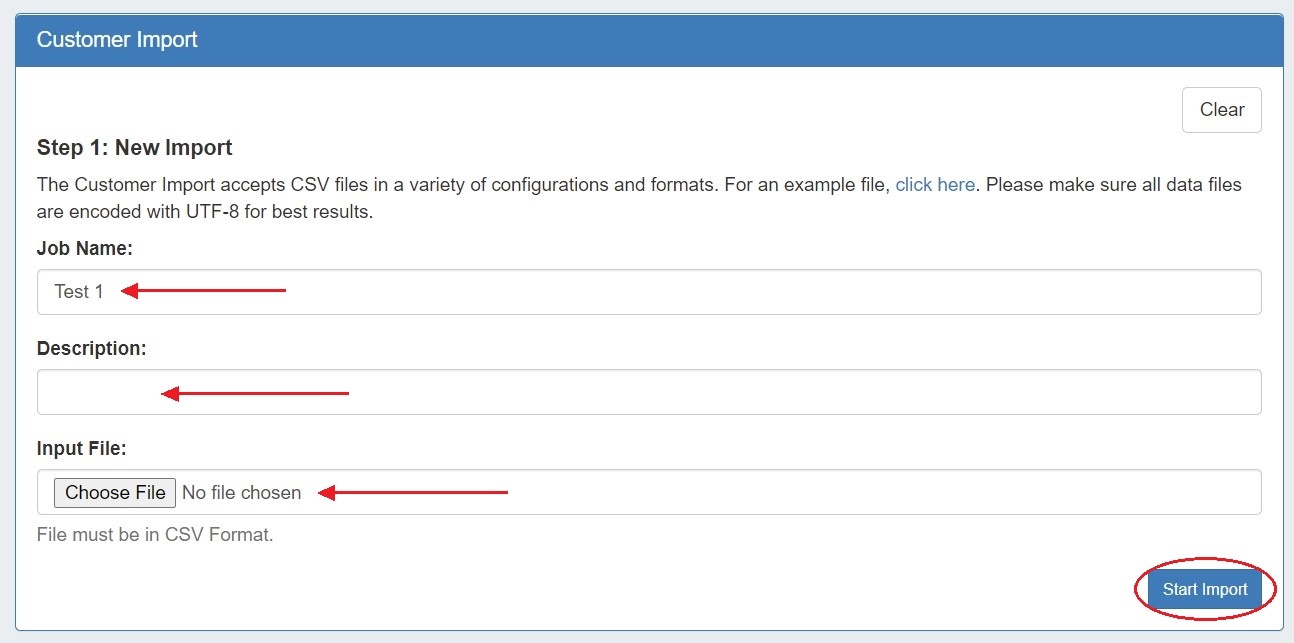
Create a Job Name and Description for the import. This is especially useful to keep track of progress in cases the data arrives from multiple sources, or will require multiple stages of manual review.
Select the .csv file that you prepared above by selecting the "Choose File" button, and browsing to the correct file location. Then hit "Start Import".

| Note | ||
|---|---|---|
| ||
Although you cannot add new files to an existing job, for jobs with multiple sources for data (which may have different formatting), you can simply create separate jobs and descriptions for each source - no need to manually combine the data into one file before importing. The Import tool's mapping and editing functions will allow for the data to be reconciled in ProVision. For large data sets where multiple stages of manual review might be needed, you can create a new job using the same set of data files in order to work in parallel on a different portion of the data. |
After importing, the new job will appear under the "Existing Jobs" section.
To continue working with this job, select it from the list (by clicking on the link) and the next step ("Define Columns") will appear at the bottom of the page.
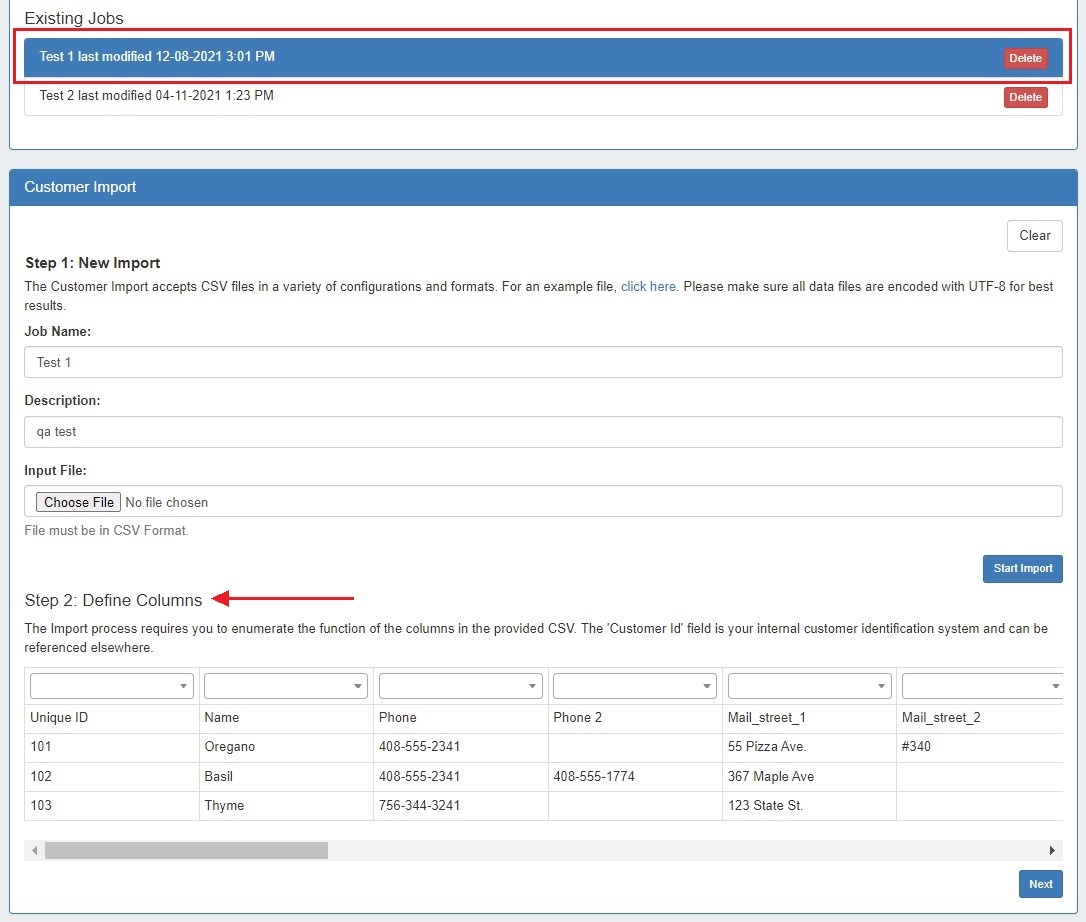

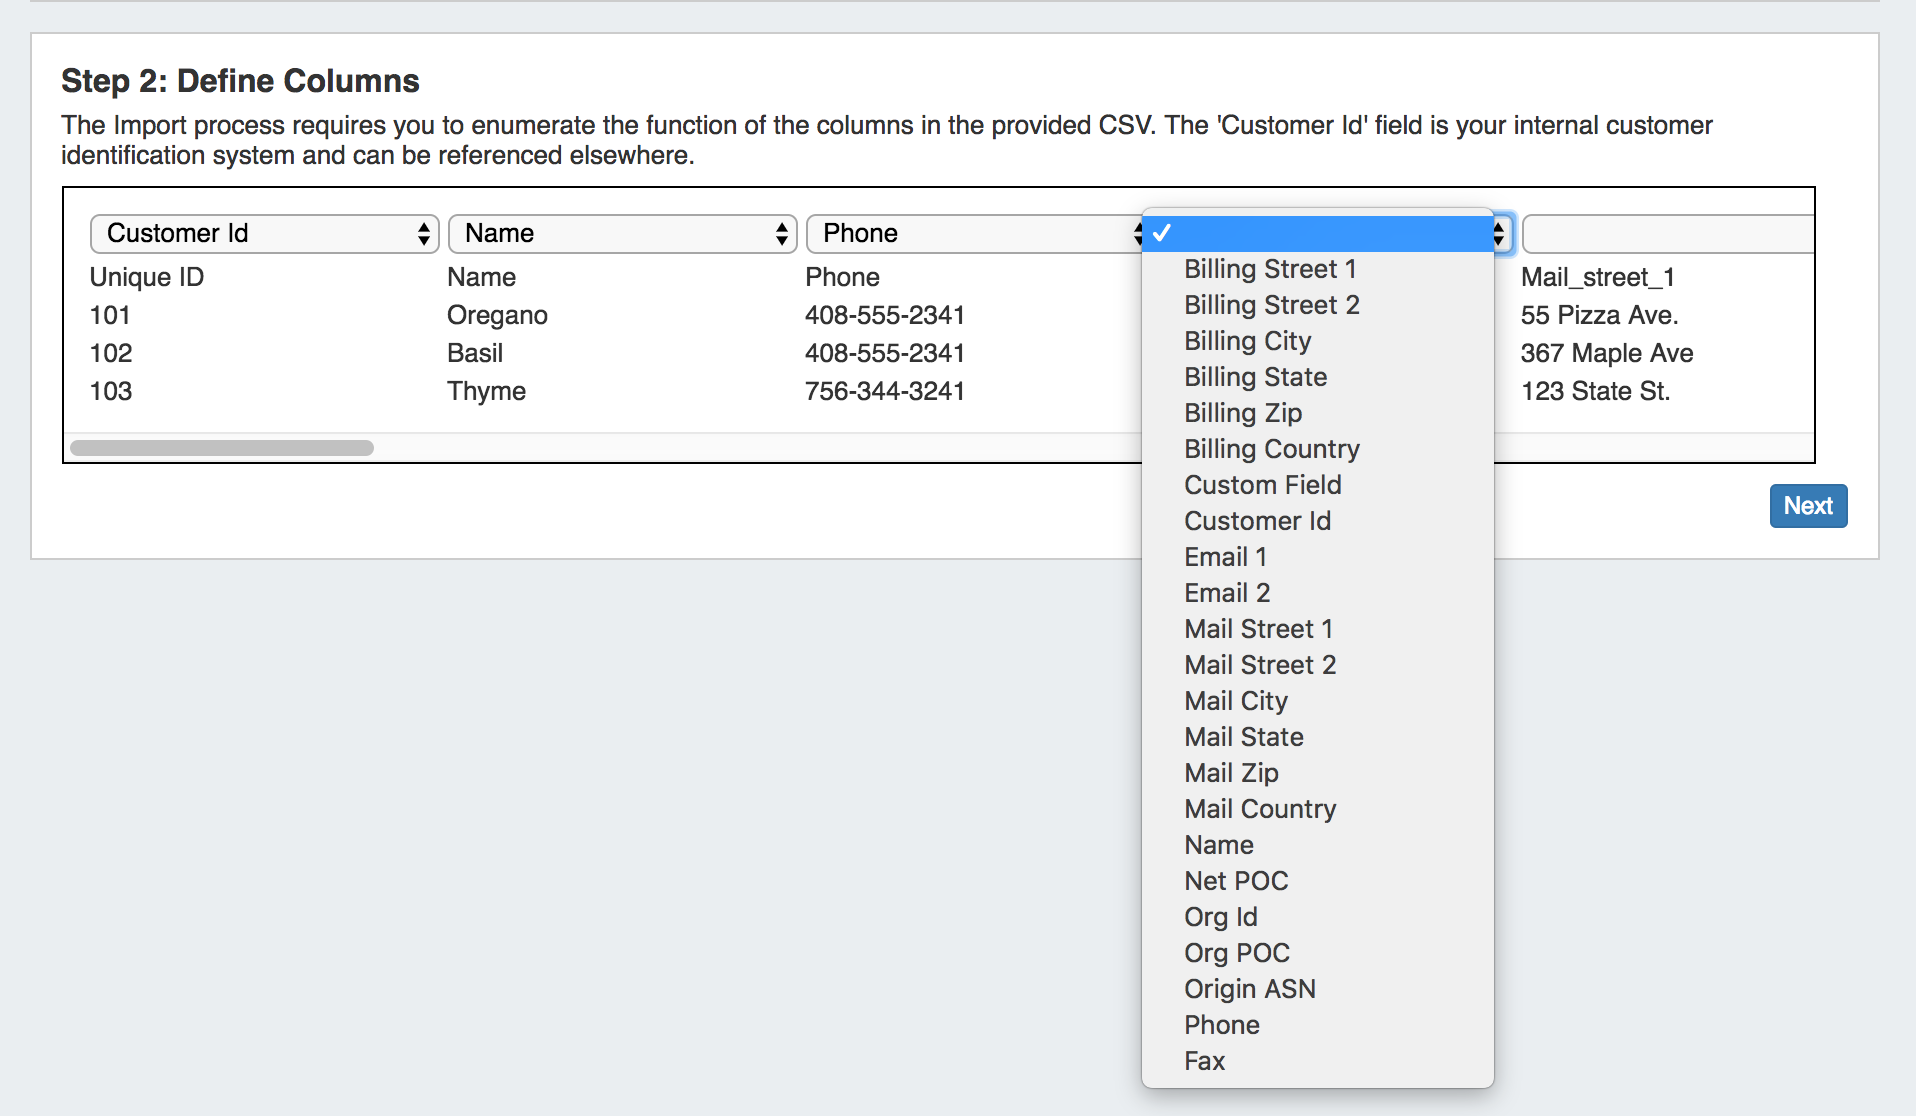
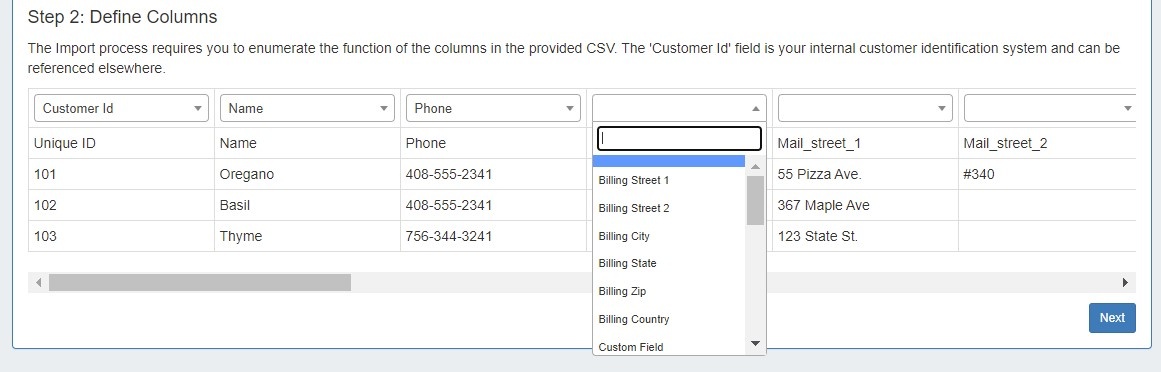
Step 2: Define Columns
...
When completed, hit "Next".
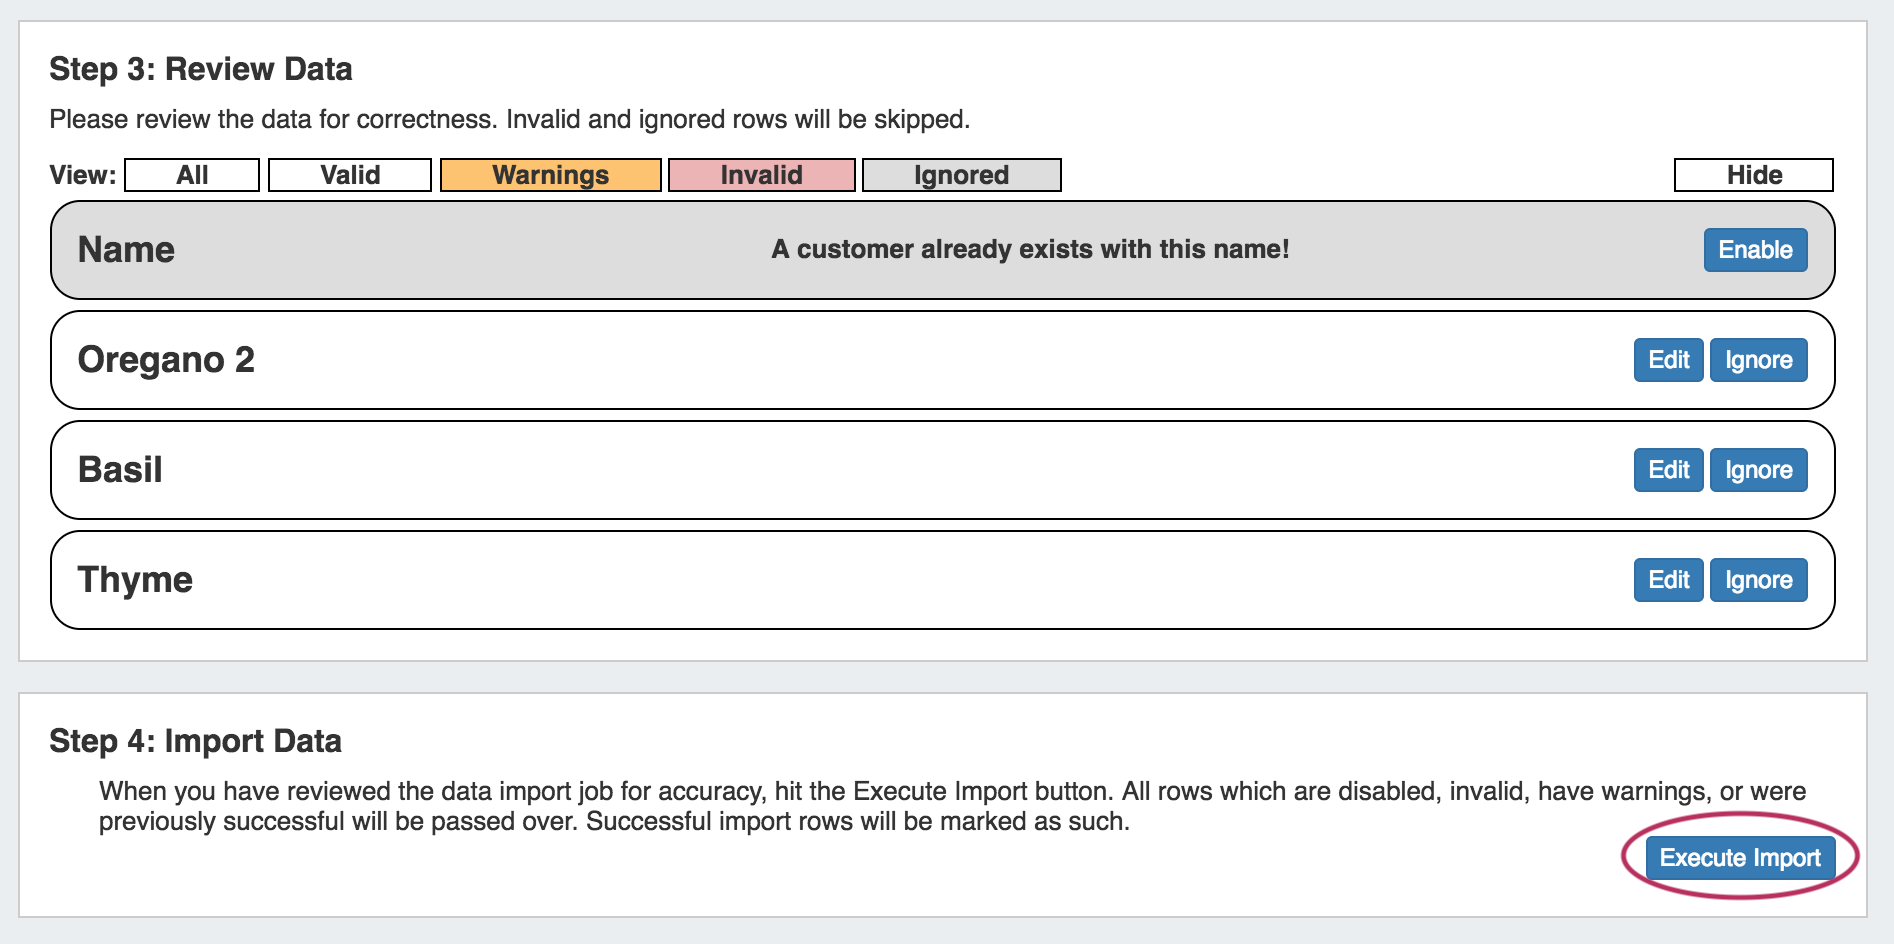
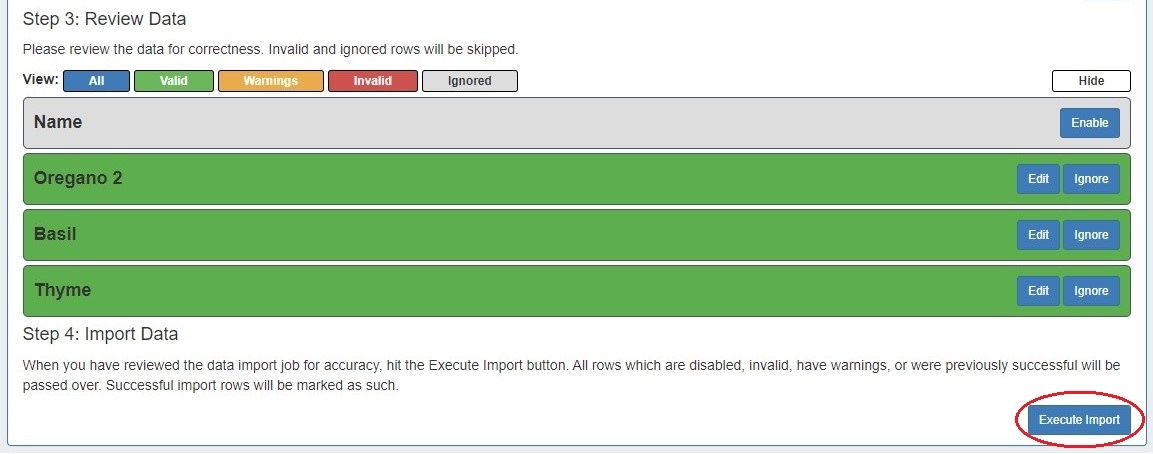
Step 3: Reviewing Data
...
For rows with an "Invalid" or "Warning" status, you may wish to edit the record to change information to a valid option.
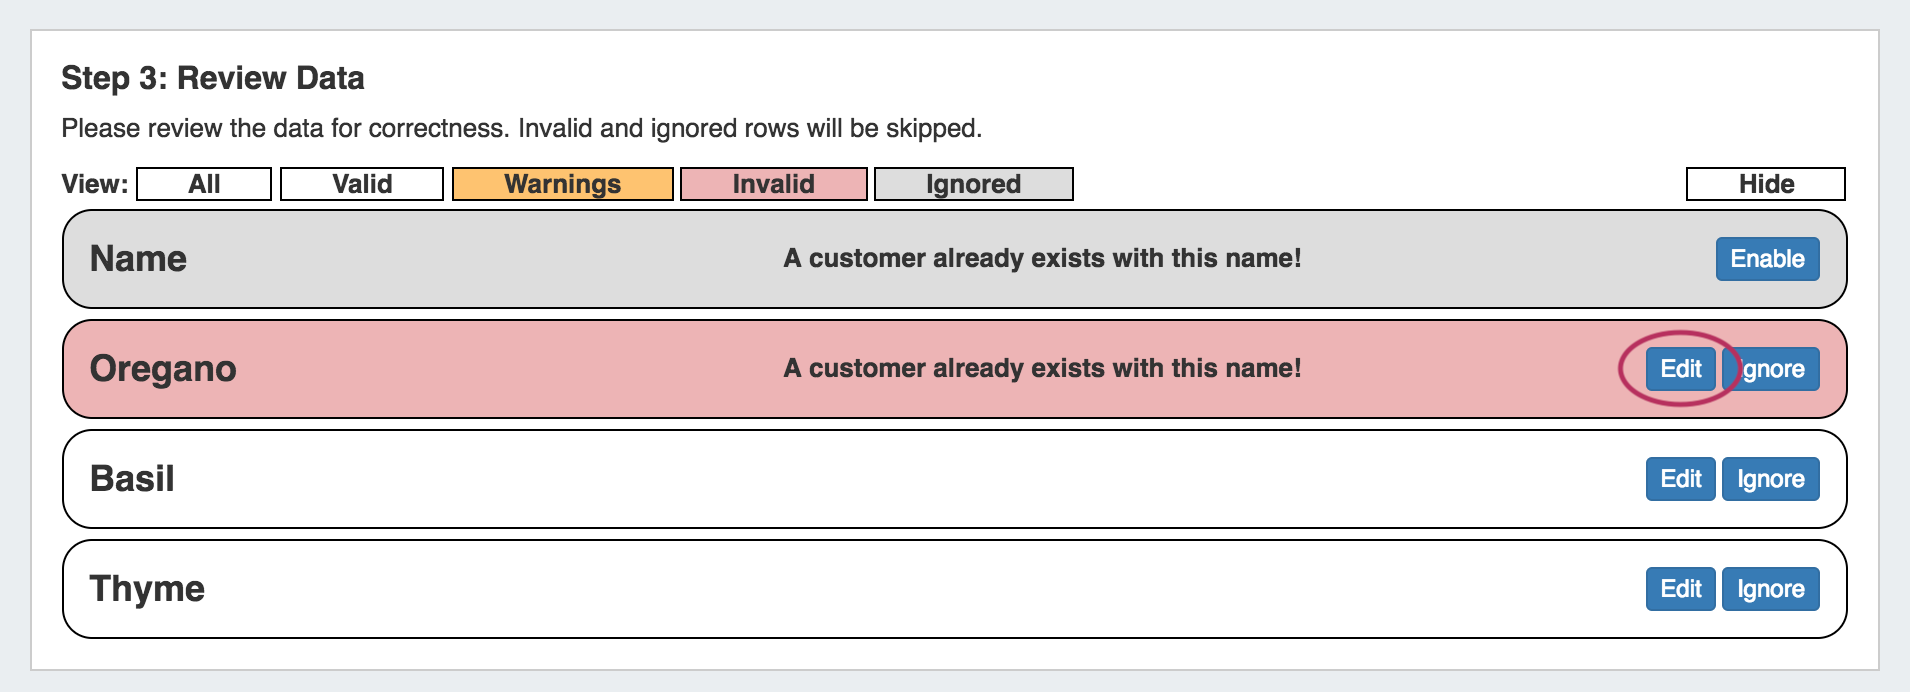
Hitting the "Edit" button for the record provides options to change or add information for available fields.
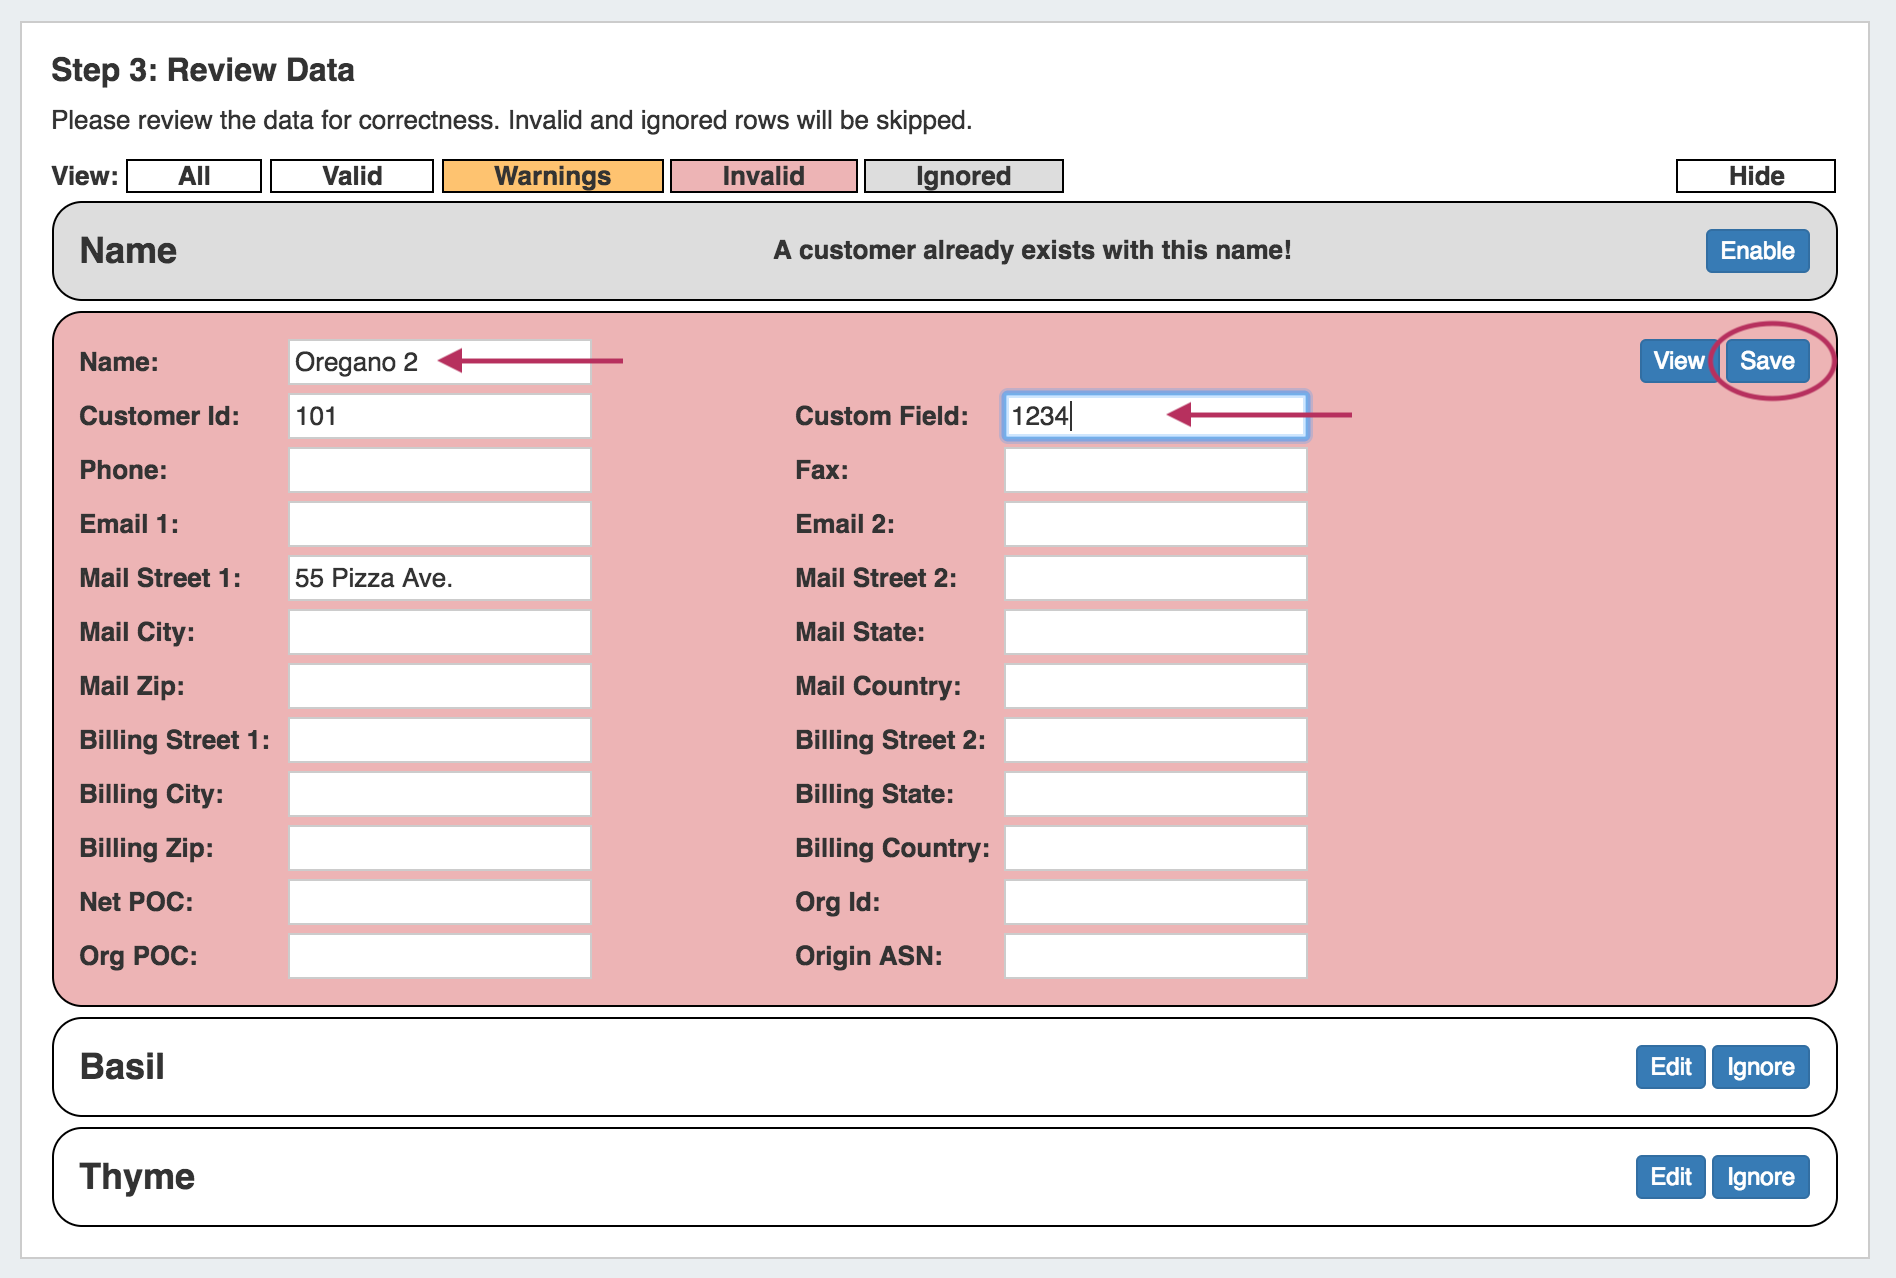
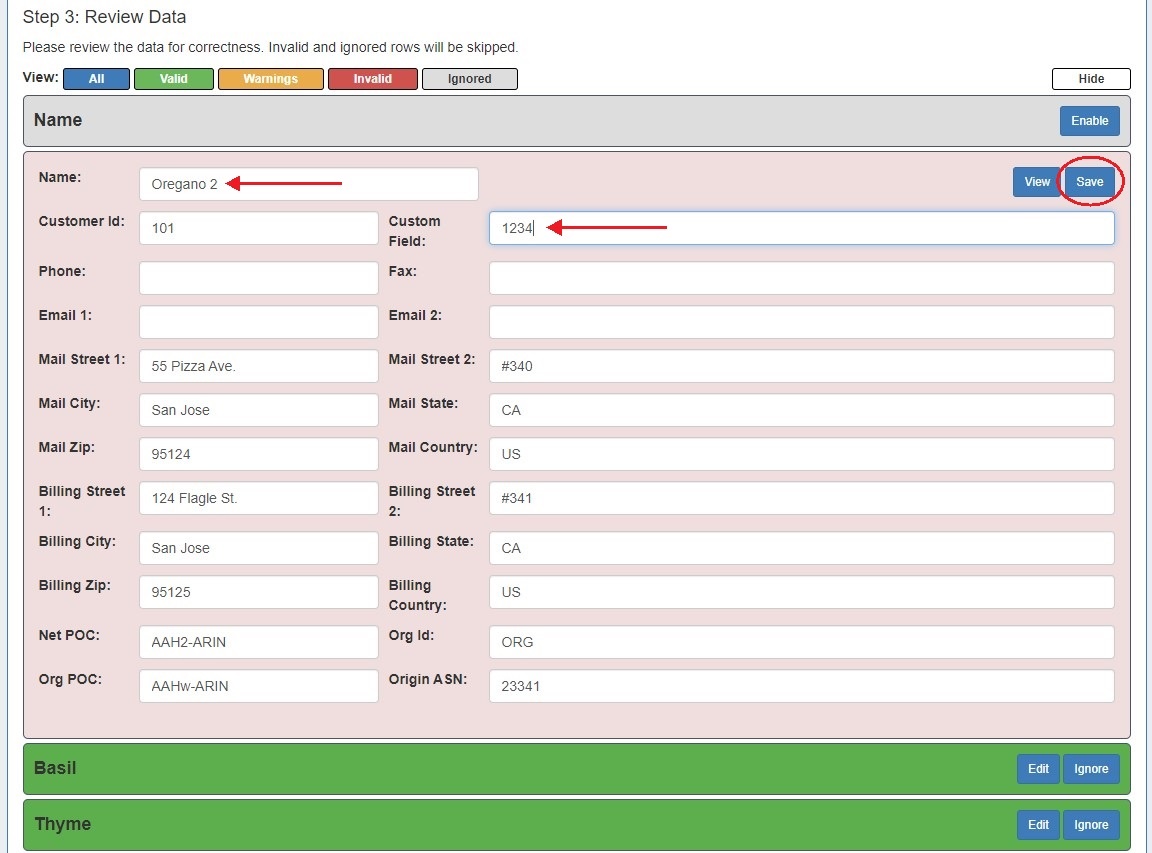
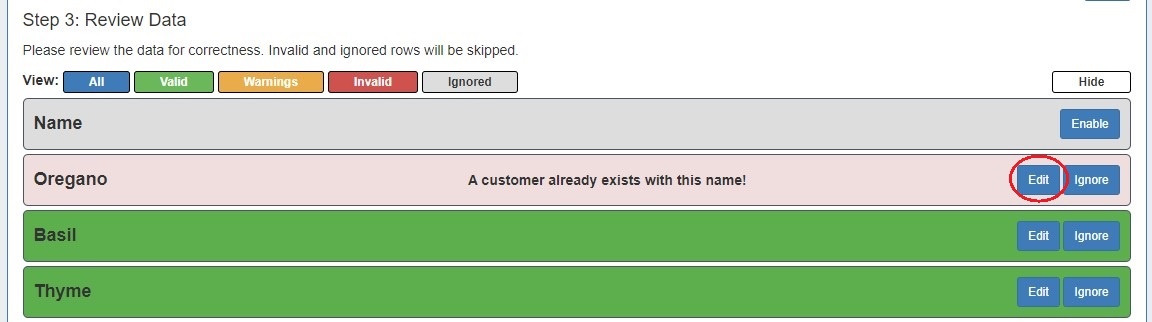
In this example, as "Name" was the invalid field, it has been updated to a unique value. The "Custom Field" value has been added as well.
...
The data record will be re-checked for validity, and will have a white background if it is now valid for import.
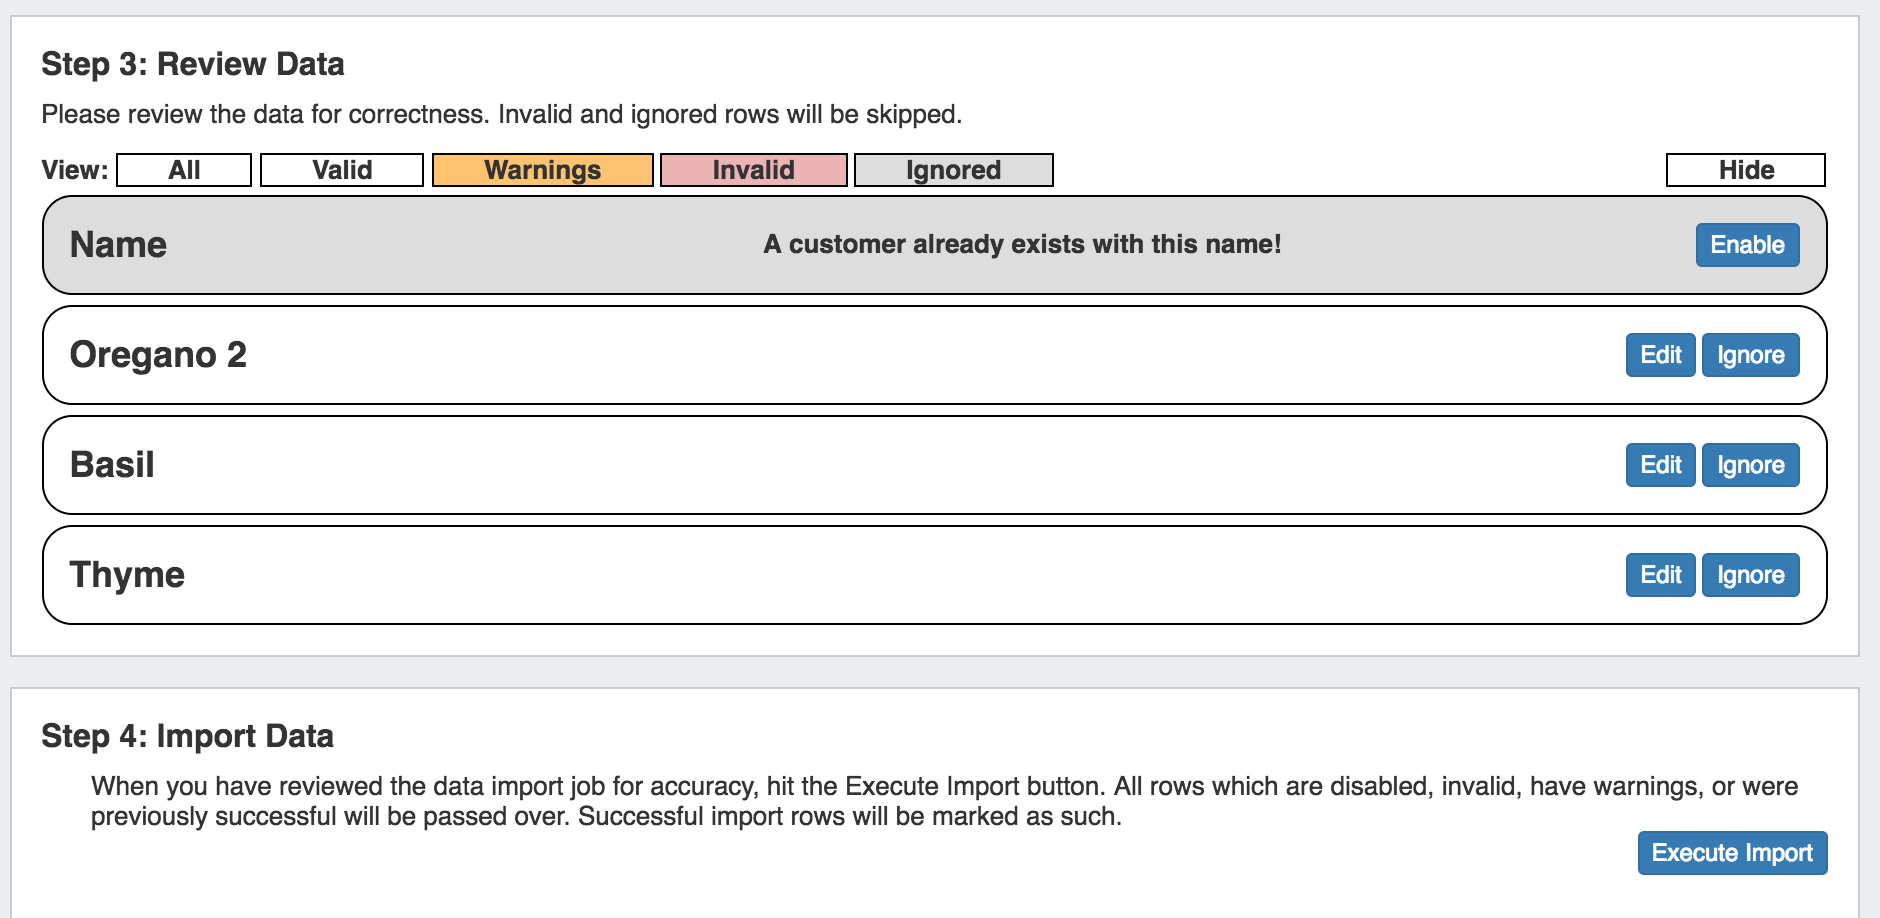
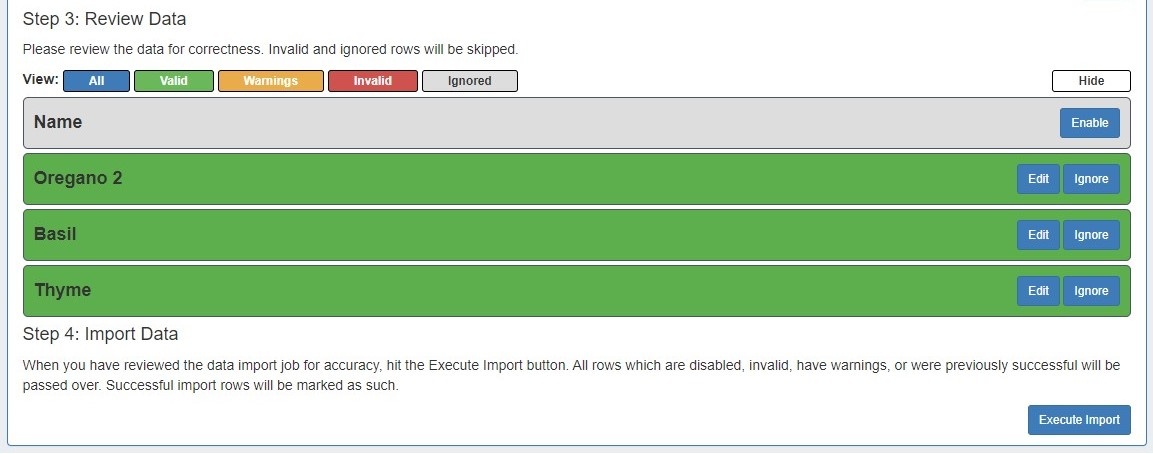
After data has been reviewed for accuracy, you may execute the import.
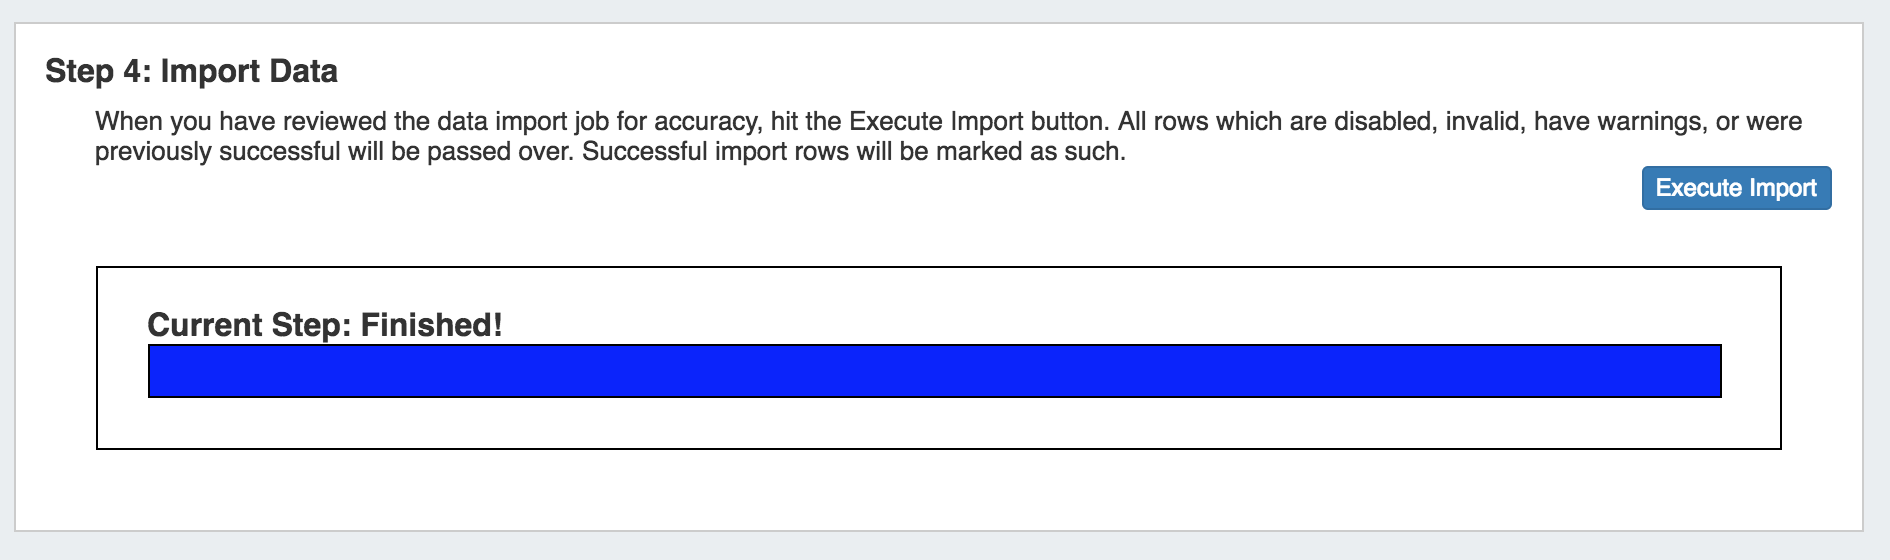
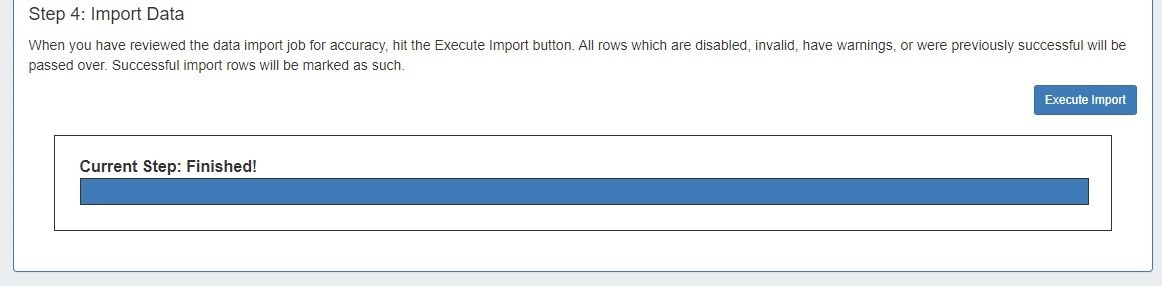
Step 4: Execute Import
When the review step is completed, hit the "Execute Import" button.
A progress bar will appear to and display the records as they are imported.
When the bar reaches 100%, and displays "Current Step: Finished!" the import is complete, and you may leave the page.
Additional Information
For more import options, see: