| HTML |
|---|
<div id="google_translate_element"></div>
<script type="text/javascript">
function googleTranslateElementInit() {
  new google.translate.TranslateElement({pageLanguage: 'en'}, 'google_translate_element');
}
</script>
<script type="text/javascript" src="//translate.google.com/translate_a/element.js?cb=googleTranslateElementInit"></script> |
Working with DNS Records
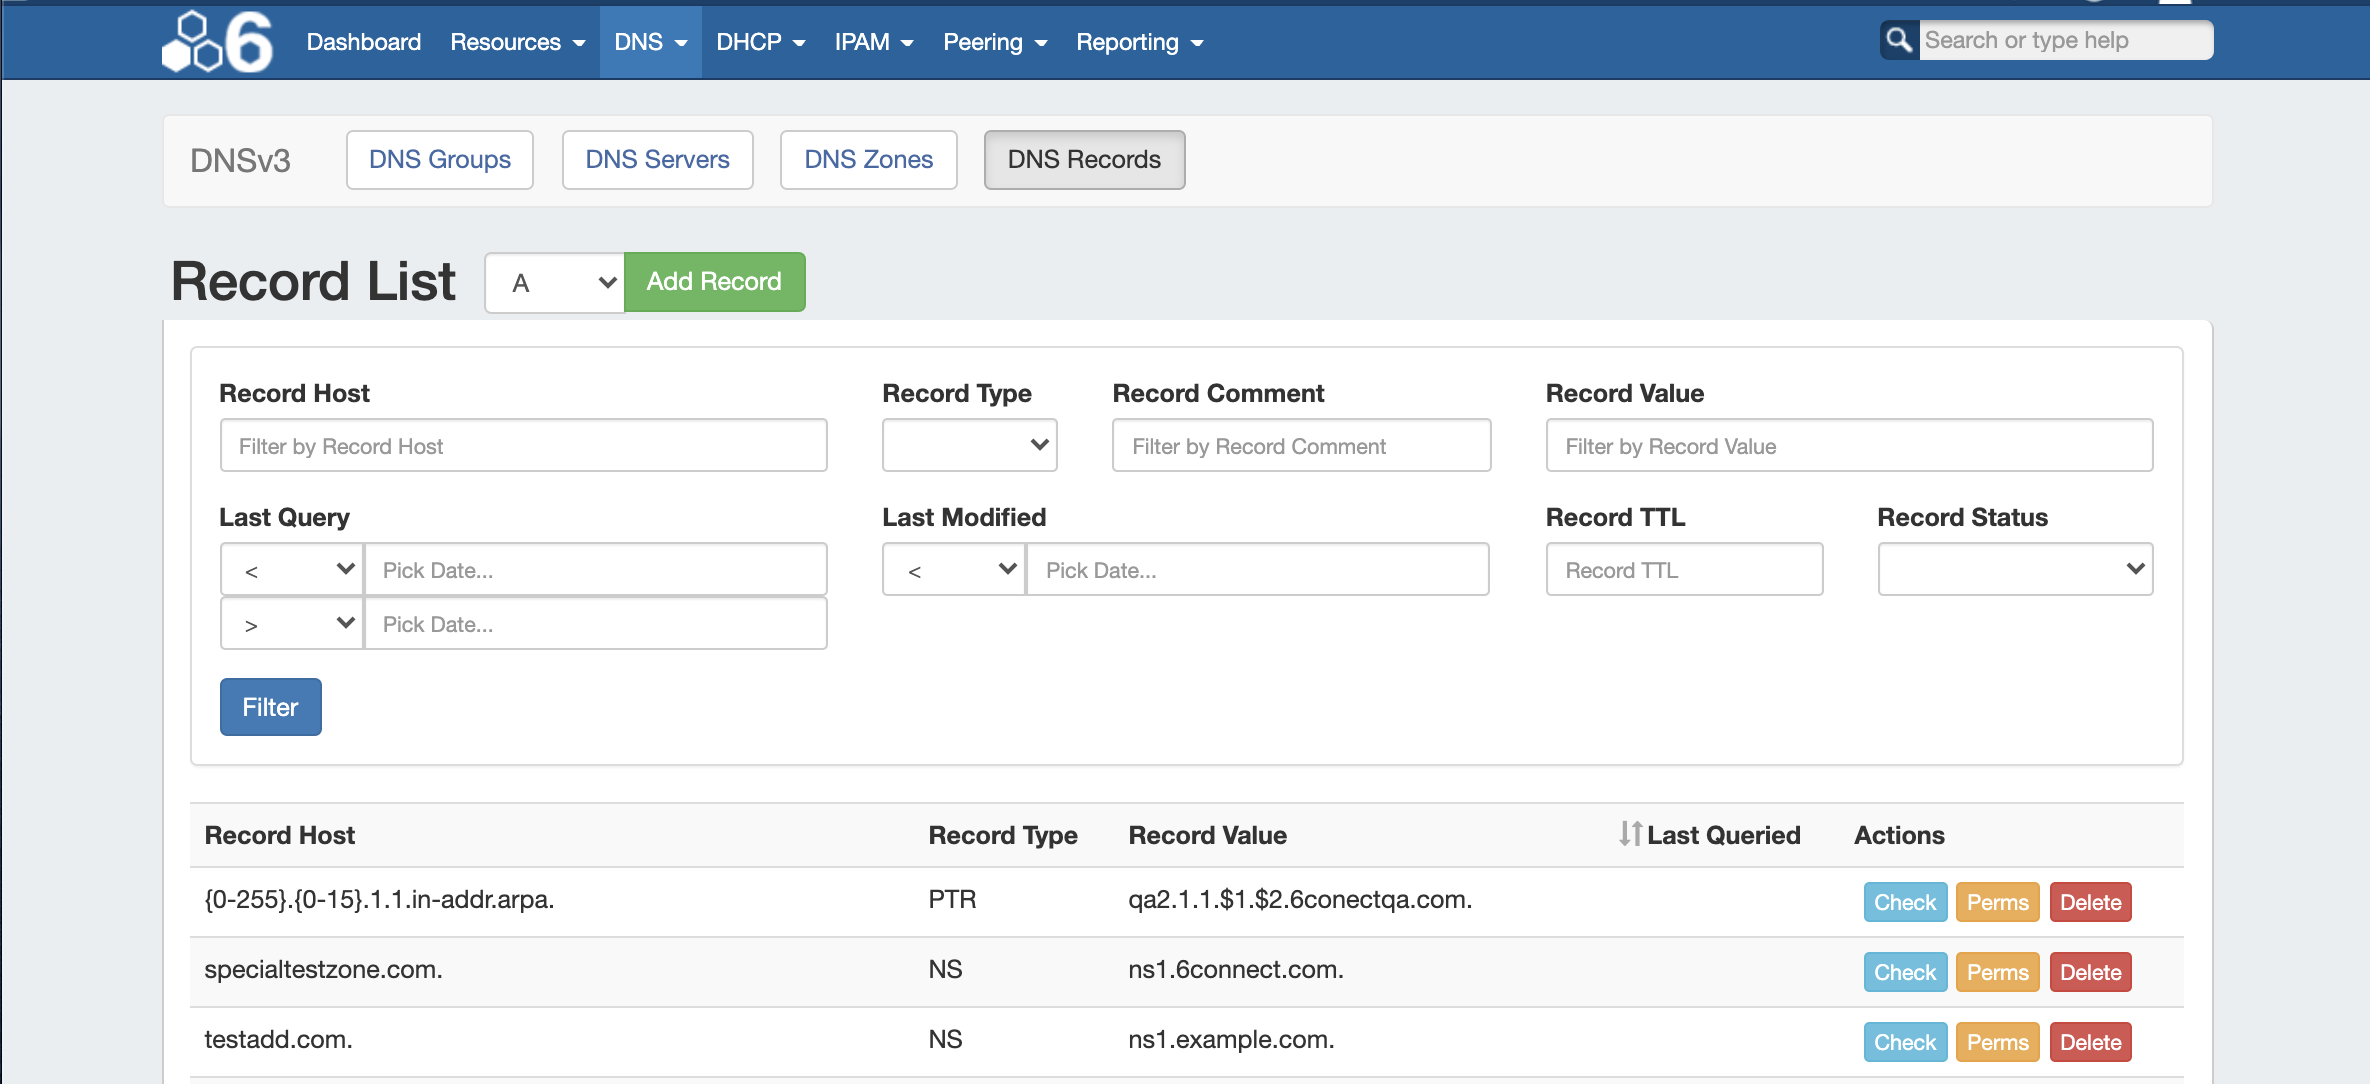
DNS Records may be managed either from the Zone View Zone page (for the records under the their respective zone) or globally through the DNS Records sub-tab.
| Table of Contents | ||
|---|---|---|
|
Working with Records - DNS Records List
The DNS Records List provides a global list records for expedited searching, filtering, adding, and editing of DNS Records.
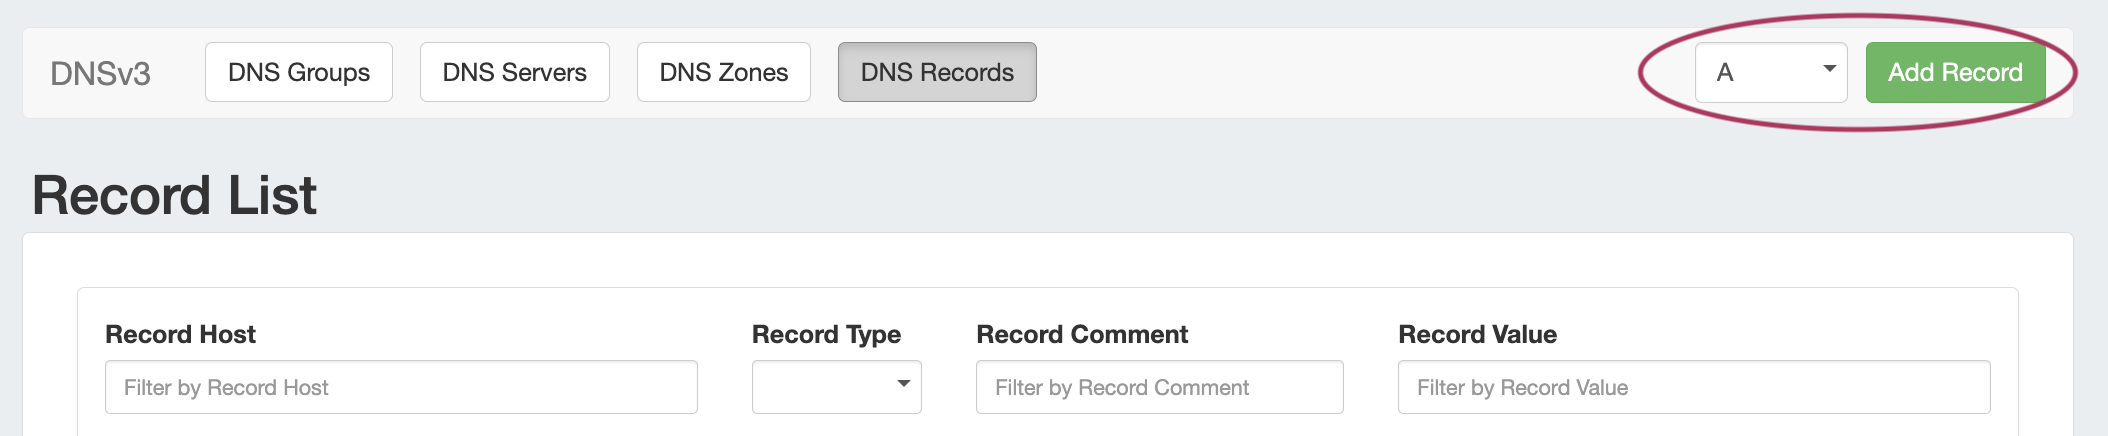
From the DNS Tab, click on the "DNS Records" sub-tab button, or select it from the DNS dropdown menu.
All DNS records available in ProVision displays in a single Record List, along with Host, Type, Value, and Last Queried information.
Records may be sorted ascending/descending by "Record Host" name, or by "Last Queried", by clicking on the column header name / sort arrows.
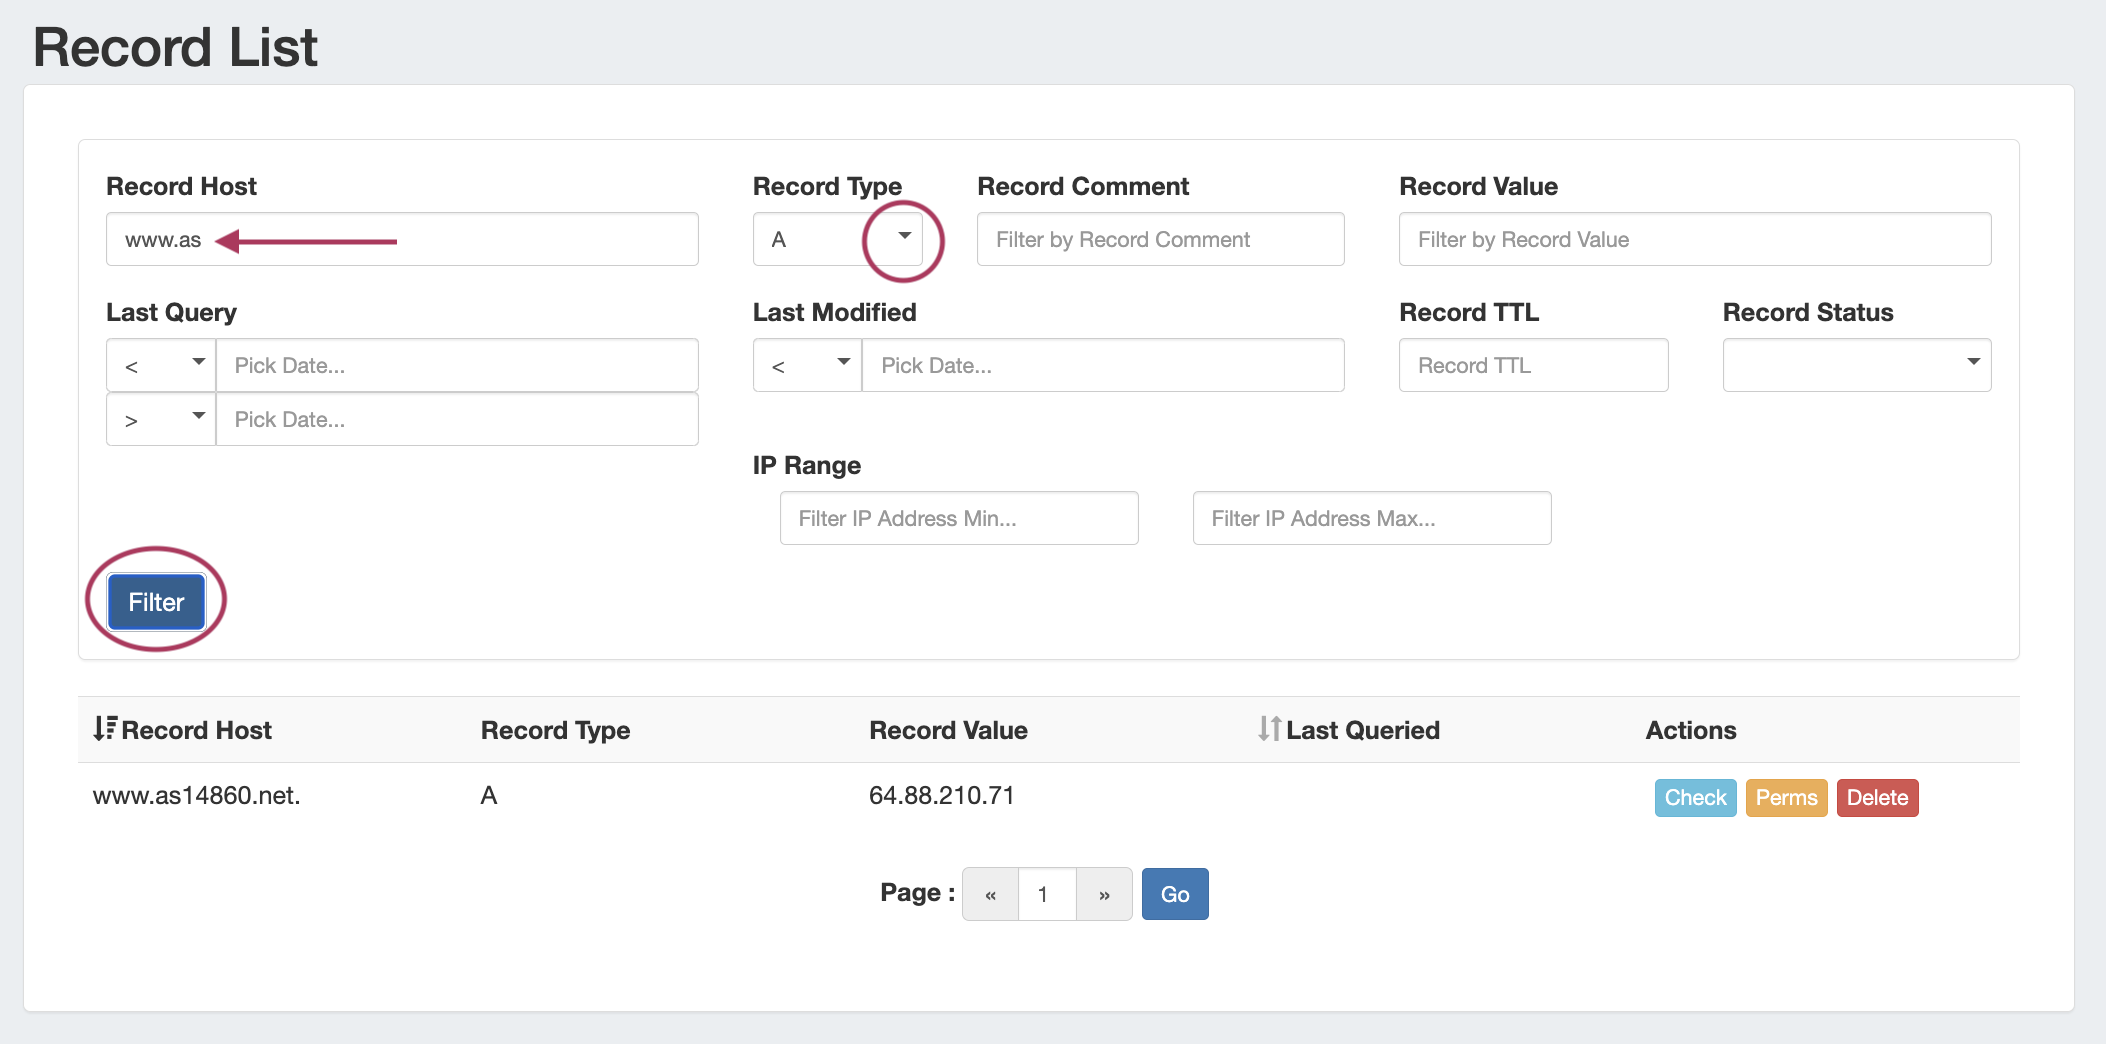
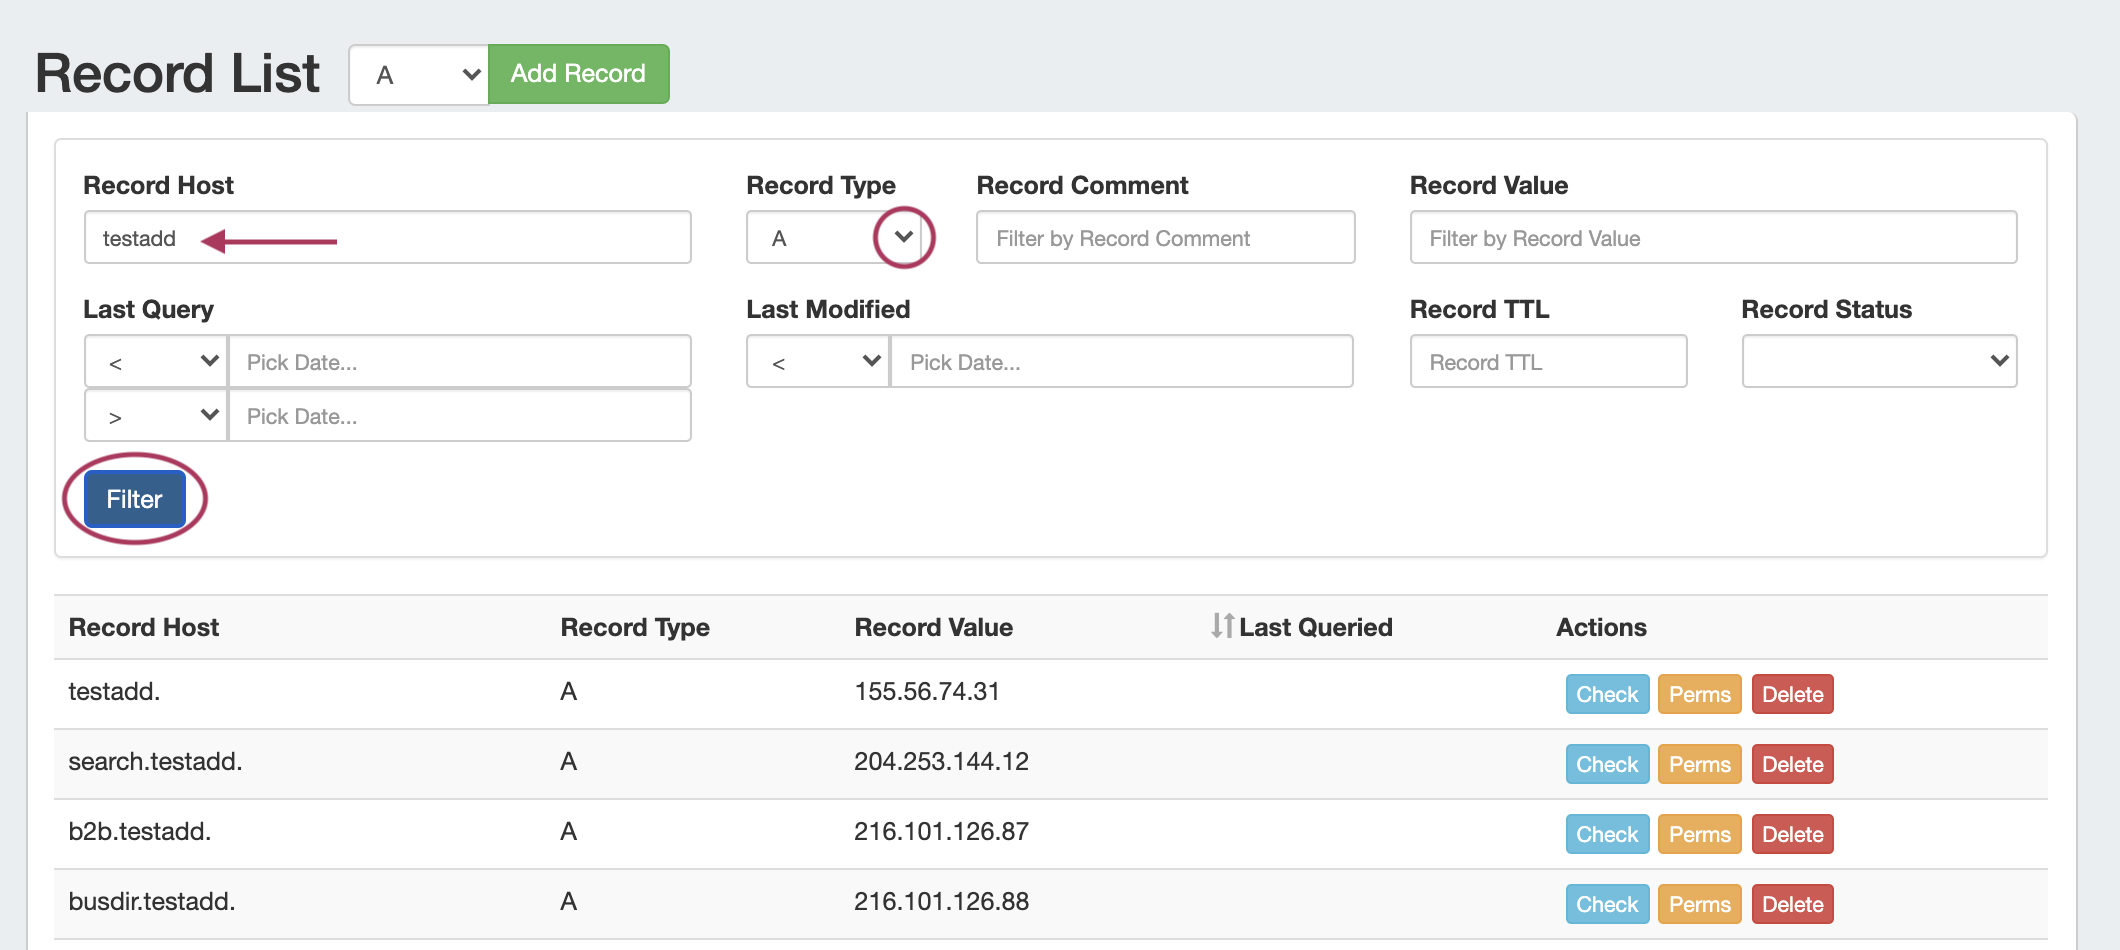
Filter Records
Search for specific records by filtering by Host, Type, Comment, Value, Last Query, Last Modified, Record TTL, Status, or IP Range.
After entering your filter criteria, click "Filter".
Record Actions
For each record, you may:
- Click the "Check" button to run an DNS Monitor error check on the record
- Review or change record permissions by clicking "Perms" (Admin only)
- Delete the record by clicking "Delete"
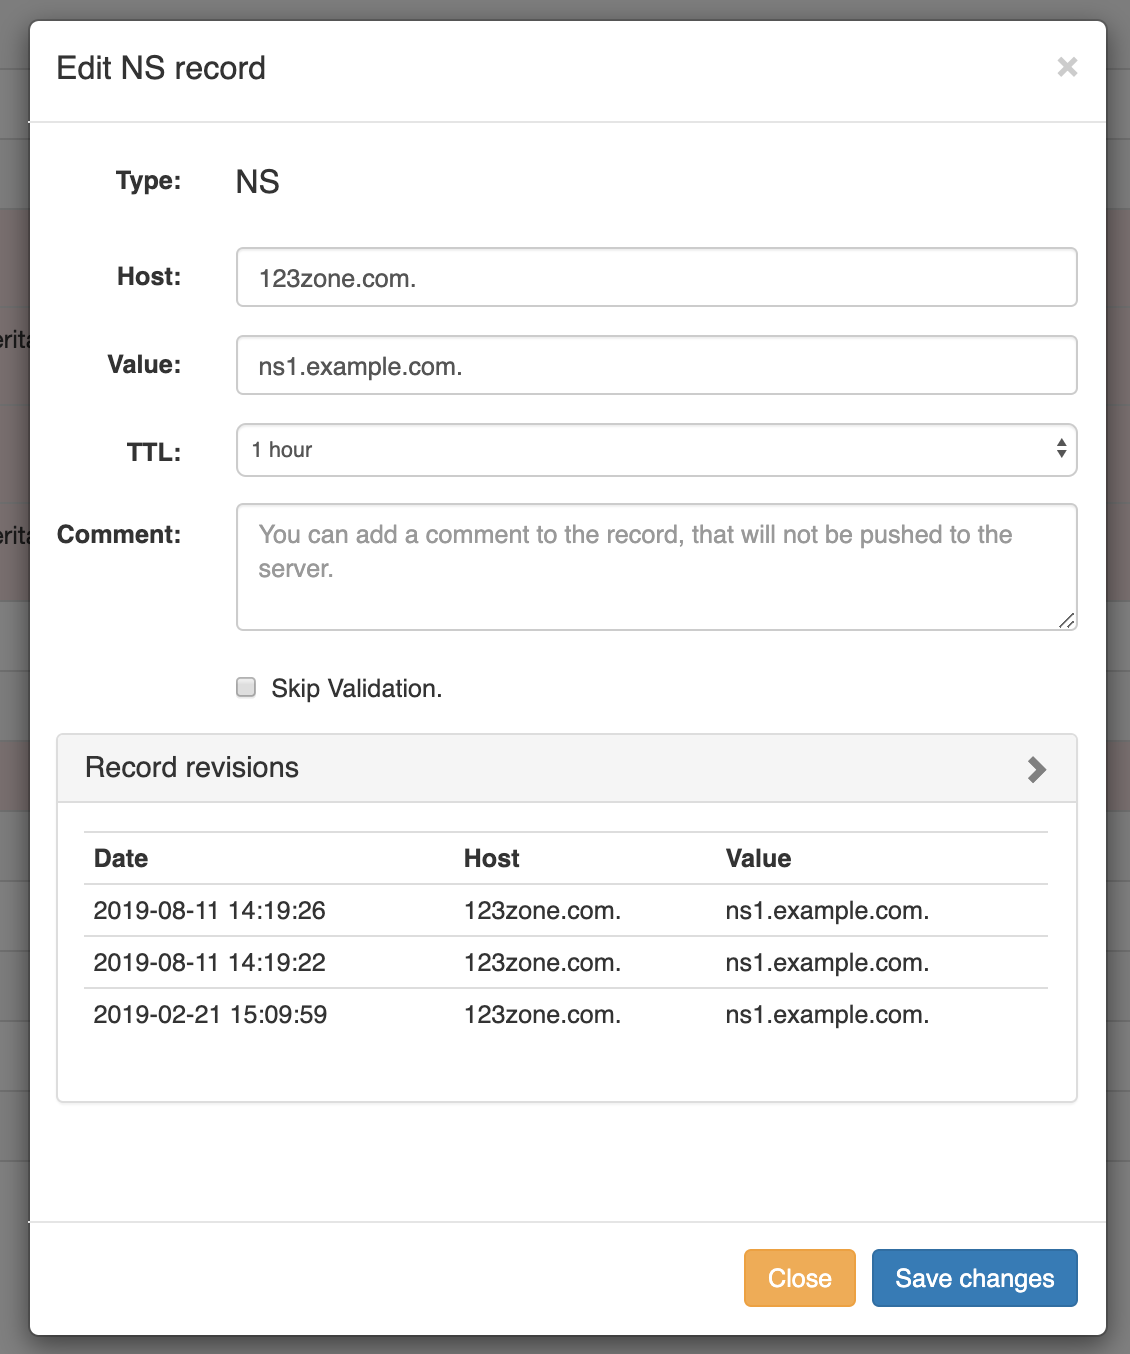
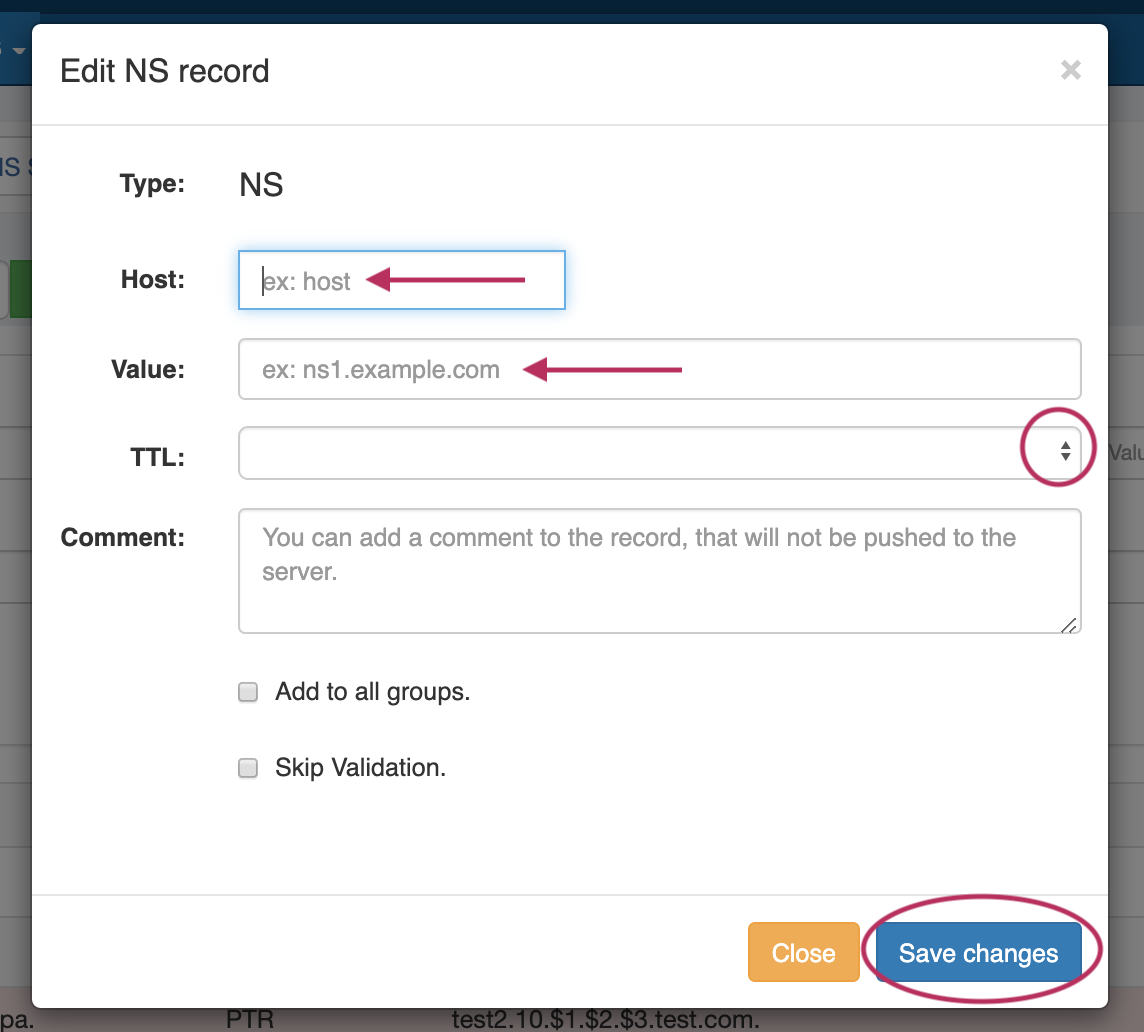
- Review or Edit record details by double-clicking on the row for the desired record.
- Review record revision dates or enter your desired edit, then click "Save changes" to complete.
Add a New Record
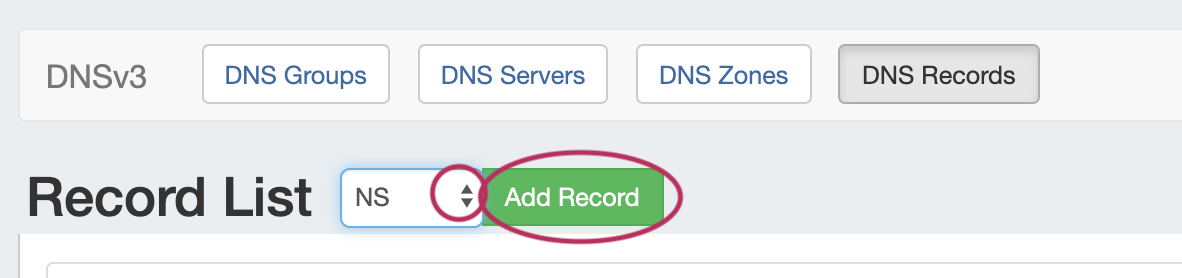
At the top of the DNS Records page, select the desired record type, then click "Add Record".
Available Record Types for the Record List include the following:
- A
- A6
- AAAA
- CNAME
- CAA
- DNAME
- DNSKEY
- DS
- MX
- NAPTR
- NS
- PTR
- RP
- SRV
- TLSA
- SPF
- HINFO
- LOC
- TXT
- URI
Enter the record information for the record type. When done, click "Save Changes".
Working with Zone Records - Zone View
...
Page
Record Types
The Zone View page supports 20 record types, as well as the ability to add a custom/arbitrary record type manually.
Available record types include the following:
| Expand | |||||
|---|---|---|---|---|---|
|
Add Zone Records
From the Zone View Zone page, under DNS Records, look for the line "Add a new ___ Record".
...
Autogenerate Forward Zone Records
From the Zone View Zone page, under DNS Records, look for the line "Add a new ___ Record".
...
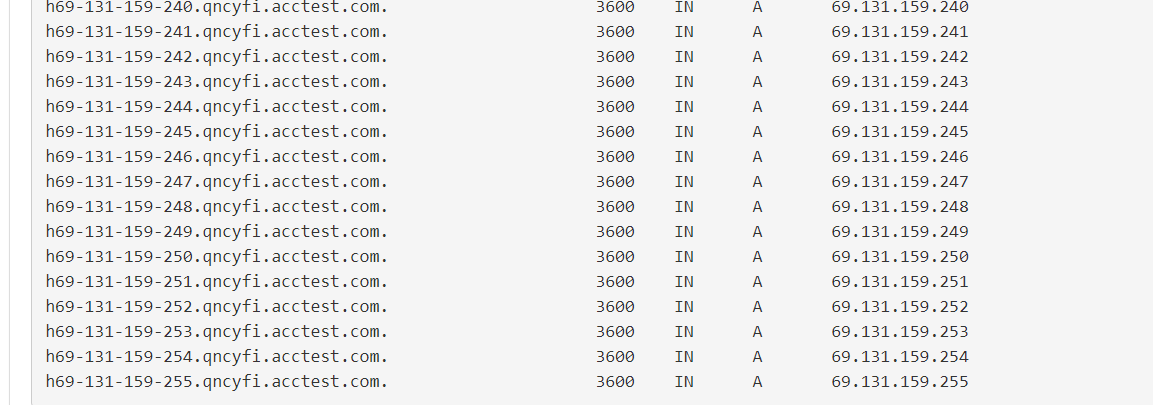
Example:
Host: h69-131-159-$1.qncyfi
Value: 69.131.159.{240-255}
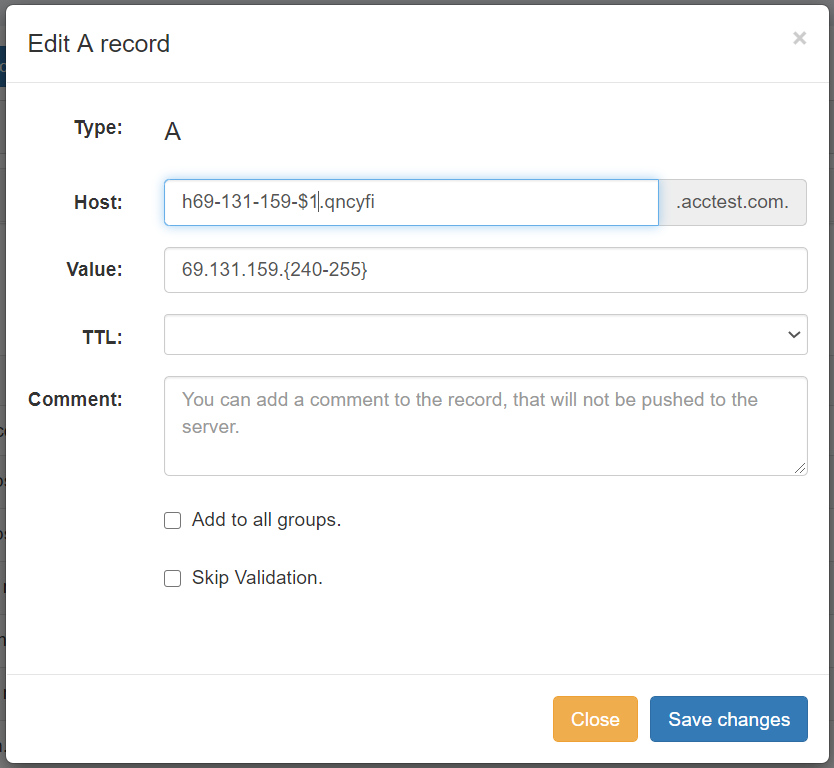
and this is expanded to:
When you are done, click "Save Changes" to complete the edit.
Autogenerate Reverse Zone Records
ProVision can be configured auto-generate IPv4 / IPv6 PTR records in reverse zones based on template.
Example IPv4 :
If the zone is named 33.44.in-addr.arpa.
Host : {100-150}.{22-24}
Value : $1-$2-available.example.com.
The generated records on push will look like :
100.22.33.44.in-addr.arpa. IN PTR 100-22-available.example.com.
101.22.33.44.in-addr.arpa. IN PTR 101-22-available.example.com.
...
149.24.33.44.in-addr.arpa. IN PTR 149-24-available.example.com.
150.24.33.44.in-addr.arpa. IN PTR 150-24-available.example.com.
Example IPv6 :
If the zone is named 0.f.e.d.c.b.a.9.8.7.6.5.4.3.2.1.ip6.arpa.
Host : 0.{0-f}.{2-3}.d.c.b.a.9.8.7.6.5.4.3.2.1
Value : $1-$2-host.example.com.
The generated records on push will look like :
0.0.2.d.c.b.a.9.8.7.6.5.4.3.2.1.0.f.e.d.c.b.a.9.8.7.6.5.4.3.2.1.ip6.arpa. 3600 IN PTR 0-2-host.example.com.
0.1.2.d.c.b.a.9.8.7.6.5.4.3.2.1.0.f.e.d.c.b.a.9.8.7.6.5.4.3.2.1.ip6.arpa. 3600 IN PTR 1-2-host.example.com.
...
0.e.3.d.c.b.a.9.8.7.6.5.4.3.2.1.0.f.e.d.c.b.a.9.8.7.6.5.4.3.2.1.ip6.arpa. 3600 IN PTR e-3-host.example.com.
0.f.3.d.c.b.a.9.8.7.6.5.4.3.2.1.0.f.e.d.c.b.a.9.8.7.6.5.4.3.2.1.ip6.arpa. 3600 IN PTR f-3-host.example.com.
Autogeneration of Reverse Zone Records is also performed when generating a reverse zone from the IPAM Gadget:
Autogenerate Reverse Zone
Autogenerate a reverse zone from an IP Block by clicking on the CIDR link in the block list.

The reverse zone will be created for the block, and the Zone View page will load, displaying further information and autogenerated records.
Import Zone Records
To import a zone file to populate record data in ProVision, go to the Zone View Zone page for the zone. The zone must already exist in ProVision, although it may be empty
...
Click "Import Zone" on the Zone View Zone page.

A Zone Import dialog box will open. Next to Zone File:, click "Choose File" and select your .zone file to import. Then, select an import policy to follow.
...
Under the "Attached Servers" section of the Zone View Zone page, next to "Attach Server:", select the desired server to attach and choose the server type (Default, Master, Slave), then click the "Attach" button.
...
To exit without saving, click the "Close" button.
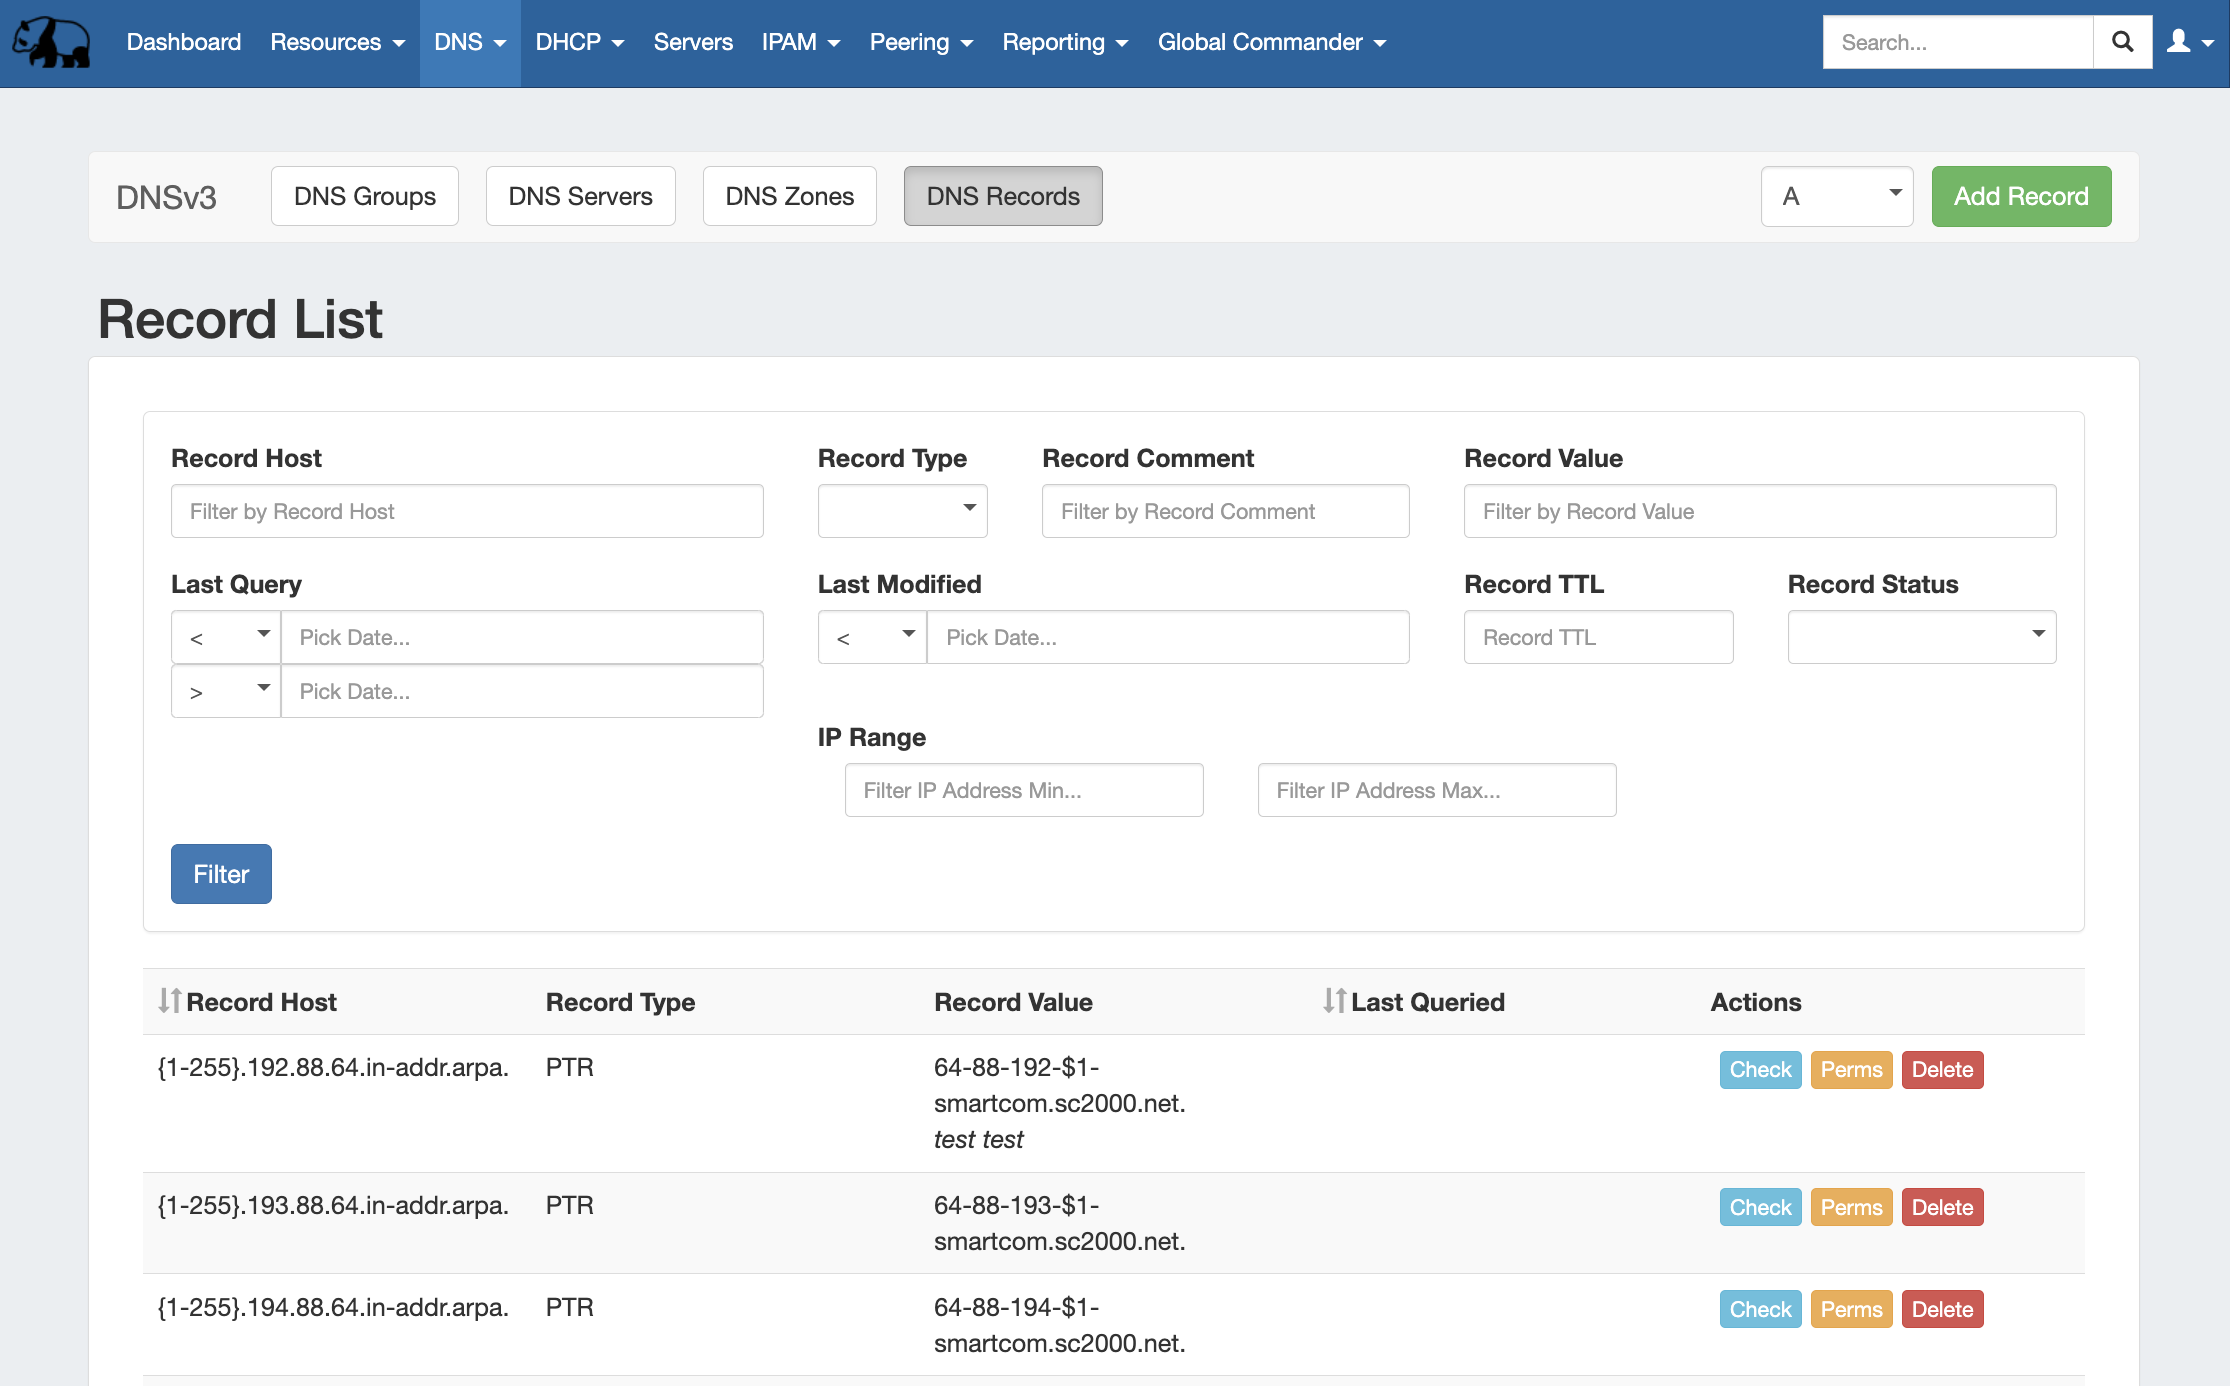
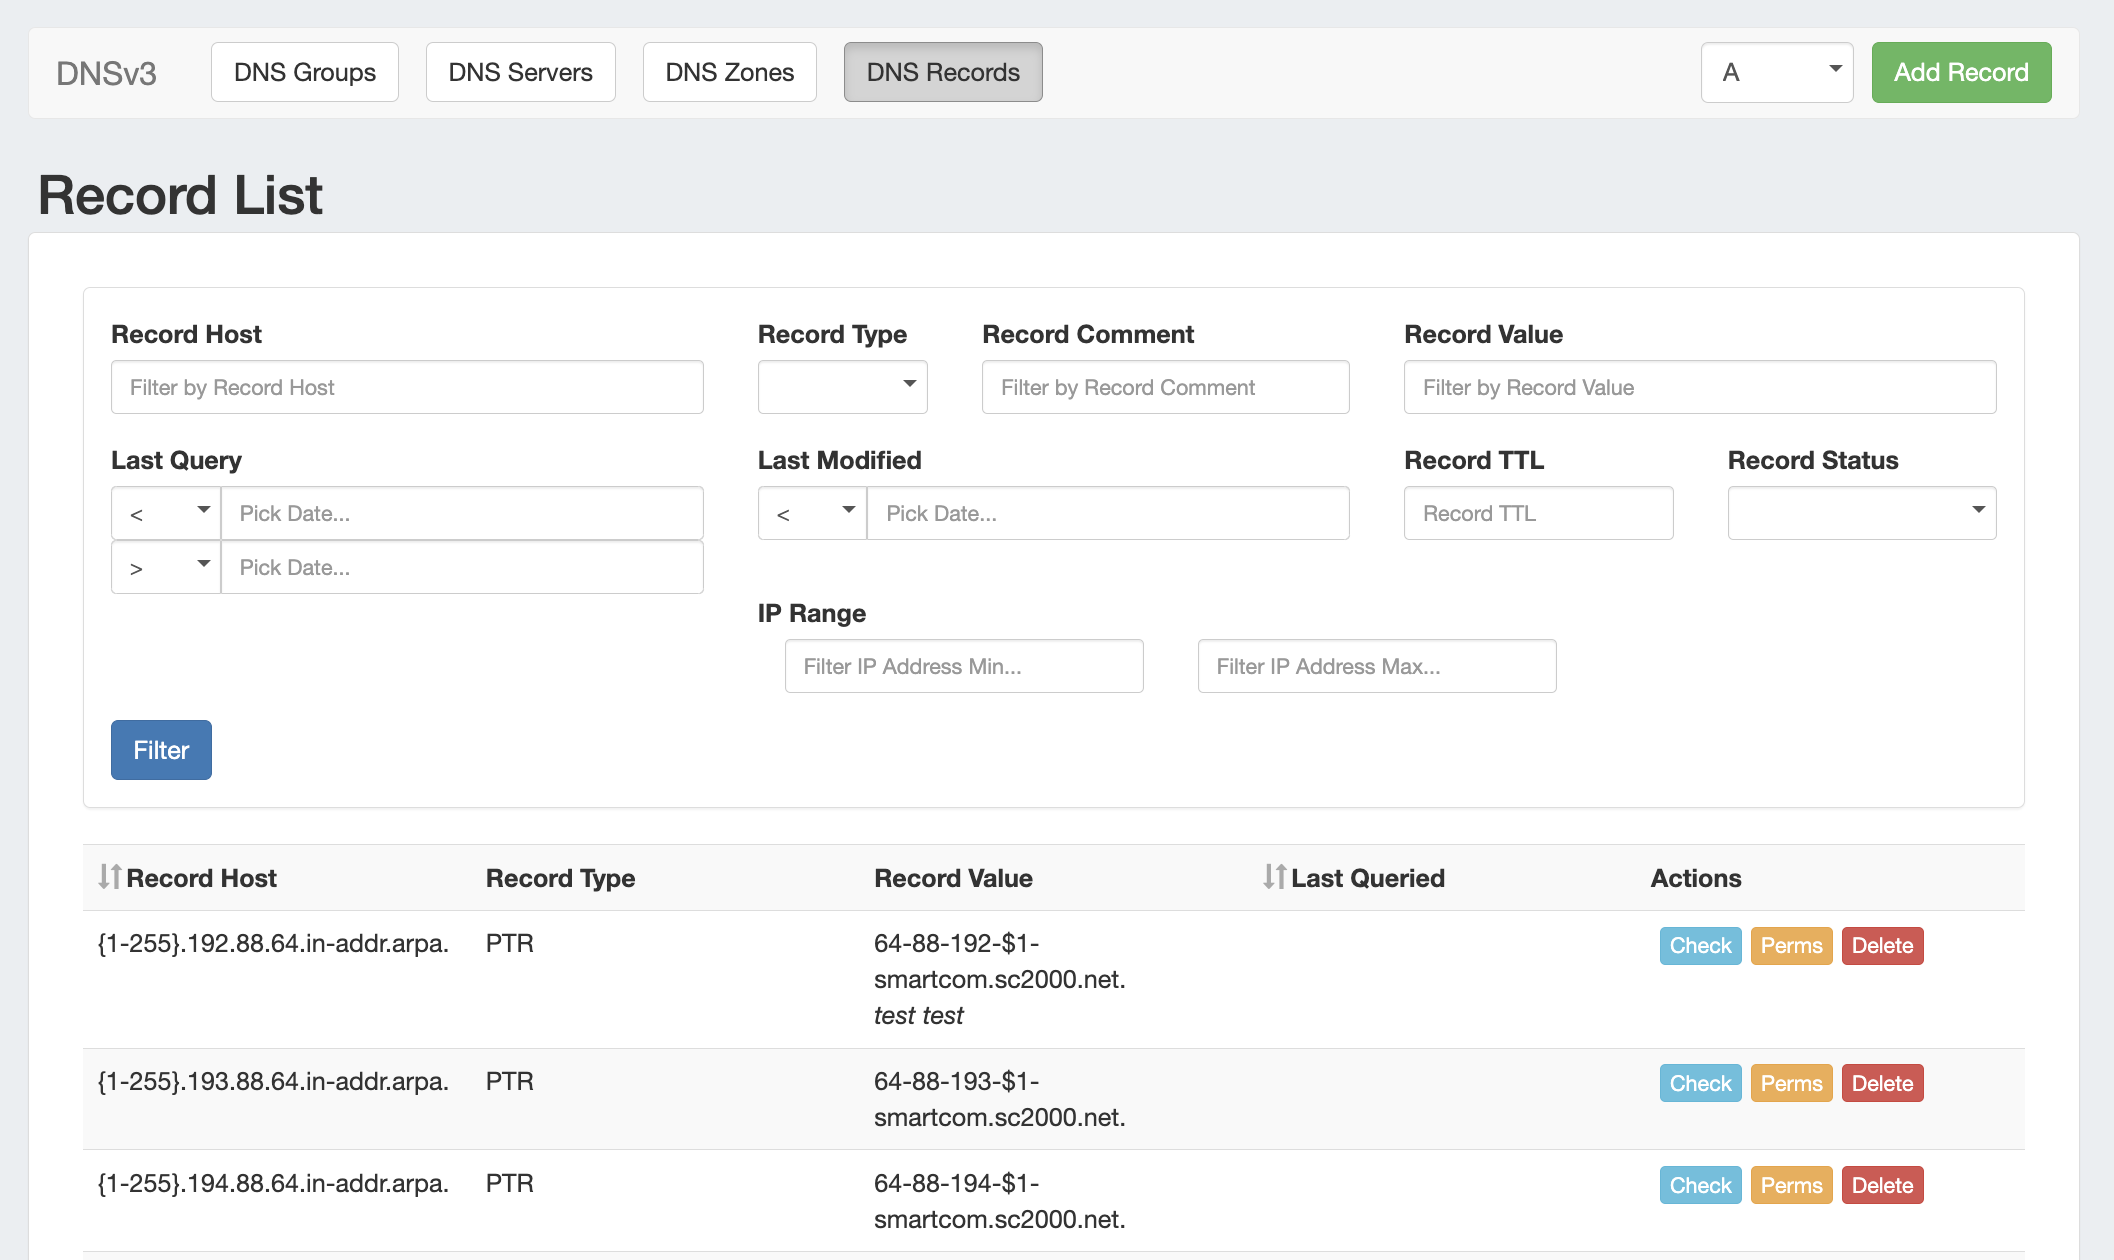
Working with Records - DNS Records sub-tab
The DNS Records sub-tab provides a global list records for expedited searching, filtering, adding, and editing of DNS Records.
From the DNS Tab, click on the "DNS Records" sub-tab button, or select it from the DNS dropdown menu.
All DNS records available in ProVision displays in a single Record List, along with Host, Type, Value, and Last Queried information.
Filter Records
Search for specific records by filtering by Host, Type, Comment, Value, Last Query, Last Modified, Record TTL, or Status.
After entering your filter criteria, click "Filter".
Work with Records
For each record, you may:
- Click the "Check" button to run an DNS Monitor error check on the record
- Review or change record permissions by clicking "Perms" (Admin only)
- Delete the record by clicking "Delete"
- Review or Edit record details by double-clicking on the row for the desired record.
- Review record revision dates or enter your desired edit, then click "Save changes" to complete.
Add a New Record
Next to "Record List", select the desired record type, then click "Add Record".
Enter the record information for the record type. When done, click "Save Changes".
Additional Information
...