Peering Sessions
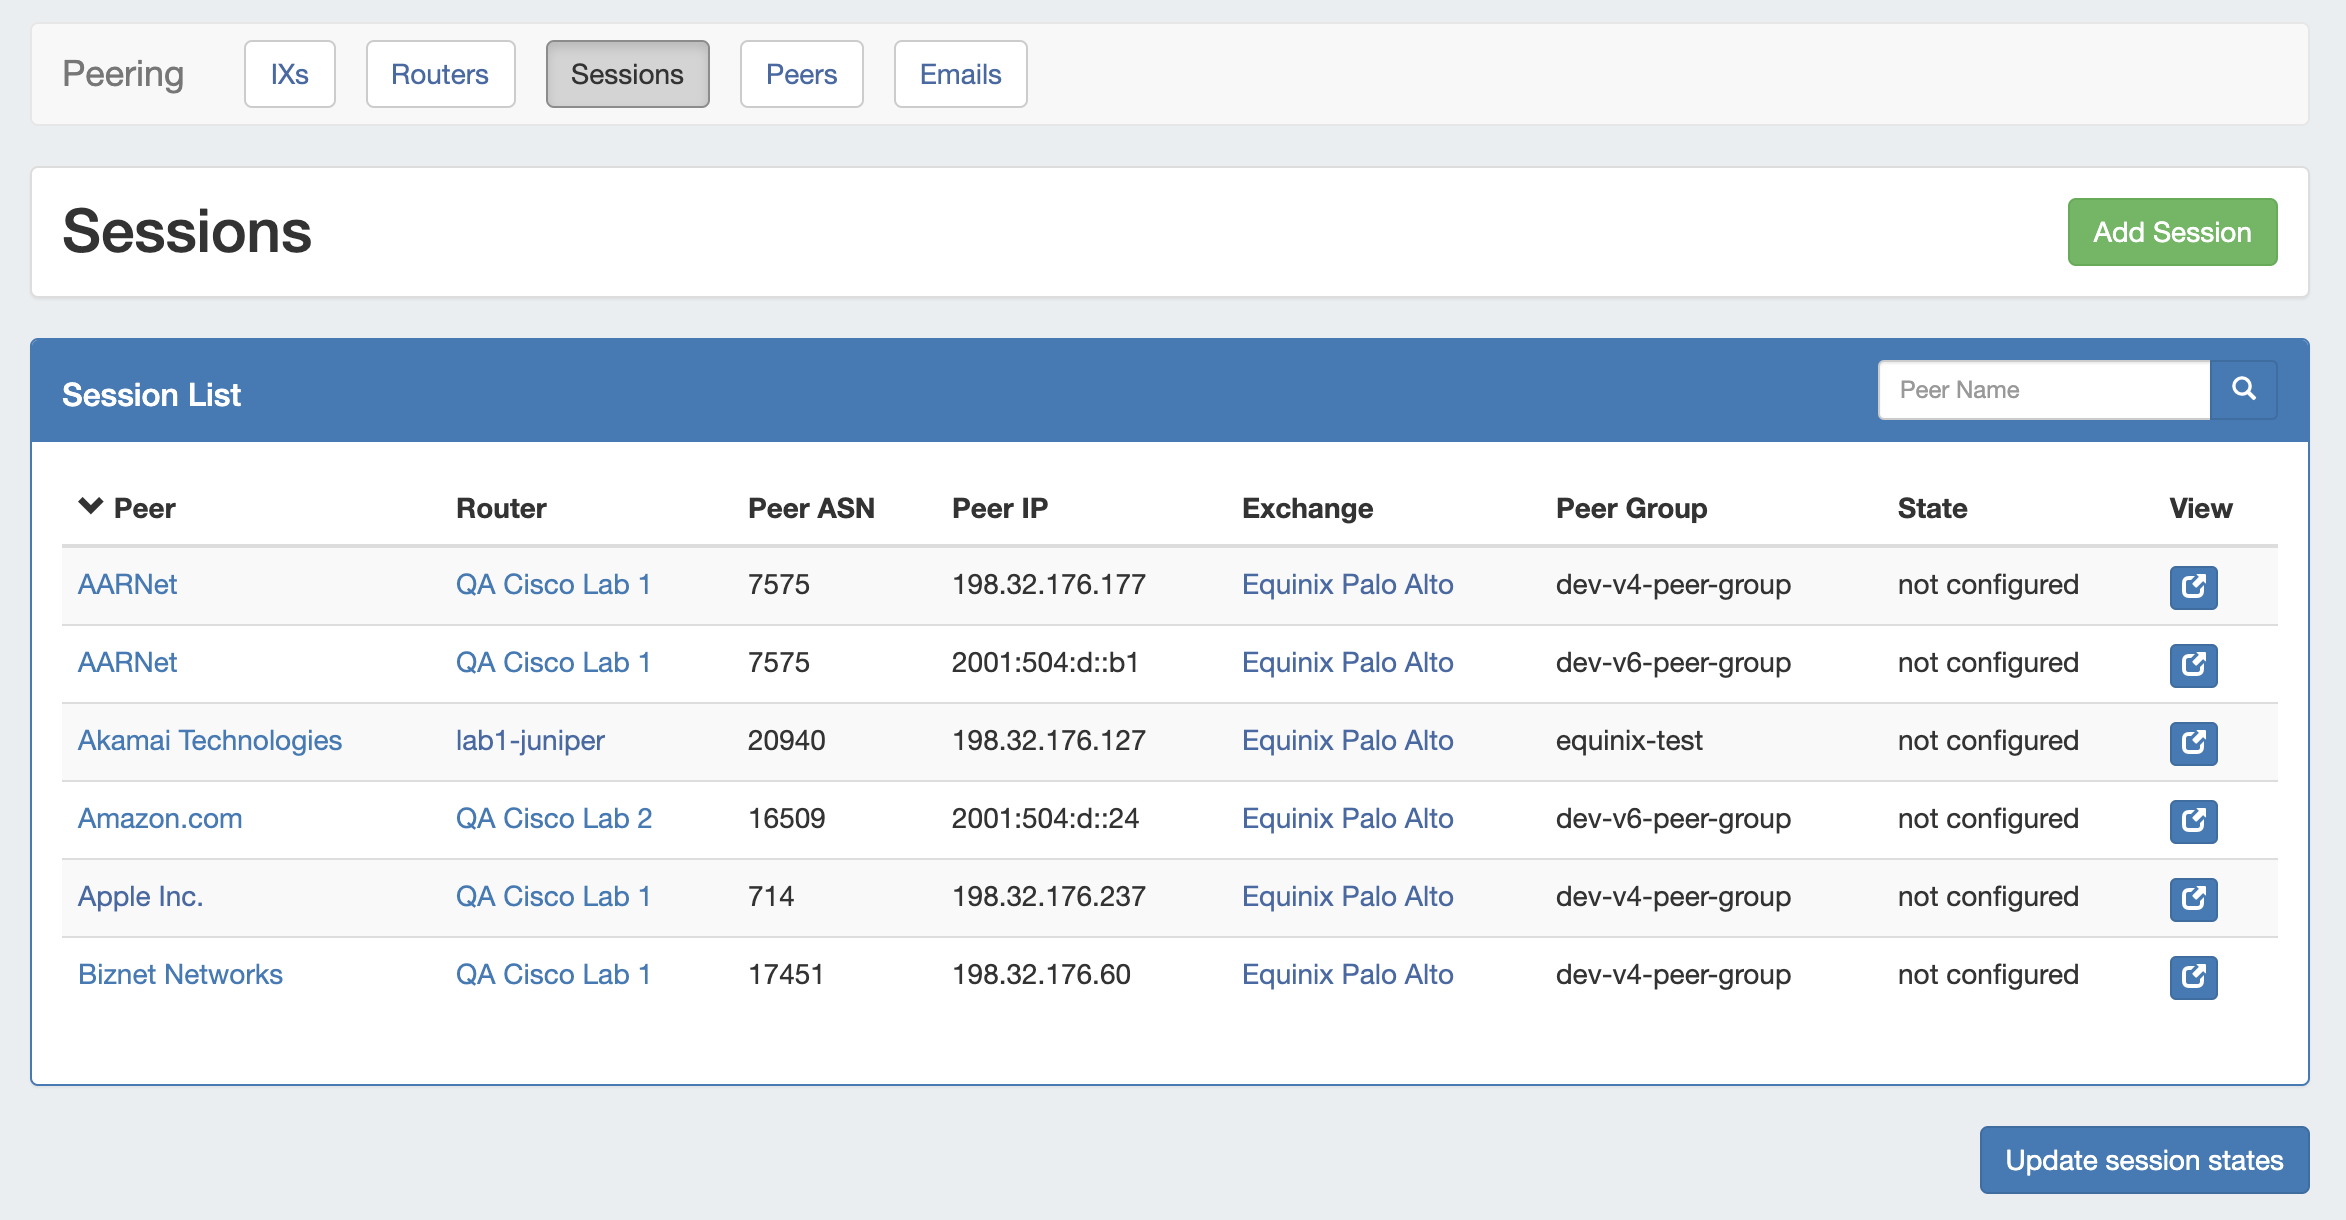 Image Added
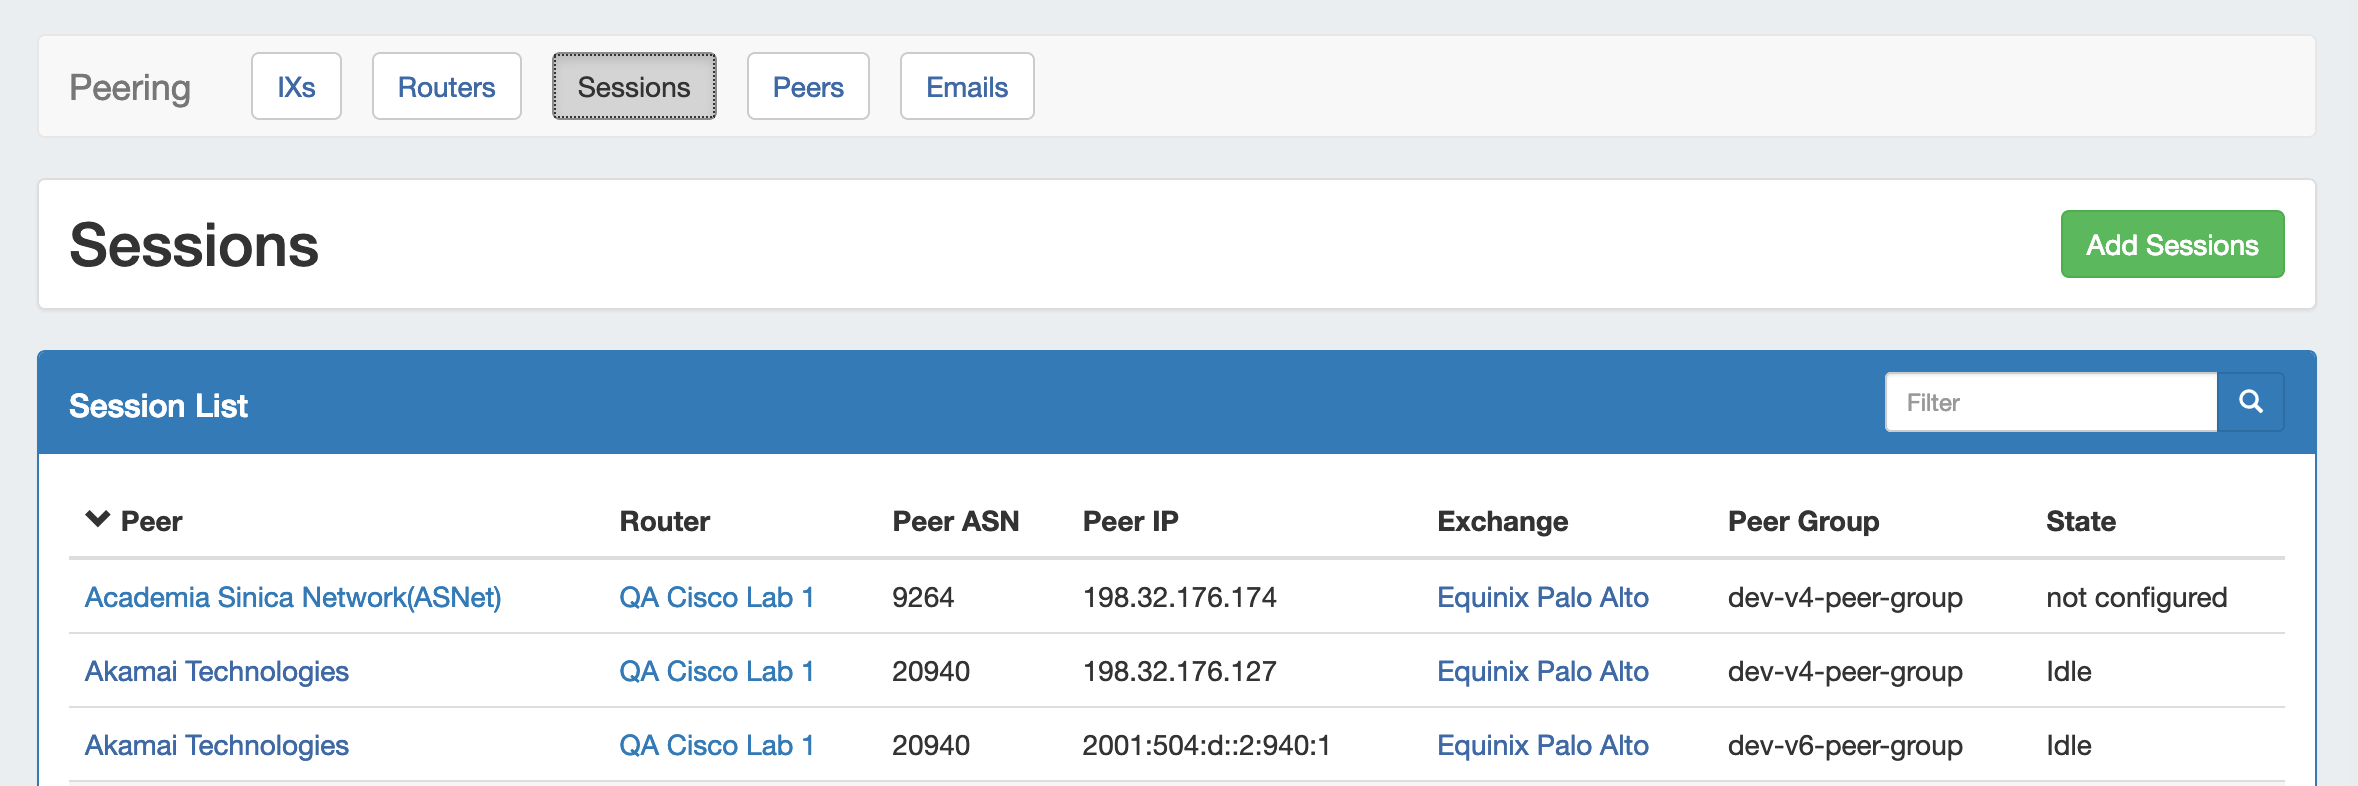 Image Removed
The Sessions subtab is where current sessions may be added, managed, and updated.
...
| Expand |
|---|
| title | Add a New Session... |
|---|
|
Click "Add Session" from the Peering → Sessions sub-tab. In the Create New Session Form, type the session information, selecting the appropriate exchange type for the planned Peer. If using a Local Peer, "No Exchange" is an available option.  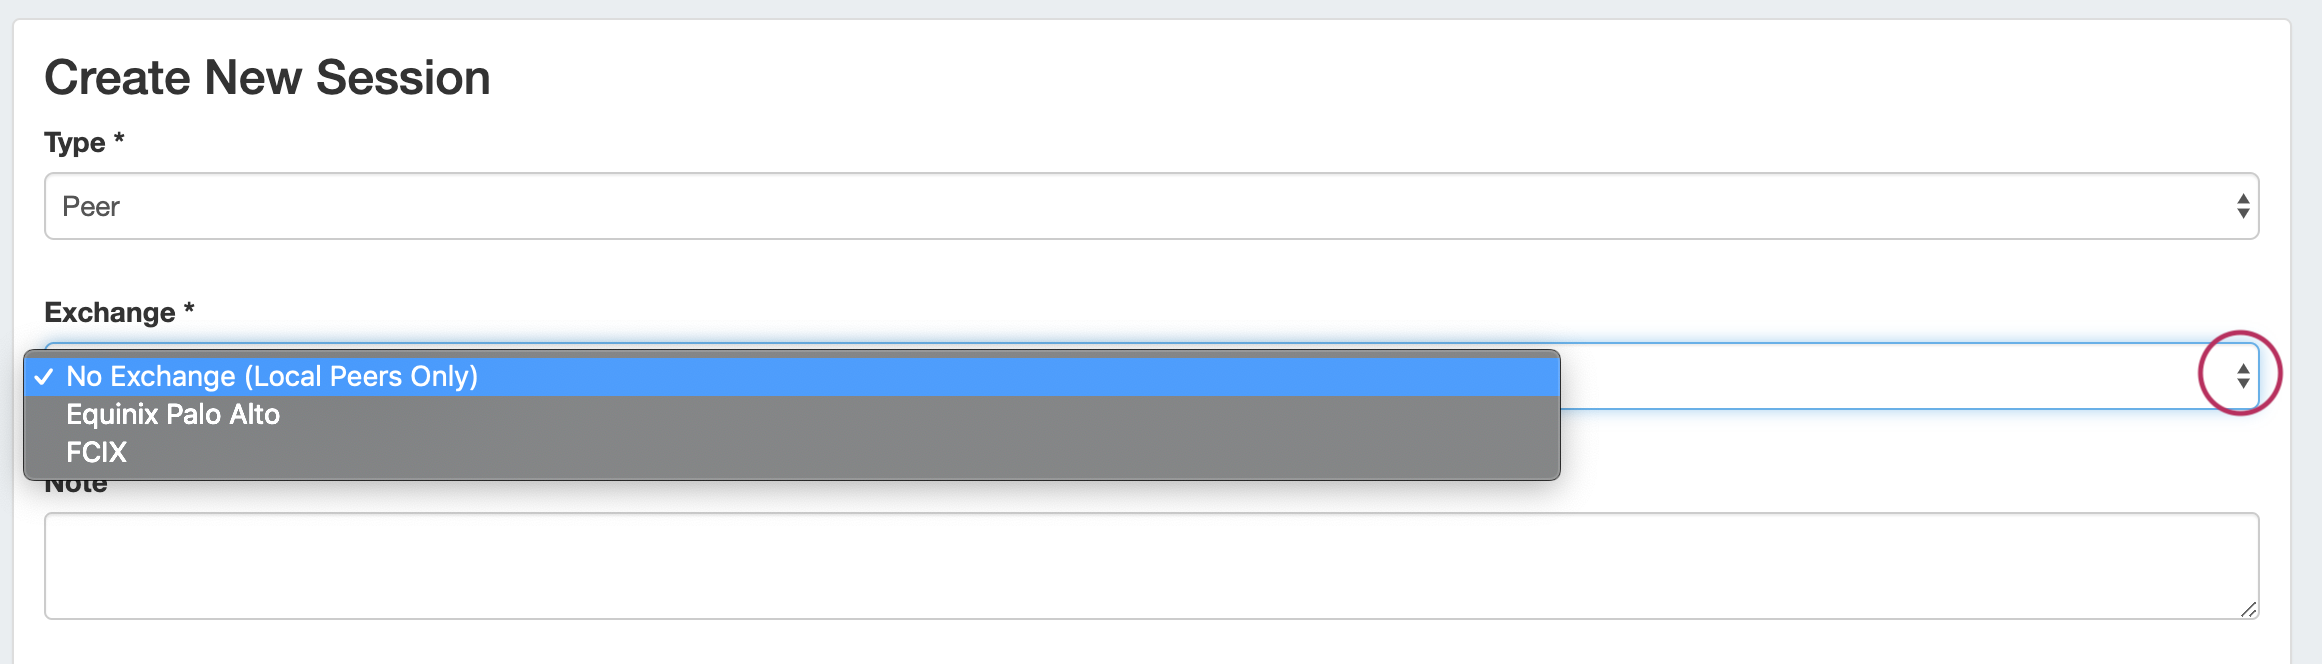
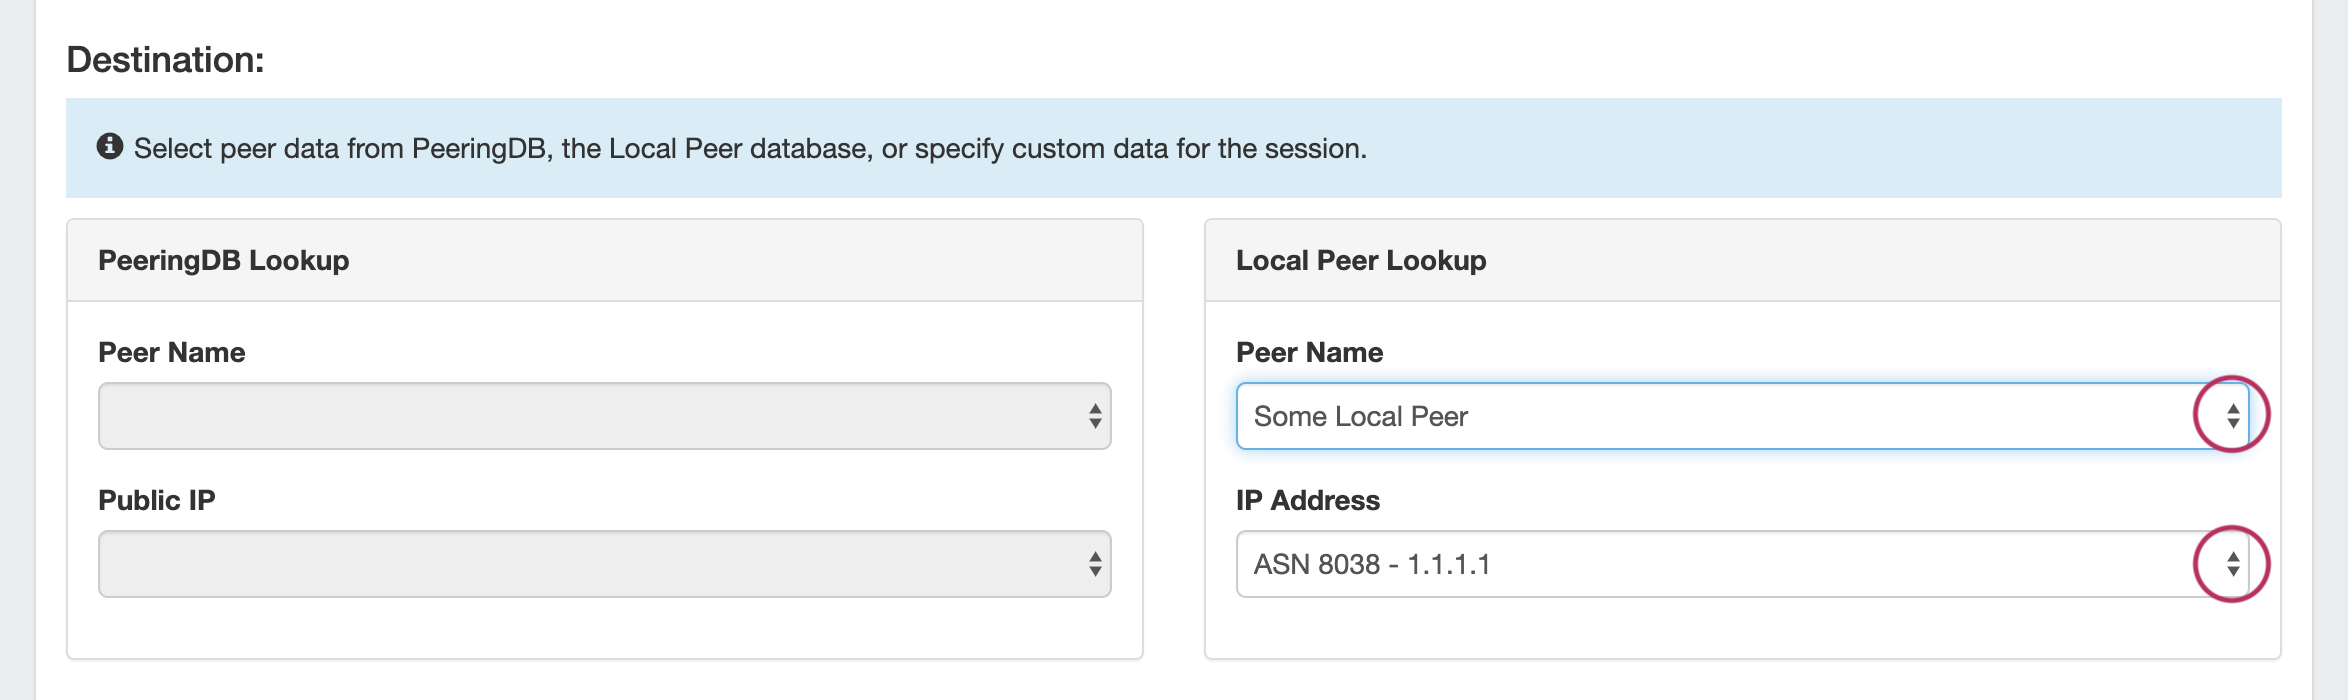
Select or Add DestinationUnder the Destination section, select or type in information for a peer. You may add Peer information from any of the three available methods: - Use PeeringDB Lookup to select a PeeringDB Peer (the destination fields will be automatically populated).
- Look up an existing Local Peer under "Local Peer Lookup" by selecting the peer name and IP address (the destination fields will be automatically populated).
- Manually add a new Local or Custom Peer, by directly typing the Peer Name, ASN, and IP in the Destination fields.
  After selecting the Peer Destination information, you have the option of configuring the router immediately after saving. When done, click the "Create" button.
| Info |
|---|
If "Configure router after saving" is selected, the router will configure immediately after session creation and automatically load the session page when done. While Configuring, you may either wait for the configure to complete and automatically load the session details page, or immediately view the details by clicking "View Session" while the configure continues in the background. |
The new Session will be added to the Session List. 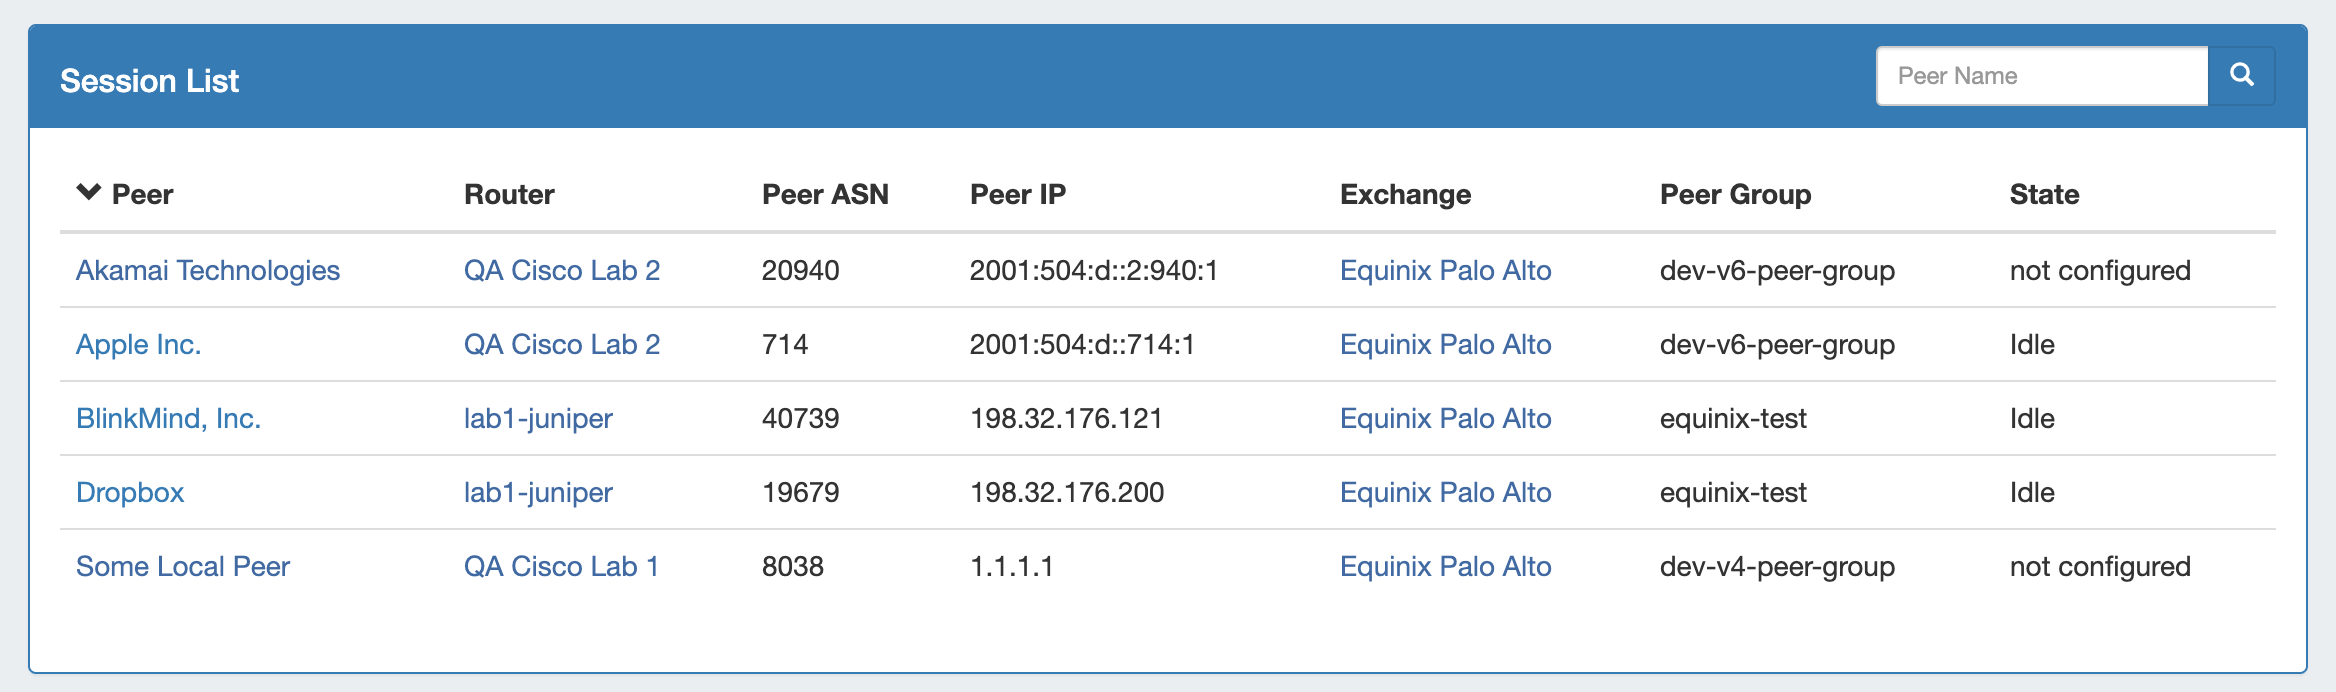 Image RemovedImage Added Image RemovedImage Added
|
Manage a Session (The Session Details Page)
...