| HTML |
|---|
<div id="google_translate_element"></div>
<script type="text/javascript">
function googleTranslateElementInit() {
  new google.translate.TranslateElement({pageLanguage: 'en'}, 'google_translate_element');
}
</script>
<script type="text/javascript" src="//translate.google.com/translate_a/element.js?cb=googleTranslateElementInit"></script> |
Working with Domains
This page provides detailed instructions on performing specific tasks in ProVision's VLAN Manager. Before reading this section, please ensure that you are familiar with navigating to the VLAN areas, including the VLAN Sidebar, VLAN Utilization area, VLAN Manage, and VLAN Advanced. For a broader overview of the VLAN system, its workflow, and basic navigation through the available VLAN pages, please refer to the VLAN page.
| Table of Contents |
|---|
Working with Domains
Viewing / Managing Domains
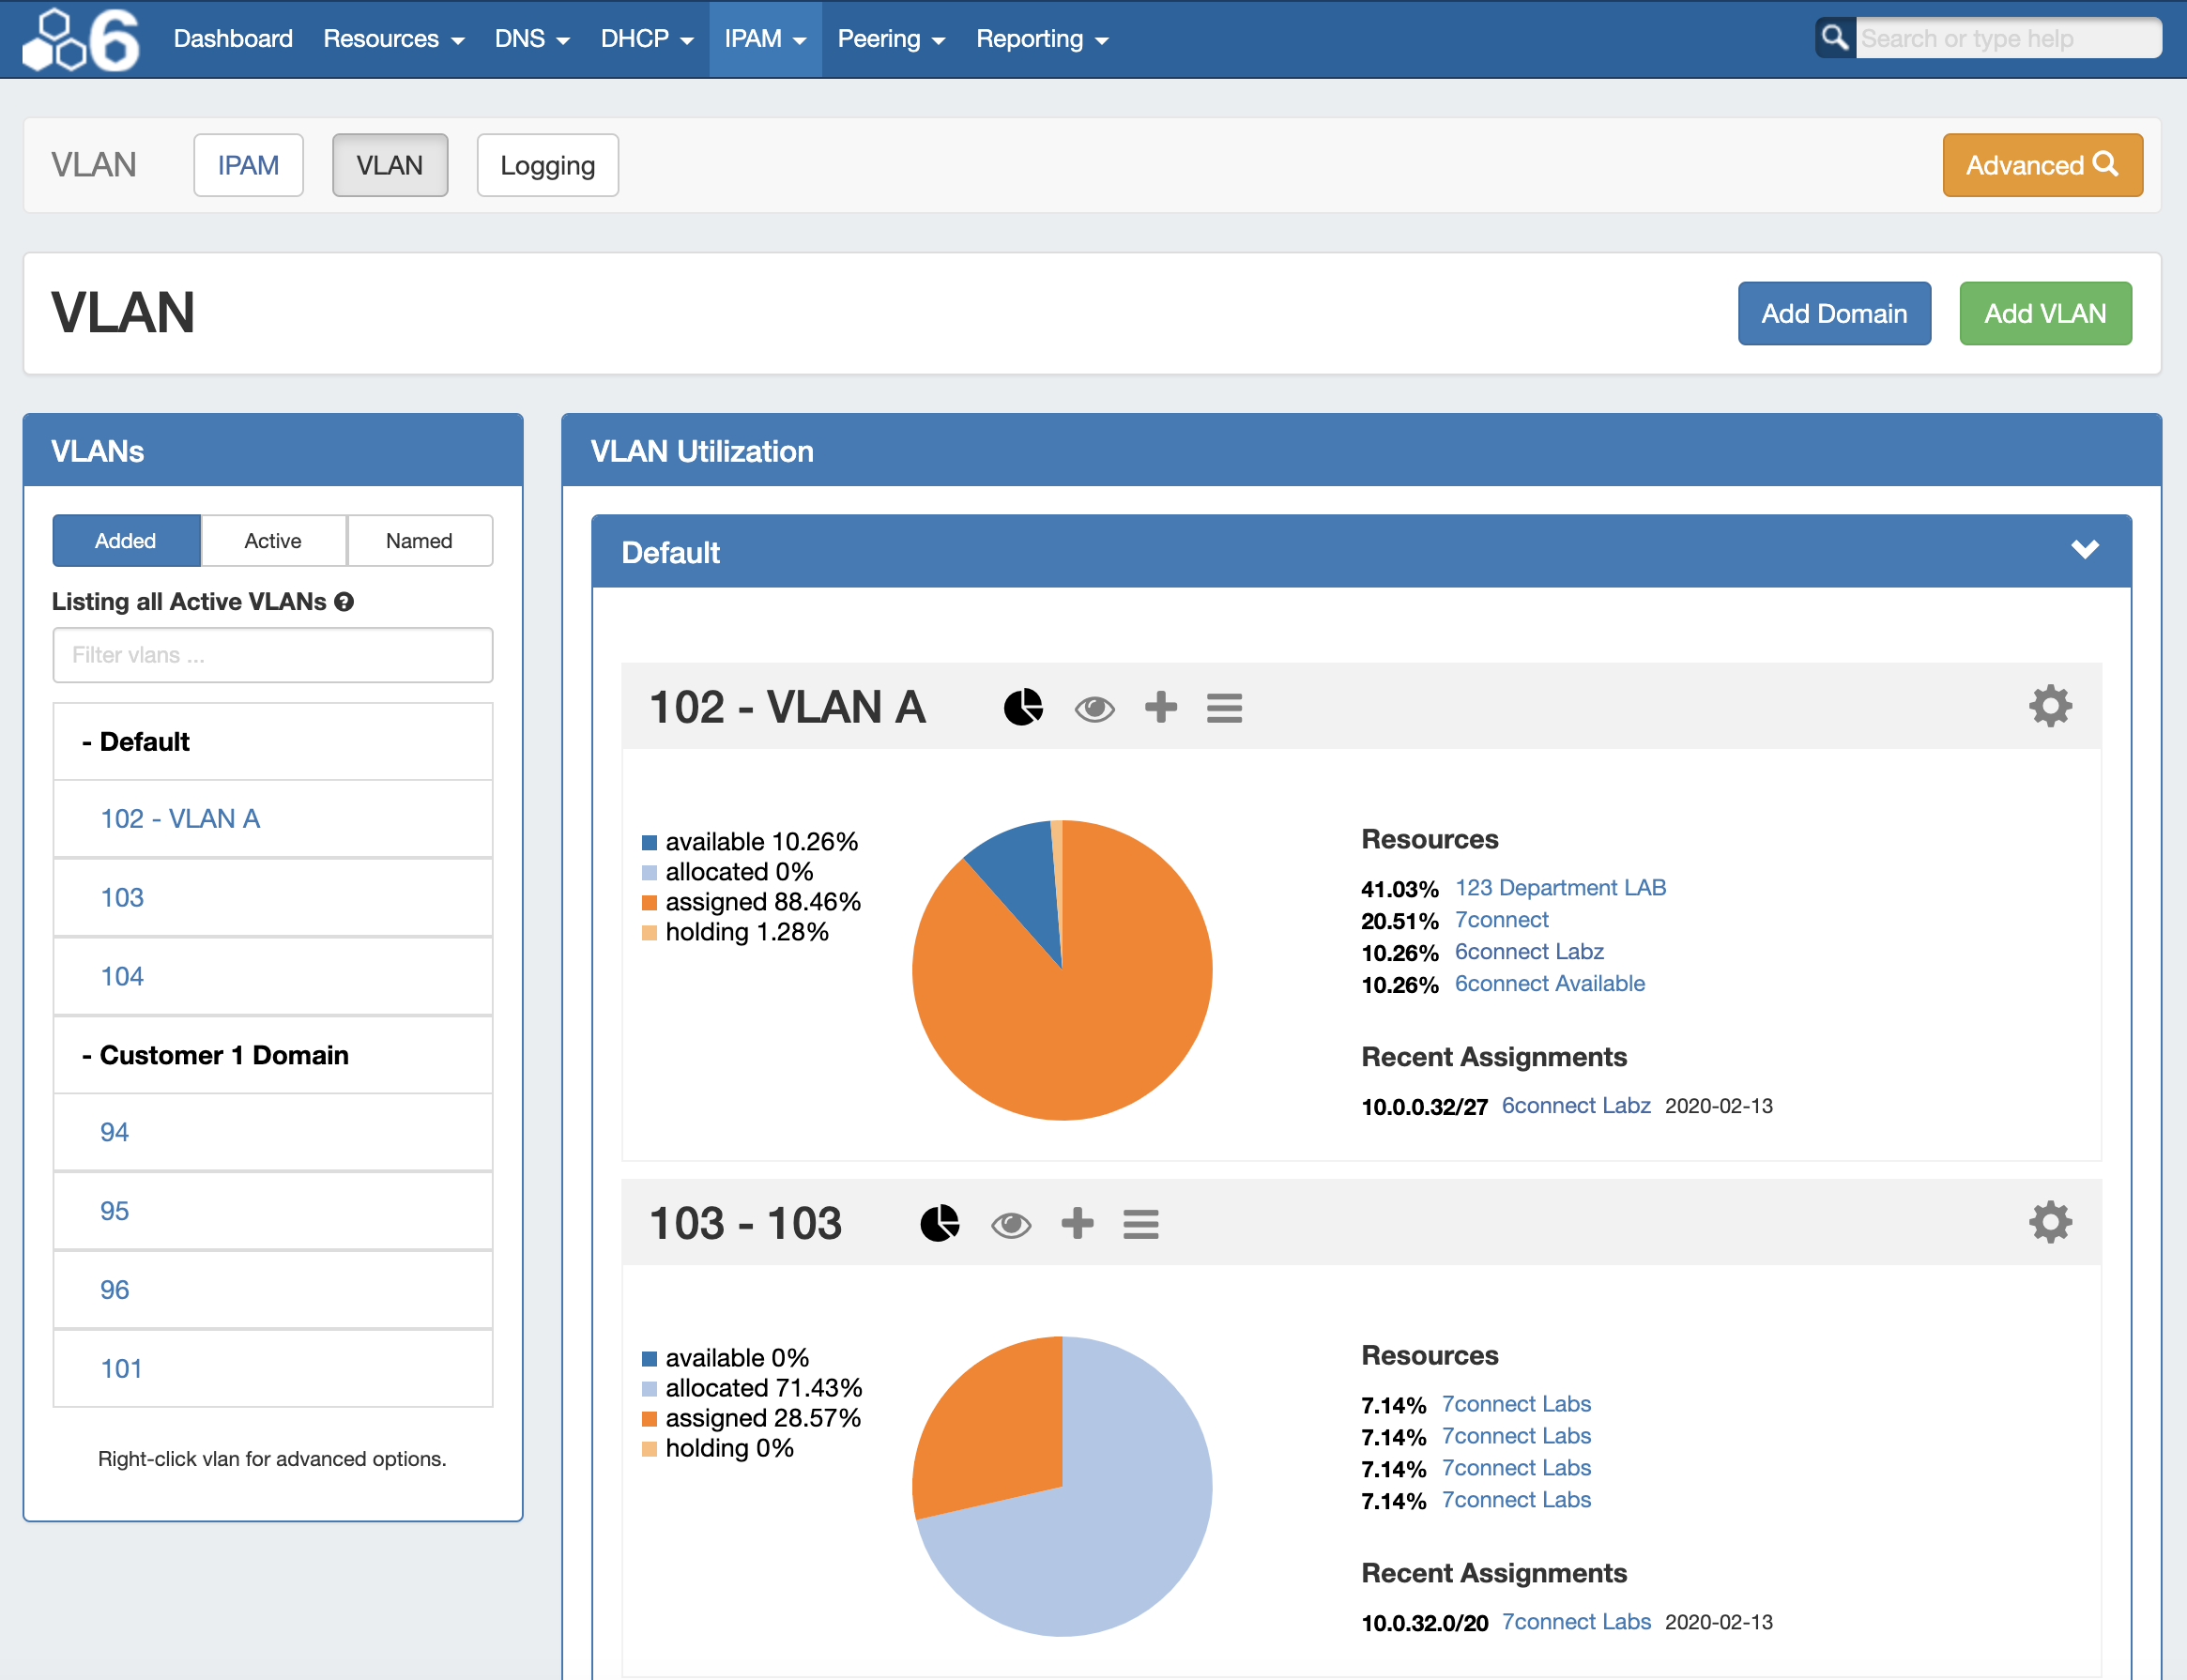
You may view active domains from the VLAN Home Sidebar, the VLAN Home Utilization area, or from VLAN Advanced.
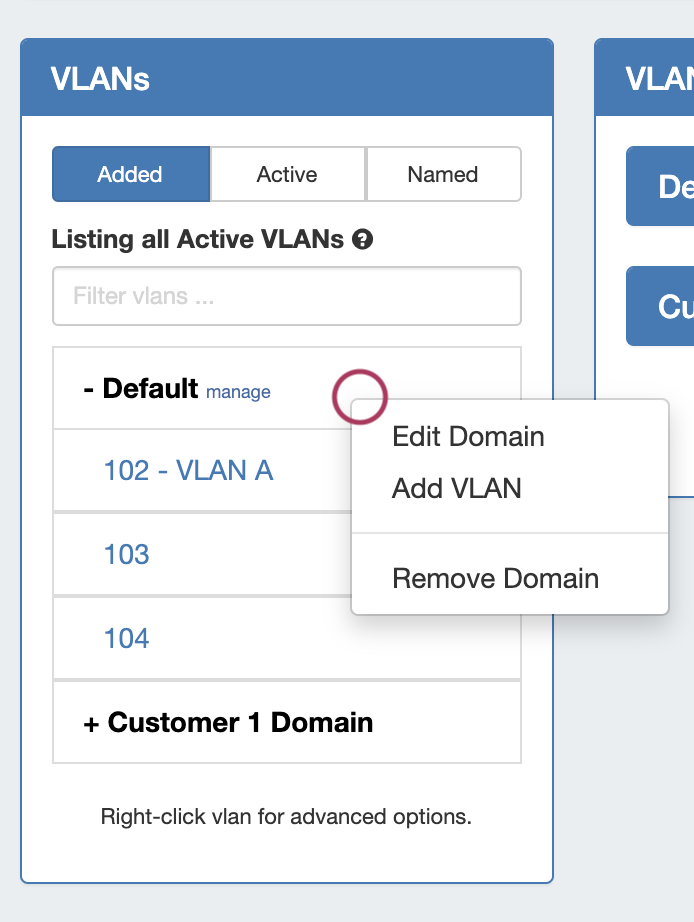
VLAN Sidebar
The VLAN sidebar lists the domains and VLANs that have been added to ProVision. Here, you can search for domains / VLANs by name, filter by Added/Active/Named status, and access common tasks.
| Column | ||
|---|---|---|
| ||
 |
| Column | ||
|---|---|---|
| ||
VLAN Sidebar Domain Actions:
|
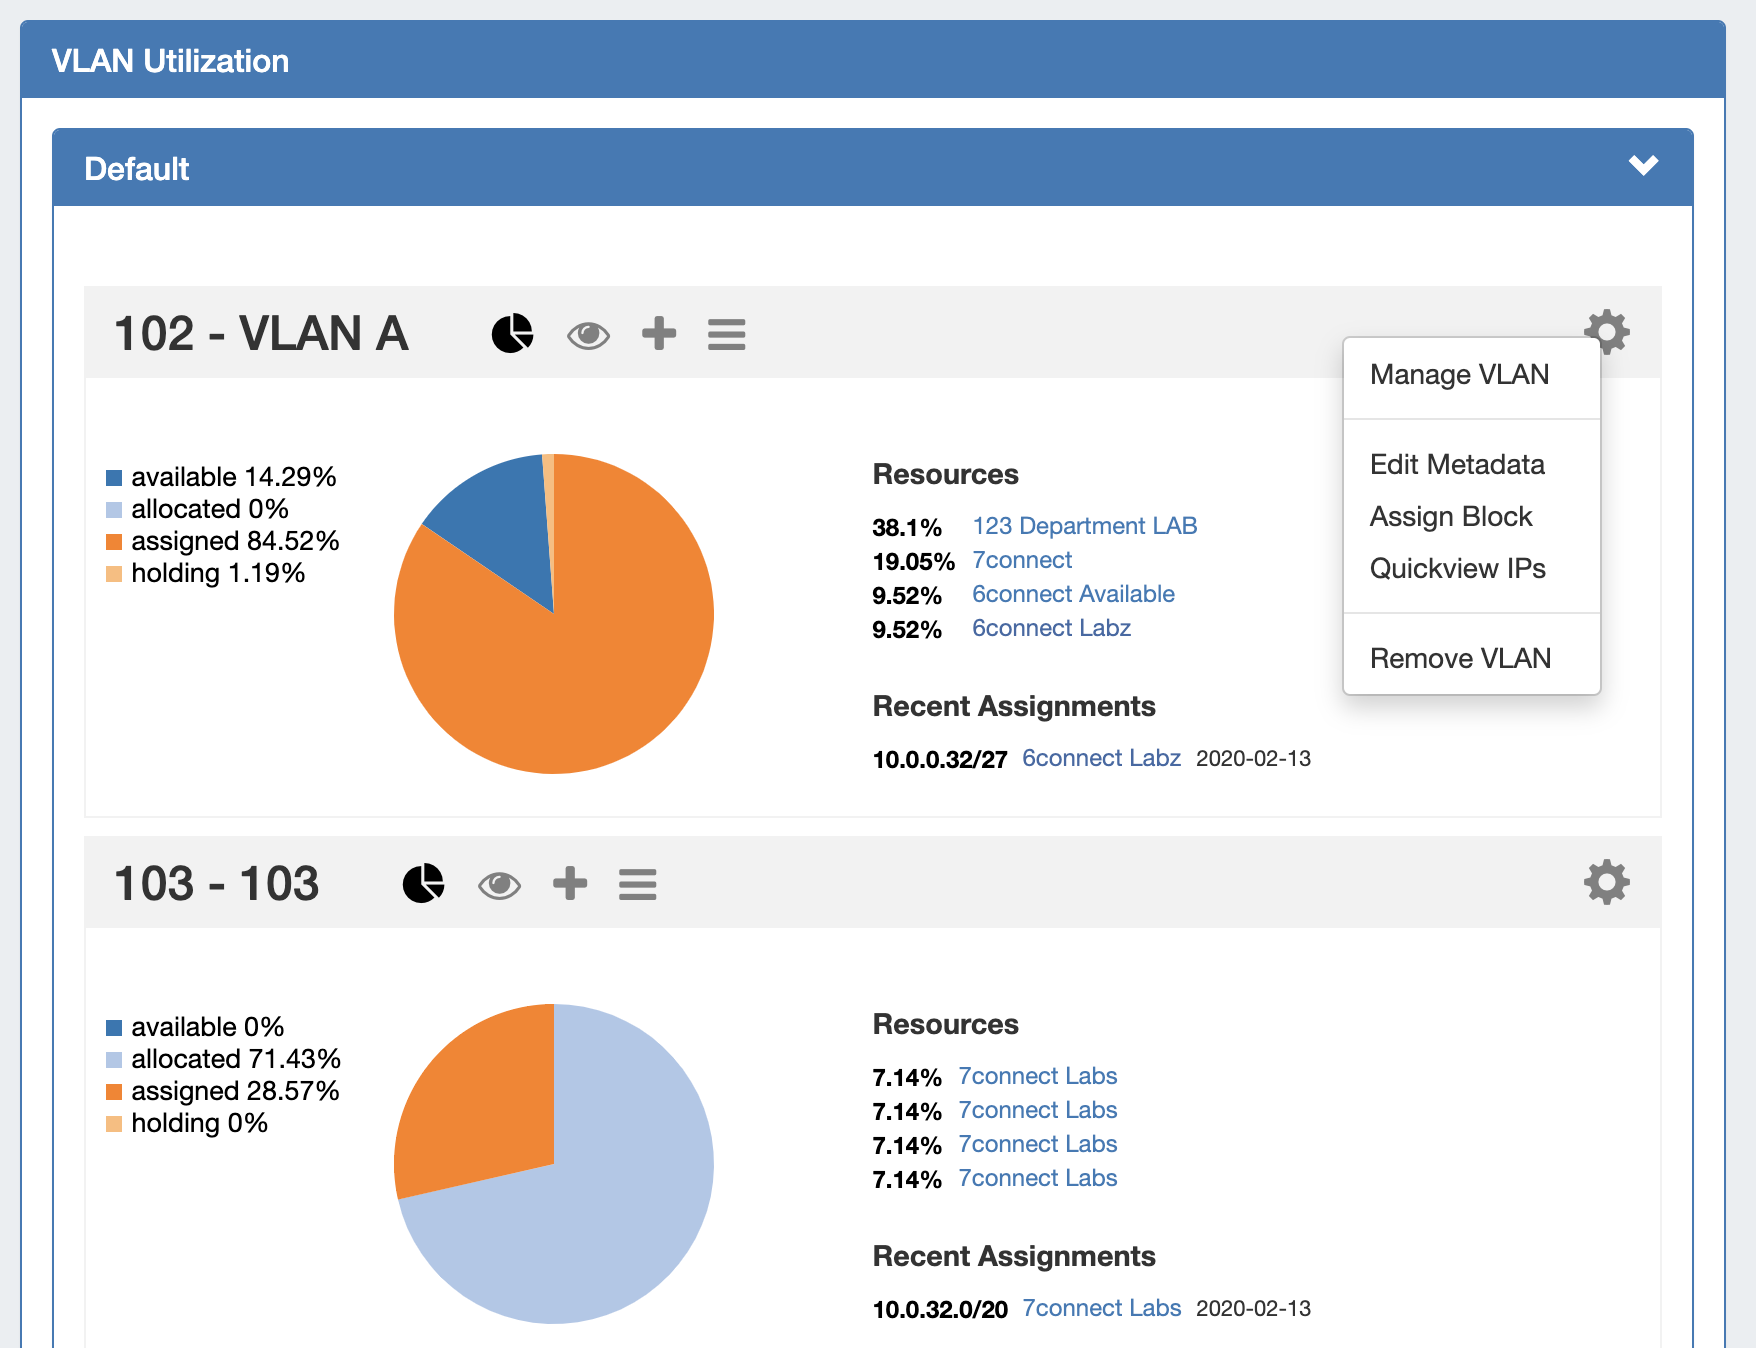
VLAN Utilization
The VLAN Utilization area displays all domains and VLANs added to ProVision in collapsable modules. Here, you may view all VLANs under a domain with their utilization data, and perform VLAN level managements tasks.
VLAN Advanced (Global View)
VLAN Advanced displays a sortable and filterable list of all the domains / VLANs added to ProVision and the associated metadata.
Open VLAN Advanced by clicking the Advanced button.
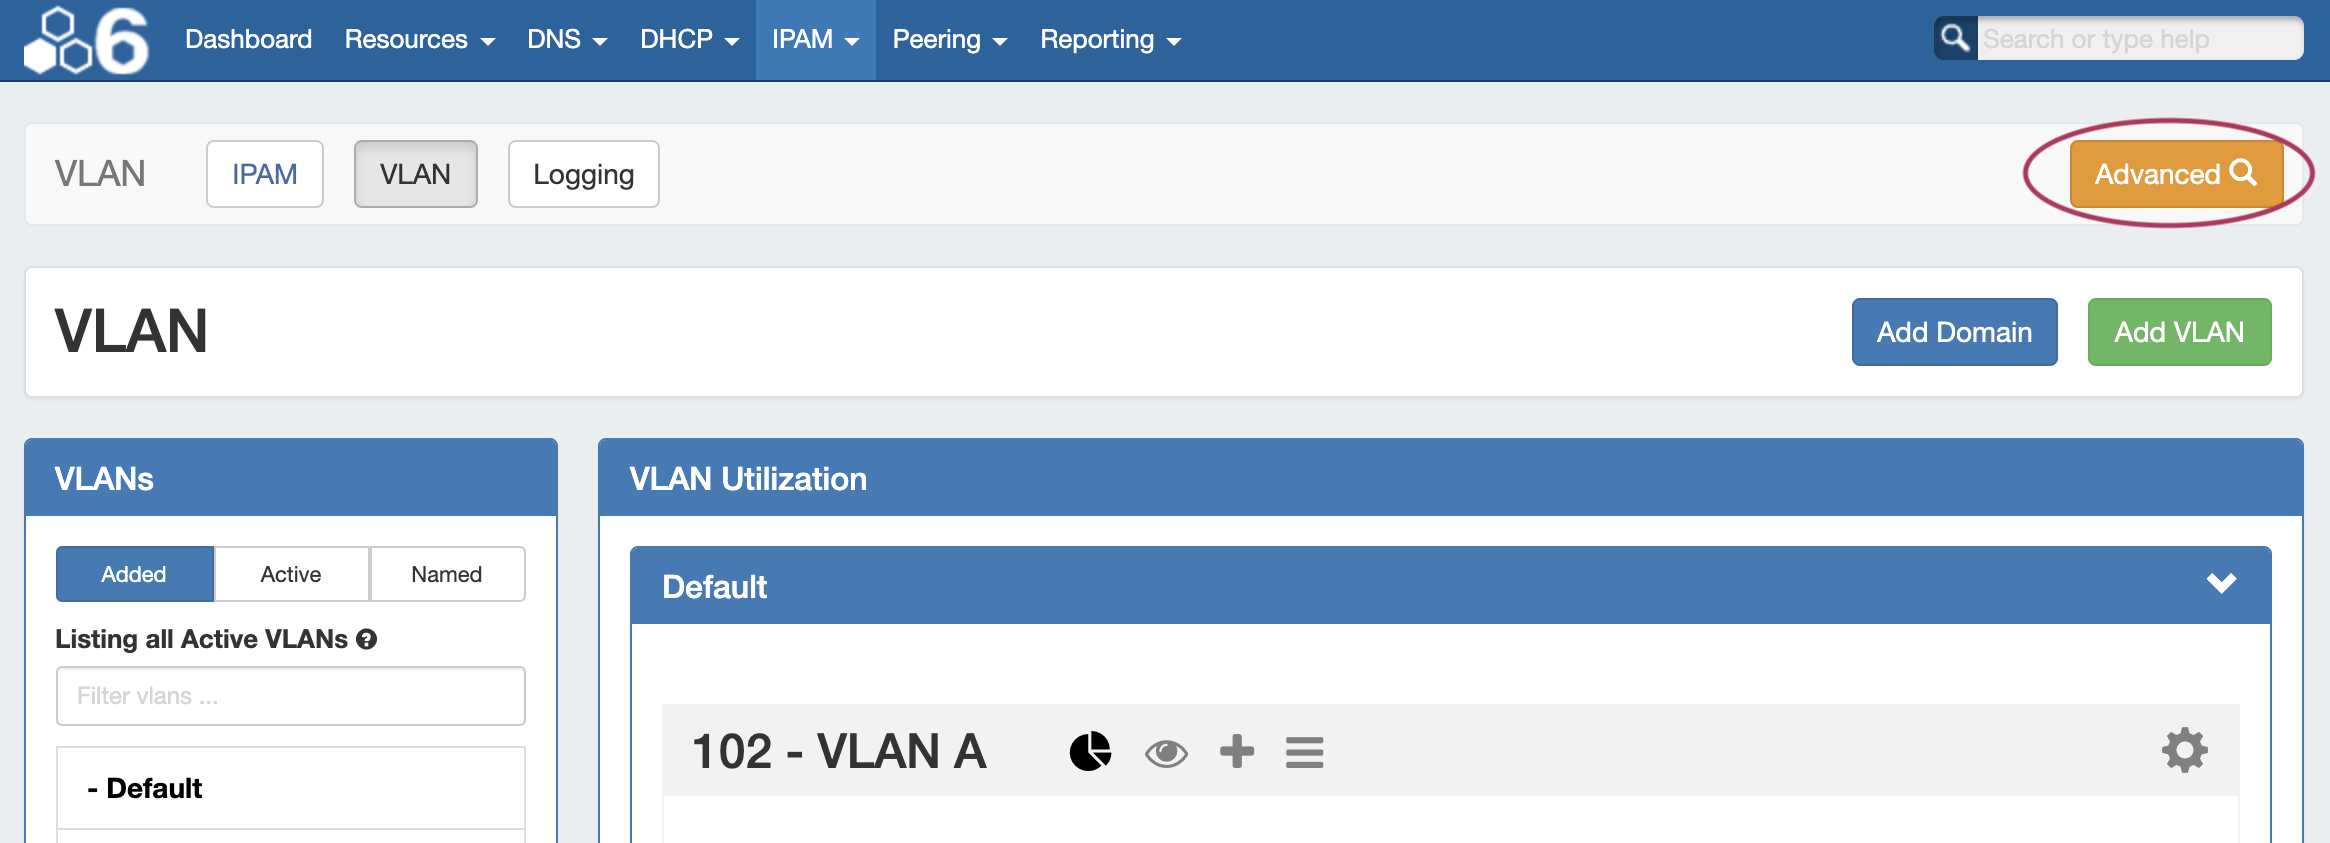
From this page, you may add domains or VLANs, edit a domain (by clicking the "List" icon), export the list, and perform various actions from the VLAN Action Menu (right click on a VLAN entry).
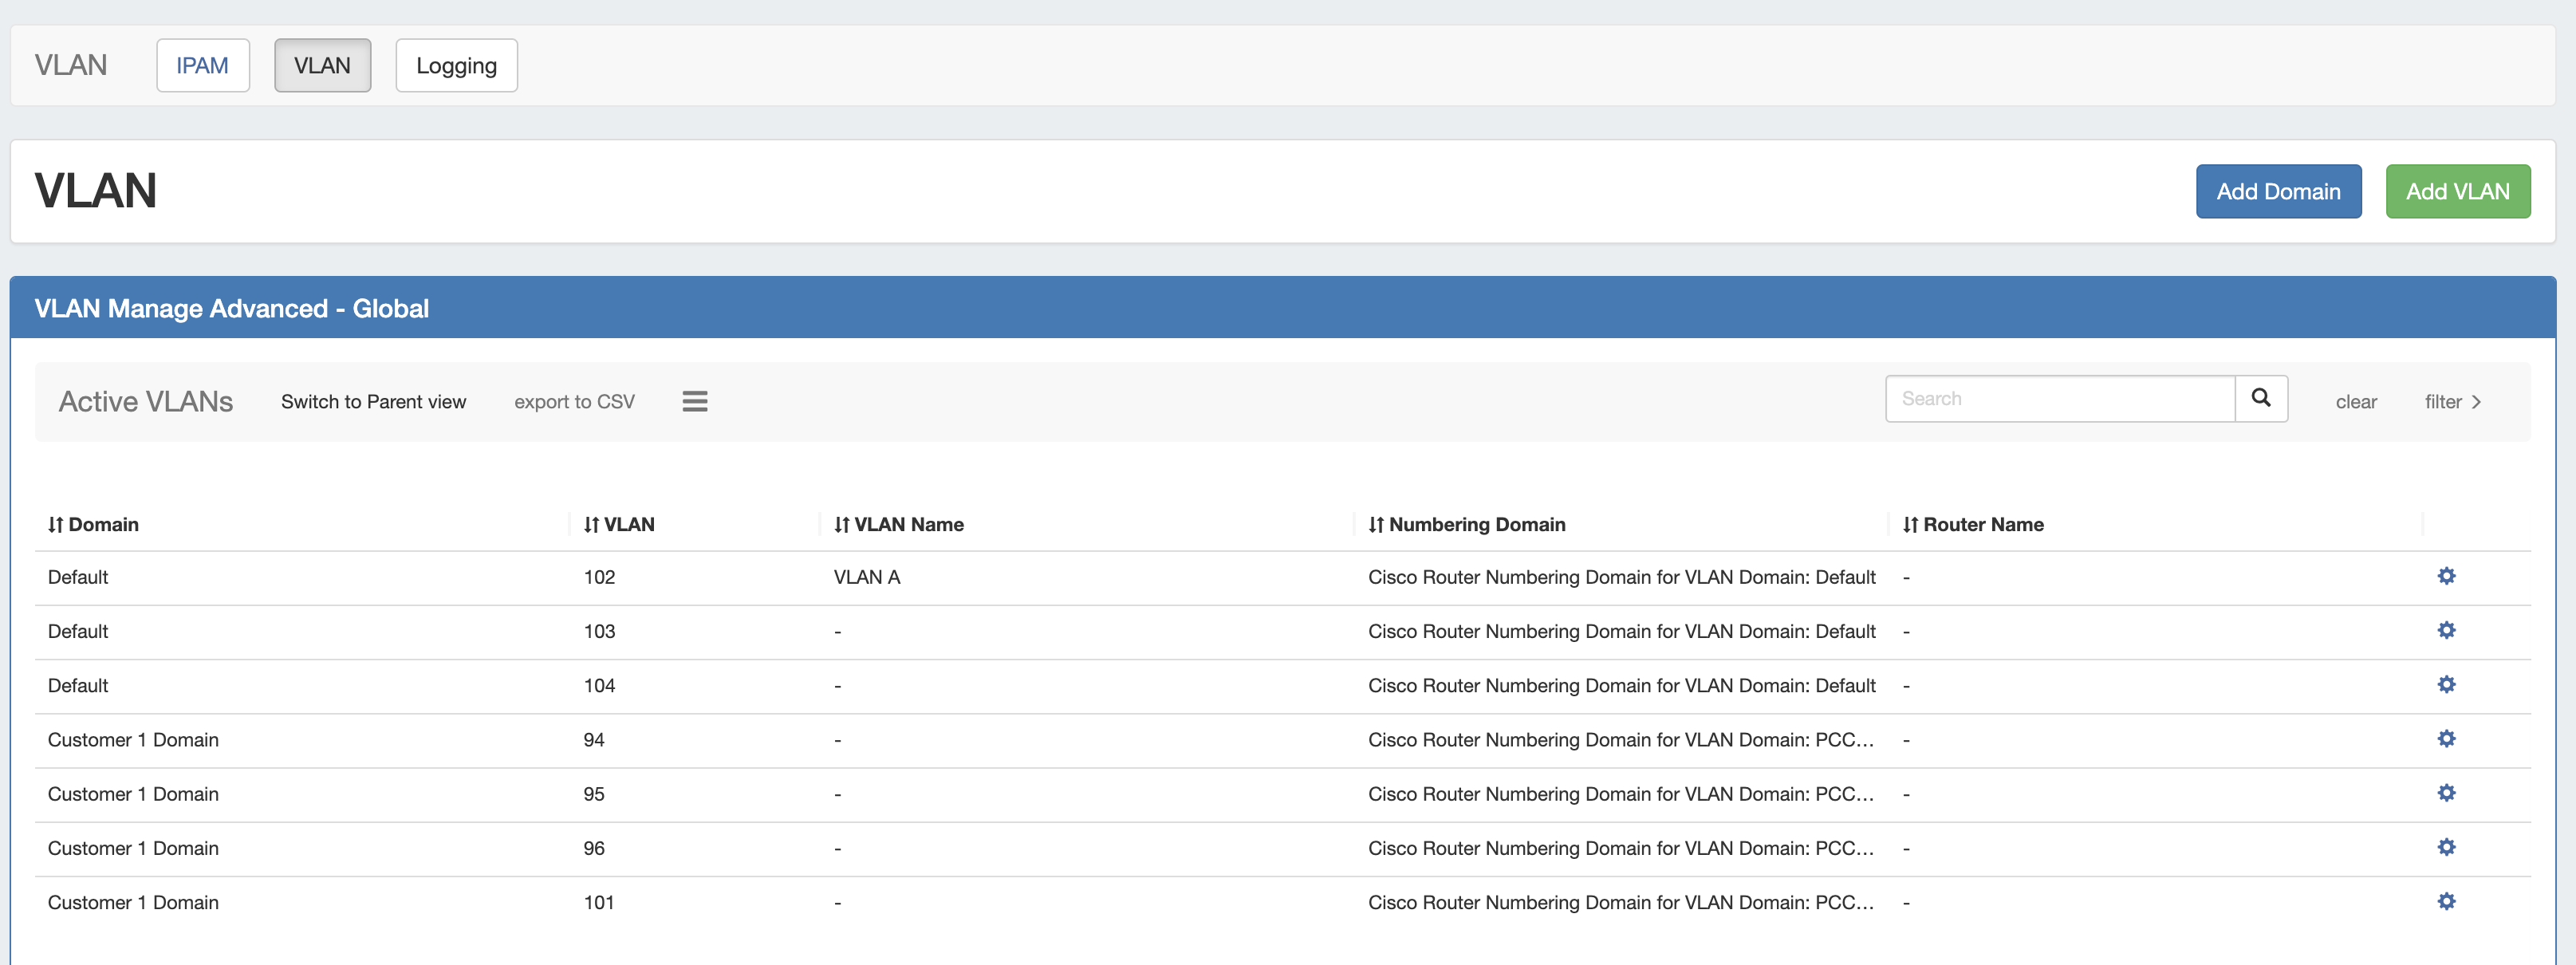
VLAN Advanced (Global View) Actions:
- Sort the list by clicking the column header(s)
- Filter the list by clicking on the "filter >" link, then select the filter criteria and click Apply
- Search for a specific domain name, VLAN name, VLAN number, router, or metadata field value by typing the search term into the search box, then hitting enter or click the Search icon.
- Export the list to .csv by clicking "export to CSV" in the list header
- Edit or remove a domain by clicking on the Edit Domain panel (list icon)
- Add domains or VLANs by clicking the Add Domain or Add VLAN buttons
Additionally, you may right-click on any VLAN while in this view to open a VLAN action menu with the following options:

- Edit VLAN (opens the Edit VLAN panel for that VLAN)
- Edit domain (opens the Edit Domain panel for the VLAN's domain)
- Manage VLAN (links to the VLAN Manage page for the VLAN)
- Remove VLAN
- Remove domain
Add Domain
Add a new domain by clicking the Add Domain button at the top of the VLAN Home page.
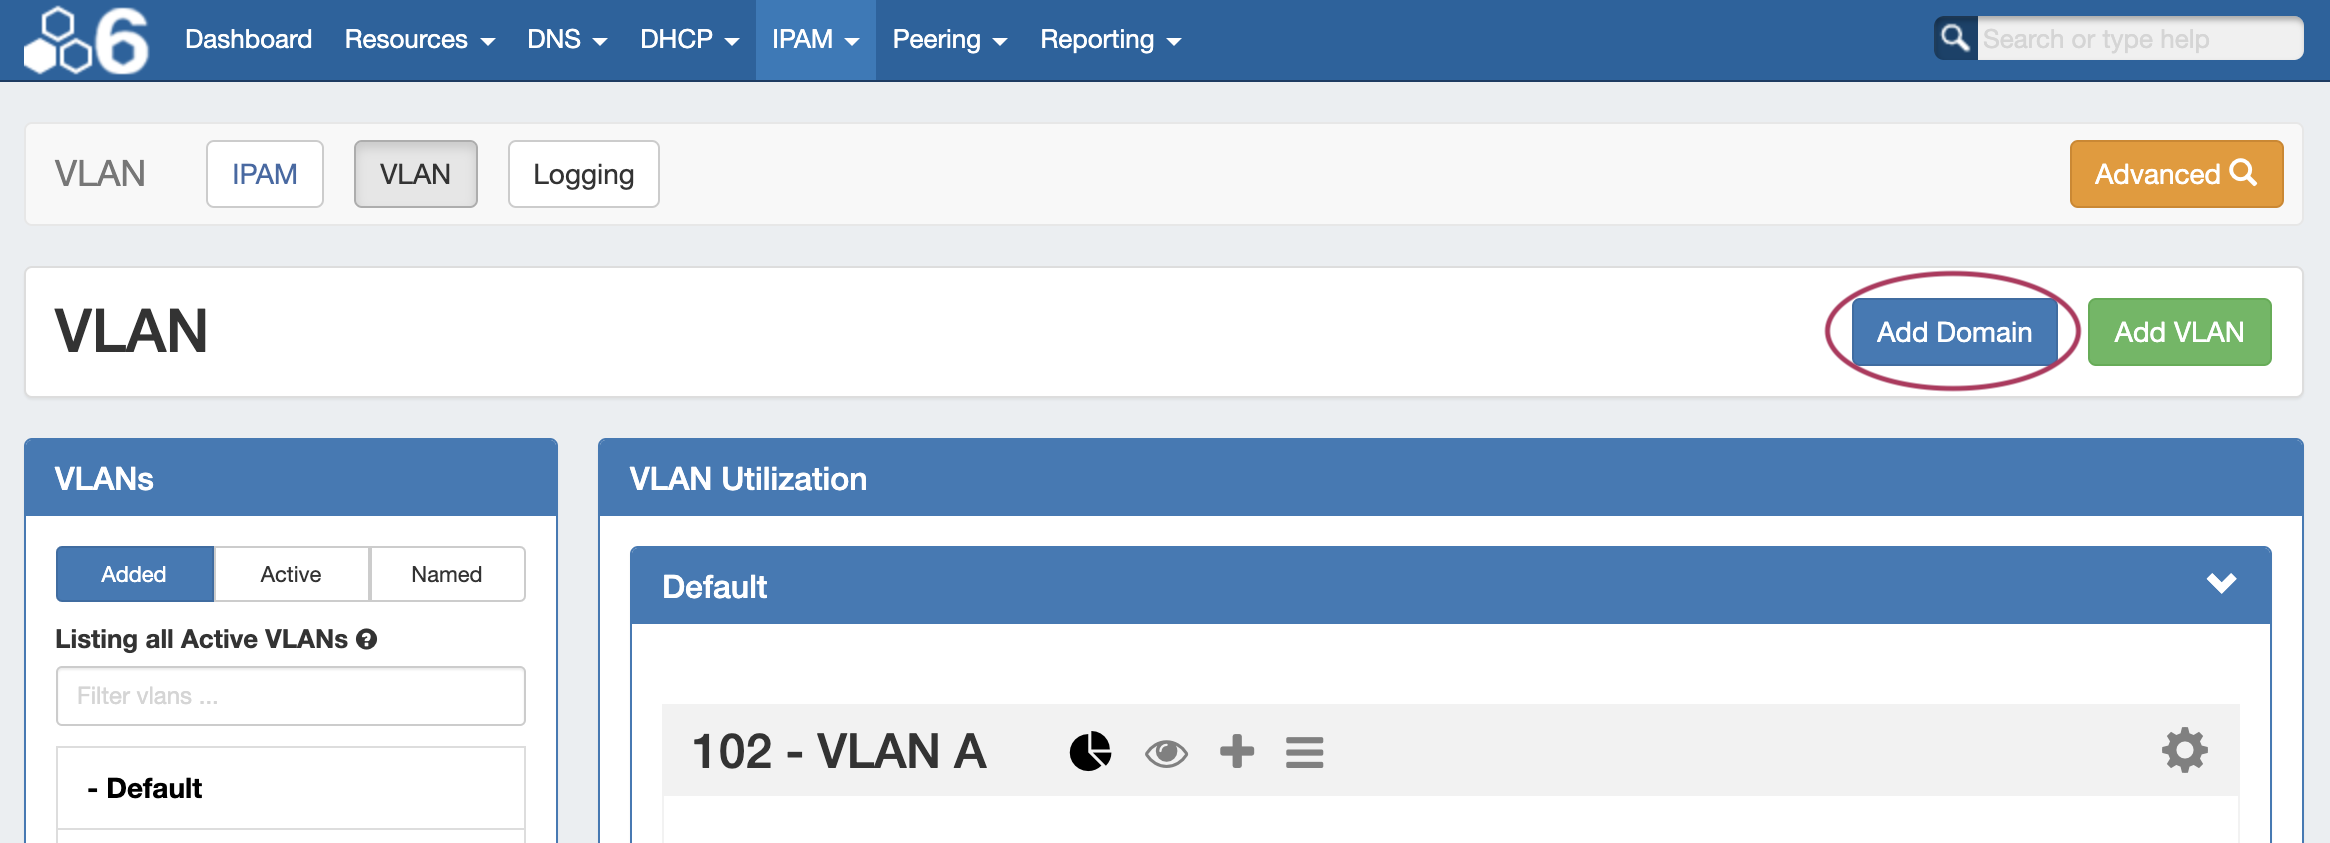
This opens the "Add Domain" page. Here, you can choose to add a domain by using a pre-set Numbering Authority range, or by creating a new range manually.
| Info | ||
|---|---|---|
| ||
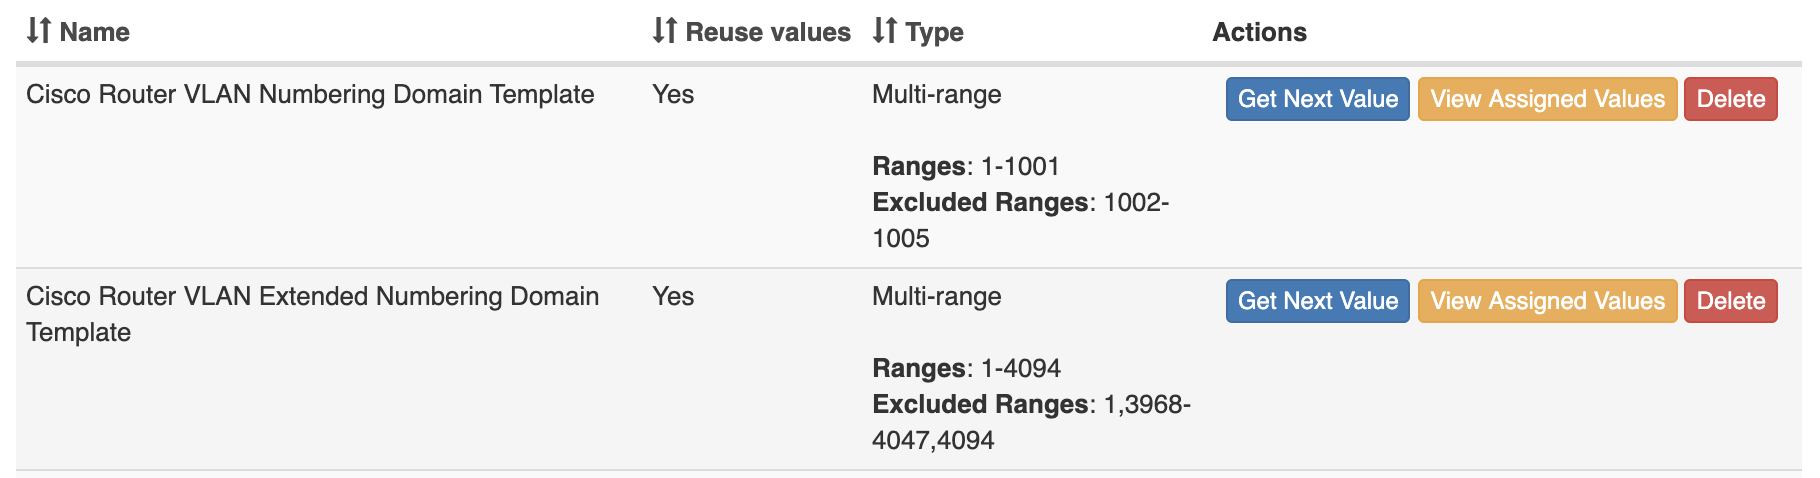
Two default Numbering Authority VLAN ranges are provided, one for a Cisco Standard domain, and another for a Cisco Extended Domain. These default ranges use Cisco Standard and Cisco Extended range extents and exclusions:
Admins may create new pre-set Numbering Authority ranges at any time to support other router types, range extents, or exclusions. Those ranges will then be available as options when adding a new domain from the VLAN area. |
Add a Domain - Numbering Authority Type
In the Add Domain section, under Domain Information, enter a new domain name and select a router (optional). For routers to be selectable in this list, they must already be set up in ProVision.
Under Domain Range, select to use an existing Numbering Authority range for your domain. If desired, you may choose to add VLANs to the domain at the same time, by specifying the VLAN or VLAN range(s) - any exclusions will automatically be skipped.
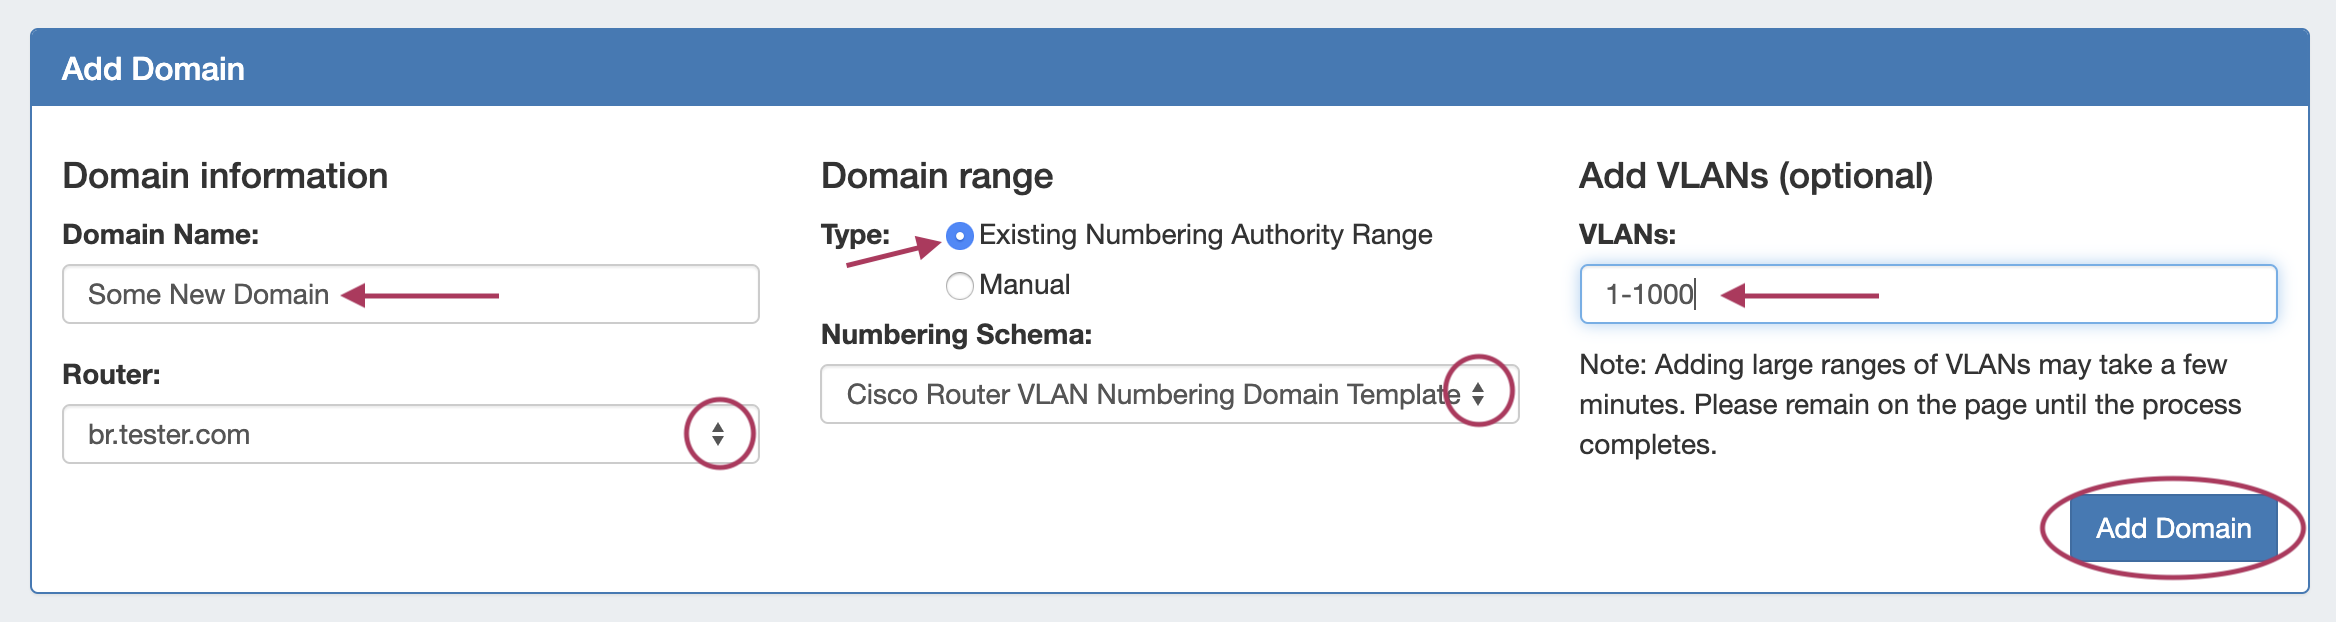
When done, click Add Domain. The new domain will be added to the VLAN Sidebar, along with any added VLANs.
Add a Domain - Manually
To add a new manual domain range, enter the domain name and router selection (optional), and select Manual for the Domain range Type. Once Manual has been selected, fields will display to enter the range extents (such as 1-1000), and range exclusions (here, 1, 5-7). If desired, you may choose to add VLANs to the domain at the same time, by specifying the VLAN or VLAN range(s) - any exclusions will automatically be skipped.
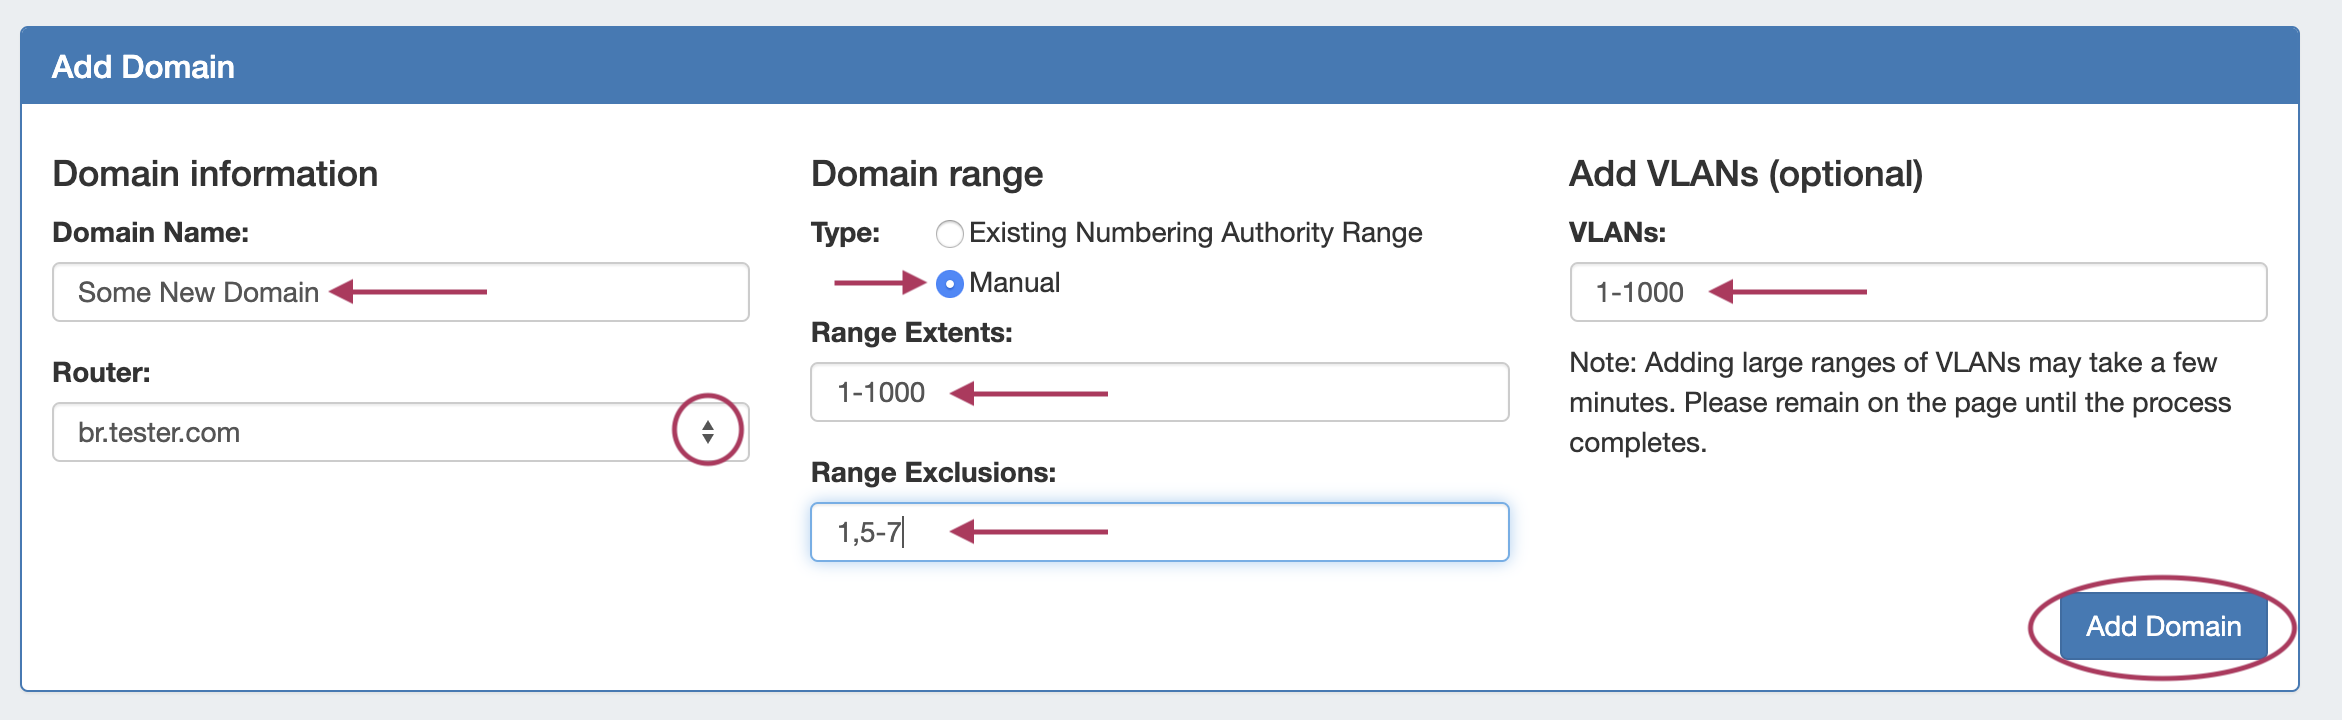
When done, click Add Domain. The new domain will be added to the VLAN Sidebar, along with any added VLANs. In addition, the manually created range will become a new Numbering Authority range, and able to be used as a template for a future domain.
Edit Domain
From the VLAN sidebar, right-click on the domain to edit and select Edit Domain. This opens the VLAN Advanced → Edit Domain panel for that domain.
You may also access the Edit Domain panel directly from VLAN Advanced clicking on Edit Domain (List icon) and selecting the desired domain.
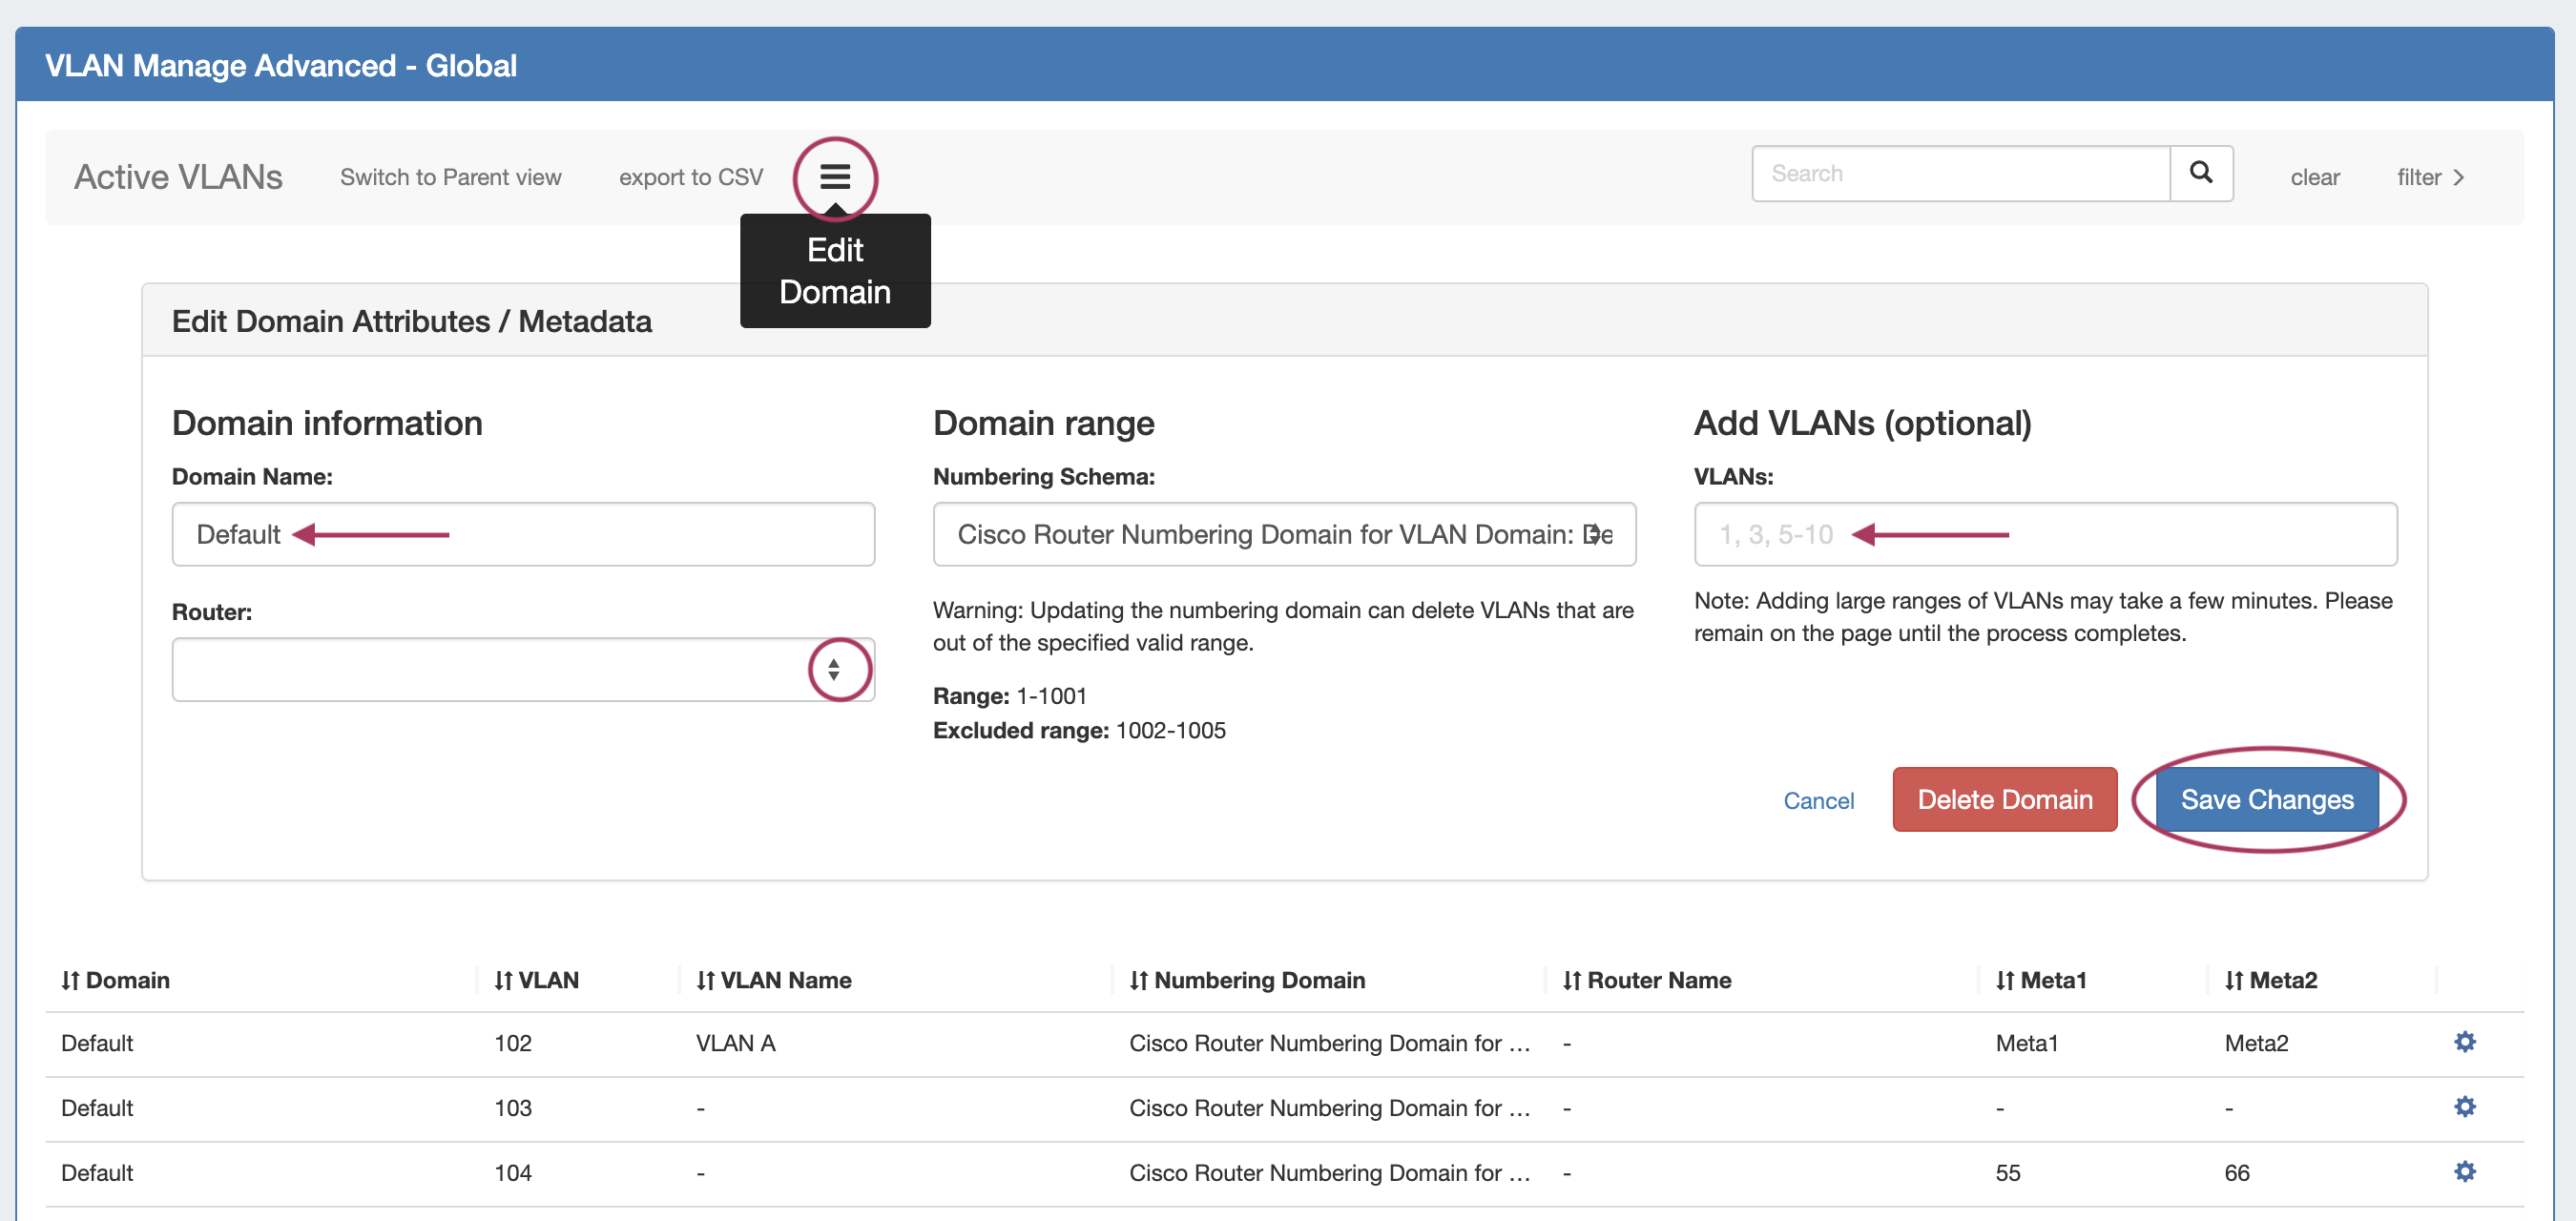
Here, you can edit the domain name, the associated router, view its range and range exclusions, and add VLANs to the domain. Enter your desired change(s), then click Save Changes.
Remove Domain
Deleting a domain may be done from either the VLAN Sidebar or from the VLAN Advanced Edit Domain panel.
To delete a domain from the sidebar, right click on the domain name and select Remove Domain.
To delete the domain from the Edit Domain panel, open VLAN Advanced for the Domain, then click Delete Domain.
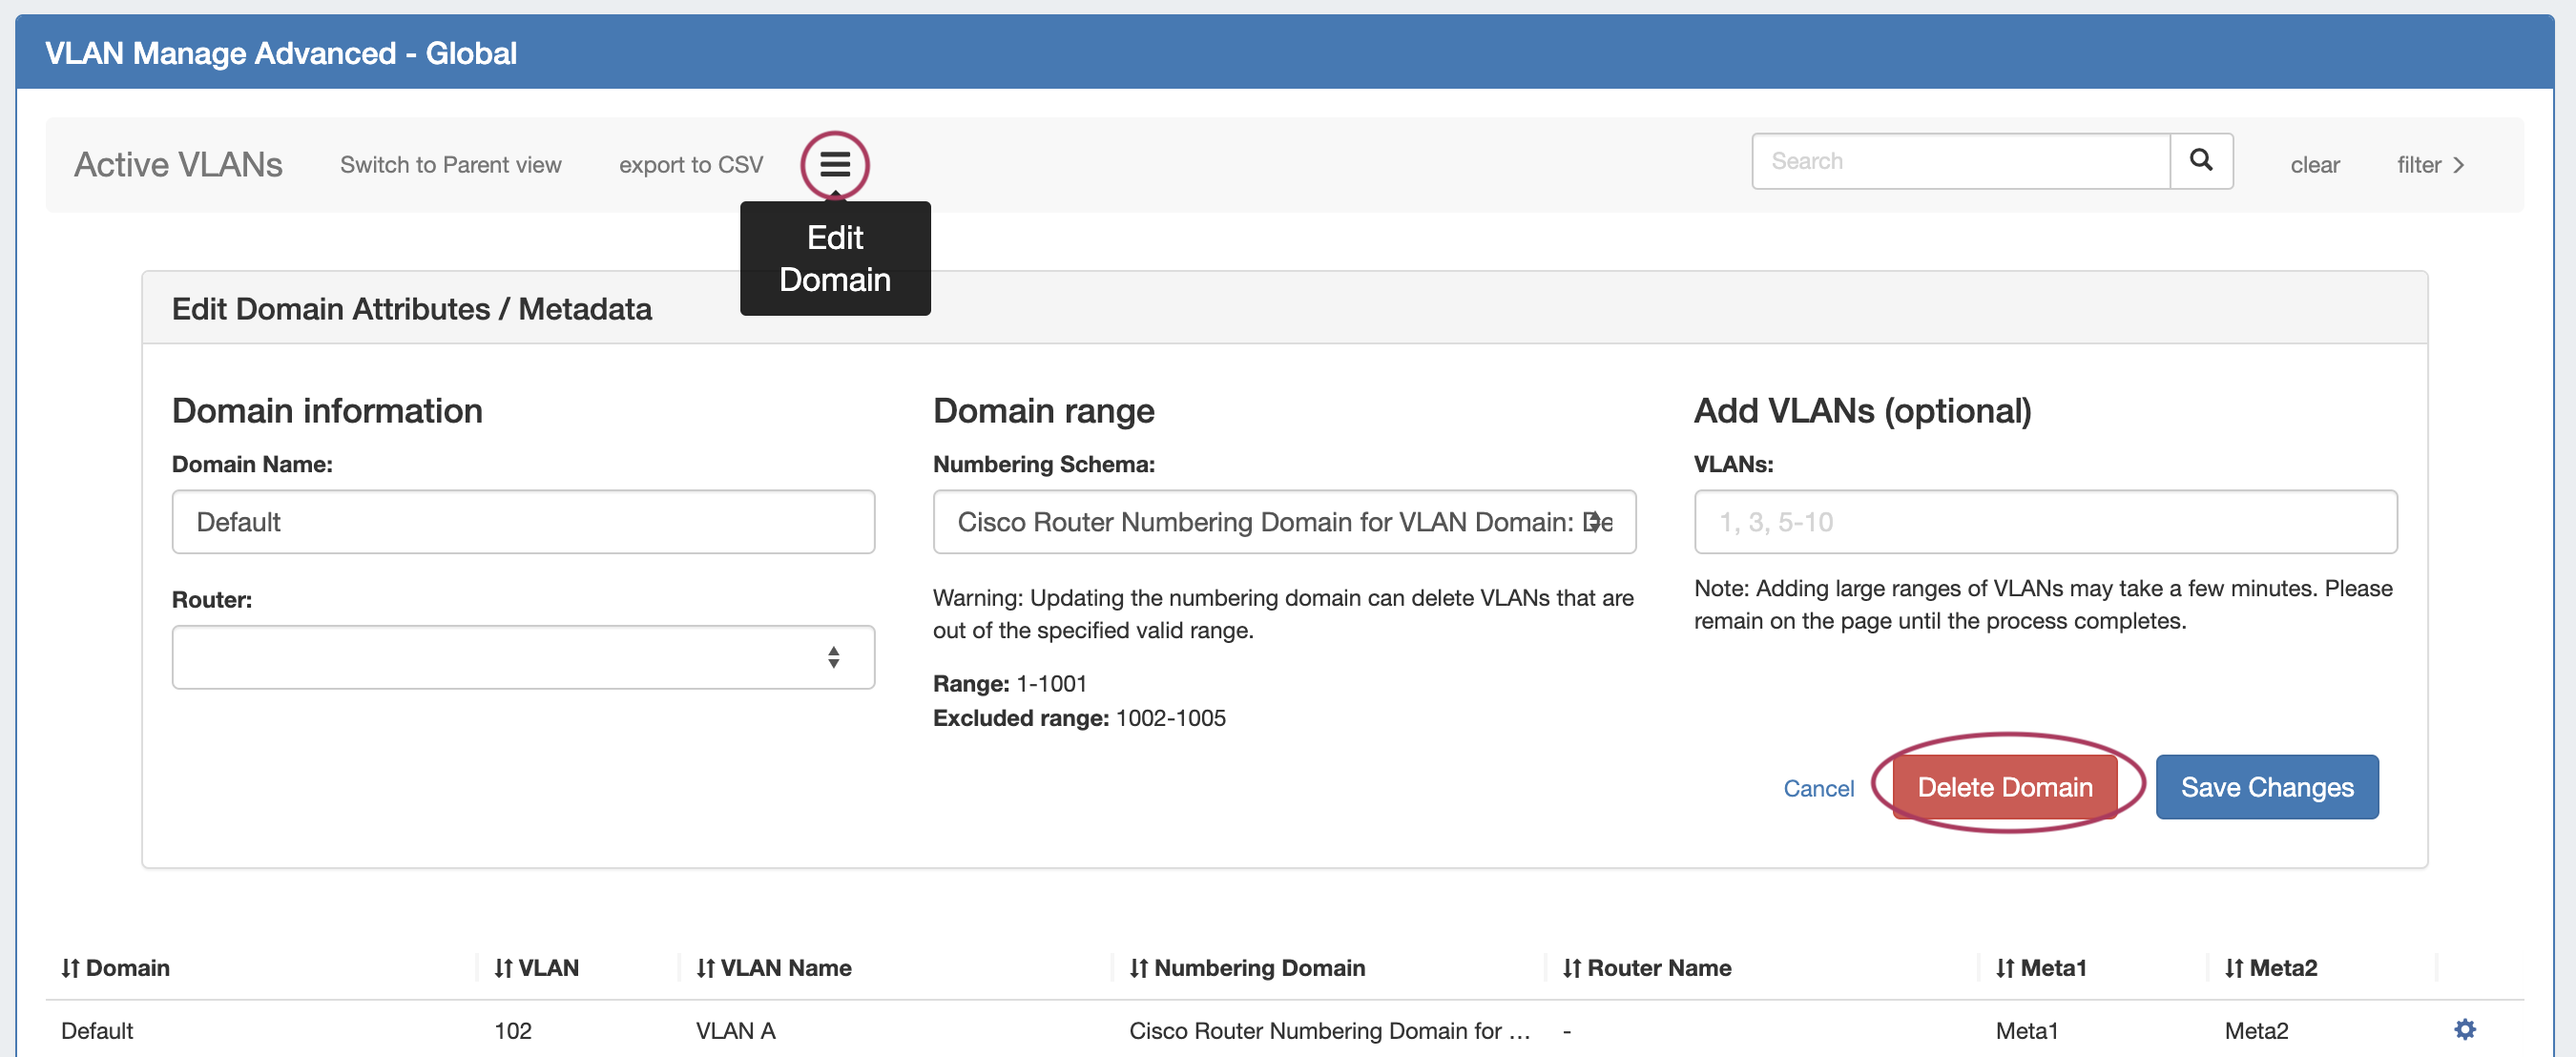
When deleting a domain, both the domain and all VLANs under it will be deleted. Any IP blocks associated with the deleted domain will have its Domain and VLAN association removed.
Additional Information
For information on working with VLANs, continue on to:
For a higher level overview of ProVision's VLAN Manager, see: