DNS Servers
ProVision's DNSv3 combines server management, group organization, and zone management under the the DNS tab.
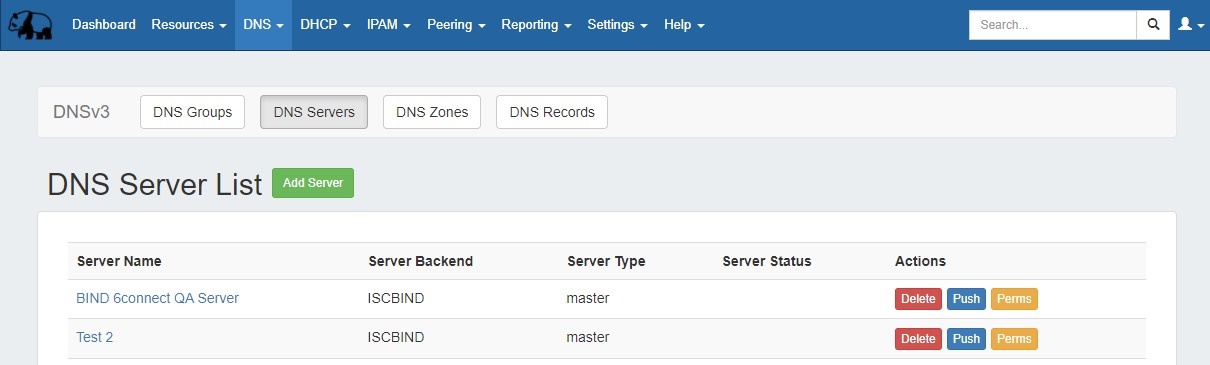
The DNS Servers tab is viewable by users with Resource read permissions, though only Admin users or those specifically granted server permissions may perform management actions. The Sever List contains functions for adding, updating, and managing DNS servers as well as scheduling server tasks.
...
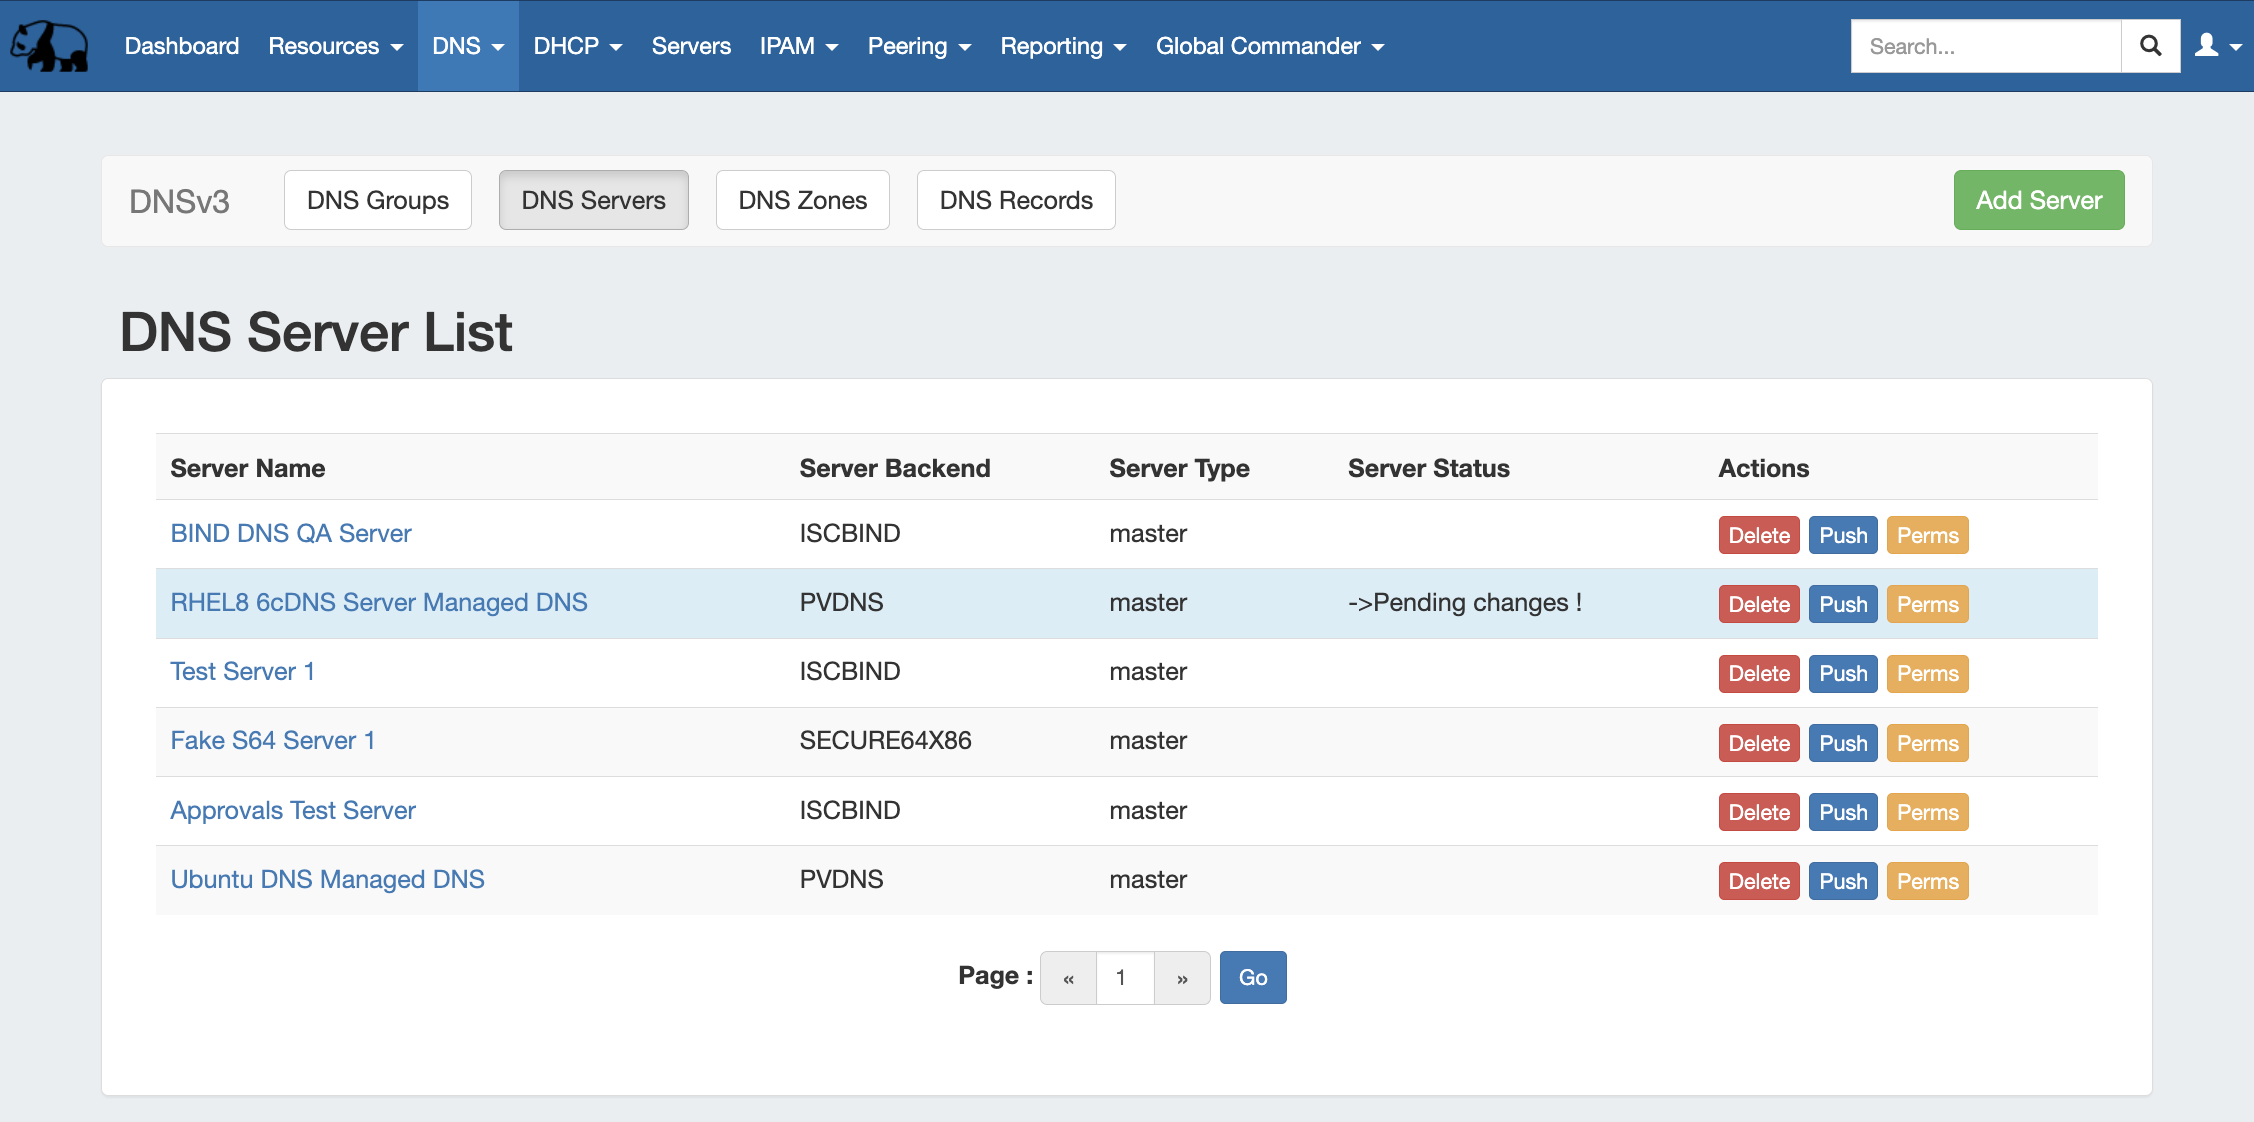
DNS Server List Interface
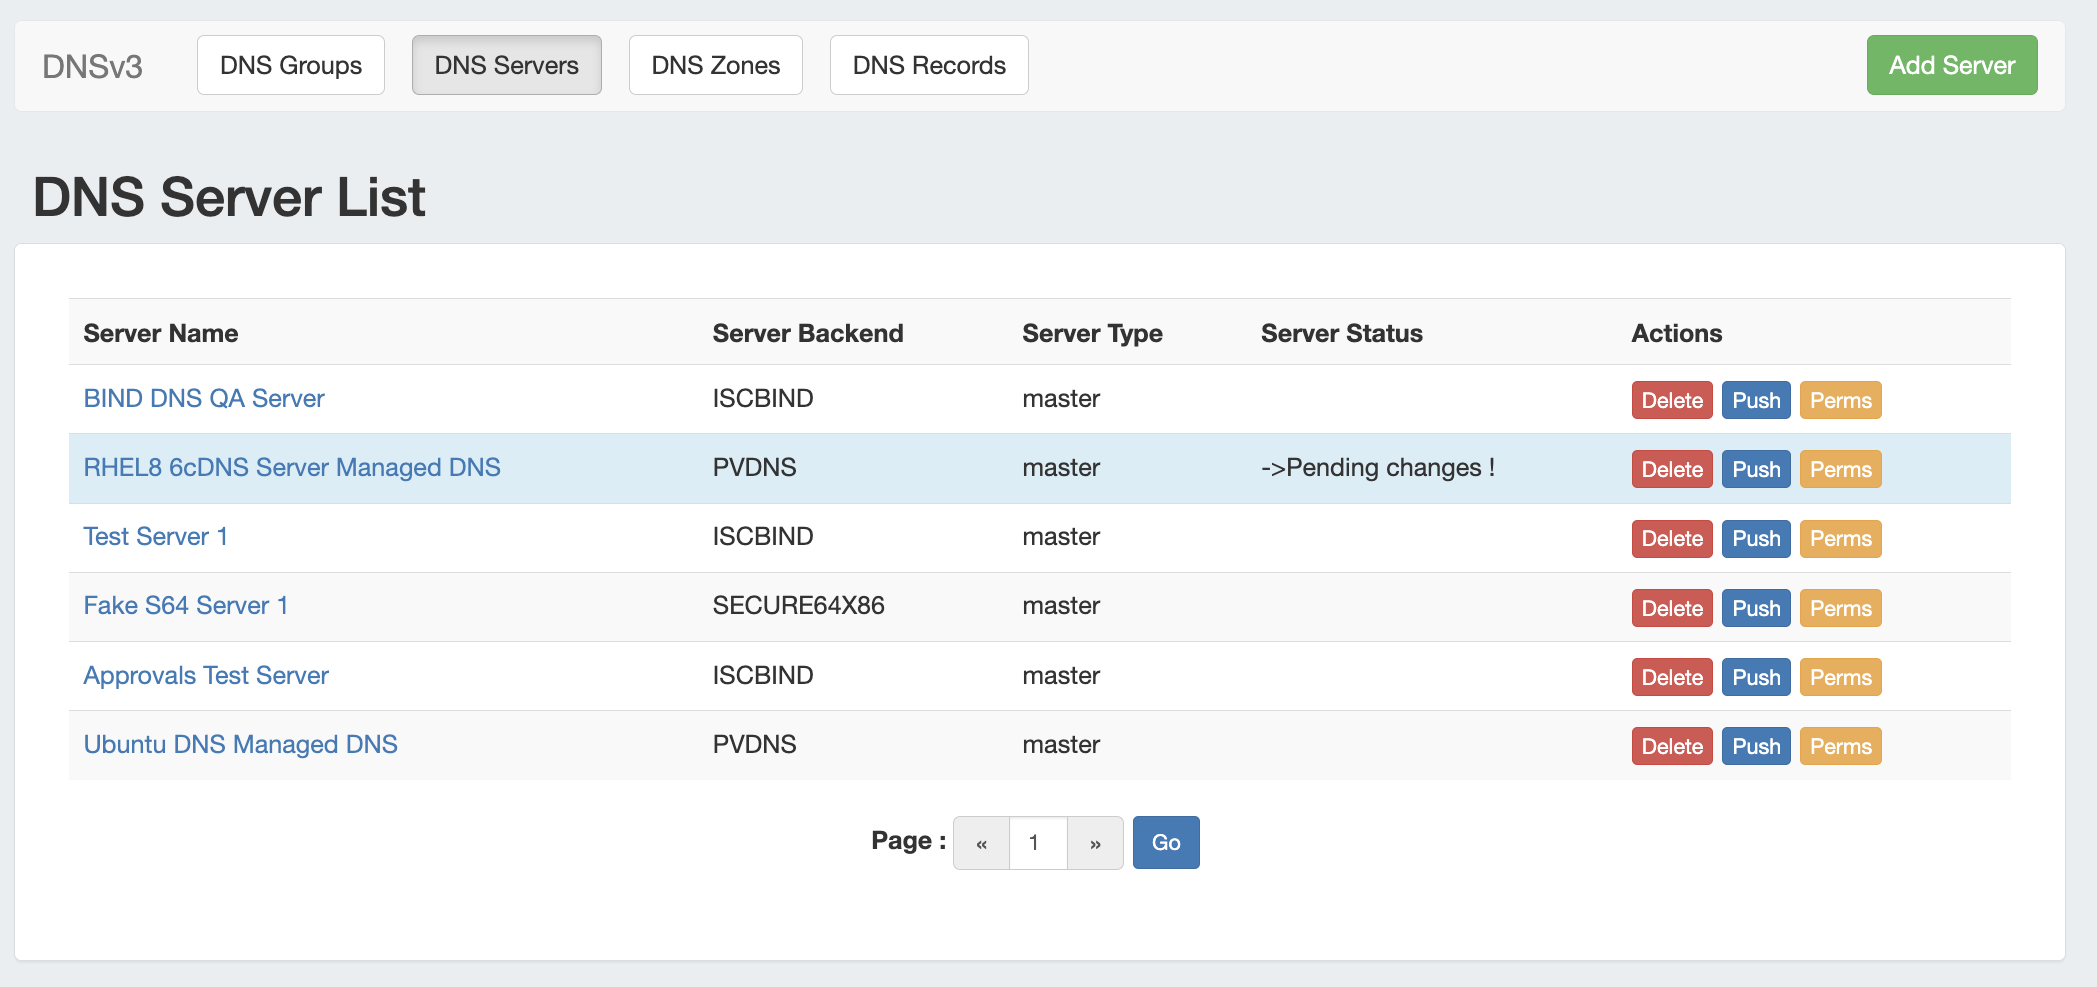
1) Add Server Button: Opens a dialog for creating a DNS server.
...
5) Server Type: Whether the server is a master or slave type.
6) Server Status: Currently a placeholder column for future display Display of server error and connection status messages.
...
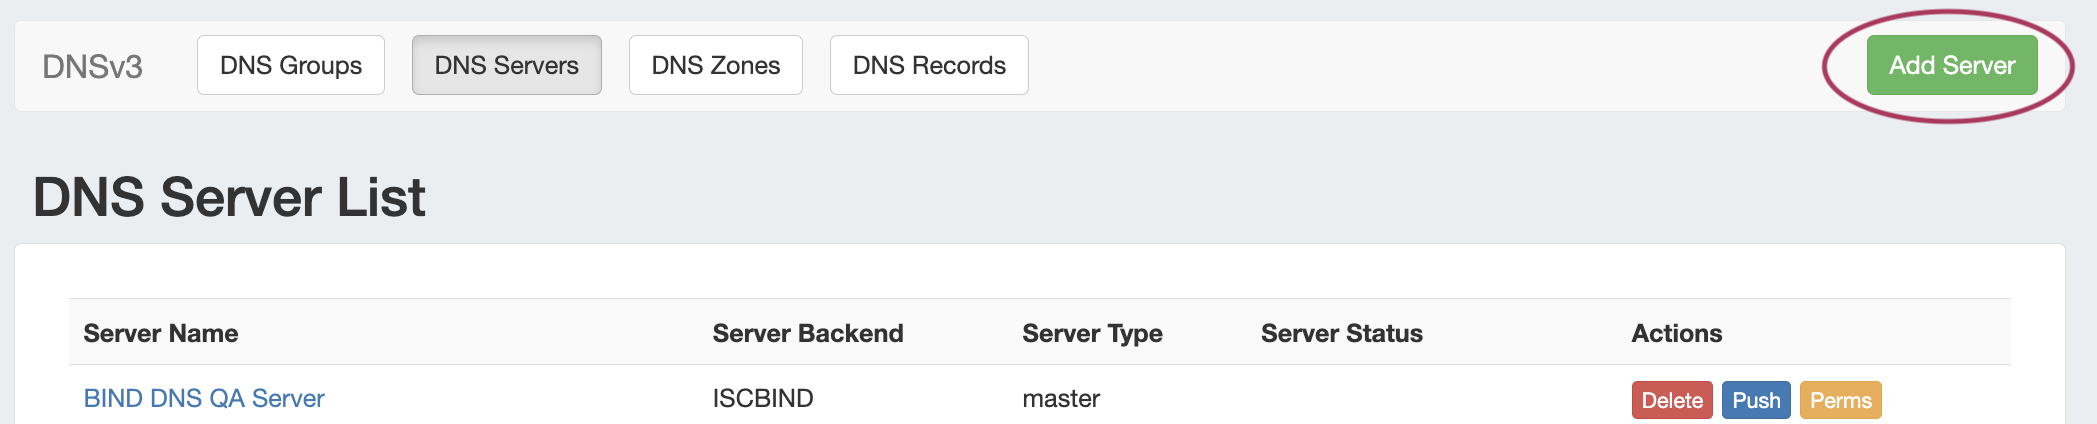
To create a new server, start from the DNS Tab, select the DNS Servers sub menu. Then, click the "Add Server" button next to "DNS Server List".

This will open the "Server Settings" page.
...
In the "Common Settings" section of Server Settings, enter the new server's Display Name (the name that will appear on the ProVision interface), the FQDN / IP, server type, service type, and desired parent Resource (may be left at the default Top Level Resource).

![]()
Display Name: Name you want the server to display.
FQDN or IP: The FQDN or ip address of the DNS server.
Default: Specify if the server should be added to new zones by default or notDNS Port: Specify a DNS Port.
Server Type: Specify if the server is a master or slave. Different configuration files are created master vs. slave on the Bind, PowerDNS/Bind, and Secure64 platforms.
Export Zones: Enable / Disable Zone export
DNS Service: Select the DNS service type (ISC Bind, Secure64, KnotDNS, etc).
Parent Resource: Select the ProVision resource to be the "parent" of the server - typically TLR (Top Level Resource), but may be a lower level resource such as a Customer or Location. The parent resource selection is the basis of access permissions for the server.
Enable Records Check: Enable / Disable zone record checks.
Enable TSIG Key for transfers: Enable / Disable TSIG Keys. If enabled, the provided key will be added to the ACL config for the server(s).
2) Set Server Specific Settings
...
For SSH Public Key Authentication, DNSSEC, and Dynamic Option updates, click on the ON / OFF toggle to select "ON" or "OFF" for each as needed.
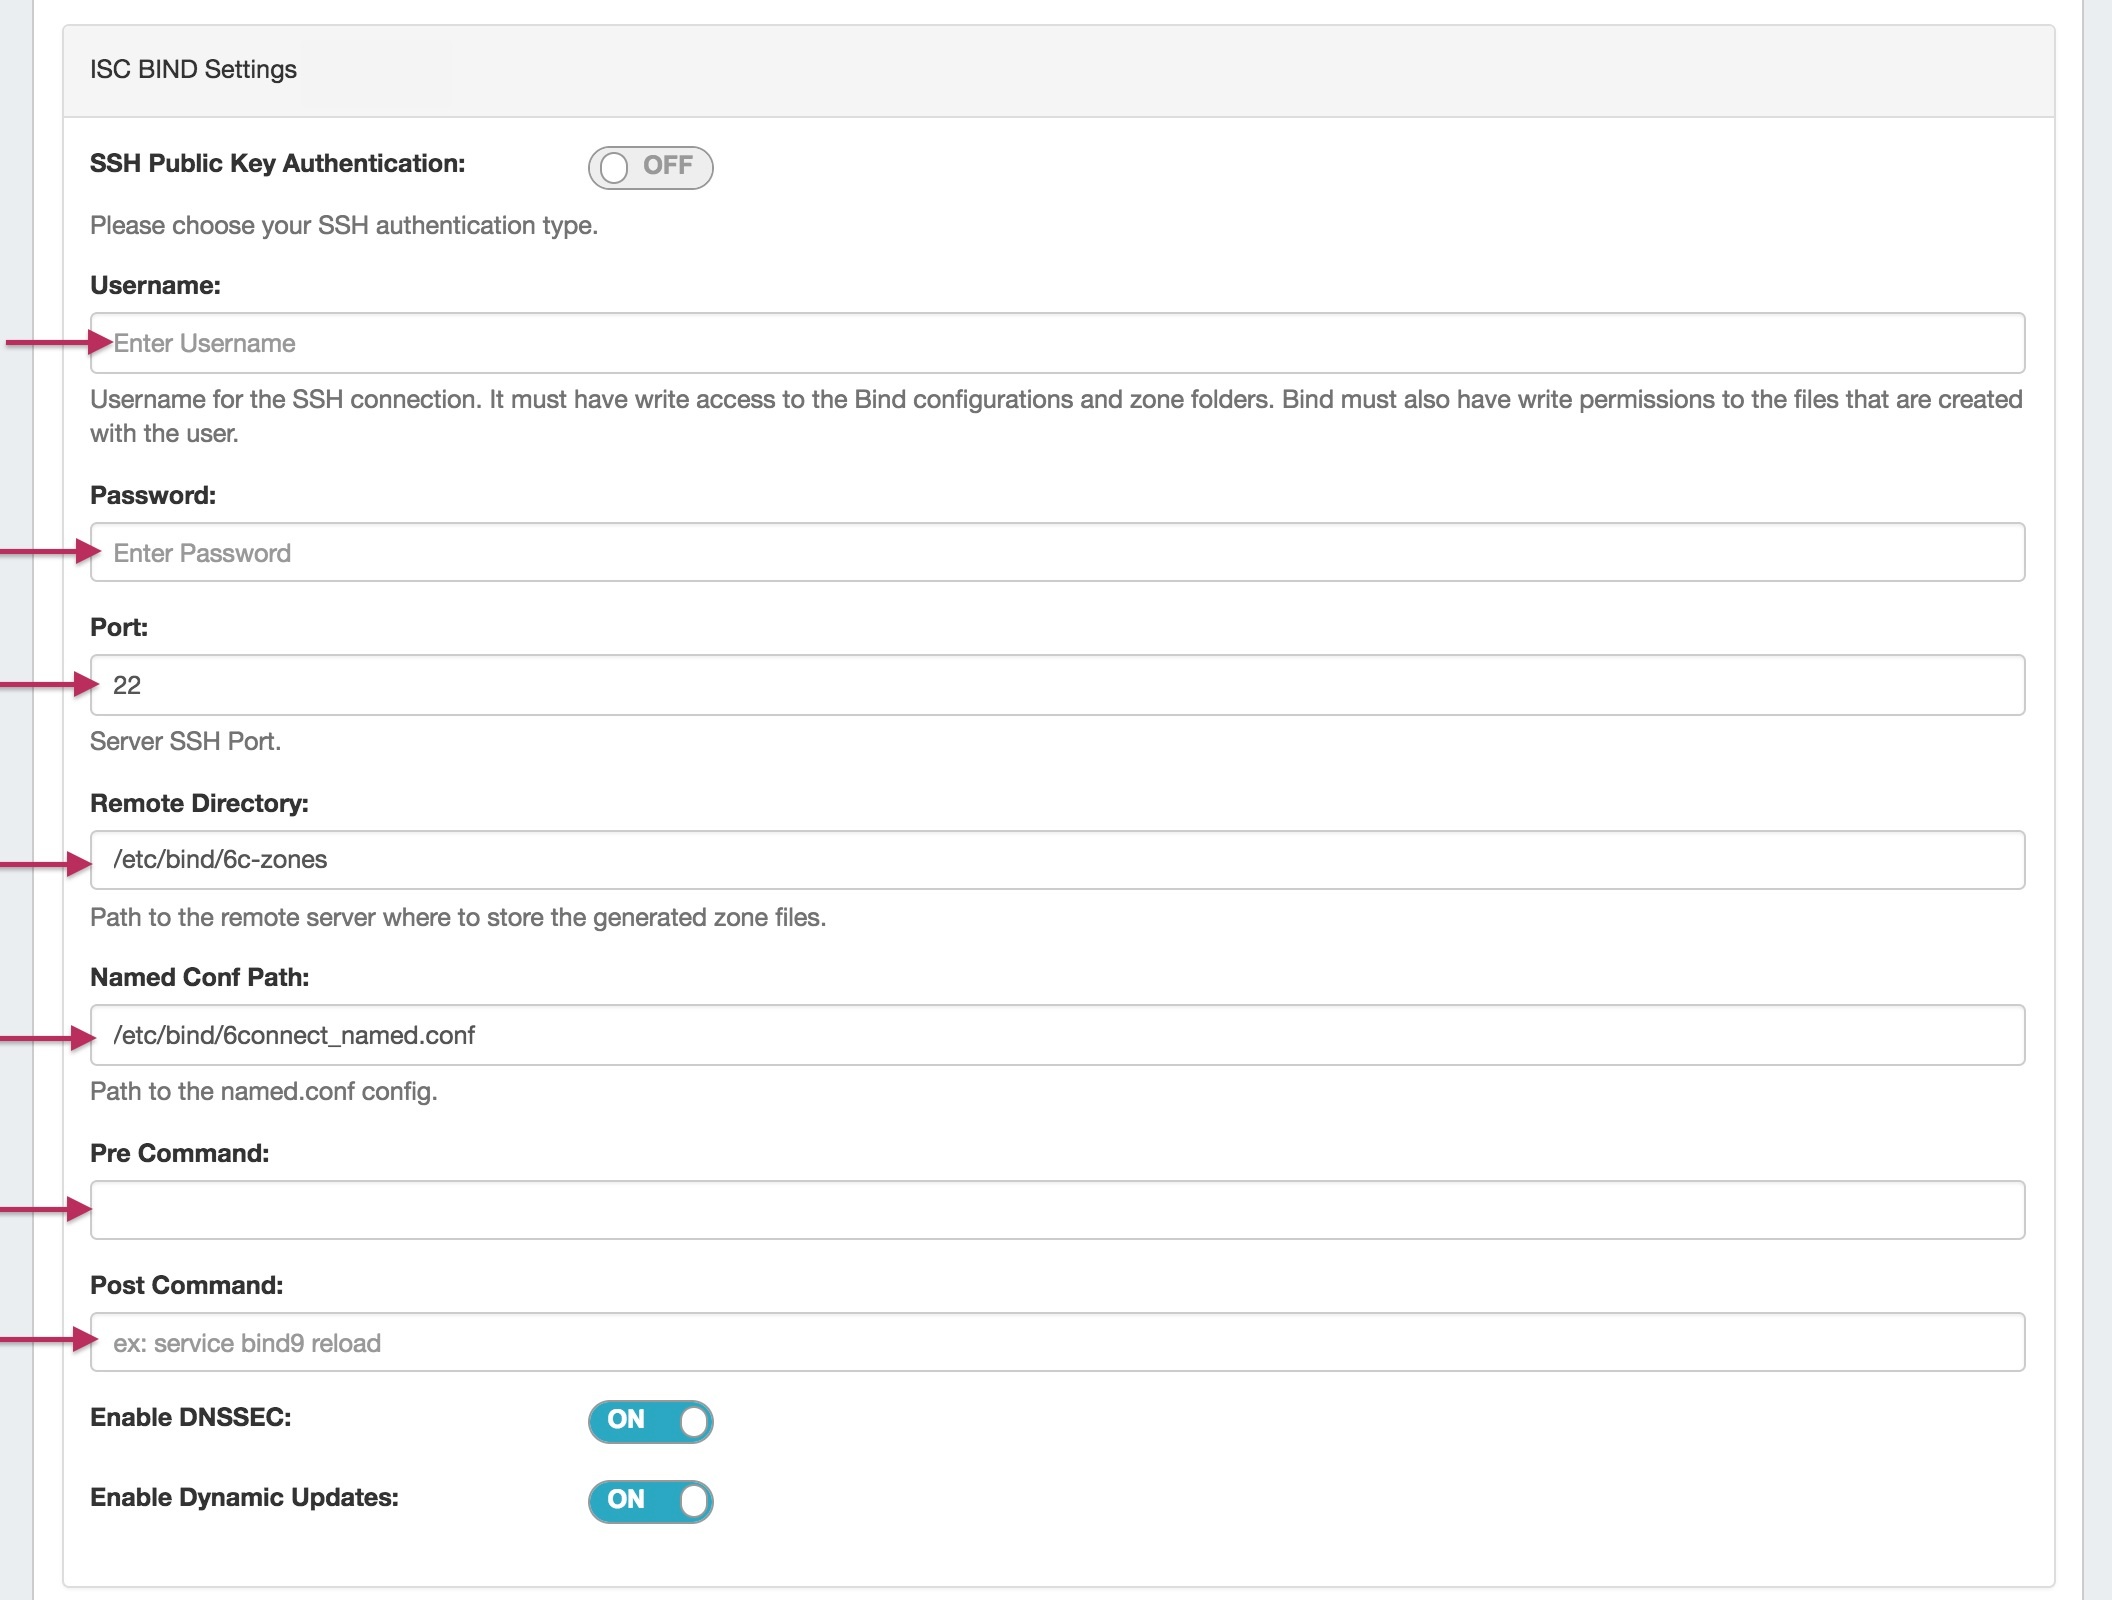
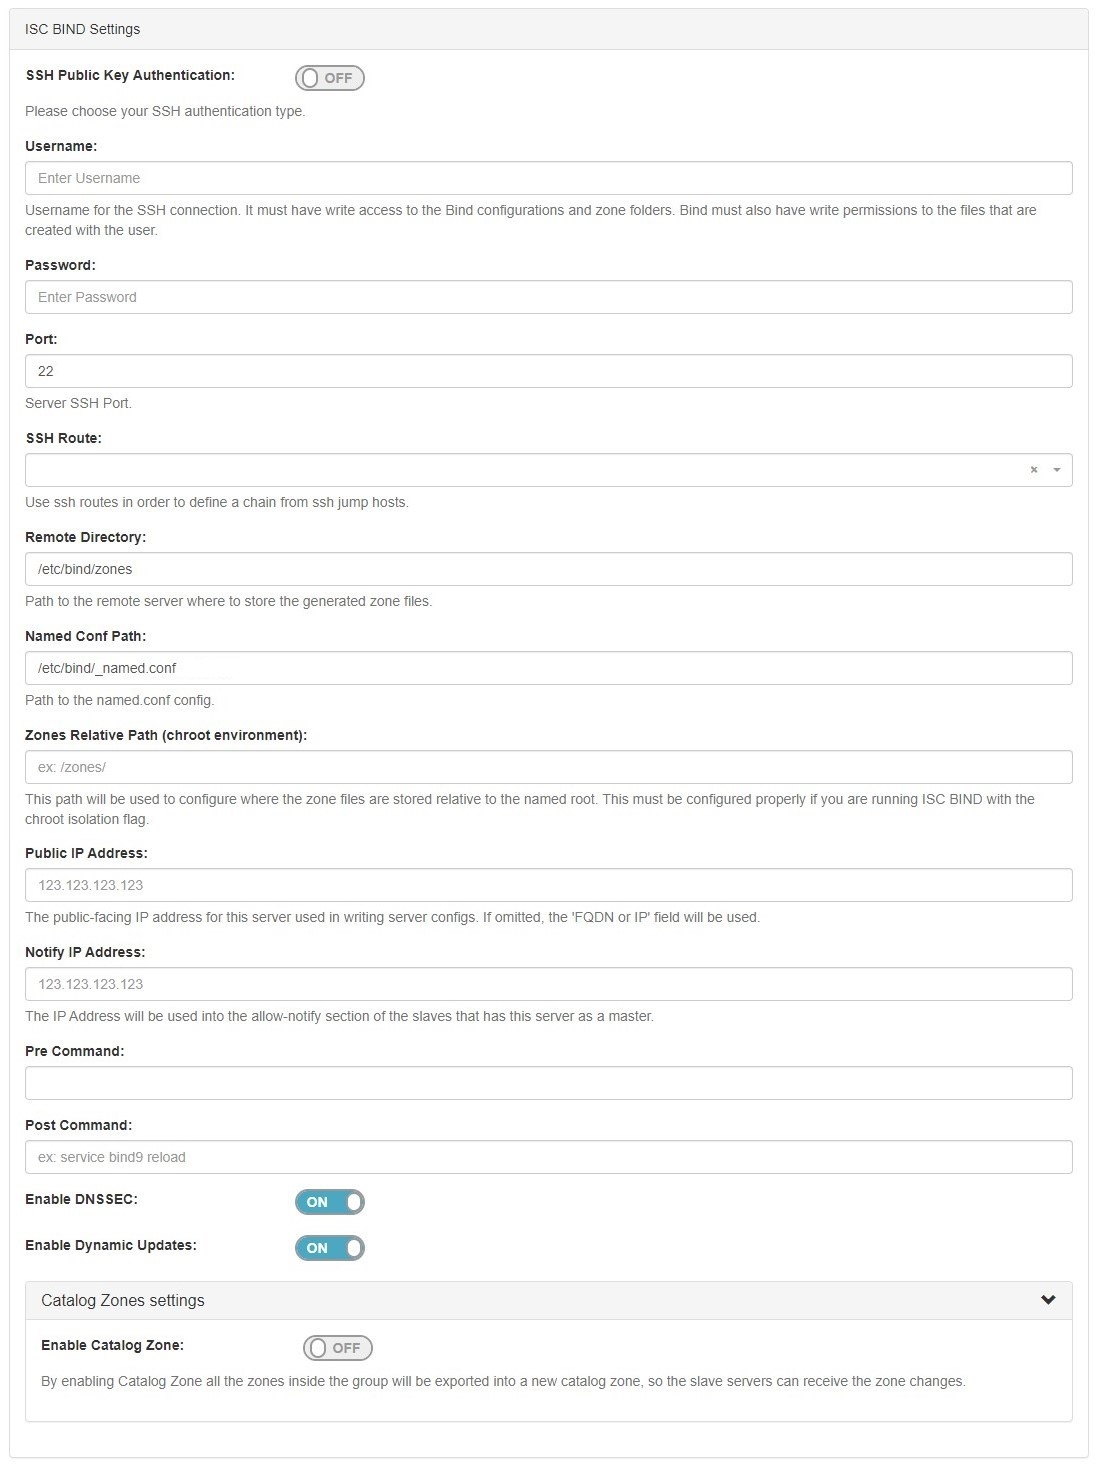
SHH Public Key Authentication: If applicable, toggle "On" or "Off"
...
Enable Dynamic Updates: Toggle to "On" or "Off", if the server allows dynamic updates. Records will then be pushed to zone files using REST API dynamically whenever any modifications are made, i.e. record creation/deletion.
Catalog Zone Settings: Opt to enable / disable catalog zones for the server.
Some DNS Server types use subscription services or outside accounts, in which case you may instead be prompted to provide account credentials, API keys, API secret, or other vendor-specific fields to connect to the service.
Test Connection (Optional)
After entering the server-specific settings in this section, you can may click the "Test Connection" button at the bottom right of the page to test the server connection and authentication.
...
If any failures are encountered, an error will be written with some detail.
If the test is successful, the word "Success!" will show verifying that files can be transferred. This does not test if the user can execute pre/post commands. This needs to be checked manually.
...
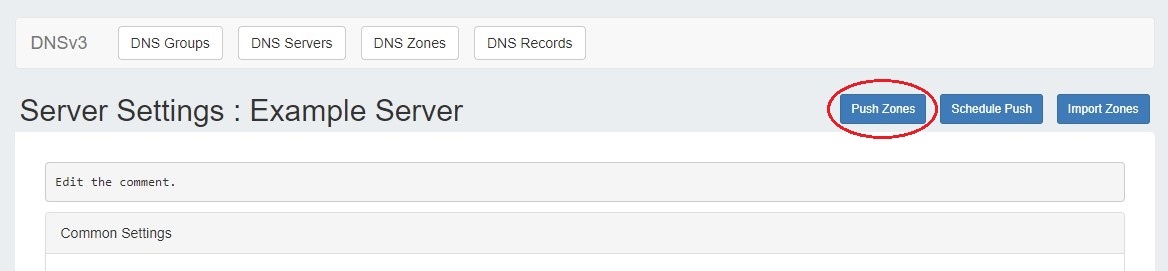
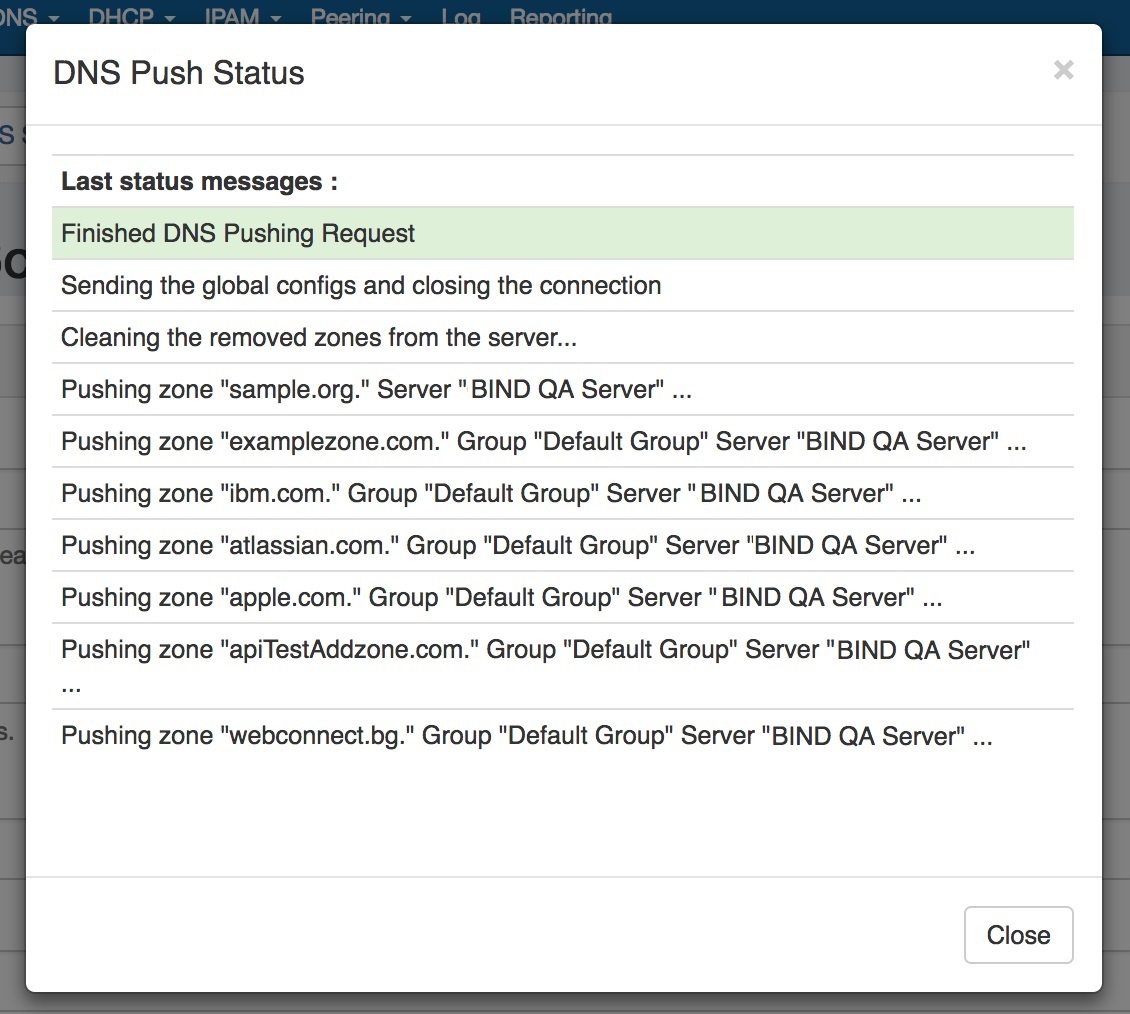
Pushing may also be done while in the Server Settings page. While in the Server Settings page, click the "Push Zones" button at the top right of the page.
Users can customize a push by choosing an option from the push options modal and clicking "Execute Push". To push normally, click "Execute Push" without selecting any options.
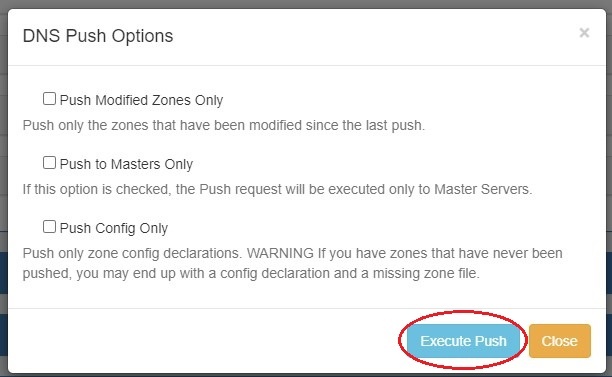
A "DNS Push Status" box will appear, showing the status of each zone as it is pushed. Once all zones have been pushed successfully, a green status message of "Finished DNS Pushing Request" will appear. At this point, the push is complete and the window may be closed.

Scheduled Push
...
If necessary, the Scheduled Push may be edited from the Scheduler Tab in in the Admin area of ProVision. See the Scheduler for information on editing scheduled tasks.
...