Scheduler
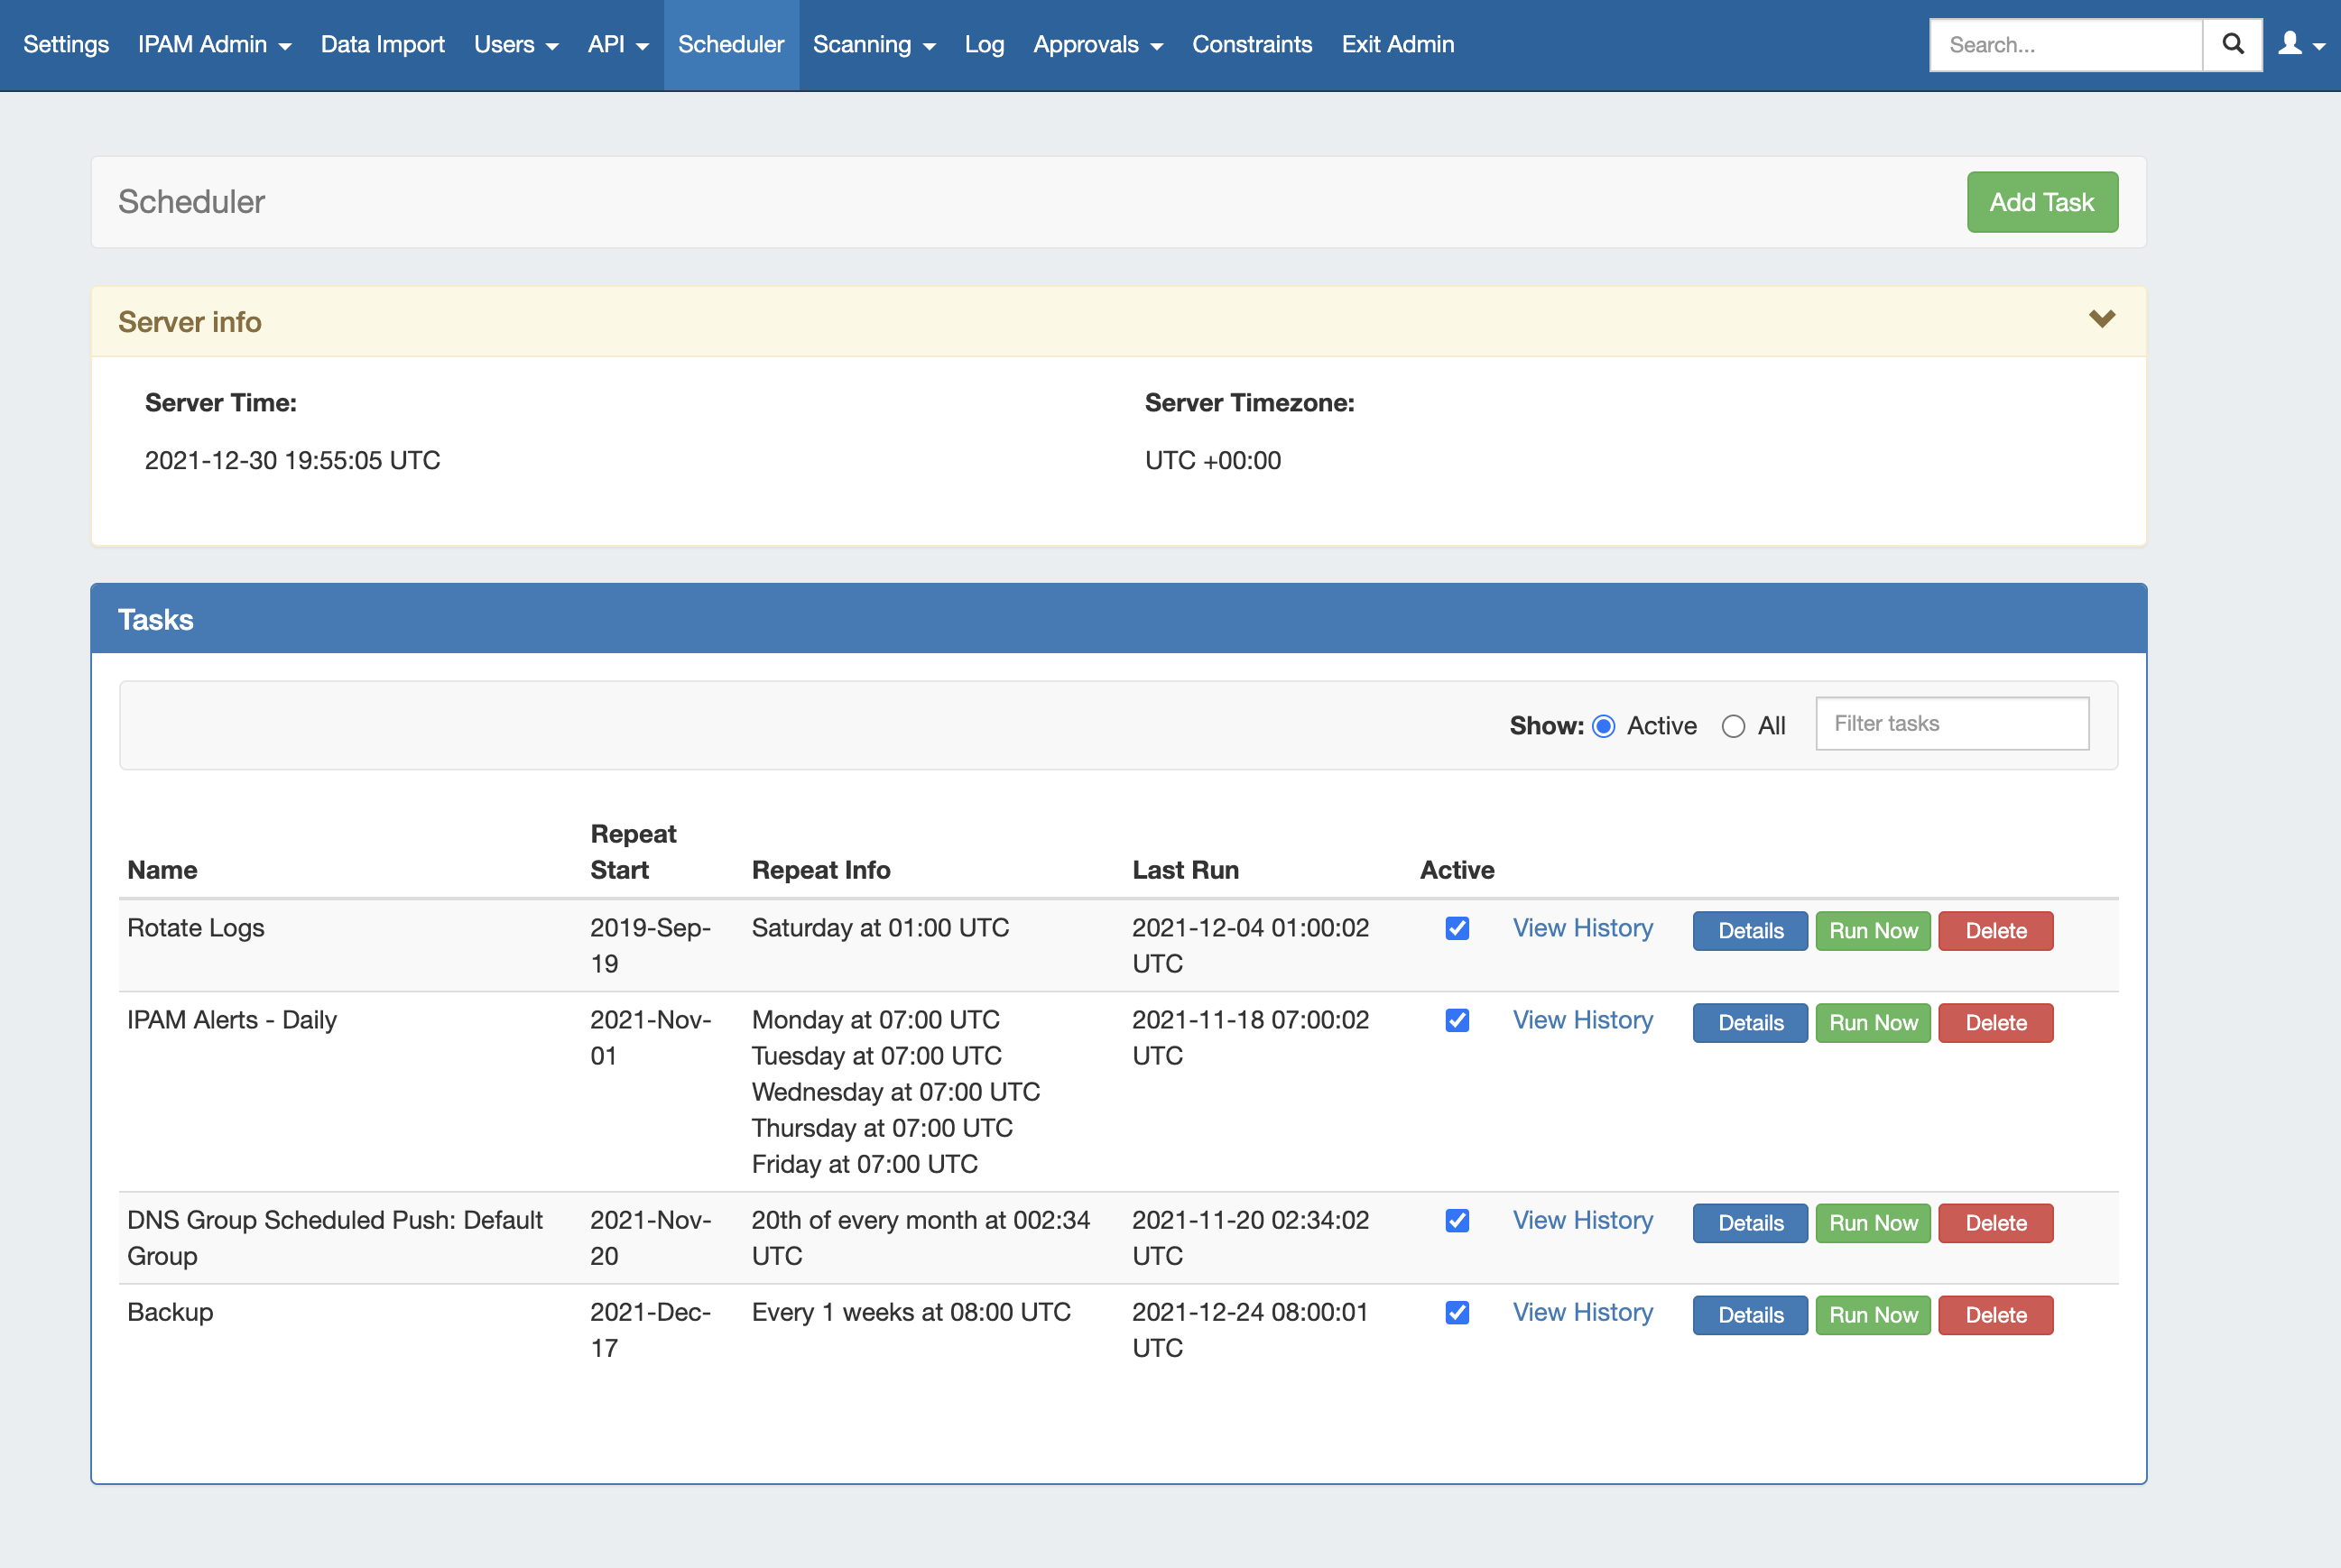
The Scheduler tab allows you to manage and schedule repeating tasks in ProVision.
Server time information is displayed at the top of the page, and active tasks are listed in the Task List module. For any task, you can view the run history, information details, run the task now, or delete.
| Info | ||
|---|---|---|
| ||
To enable the scheduler in a local instance, add the following to cron: * * * * * /path/to/php /path/to/ProVision/scheduler/task-runner.php |
| Table of Contents |
|---|
Available Task Types
- ACP - Run Workflow:
Runs the selected ACP Workflow at the scheduled time, with the option to execute the project asynchronously. Requires an ACP license and ACP settings successfully configured under Admin → Settings → ACP Settings.
- Approvals - Delete events older than 1 month:
The "Approvals - Delete events older than 1 month" task deletes any Approvals history events older than 30 days. It is recommended to run this task monthly to clear out obsolete approvals items and reduce approvals page load time. For information on working with Approvals, see DNS Tab and Approvals.
- Approvals - Process Subscription Events:
The "Approvals - Process Subscription" task processes approval request events and handles the sending of notification emails to subscribed Approvals Groups. If Approvals are in use with notifications, it is recommended to create this task with a run time of "every 5 minutes" and no end date. For information on working with Approvals, see DNS Tab and Approvals.
- Auth - Remove old PHP Sessions:
Removes PHP Sessions older than the specified max session idle time.
- Backup - Backup the database
Performs a data backup to the 6connect cloud servers, or to a selected resource server existing in ProVision.
- Backup - Delete old archived data and logs:
The "Delete old archived data" task removes data older than 30 days from archived resources, logs, systems logs, and statistics from your ProVision instance. Be sure to use care with running this task to prevent accidental deletion of log data that may still be necessary for reference. It is typically recommended to run this task once every 1-3 months to reduce log data volumes.
- Contacts - GEO IP Exporter:
The Geo IP Exporter searches the ProVision instance for resources which have IP addresses and an address provided in the Contact Info Gadget, then saves the resulting .csv to the ProVision root directory.
- DHCP - Leases Monitor:
Updates lease monitoring and checks for lease expiration for the DHCP module. See DHCP Tab for additional information on setting up DHCP Servers and Push options.
- DHCP - Server Push:
Pushes configuration updates to the selected DHCP server(s). Select push to a single server, or all DHCP servers. See DHCP Tab for additional information on setting up DHCP Servers and Push options.
- DNS - Error Monitor:
Checks the DNS records in theError state to determine if they have been fixed. Default setup is once a day, and you can set it to run more often if necessary. This task may replace or supplement the manual DNS Zone / Record "Check" button, depending on set frequency.
- DNS - Queue Push:
If "Enable DNS Push Queue" is set to ON in Admin → DNS → Push Settings, this task must be created in order for the scheduler to run at the desired interval to execute the queue.
- DNS - Resource Monitor Task:
Checks Records/Zones periodically to monitor DNS server response.
- DNS - S64 Pull Stats:
Pulls the stats file for the selected S64 DNS server at the desired interval and updates DNS Records associated with that server.
- DNS - Zone Transfer:
Pushes zone updates to the DNS servers. Select pushes to apply to all zones
on all serversin a DNS Group, all zones on one server, or one particular zone. Requires the intended Group / Server / Zone to already exist in ProVision.
...
See DNS Tab for additional information on setting up DNS Servers, Groups, Zones, and Push options.
- DNS - Zones Backup Removal:
Removes DNS Zone backups that are older than the " setting in the Scheduler Task. See DNS Tab for additional information on setting up DNS Servers, Groups, Zones, and Push options.
- IPAM - Alerts Task:
Set a time / frequency for IPAM aggregate alert emails to be sent to alert recipients. Alert recipient email and available space threshold percentage is set through the action menu for individual aggregates under the IPAM Tab. For information on setting up an alert for an aggregate, see Working with IP Aggregates. This task is created/enabled by default.
- IPAM - Process Holding Tank:
Removes IP Blocks from the Holding Tank and returns them to the available pool. See Holding Tank Management.
- IPAM - Rotate Dynamic IPs:
The Scheduler task "Rotate Dynamic IPs" reassigns single IPv4 NAT addresses (/32s) after 'x' days post-config to an available address denoted by the
...
Dynamic_Available tags.
Prior to using this task, two blocks (one public, one private) must be NAT'ed in IPAM, the NAT Config pushed to a router, and appropriate blocks tagged with "Dynamic_Base" and "Dynamic_Available". For information on working with NAT'ed Blocks, see Working with IP Blocks.
- LDAP - Sync Users:
Connects to the LDAP server set up in Admin Settings → Auth → Authentication Options -> LDAP and updates imported LDAP users with any changes.
- Logs - Rotate Logs:
Removed Log items older than the "Delete Logs older than X days" setting in Admin Preferences.
- MySQL - Replication Monitor:
Runs the MySQL Replication Monitor and provides status information when "MySQL Replication" is enabled under Admin Settings → Application → "MySQL Replication".
- Test Task:
Tests the scheduler and notification system - it simply sends a notification email to the provided address at the specified run time.
Add Task
To add a new scheduled task, hit the "Add Task" button below on the right side of the Scheduler page header bar.
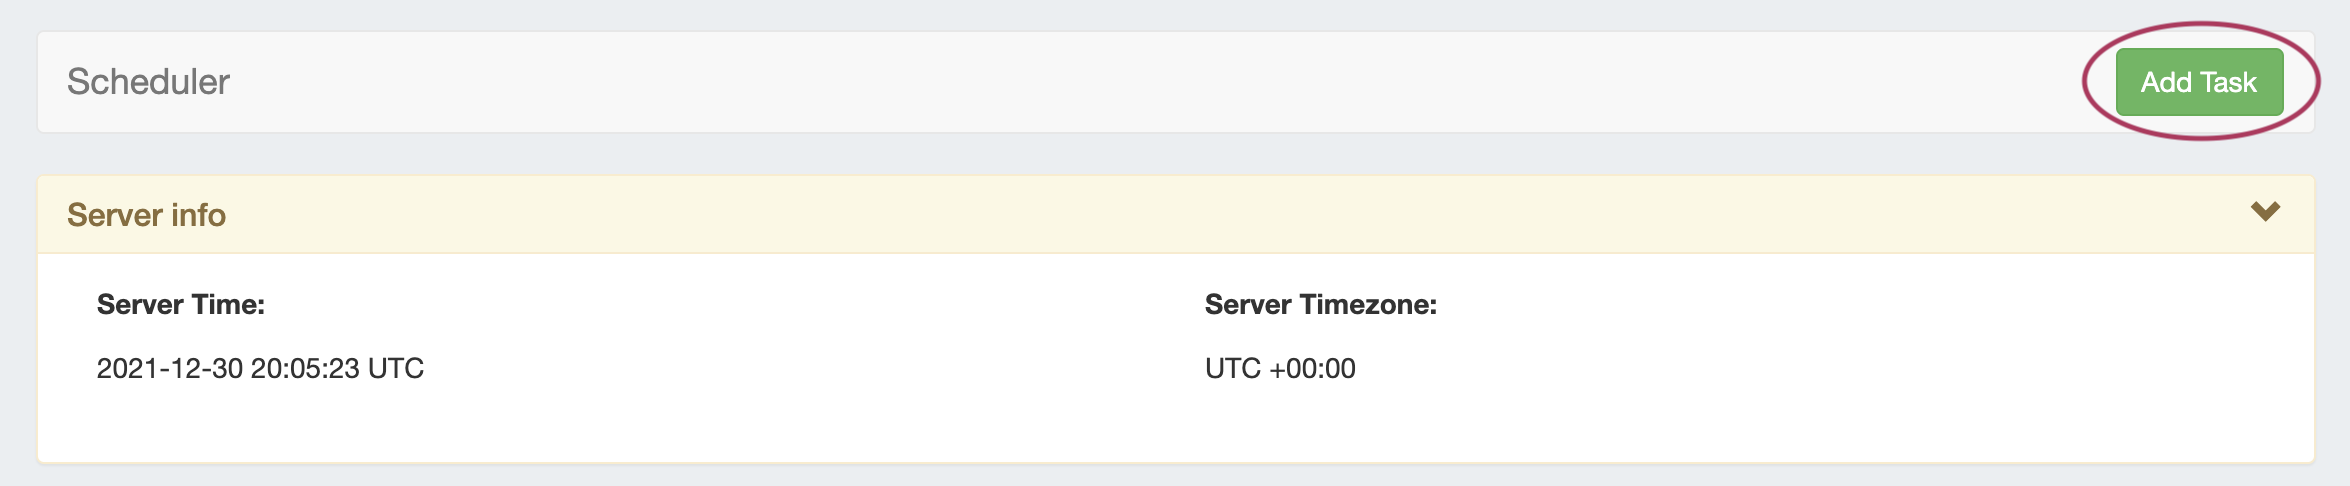
task list. You will then see the Task Detail Settings area.
Enter Task Details
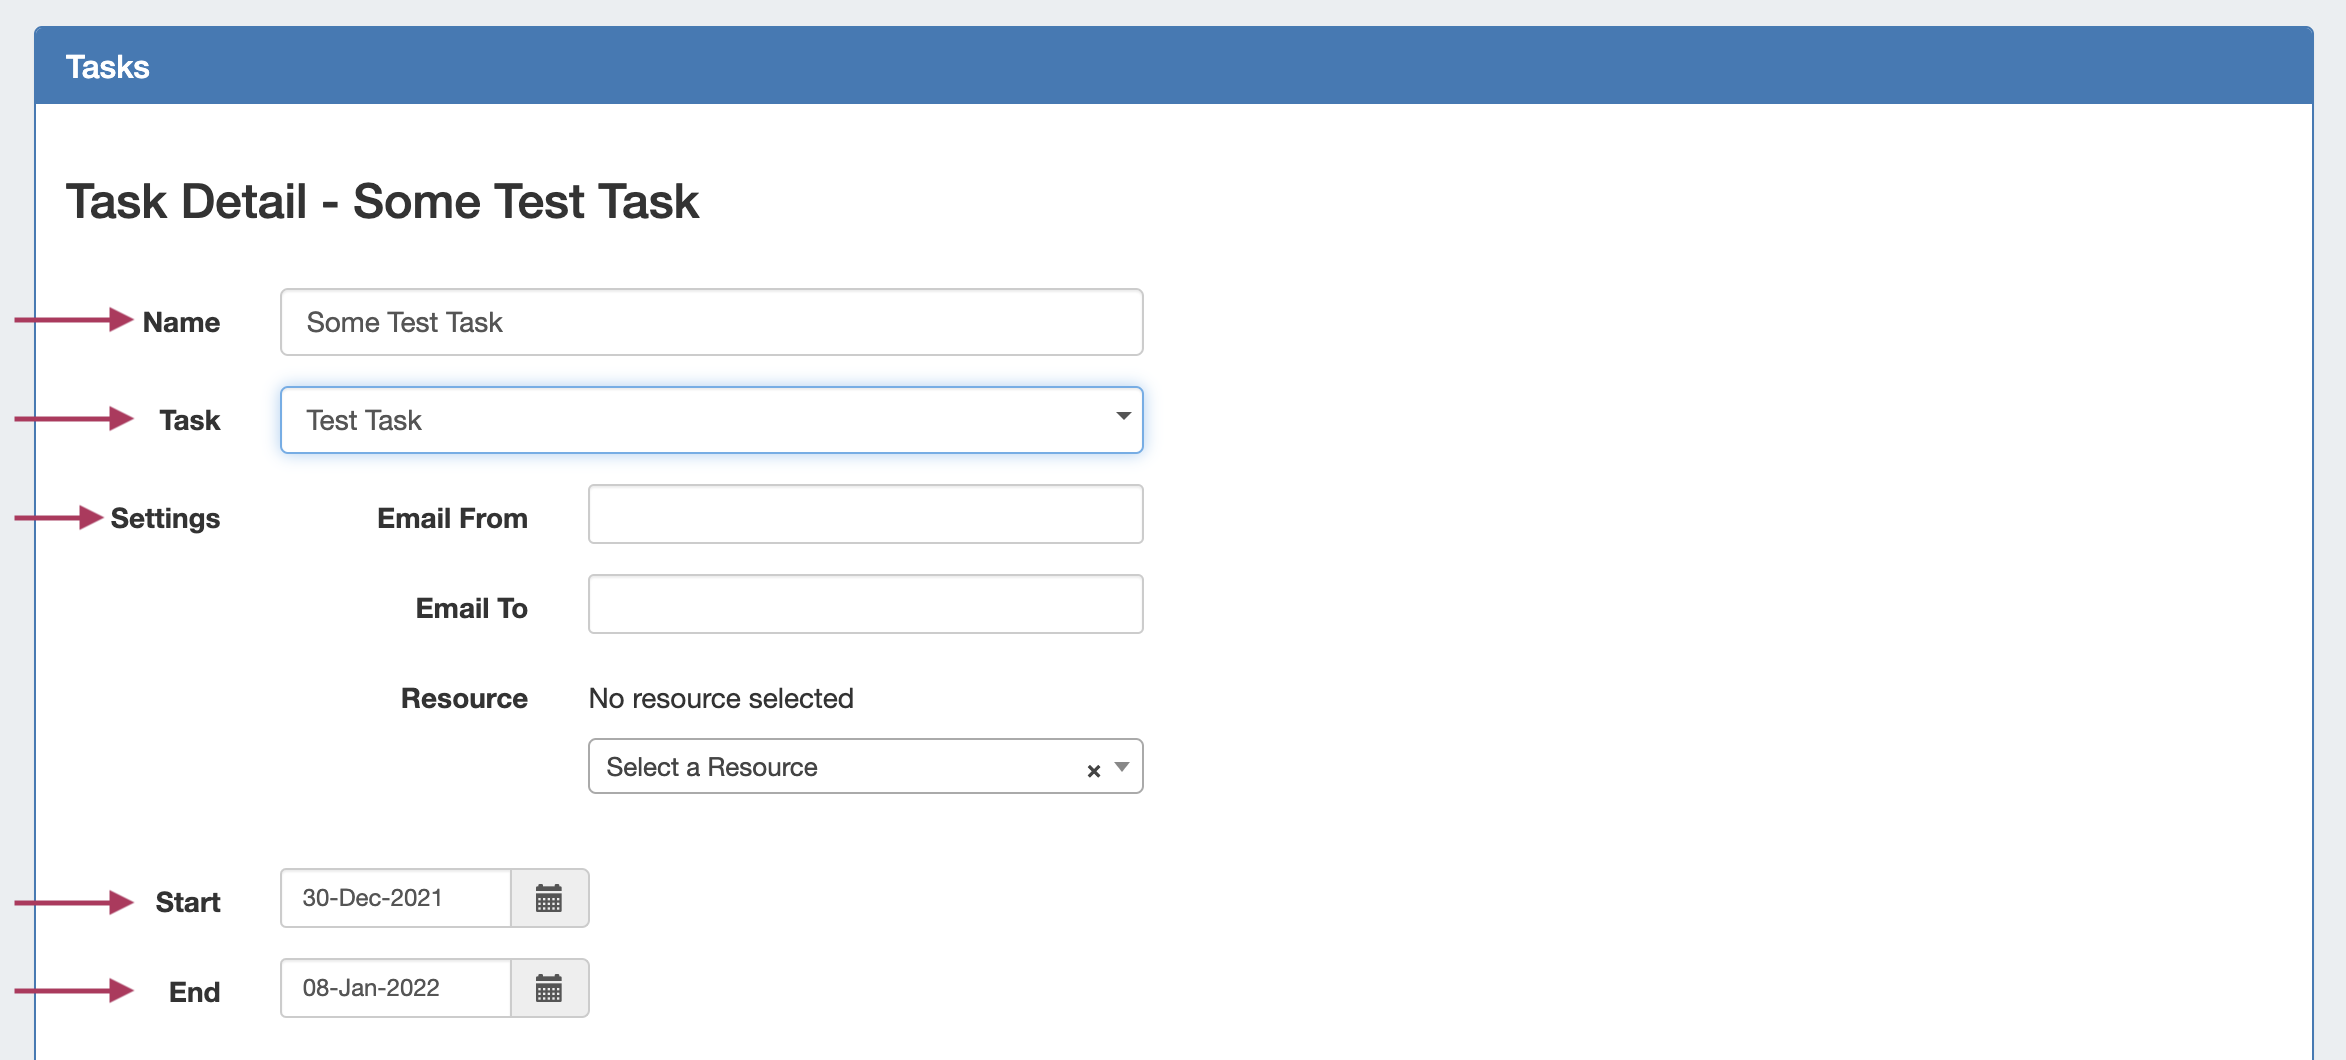
Under "Task Detail", fill in the following fields (fields may vary based on the selected task):
Name: Create a name for your task
Task: Select a pre-created task from the dropdown menu.
...
Email From / Email To: Enter an email address to send task notifications from, and the desired recipient. This is an optional setting.
DNS Zone Transfer Settings: When selecting the DNS Zone Transfer task, you will have the following setting options:
Select Action Type / Select Server: When selecting the DNS zone transfer task, you can choose the action type to a) push all zones to all servers b) push all zones on a single server (then select server) or c) push one zone (then select zone).
Backup the Database Settings: When selecting the Backup task, you will have the following setting options:
Email From / Email To: Enter an email address to send task notifications from, and the desired recipient. This is an optional setting.
...
Resource / Server / Action / Location: Some tasks have additional selections to perform the task on a specific resource, server, save to a specific location, or perform a specific action type. Options will vary depending on the selected task.
Start: The start date you wish the task to begin repeatedly occurring. By default, the current day is entered.
End: The date you wish repeat settings to end. For one-time tasks, enter the next calendar day after the start (run) date. To have a task run indefinitely, leave the end date blank.
...
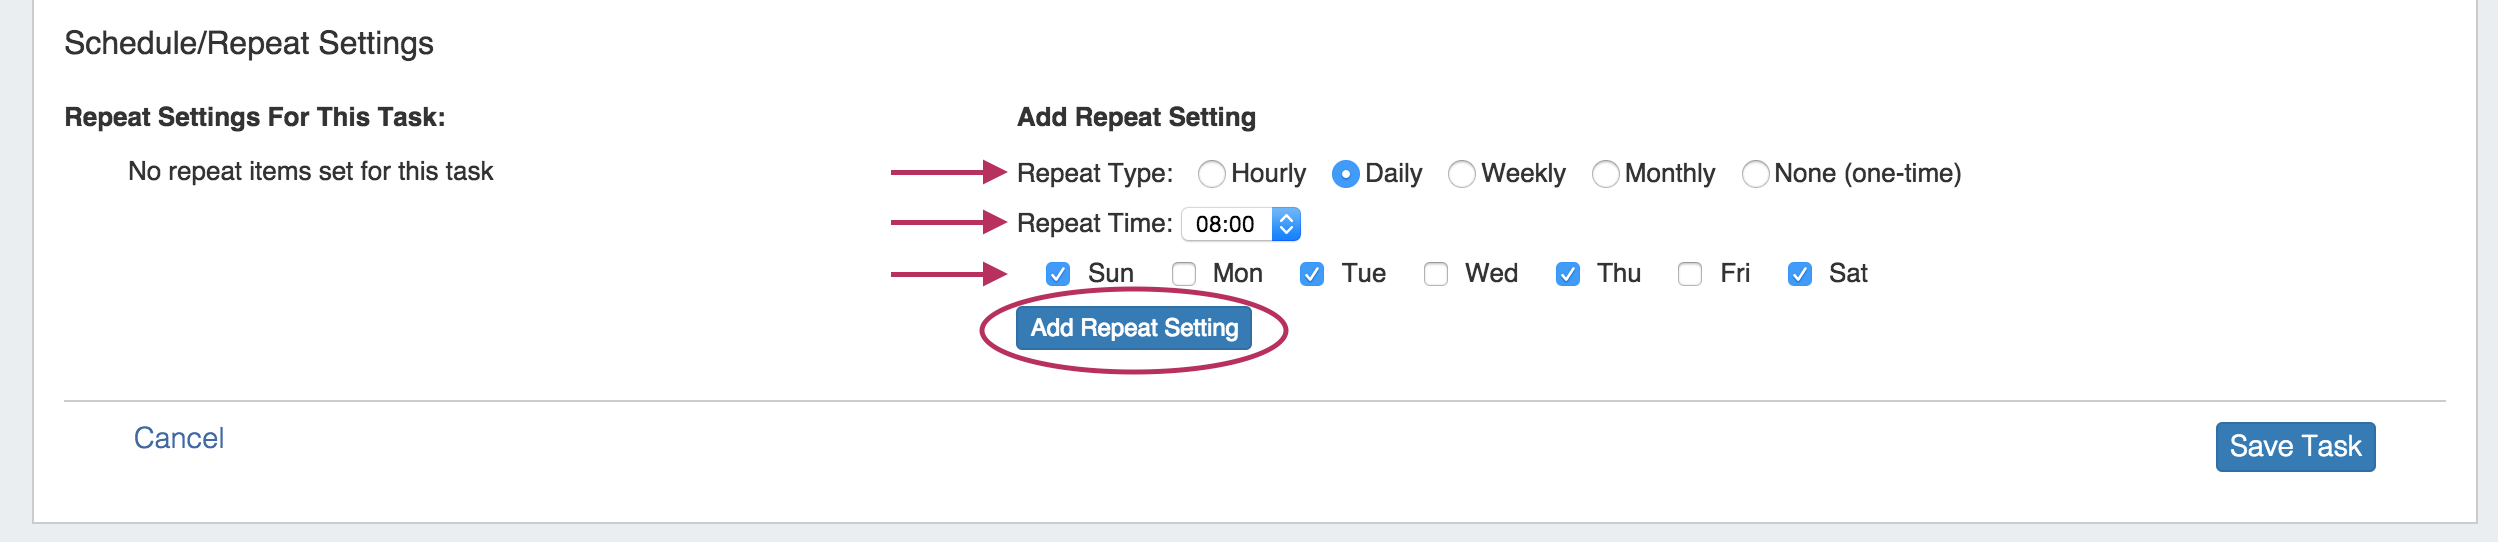
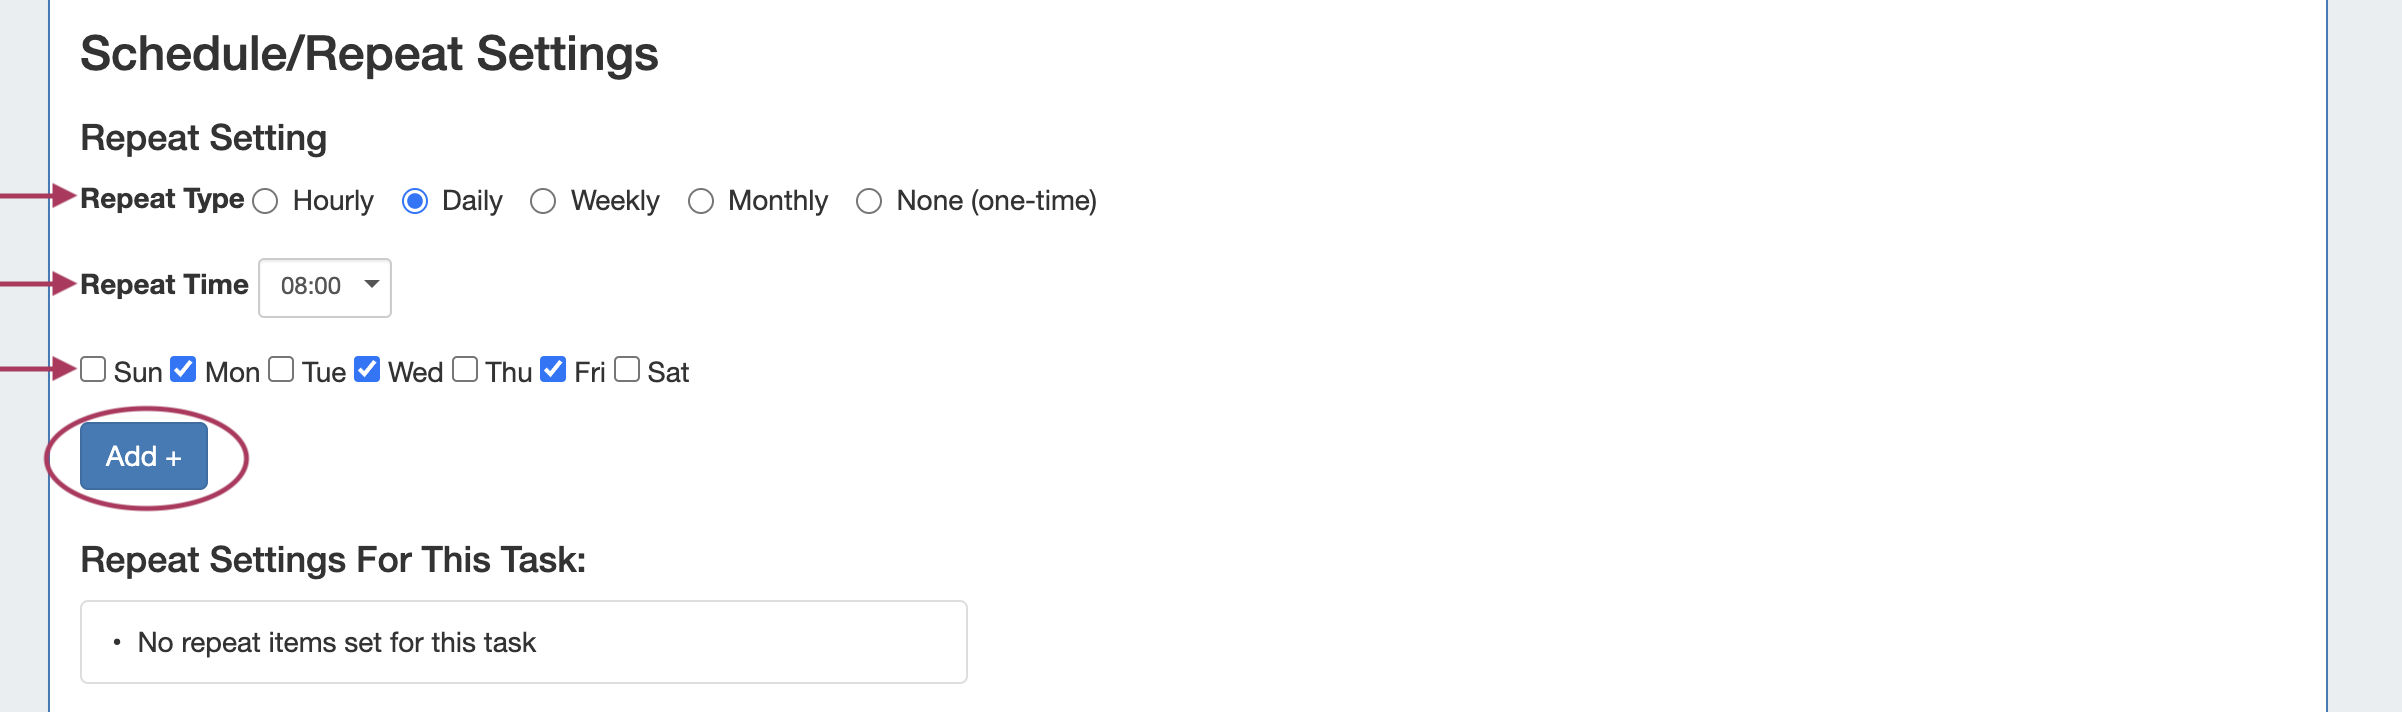
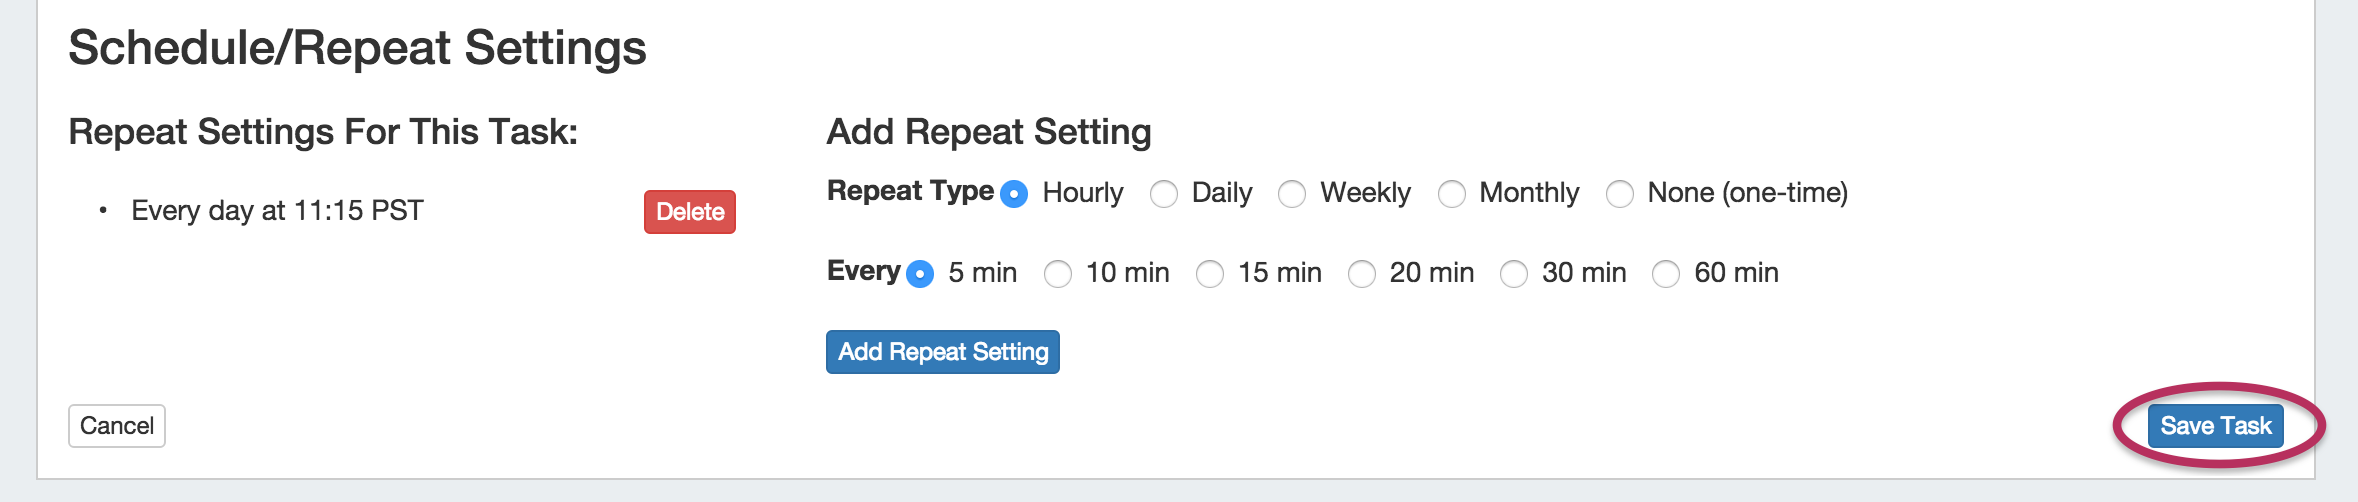
Add Repeat Settings
Add repeat settings for your tasks. First, select your repeat type - hourly, daily, weekly, monthly, or none (one time). The type that you select will prompt different additional setting options.
Once you have selected the type, time, and day(s)/options, click "Add" to associate those settings with this task.
Repeat Type options and details:
Hourly: Selecting the hourly repeat type will then prompt for the number of repeat times per hour - every 5,10, 15, 20, 30, or 60 minutes. All minute selections start from the top of the hour. For example, if every 20 minutes is selected, the task will run at :00, :20, :40 during each hour.
Daily: Selecting the daily repeat type will prompt for the specific time to repeat the task, and which days you wish the task to occur. The Repeat Time is based on a 24 hour clock set at UTC time. To assist in any time zone conversions, the current UTC time is shown at the top of the scheduler page.
Weekly: Selecting the weekly repeat type prompts for the specific time to repeat the task as well as frequency by week. Weekly tasks occur on the day selected as the start date. Using the weekly option, you may choose from a range of weekly (every 1 week) to once every two months (every 8 weeks).
Monthly: Selecting the monthly repeat type prompts for a repeat time and a day. For the day option, you can either choose a specific day (ie, the 15th of each month) or a relative day (the 1st Friday of each month).
| Warning |
|---|
For Monthly repeat settings, verify that the calendar day you select the task to occur exists! For example, if you select the 5th Saturday of each month, the task will repeat only in months which have 5 Saturdays and skip all other months. |
None (one-time): Select the time and day that you wish the single occurrence task to run. (Ensure that "End Date" in task details is set to the day after the desired run date).
After you have selected your Repeat Setting options, click the "Add Repeat Setting" button.
Verify Repeat Settings and Save
When you add repeat settings, they will appear under the "Repeat Settings For This Task" area. Verify your all selected settings, and if desired, you may delete individual repeat settings by hitting the "Delete" button.
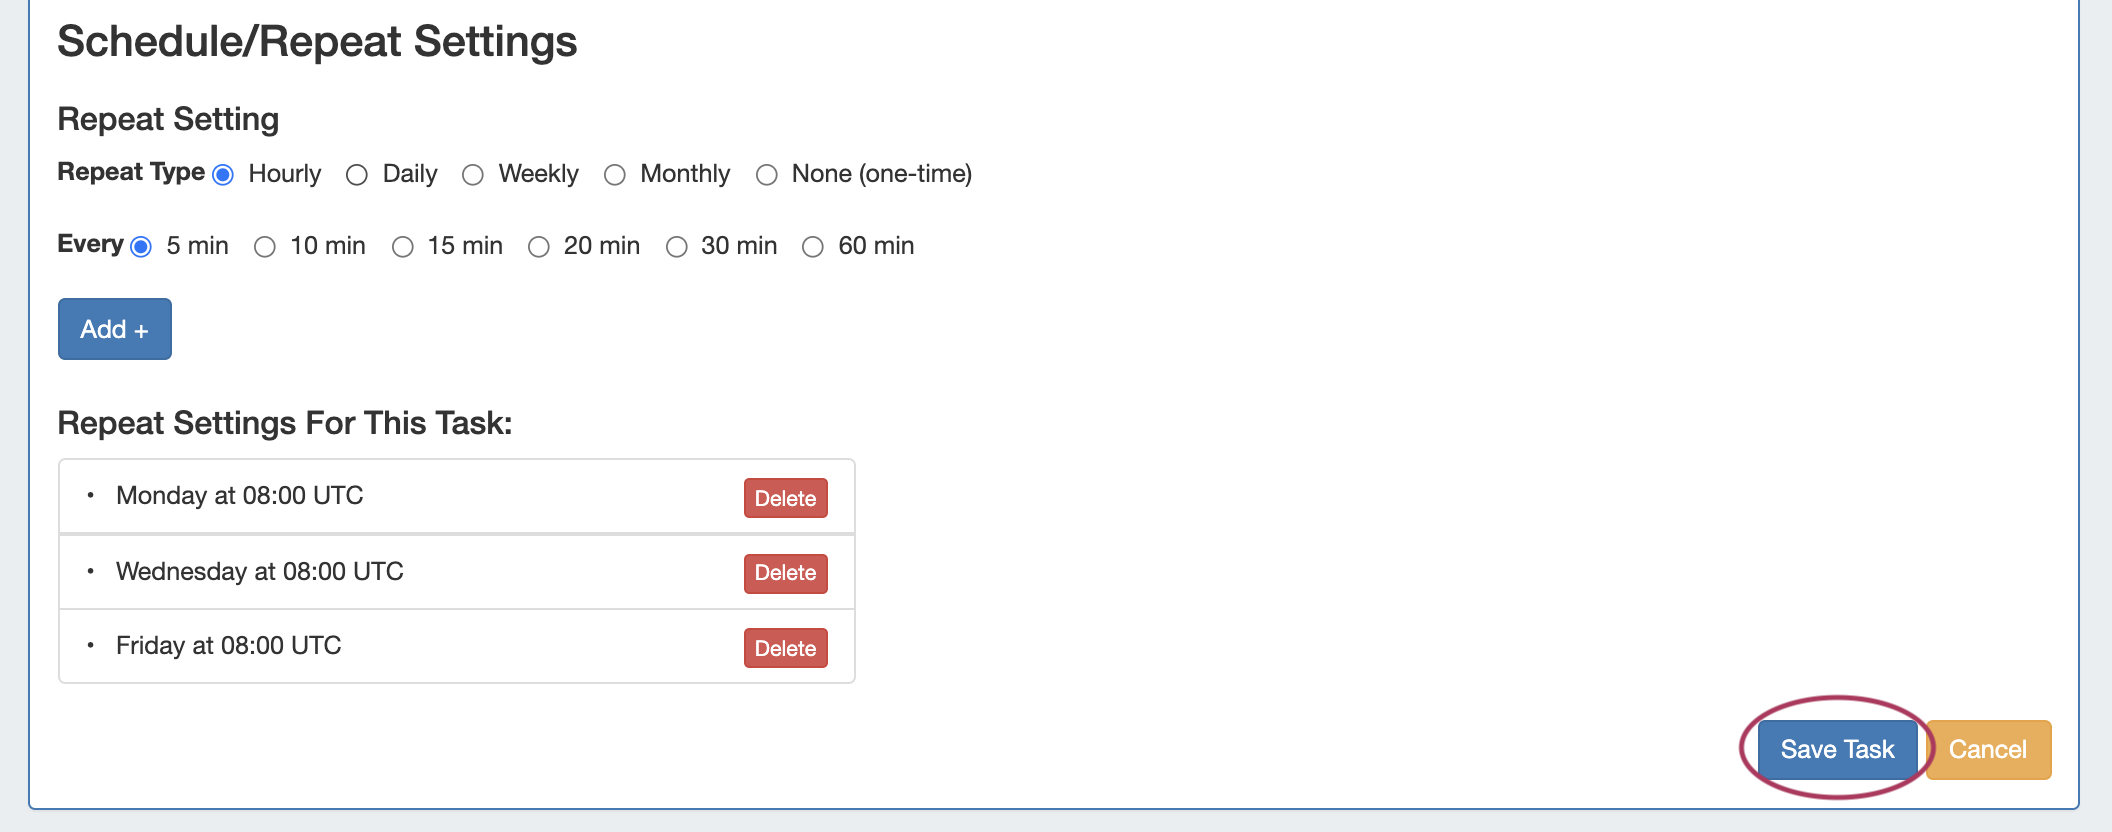
When complete, hit the "Save Task" button to finalize your changes and add your new task to the task list. 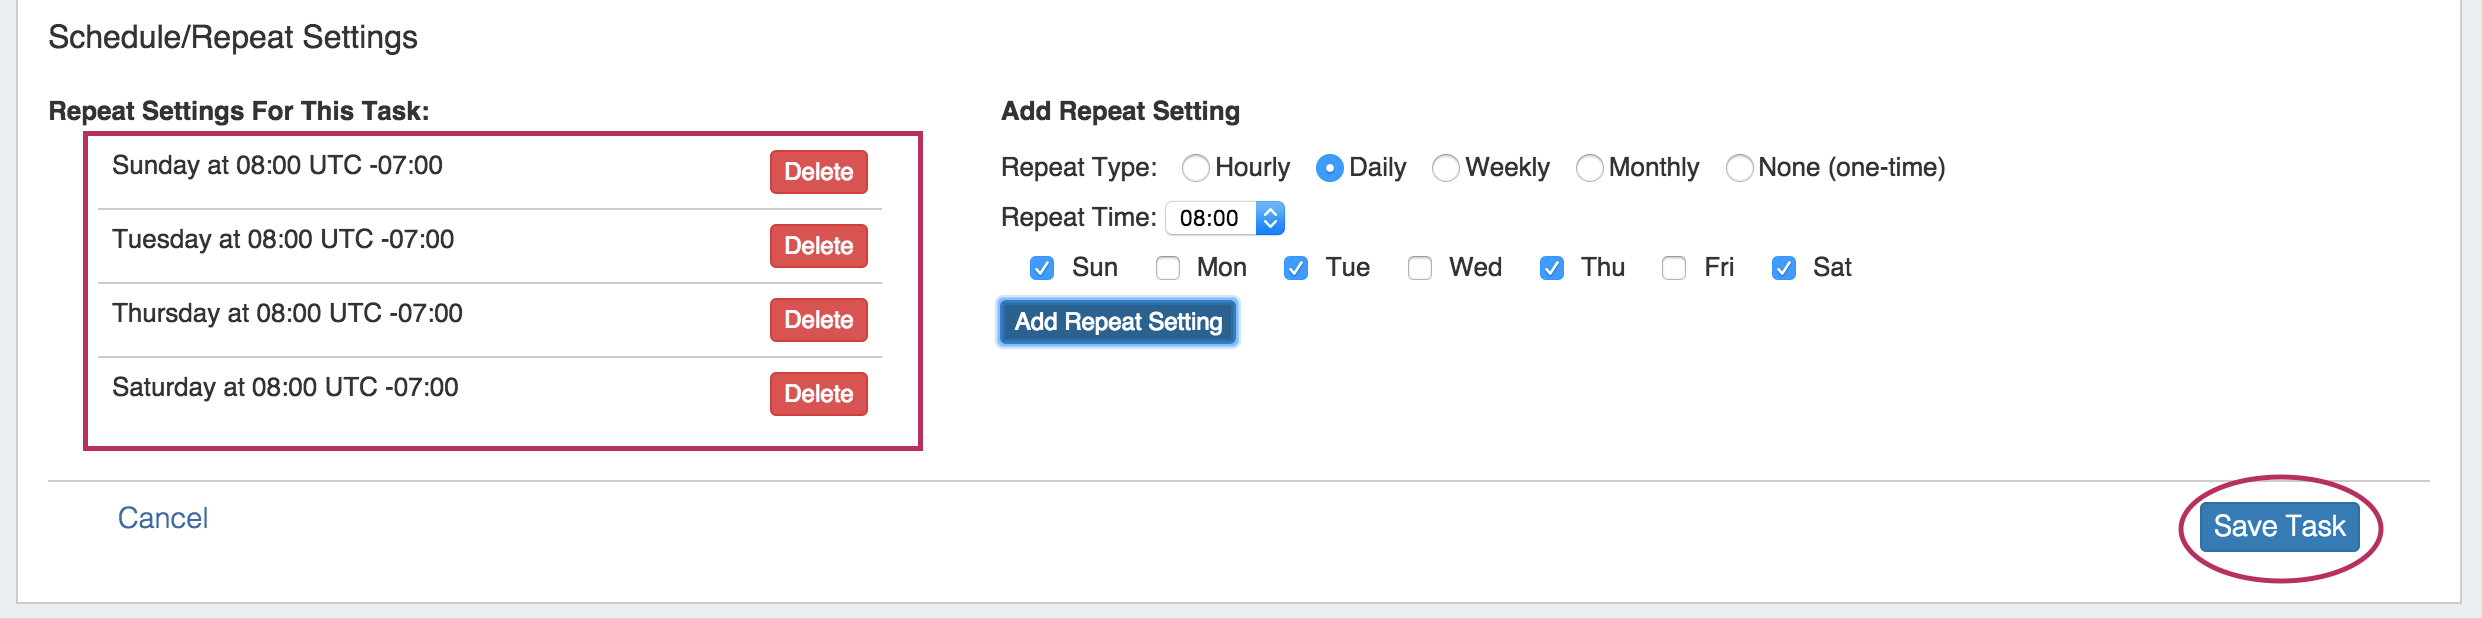
Managing Tasks
...
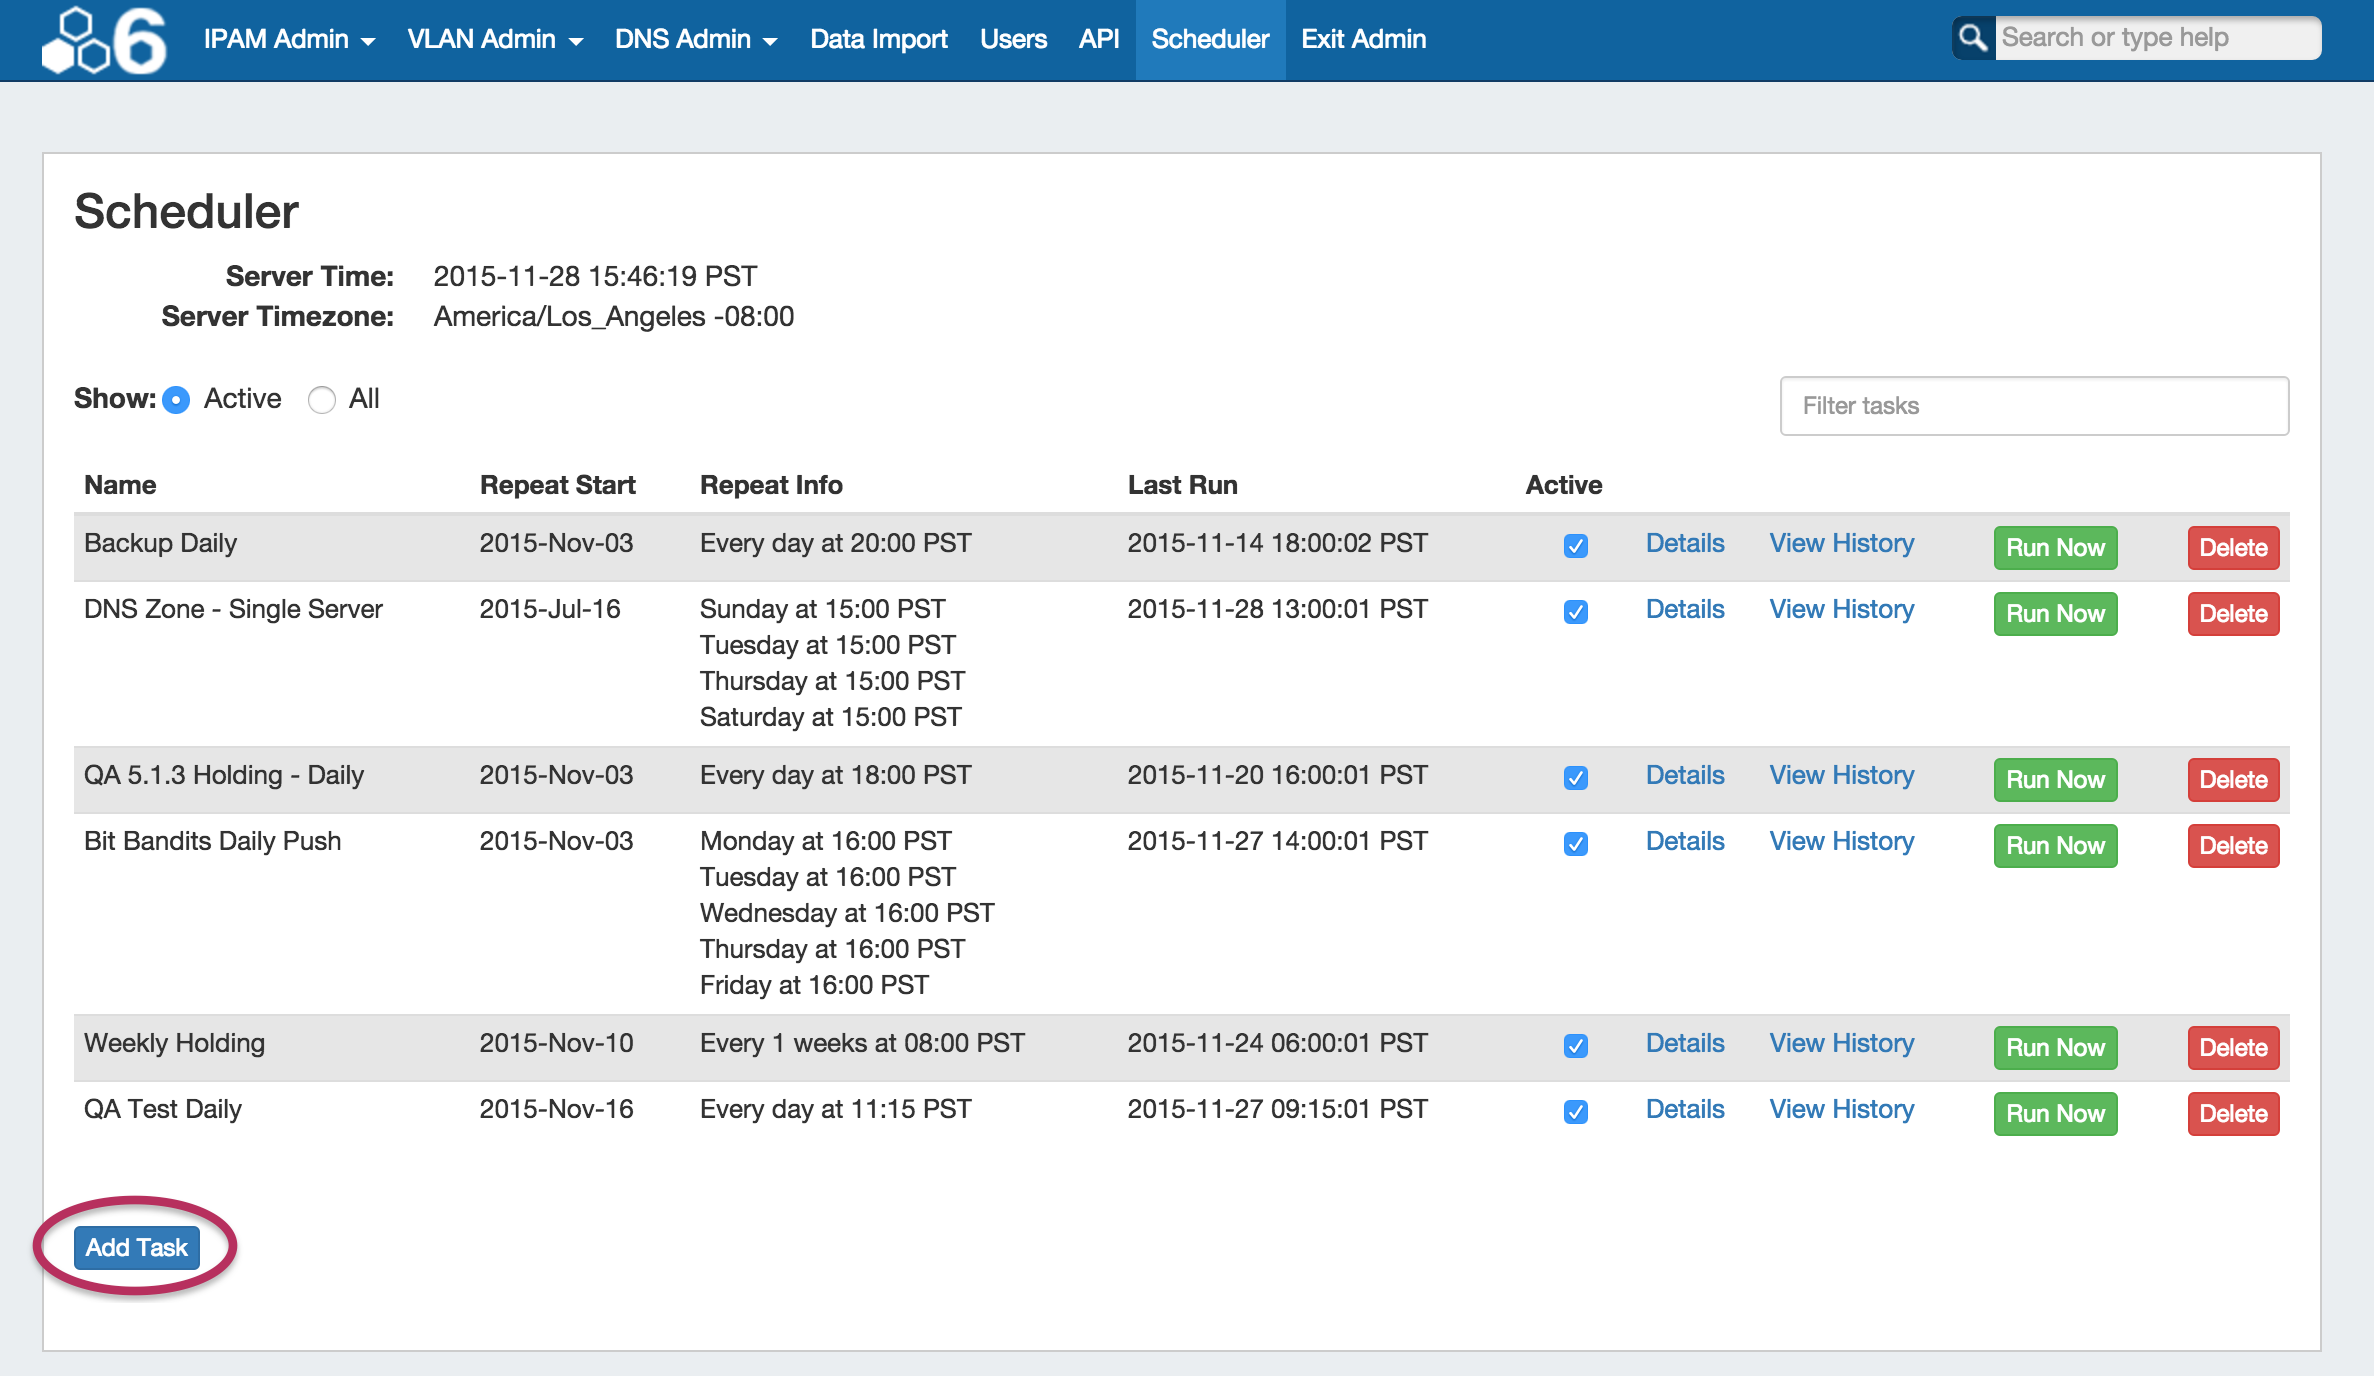
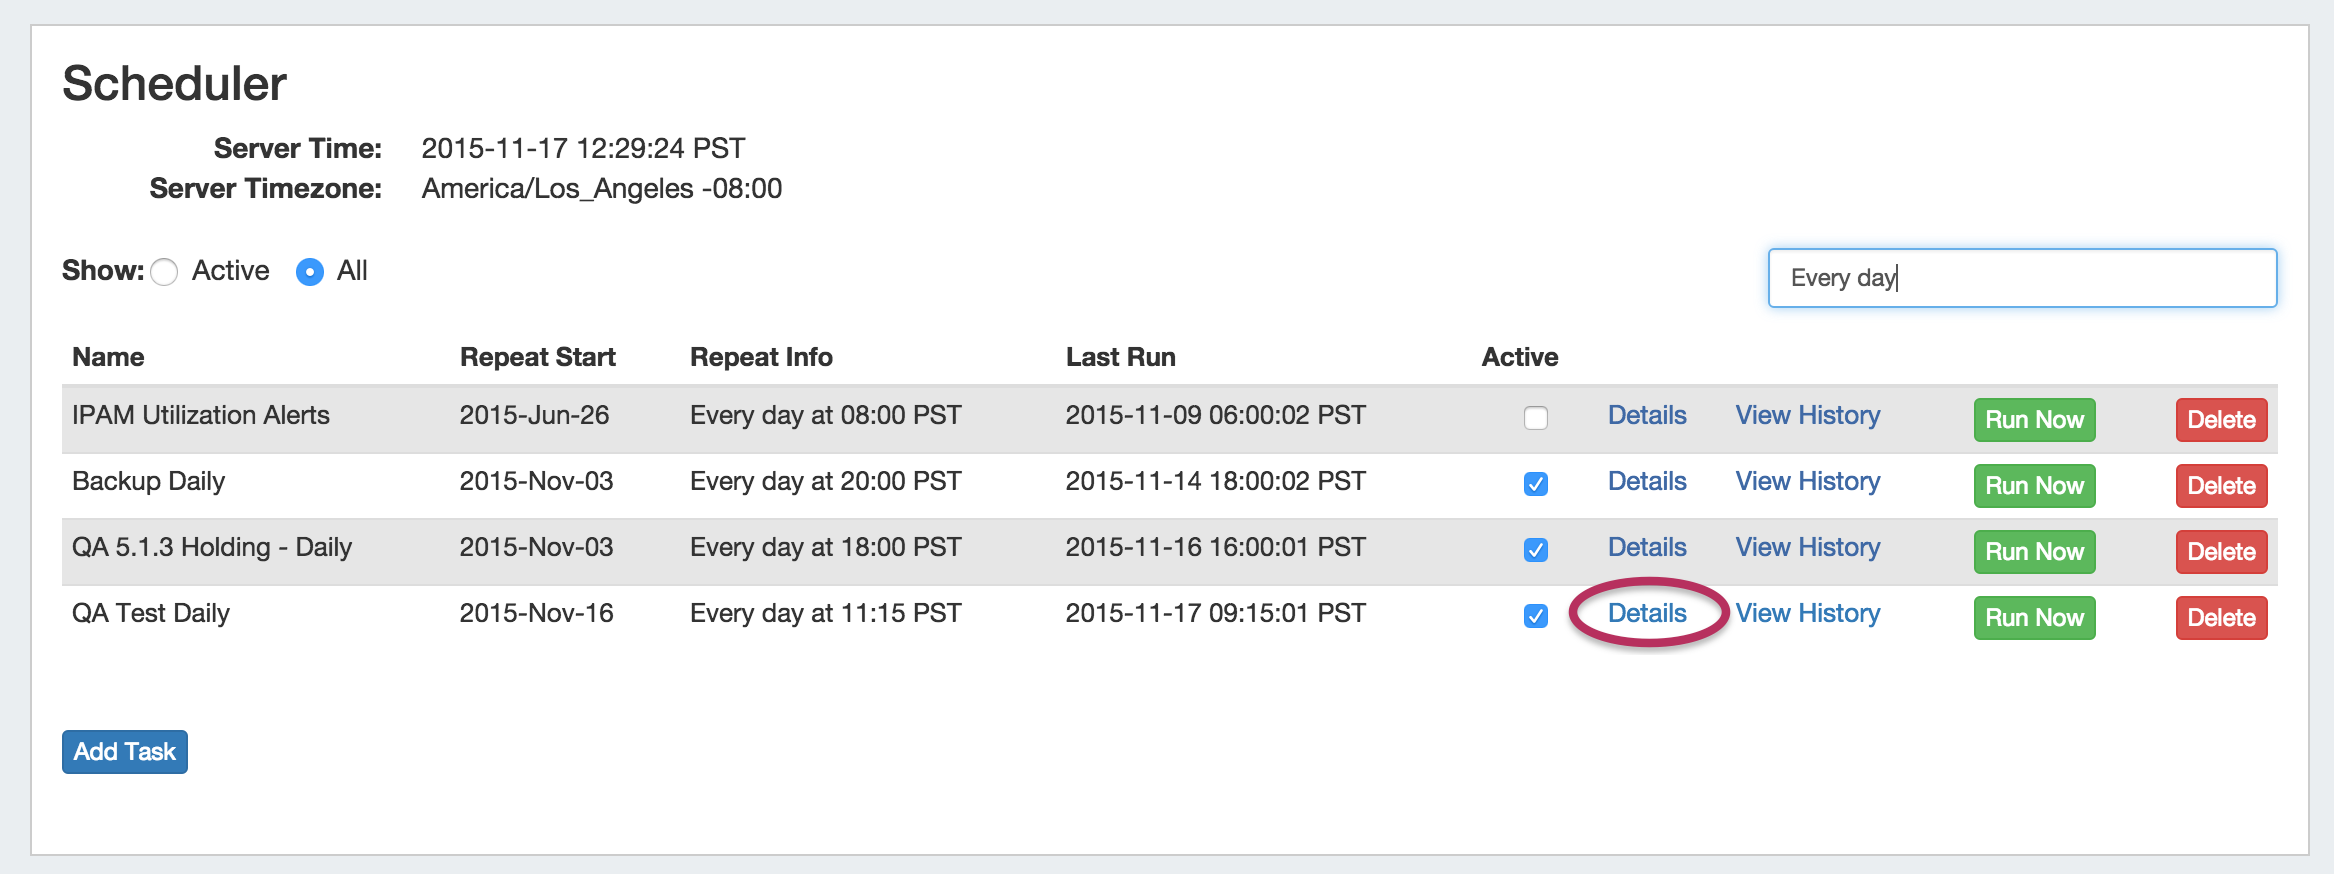
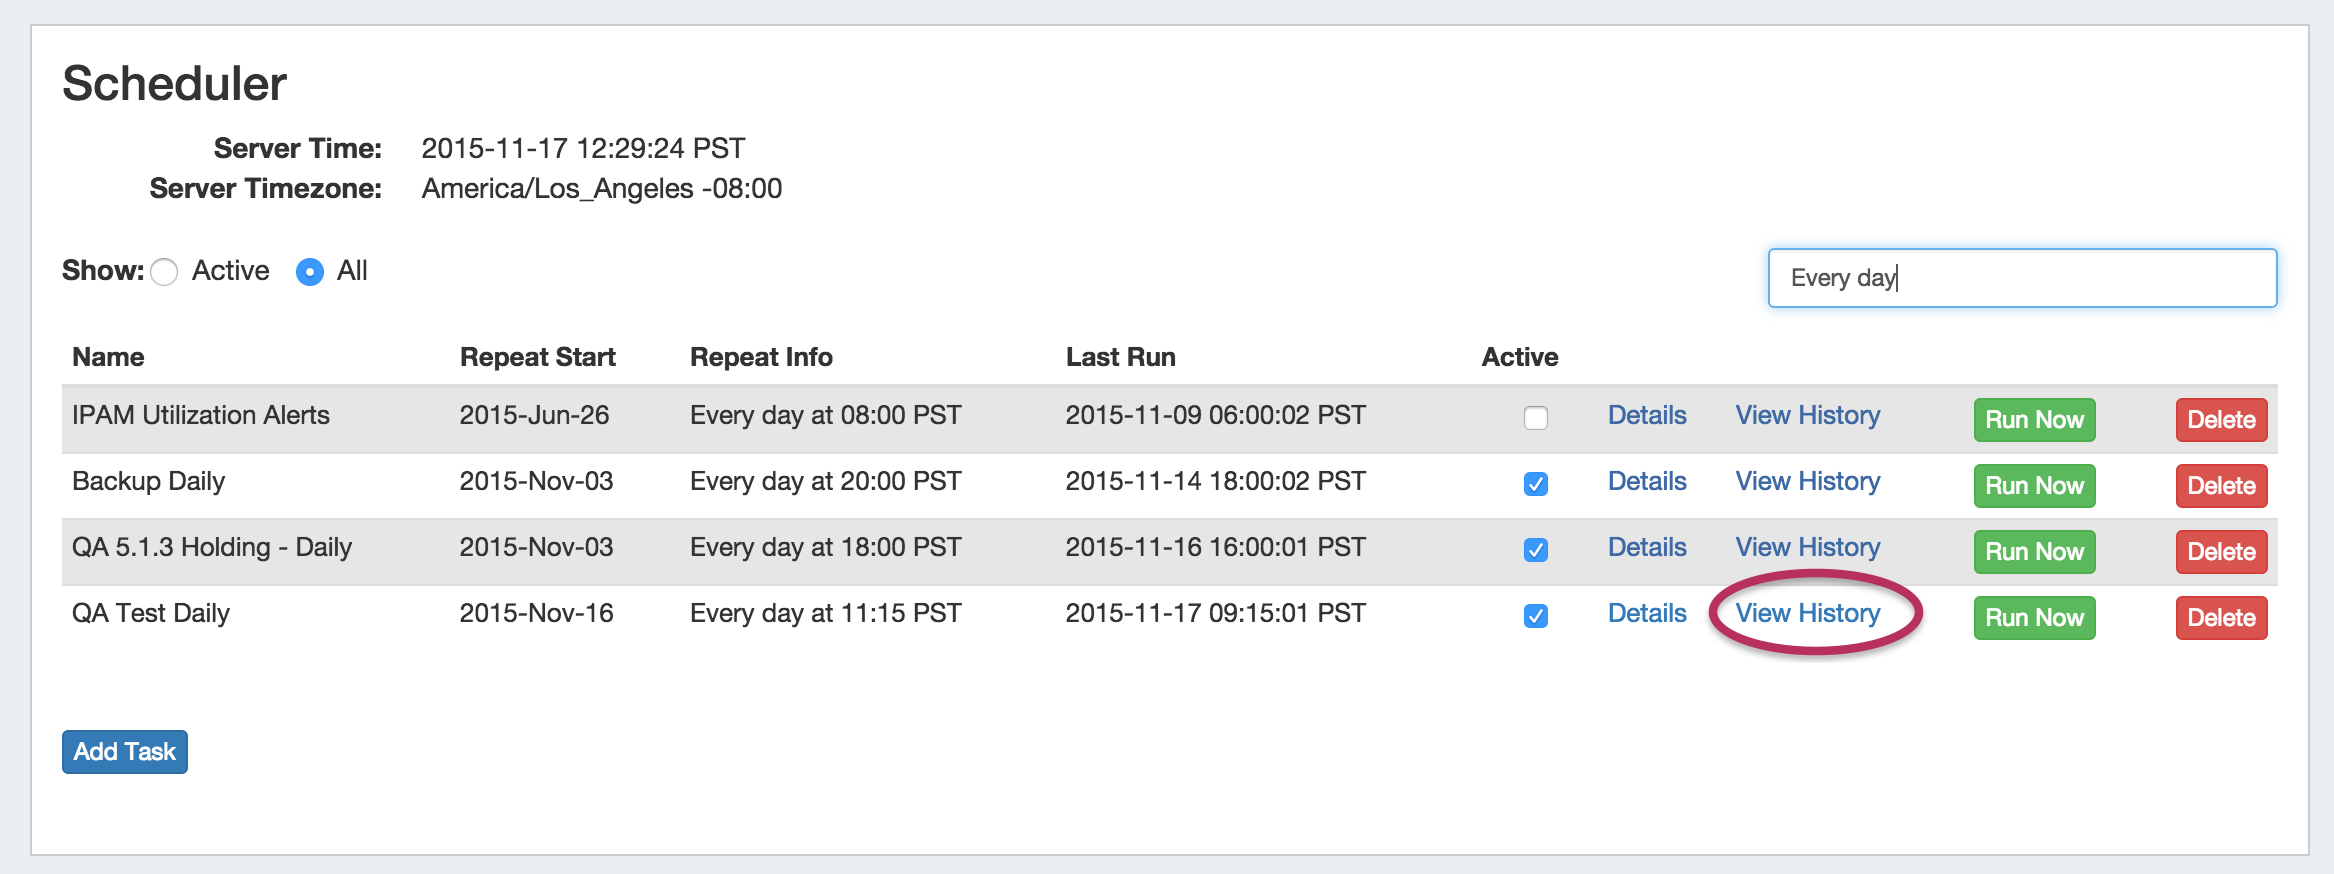
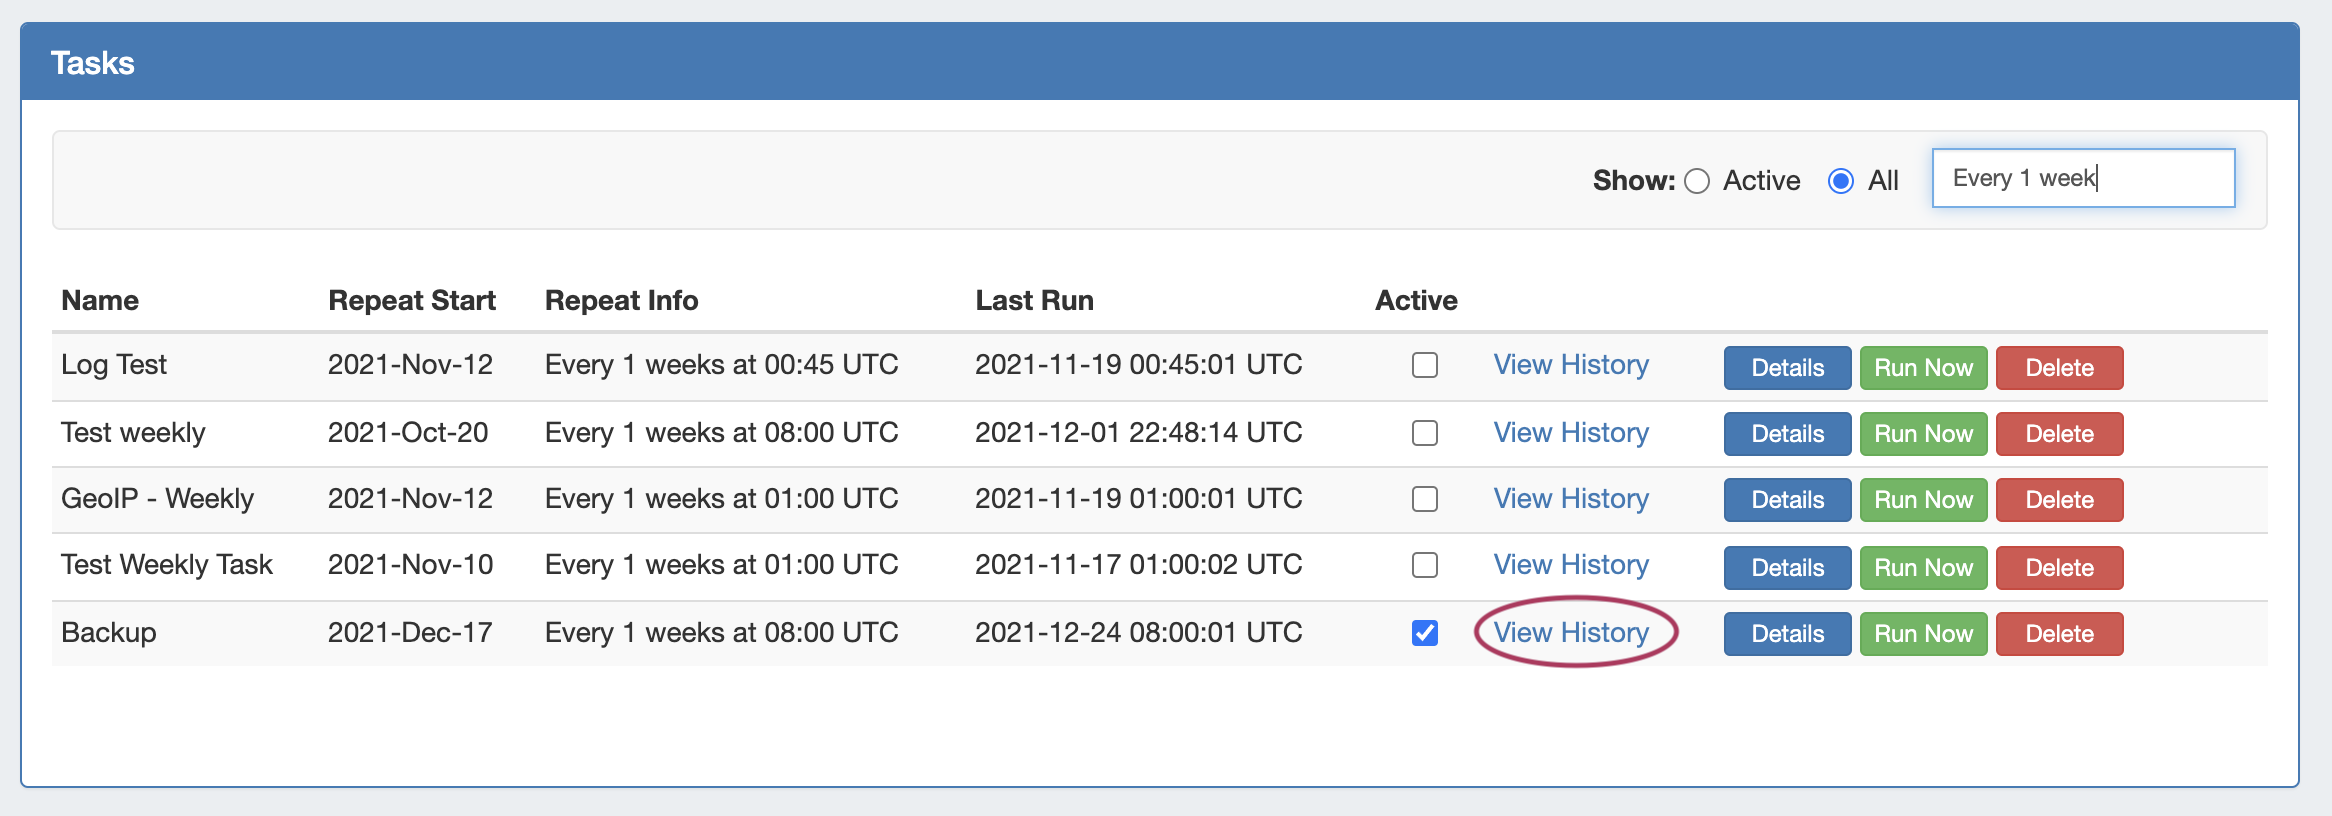
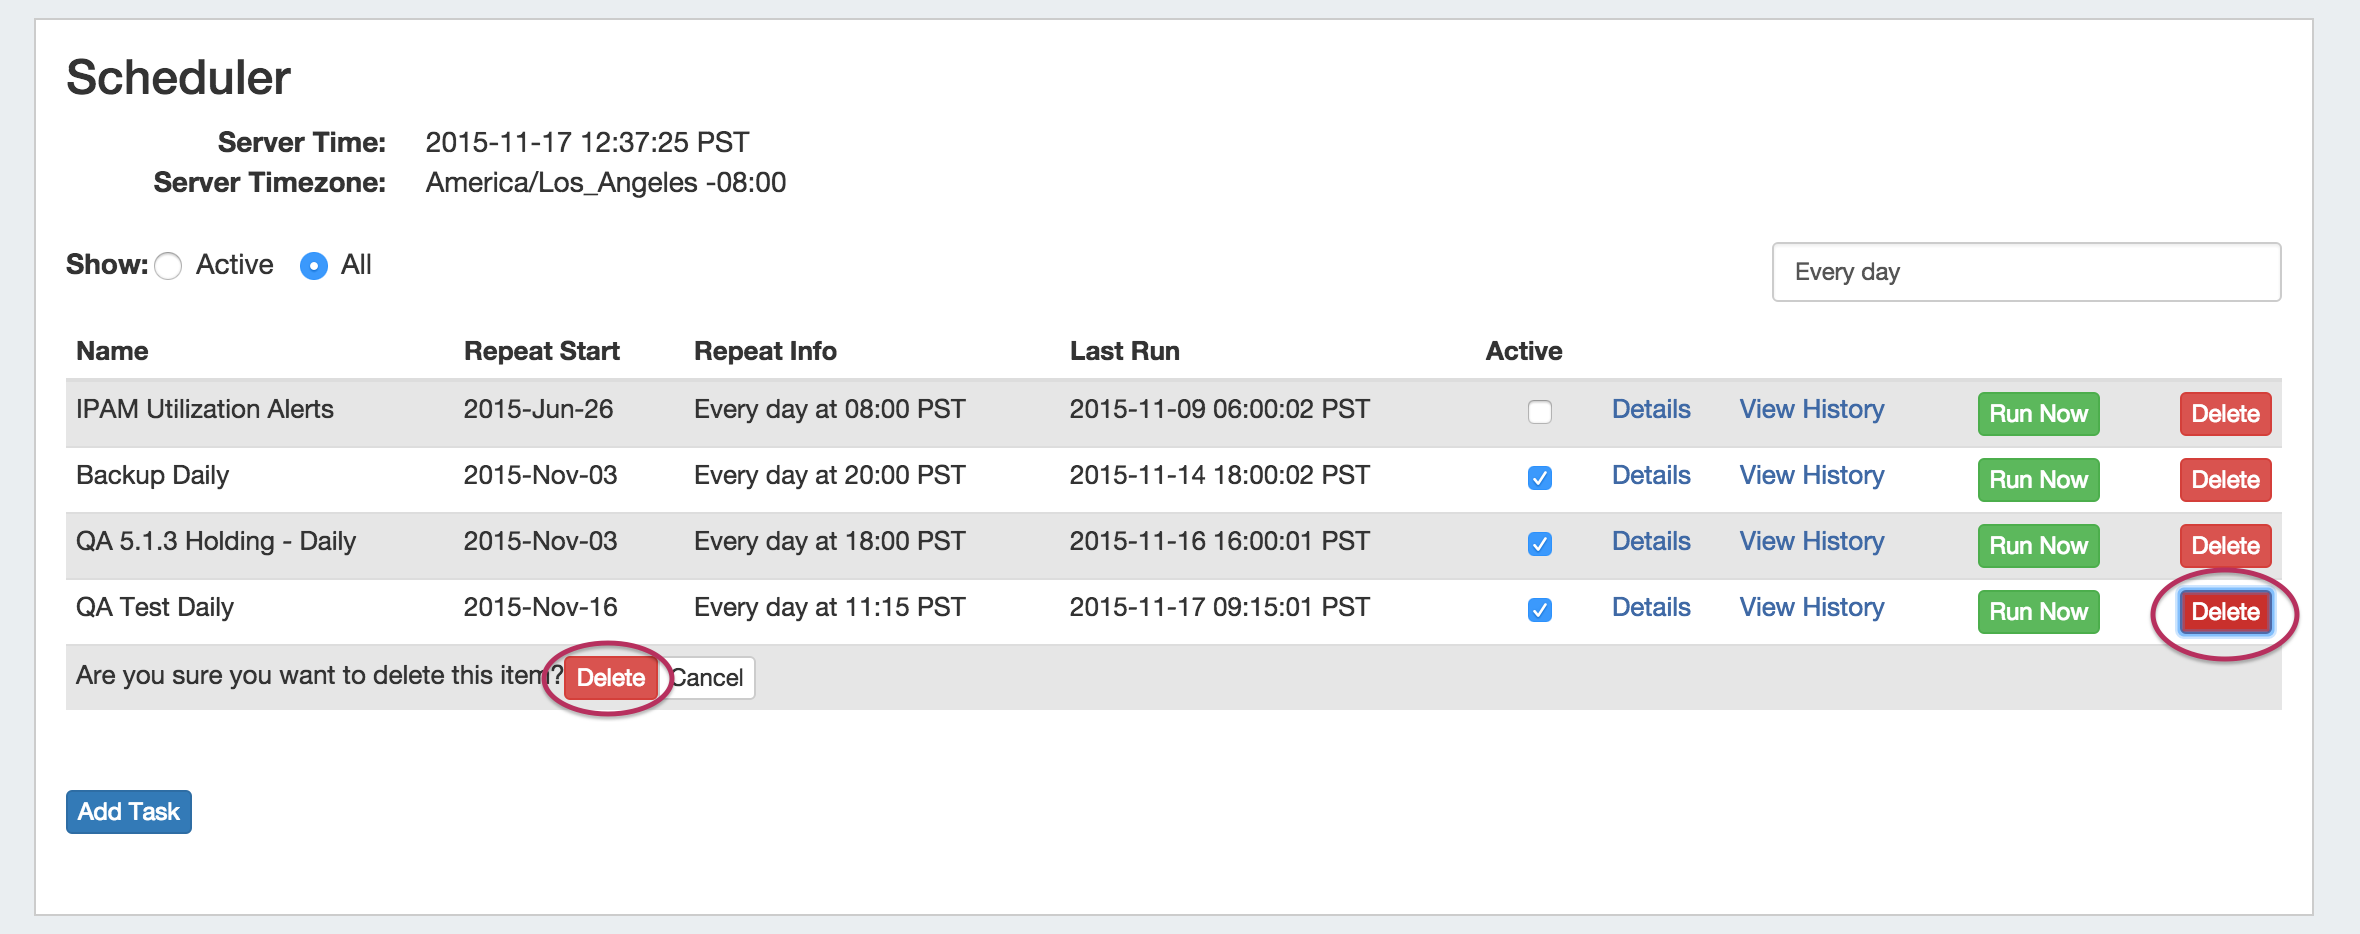
From the task list itself, you can enable/disable tasks, view details, view history, run tasks, and delete tasks.
![]()

Filters:
Show: Select "Active" to show only active tasks (checkbox enabled under "Active" for the task), or "All" to show all tasks
Filter Tasks (Text box): To further filter the task list, type a Name or Repeat Info keyword (ie, "Backup" or "Every day") into the Filter Tasks text box.
Task List:
Name: The task name assigned during the "Add Task" creation process.
Repeat Start: The date selected for the repeat settings to start
Repeat Info: The repeat settings chosen for the task.
Last Run: The date and time the task was last run, if applicable.
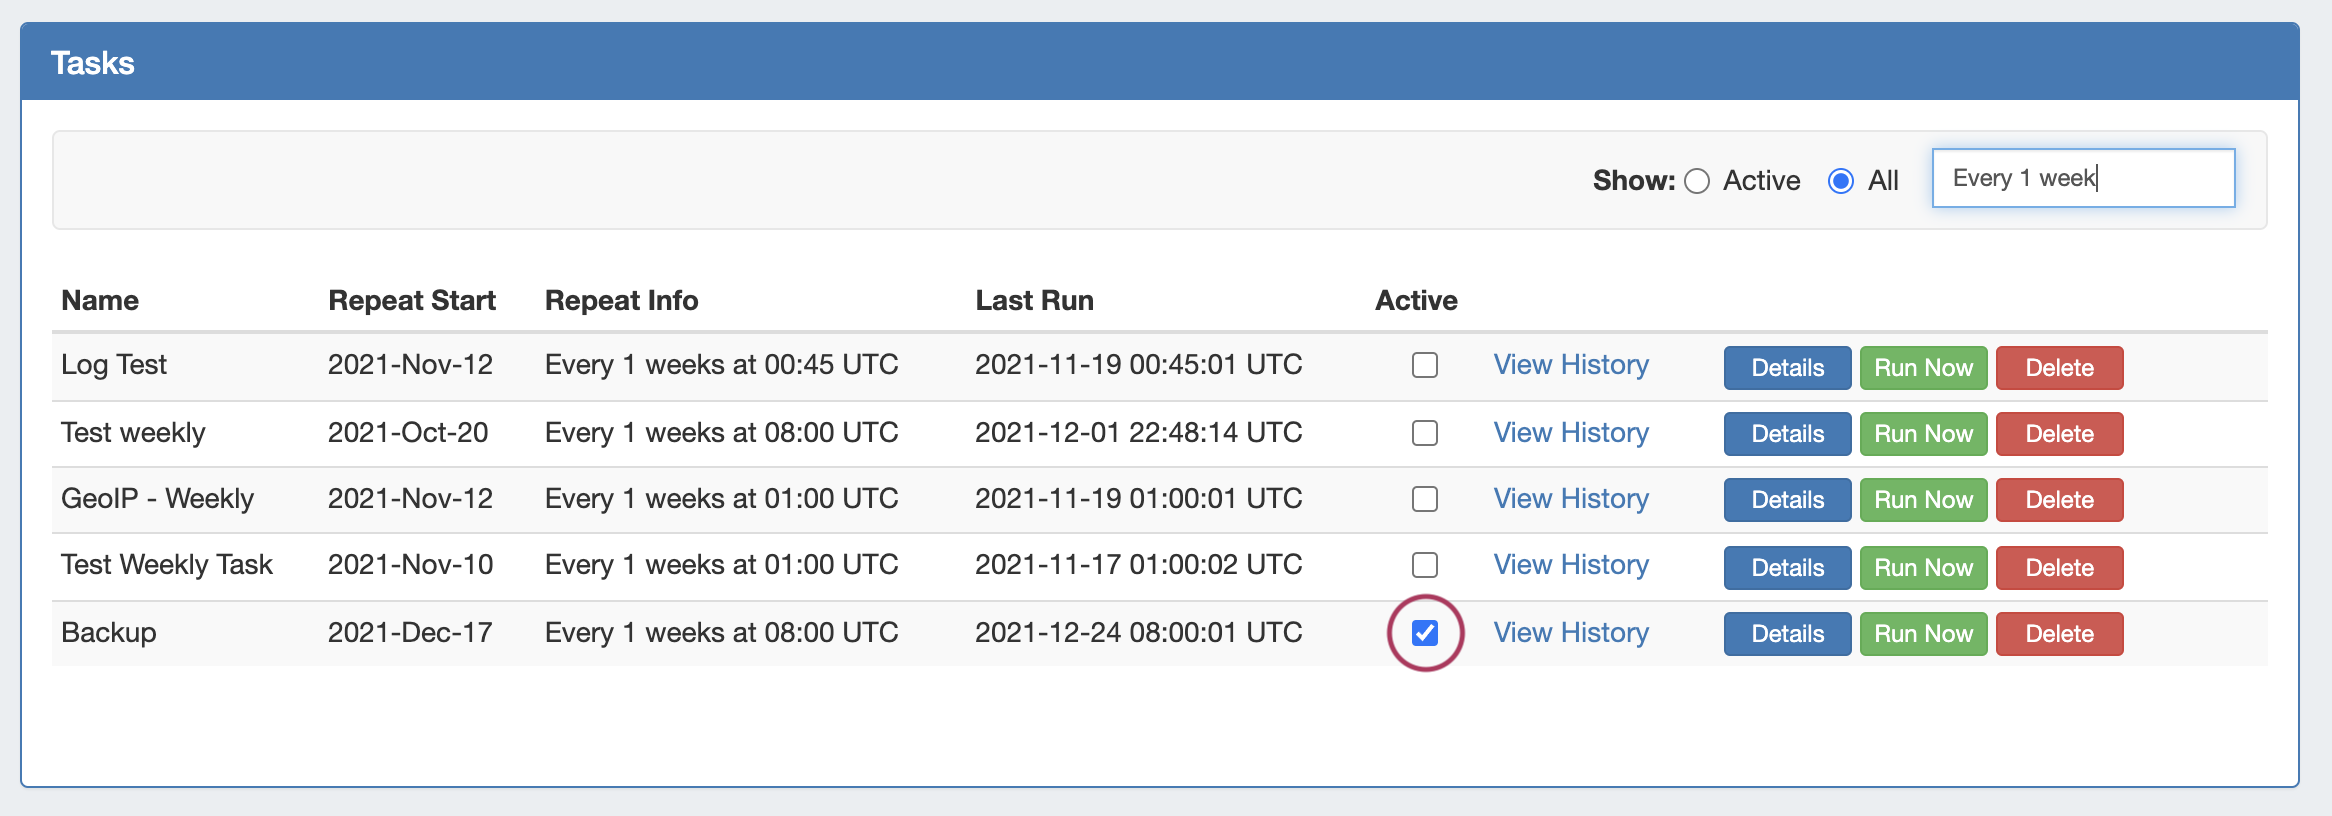
Active: To activate tasks, simply click the check box under "Active" in the task list. To deactivate a task, uncheck it. By default, tasks are checked as active once created.
View History: This link will show the log for task actions.
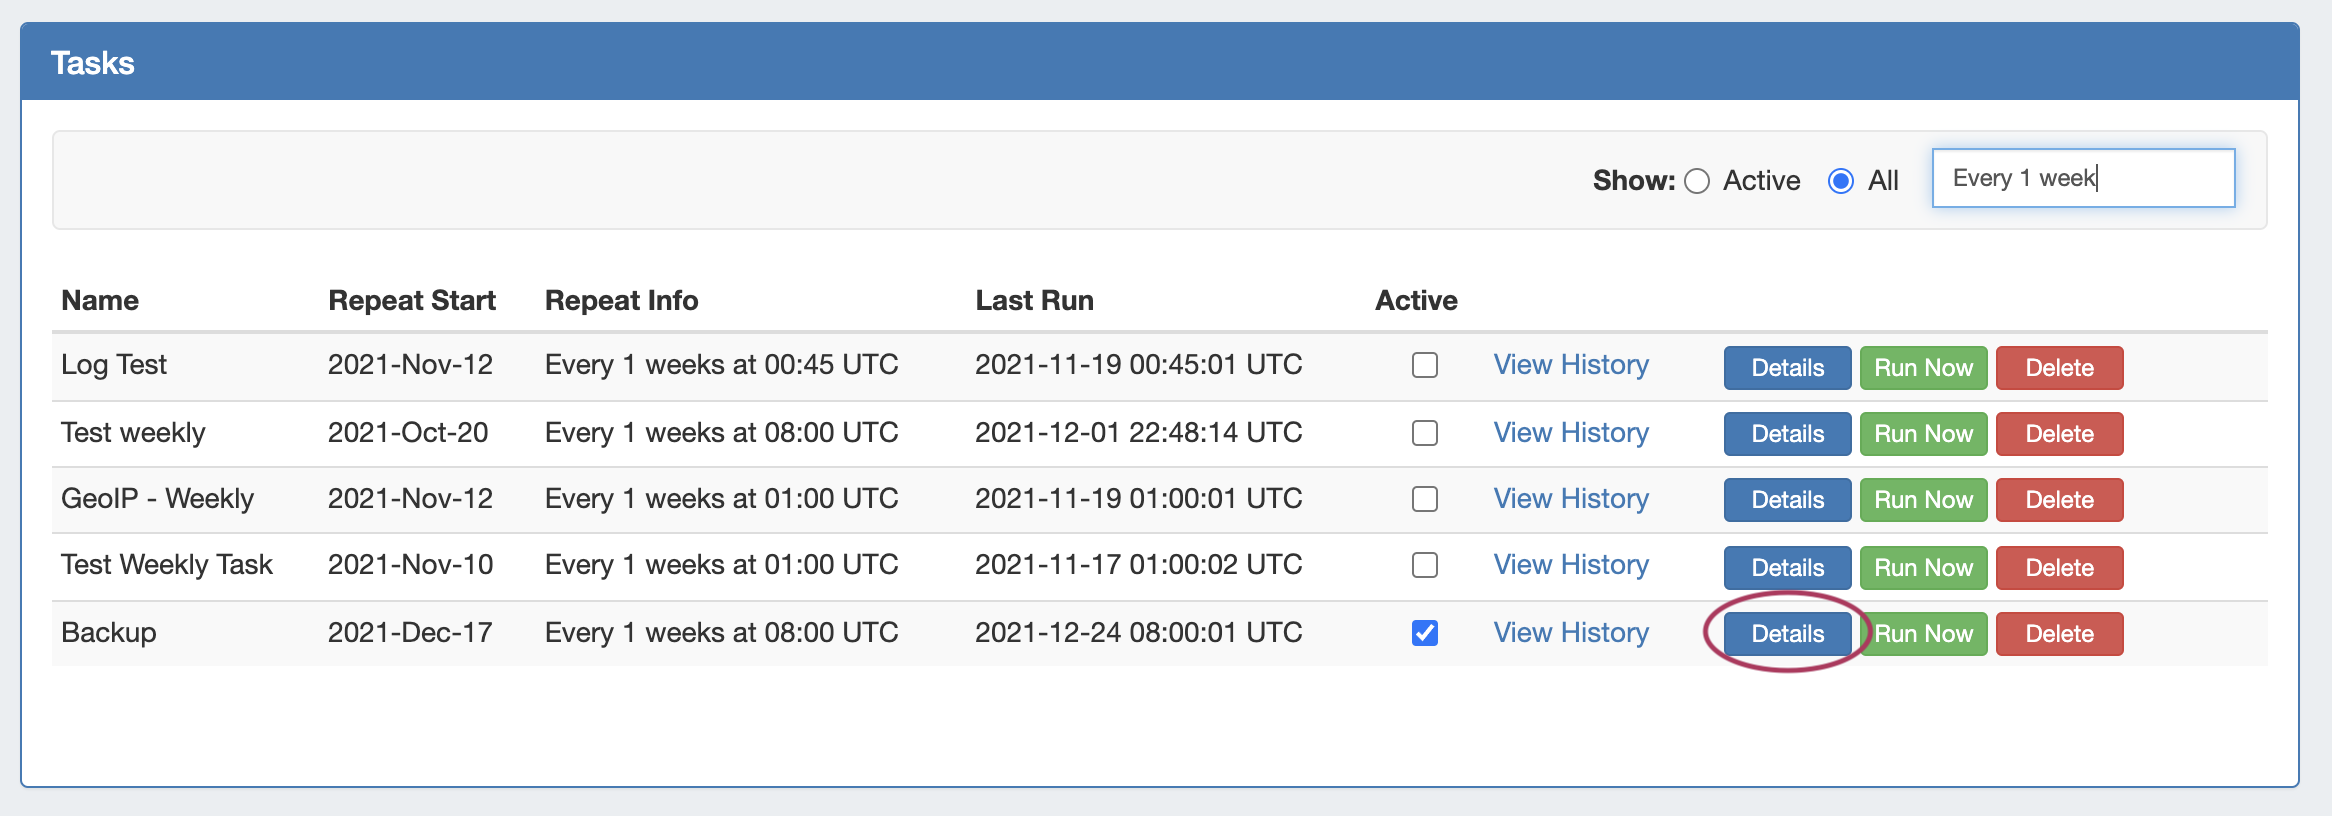
Details: This link will bring up the task details and repeat settings, which then may be edited and re-saved if needed.
View History: This link will show the log for task actions.
Run Now: The "Run Now" button will run the scheduled task when pressed, regardless of the scheduled repeat settings.
Delete: Deletes the task.
Activate / Deactivate Tasks
Click on the check box under "Active" for the task

Edit a Task
Click on the "Details" link for the task, then edit the Task Detail and Repeat Settings that appear below as needed.
Hit "Save Task" when finished to save your changes, or select "Cancel" to close the view without saving.
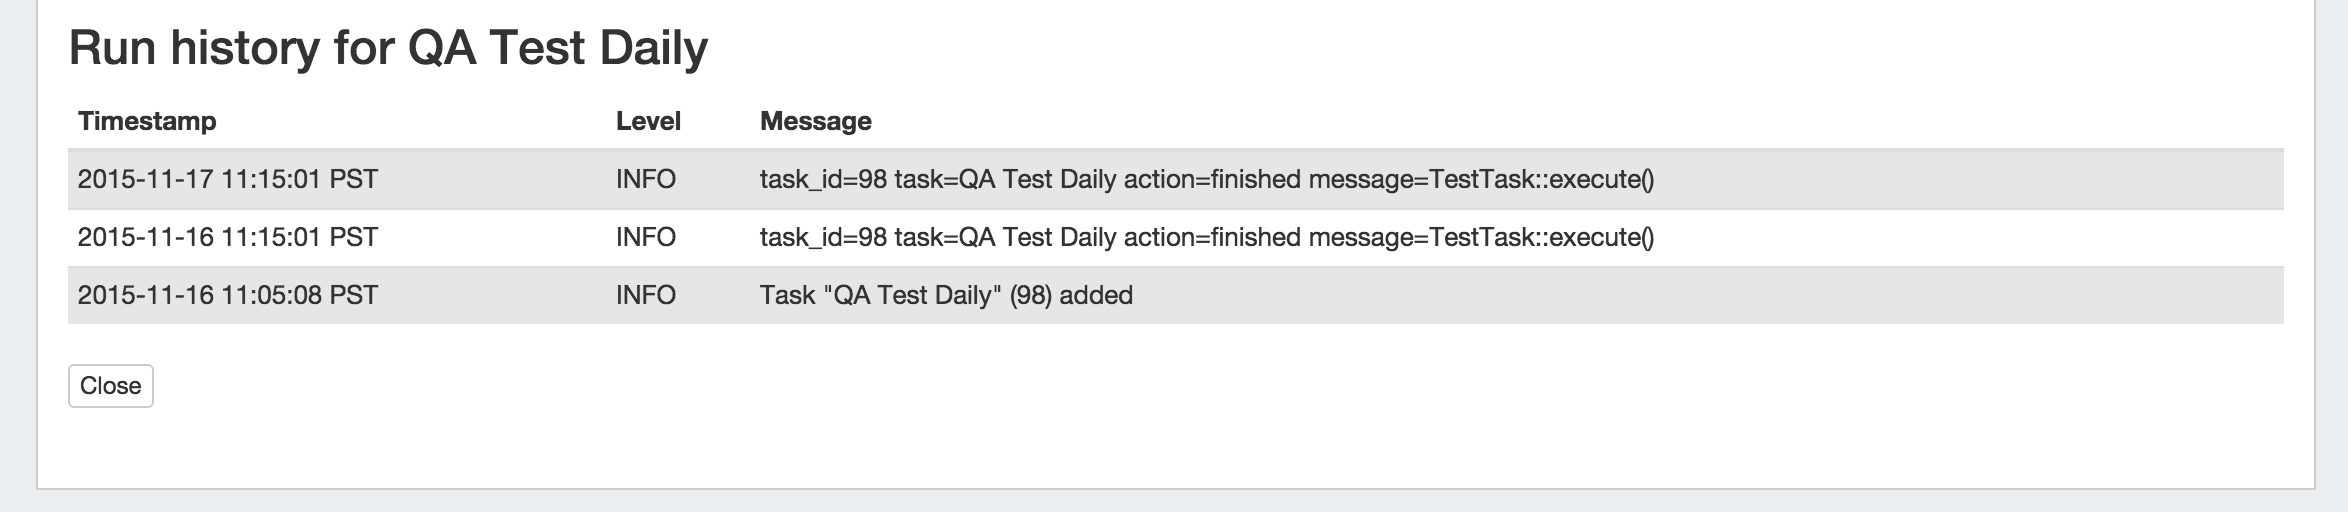
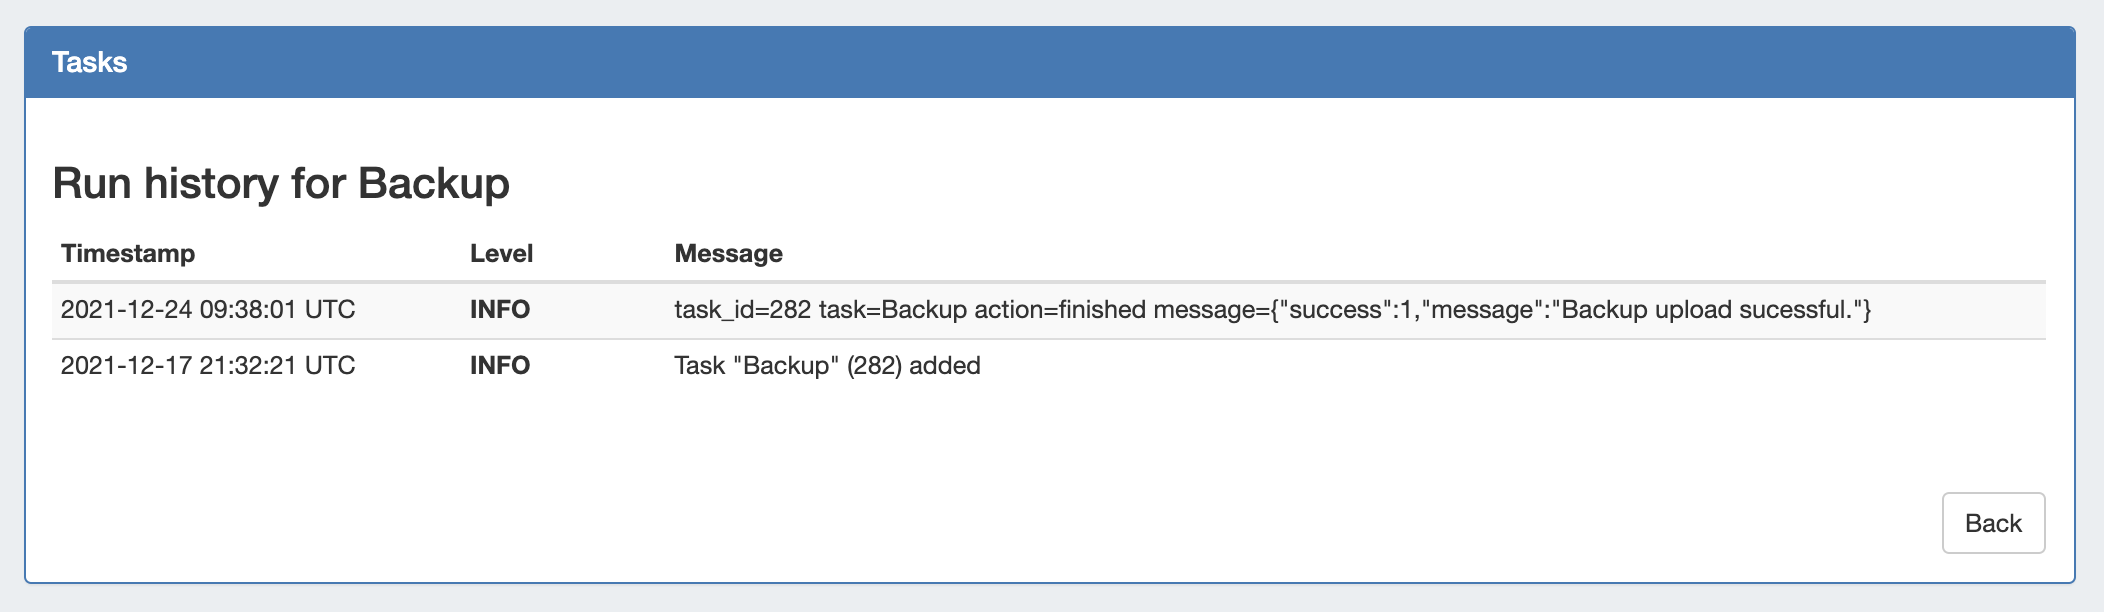
View Task Log
Click on the "View History" link for the task.
The log details for the task will be shown below. When done, click on the "CloseBack" button to exit the view.
Delete a Task
To delete a task, hit the "Delete" button at the end of the row in the Task List.
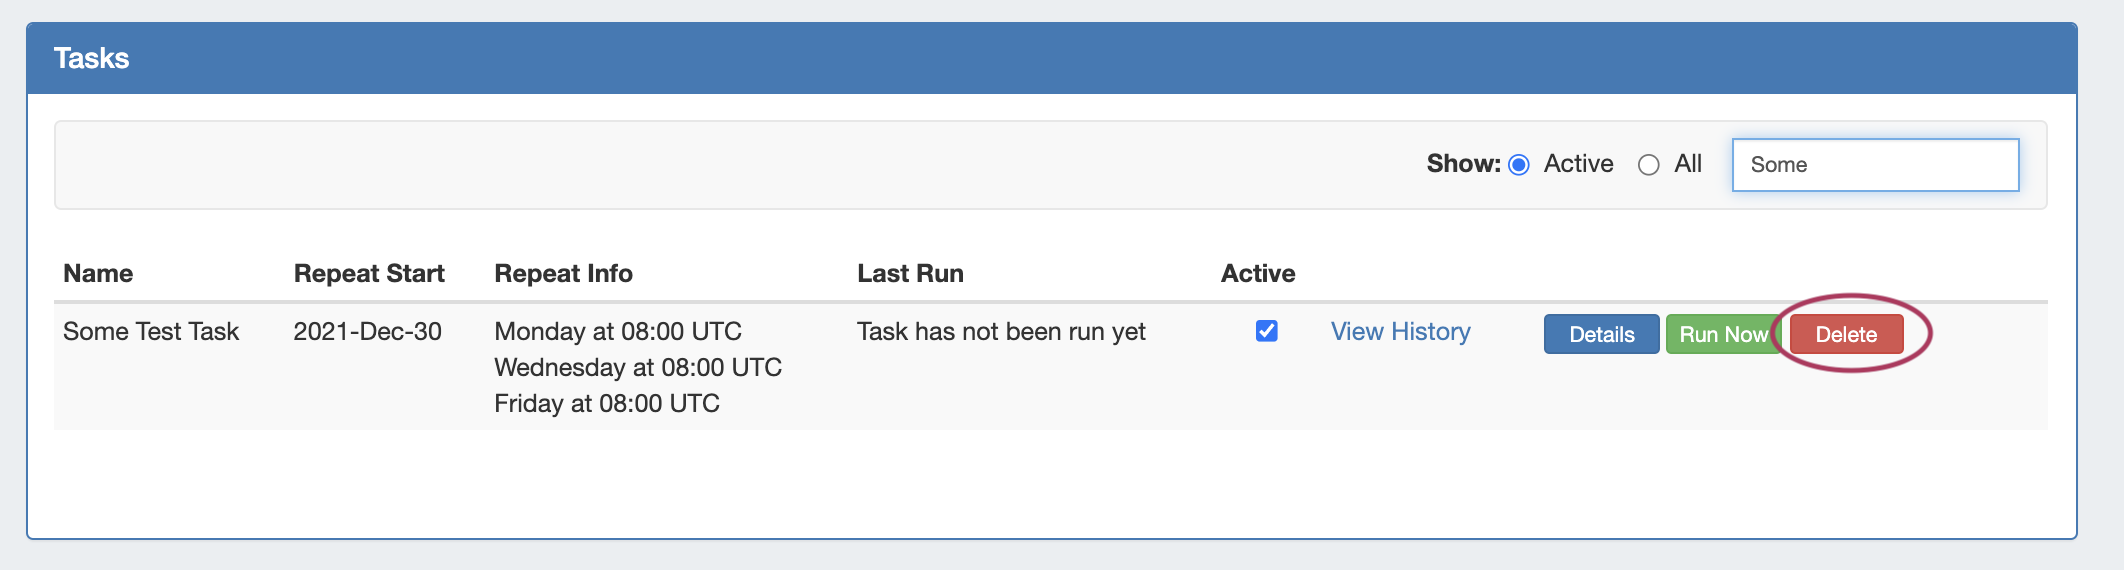
You will be presented with a confirmation message asking if you are sure you wish to delete the task.
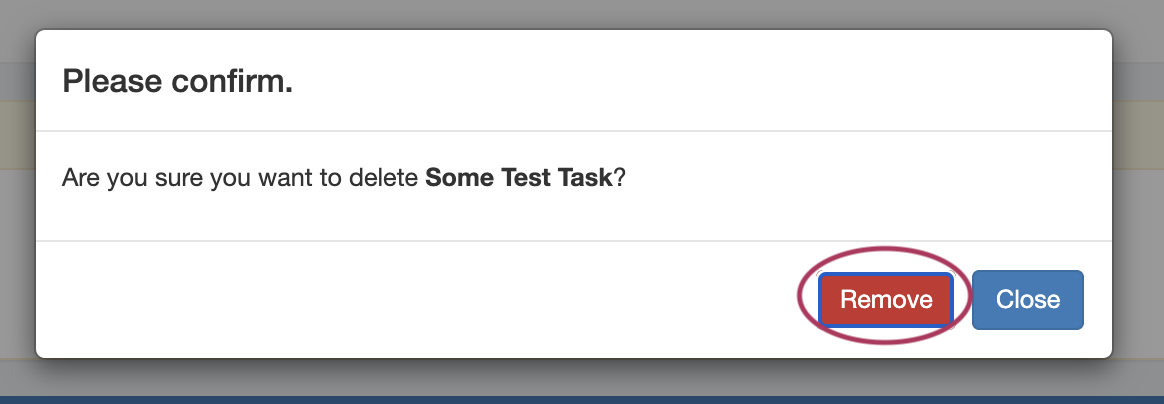
Click on the "DeleteRemove" button next to the message to verify the deletion, or hit "CancelClose" to exit without deleting.
| Info | ||
|---|---|---|
| ||
To enable the scheduler in a local instance, add the following to cron: * * * * * /path/to/php /path/to/ProVision/scheduler/task-runner.php |