| HTML |
|---|
<div id="google_translate_element"></div>
<script type="text/javascript">
function googleTranslateElementInit() {
  new google.translate.TranslateElement({pageLanguage: 'en'}, 'google_translate_element');
}
</script>
<script type="text/javascript" src="//translate.google.com/translate_a/element.js?cb=googleTranslateElementInit"></script> |
Peering
The Peering tab displays allows you to add and manage exchanges, routers, sessions, and peers. Admin users may view and manage recent emails for a company peering email address, and associate email communications with ProVision peers.

ProVision's Peering tab has five subtabs to manange manage various peering functions: IXs (Exchanges), Routers, Sessions, Peers, AS Set, and and Emails.
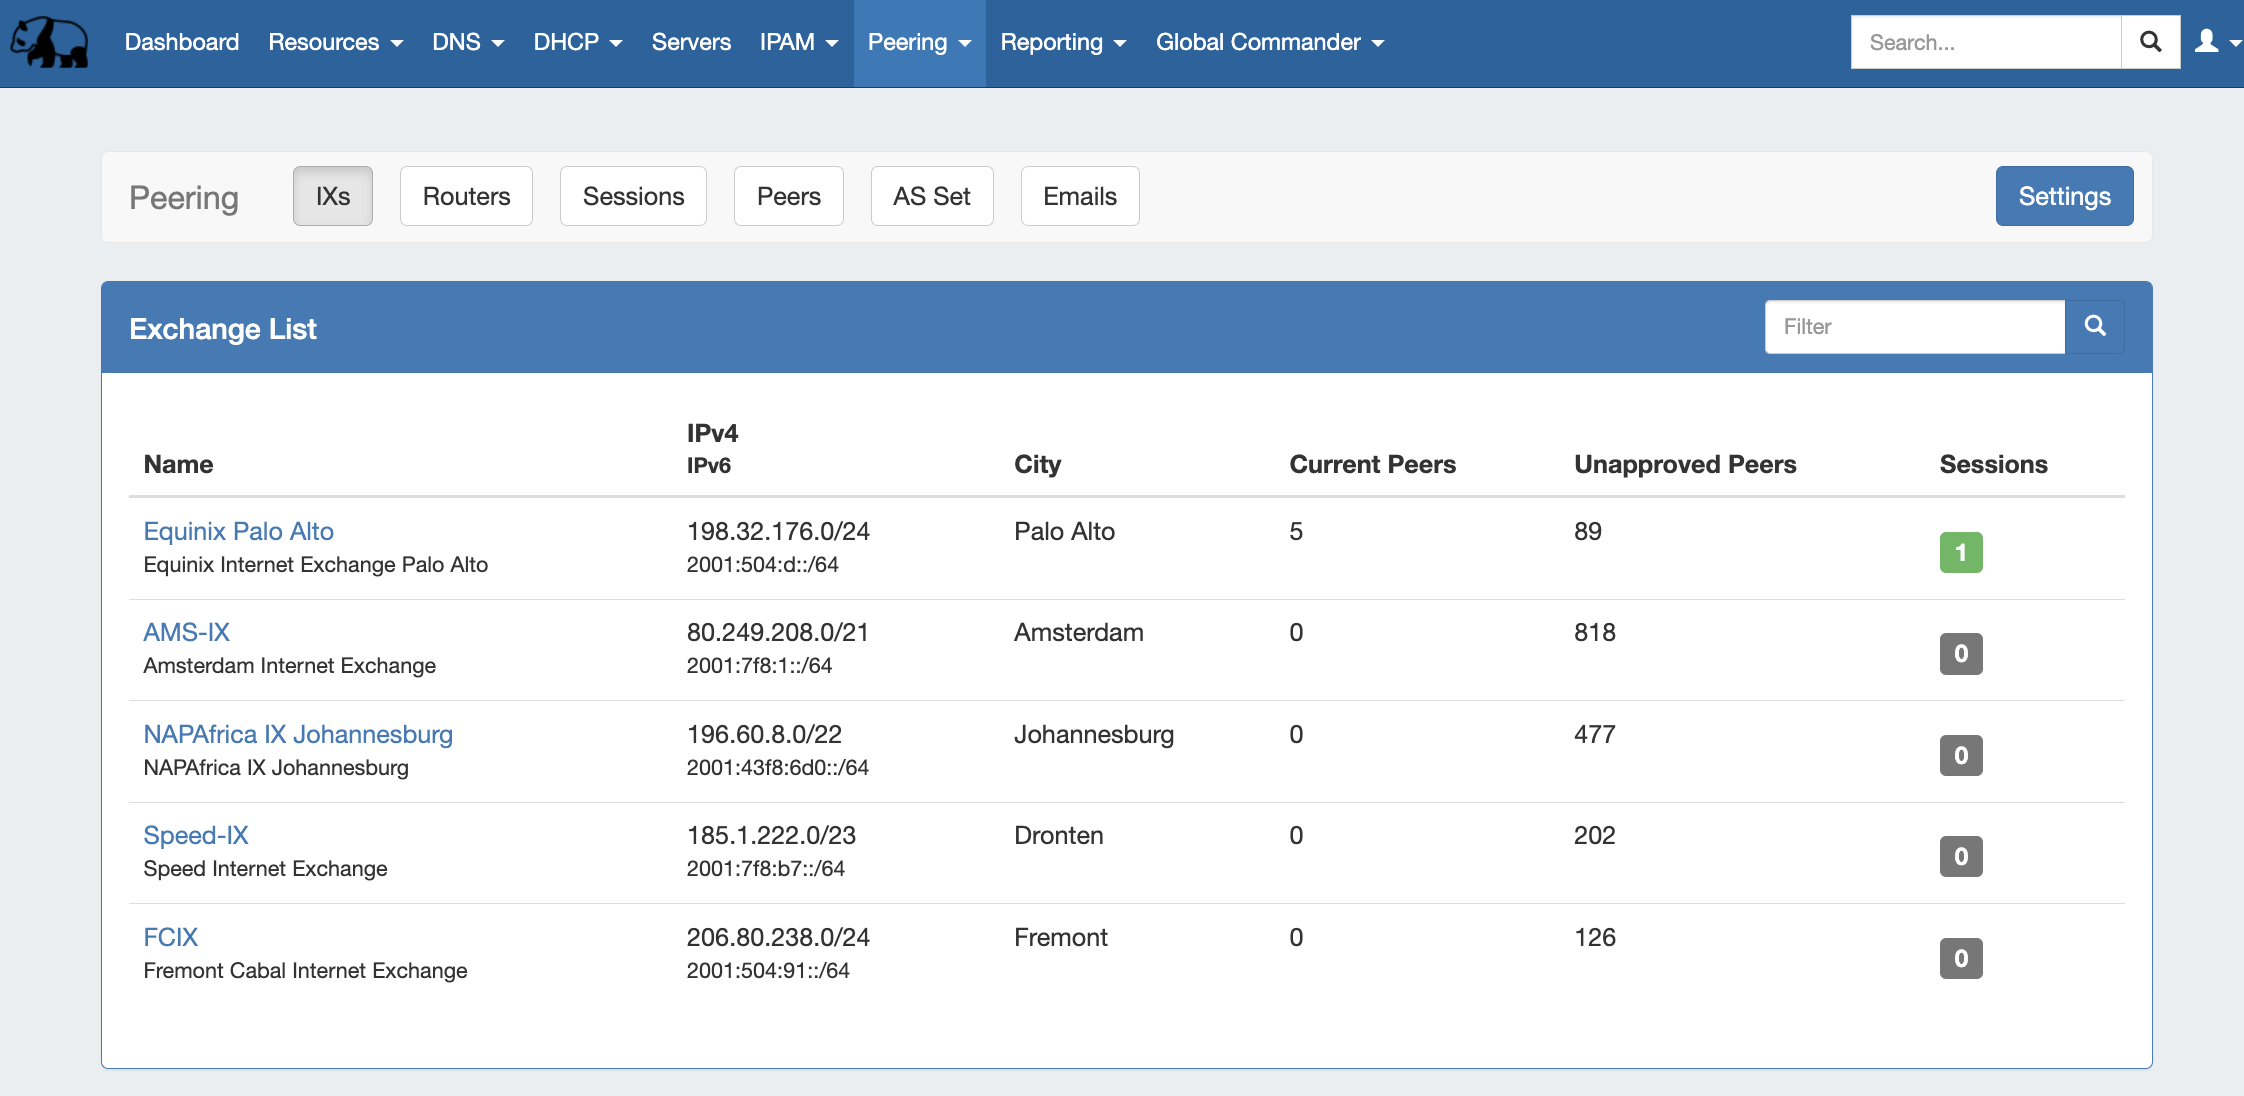
The IXs tab shows the exchange list. From here, you can edit exchange settings and view, manage, and mark peer status and communications via the exchange details page.
...
On the Peers tab, you can view and manage session peers.
The AS Set tab lets you view, import, and update Autonomous Set inbound prefix filters per peer.
In the Email tab (Global Admins only), recent email communications to and from a company peering email account may be managed.
...
In ProVision's Peering tab, you can add multiple exchanges, routers, sessions, view peer details, as well as send and receive peering requests. ProVision directly interfaces with PeeringDB's API to update exchange and peering data , to ensure up to date information. This requires Peering users , which is automatically managed for cloud installations. Local installations of ProVision that use Peering need to have a PeeringDB account, and for the account credentials API Key or Database to be set up in ProVision.
| Info | ||
|---|---|---|
| ||
If you are using a locally hosted instance of ProVision, verify that you have followed the instructions on the Local Installations - Peering Setup page to set up Peering for your instance. |
Set up ProVision Peering
Two components need to be set up before you can begin to do In order to perform common peering tasks, one or more ASNs need to be added in ProVision - set at least one ASN, and set PeeringDB account credentials..
Local instances will also need to provide a PeeringDB API key, or self-manage a PeeringDB database. For cloud instances, 6connect manages the PeeringDB database automatically.
Add ASN(s) to ProVision
Add at least one ASN to ProVision from either the Admin → Admin Preferences → Peering page, or via the Peering Tab -> Exchange Settings.
Click one of the options below for details:
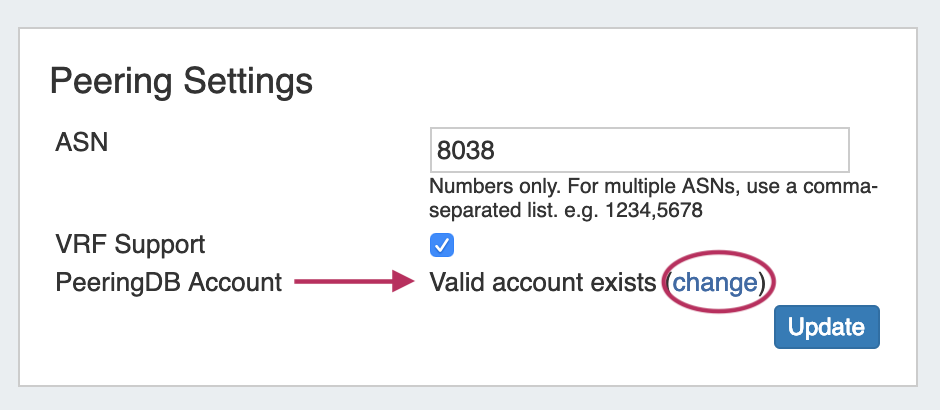
Expand title How to set an ASN via the Admin Preferences Page... From the Admin PreferencesSettings page, go to Peering -> Peering Settings.
Next to "ASN", enter the ASN(s) you want to track in ProVision.
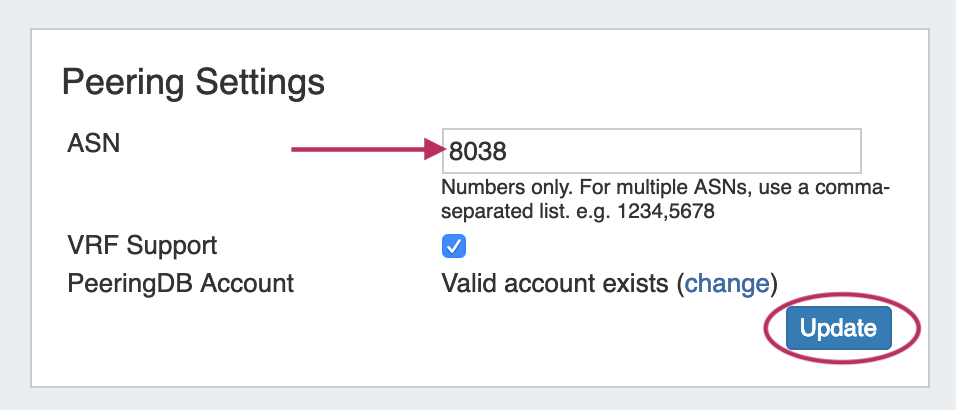
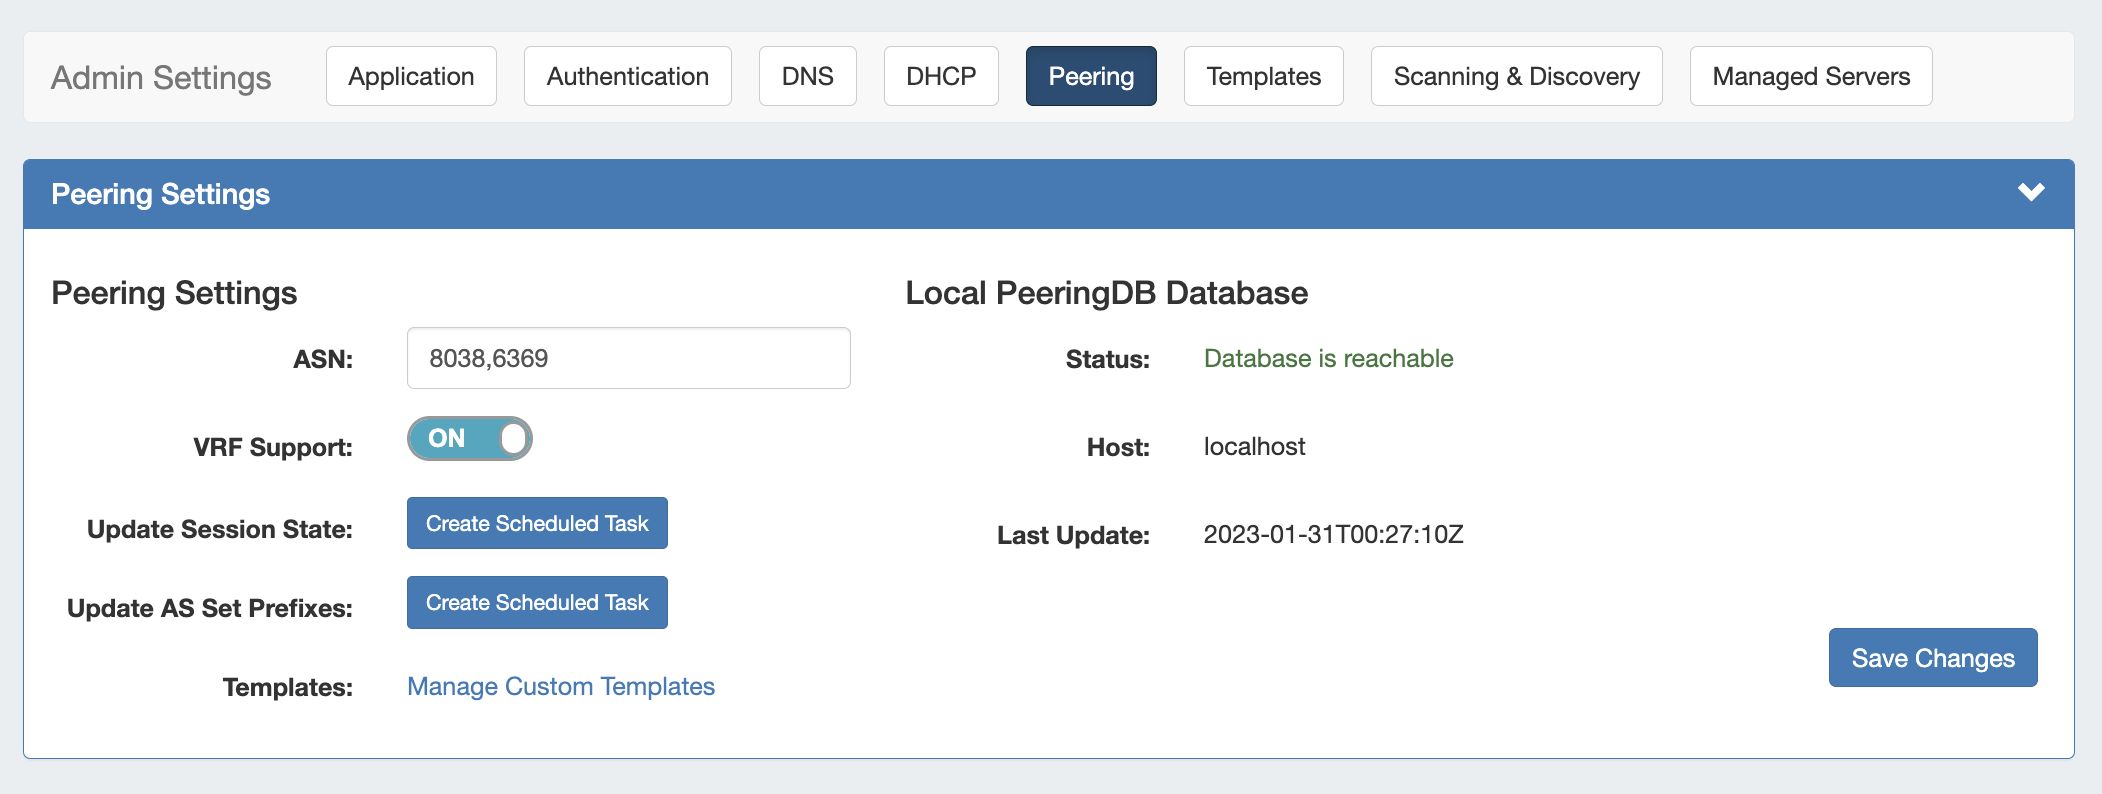
For multiple ASNs, separate each ASN with a comma (e.g. "1234, 5678").
When done, click "UpdateSave Changes" to save your changes.
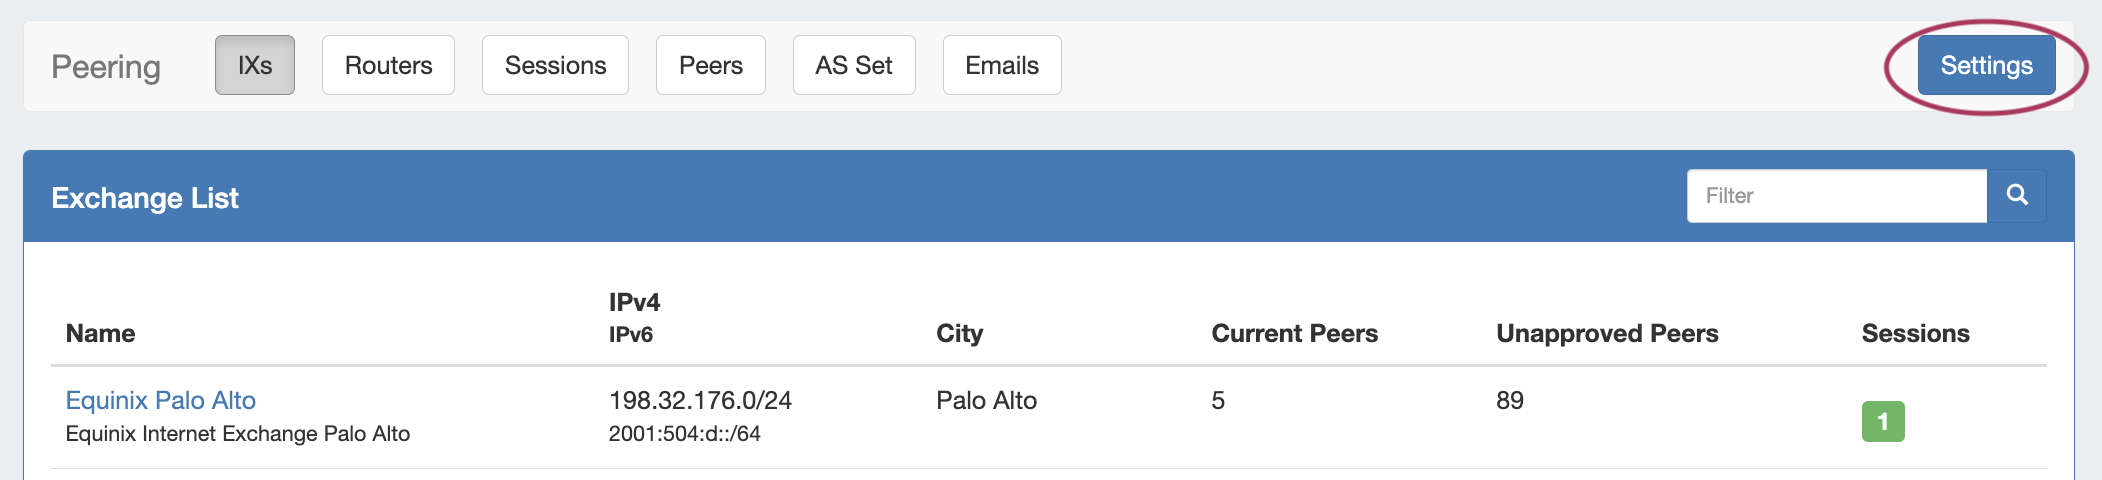
Expand title How to set PeeringDB Credentials an ASN via the Peering Tab... From the Peering Tab, go to the IX's subtab and then click "Settings".

Peering Settings will display.
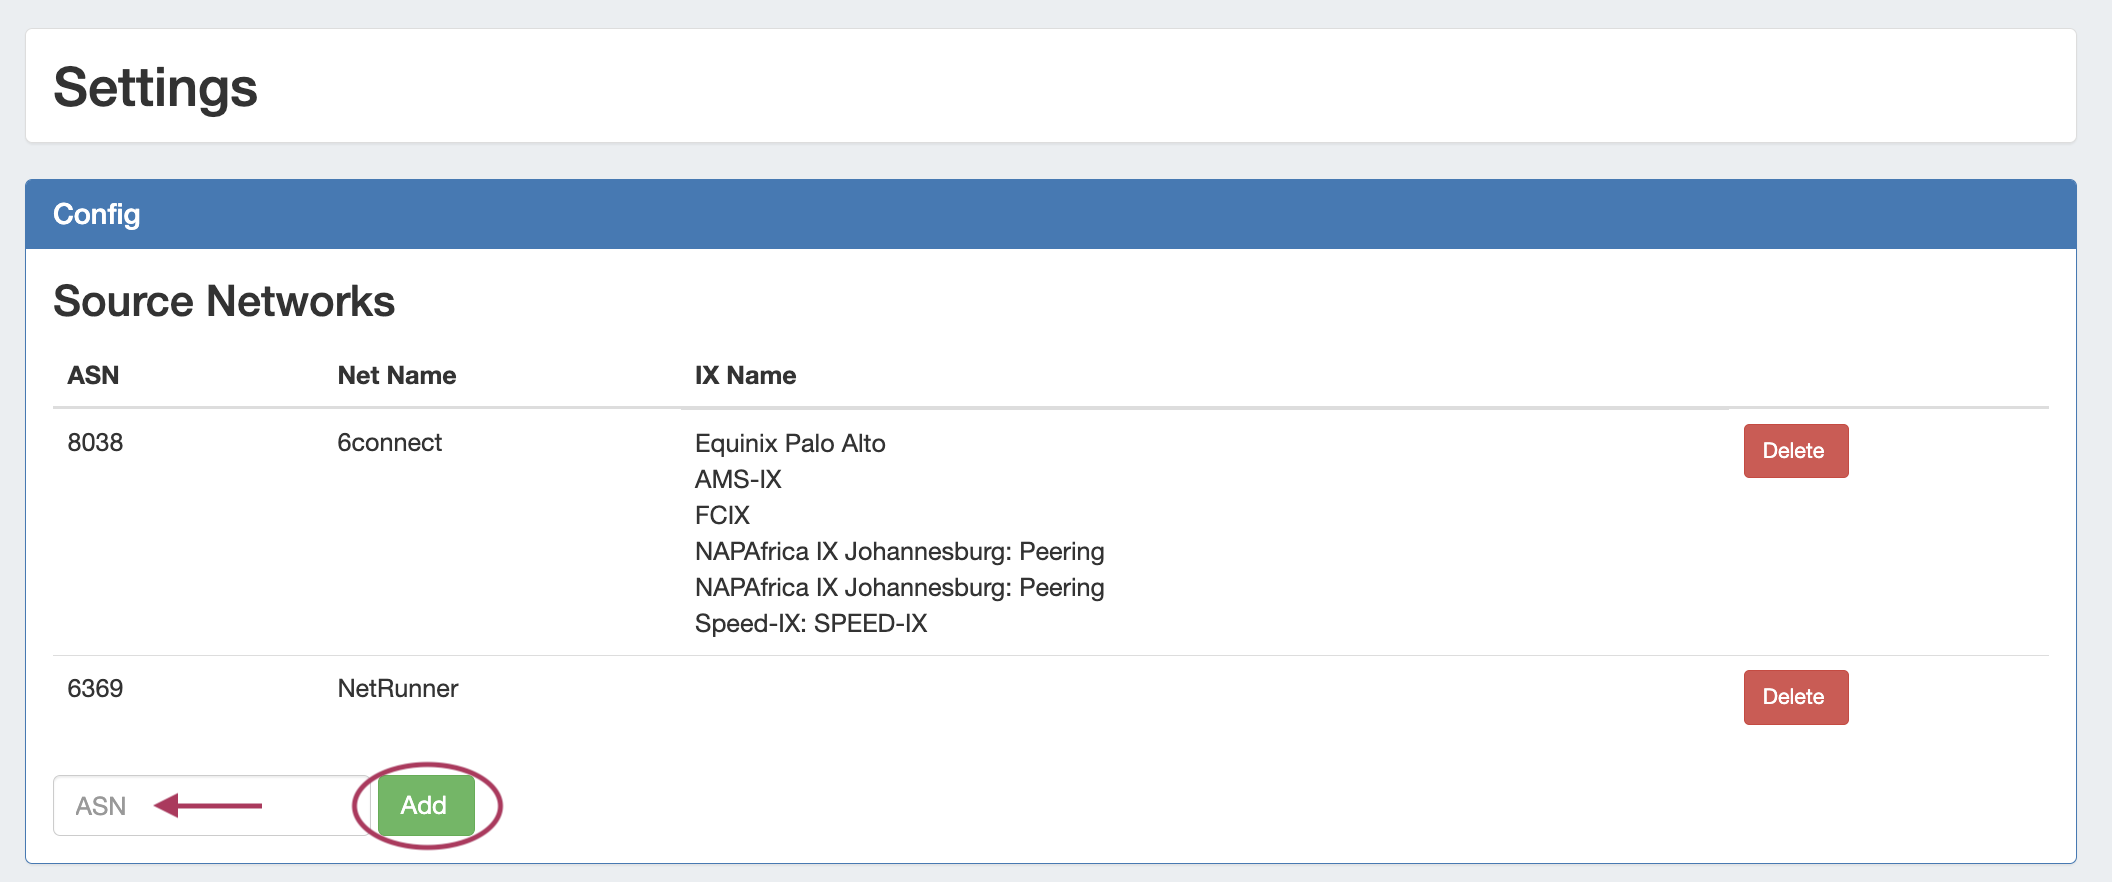
Under the "Config" section, you'll see a field to add an ASN - fill in the desired ASN(s), and click "Add".
Add PeeringDB
...
API Key (Local Installations)
Local Both Cloud customers and local installations may set the PeeringDB credentials API Key in the ProVision Admin → Admin Preferences -> Peering page, or via the Peering Tab -> Exchange Settings.
Click one of the options below for details:
Expand title How to set PeeringDB Credentials via the Admin Preferences Page... From the Admin PreferencesSettings page, go to Peering -> Peering Settings.
The current PeeringDB Account status will display next to "Peering DB Account". To set or change the account, click the "change" link. You will go to the PeeringDB API Connection page to test and set the account.
Enter the PeeringDB account username and passwordAPI Key, then hit "Test" - the connection will be tested. If successful, you can then save the credentialskey.
Expand title How to set PeeringDB Credentials via the Peering Tab... 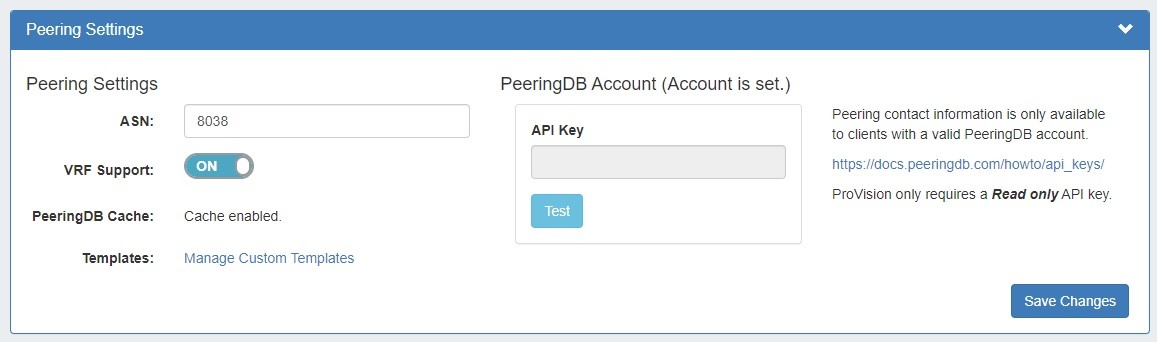
When you are done, click "Save Changes".
From the Peering Tab, go to the IX's subtab and then click "Settings".
Peering Settings will display.
Under the "PeeringDB Account" section, you will see account status instructions to set or change the Peering DB Account.
Click on the "Peering Admin Settings" link to go to the PeeringDB API Connection page to test and set the account.

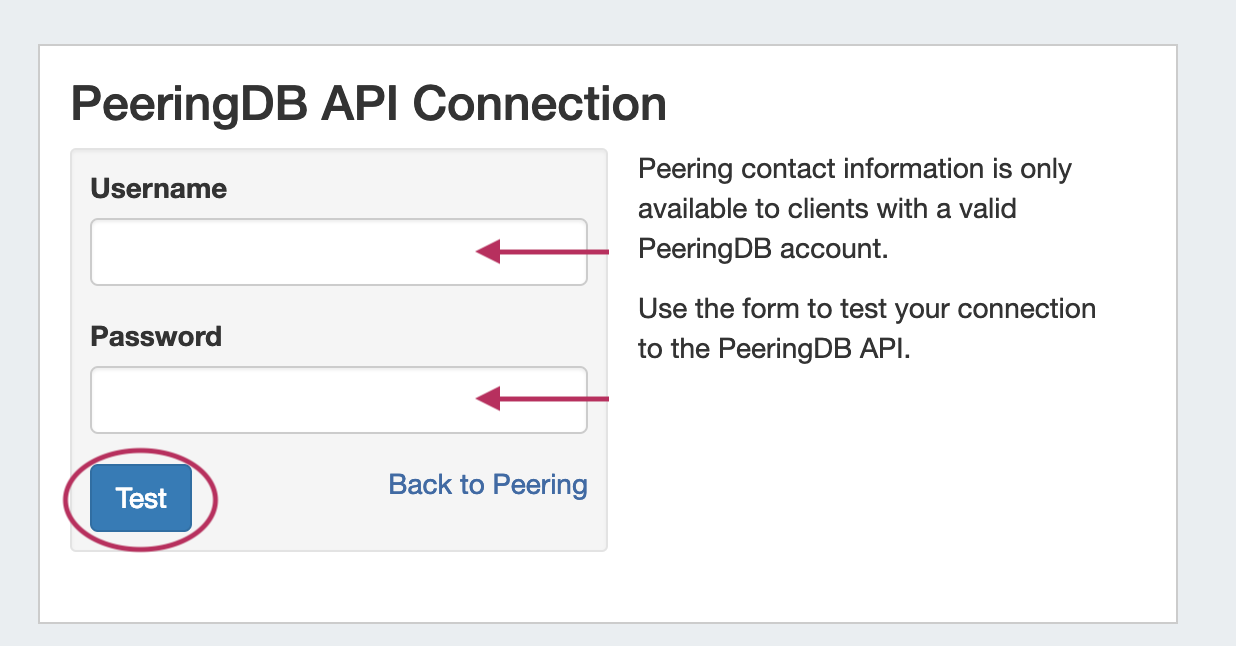
This opens the PeeringDB API Connection page.
Enter the PeeringDB account username and password, then hit "Test" - the connection will be tested. If successful, you can then save the credentials.
Additional Options for Local Installations
Local Installations have an additional option of hard-coding the PeeringDB credentials in ProVision's globals.php file or self-managing a local database.
Additional Peering constants may be added into globals.php to change the PeeringDB URL between the main and beta site (some users may find the beta site to have faster response times), and to adjust the PeeringDB cache TTL.
...
For details on adding / editing these peering constants, see Local Installations - Peering Setup.
Peering Workflow
After the initial Peering setup is complete (Adding ASNs and a Peering DB account), you can begin to work with the rest of the Peering tabs, including routers, peer groups, sessions, managing peers, and communications.
...
| Expand | |||||||||||||
|---|---|---|---|---|---|---|---|---|---|---|---|---|---|
| |||||||||||||
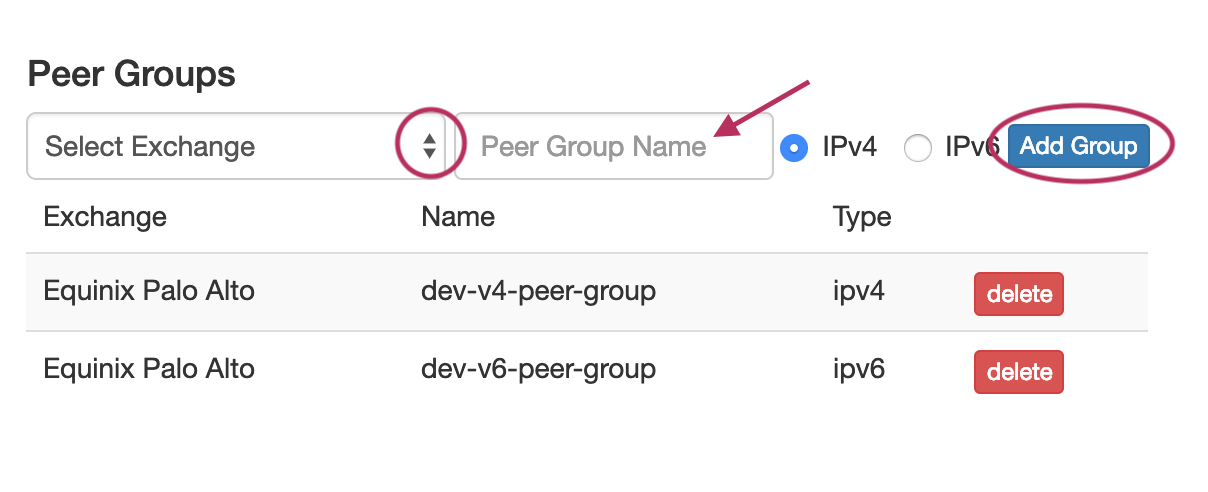
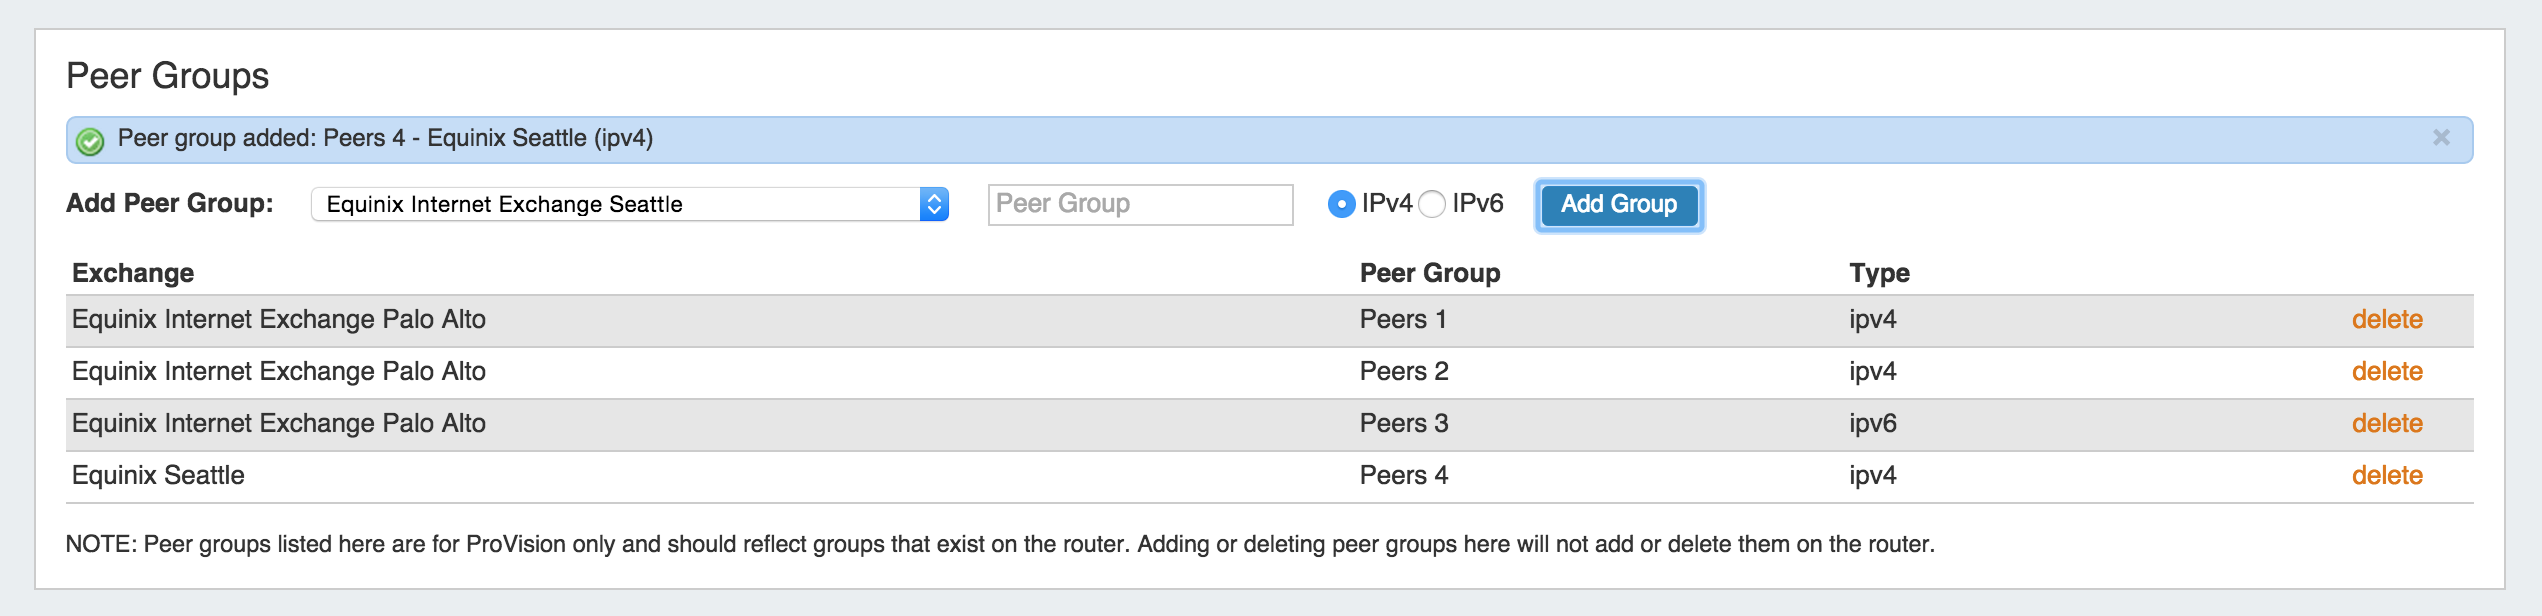
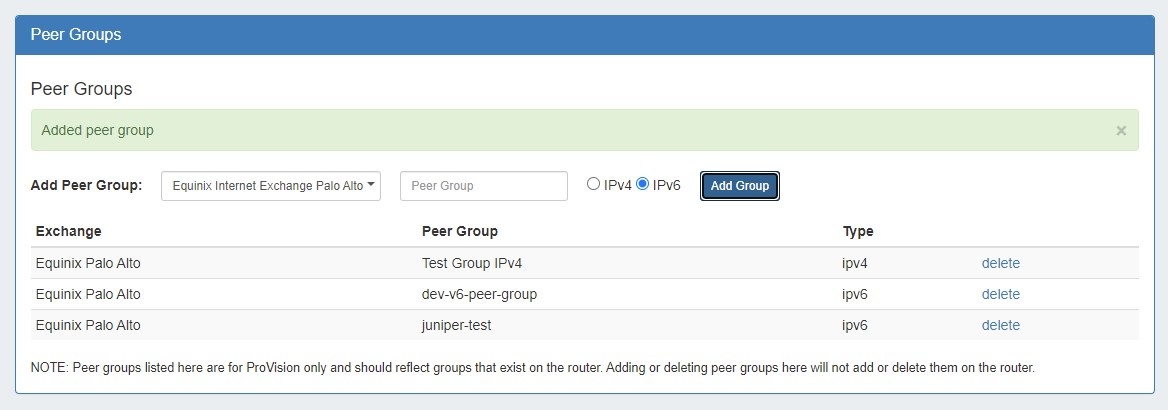
1) Add Router(s)Adding a router is the fundamental base and first step of working with peering in ProVision. Routers may be added through the "Add Router" button in the Peering Tab. For a detailed breakdown of this task, see Peering Routers. 2) Add Peer GroupsAssociating the router with a peer group is necessary to link the router to a particular exchange. You may add the Peer Group information either in the "Router Details" page in Peering, or in the Peer Group Gadget prior to adding sessions.
3) Add Session(s)After Routers and Peer Groups have been set up, the next step is Adding Sessions to ProVision. You may add a new session through the "Add Session" button in the Peering tab, or you may Import Sessions from an existing router. Importing sessions requires Admin level permissions, and is accessed through the Data Import Tab in the Admin section of ProVision. 4) Configure SessionsOnce a session has been added, you will see it in the session list. For a newly added session, the status will show as "Not Configured". There are a few options to configure sessions:
5) Manage CommunicationsOnce a session has been added with a peer, you will see the peer listed Peer List under the Peers tab. You'll also be able to manage communications from Exchange Communications. You will see the list of Peers, their ASNs, Name, Request Status, Notes (log), and the Action Menu (wrench icon). From here, you may send peer requests, mark peer status, and view notes on previous actions. The available options and flow depends on the Peer Status and whether a request is Outgoing or Incoming.
6) Repeat for new Routers, Sessions, and Peers.To add additional Routers, Sessions, and Peers repeat steps 1, 2, or 3, and manage your newly added sessions and peer communications similarly with steps 4 and 5. |
...