LDAP Authentication on Windows Server
Starting in 3.6, ProVision supports LDAP authentication (including Windows Server!). To setup an LDAP server for authentication, you must perform the following procedures:
...
To configure the use of LDAP authentication with ProVision, follow the steps below.
- Log into 6connect ProVision
- Go to Settings Tab → Admin Settings -> Authentication
- Select "LDAP" under "Authentication Options"
- Move the LDAP Enable selector to the "ON" position.
- Fill in the hostname or ip address, authentication port, LDAP Security, Auth DN, Fetch DN, and Fetch Filter DN.
- Optionally, enter the LDAP Username and Password in order to allow ProVision to import LDAP Contacts and sync LDAP contact information (see: Contact Manager)
- Click "Test Server" to verify the connectionSave Changes".
Example values in this case would be:
- LDAP Enable: (Checked)
- LDAP Server Address: 52.240.195.12
- LDAP Port: 389 ( or SSL/TLS port is 636)
- LDAP Security: None
- LDAP Auth DN: cn=%LOGIN%,ou=people,dc=6connect,dc=com
- LDAP Fetch DN: cn=%LOGIN%
- LDAP Filter DN: cn=%LOGIN%
| Note | ||
|---|---|---|
| ||
In the login screen, you would select the authentication method from the dropdown. If you like, you can set the default login option in the following way: Go to the /data/globals.php and open in vi (or other editor). Add in the following text as the last line of the file (before the closing ?>) define('DEFAULT_LOGIN_TYPE', 'radius'); |
...
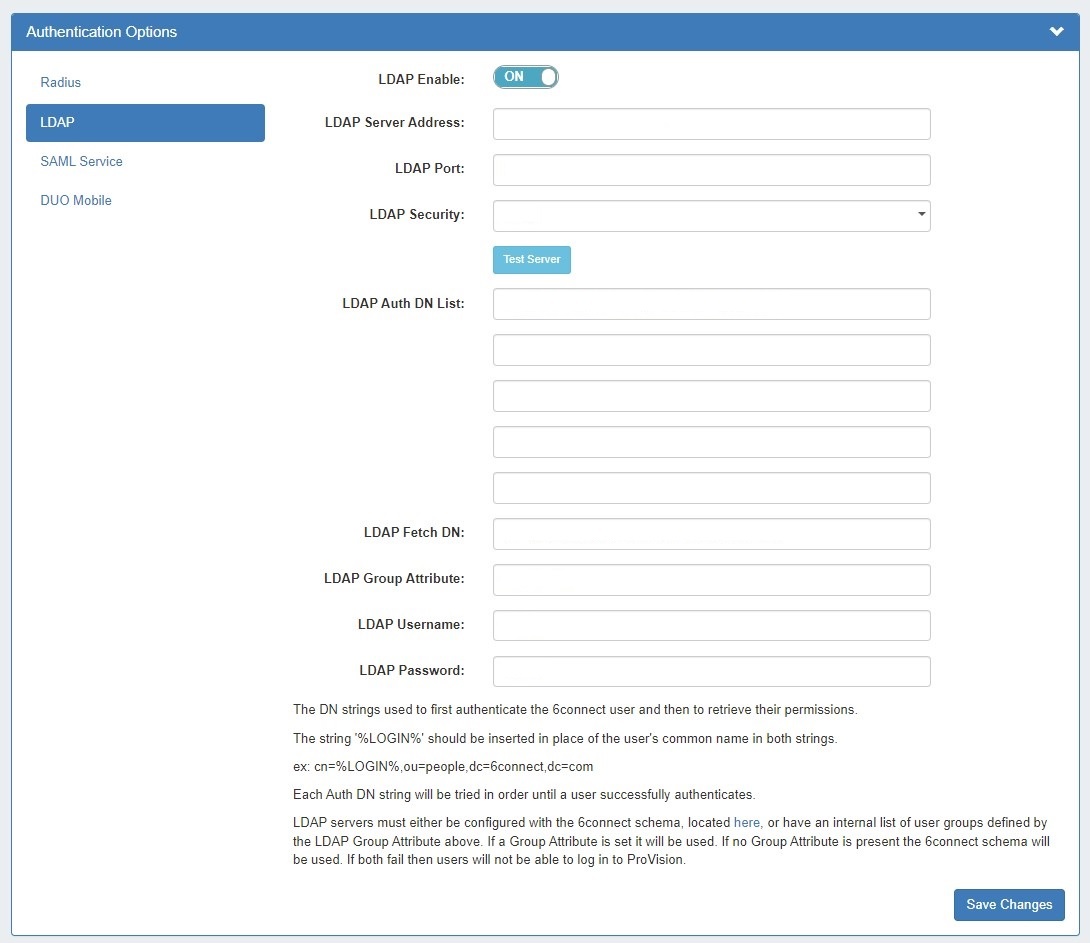
To add or update LDAP settings, go to the Settings Tab → Admin to enter the Admin area of ProVision.
Then, click the "Authentication" sub-tab at the top of the Admin Settings page, and select "LDAP" from the "Authentication Options" module.
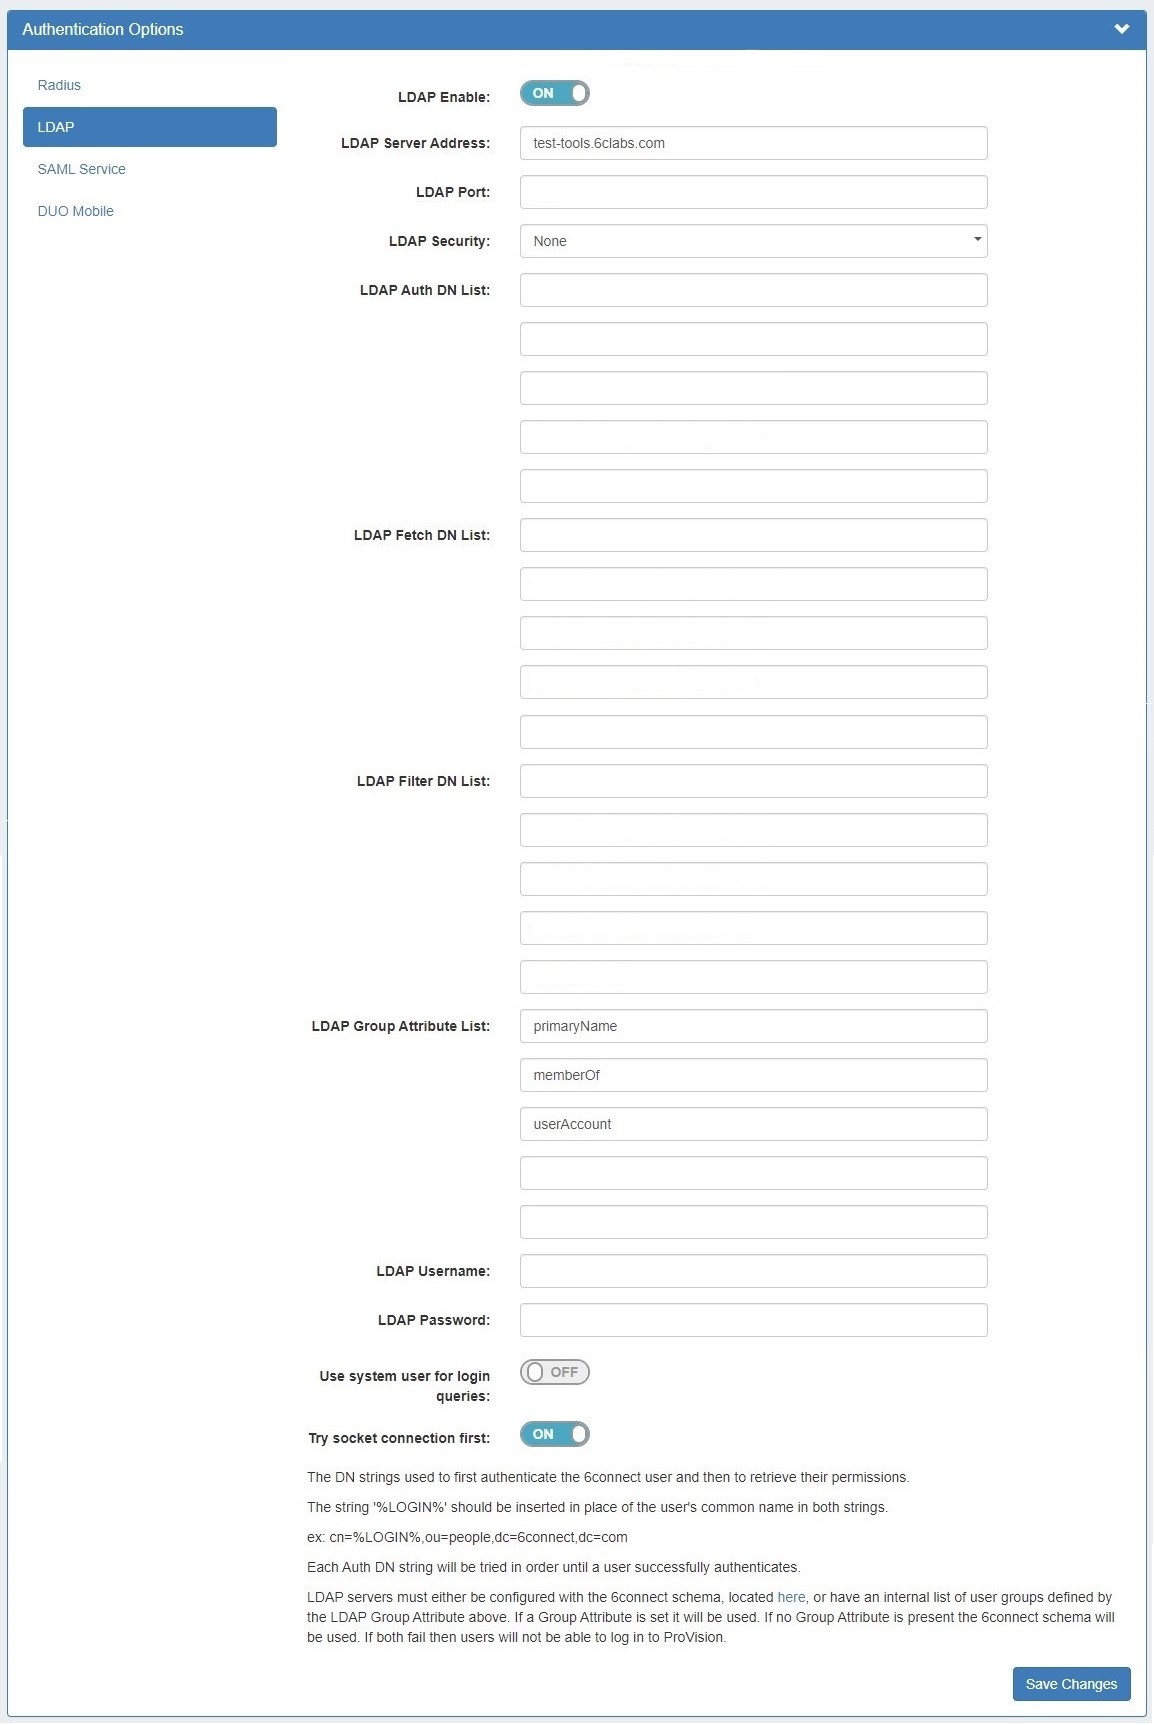
Enter or update the following settings:
- LDAP Enable: check the box to enable LDAP functionality.
- LDAP Server Address: Set the IP address of your LDAP server.
- LDAP Port: Set the port for your LDAP server
- LDAP Security: Select the security method of your LDAP server - SSL, TLS or NoneTest Server:
- Click to test the connection to the LDAP server.LDAP Auth DN/Fetch DN/Filter DN: These strings are used to first authentication the 6connect user and then to retrieve their permissions. The string '%LOGIN%' should be inserted in place of the user's common name both strings. (ex: cn=%LOGIN%,ou=people,dc=6connect,dc=com)
- LDAP Group Attribute: If using an internal list of user groups instead of 6connect groups, enter the attribute name for the LDAP groups here. If a Group Attribute is set, it will be used first, otherwise the 6connect schema will be used.
- LDAP Username / LDAP Password: Optionally, you may enter LDAP admin credentials to allow ProVision to import and sync LDAP contacts. See Contact Manager for details on LDAP contacts.
- Mapping Permissions to 6connect schema: To integrate 6connect permissions with your existing directory structure then you will need the 6connect schema. It should snap in with any existing LDAP structure and allow you to assign 6connect permissions to your existing users. You can download a copy of the schema from this section.
| Expand | ||
|---|---|---|
| ||
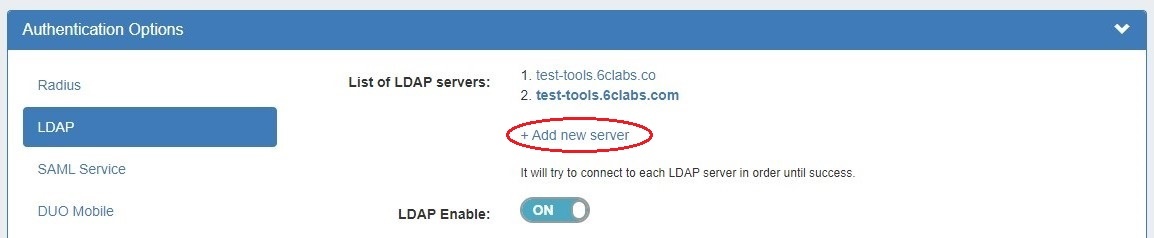
Once at least one LDAP server has been added, a list will appear at the top of the Radius module. Add an additional Radius server by clicking "Add new server".
ProVision will try to connect to each server listed in the order listed, until a success is returned. Disabled servers will display in grey, and the currently selected server will display in bold. |
When done, click When done, you may optionally click "Test Server" to verify the connection to the LDAP server with the entered settings, then "Save Changes".