...
On the standard IPAM page there is an option to "Add Aggregate". Click on the green "Add" icon.


Once clicked, you get a more detailed screen to add an aggregate block.


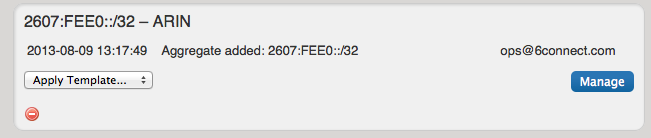
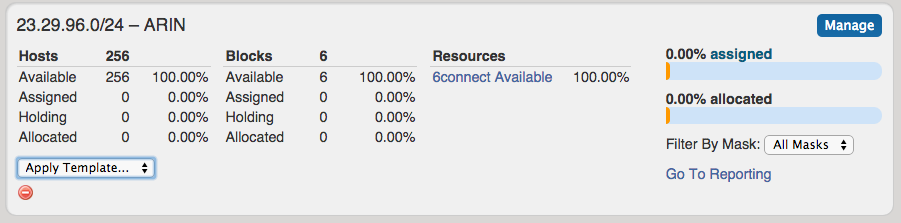
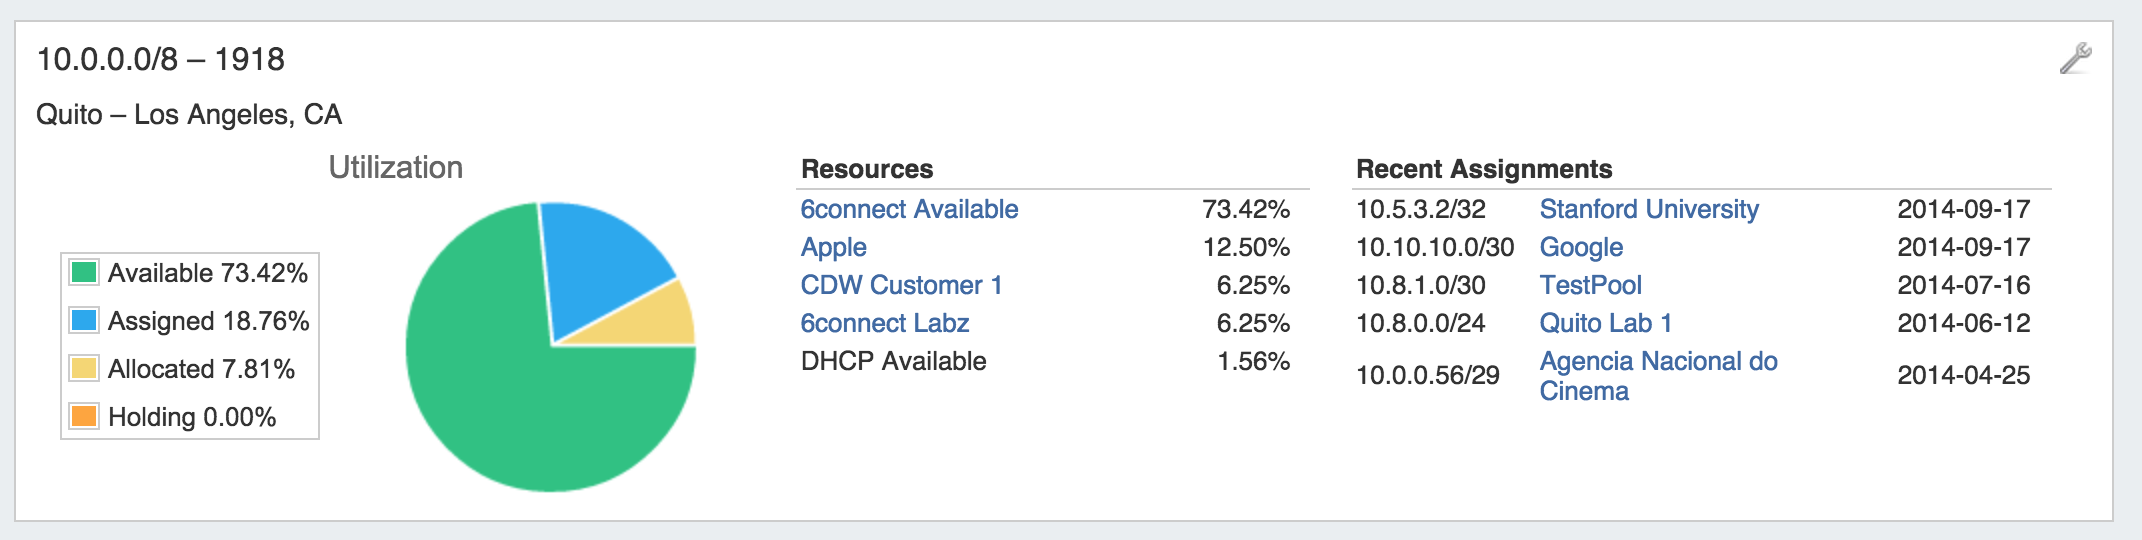
When a block is added, you will be able to see it on the IPAM page.

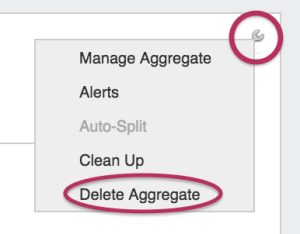
To delete the aggregate - press the red icon click on the Action Menu (wrench icon) for the aggregate in the top right corner of the box, and you will have the option delete the aggregate.
| Info | ||
|---|---|---|
| ||
In order to delete an IP Aggregate, all resources need to be "unassigned". Once they are unassigned from their respective resources, the "Apply Template" drop down will permit the function "Aggregate" which will bring the IP block back to it's original size. Once the block is back to it's original size and there are no subnets assigned, the IP Aggregate can be deleted. |
After selecting the "Delete Aggregate", a message will show up in the aggregate box verifying that you would like to delete. Deleting will remove all data and existing assignments from the aggregate and its child blocks. If certain you want to delete, click the "Delete" button. Otherwise, select "Cancel".

Set Aggregate Alerts
Aggregate alerts allows you to set up an email notification to send once an aggregate's available space hits a chosen percentage threshold.
| Info |
|---|
| Prior to setting the alert, verify that an IPAM Alerts task has been created in the Scheduler, detailing the alert schedule / frequency. Alerts will not send unless the scheduled task has been created to set the desired alert frequency. |
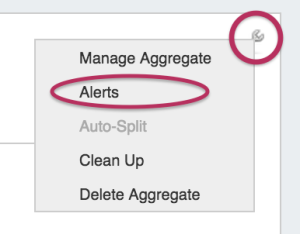
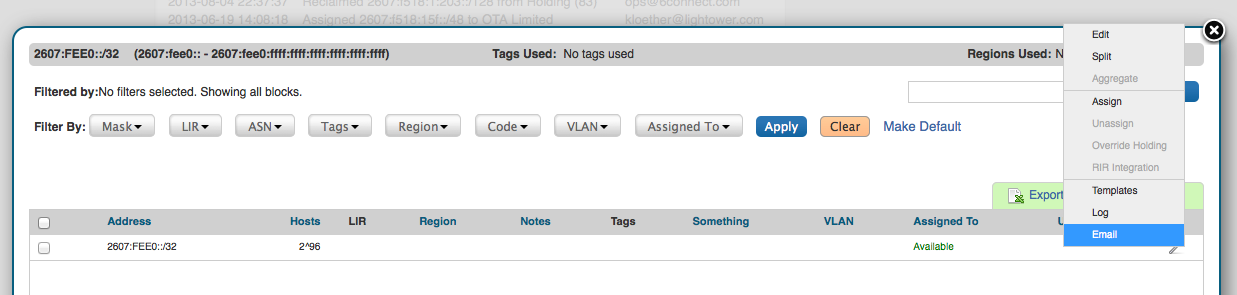
To set the alert, select the Action Menu (wrench icon) for an aggregate, and click on "Alerts".
This brings up the "Manage Alerts" dialog. Enter the email address for the alert recipient and the available space percentage at which the alert is triggered.
When done, hit "Save Alert". You may also cancel at any time.
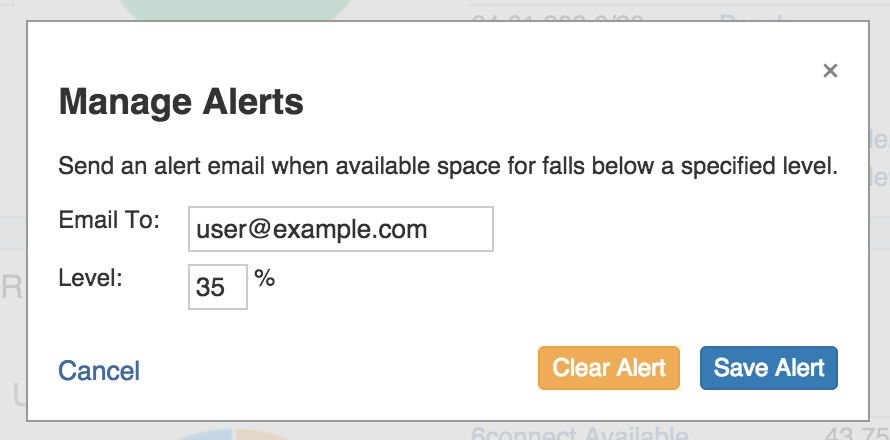
To clear an existing alert, hit "Clear Alert", and the alert information will be removed and status saved.
Architecting IP Address Blocks
Splitting/
...
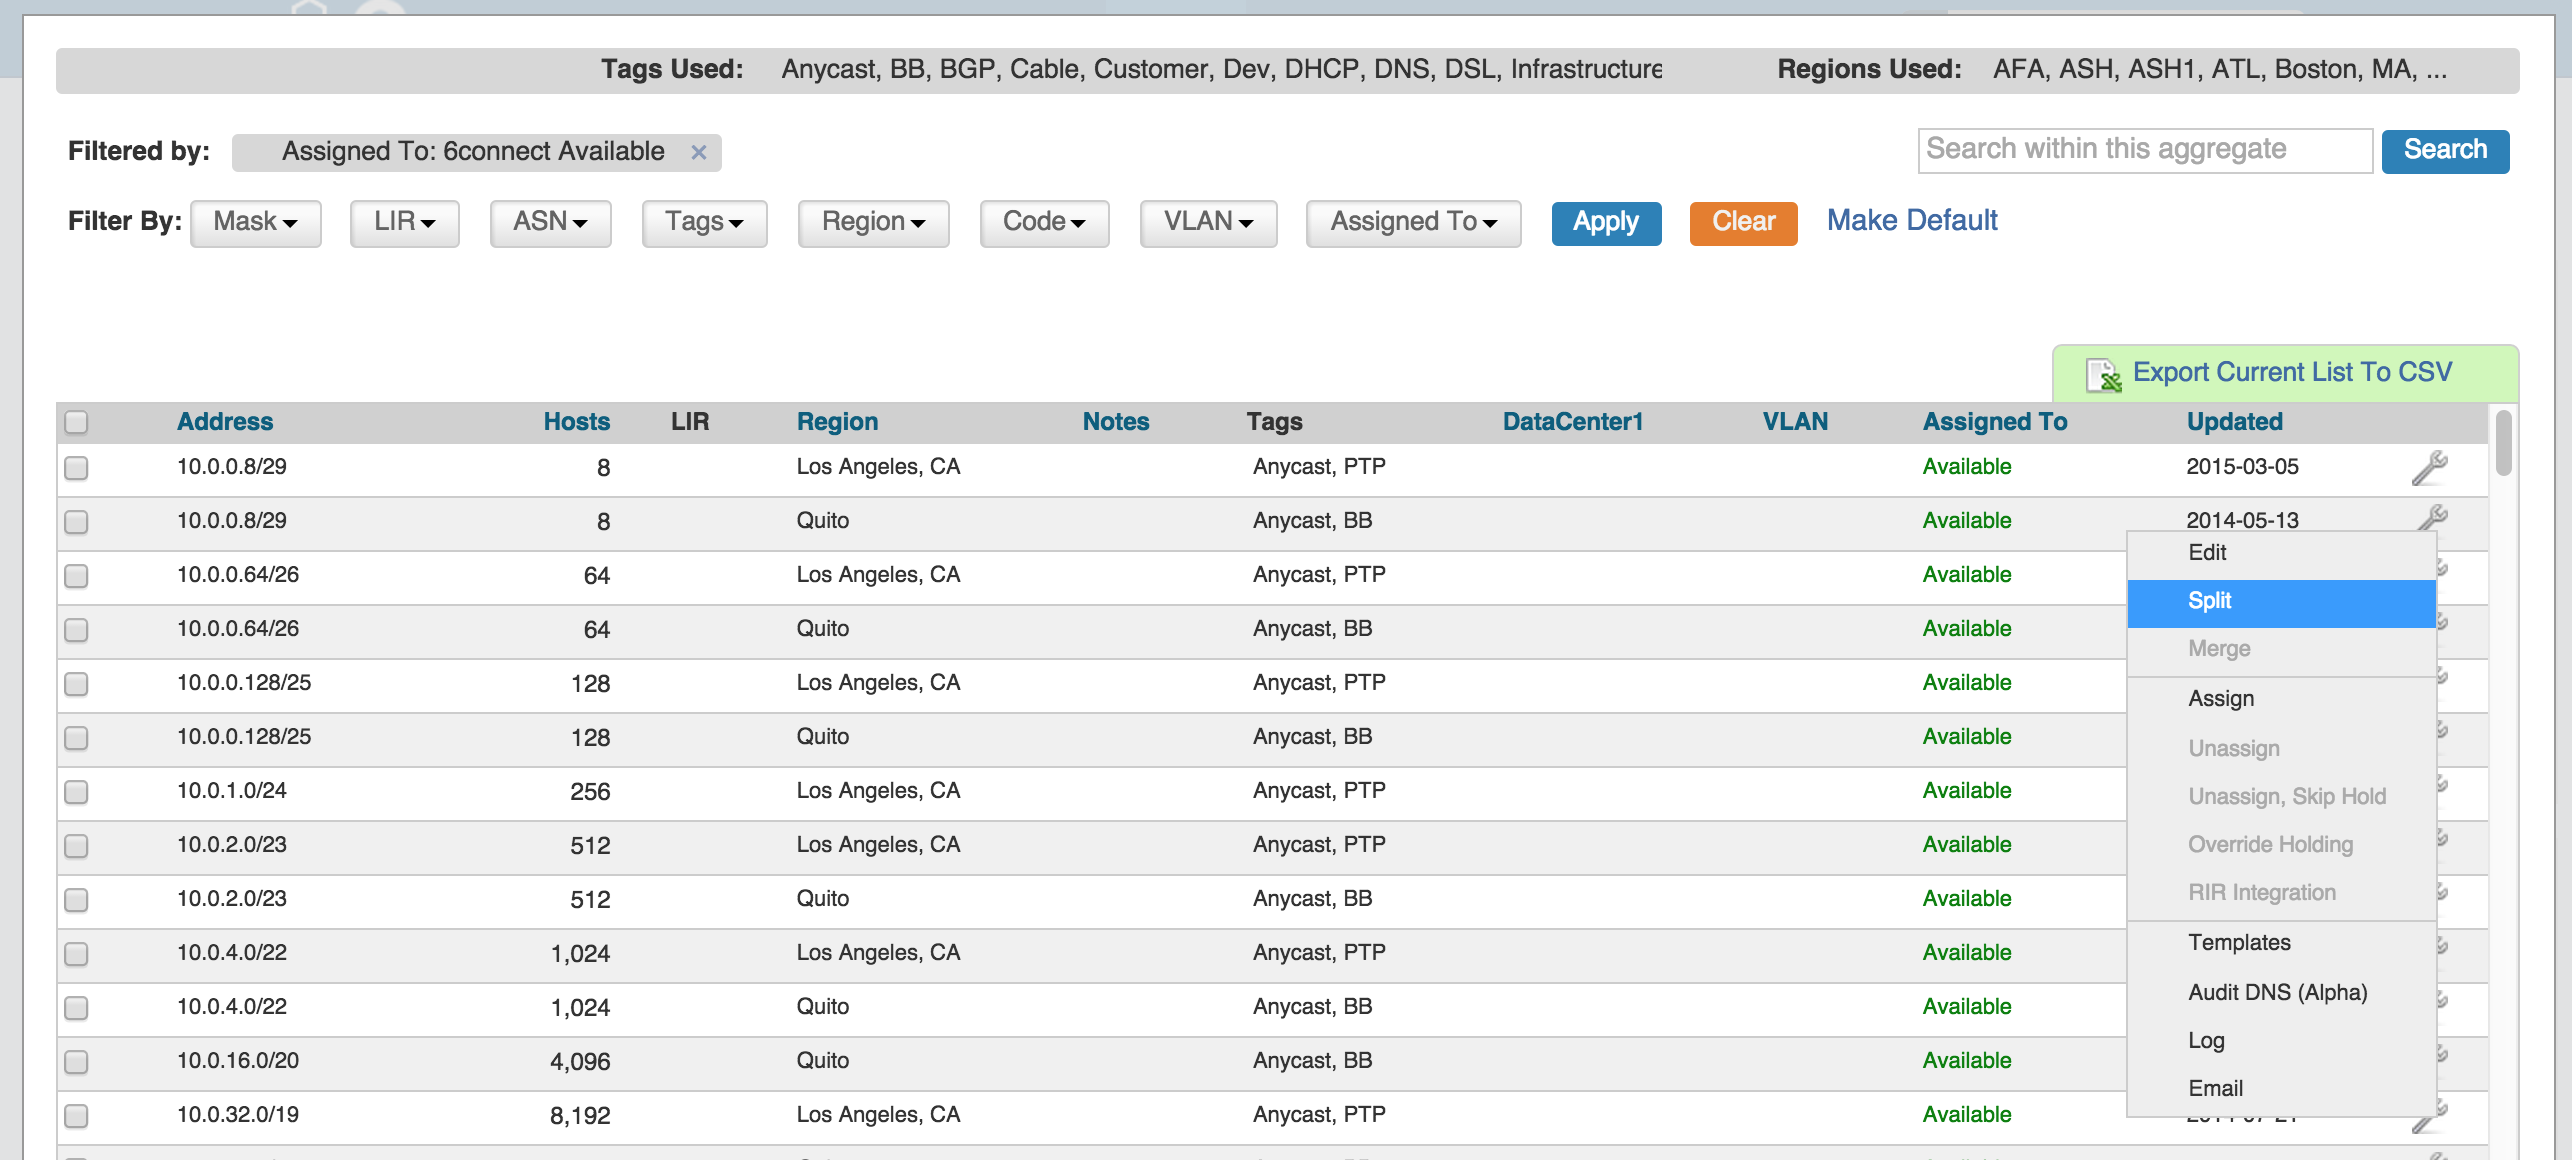
Merging blocks manually
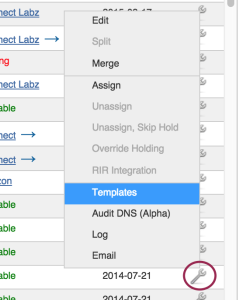
To split a block manually - you can use the functions from the Manage screen for any aggregateWhile in the IPAM Mange screen, click on the Action Menu (wrench icon) for the block you wish to modify. Then select the "Split" function. To aggregate blocks, select "Merge" from the same menu.
Splitting/Aggregating blocks with Templates
When you first import a block, you can select the template to use from the main IPAM page.
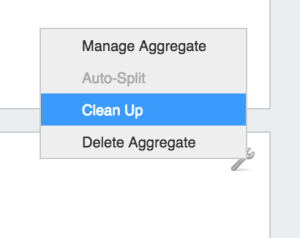
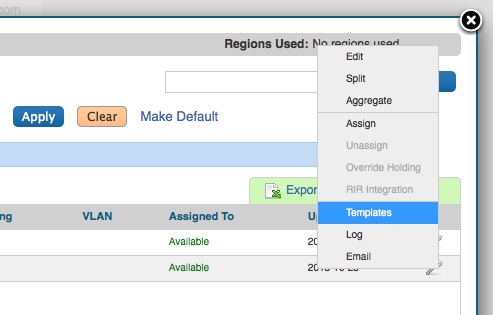
Templates for a block are available under the Action Menu (wrench icon) for that block. There are two templates available: Cleanup, which auto-aggregates the block, and Auto-split.
Select the desired template from the action menu.
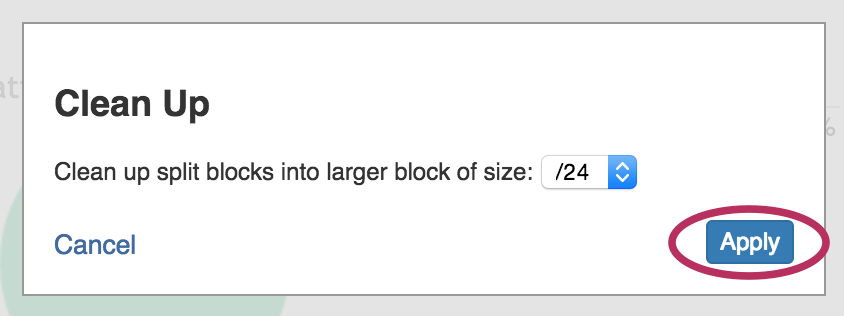
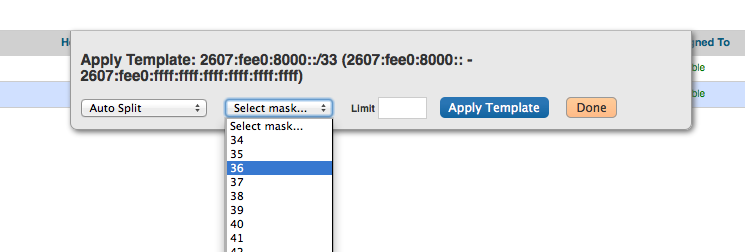
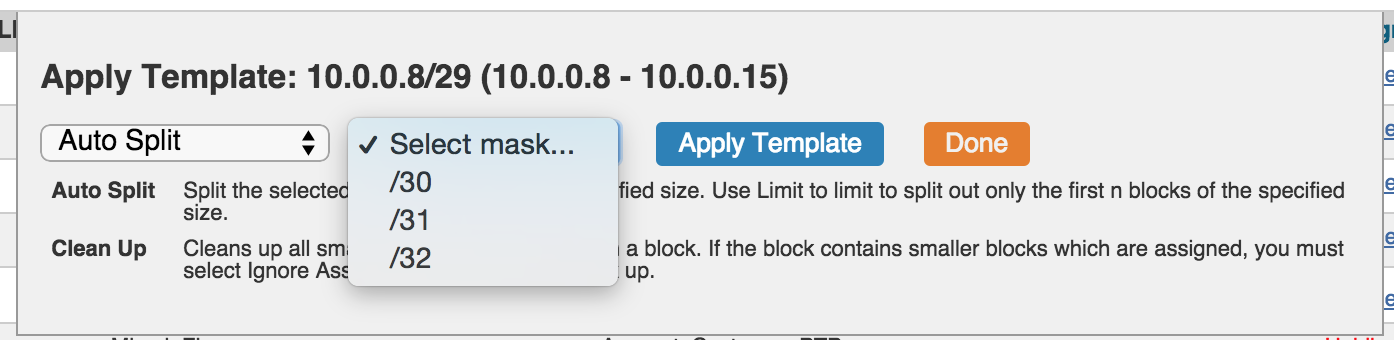
Select the Split / Clean Up size desired, and hit "Apply".
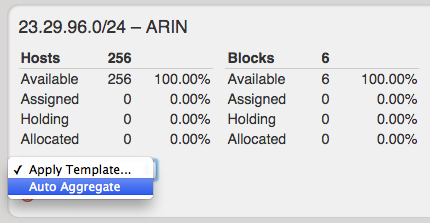
You can also use the "Templates" option from the Action Menu on the IPAM Manage screen for the specific block.
Then, select the auto split parameters from there, and hit "Apply Template".
IP Block parameters and Editing Attributes
...
From here you can set a variety of attributes for a given block. These values are also customizable from the Admin screen - IPAM Admin. For more information on IPAM management , see IPAM Administration and IPAM Parameters.
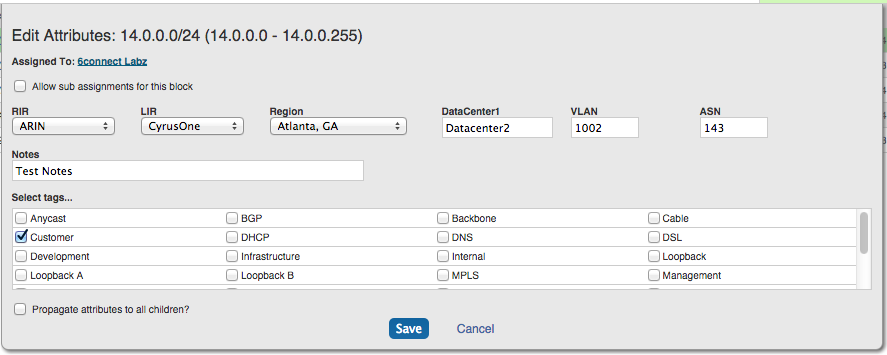

Edit Attributes Overview:
Allow Subassignments: When editing a block that has been assigned, checking this box allows for further subassignments, indicated by a blue arrow next to the assignment in the Manage screen. Note: Subassign status cannot be changed if a block has children.
RIR / LIR / Region: Select the information from the drop down menus. LIR and Regions can be customized in the IPAM Admin section of ProVision - see IPAM Administration and IPAM Parameters.
Generic Code (Herehere, DataCenter1): This is a customizable text field that can be used to track information specific to your needs. It can be filtered in the IPAM Manage screen. The header, display, and enabling settings for this field are set under IPAM Configuration in the IPAM Administration section.
...
There are two areas where you can assign IP Space: in the IPAM Gadget for the particular Resource, or through IPAM Manage for manually assigning a block to a resource. The IPAM Gadget allows for more detailed assignment options including Browse to Direct Assign, Direct AssignSmart Browse, and Smart Assign with advanced options, and is the primary tool for space assignment.
...
The IPAM Gadget is accessed from a Resource Entry page, once enabled for the Section (to add Gadgets, see Customizing Sections and Add Gadgets to your Section).
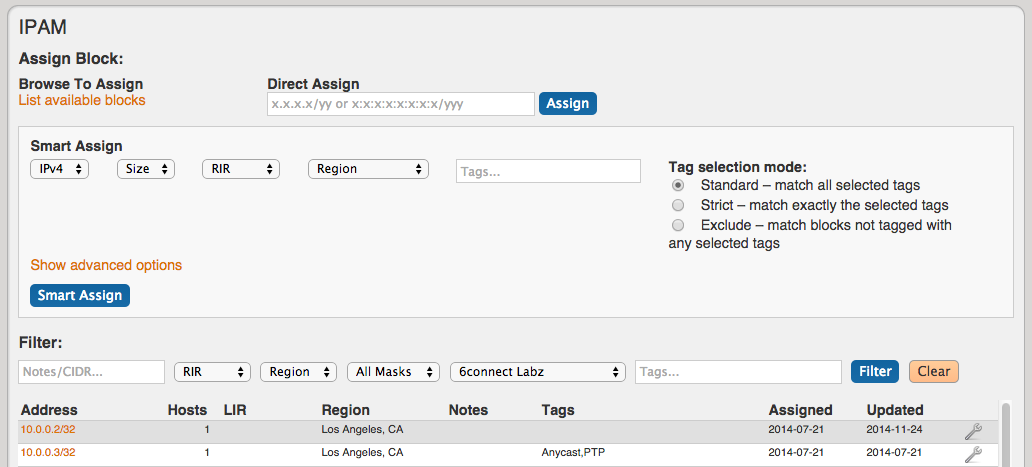
You have three options for assigning IP space using the IPAM Gadget:
Browse to Assign
This brings up a list of IP aggregates where you can select the block to assign.
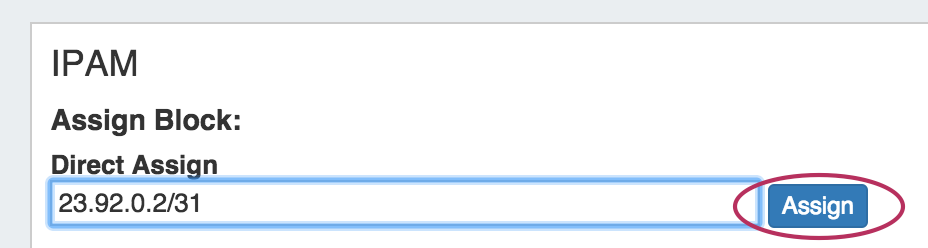
Direct Assign
This field allows you to manually enter an IP block to assign. Enter an IPv4 or IPv6 block, and then click "Assign".
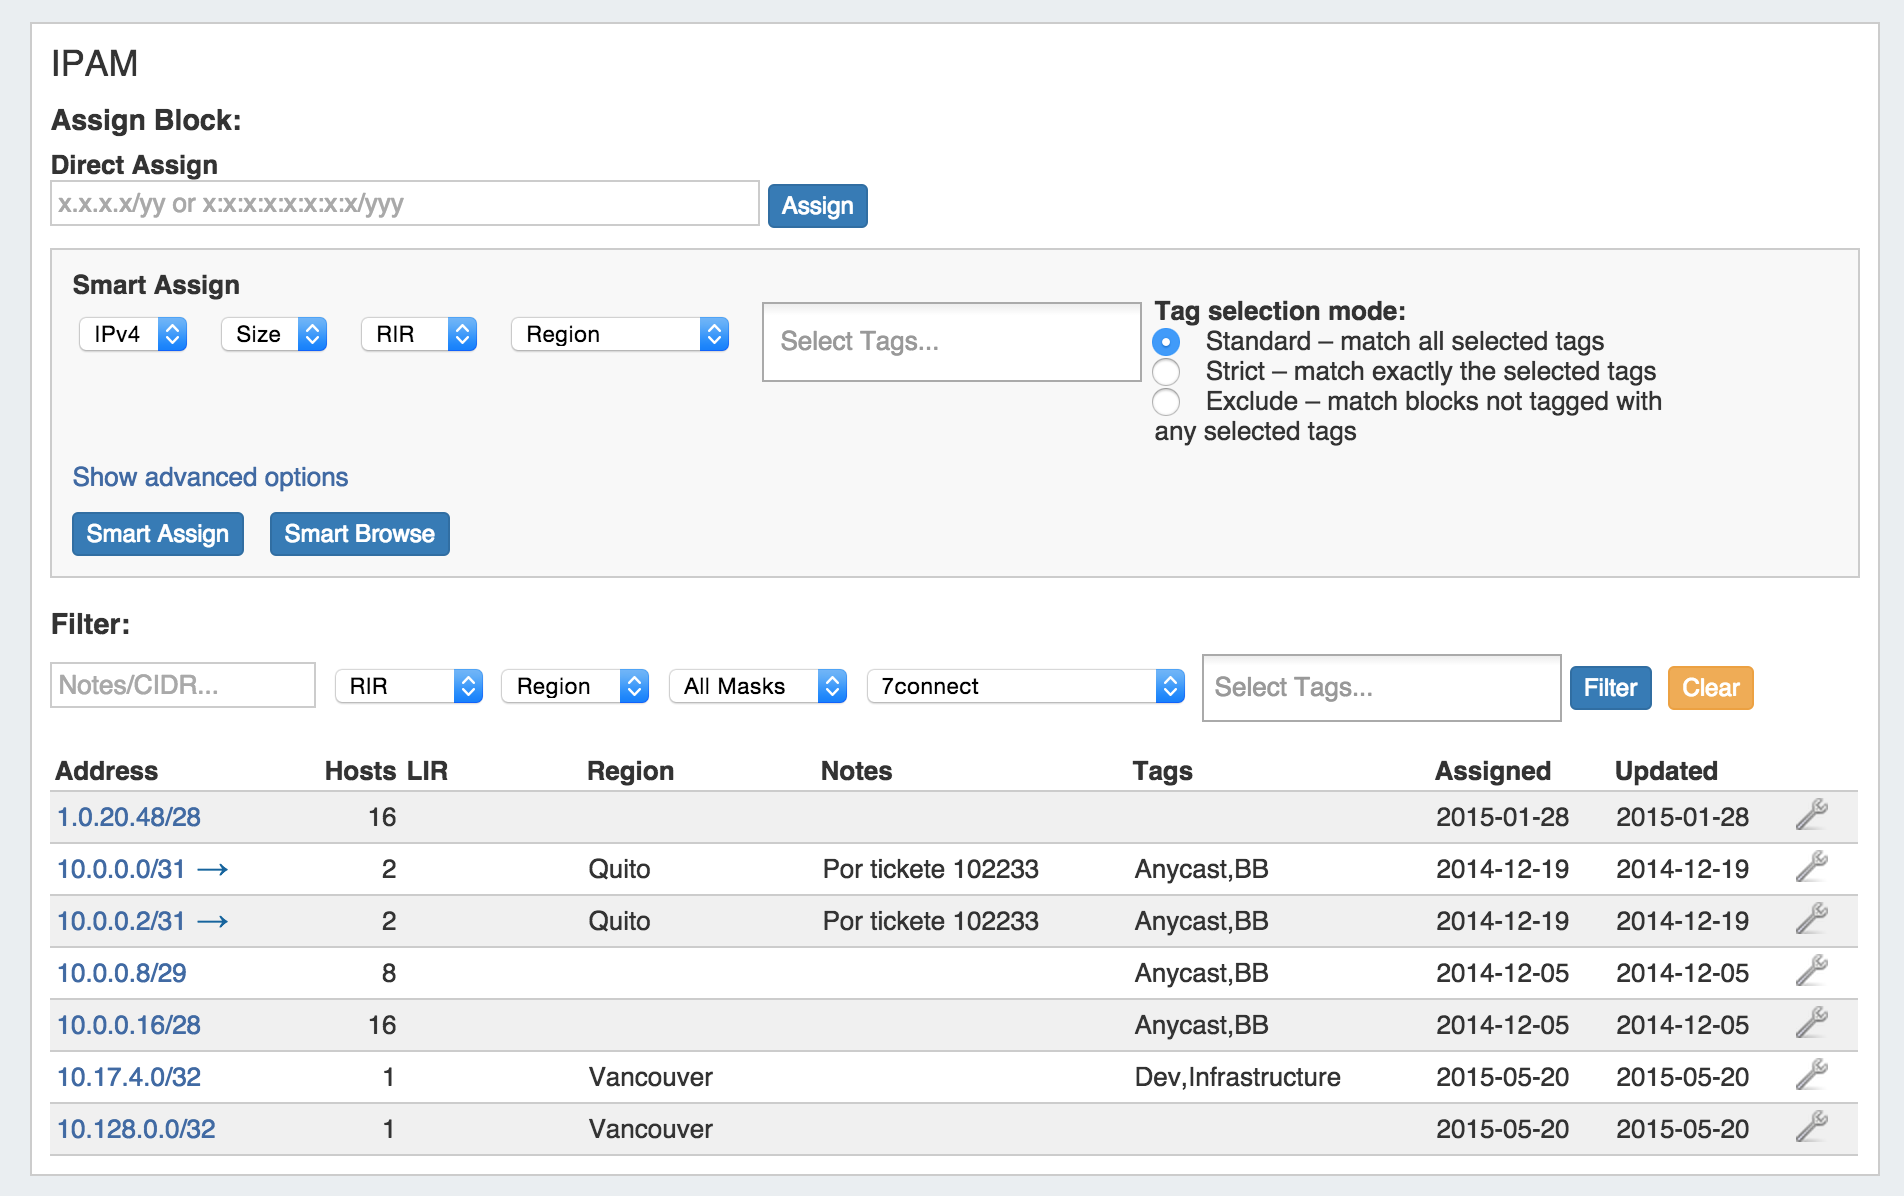
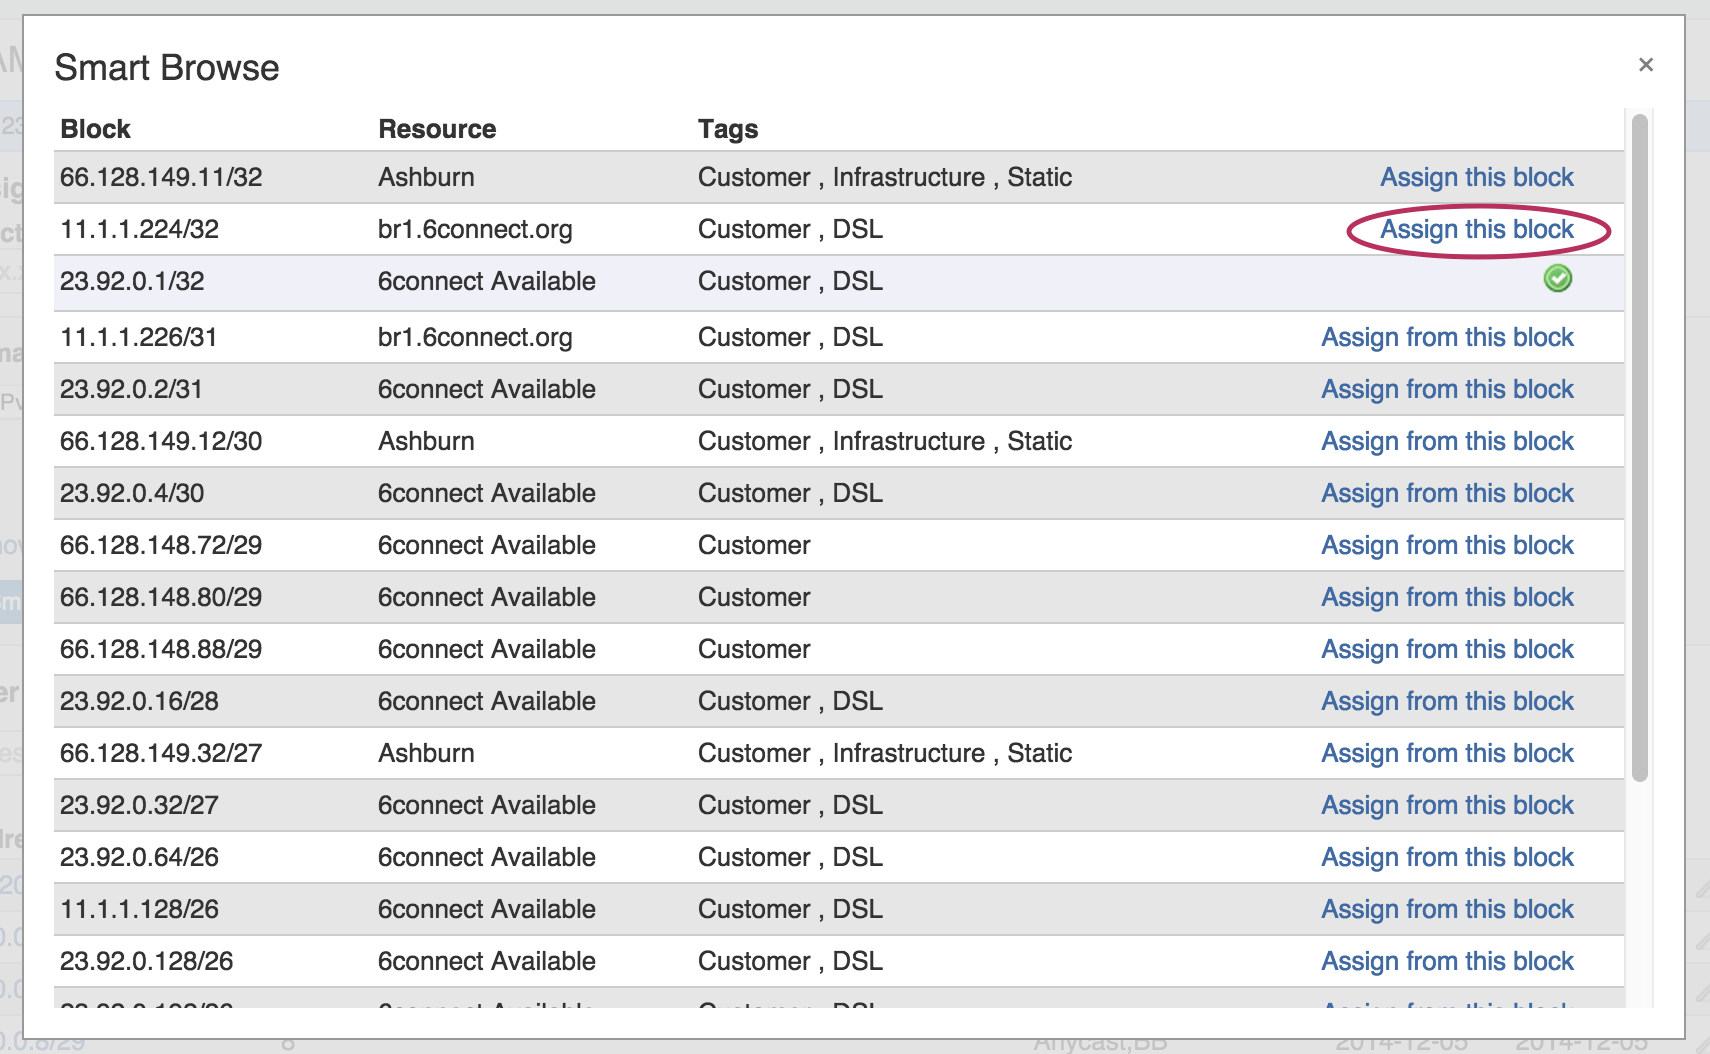
Smart Browse
Smart Browse utilizes the smart assign parameters as search filter criteria. Under the "Smart Assign" area, select the IPv4/IPv6, Size, RIR, Region, and/or Tags that you wish to filter the available blocks list.

Click on "Smart Browse" to bring up a list of IP aggregates meeting that criteria, which you can select the block(s) to assign. A green check will show next to the block once assigned. You may assign multiple blocks per browse session.
Smart Assign
This series of dropdowns allows you to specify the parameters for the type of IP block you want to assign, as well as tag selection modes. Then it will look at the IPAM blocks that match your criteria to find the correct IP assignment based on availability and relevant parameters.
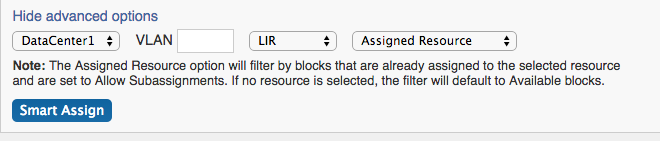
Additional advanced Smart Assign options are available under "Advanced Options", including VLAN and LIR.
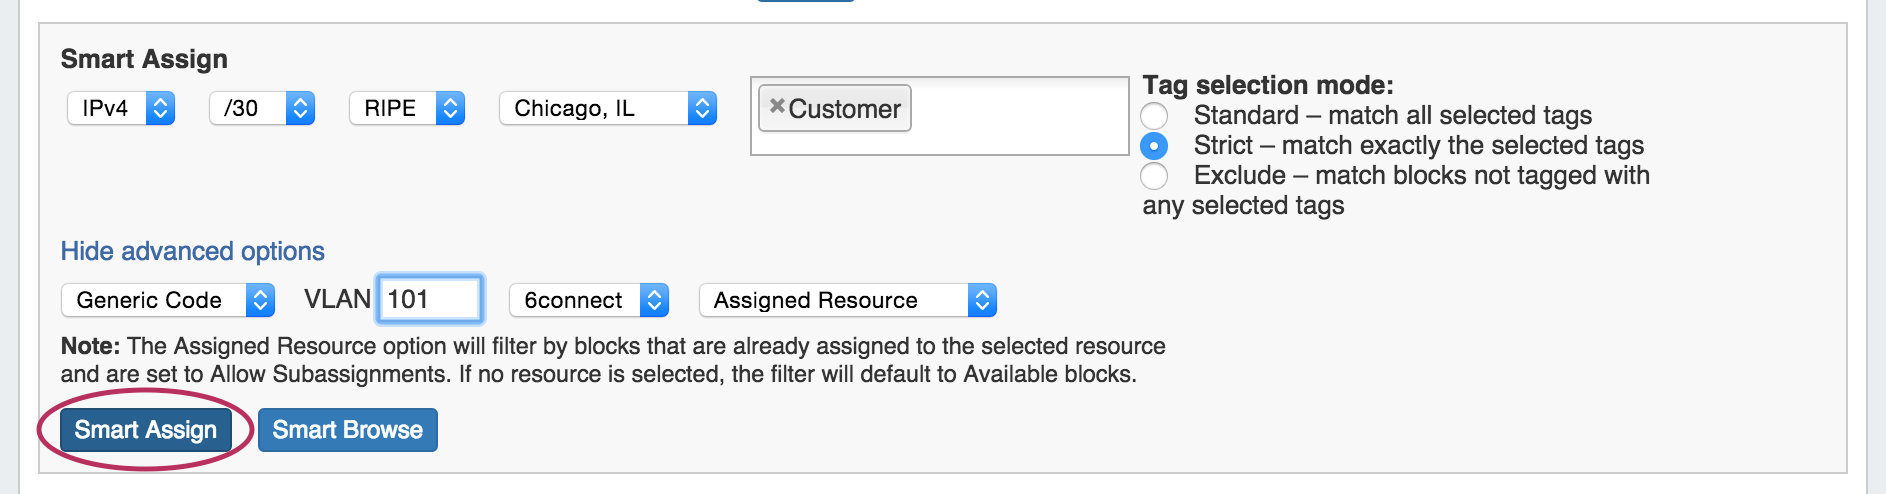
Once your criteria has been set, click the "Smart Assign" button.
...
You can also assign blocks manually using the "Assign" function from the IPAM Manager screen (accessible from the IPAM Tab). Click the Action Menu (wrench icon), then select "Assign".
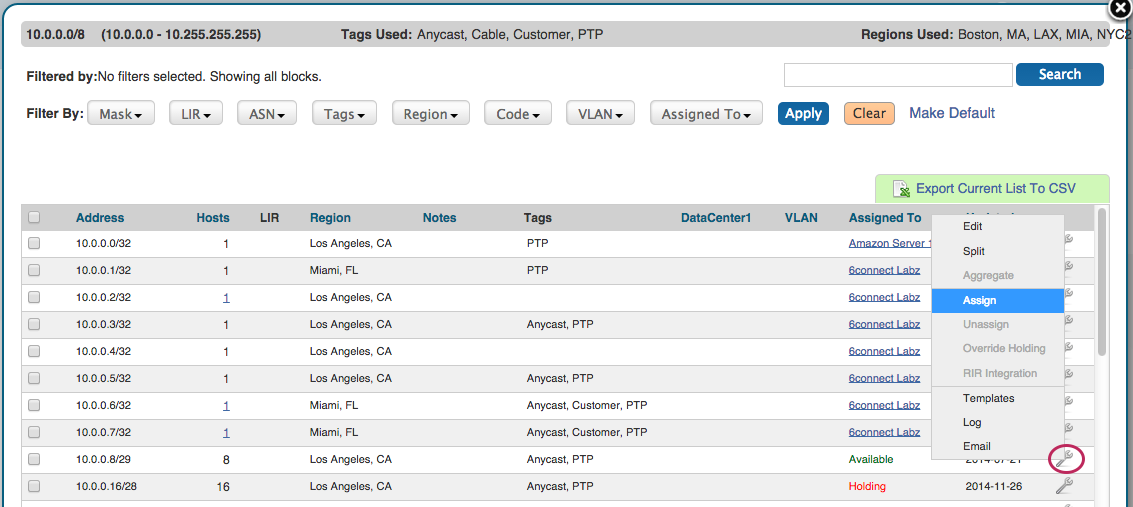
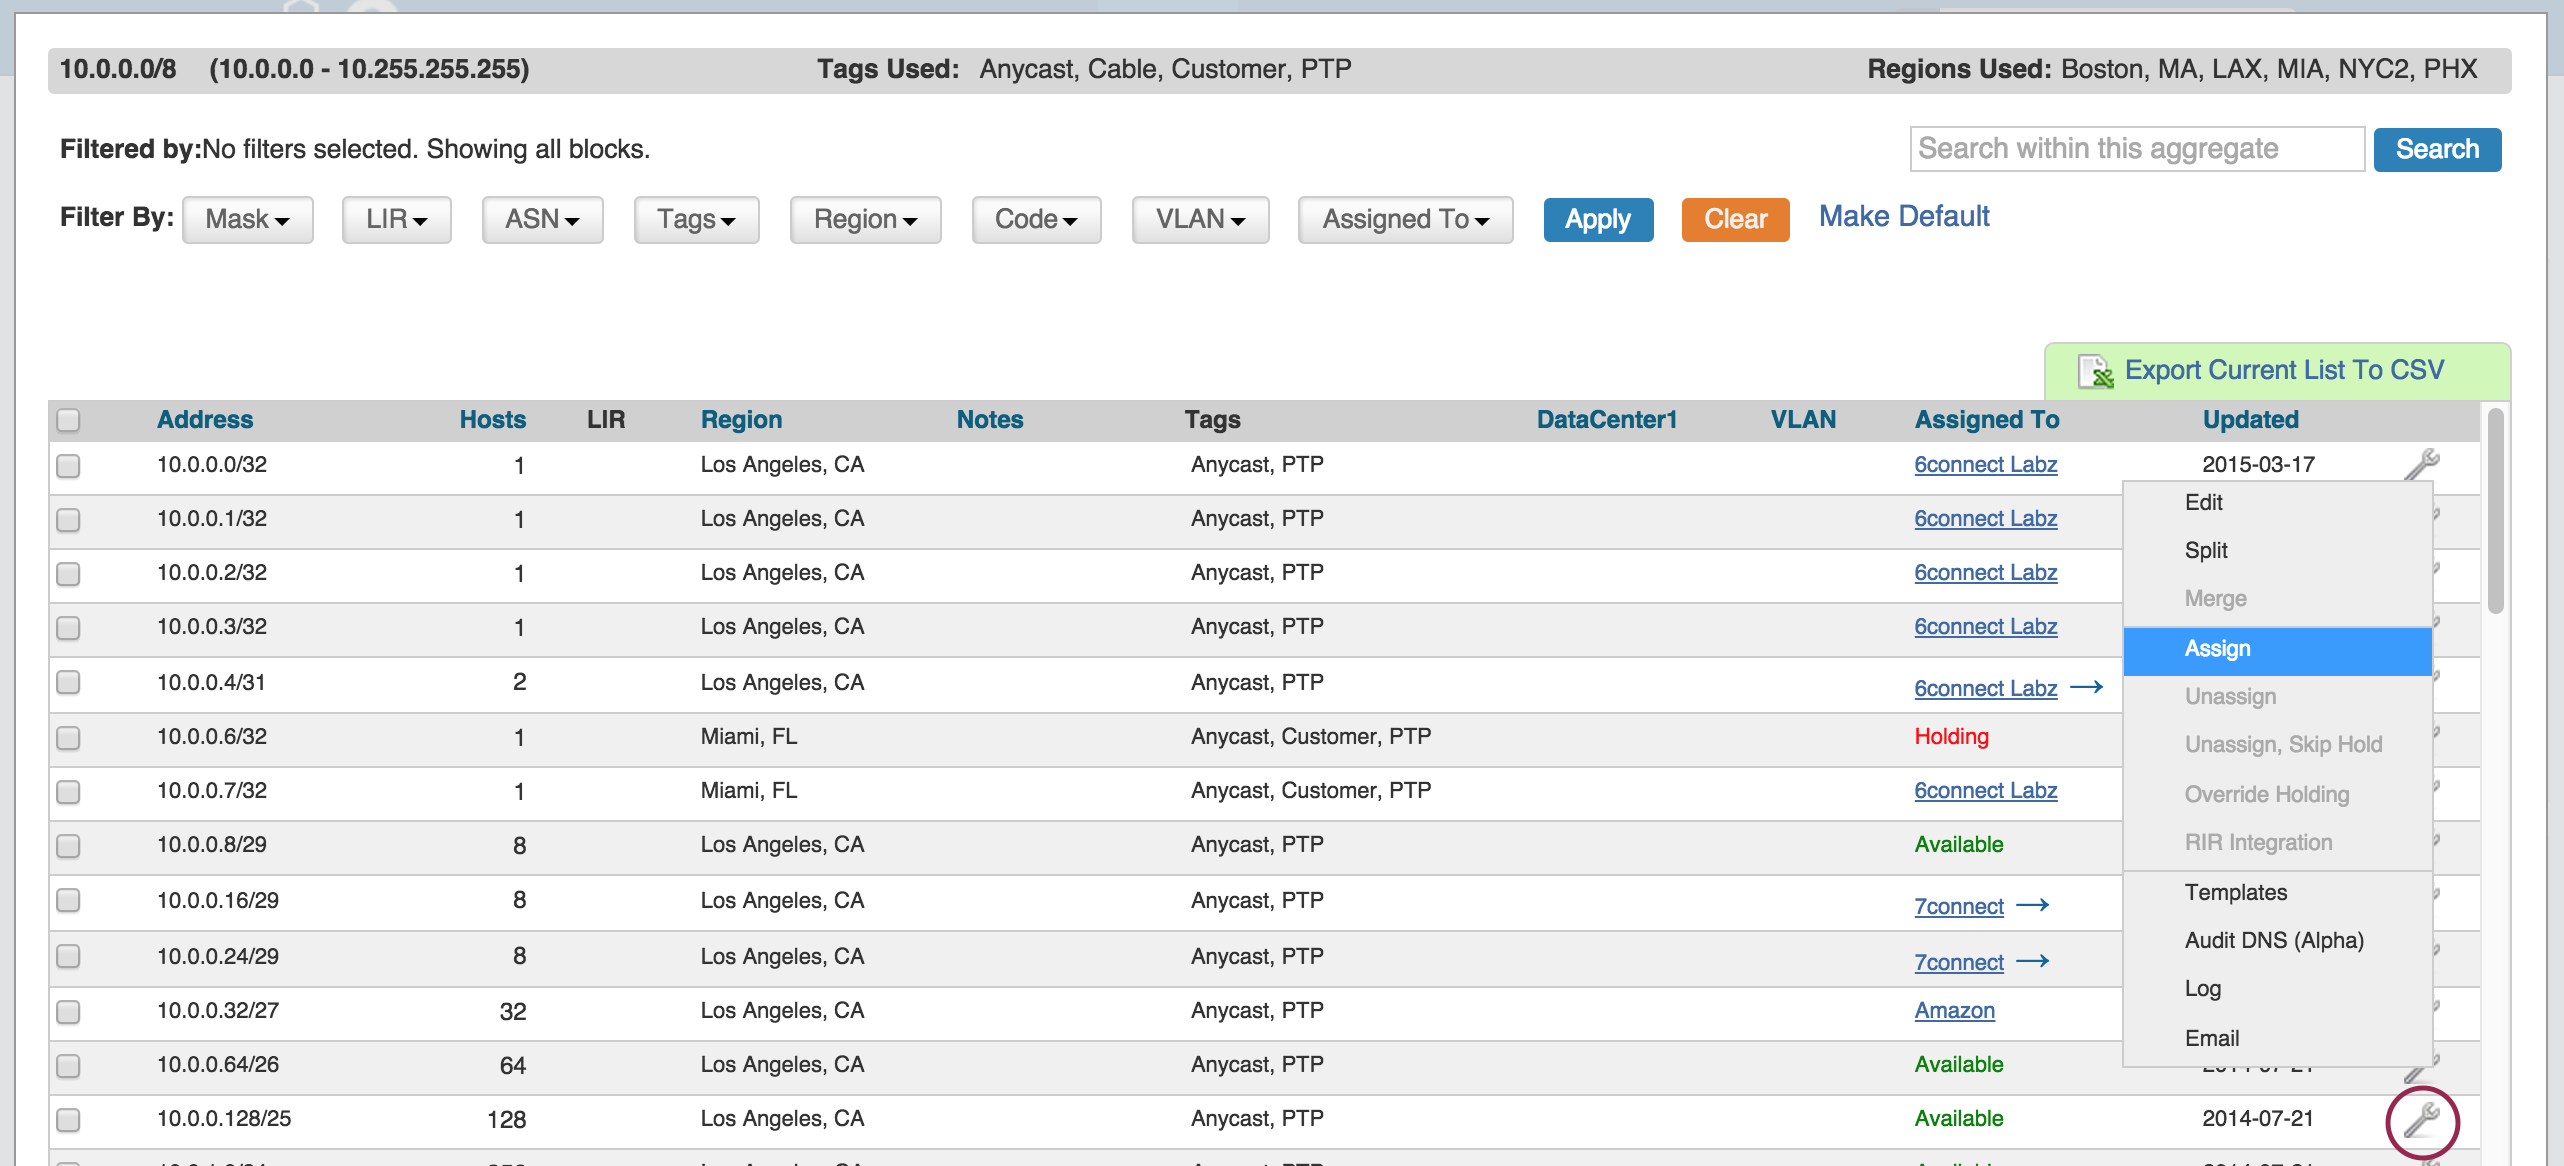
Then, select the Resource to assign the block. A filter tool is provided to narrow the list to a particular Section type.
...
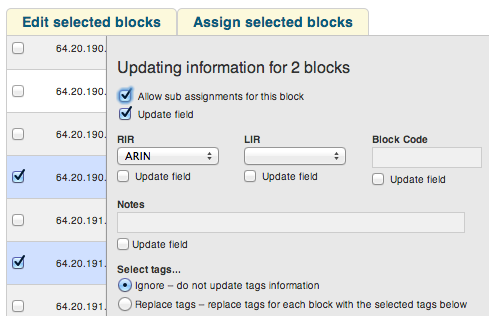
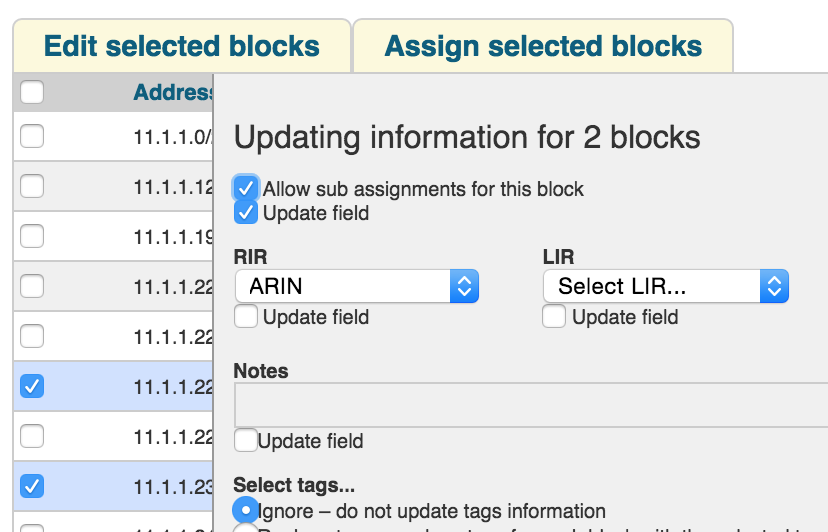
To allow sub assignments for multiple blocks at once, open the Manage screen for the aggregate. Then, select the desired blocks and click "Edit Selected Blocks". The Multi-block edit interface will open. In that interface, select the check boxes next to "Allow sub assignments for this block" and the "Update field" below it. Lastly, save your changes.
Unassigning IP Space
When a block is assigned, you will then have the option of unassigning the block from the resource and returning it to the Holding Tank.
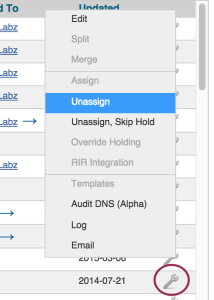
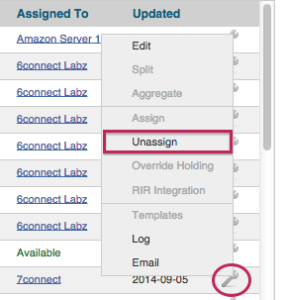
To unassign the block, simply click on the Action Menu (wrench icon) for the block and select "Unassign". You may also chose "Unassign, Skip Hold", which unassigns the block and immediately returns it to available, bypassing the holding tank. After unassigning blocks / overriding holding, newly available blocks will be merged upon next page refresh.
To return IP space in the Holding Tank to the Available Pool - there are two methods:
...
2) Process the Holding Tank via the Admin screen under IPAM Admin (this will only process blocks that were present for the specified number of days).
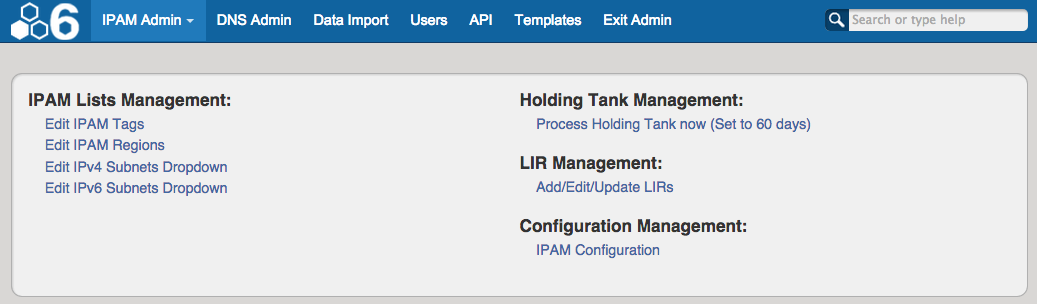
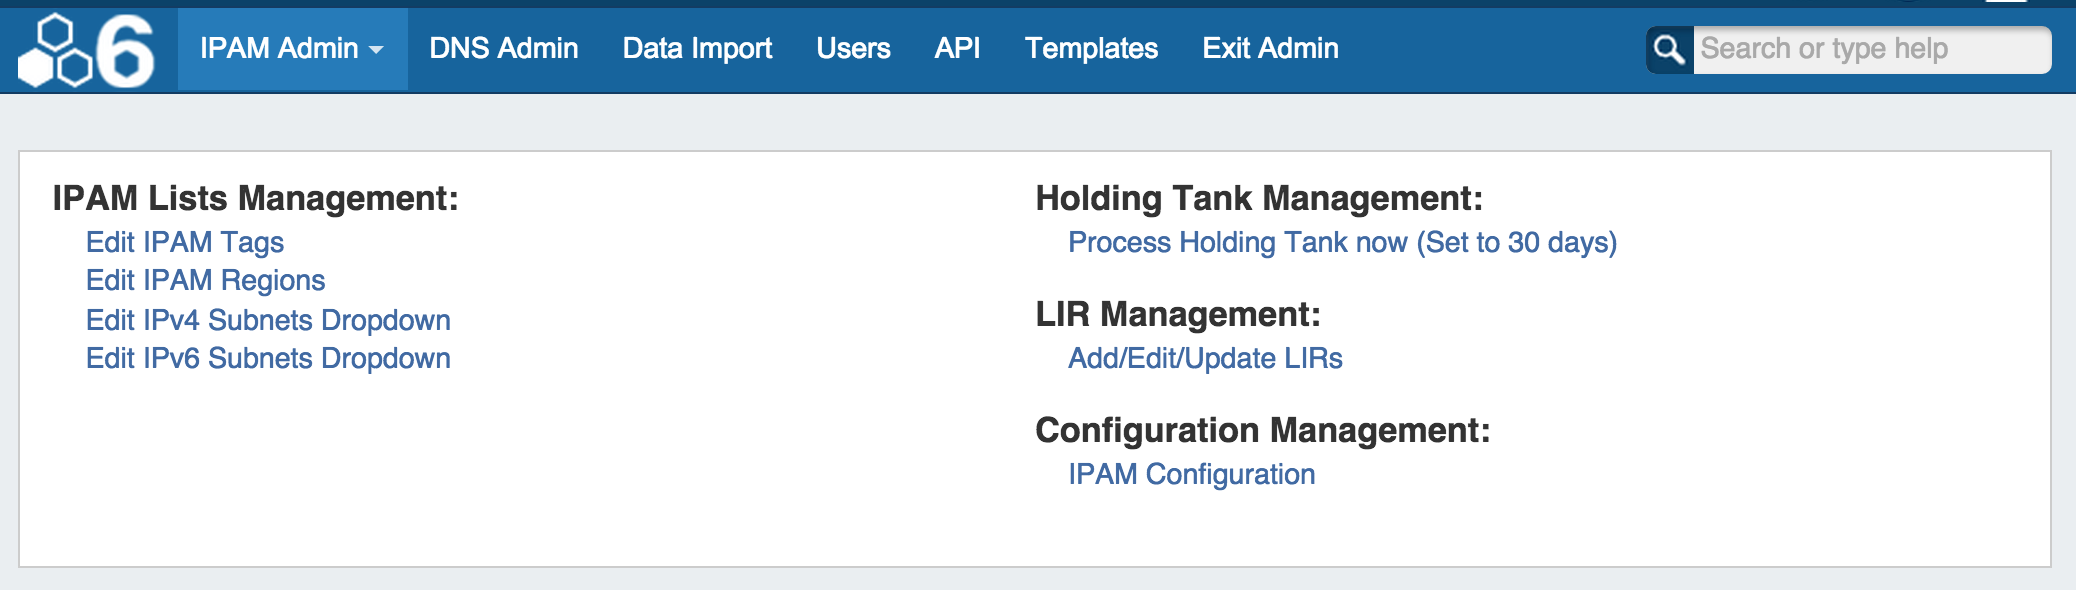
For more information on the Holding Tank, see Holding Tank Management.
View Parent Blocks in IPAM Manage
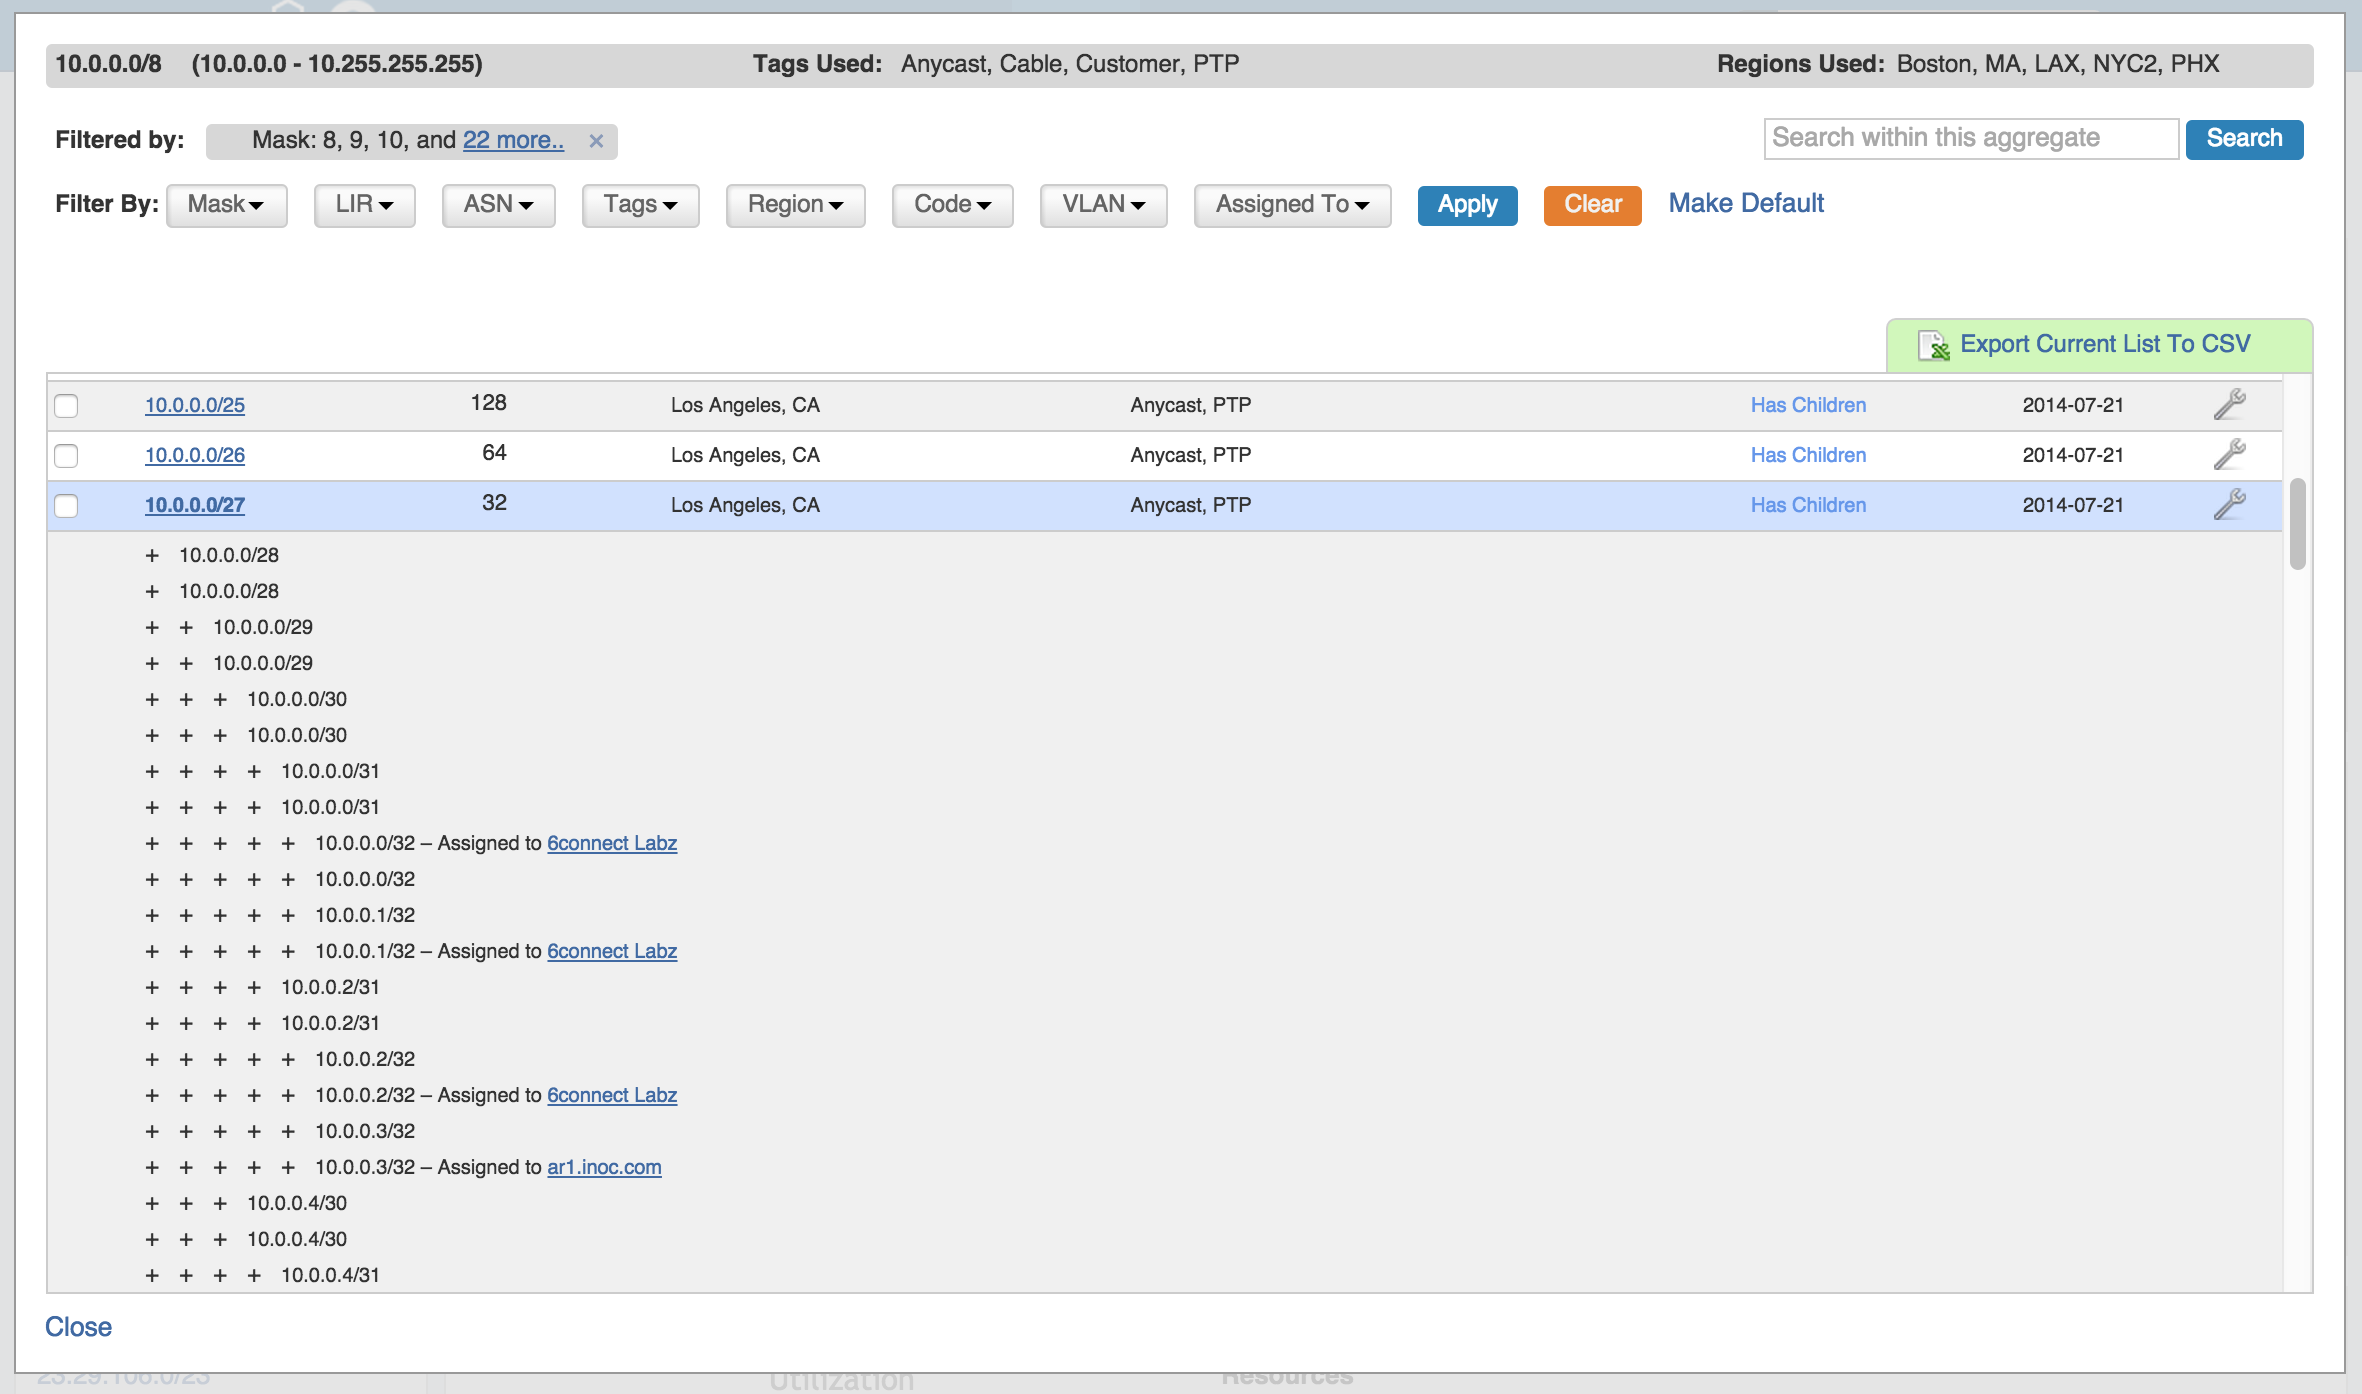
On the IPAM Manage screen, you have an option to Filter the view by selected Subnet Mask (dropdown). By default, blocks in ProVision are displayed at their child size, the lowest point in the block tree available for that block.
With the Filter By Masks enabled, and multiple or all masks selected, the view changes to include the "Parent" blocks, showing all masks throughout the assignment tree.
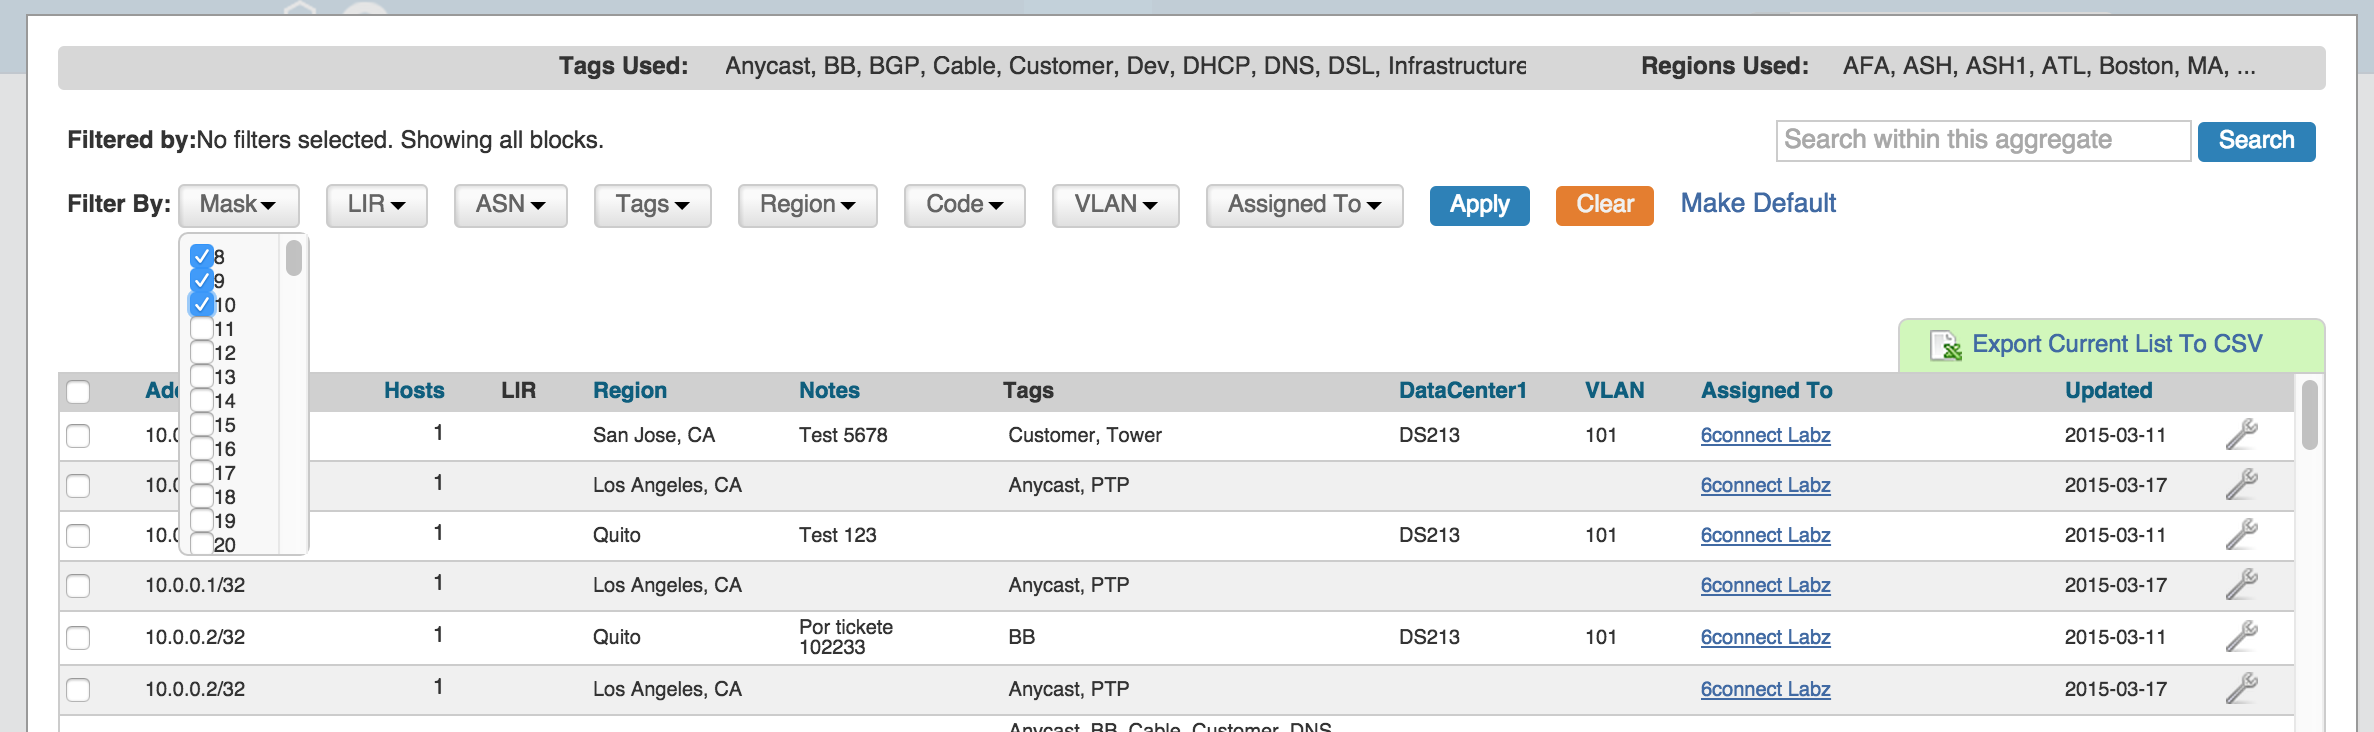
A parent block with children will show "Has Children" in the column where assignment status is shown, and the block CIDR will show as a clickable link.
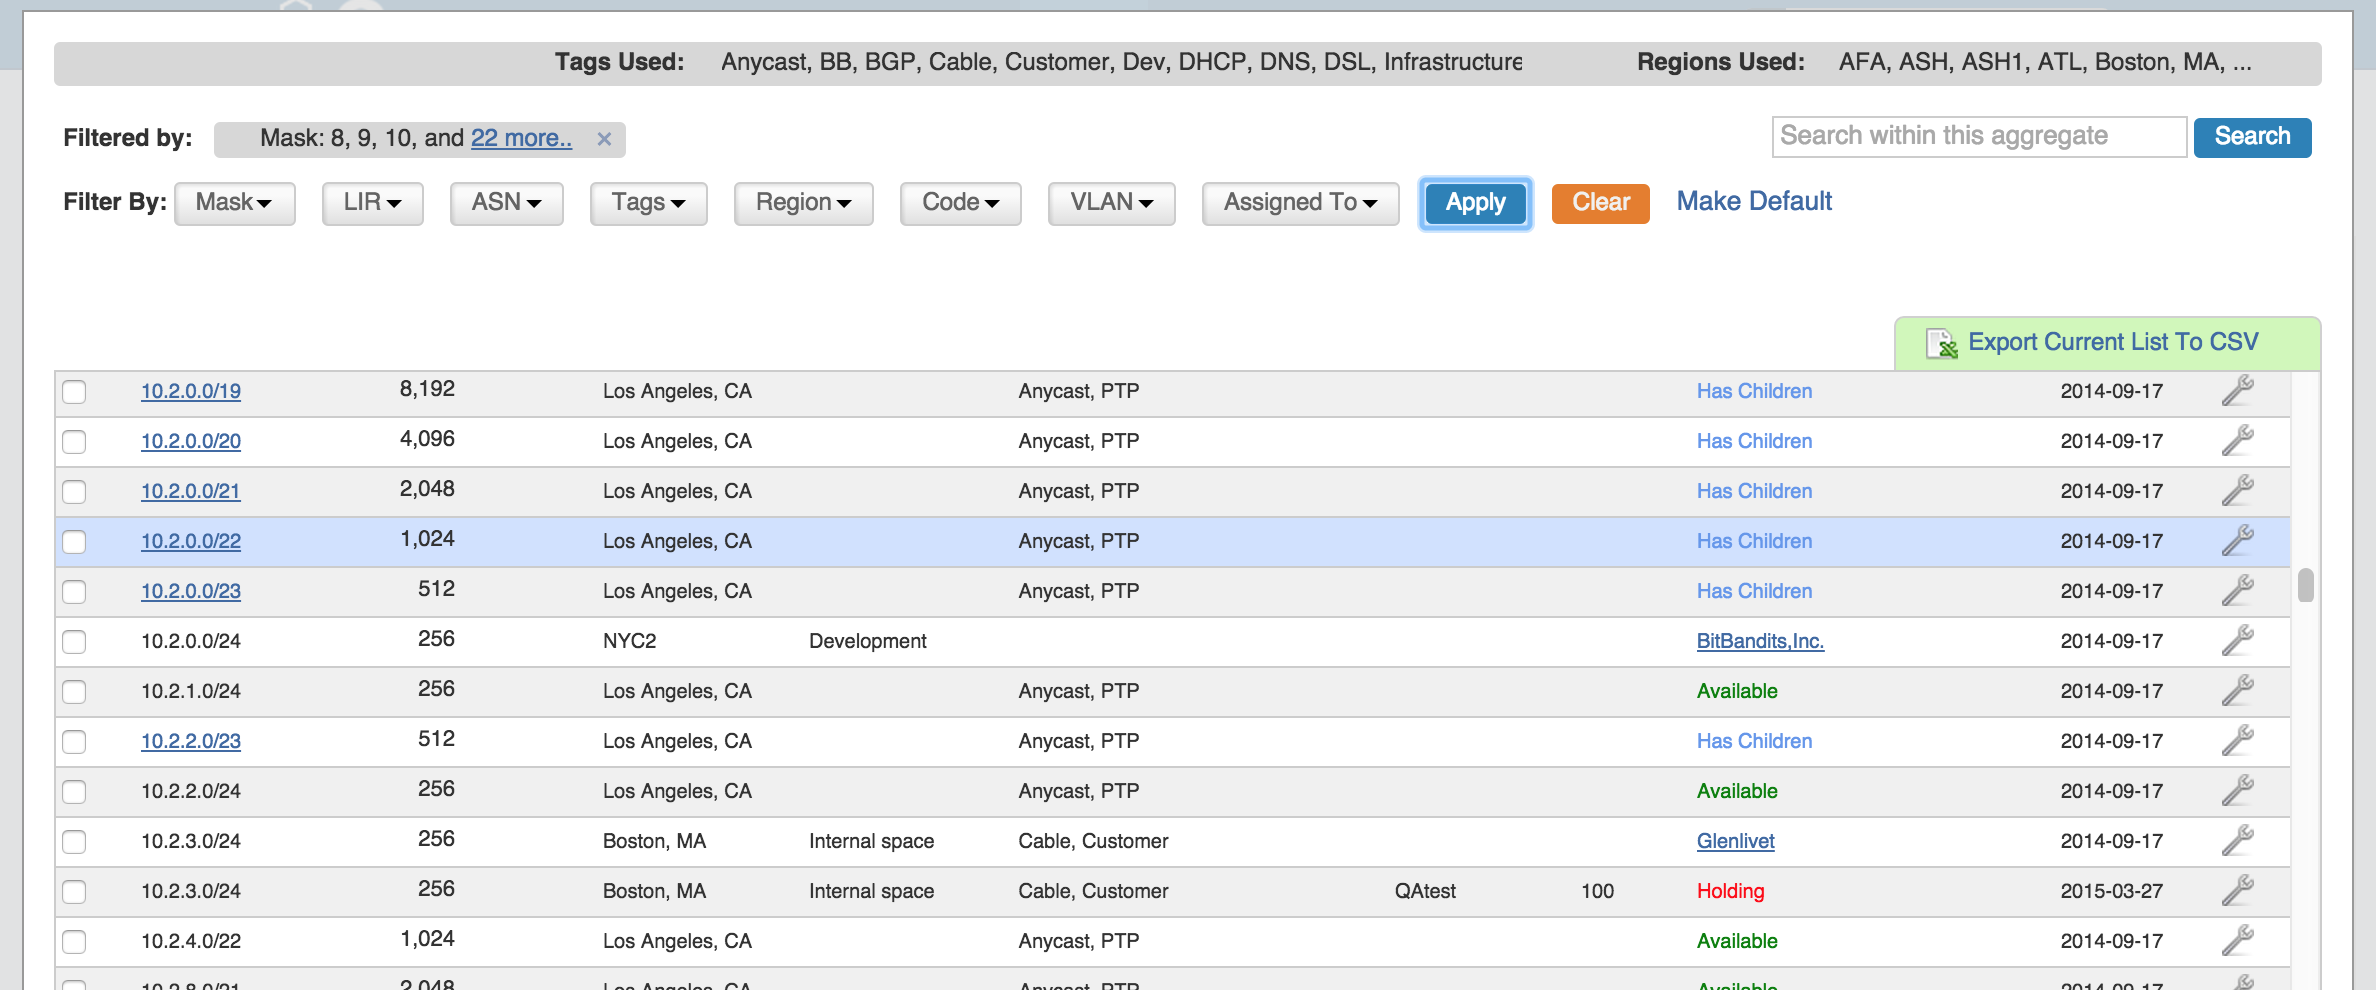
Then, the user can click on the block link once to view the additional assignments/allocations underneath it.