DNS
The DNS tab allows you to add new Zones as well as view and manage existing zones.
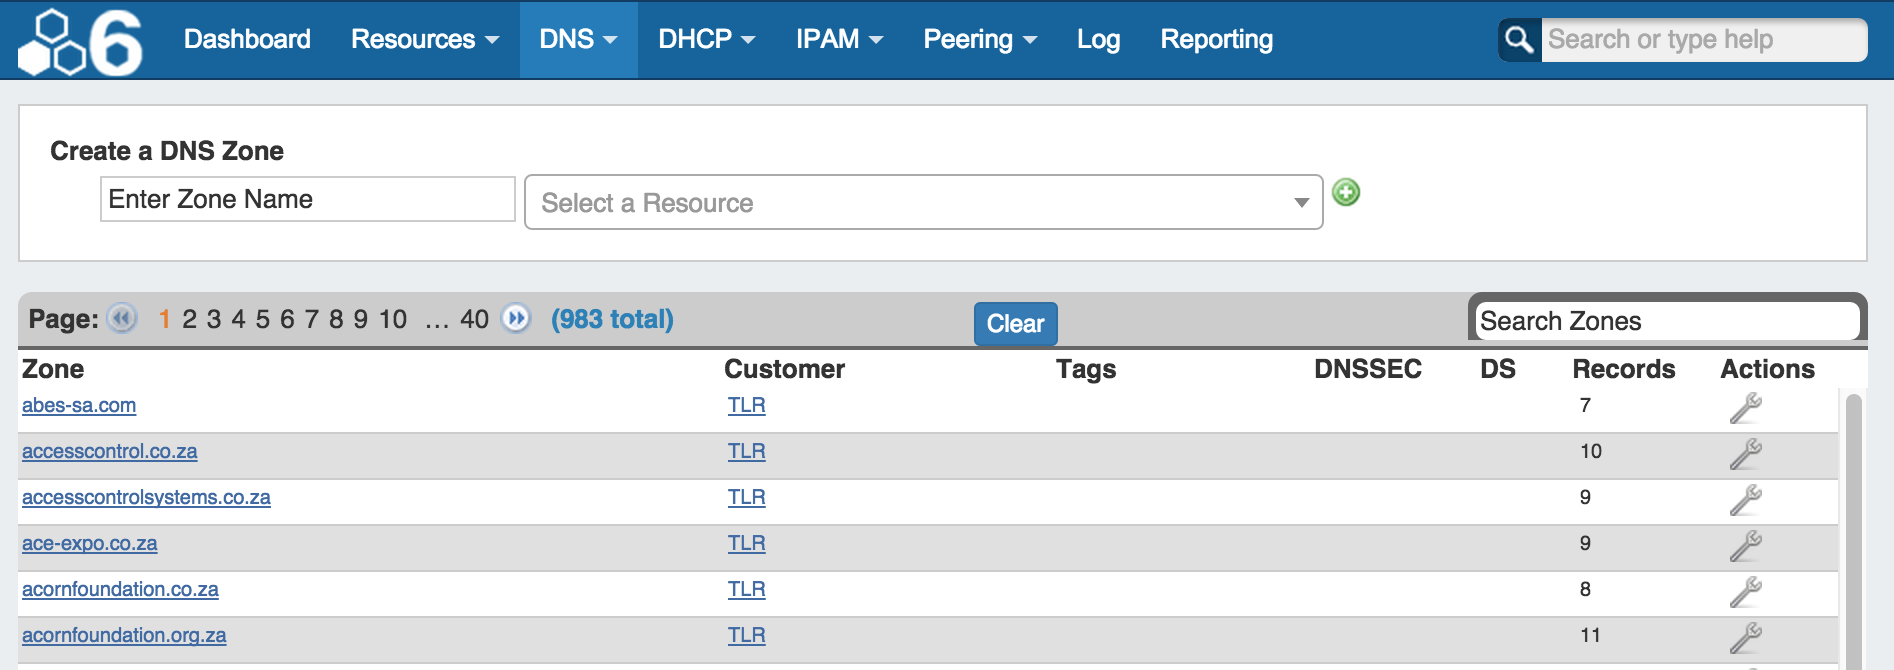
Navigating to the DNS Tab
Clicking on the main DNS Tab, then on "Add Zone" will bring up the following UI.

Creating/Adding Zones
To create a zone, enter the name of the zone and select the Resource you want to assign the zone to. Click on the green plus sign to be taken to the newly created zone file. There you can edit the zone, assign views, etc.
DNS Tab User Interface
| Table of Contents |
|---|
DNS Tab User Interface
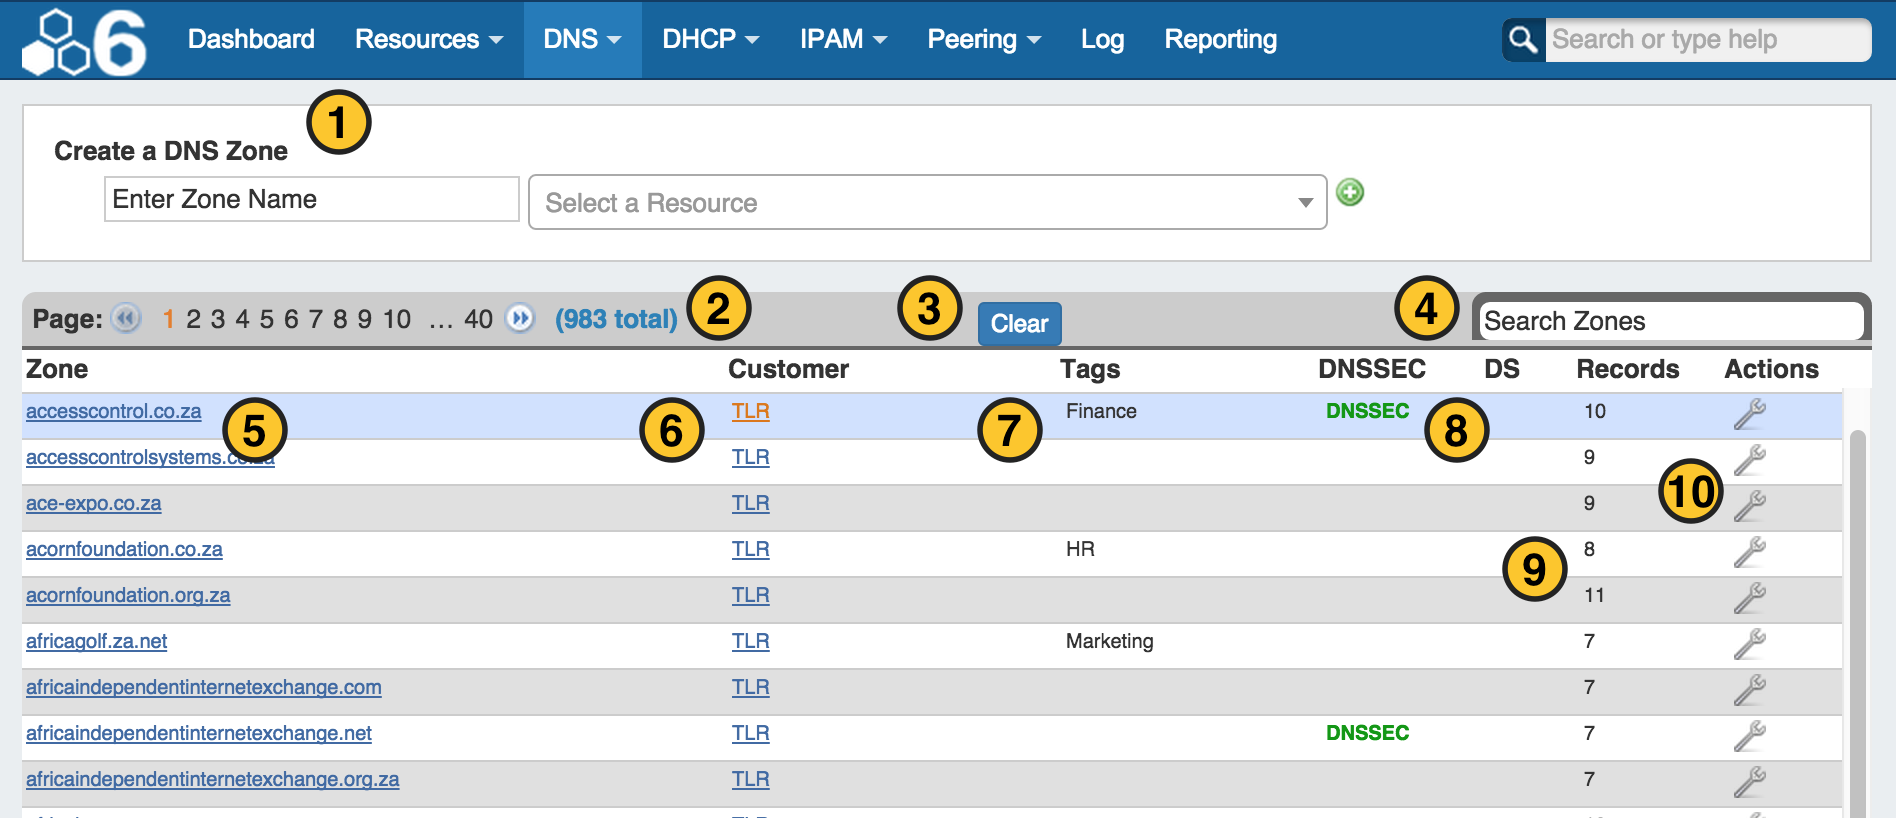
1) Create Zone Interface: Dialog for creating a DNS zone
2) Paging: 1) Paging - this allows for easier browsing of large lists of DNS zones
3) Clear Button: Clears out the search box text
4) Search: this 2) Filtering - this text box allows the user to enter in criteria to filter the list of zones
3) The Zone list is a 5) The Zone list: A click-able list of zone names - if clicked, the user will be directed to the DNS zone editing page
4) The Customer list is a 6) The Customer list: iA click-able list of Resource names that the zone is assigned to
57) The Tags column lists : lists the tags associated with the zone
68) DNSSEC / DS Status: The DNSSEC column will show green if the zone has been signed and pushed successfully, the "X" column DS column will provide a status "X" to acknowledge that the zone was verified by an authenticated DNS server
7) The Records value 9) Records: The records value is the number of zone records in the given zone
10) Action Menu: The Action Menu (wrench icon) gives a list of additional actions to perform on the zone
DNS Zone Action Menu
The Action menu provides a list of options that the user can select for any given zone.
1) Edit Tags: This allows to assign tag values to a zone for easier filtering. This a free form field and not the same as the IPAM Tags
2) View: Brings you to the View/Edit screen for the zone
...
6) Log: Brings the user to the Log Tab with the results filtered for the specific zone
Additional Information
| Children Display |
|---|