Working with IP Aggregates
IPAM Aggregates
...
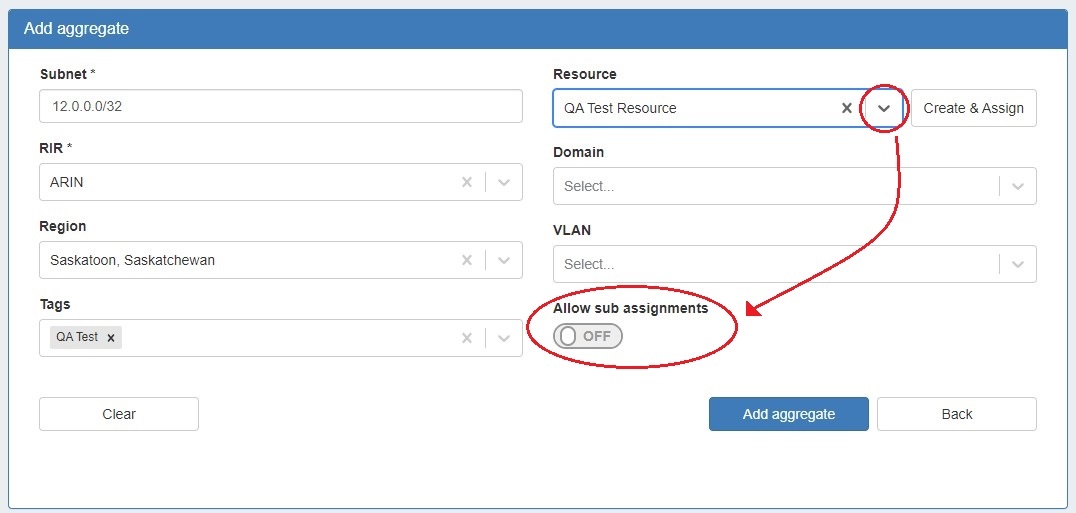
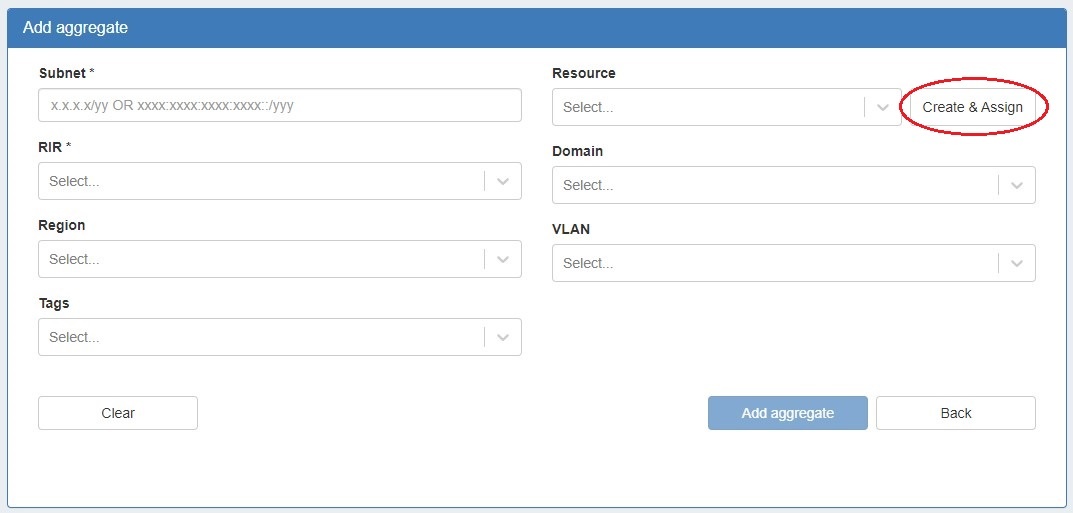
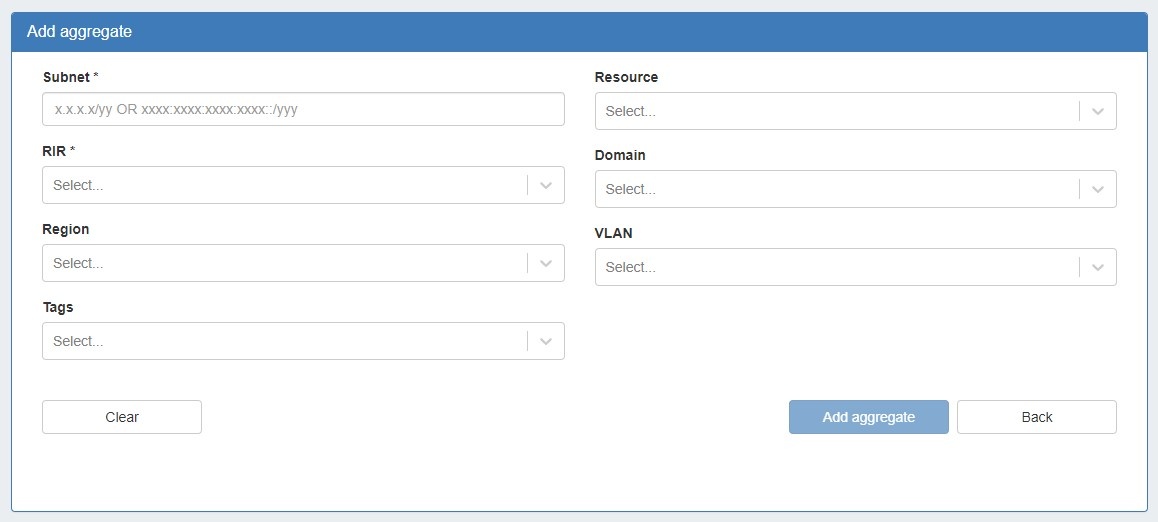
Enter in the desired IPv6 / IPv6 CIDR and RIR, at minimum. Region, Tags, Resource, Domain, VLAN, and subassignment status are optional, if desired.
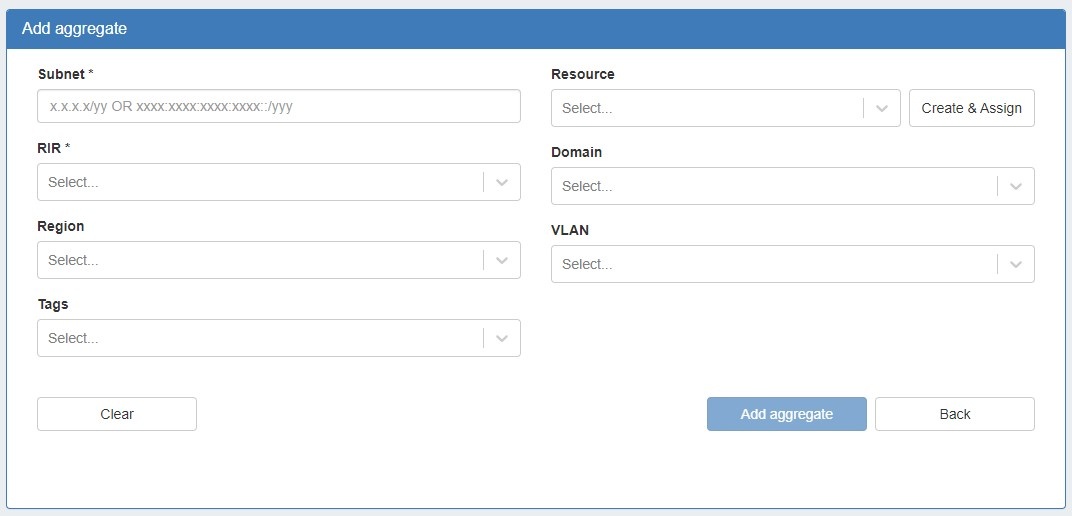
To enable subassignments, a resource must be selected. The "Allow sub assignments" selector will be visible once a resource is selected from the dropdown.
Select "Create & Assign" to create a new resource to which to assign the aggregate.
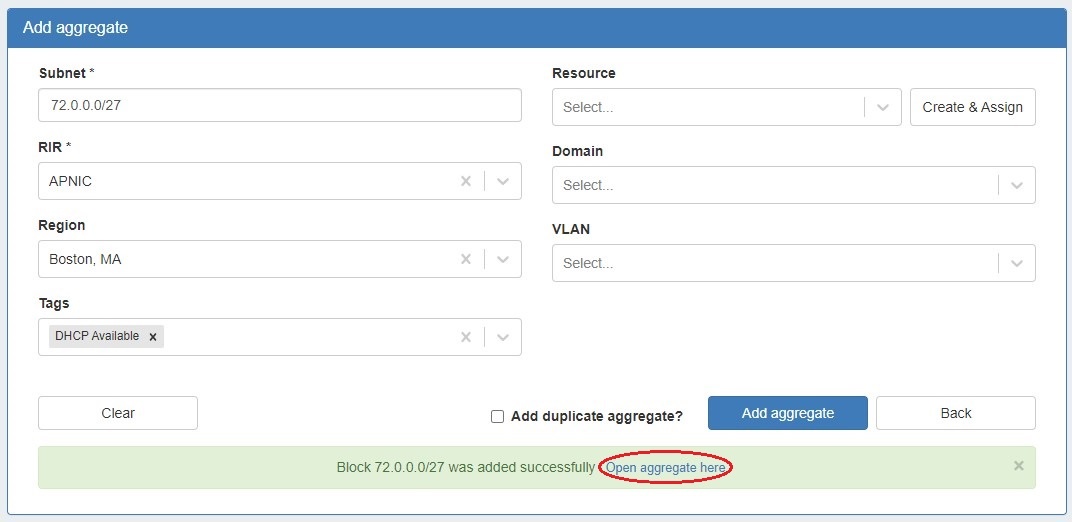
If creating the aggregate for a specific use, keep in mind that certain uses may require additional information is provided in the aggregate, such as requiring 1918 space (DHCP Pools), a region to be provided (DHCP Customer Configuration Gadget), or a resource to be assigned with subassignments enabled. In such cases, it may be useful to assign a specific IPAM tag to associate with that use to assign at aggregate creation (such as "DHCP" )
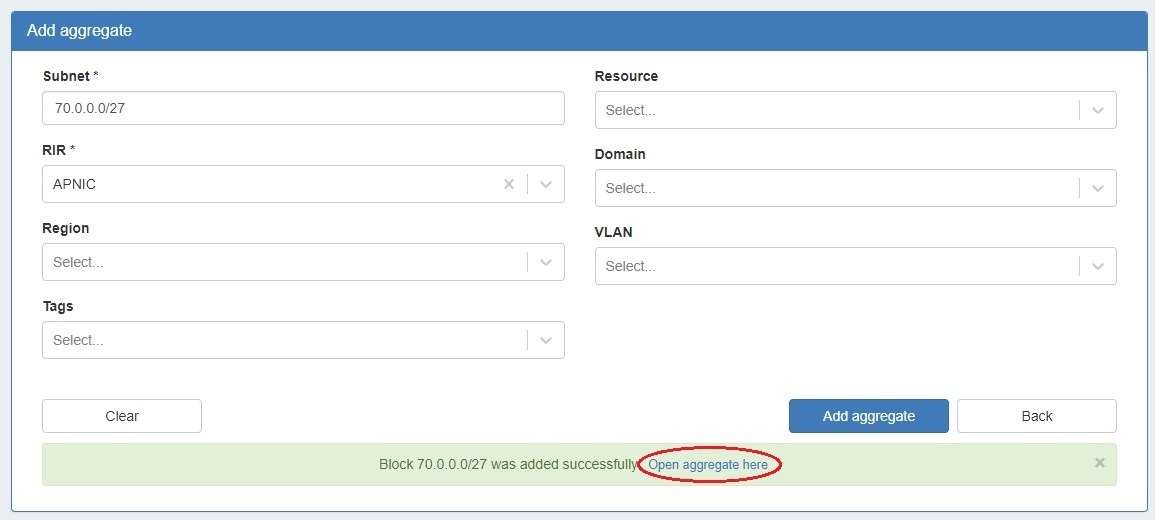
When done, click "Add Aggregate", and a link to the newly created aggregate will be available. You may also click "Clear" and create another aggregate. Aggregates will be listed under the Host Utilization and Aggregate Blocks list of the IPAM Tab.
Delete an Aggregate
...
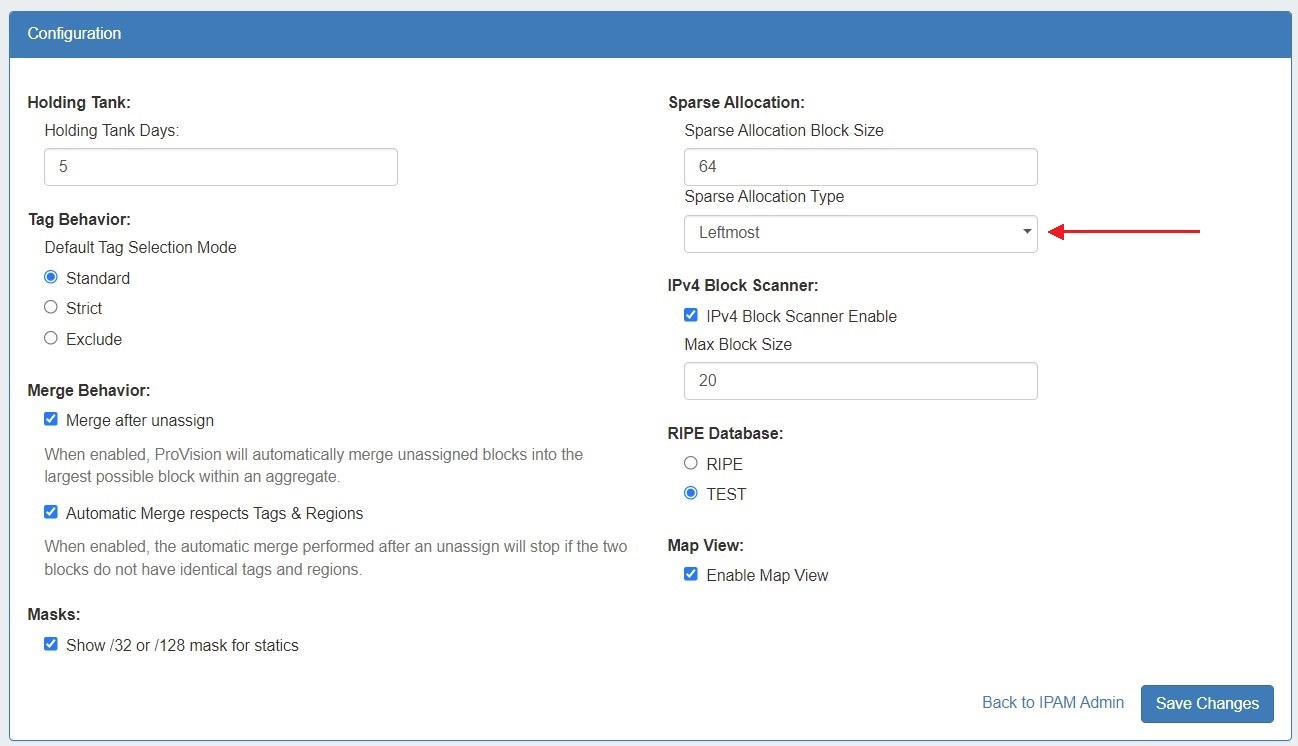
Admins may select a system default Sparse Allocation scheme to use for IPv6 Sparse Allocation. Available values are Leftmost, Center, and Rightmost. If not otherwise specified, Leftmost is the ProVision Defaultdefault.
To edit the Sparse Allocation Scheme, select the desired scheme in IPAM Configuration, then enable sparse allocation for the desired IPv6 aggregate. The Sparse allocation scheme is applied to the aggregate when sparse allocation is enabled for the aggregate, thus, pre-existing sparse allocation schemes will not be altered by later changes.
If you wish to change the scheme for an existing sparse allocated-enabled aggregate, you must
...
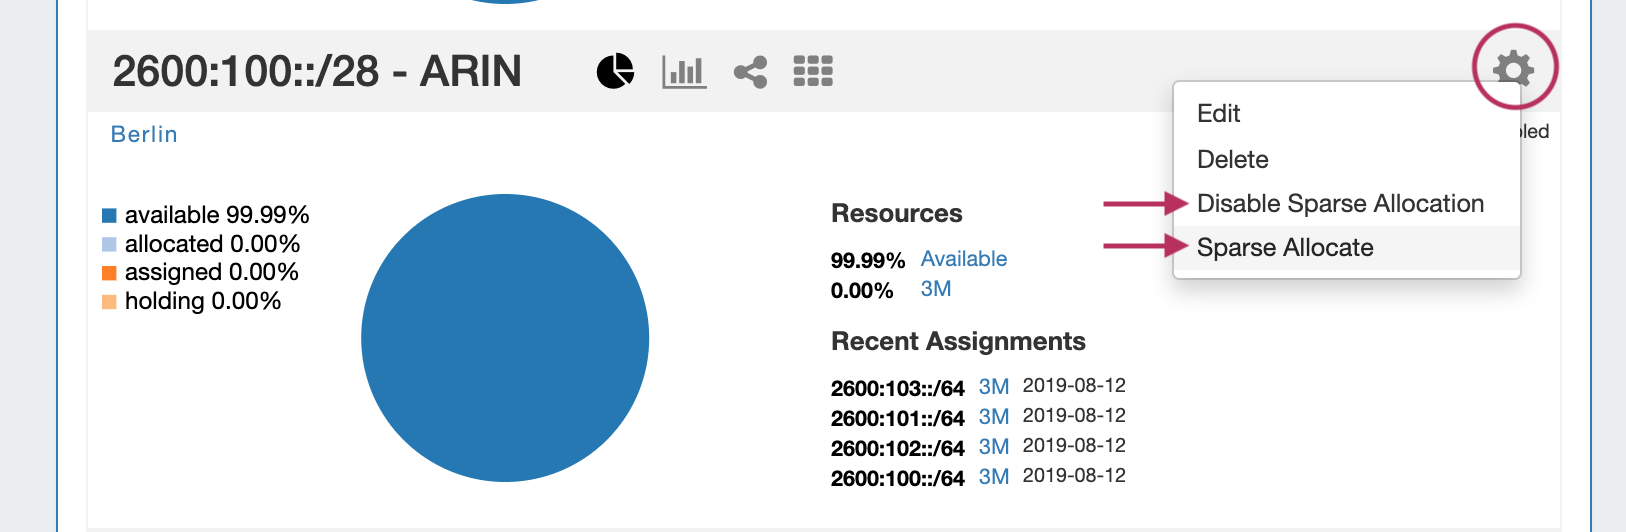
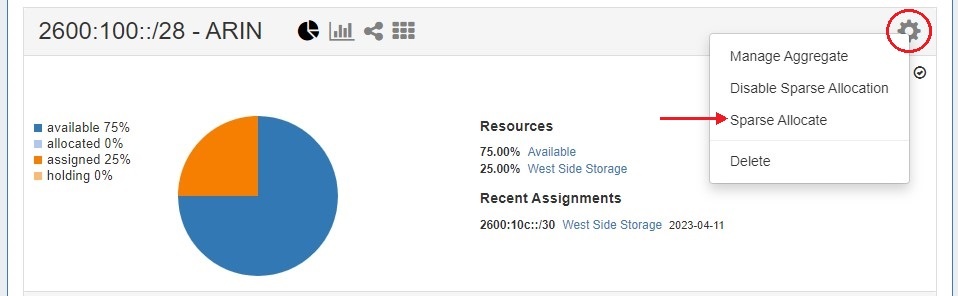
Enable or disable Sparse Allocation for the aggregate by clicking on the aggregate menu, and select to Enable / Disable Sparse Allocation for the aggregate. A "Sparse Allocate" Numbering Domain will automatically be generated for the aggregate in the Admin → IPAM Admin area of ProVision, using the currently set Sparse Allocation Scheme setting.
...
To Sparse Allocate assign the next IP generated, select "Sparse Allocate" from the aggregate action menu.
Then, select the resource to assign (or create a new one) and click "Assign".
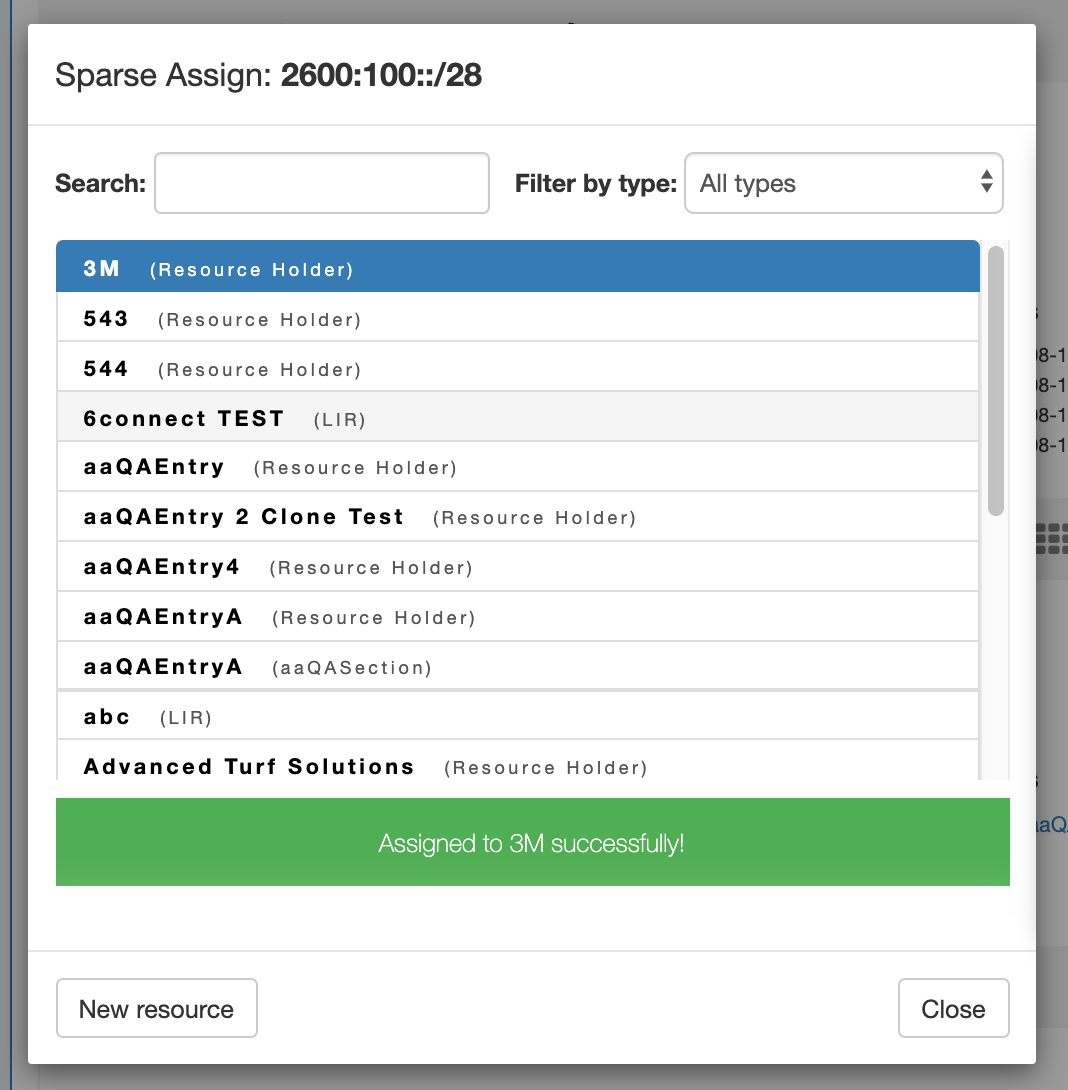
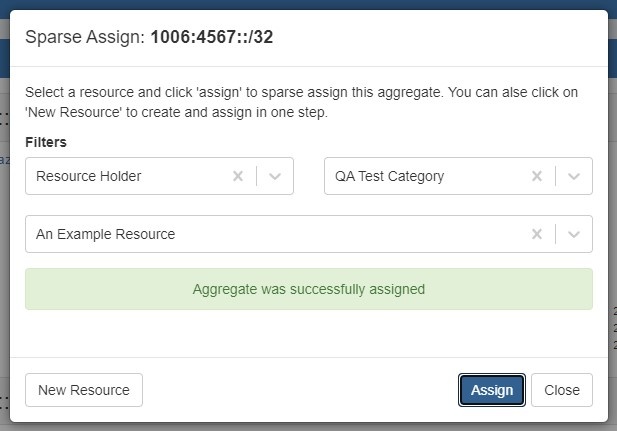
The resource will be assigned according to the distribution algorithm and may be further managed in IPAM Manage for the aggregate.
...
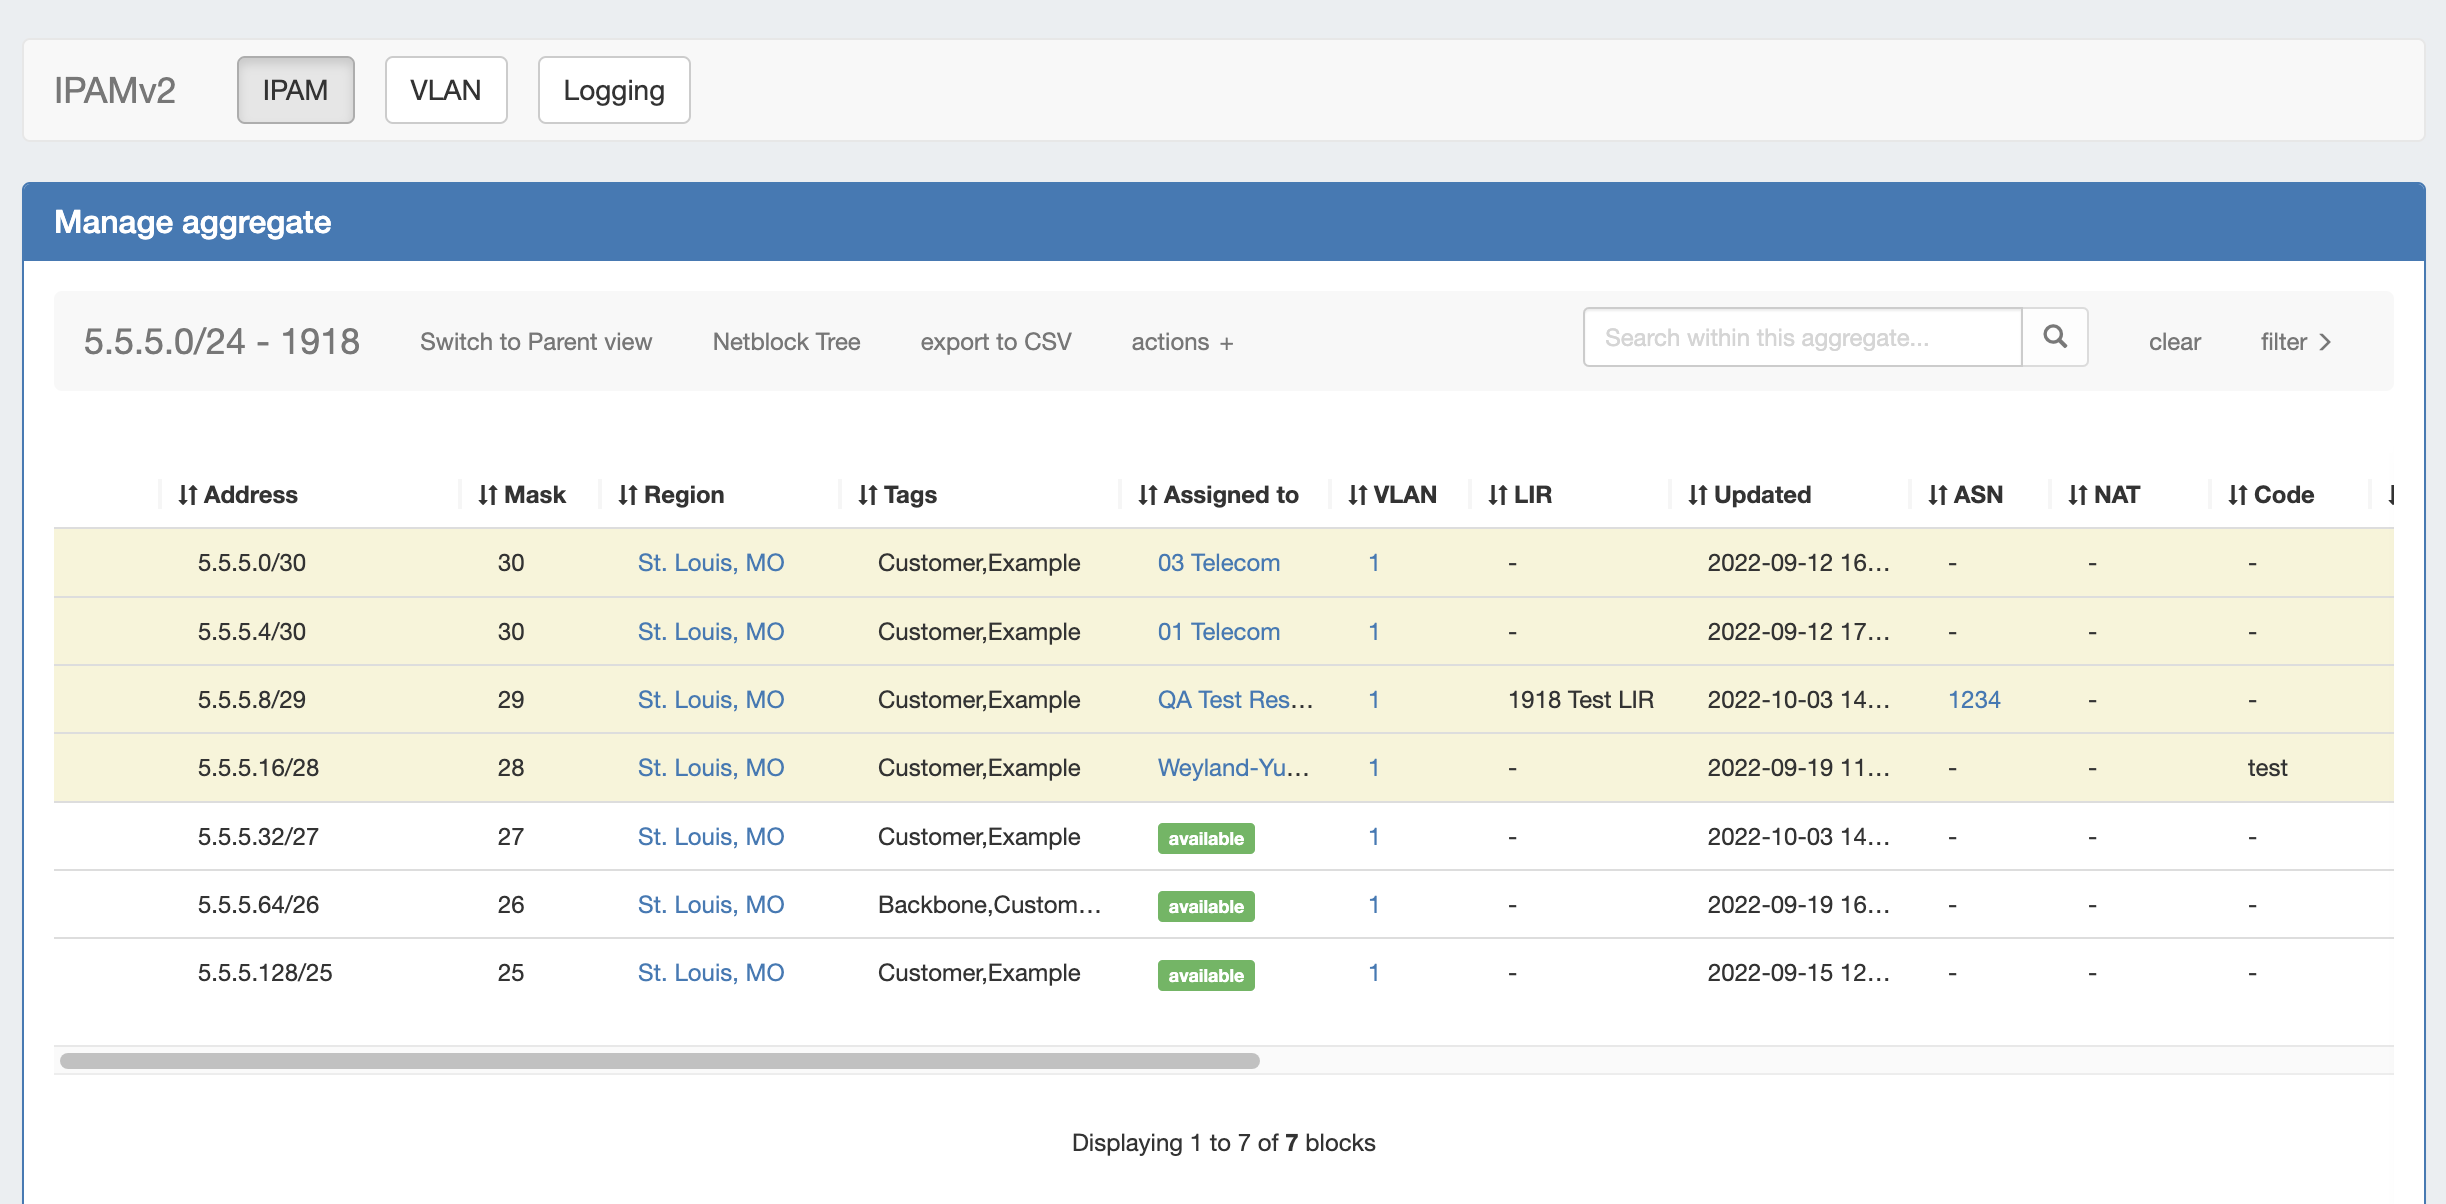
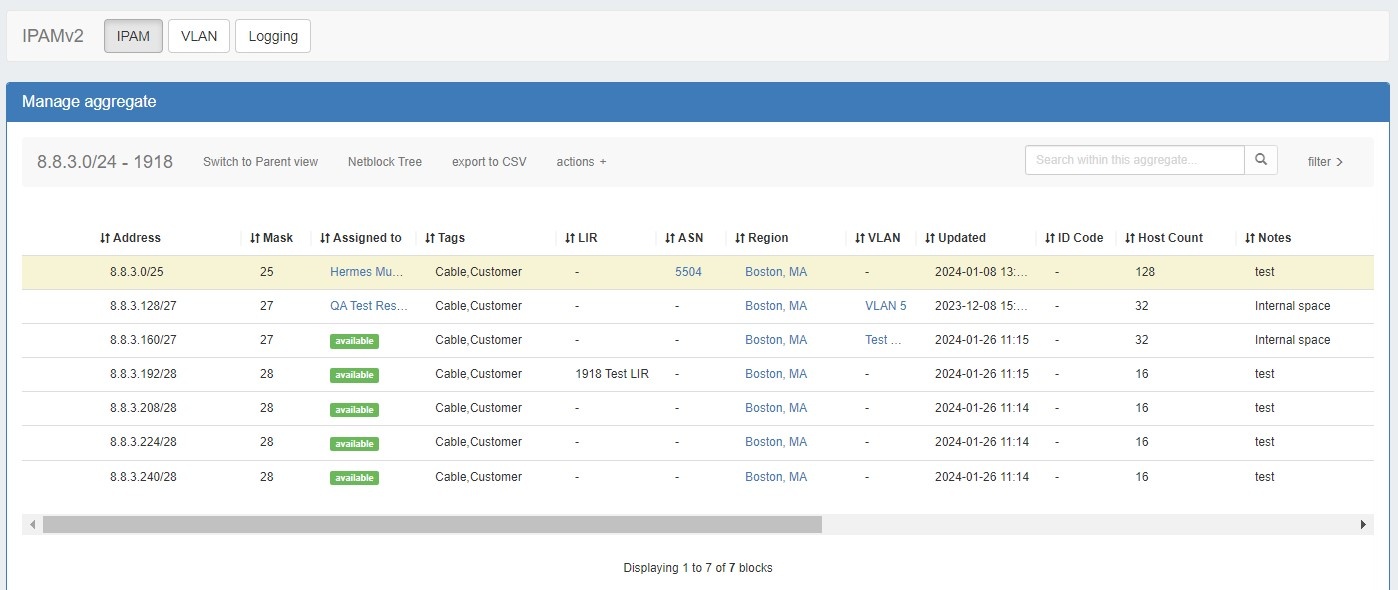
For detailed information on using the IPAM Manage screen and managing at a block level, see Working with IP Blocks.
Open IPAM Manage for an Aggregate
...
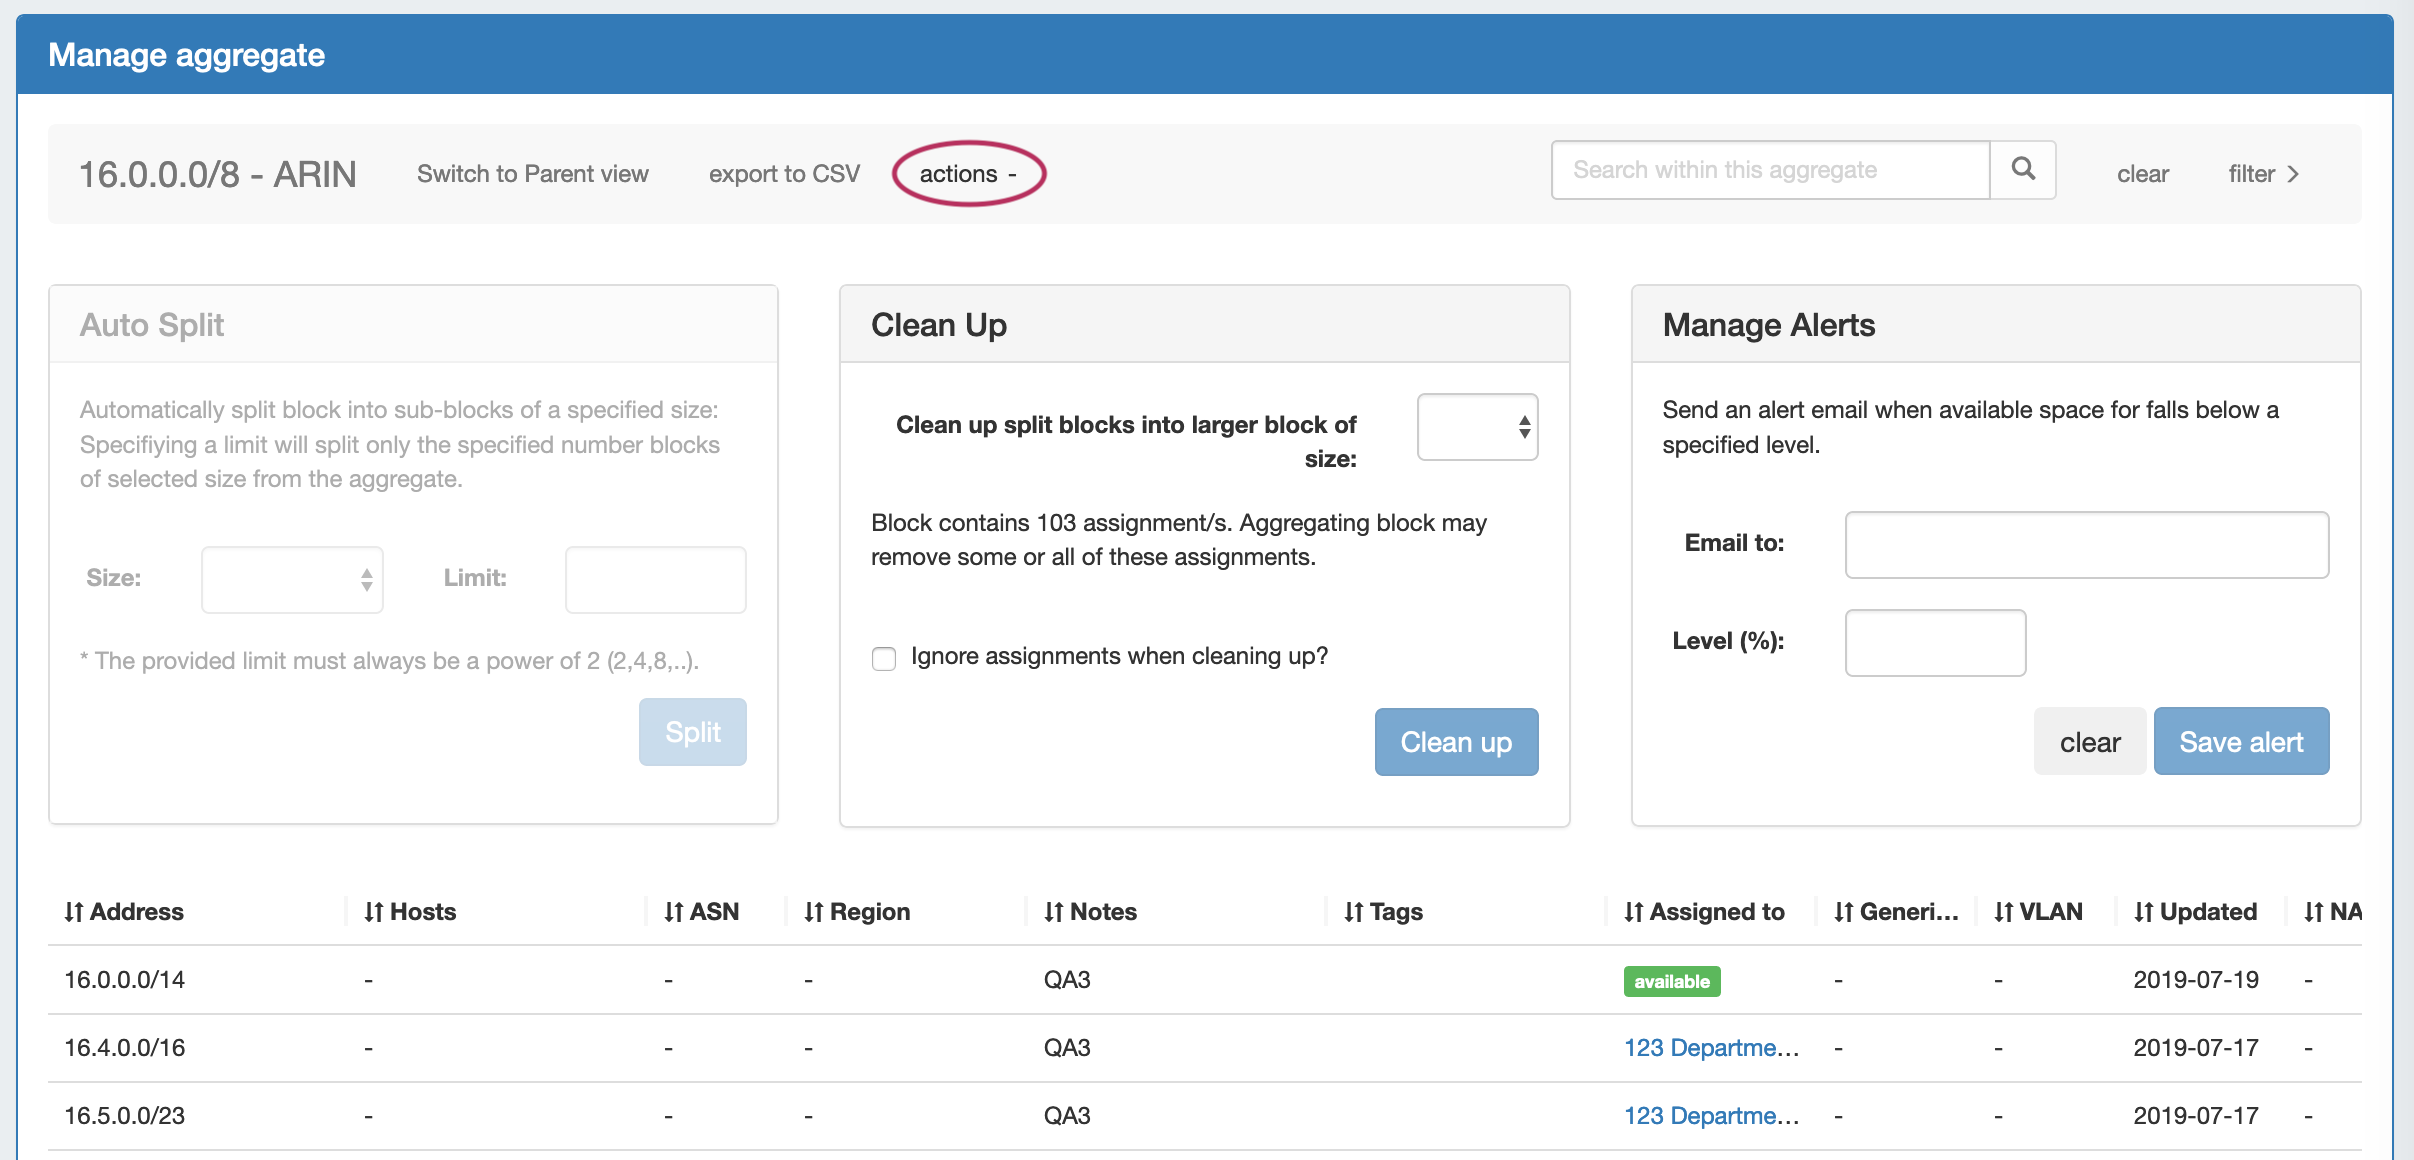
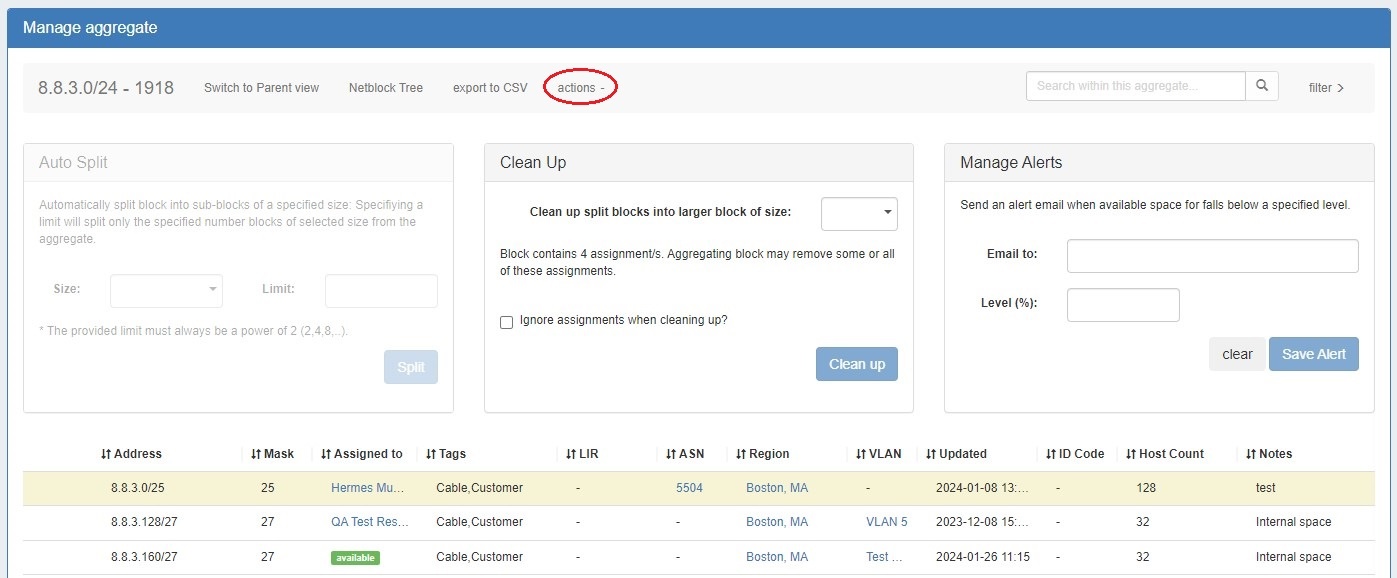
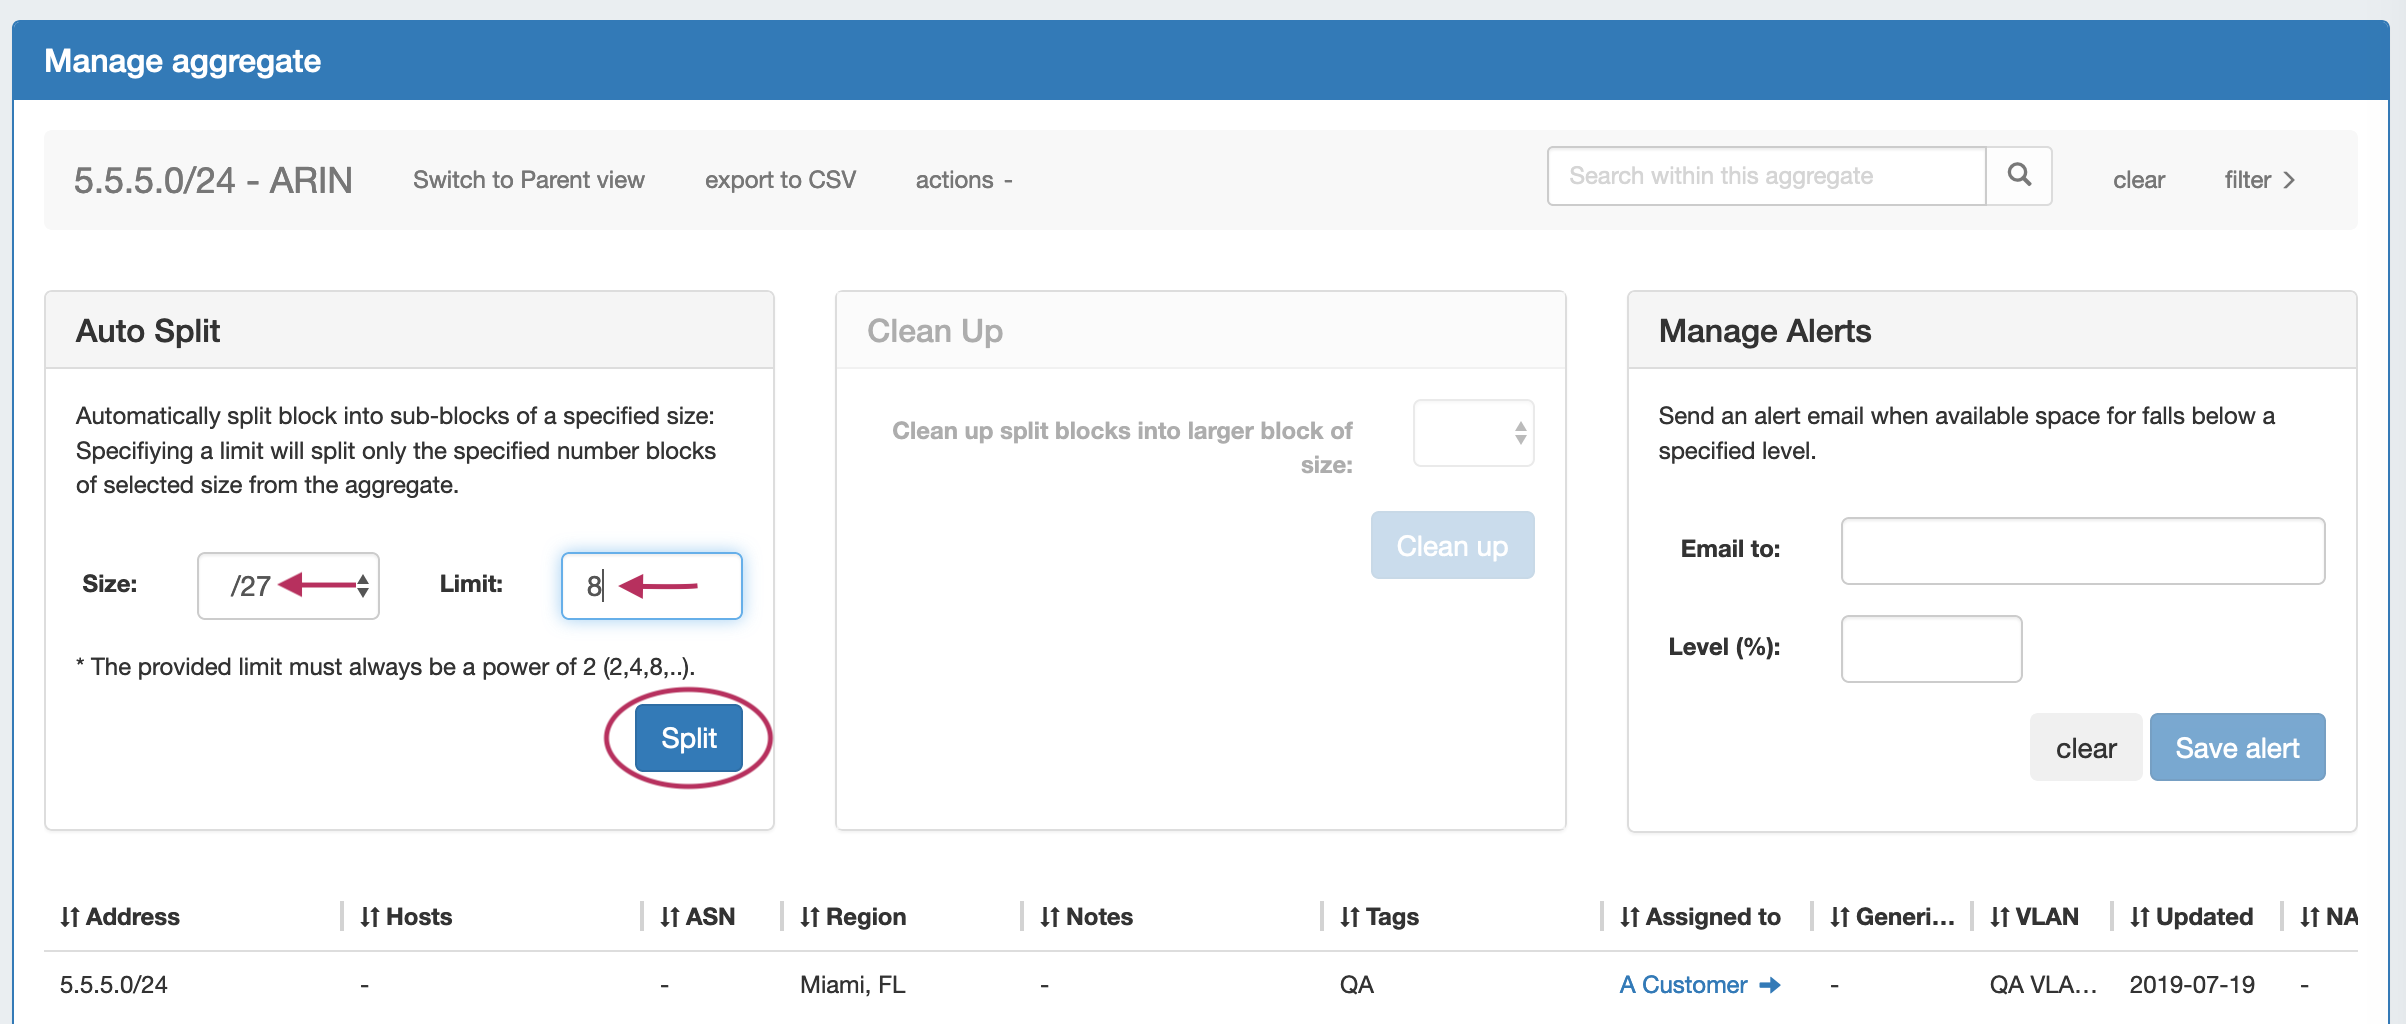
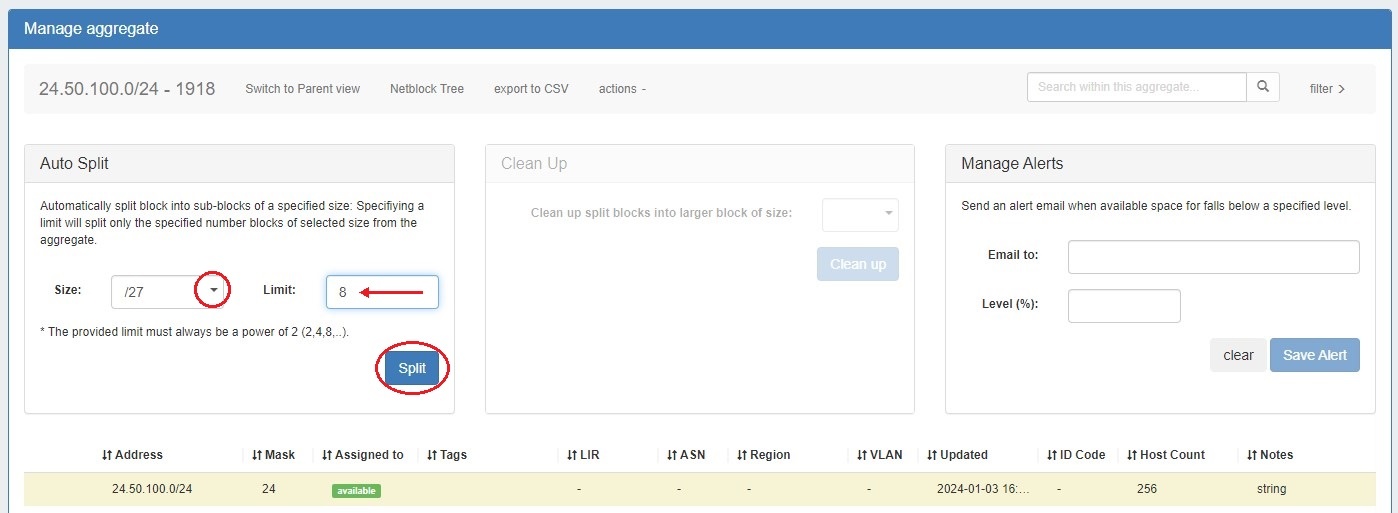
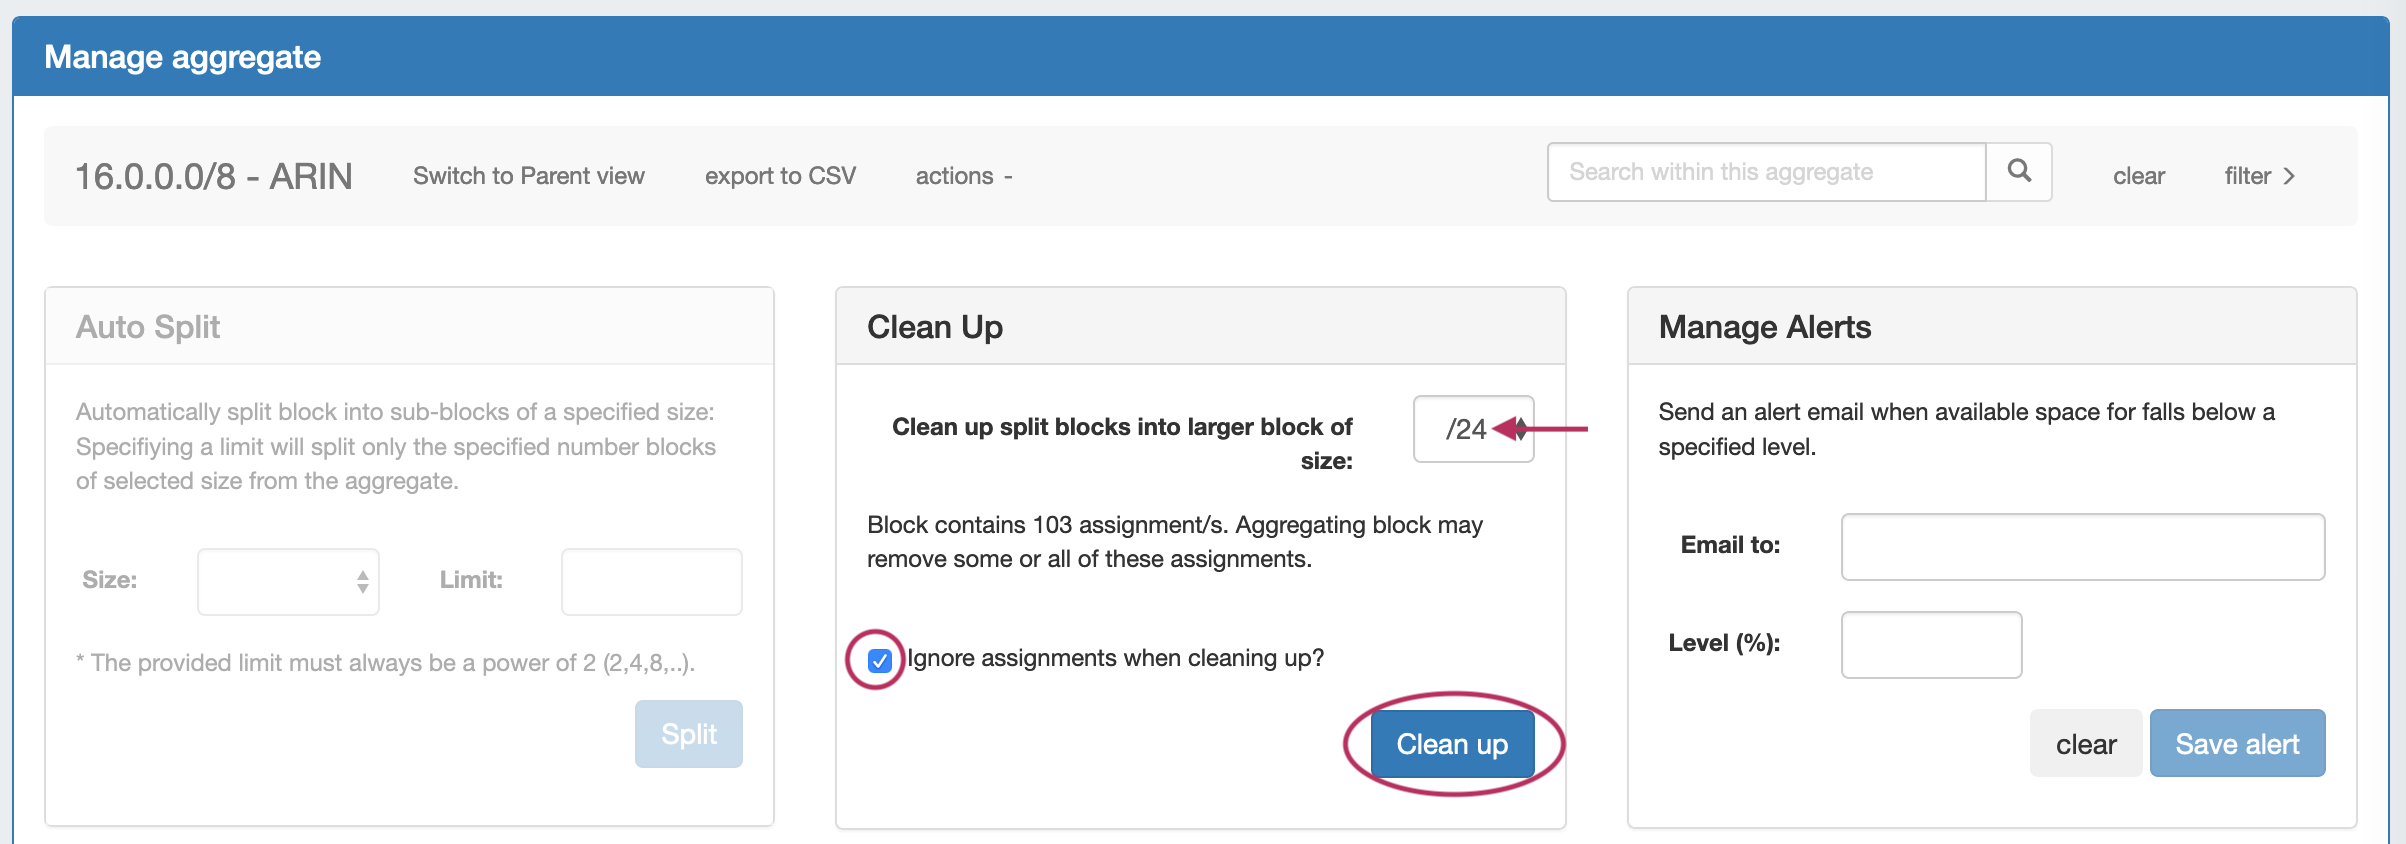
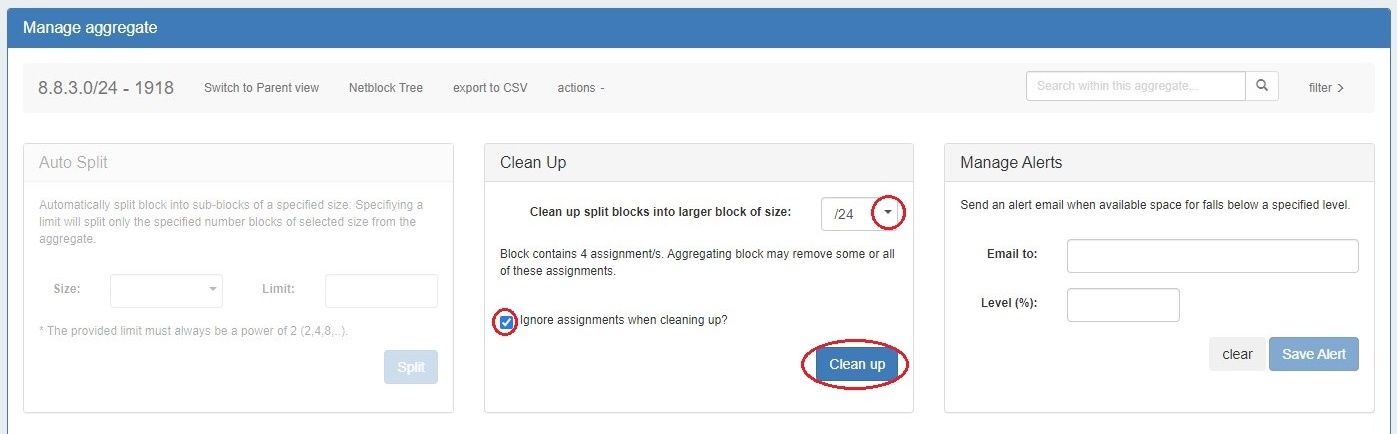
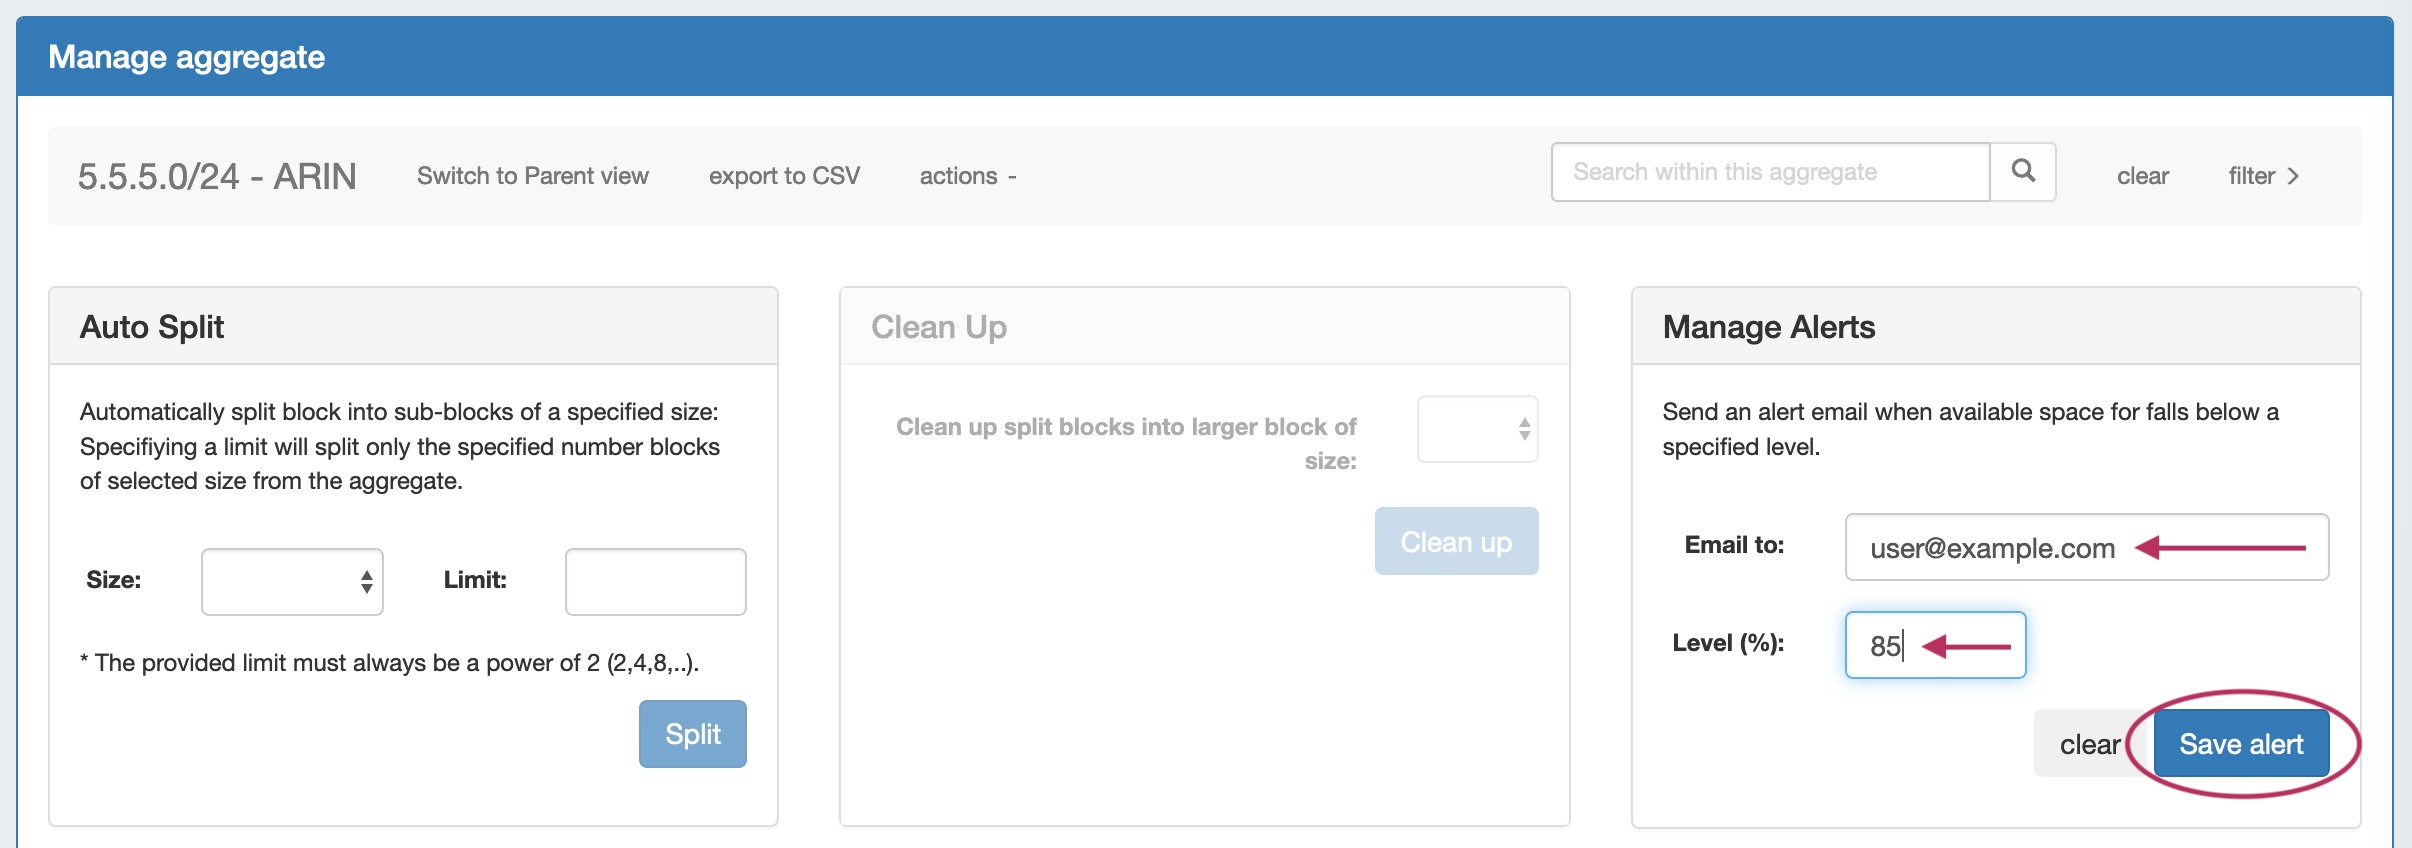
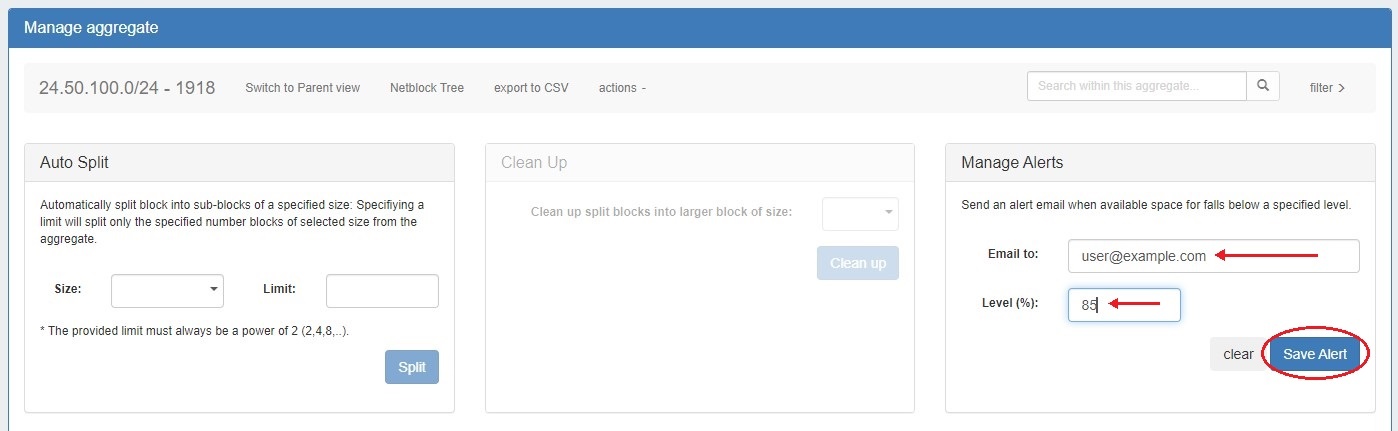
Three options are available - Auto Split, Clean Up, and Manage Alerts.
| Expand | ||||
|---|---|---|---|---|
Auto Split AggregateAuto Split an available aggregate into blocks of a specific size, up to a specific quantity of blocks by selecting "Size" and "Limit" under "Auto Split". The block limit must be a power of two, or an error will appear. When done, click "Split".
Clean Up AggregateClean up an Aggregate into fewer blocks of a specific size, by selecting your desired block size and clicking "ignore assignments" (if blocks have assignments that would prevent merging). When done, click the "Clean Up" button.
A confirmation modal will display the scope of the potential change.
Click "Continue" to confirm and all blocks will be merged to the set size and reset to available. Click "Cancel" to exit. Set Aggregate AlertsEnable or clear aggregate alert emails for the aggregate by setting an email address and utilization percentage level. When the aggregate is utilized to the set percent, an email alert will be sent to the provided address.
When done, click "Save Alert". To clear an existing alert, hit "Clear Alert", and the alert information will be removed and status saved. For more on IPAM Alerts Management at the Admin level see Alerts Management in the ProVision Admin Guide.
|

...
For additional information on working with the IPAM system in ProVision, see the following areas:
...