DNS Gadgets
The following gadgets are available to support DNS.
Table of Contents maxLevel 3
DNS Gadget
This gadget is used on the Resource Holder section type. The DNS Gadget shows zones that have the current Resource Holder set as their parent, and provides links to the zone's View Zone page.

To go to the View Zone page, you may either click on the zone name, or click on the Action Menu (gear icon) and select "View Zone".
For more information on DNS functions and managing zones, refer to the documentation for the DNS Tab.
DNS Autogenerator
The DNS Autogenerator Gadget uses a Hostname to generate a list of DNS forward and reverse zone entries based on the blocks assigned to the resource in the IPAM Gadget It will generate a list of potential zone records - just select the ones you want to create, save the changes and you are ready to push the zones.
Enabling the DNS Autogenerator
To set up this gadget, ensure that the section of the resource has the DNS Autogenerator Gadget added to the section. (See: Customizing Sections).
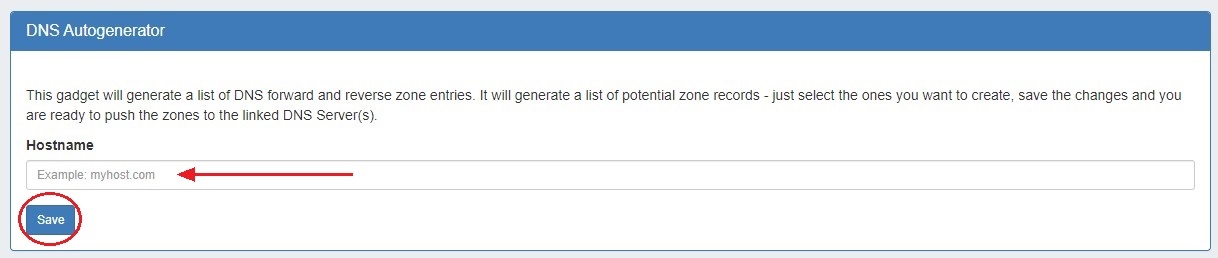
Once the gadget is added to the resource, enter a Hostname and click "Save".
Before you Begin
Before starting, check that the blocks assigned to the resource in the IPAM Gadget are correct and up-to-date - the Autogenerator uses these blocks to create the records. If using a DNS group other than "Default" to hold zones, ensure that the desired DNS group to hold the generated records has been set up. (See: Working with DNS Groups).
Working with the DNS Autogenerator
One enabled and a Hostname attached, the DNS Autogenerator Gadget will initially show a short description, the hostname, and a button to "Autogenerate Records".
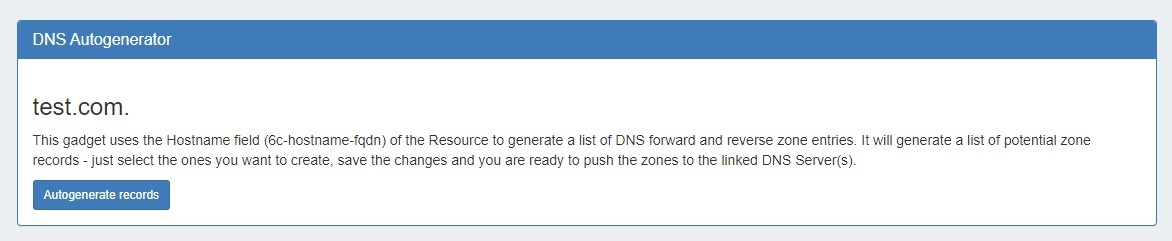
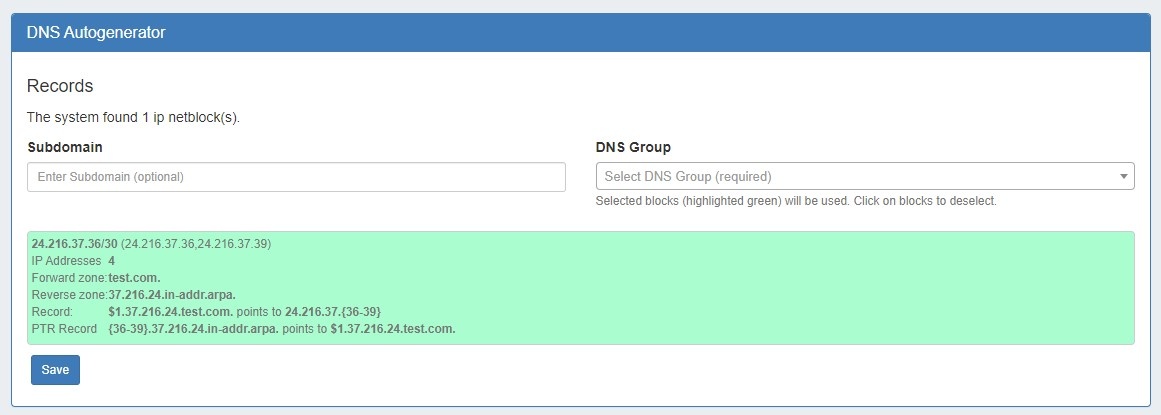
When ready, click the "Autogenerate Records" button. The gadget will search through the blocks in the IPAM Gadget and provide a list of found blocks.
Add Subdomain / DNS Group
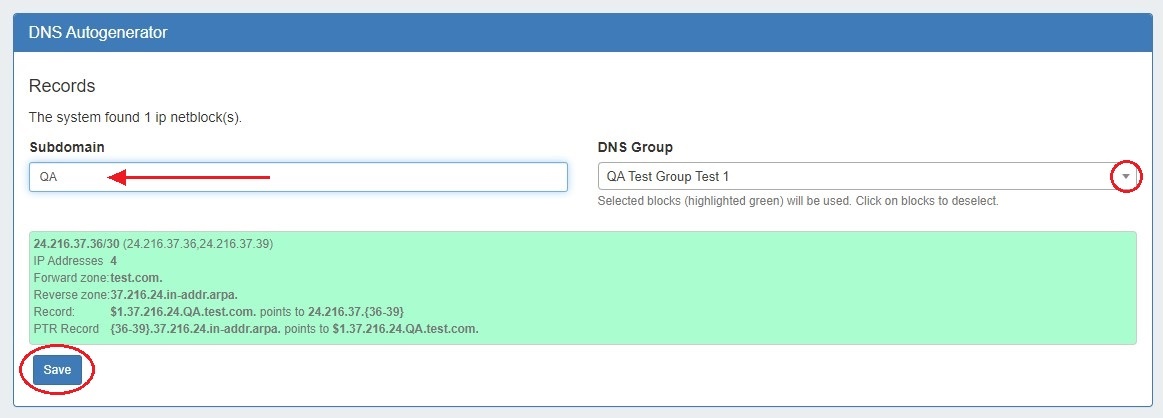
Next, add in a subdomain if desired (optional), and select the DNS group to hold the records (required). Click on the listed blocks to select (highlighted green) or deselect (grey) for DNS zone / record creation.
Save and Push
Finally, hit the "Save" button at the bottom of the gadget - the selected forward and reverse DNS records will be created and added into the DNS Group, viewable in the DNS Tab.
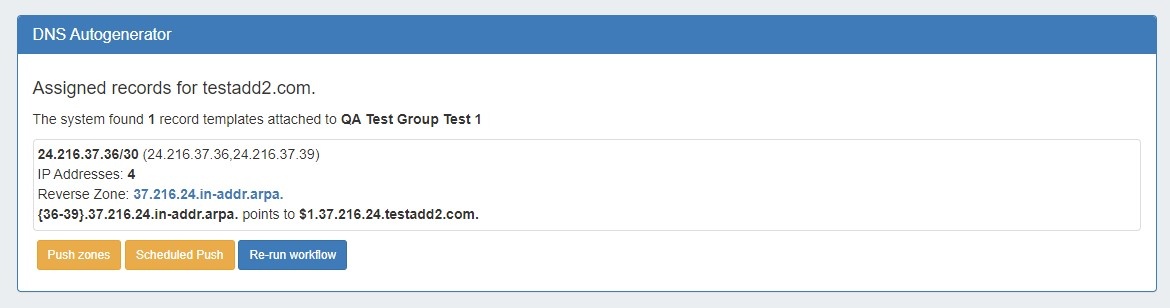
At this point, you may choose to immediately push the autogenerated zone(s), schedule a push, or re-run the workflow to edit the subdomain or group.