| HTML |
|---|
<div id="google_translate_element"></div>
<script type="text/javascript">
function googleTranslateElementInit() {
  new google.translate.TranslateElement({pageLanguage: 'en'}, 'google_translate_element');
}
</script>
<script type="text/javascript" src="//translate.google.com/translate_a/element.js?cb=googleTranslateElementInit"></script> |
Working with NAT Blocks
The following section contains details on working with NAT blocks, from within the IPAM system.
| Table of Contents |
|---|
Track IP NAT Associations
Track NAT associations between public and private (1918) blocks via the IPAM "NAT" Field.
The "NAT" field accepts a single IPv4 CIDR to associate with the current block, and automatically updates the corresponding block with the NAT association.

| Note |
|---|
Working with NAT'ed BlocksUse caution when managing NAT'ed blocks or aggregates - major actions that change either block's assignment or size (assign, unassign, split, merge, autosplit/cleanup) removes the NAT association. In this case, complete the necessary high-level block tasks, and then re-save the NAT CIDR association to either block. |
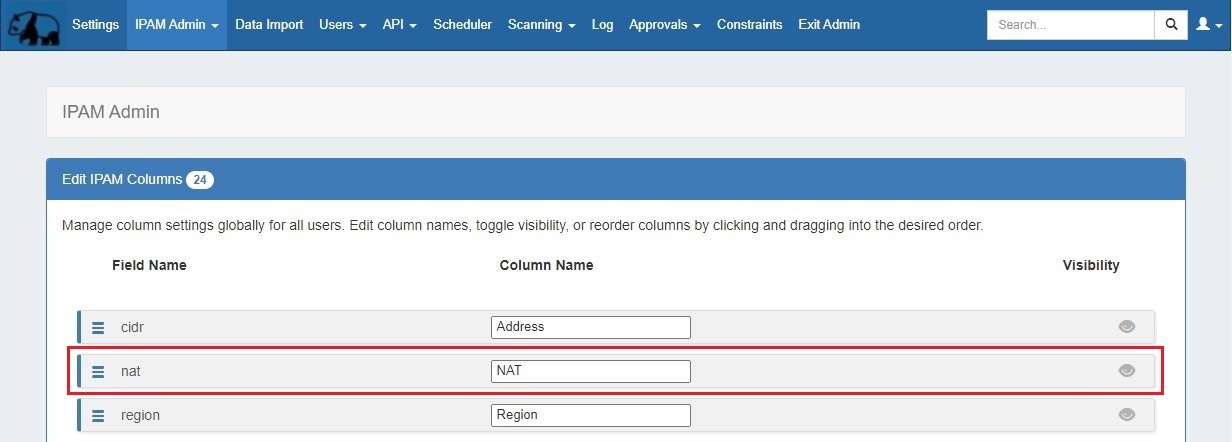
Enable NAT
Enable the NAT field by navigating to IPAM Admin → Edit IPAM Columns.
| Expand |
|---|
From there, ensure that the NAT column is enabled (visible), and customize the column location if desired. Be sure to click "Update" to save any changes.
|
Create NAT Association
Ensure that the two appropriate IP Aggregates (one public, one 1918 private space) containing the desired blocks to NAT have been added into ProVision. (See: Working with IP Aggregates)
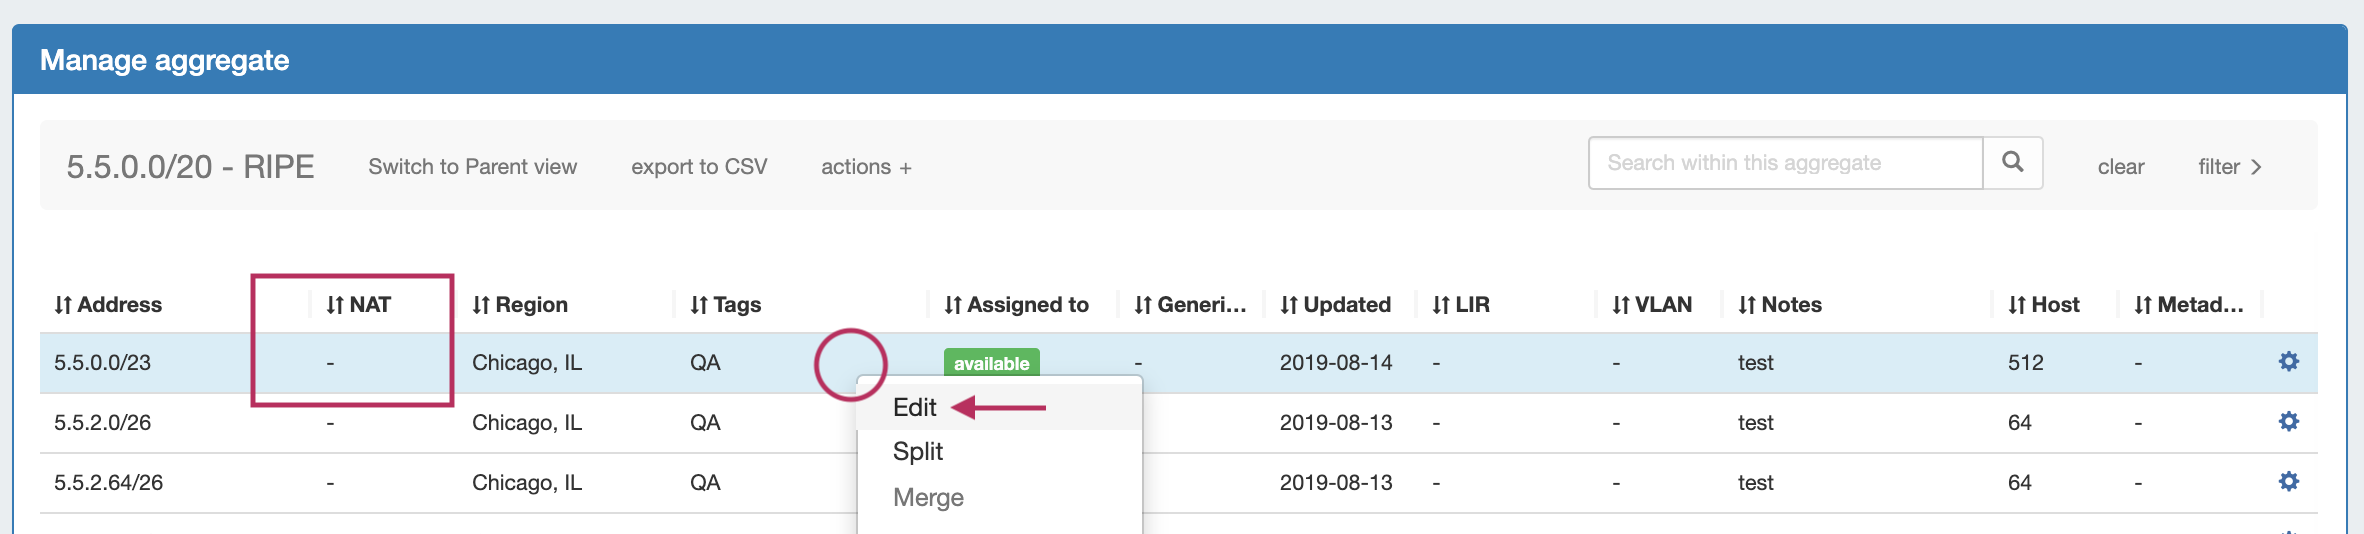
After verifying the aggregates and blocks, you may add the NAT association:
| Expand |
|---|
Open IPAM Manage for either aggregate, then open "Edit Block" for the specific block you wish to NAT. (See: Working with IP Blocks)
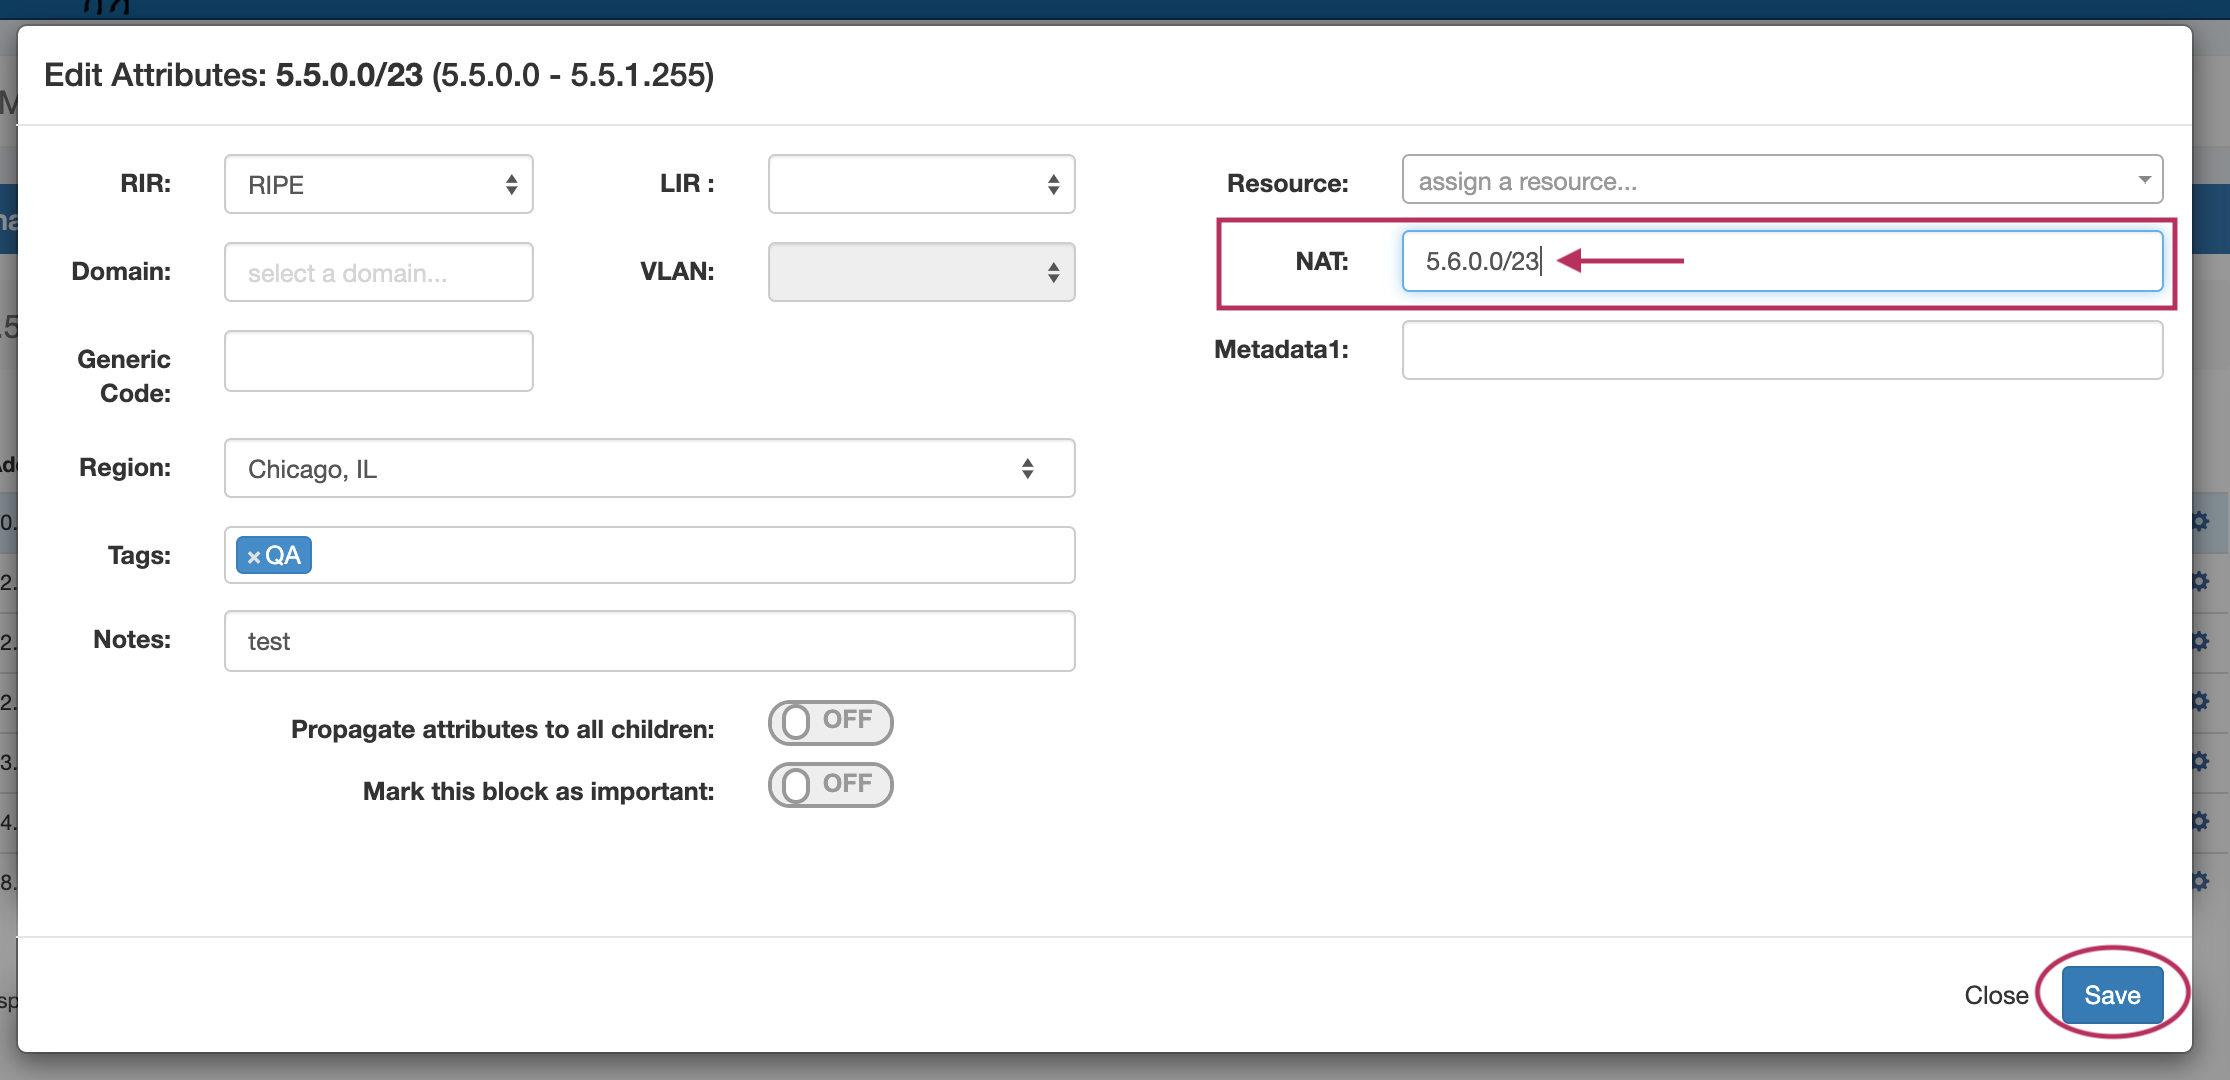
In the Edit Block dialog, enter the IPv4 CIDR of the corresponding NAT block. When complete, click "Save".
Once the NAT field has been saved, the association will display in the NAT Column.
The corresponding block (here, the private 1918 space block) will automatically have the NAT associated applied.
|

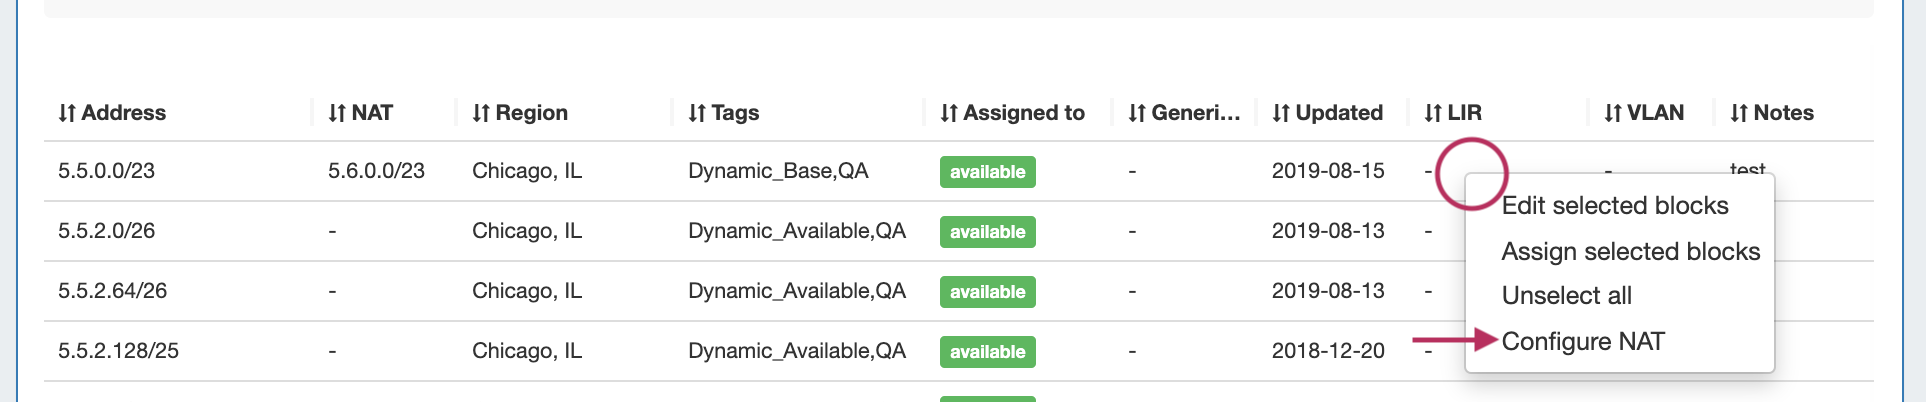
Configure NAT to Router(s)
To push the NAT association to a router, go to the IPAM Manage Action Menu, and select "Configure NAT" for the NAT'ed block(s) (For information on adding a router to ProVision, see Peering Routers).
| Expand | ||
|---|---|---|
| ||
Open the Action Menu for the NAT'ed block(s) and select "Configure NAT".
Then, select the router. Add the custom configuration / interface information for the router and click "Configure". 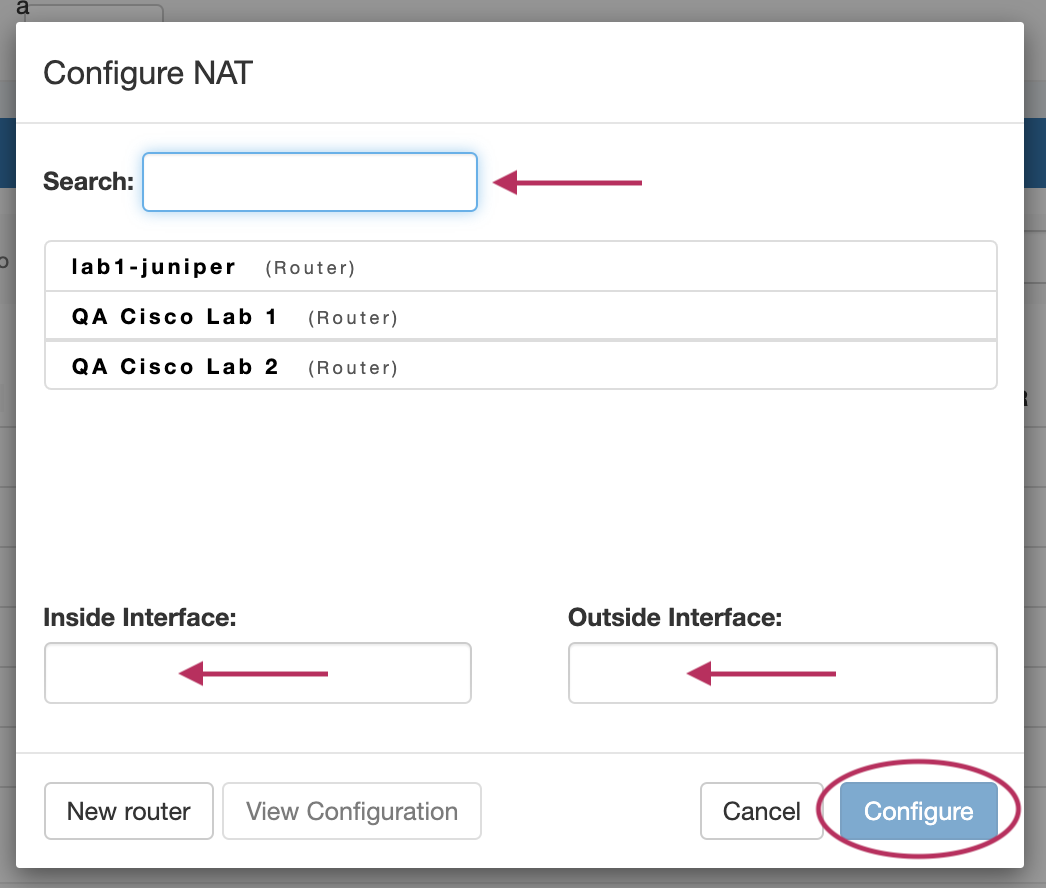 |
NAT Rotate Dynamic IPs
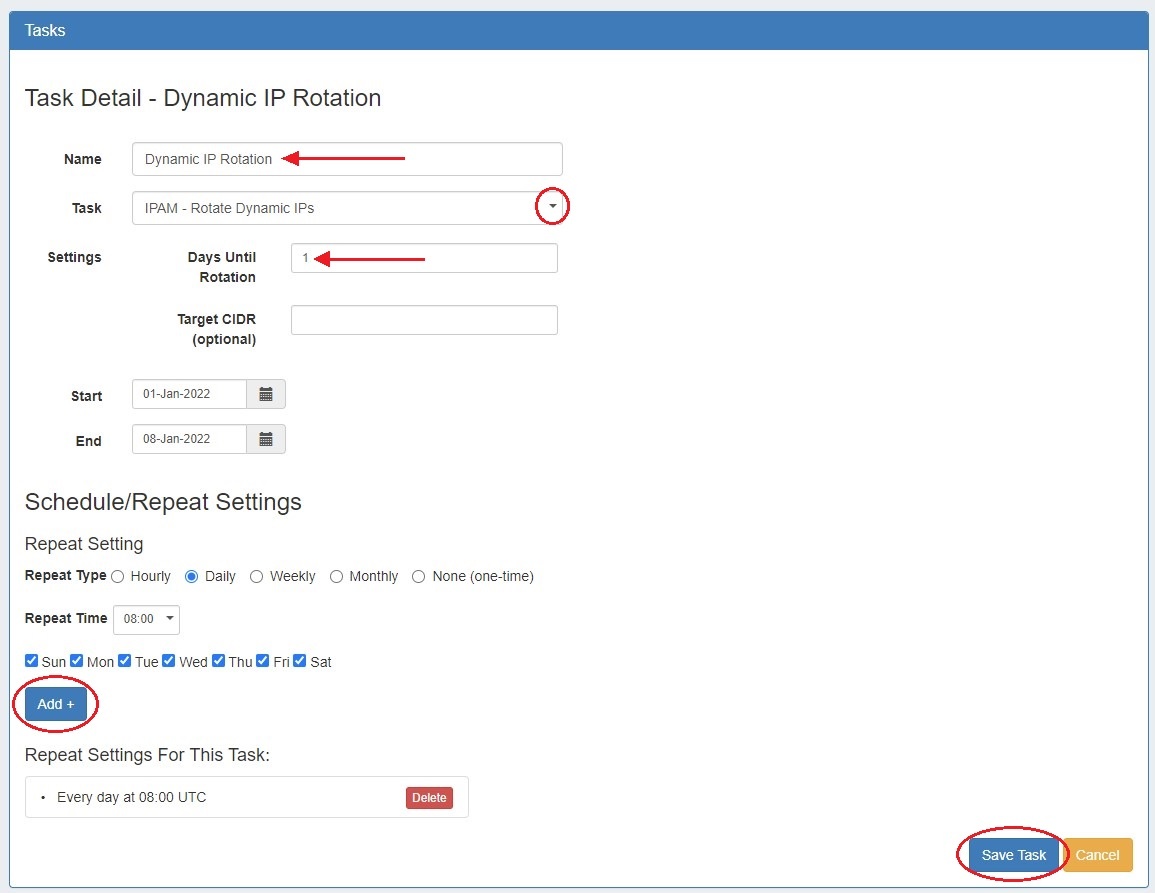
NAT'ed block assignments may be automatically rotated to other available IPs via the "Rotate Dynamic IPs" scheduler task available in the Admin → Scheduler tab.
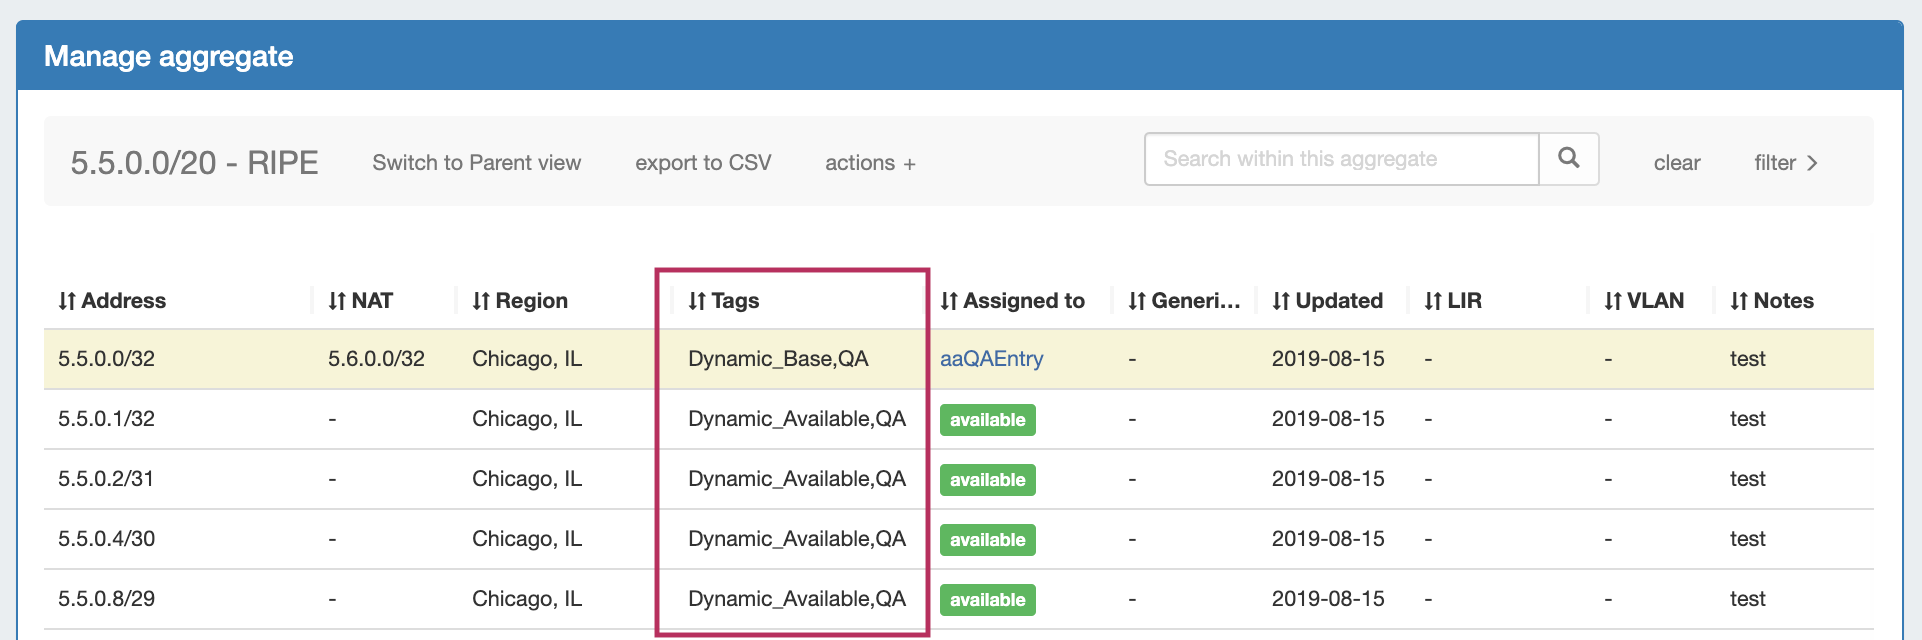
"Rotate Dynamic IPs" reassigns single IPv4 NAT addresses (/32s) after 'x' days (since last config push) to an available address denoted by blocks associated with the Dynamic_Available tags.
Prior to using this task, two blocks (one public, one private) must be NAT'ed in IPAM, the NAT Config pushed to a router, and appropriate blocks tagged with "Dynamic_Base" and "Dynamic_Available".
| Expand | ||||||||||
|---|---|---|---|---|---|---|---|---|---|---|
| ||||||||||
Before you BeginBefore setting up NAT Dynamic IP Block Rotation, ensure the follow has been completed:
Add Dynamic Tags to BlocksAfter NAT blocks and aggregates have been set up in ProVision with sufficient size, matching IPAM tags, and NAT metadata, you can identify which blocks to use for dynamic rotation by adding the "Dynamic_Base" and "Dynamic_Available" tags.
Set up Scheduler TaskGo to Admin → Scheduler, Add the scheduler task "IPAM - Rotate Dynamic IPs".
|
Additional Information
For additional information on working with the IPAM system in ProVision, see the following areas: