ProVision 5.1.2 is a minor release with new features and bug fixes
Please note that ProVision 5.x requires php 5.5.+. For local installations, please upgrade php prior to installing the upgrade. Also ensure that the correct Sourceguardian php extension is loaded for the new version of php. |
(CFR denotes customer requested)
IPAM Map View:
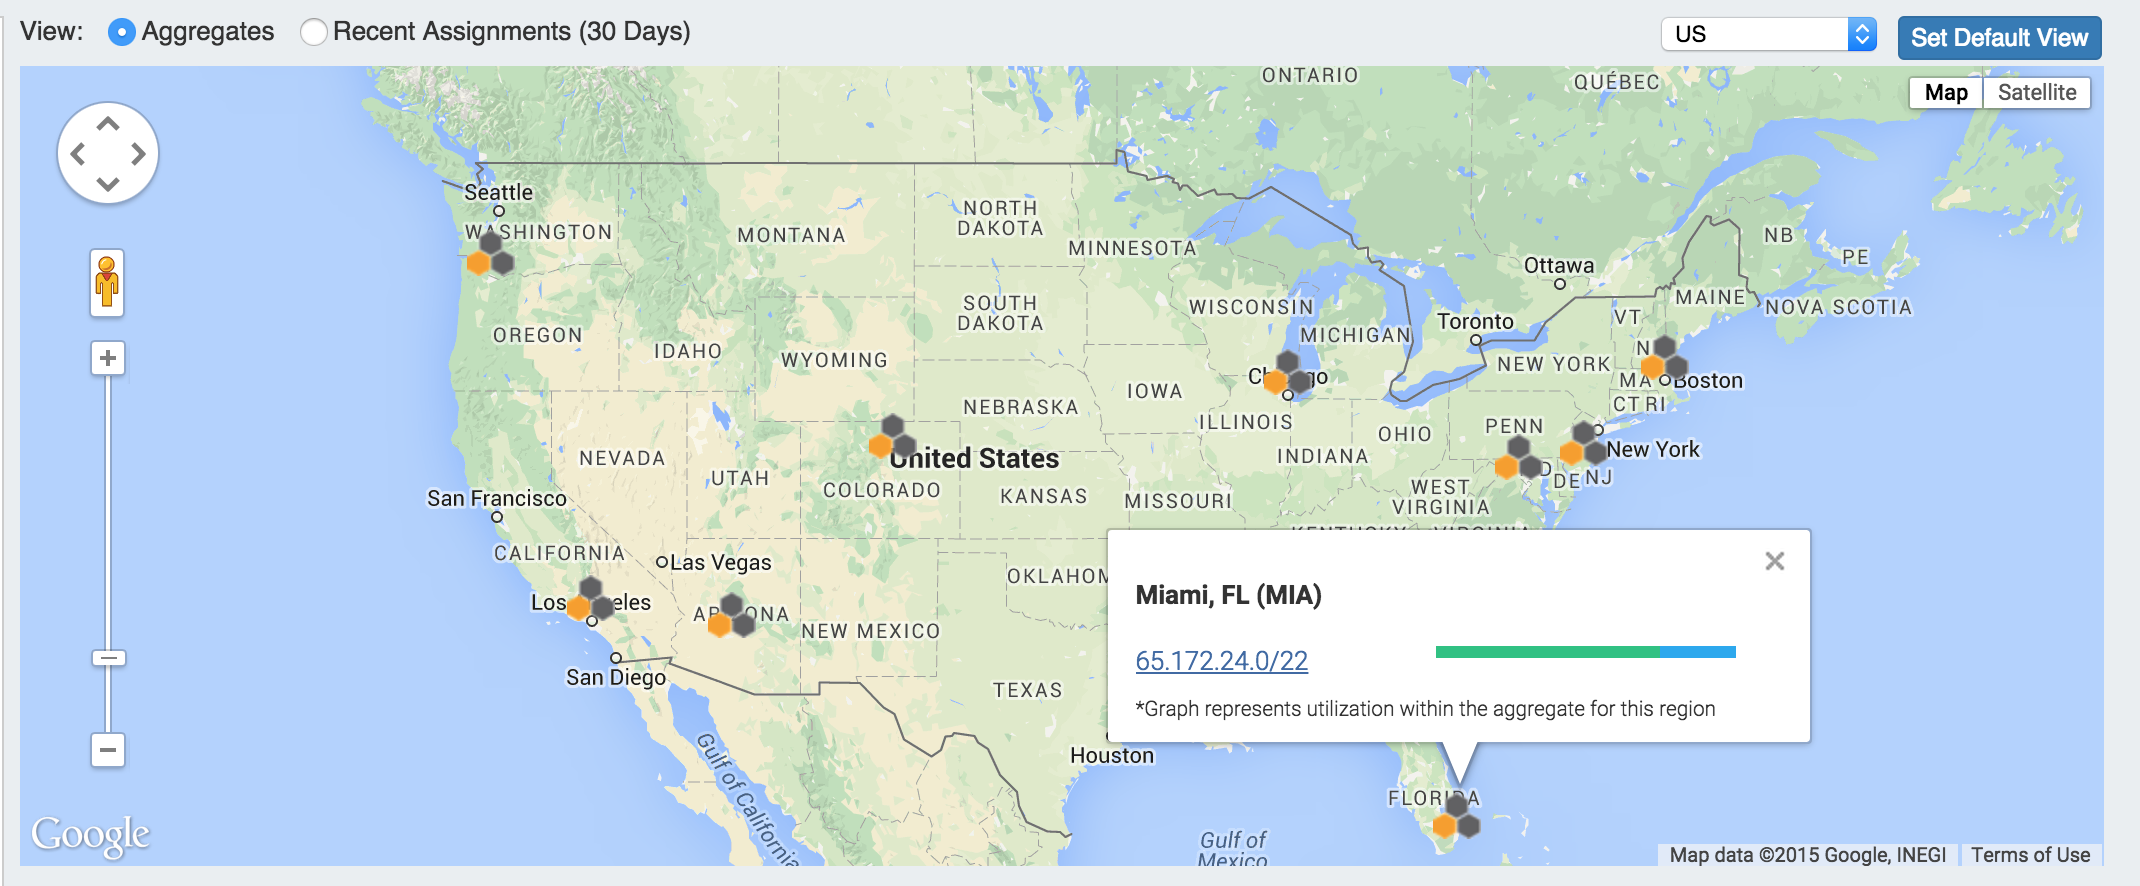
Map View will show aggregate locations / recent assignments in geographical format, based on region data assigned to those aggregates. Clicking on a location icon will bring up a current utilization graph and a link to that aggregate's IPAM Manage page. A default map view may be set by either selecting a predefined map area from the dropdown (US, US & Europe, South America, All), and clicking on "Set Default View", or a custom area set by zooming / navigating to the desired map area and clicking "Set Default View".

The IPAM aggregate map view may be enabled / disabled from the IPAM Configuration page.
Once enabled, a map pin will be visible on the IPAM Tab next to the search box that will show / hide the map.
|
Regions must be enabled, the region address field populated, and regions assigned to aggregates / blocks for the IPAM Map view to populate data. See Edit Regions for additional detail. |
IM- 1906: IPAM Aggregate Utilization alert
Aggregate utilization alerts allows you to set up an email notification to send once an aggregate's available space hits a chosen percentage threshold.
An "IPAM Alerts" task has been added to the Scheduler's list of available tasks - this task must be created and set up to the desired alert schedule. See Scheduler Tab documentation for additional information on setting up scheduled tasks.
Once the Scheduled IPAM Alert Task has been created in the scheduler, alert criteria for individual aggregates may be set up from the IPAM Tab Action Menu.
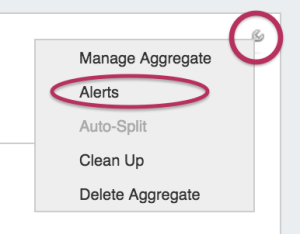
To set the alert, from the IPAM tab, select the Action Menu (wrench icon) for an aggregate, and click on "Alerts".

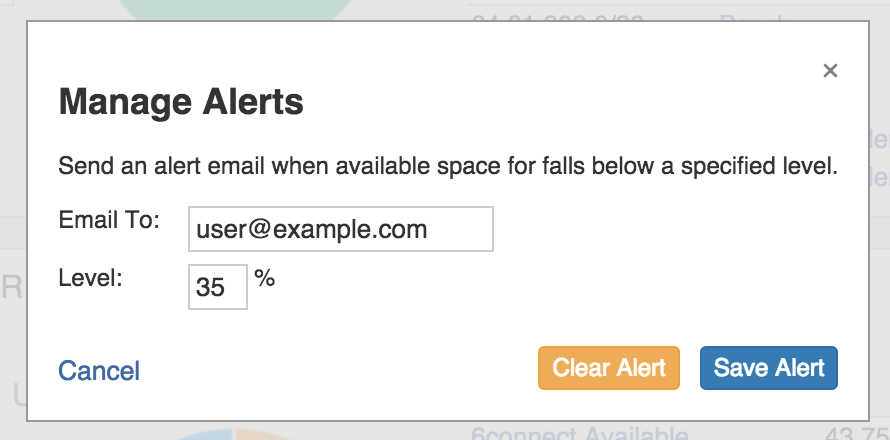
This brings up the "Manage Alerts" dialog. Enter the email address for the alert recipient and the available space percentage at which the alert is triggered.
When done, hit "Save Alert". You may also cancel at any time.

To clear an existing alert, hit "Clear Alert", and the alert information will be removed and status saved.
IM- 1907: DNS Save and Push/Schedule
DNS Schedule Push allows a user with Admin permission to schedule a one-time zone push directly from the view zone page.
If you have Admin access, a "Schedule Push" button will be visible below the "Push Zone Now" Button.

To schedule a DNS Zone push, hit "Schedule Push". Select the desired UTC time and fill in the notification email address. When done, click on "Schedule Push" again.
When done, you will see a notification that a push is scheduled. It will also show in the scheduled task list on the Admin Scheduler Tab.
You may edit or delete the scheduled push via the Scheduler, similarly to any other scheduled task. |
IM- 1909: Resources - Native Document storage
The Document Storage Gadget allows you to upload documents to a resource, and have those documents accessible to download from the 6connect cloud to your local machine. It may be enabled on any Section type. For detailed information on using the Document Storage Gadget, see the Gadgets documentation. For information on how to add a Gadget to a Section, see Customizing Sections.

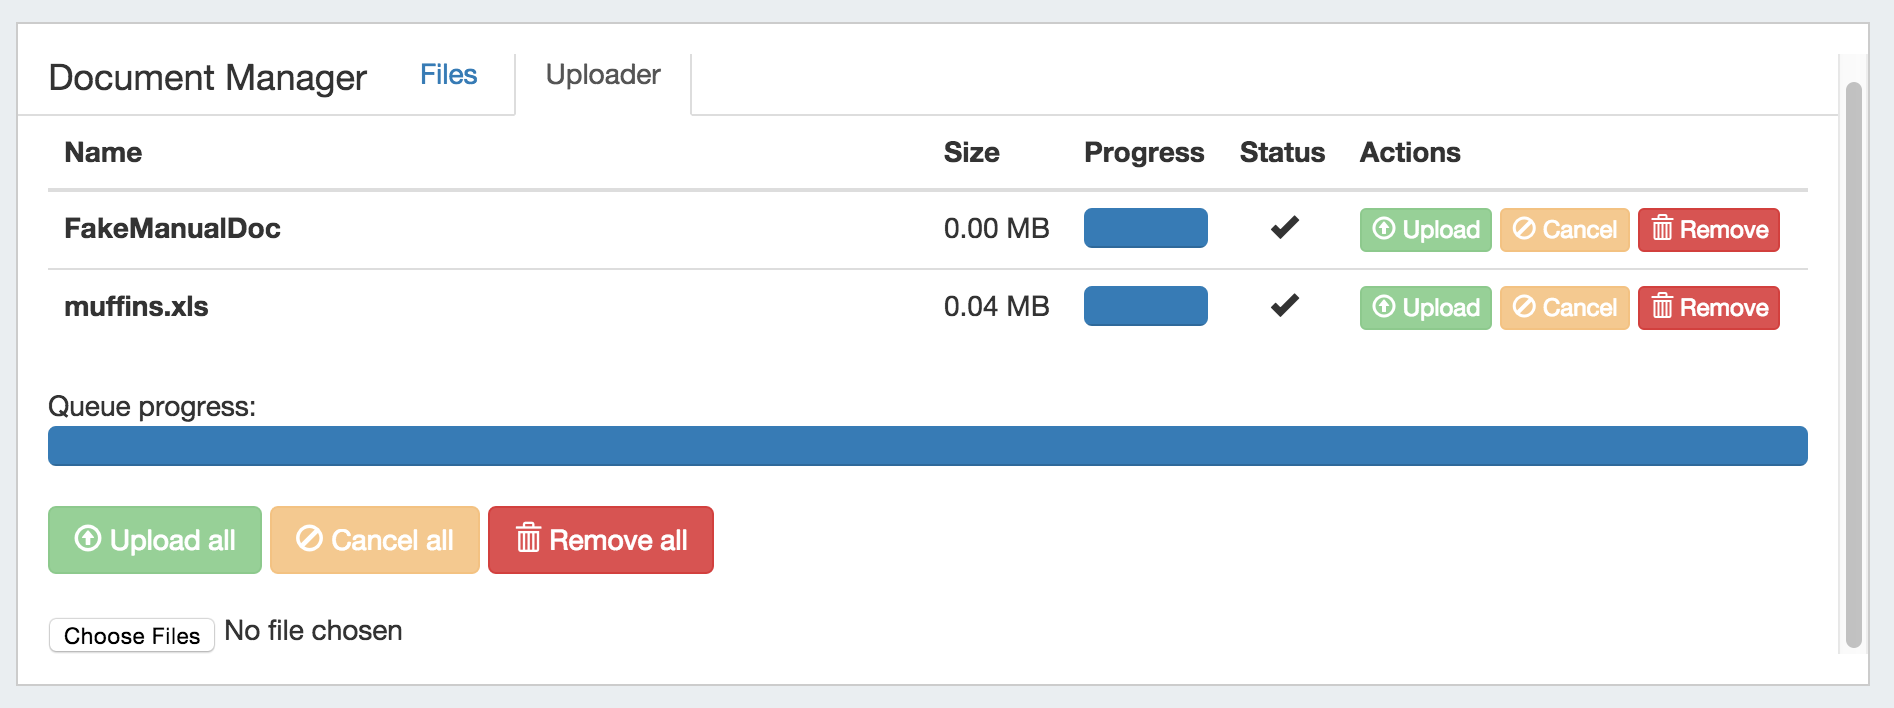
Upload Files First, ensure the Document Storage gadget is enabled for the Section type. Then, select the "Uploader" tab under the Document Manager gadget. Click on the "Choose Files" button, and select the file(s) you would like to upload.
The selected files will show in a list under the Uploader tab. To upload the file(s), click on either the "Upload" button adjacent to the file to upload the individual file, or the "Upload All" button to upload all files listed. You may also choose to remove files from the upload list, or cancel.
Once the progress bar is filled in, your upload is complete! Your files will show under the "Files" tab.
Download Available Files Successfully uploaded files are listed under the "Files" tab of the Document Manager gadget. From here, you can see the file Name, Size, Type, Date, and available Actions. To download a file to your local machine, ensure you are on the "Files" tab, then click on the "Download from Cloud" icon.
If a file is no longer needed, you may delete the file from the Document Manager by clicking on the Delete (trash can) icon. |
| Note: The uploader has a file size limit of 14 MB, files above this size will not successfully upload. |