Resource Import Tool
The Resource Import Tool - Overview
The Resource Import Tool (in beta) allows you to import resource data from a .csv file into ProVision. In the Resource Import Tool, you can open one or more user-created .csv spreadsheets, perform basic editing functions if needed, associate the data to a specific Section, and correlate the data columns to specific Section Fields.
In ProVision, since Resources can be any desired entity, and Sections can be anything from "customers" to "firewalls" to "racks", you have total flexibility in what type of data to import with the Resource Importer to meet your specific company needs. Check out Working With Resources, Customizing Sections, and Customizing Fields for more details on how to fit these elements to your business.
Note: The Resource Import Tool currently supports field attributes which are able to be added to Section. High level resource information metadata (associated Parent, Category, etc) are outside the scope of this tool, but may be imported via the API or by custom import services. Contact support for additional assistance.
Before You Begin
There are a few items that you will need have set up prior to using the Resource Importer Tool. Ensure that you have:
- The .csv document you wish to import saved with UTF-8 encoding. Windows, Mac, and Linux type .csv files are supported.
- A header row for the data in the .csv.
- The .csv file should be "clean", that is, only contain the data to be imported and a header row for that data.
A Section created in ProVision with fields that correlate to the import data. For example, if you wish to import a list of contact information, there will need to be a Section in ProVision created for "Contacts", with fields such as "First Name", "Last Name", "email address", "Phone number", and so on. To create a new Section, or edit an existing Section, refer to Working With Resources, Customizing Sections, and Customizing Fields. Only fields which are able to be added to a Section are supported by the Resource Import Tool.
If the above preconditions are not met, the Resource Importer Tool may not be able to correctly read the .csv file or complete the import. Verify UTF-8 .csv encoding, a clean dataset with a header row, and that an appropriate Section exists in ProVision prior to import.
Best Practice
To ensure a fast and straightforward resource import, best practice is to verify ahead of time that your .csv data is correct and contains all the necessary column information for the Section. This includes a top-level Name and Unique ID, as well as a column per Section field. Data edits and column adjustments can be performed inside the Resource Importer Tool if necessary, but will require additional time and steps.
Navigating the Resource Import Tool
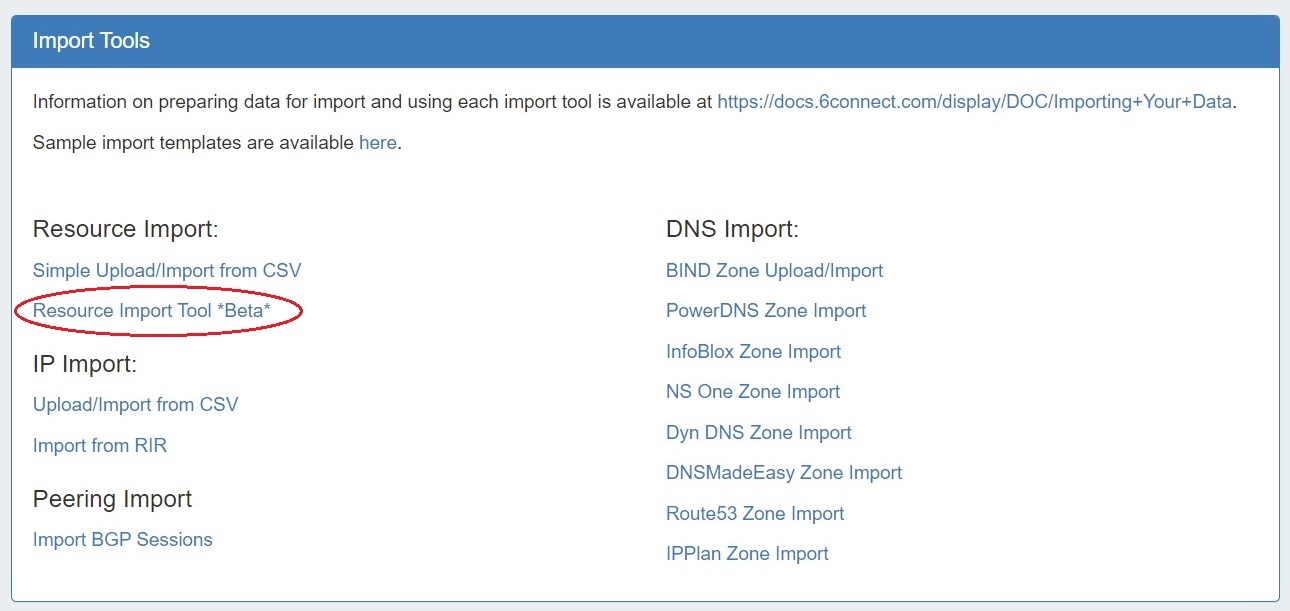
To open the Resource Import Tool, navigate to the Data Import Tab from the Admin button to import your aggregate blocks. Select "Resource Import Tool" under "Resource Import".
When you first open the Resource Importer, you will be given the option to view a short on-screen guide to using the tool. After stepping through the guide and/or exiting out of it, the tool will look like this:

The top bar lists standard menu options of "File", "Insert", and Data" and "Help". Under those menus, you may see greyed-out functions listed - those options are either not available to use at the current Importer step, or planned future features.
On the left side of the screen is a listing of currently opened files:
- Sections Grids lists grids currently open that were created from a ProVision Section
- Open Files lists the current user created .csv spreadsheets that are open
- Local Grids lists any grids that were created in the tool itself, instead of opened from an external file
- Completed Imports show imports which have been completed and imported into ProVision
If, at any time, you need to leave the Resource Importer Tool, select the "Exit Import Tool" in the top right corner of the screen, and you will be taken back to the ProVision Dashboard.
Exiting the Resource Importer Tool prior to completing the import process will result in the current open grids being discarded.
Resource Importer Walkthrough
For a step by step walkthrough of the Resource importer, continue on to the Resource Importer Walkthrough , which shows how to import a sample contact list and perform minor editing tasks.
- Step 1 Upload your .csv data file
- Step 2 Open a Template Grid from an existing Section
- Step 3 Reorder .csv columns to match the Section Grid column order
- Step 4 Edit Data as Needed
- Step 5 Drag rows from the .csv Grid to the Section Grid
- Step 6 Import into ProVision