...
| Info |
|---|
If another Workflow is still open (such as Tutorial 1 Workflow), a warning may appear confirming that you wish to close the previous workflow. If any unsaved changes exist in the previous workflow, select 'Cancel', save the Workflow, close, and then re-open the Tutorial 2 Workflow. Otherwise, select "Close" and continue to the next step of Tutorial 2. |
Step 4: Edit
...
Step Inputs
Step 4: Click the ‘Get Resources’ step we created previously and scroll in Tutorial 1, and select the 'Optional Inputs' tab. Scroll down to the ‘name’ field we assigned previously to ‘Default Value: TLR’.
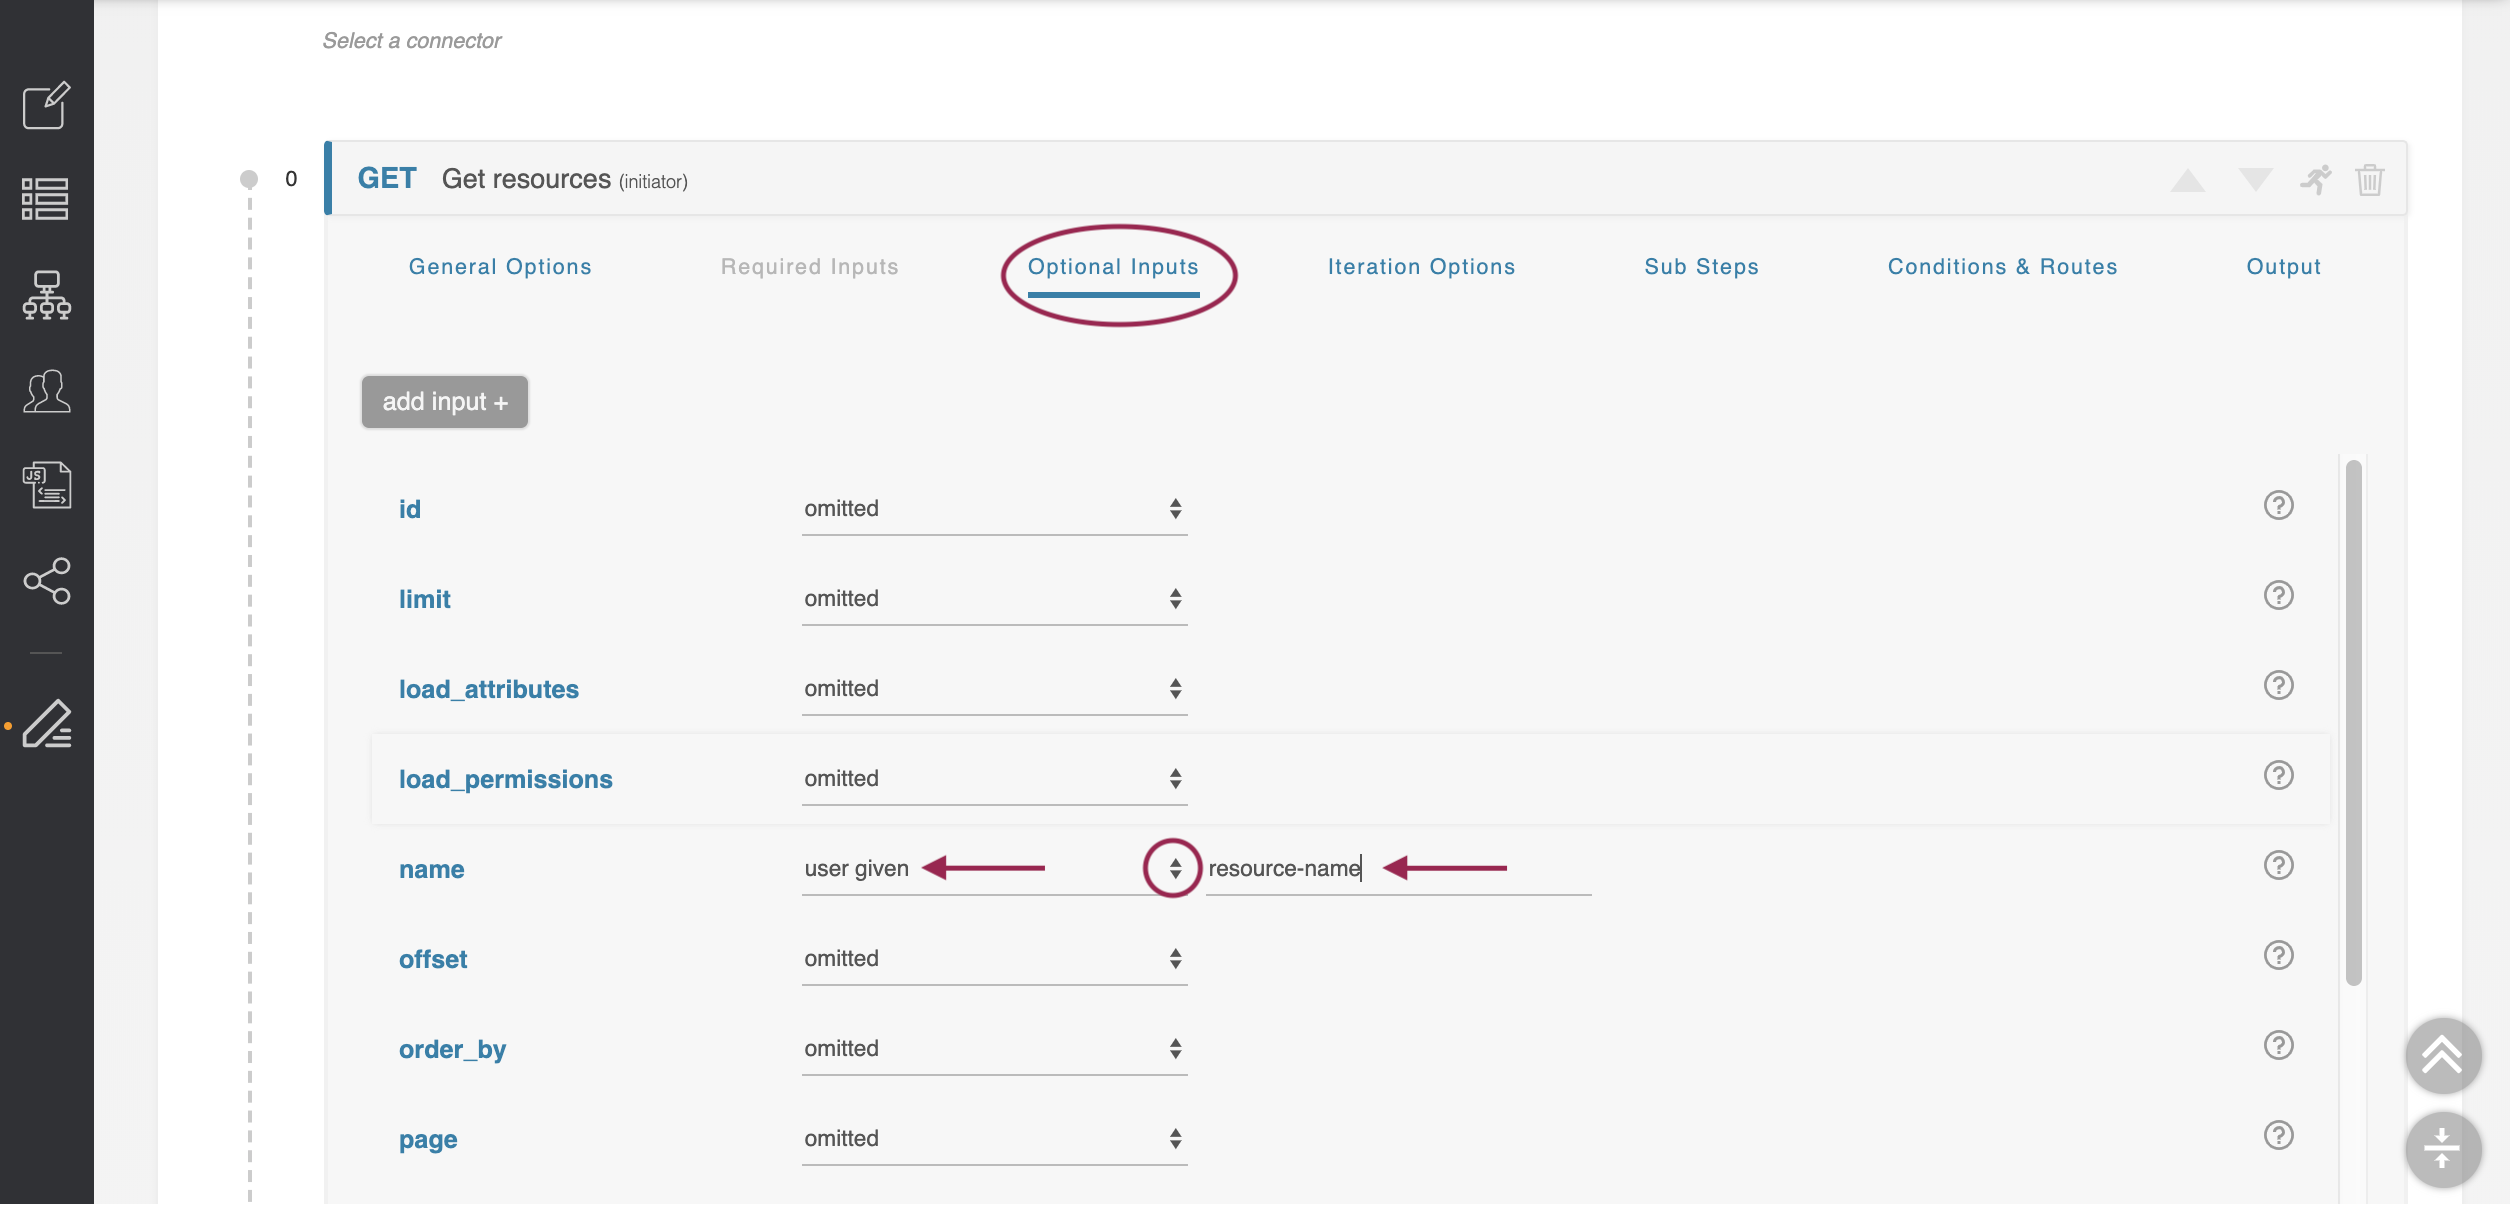
Change this field to ‘user given.’’ The form changes to allow you to name this user-given variable we just declared. Name it ‘resource-name.’
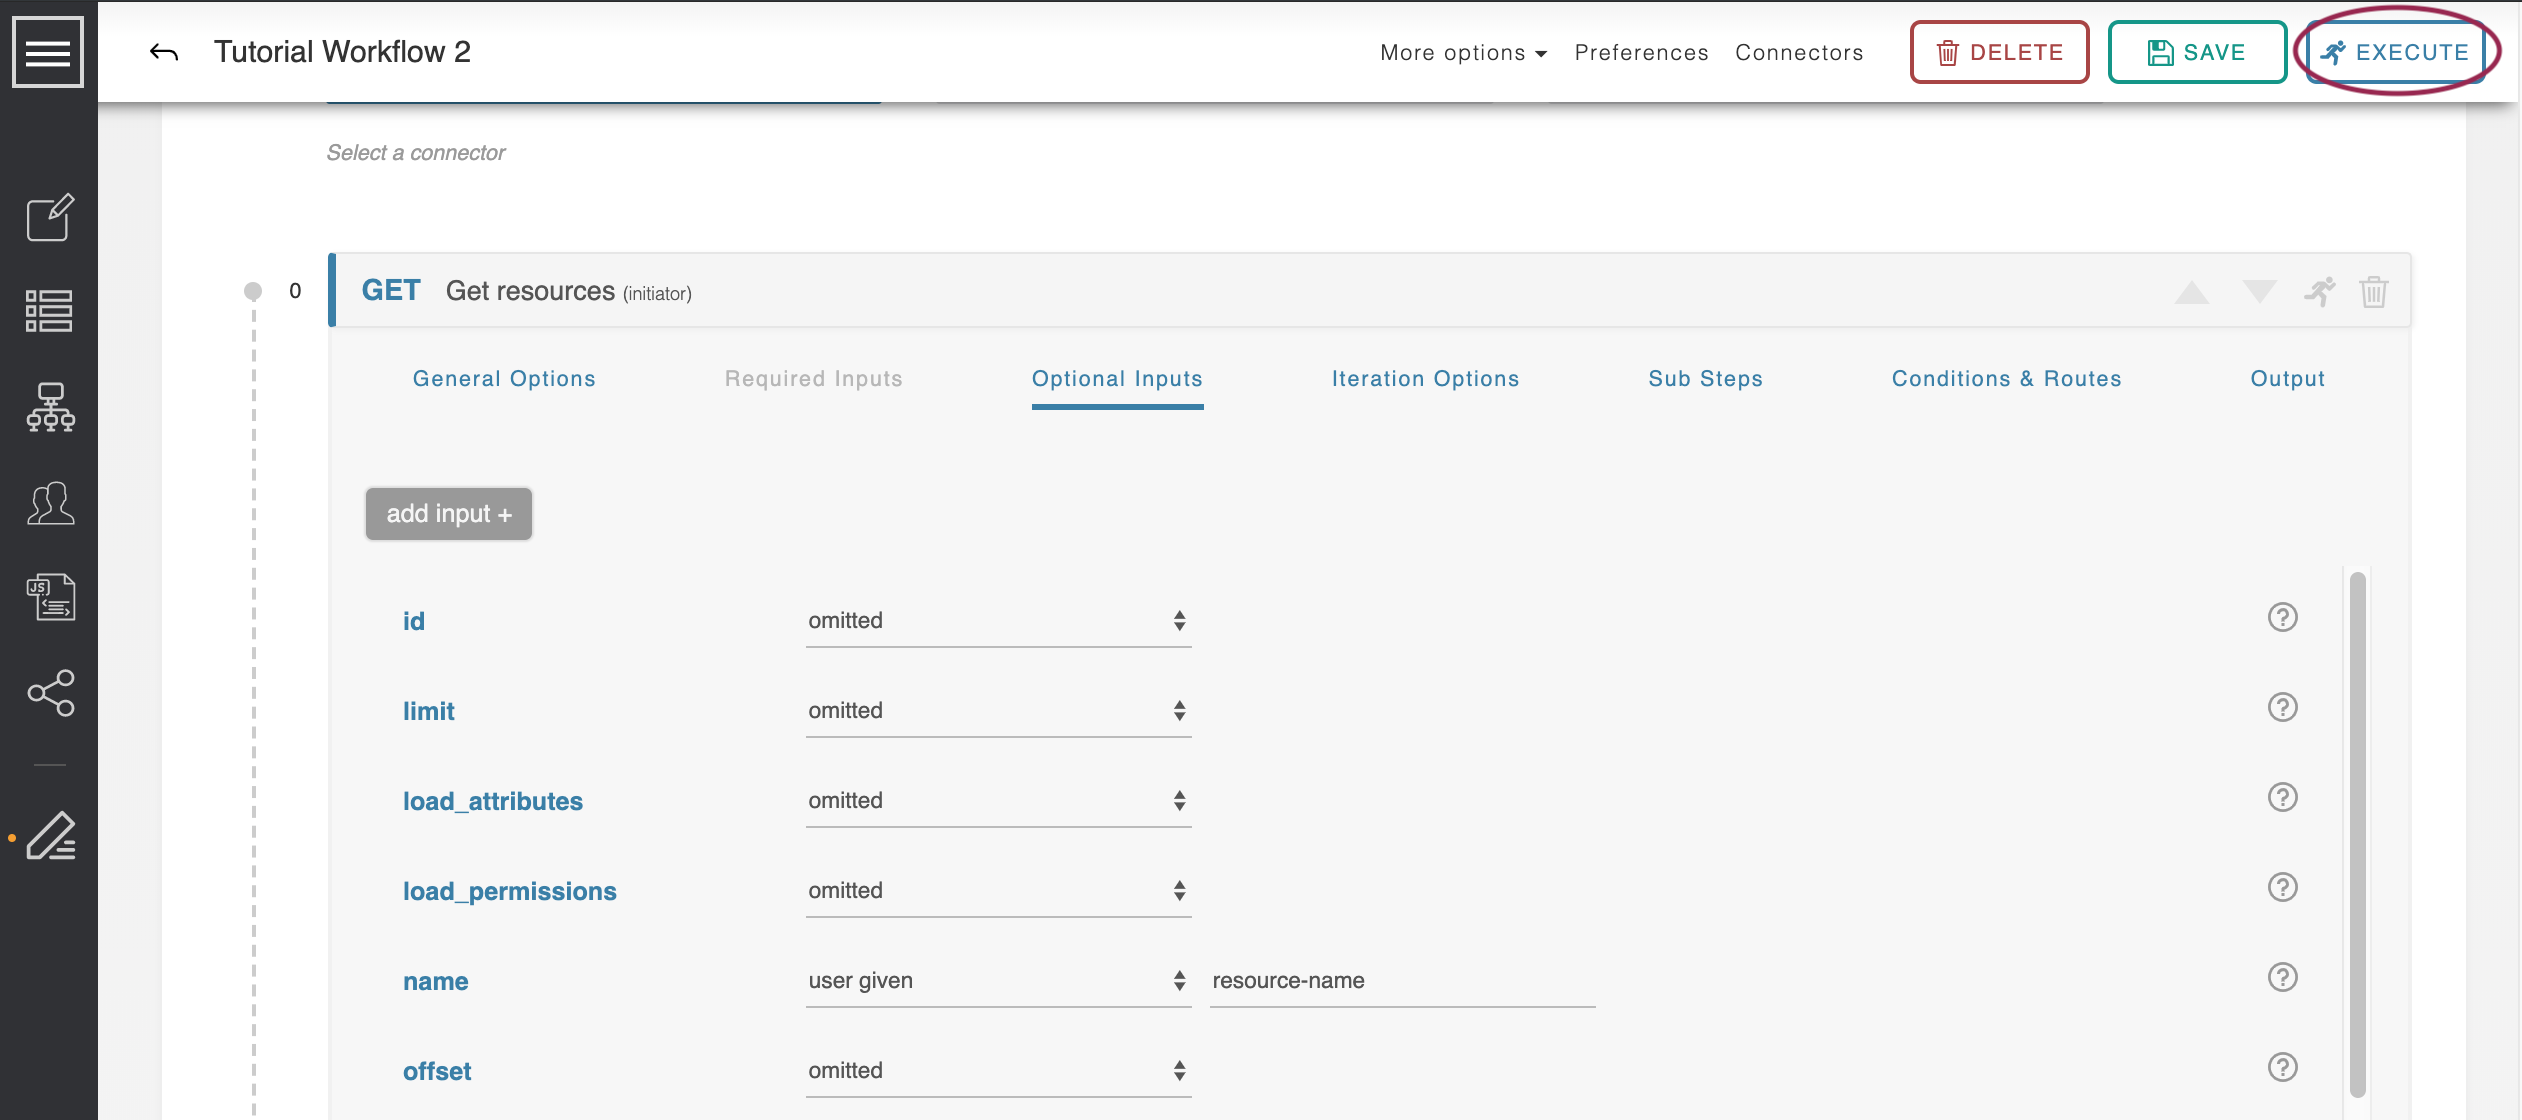
When done, save the Workflow.
Step 5: Execute Workflow with User-Given Variables
After saving the Workflow, click 'execute' to run Save the workflow and execute it.
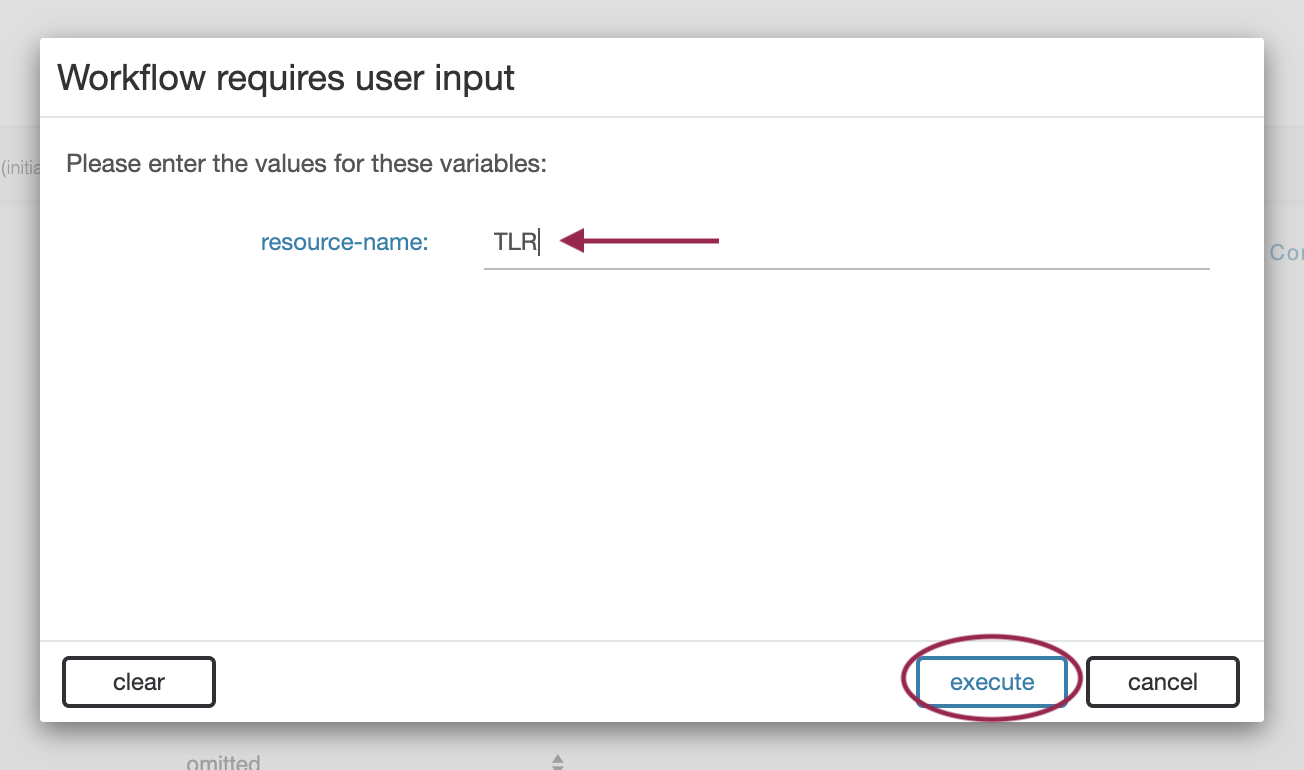
A form pops up listing off all the user-given variables required to run the workflow. In this case, there is only one, but there can be as many as are needed.
Enter ‘TLR’ as the resource-name and click ‘execute.’
The resultant id is the same.
Step 6: Execute Workflow with User-Given Variables - Fail Condition
Execute the workflow again , - but this time enter in the name ‘does not exist.’

This resource obviously does not exist, and so the id returned is ‘null.’ Lets
Step 7: Add Workflow Step 2 - Create Resource
To adjust for a null return, we will instead alter the routing of the 'Get Resources' call, and create the resource if it is not found.
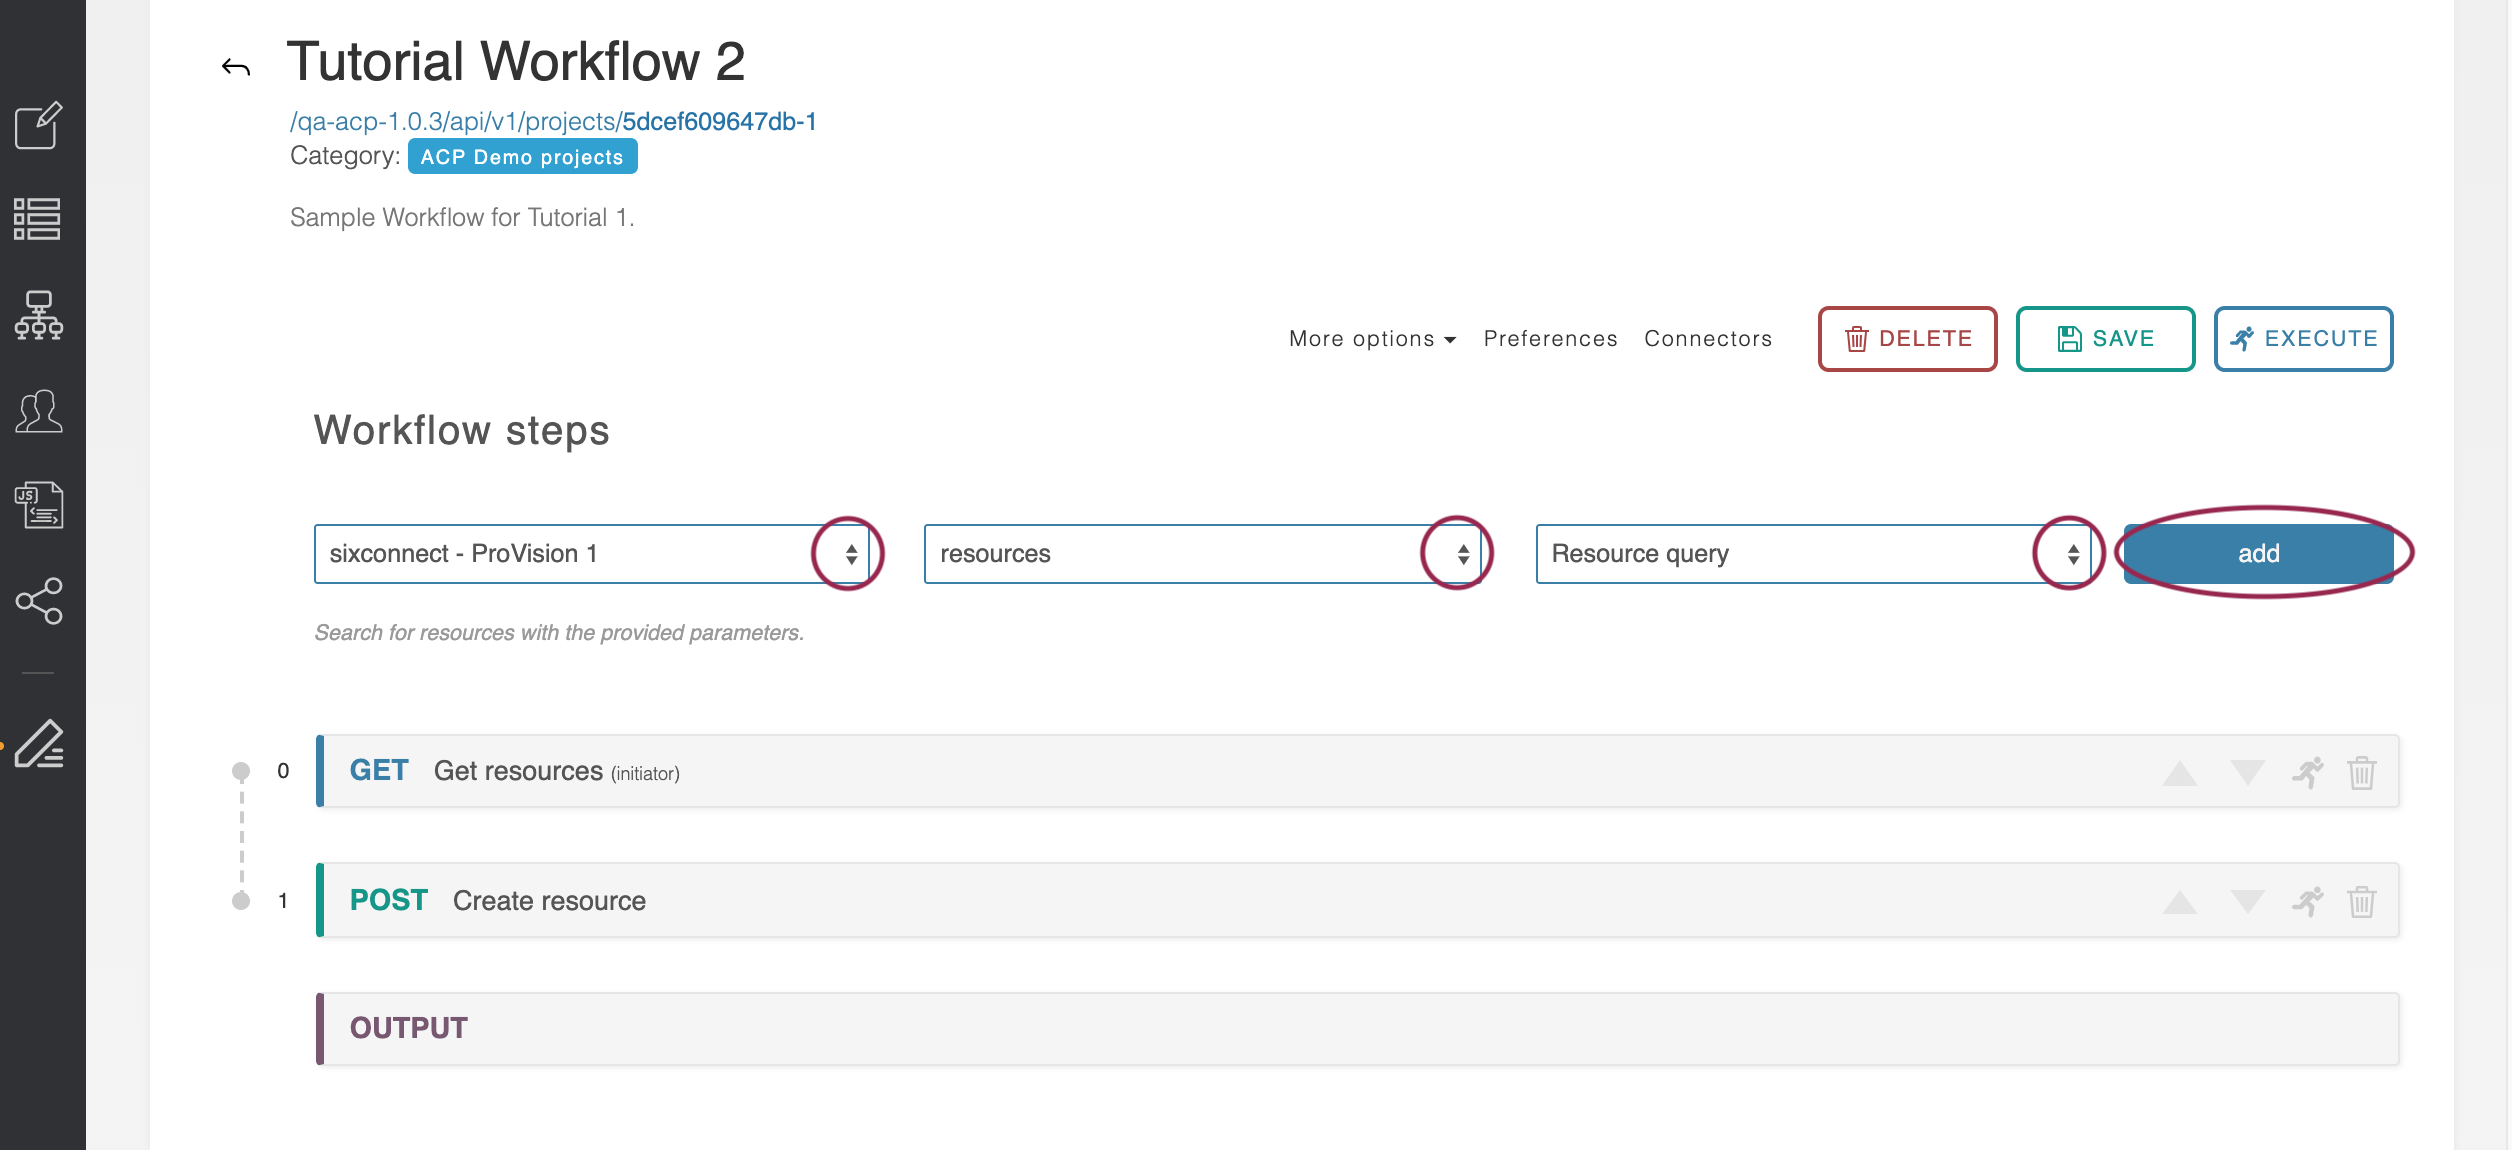
Step 7: Add a new step to the workflow by selecting the ‘sixconnect’ connector, then the ‘resources’ family, and finally the ‘Create Resource’ action. Then, Click "Add".
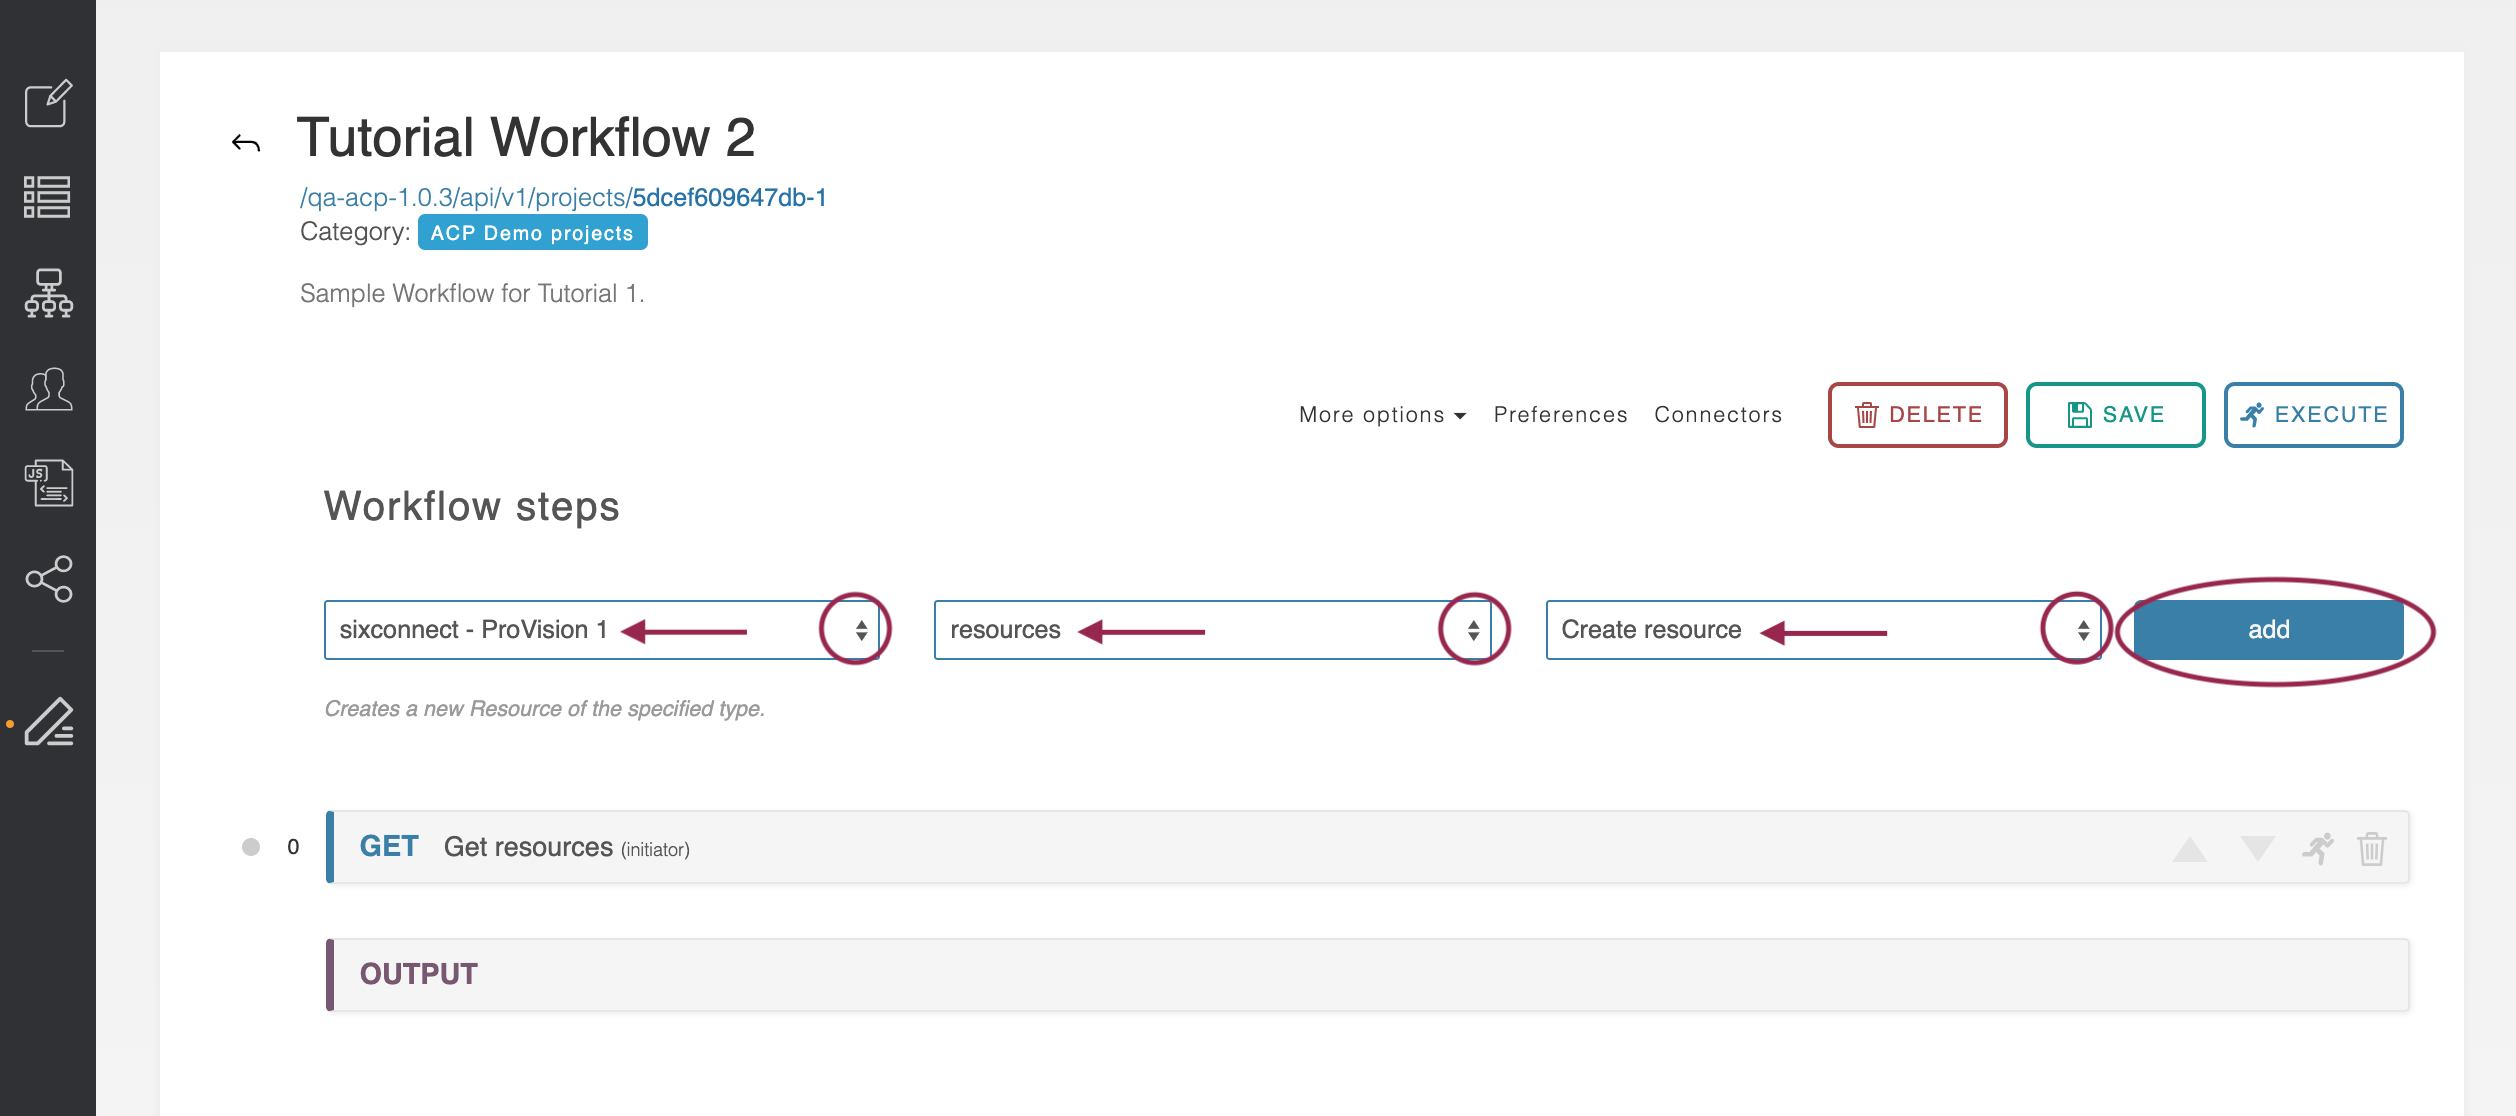
A second step, POST Create resource, will be added to the Workflow.
Step 8: Add Workflow Step 3 - Query
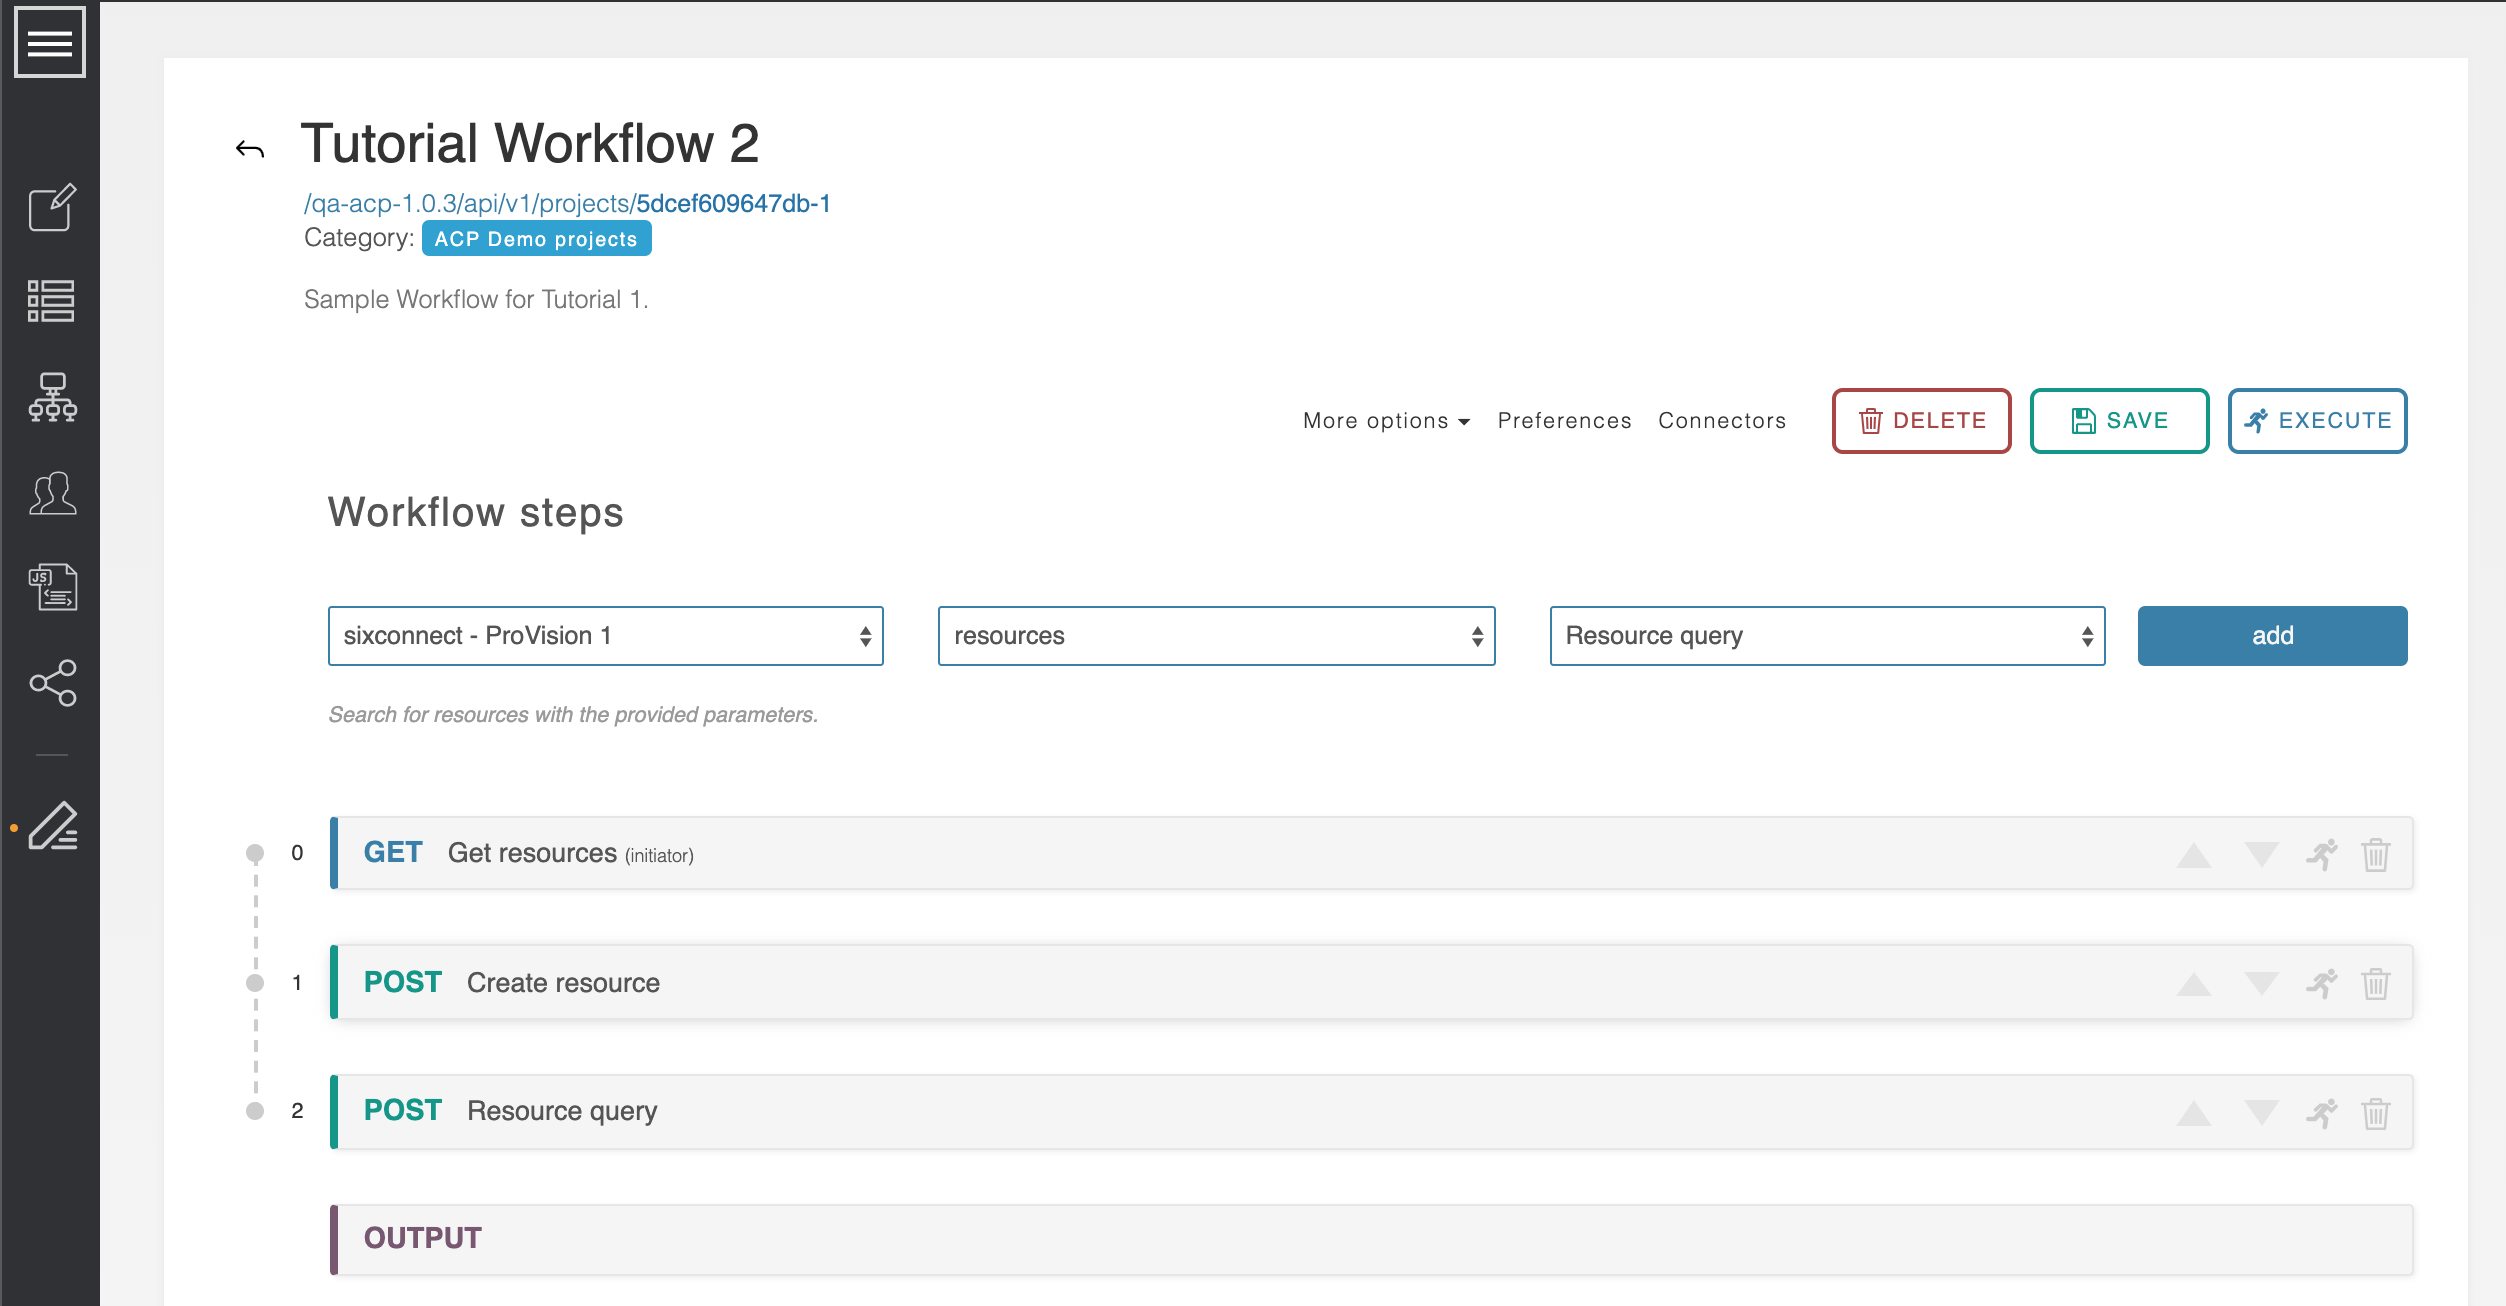
Add a third step to the workflow by selecting for Resource Query. Select the ‘sixconnect’ connector, then the ‘resources’ family, and finally the ‘Resource Query’ action.
Note this is different from the ‘Get Resource’ action we use as Workflow Step #1.
You should now have a 3-step workflow, with 'Get Resources', 'Create Resource', and 'Resource Query', like so:
If you tried to save or execute the Workflow at this point, a warning occurs indicating that an invalid input exists, and the save/execute fails. Although we have created the three calls we would like to occur, they still need condition logic added to handle the "does not exist" resource scenario.
Step 9: View Conditions & Routes
Open up the first step , in blue, of the workflow. Scroll down to the , 'Get Resources', then select the ‘Conditions and Routes’ area at the bottomtab.
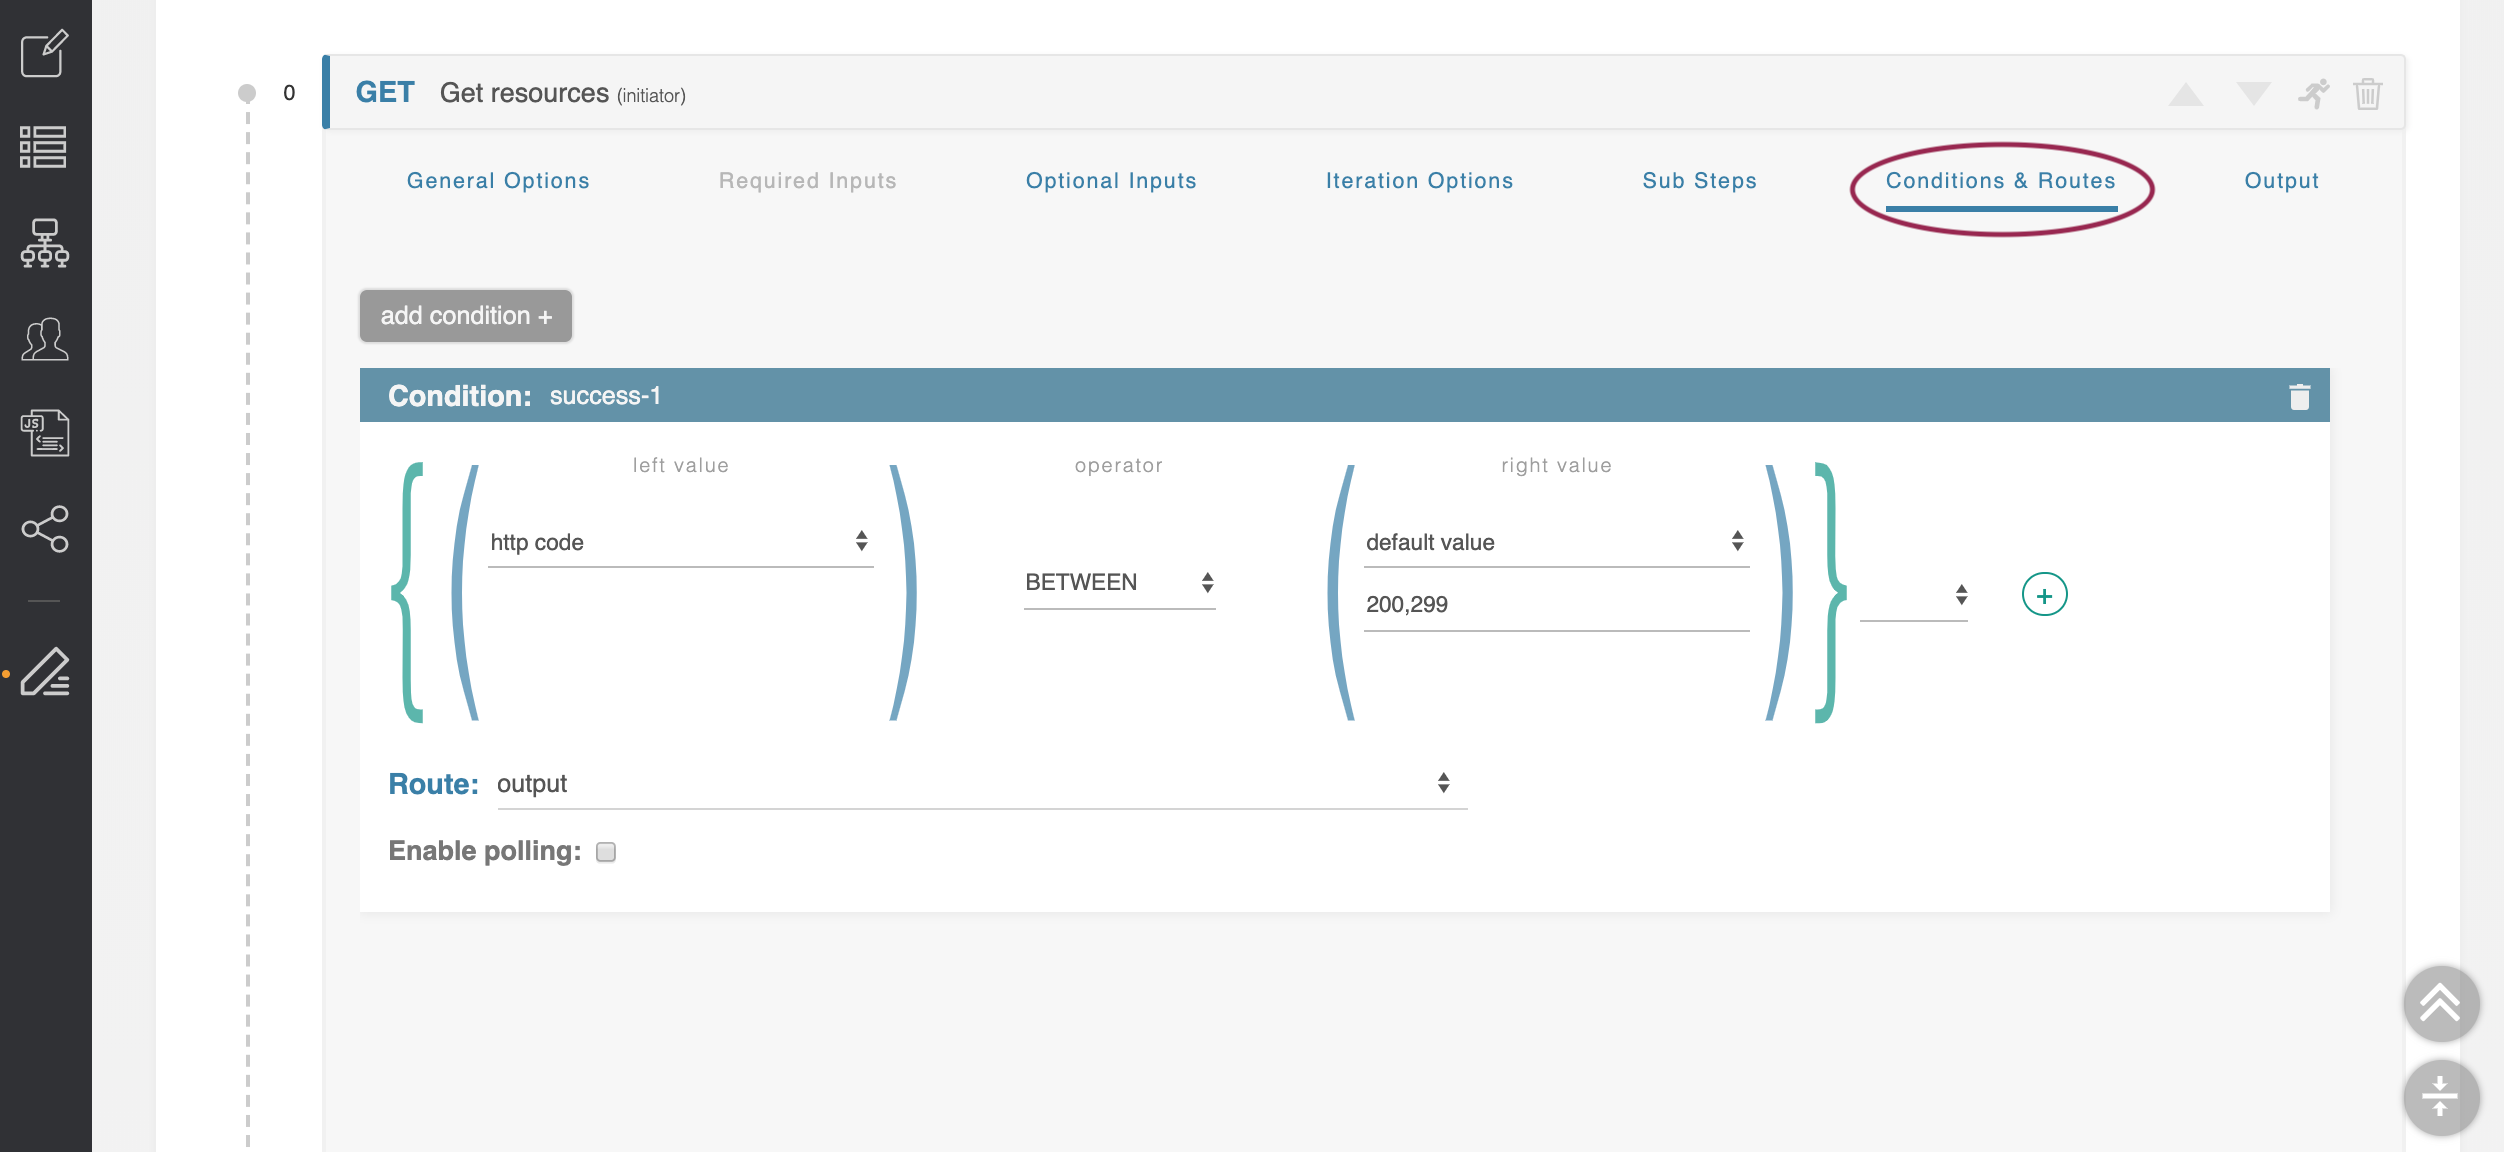
This is the area where the decision logic is stored. Currently, it is configured to proceed directly to the Output whenever the step successfully returns data.
We are going to add a second condition to handle the case where a resource is not found.
Step 10: Add a New Condition
From the Conditions & Routes tab under the 'Get Resources' step, click the ‘add condition +’ button Click the ‘+’ icon in the upper left of the Conditions area to add a new Condition. It
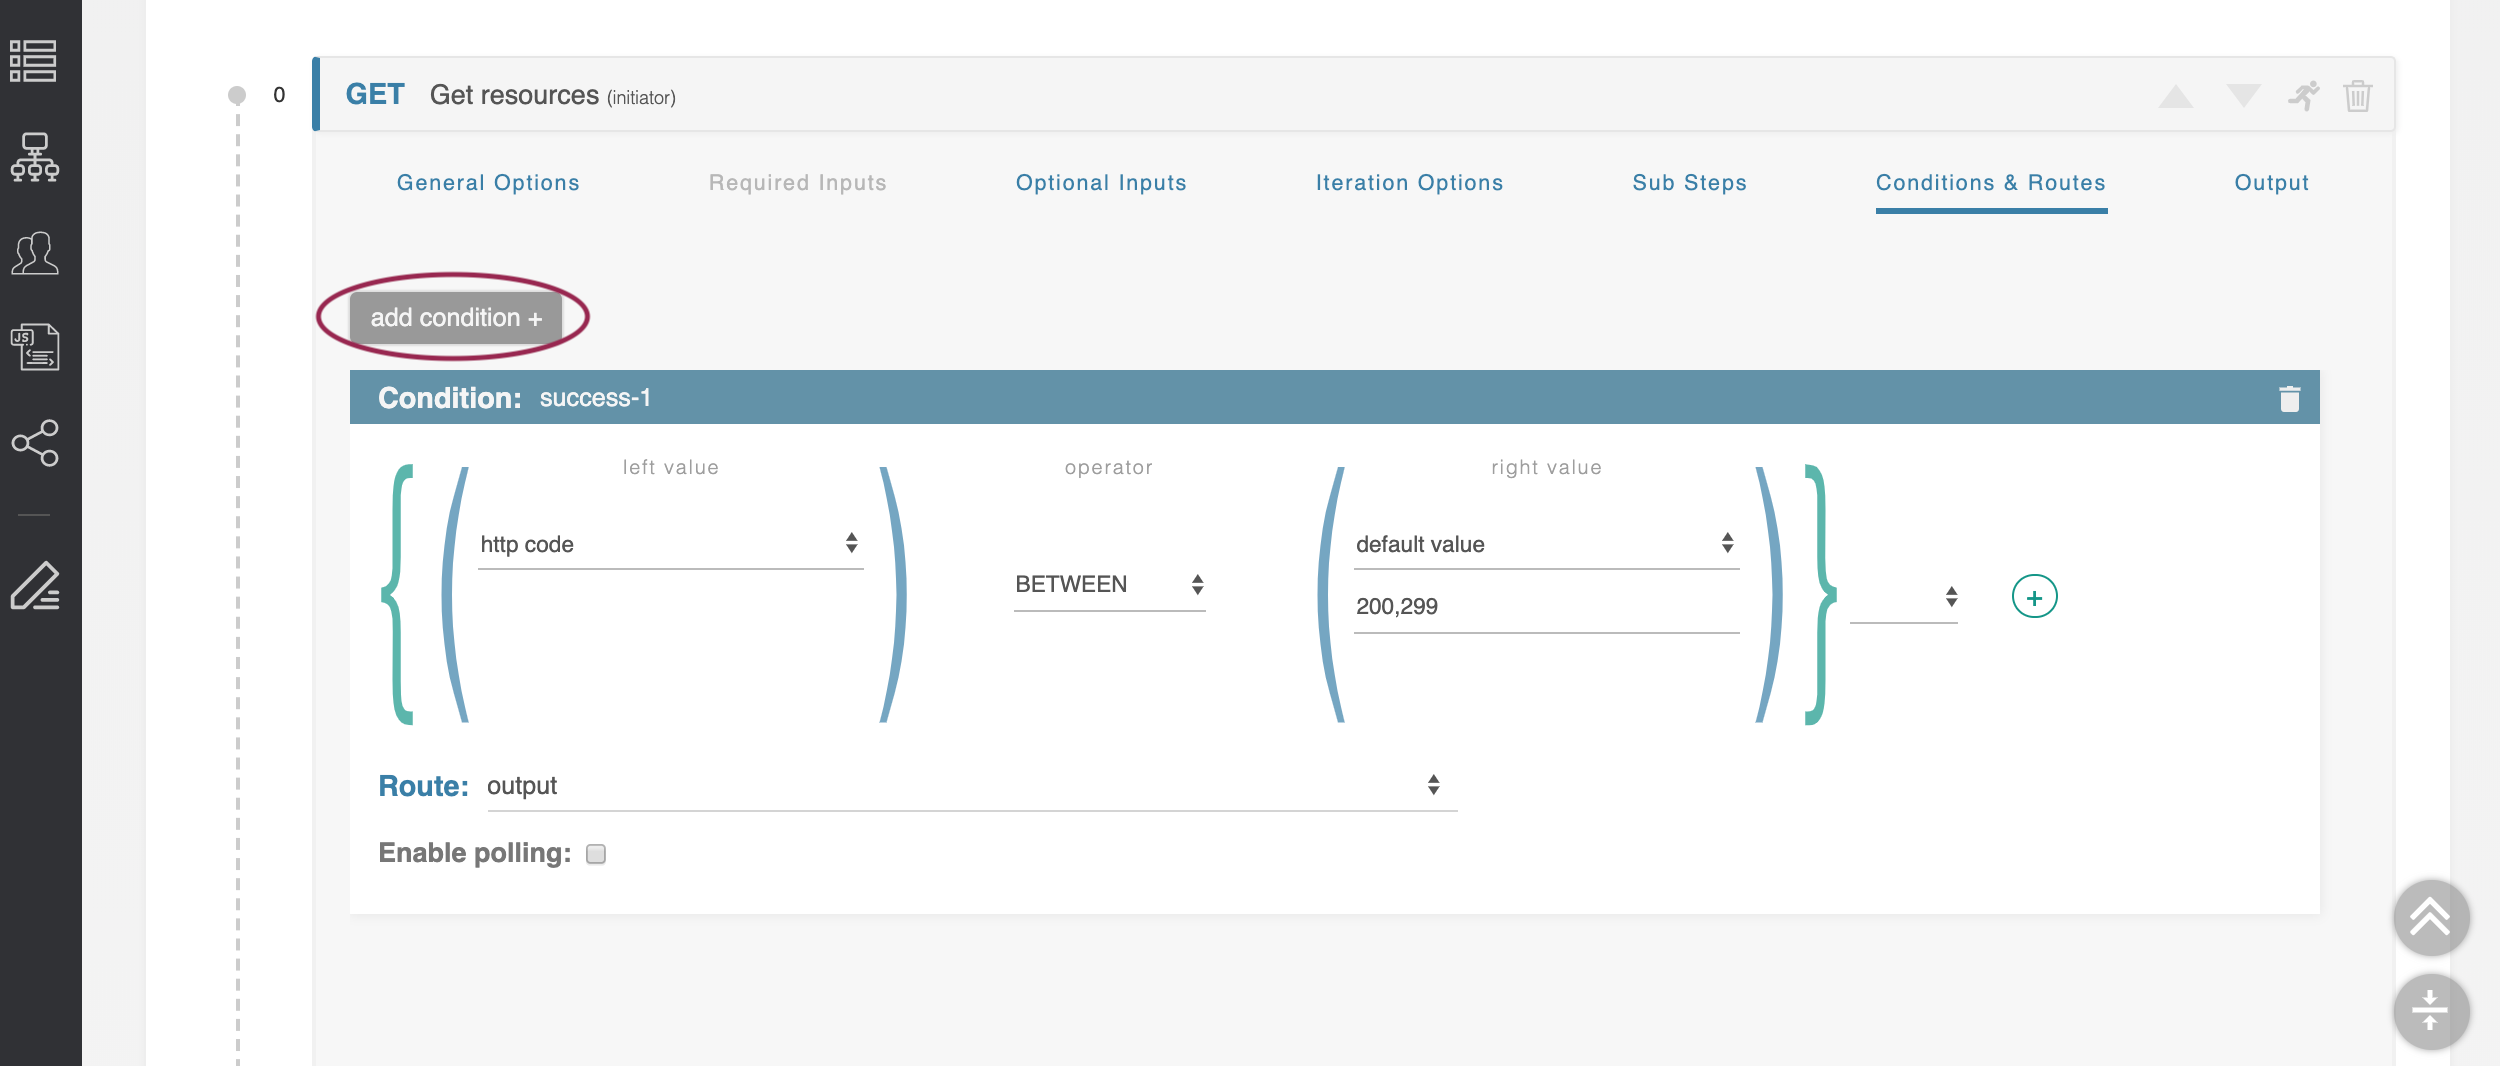
It is added at the bottom of the list. . You should now see two Condition blocks, one named "success-1", the other "success-2".
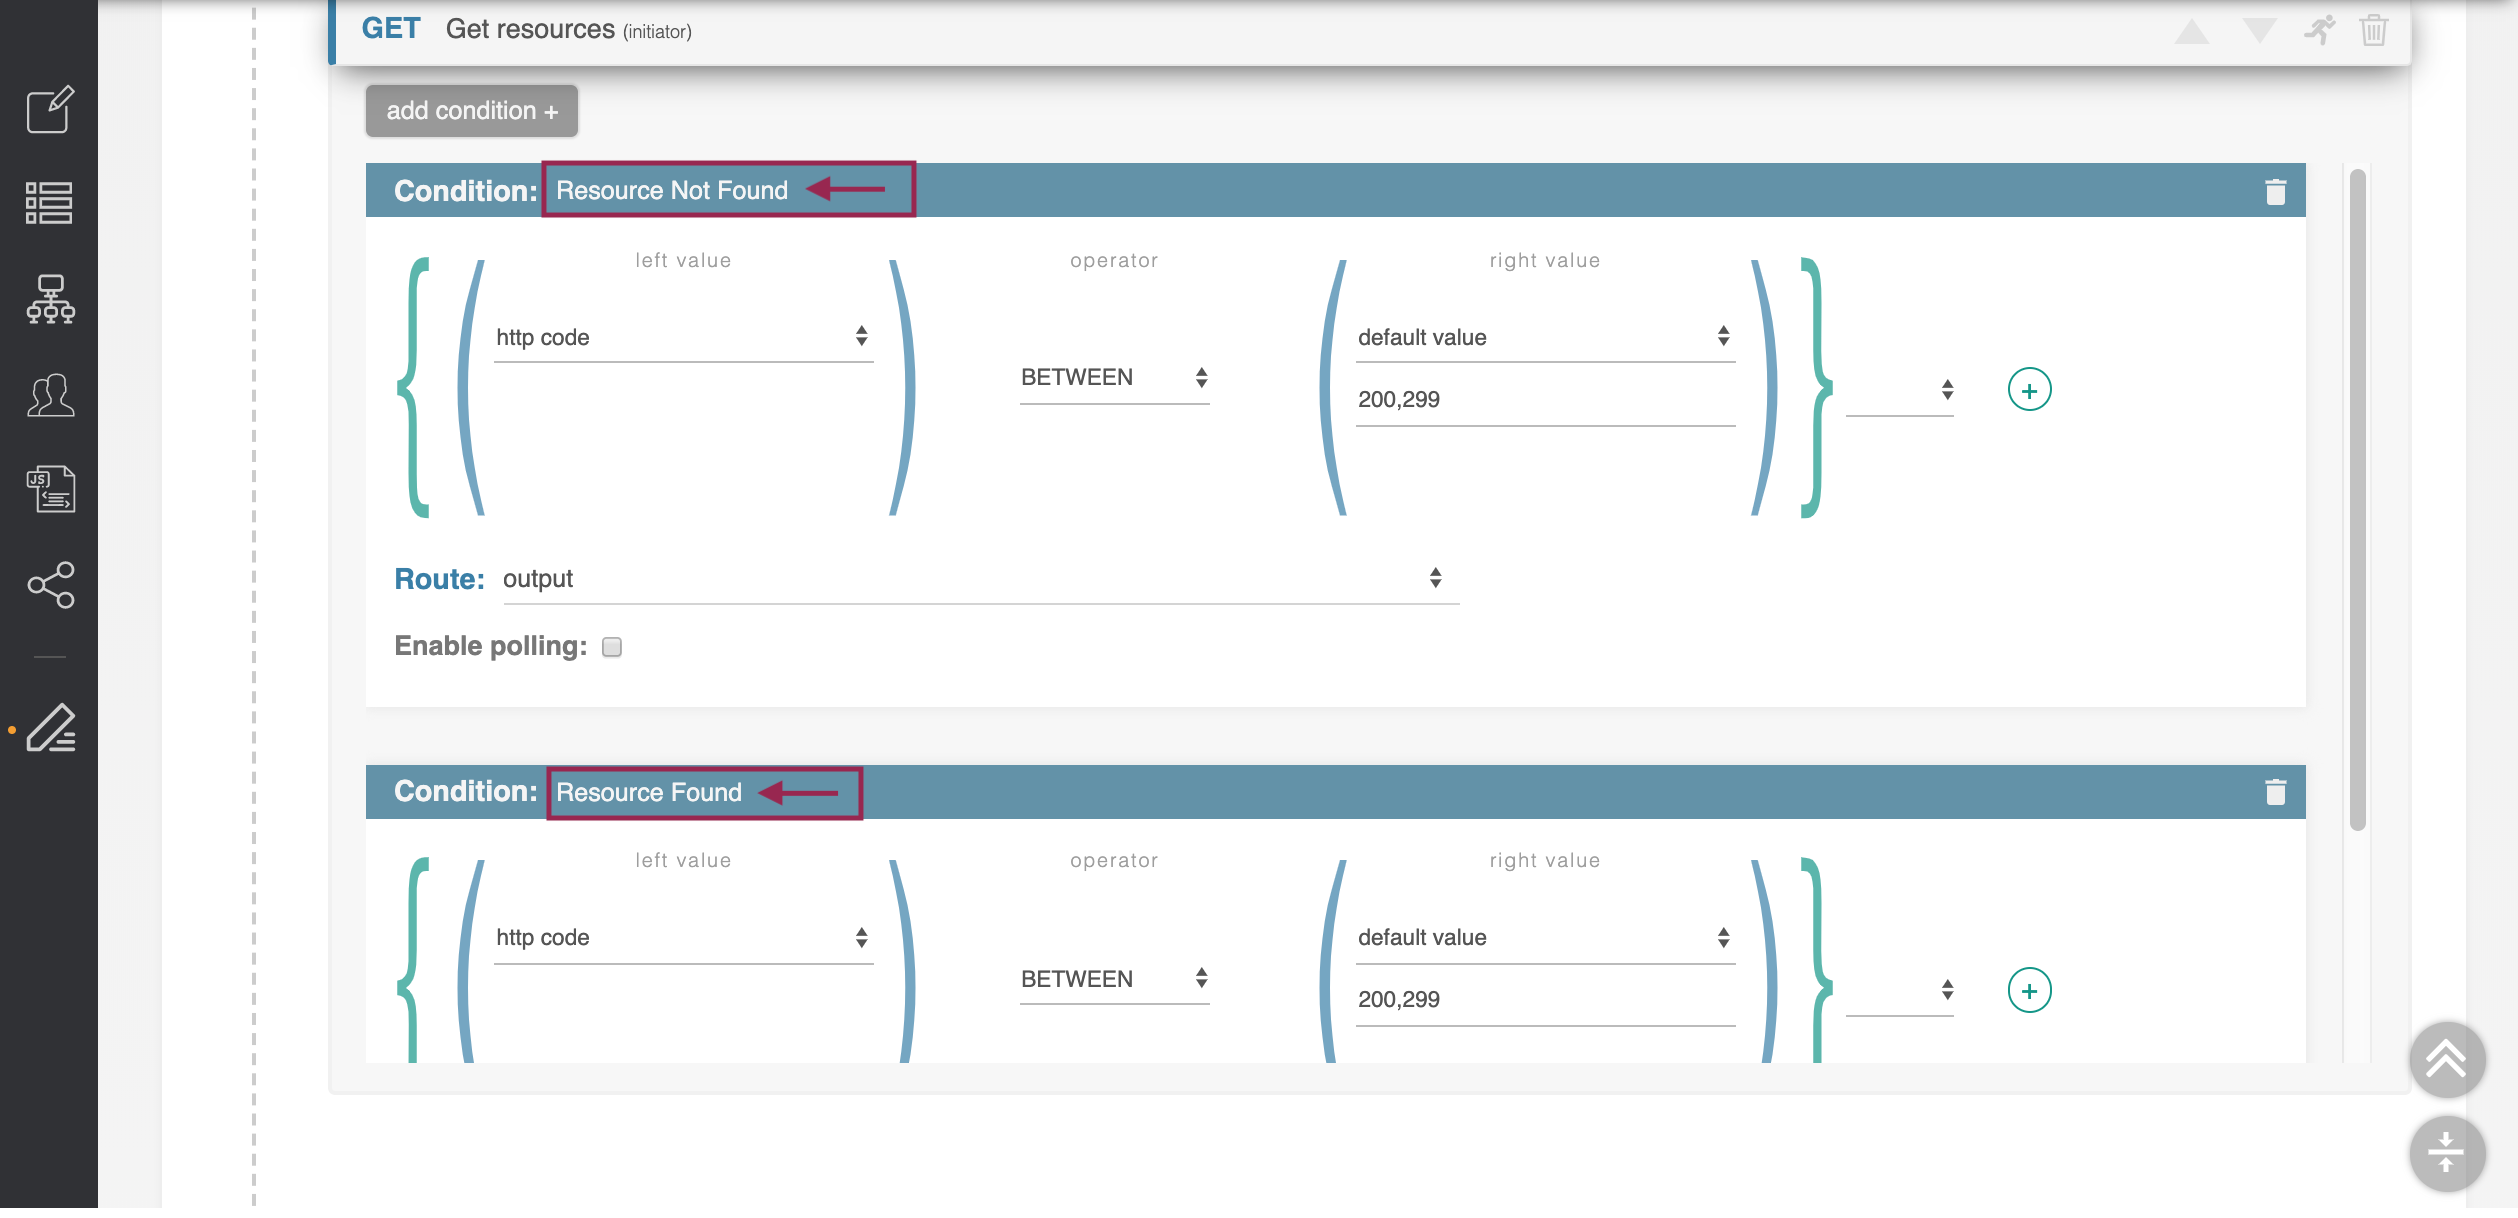
Change Condition Name(s)
Edit the Condition names by clicking on the condition name (you should see a typing cursor), and typing in the new name(s).
Change the name of the first condition to read ‘Resource Not Found’ and , then change the name of the second condition to read ‘Resource Found.’
Step 11: Add a New Condition
Step 11: Edit the ‘Resource Not Found’ condition so that the left value is set to ‘body’ and its ‘id’ property.
...