...
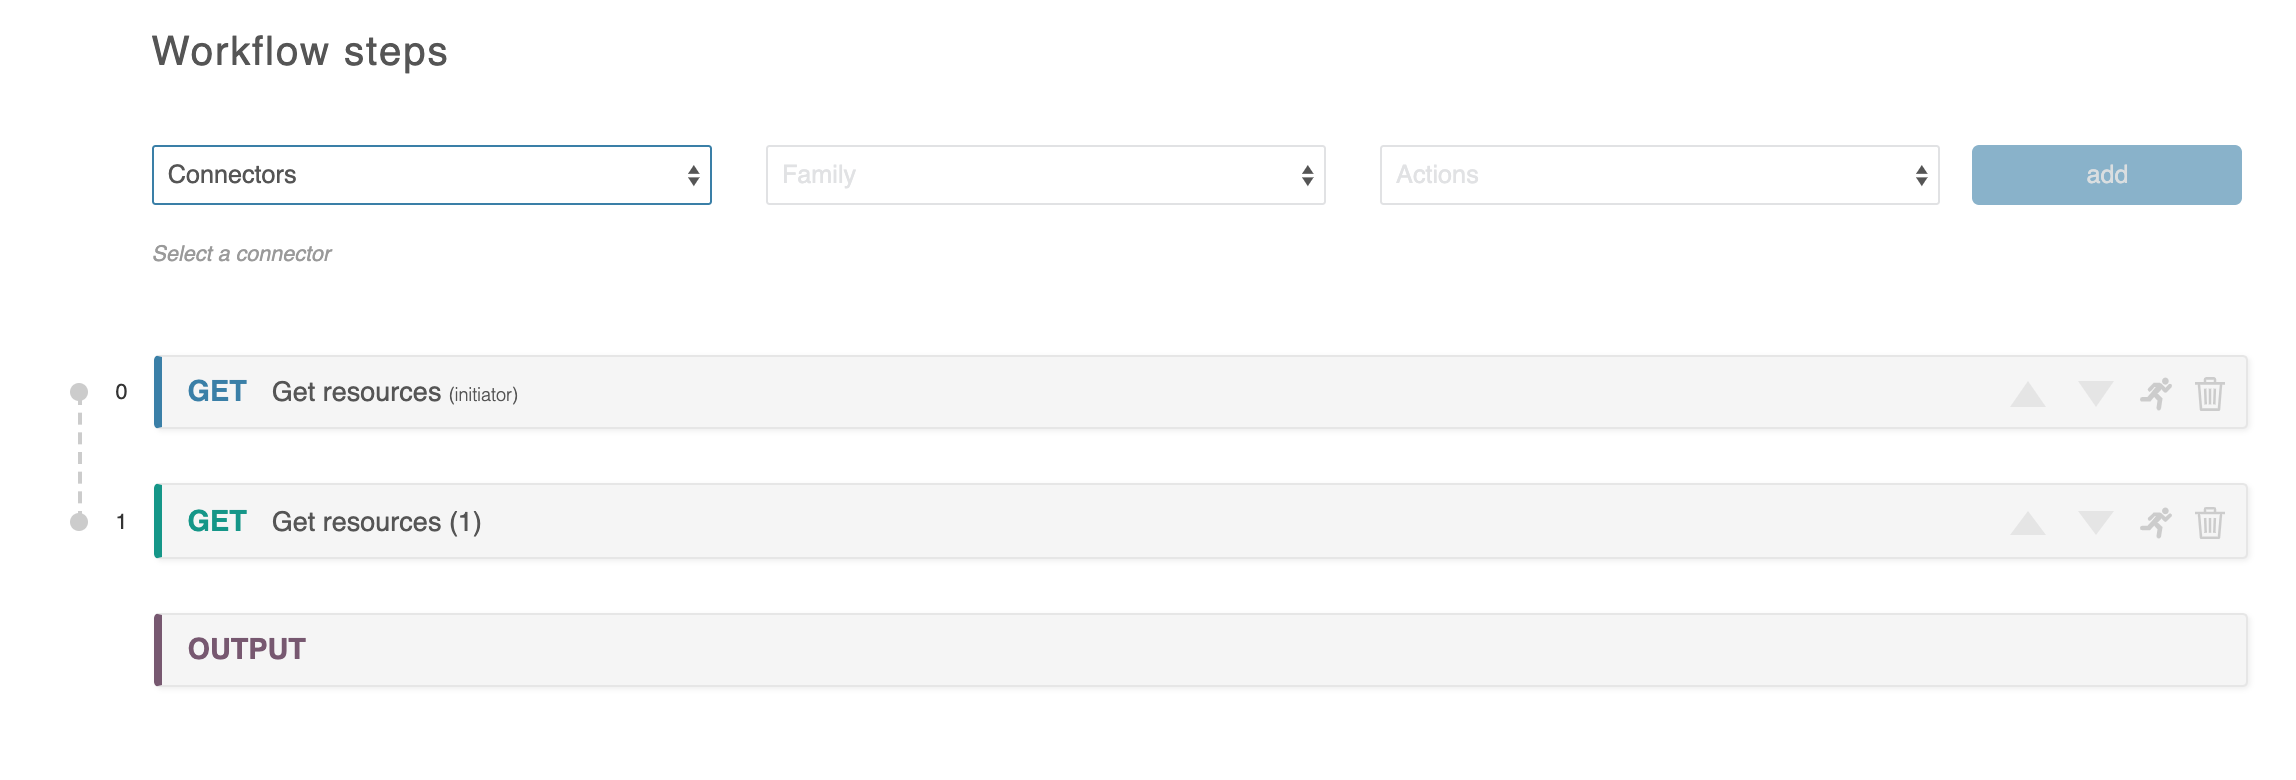
These steps appear under the "Workflow Steps" portion of the Workflow page. To add steps, at least one connector needs to have already been applied to the Workflow (see Connectors).
This section covers a basic overview of the Workflow Steps page section.
| Table of Contents |
|---|
For more in-depth information, see Workflow Options, Initiator Conditions and Iteration, and Executing Workflows.
Add a Step
At the top of the "Workflow steps" section is the area to add a new step to the current workflow. First, select the desired connector.
...
Step headers in red also display a ‘view response’ link on the right-hand side. This can be clicked to bring up a window which shows what the API service is responding with. This can be very helpful in debugging. Also, turning on Debug Mode can show the full logical pathway of the ACP Workflow.
Anatomy of a Step
...
- Overview of Workflow Options
...
Clicking on any step header will expand the step to reveal the individual sections which it uses to define its behavior.
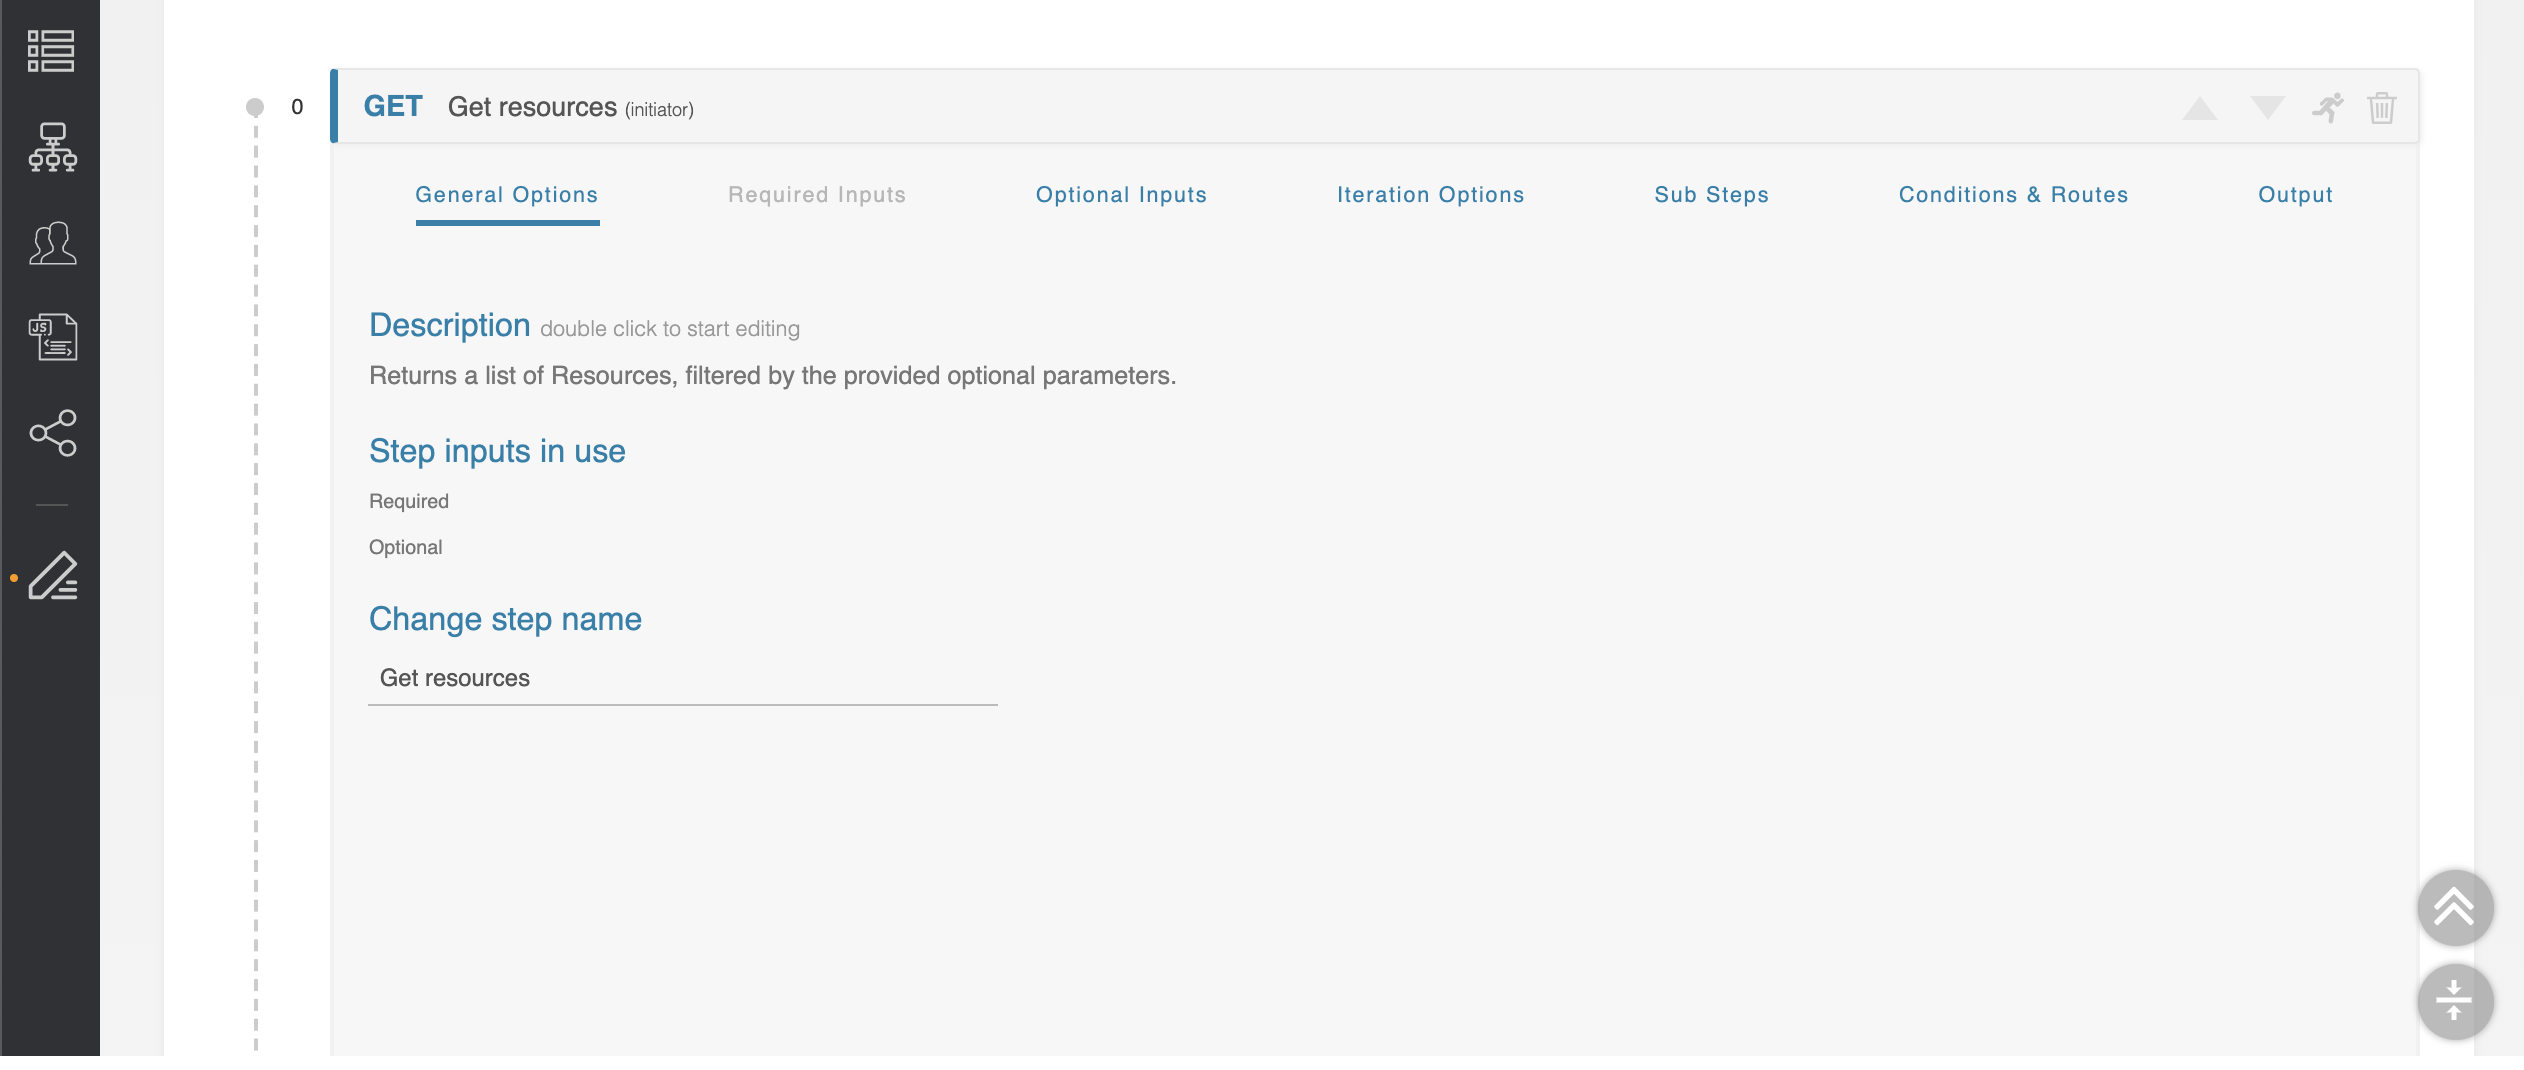
There are seven option tabs available for a workflow step, although not all tabs will be available for all steps.
General Options
The first section is ‘General Options,’ and it contains a field where you can add a description of what the step is trying to accomplish. You can also customize the name of the step. This section also provides a list of user-given inputs used in this step. For more detail, see Workflow Options.
Required Inputs
The ‘Required Inputs’ section contains variables that must be set for the API call to proceed. This section is not always present, as not all API calls have required parameters. For more detail, see Workflow Options.
Optional Inputs
The ‘Optional Inputs’ section contains those parameters that the API call might make use of which are not explicitly required. Some APIs are flexible and allow you to add additional optional parameters not explicitly defined in the API specification. To allow for this, the ‘add input’ button lets you define an arbitrary optional inputs to complete the API call. For more detail, see Workflow Options.
| Info | ||
|---|---|---|
| ||
All types of inputs have a small ‘?’ to the right of their input area which will supply help text as to what that parameter does. For more details, see the official API documentation for the API service you are using. All types of inputs can be customized with the following states:
|
For more details on inputs, see
Iteration Options
The next section is 'Iteration Options' and deals with how to loop over array responses. For more detail on iteration, see , see Workflow Options, and for advanced information see Initiator Conditions and Iteration.
Sub Steps
The ‘Sub Steps’ section describes how to iterate over an array of return objects, similar to the ‘iteration options’ previously. For For more detail on sub-steps, see Initiator Conditions and Iteration, see Workflow Options.
Conditions & Routes
The ‘Conditions & Routes’ section describes the flow-control by which the ACP system chooses what step is next. The logic involved is complicated and is detailed in Workflow Options.
...
Lastly, the ‘Output’ section shows an example return of the API endpoint, for use in establishing Workflow Links. For more detail, see Workflow Options.
Links Between Steps (Workflow Links)
...
Another example can be found in ‘Getting Started 9. Working with Arrays.’ The Output area contains a reference to ‘2’, which indicates the entire 3rd object returned by the ProVision Get Resources query.
Output
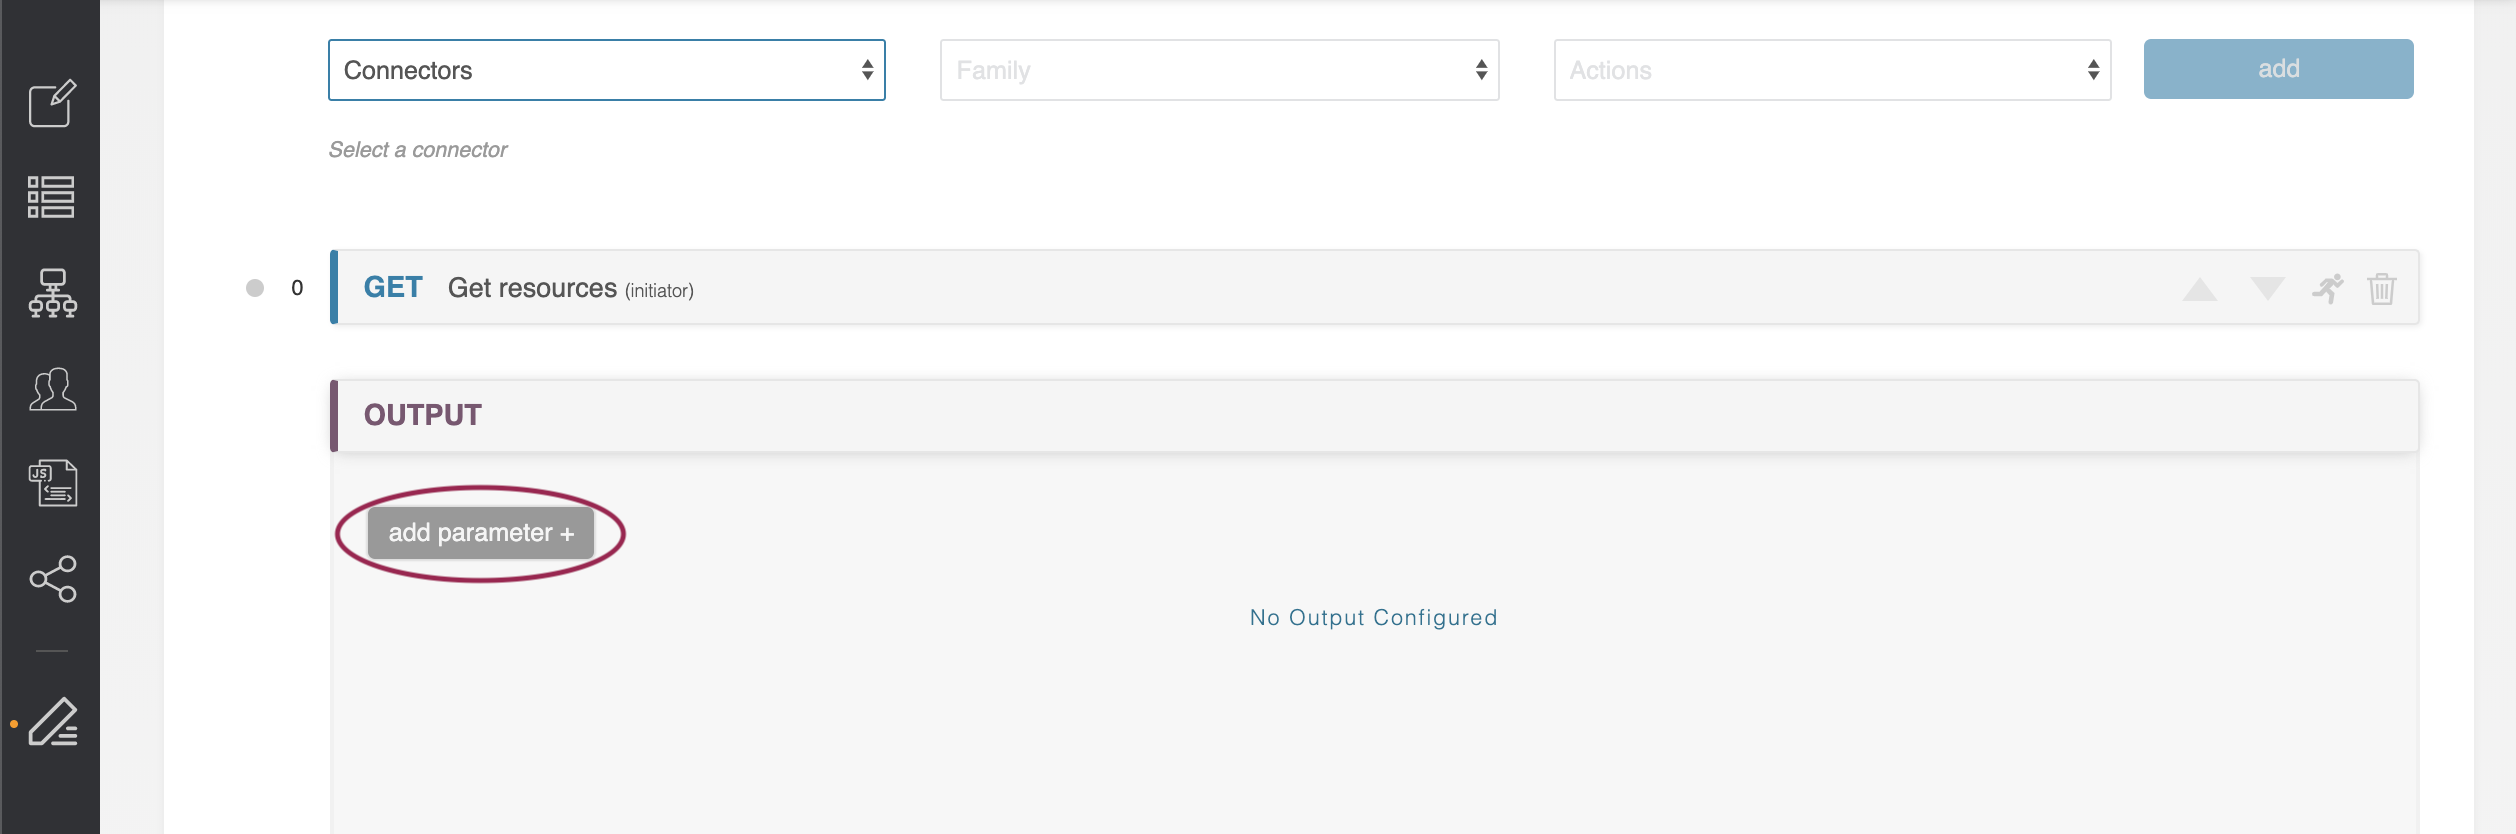
The Output Step is always the final section in every workflow and determines what data is returned to the user when the workflow is invoked. The workflow can be configured to return individual fields, entire arrays, individual members of arrays, and the entire body return from the executed steps.
The “add parameter” button allows you to populate the Output area with individual return parameters. There is no limit on how many parameters can be returned by a single workflow.
Each Output parameter consists of a number of parts: the parameter name, the parameter type, and the type details. Each parameter requires a distinct name. This is the name used in the return payload.
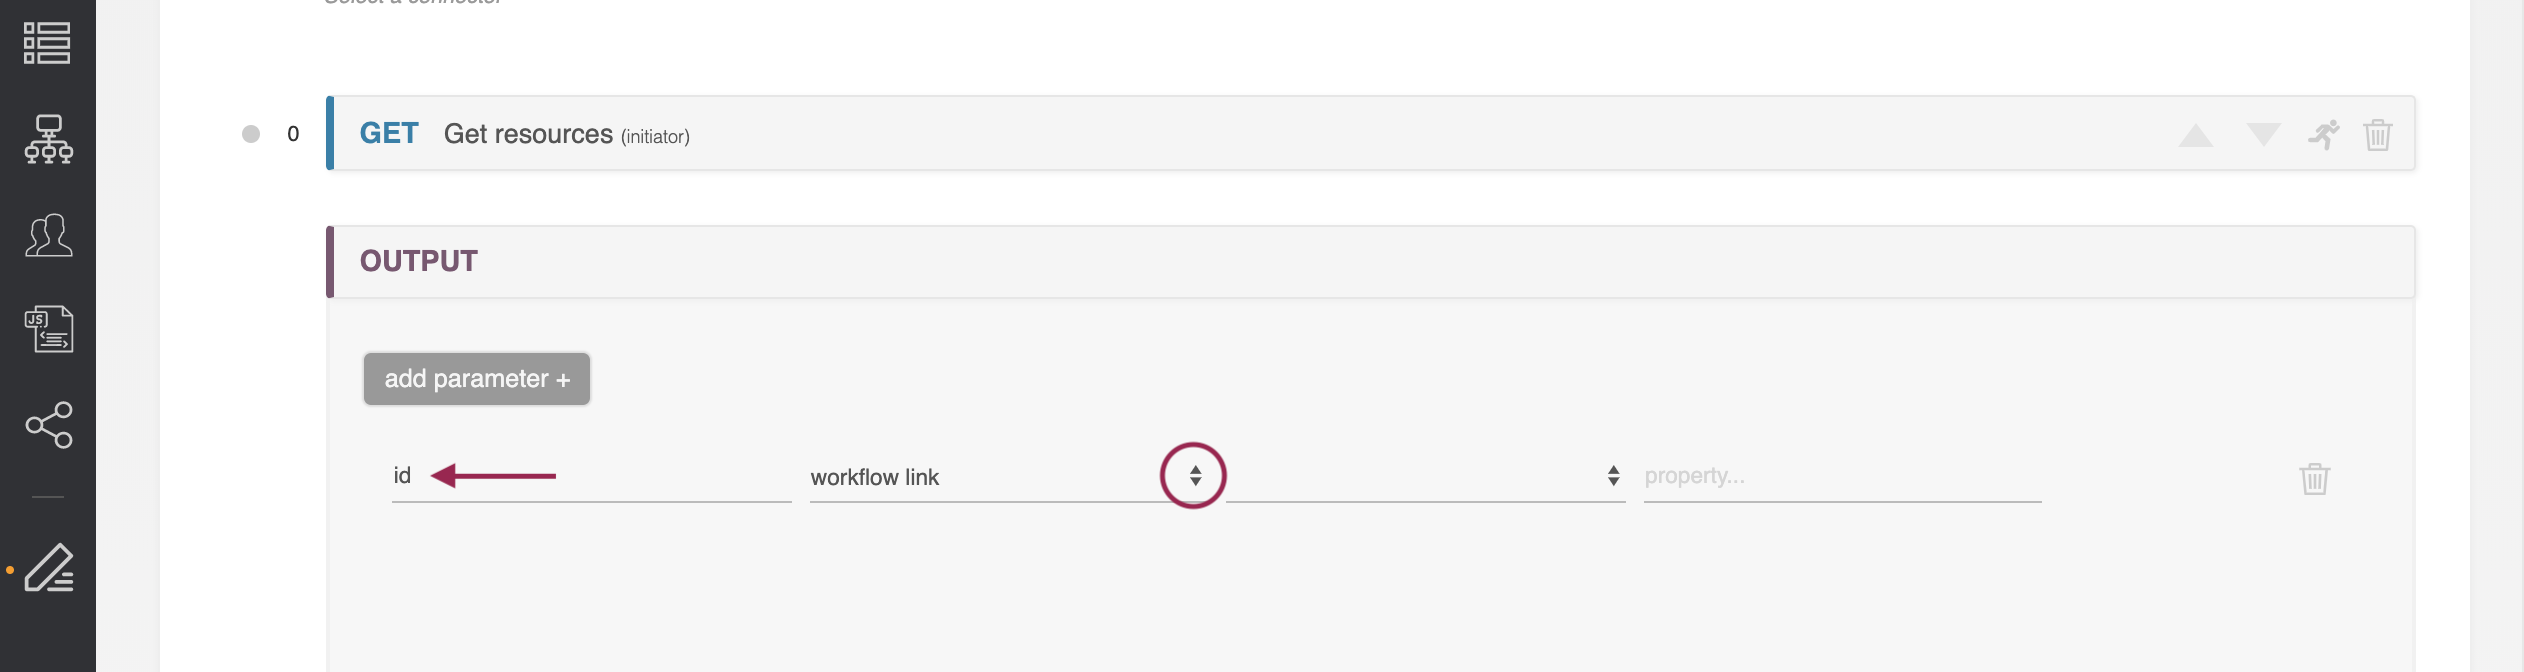
The parameter types field is similar to those in the Optional and Required Parameters section. You can define a parameter to draw its data either from a workflow link, a function, user given data, or a javascript function. These functions are more fully described in the Optional and Required Parameters section.
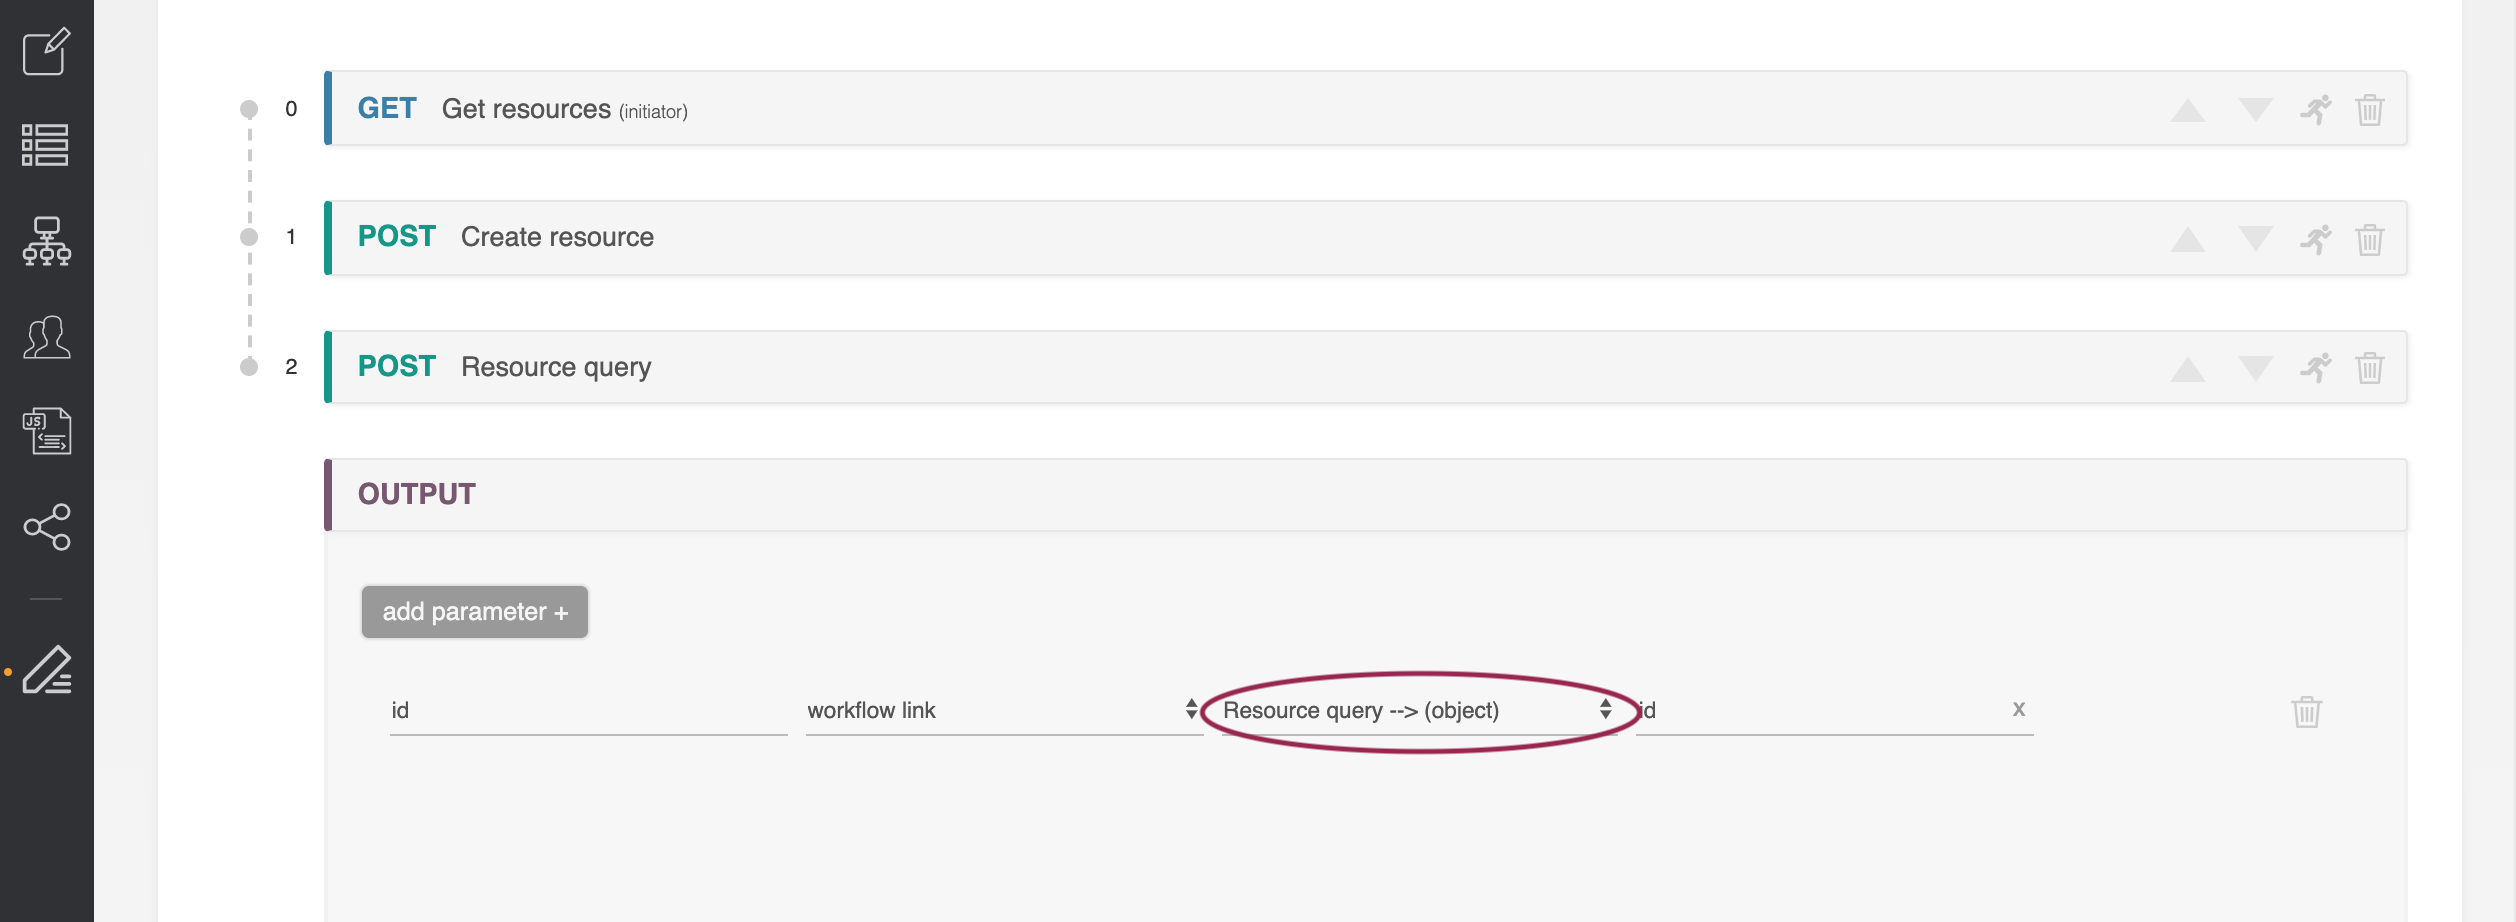
Parameters can be removed by clicking the trashcan on the right.
Additional Information
Continue on to additional User Guide pages for detailed information on working in ACP:
...