...
| Expand | ||
|---|---|---|
| ||
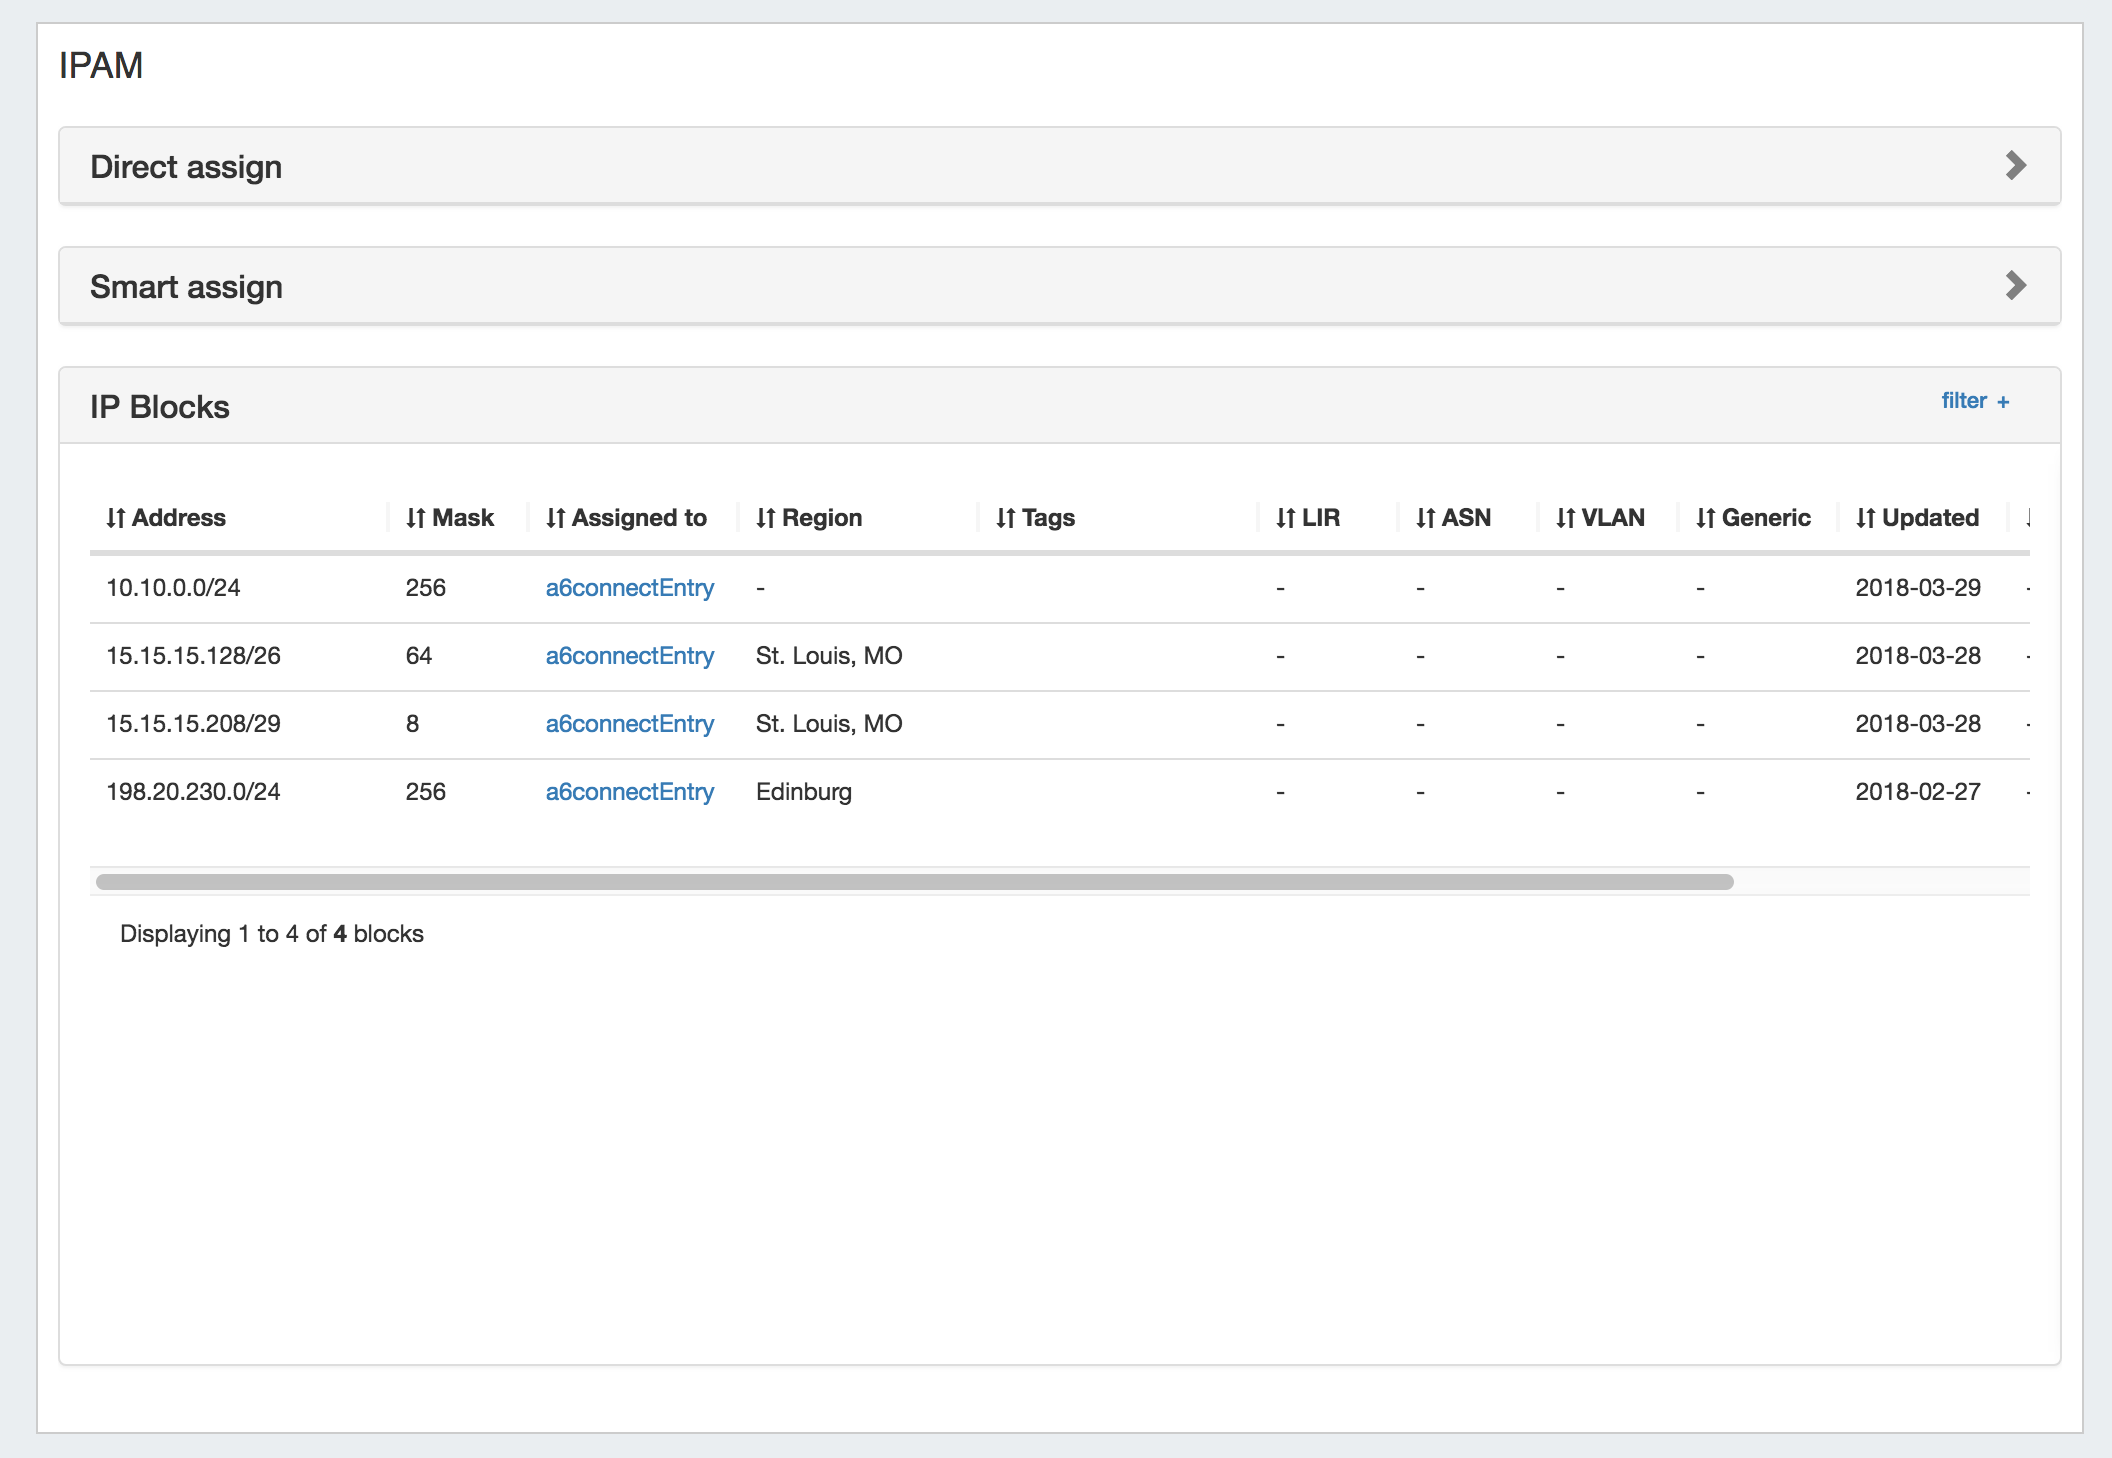
IPAM Gadget Features
The IPAM Gadget is accessed from the Resource Entry Page → IPAM Gadget, once it has been enabled for the section. Here, you can:
Both IPAM Manage and the IPAM Gadget have customizable column names, order, and visibility, as well as options for user-defined meta columns (for details on setting up customization of the IPAM Manage / IPAM Gadget block list, see IPAM Parameters → Edit Columns). |
...
Blocks may be manually marked or unmarked as "Important" from either the "Edit Block" interface (by opening "Edit" for the block, then selecting the toggle for "Mark this block as important"), or from the API .

Working with IP Blocks - Common Tasks
Individual Blocks may be managed from either IPAM Manage, or the IPAM Gadget. (if assigned to a resource, and the IPAM Gadget is enabled on the Resource's Entry Page).
In general, standard actions from the Action Menu will be performed the same in either area, with "Assign" being the exception.
IPAM Block Action Menu - Overview
Most actions performed with block managed are contained under the IPAM Manage - Action Menu. Open the Action Menu by left clicking on the Gear Icon, or right clicking anywhere on the block's row. The same Action Menu is also available to manage blocks via the IPAM Gadget.
If multiple blocks are selected with mixed "important" statuses, then the toggle will display in the "Off" position. To update all selected blocks to flag as important, switch the toggle to "On", and save changes. To switch all to the "Off" position, you may either toggle all blocks to "On", save changes, then switch all blocks back to "Off" and re-save, or adjust your selection to only include the blocks that need the Important Flag removed. (Tip: Use the list filter to show only "important" blocks!)
Working with IP Blocks - Common Tasks
Individual Blocks may be managed from either IPAM Manage, or the IPAM Gadget. (if assigned to a resource, and the IPAM Gadget is enabled on the Resource's Entry Page).
In general, standard actions from the Action Menu will be performed the same in either area, with "Assign" being the exception.
IPAM Block Action Menu - Overview
Most actions performed with block managed are contained under the IPAM Manage - Action Menu. Open the Action Menu by left clicking on the Gear Icon, or right clicking anywhere on the block's row. The same Action Menu is also available to manage blocks via the IPAM Gadget.
| Column | ||
|---|---|---|
| ||
|

| Column | ||
|---|---|---|
| ||
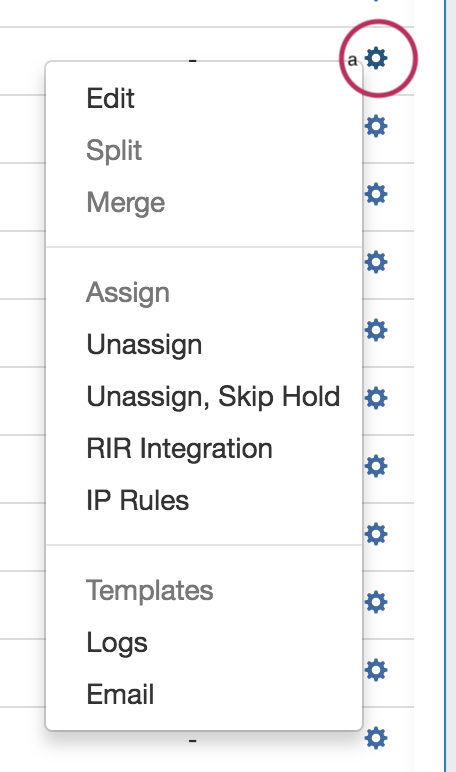
The Action Menu contains the following options:
| ||
| Column | ||
| ||
| Column | ||
| ||
The Action Menu contains the following options:
|

...
To aggregate blocks, select "Merge" from the same menu.
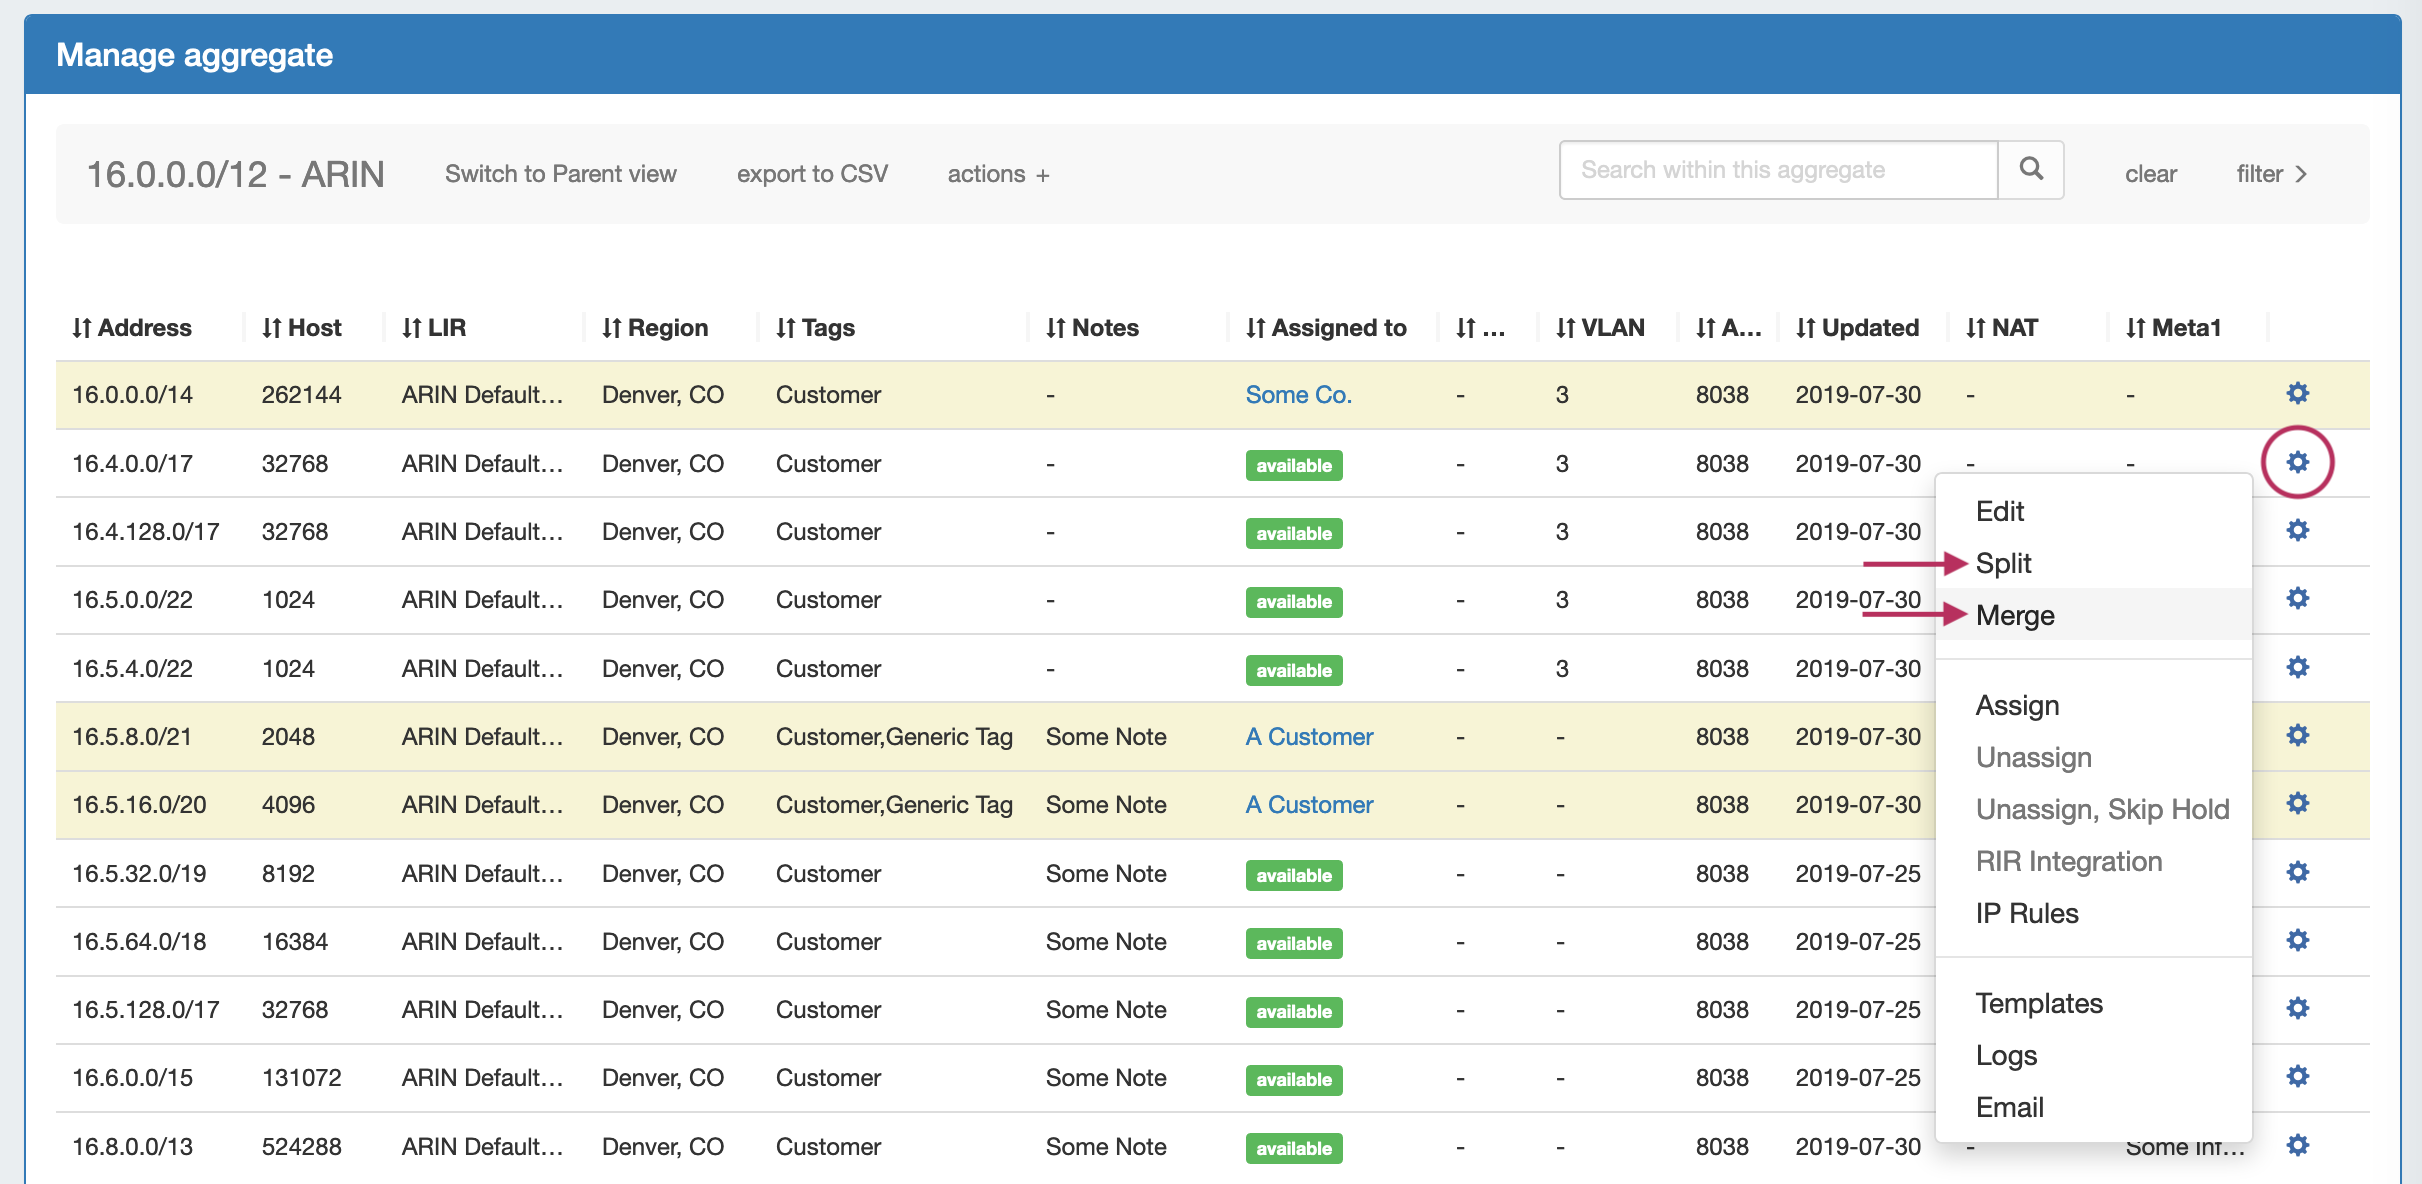

The Split option is not available for blocks that are already of the smallest available size ( IPv4 /32s or IPv6 /128s), for blocks in "Holding", or for blocks that are already assigned and do not have subassignments enabled. If more than one level of splitting is needed, use "Templates - Auto Split" instead.
...
Templates for a block are available under the Action Menu (wrench icon or right-click) for that block. Templates are only usable from IPAM Manage.
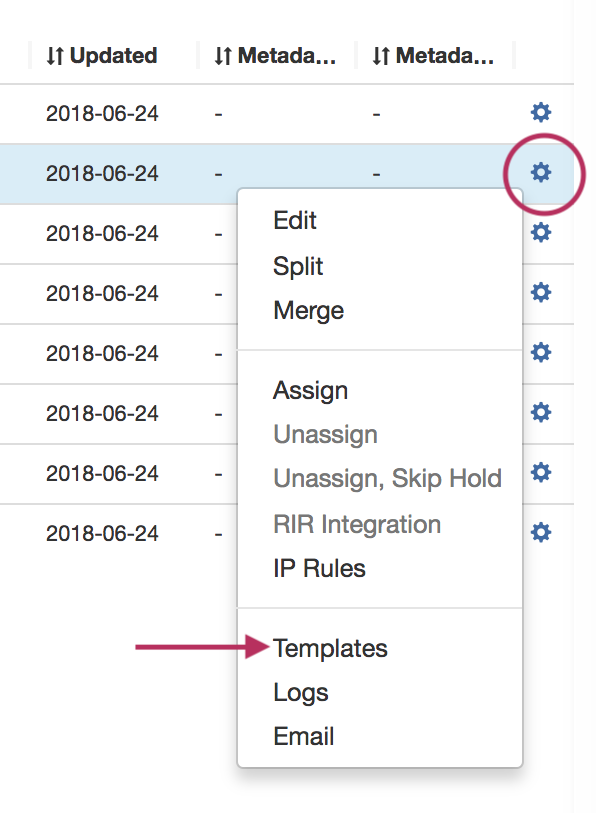

There are two templates available: Cleanup (Only available for parent blocks) which auto-aggregates the block, and Auto-split.
...
Select the "Edit" option from the Action Menu (or double click on the block row) for a given block to get the Edit Attributes menu.

To edit multiple blocks at a time, shift-click each block you wish to edit - they will highlight in blue. Once selected, right-click on any highlighted block to open the multi-edit attributes screen.
...
ASN: The ASN to associate with the block. ProVision auto-generates AS-Resources when an ASN is provided for the field in standard ASN format.
Region: Select the region from the drop down menu. Regions can be added and customized in the IPAM Admin section of ProVision - see IPAM Administration and IPAM Parameters.
...
Resource: The resource assigned to the block. Click "Create and assign" to create a new resource to assign the block to if desired.
NAT: The corresponding public or private block CIDR that is associated with the current block.
Metadata1 - Metadata 10: User-defined text fields, as set in IPAM Administration Edit Columns.
Allow SubassignmentsSub-assignments: When editing a block that has been assigned, toggling this setting to "On" allows for further subassignments, indicated by a blue arrow next to the assignment in the Manage screen. Note: Subassign status cannot be changed if a block has children.
...
To view parent blocks, and which children would be affected, ensure that top level or all masks are selected in the Filter menu in the IPAM Manage screen. See Working with IP Blocks for more information.
| Info |
|---|
| Note: The VLAN of a child cannot be different from that of its parent, so for multi-level situations (Parent -> Child -> Grandchild), VLAN should be updated at the |
...
| top tier parent level. |
IPAM Auto AS-Resource
ProVision automatically creates an AS resource for ASN's entered into IPAM Manage (formatted as "AS1234" or "1234").

An ASN in IPAM Manage will link to the created resource, which will display all IP Blocks in ProVision with that ASN value. SystemAS resources may not be edited, however they may be deleted by an admin if desired.

| Info |
|---|
| Note: The VLAN of a child cannot be different from that of its parent, so for mutil-level situations (Parent -> Child -> Grandchild), VLAN should be updated at the top tier parent level. |
Assign IP Space
There are two areas where you can assign IP Space: in the IPAM Gadget for the particular Resource, or through IPAM Manage for manually assigning a block to a resource.
...
With Smart Assign, you enter criteria such as IP Type, Size, RIR, Region, and Tag information, then ProVision's automation will automatically assign a block meeting that critieriacriteria, if any exist. Smart Browse uses the same criteria, but provides a browsable list of blocks meeting that criteria for you to select from.
...
You can also assign blocks manually using the "Assign" function from the IPAM Manager screen (accessible from the IPAM Tab). Open the Action Menu for a block, then select "Assign".
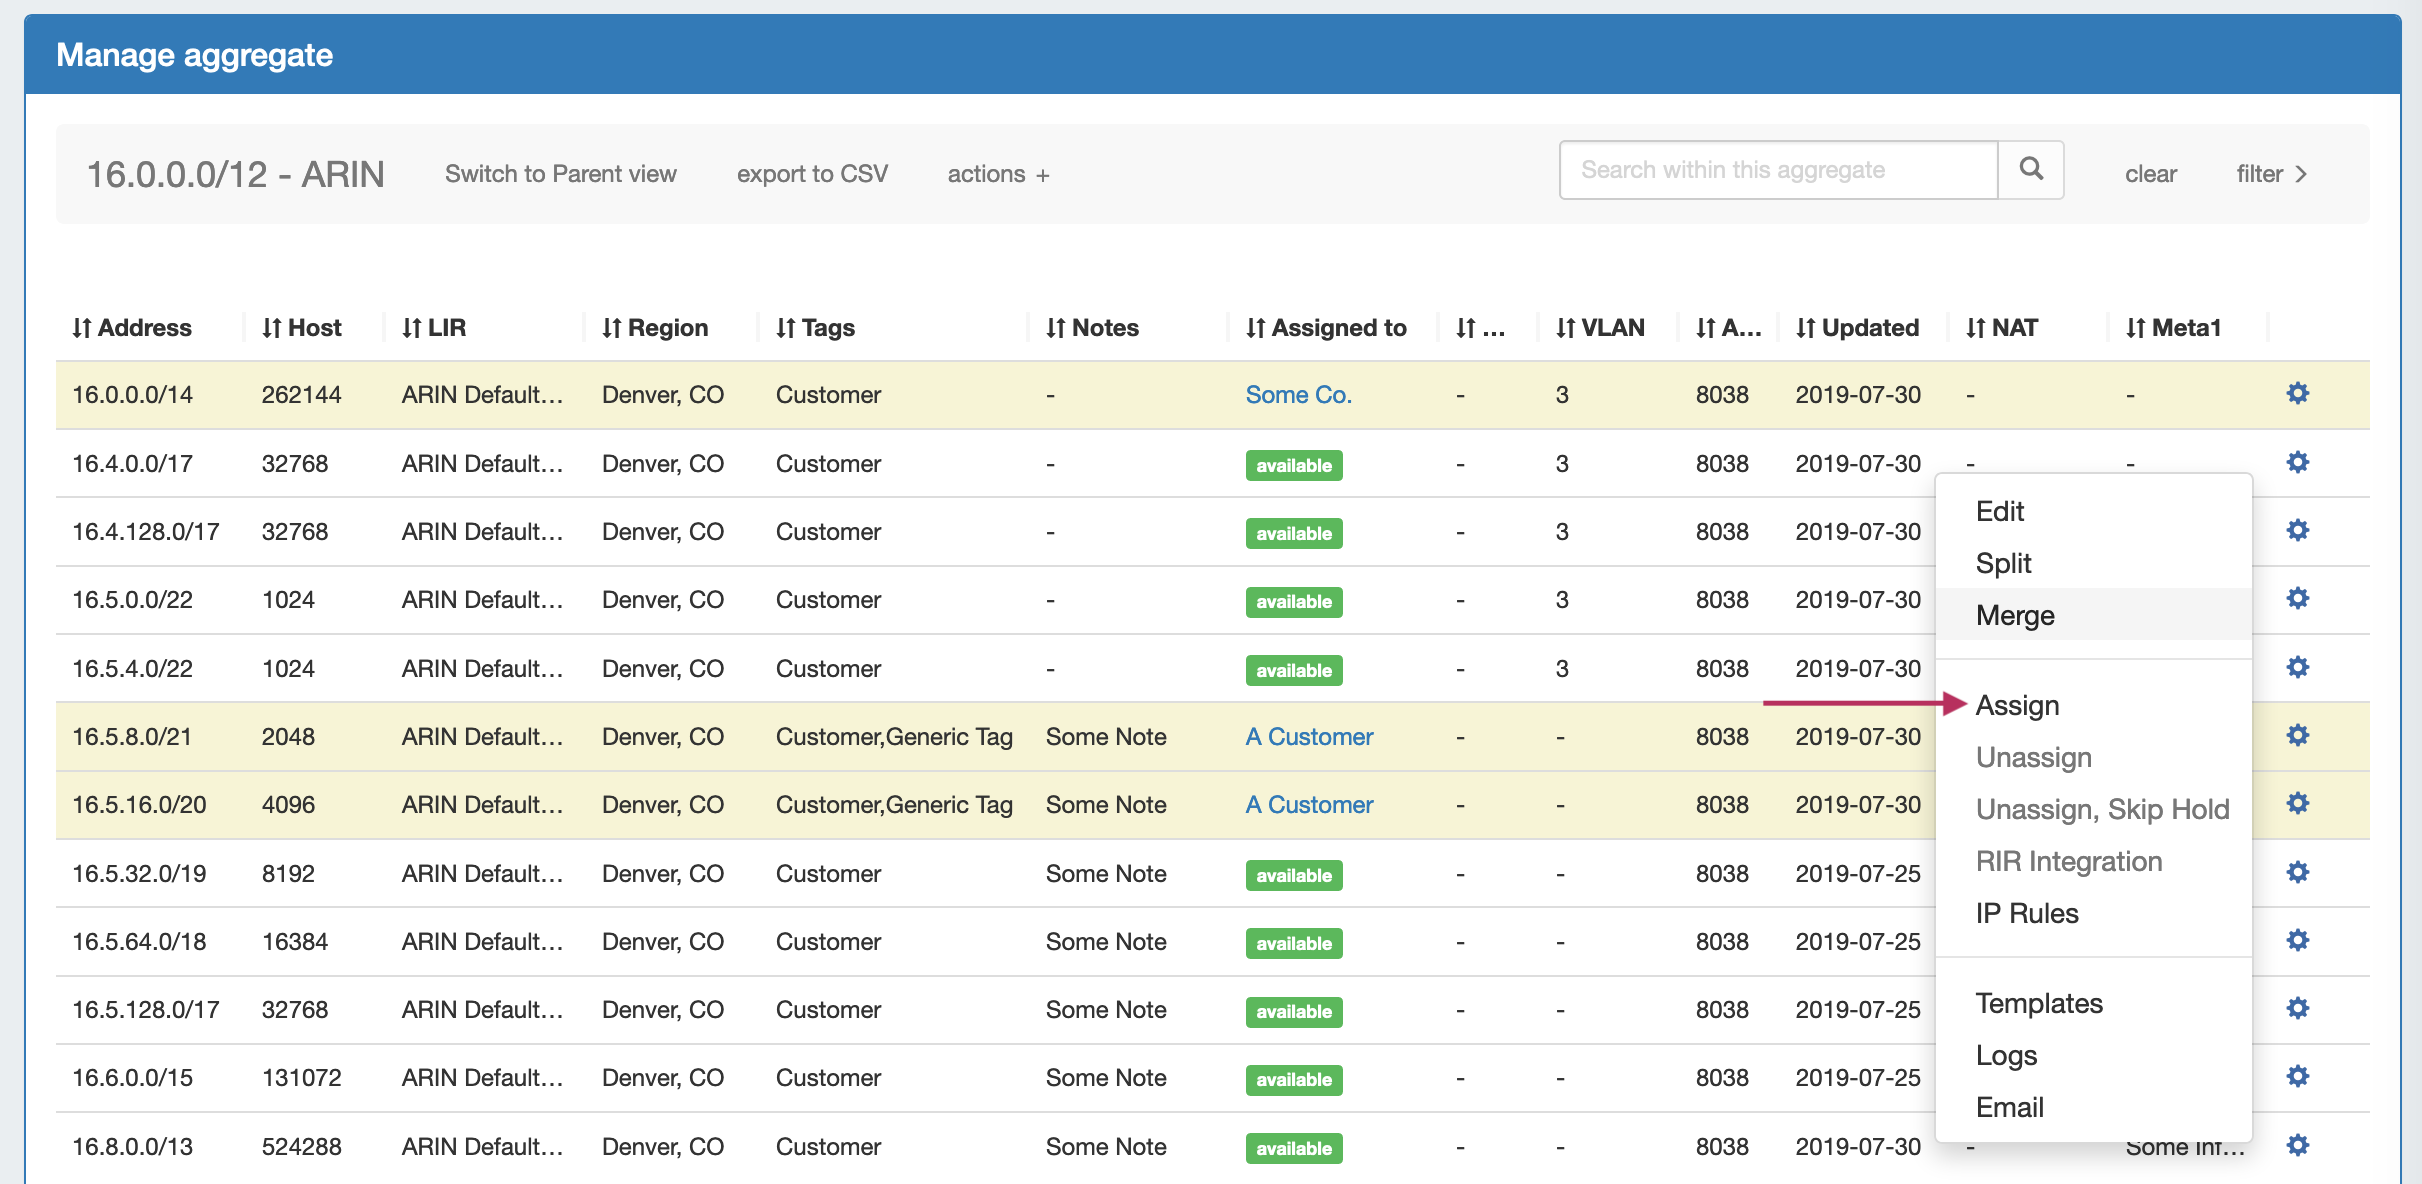

Assignments may also be performed for multiple blocks at a time, by shift-clicking the desired blocks, and right-clicking on any highlighted row to open the multi-block menu (choose "Assign Selected Blocks") :
...
You may also chose "Unassign, Skip Hold", which unassigns the block and immediately returns it to available, bypassing the holding tank.
Another option is "Move", which moves the block from one resource directly to another without passing it through either available or holding status.

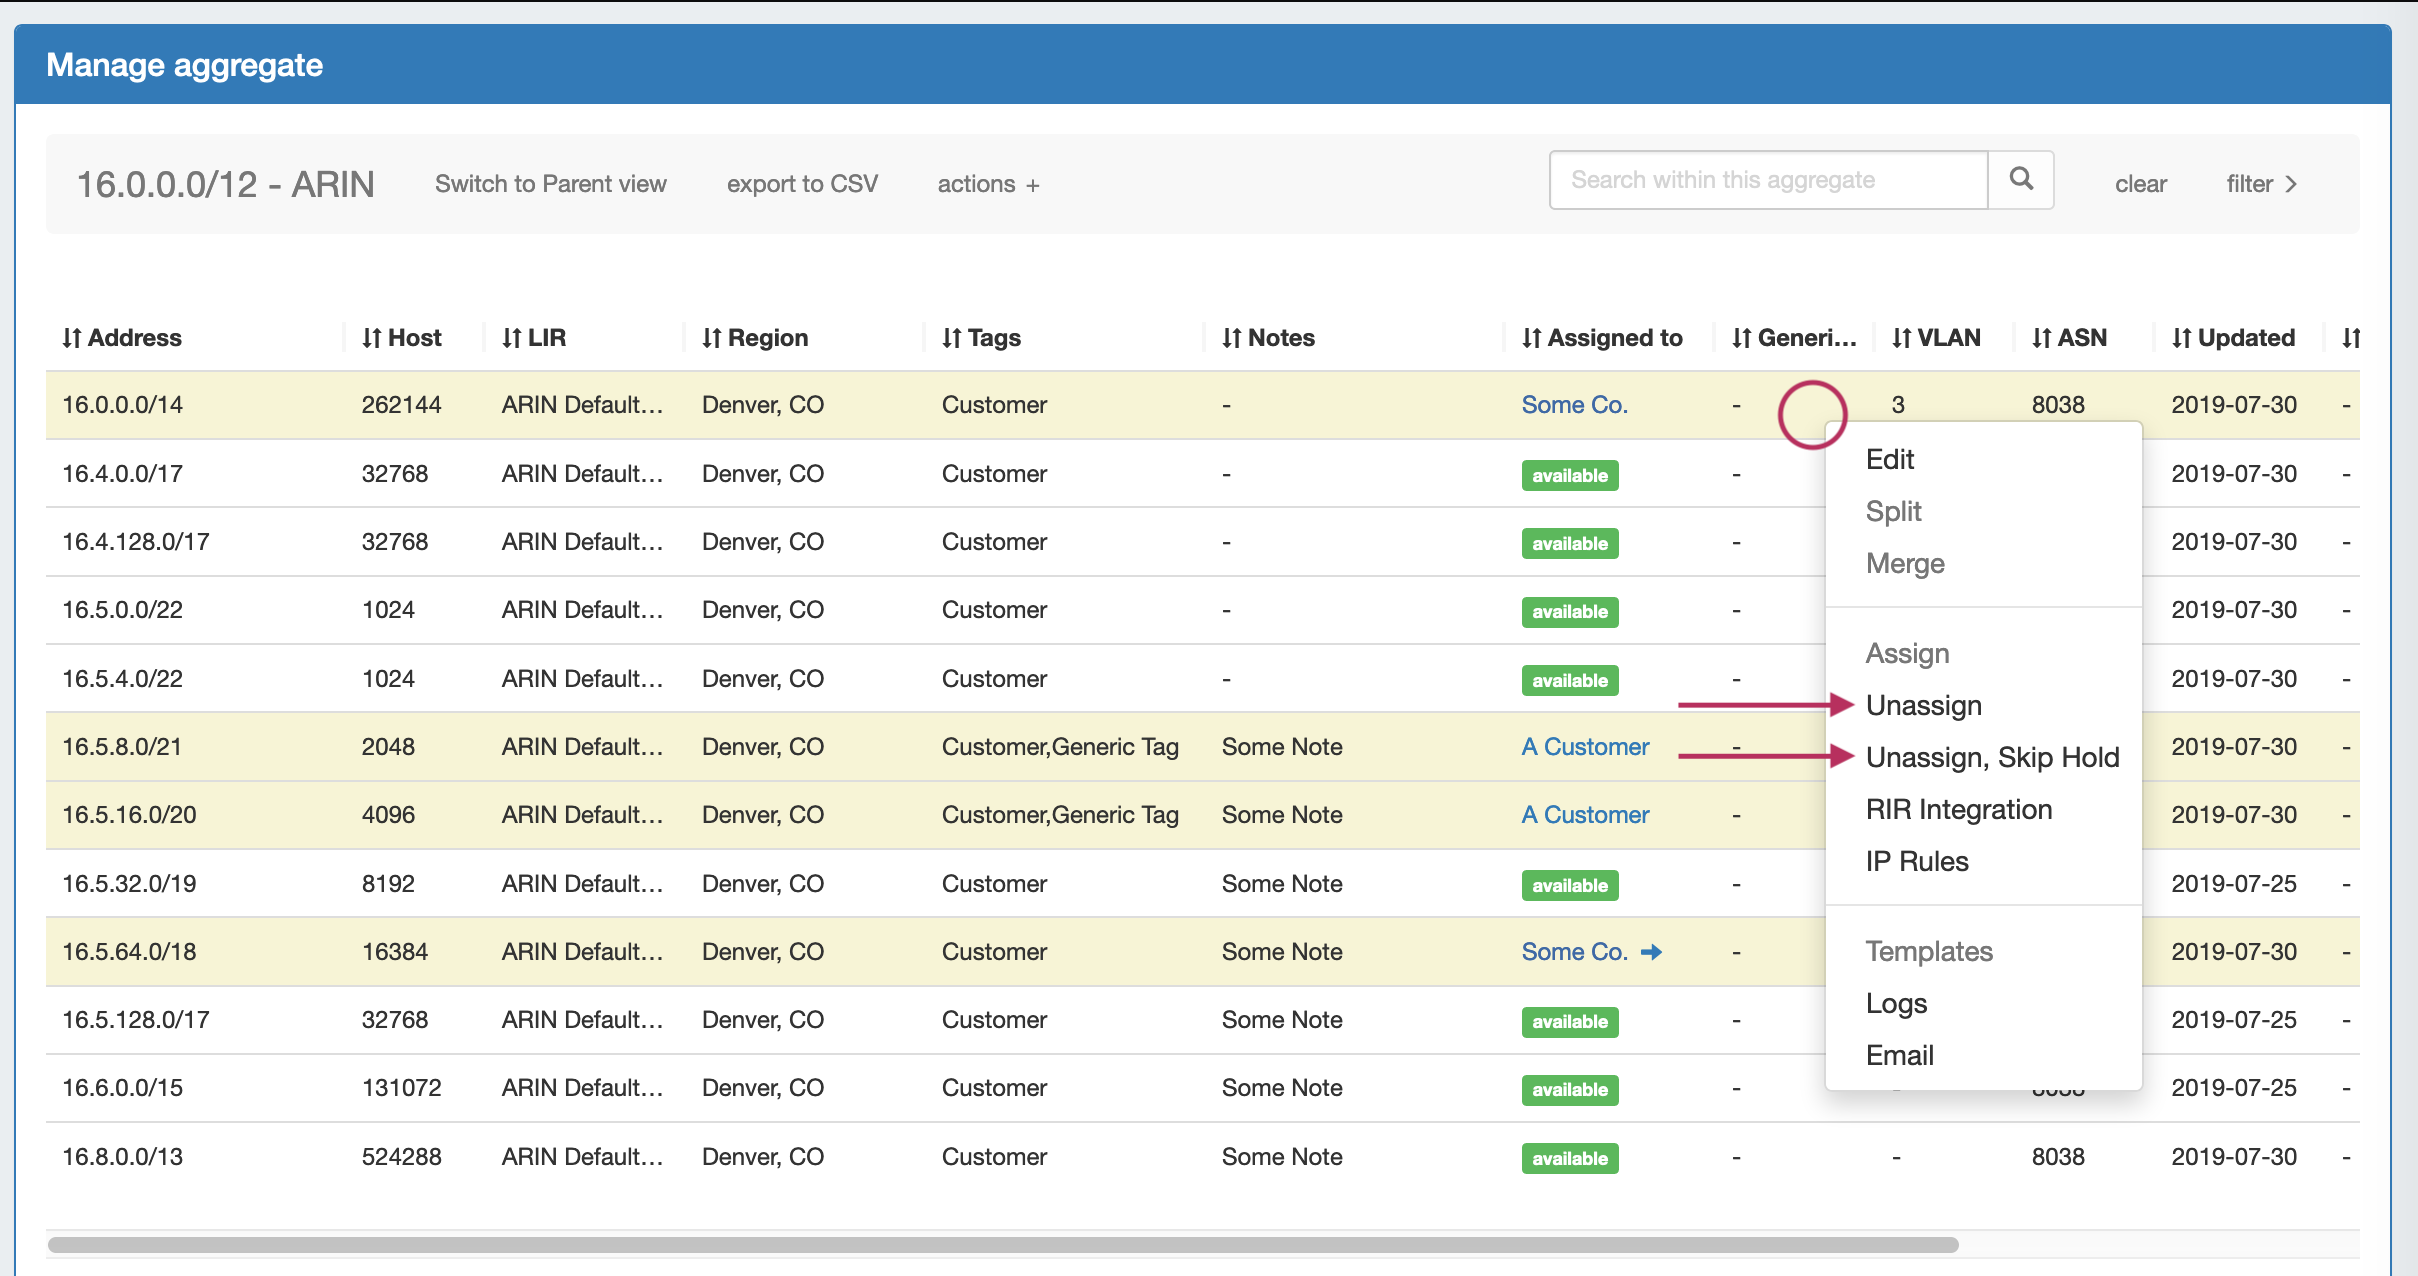
After unassigning blocks / skipping holding, newly available blocks will be merged upon next page refresh. Blocks which had been subassigned will revet back to the parent resource.
...
For more information on the Holding Tank, see Holding Tank Management.
| Tip |
|---|
For a fast method of unassigning all blocks from a particular resource, you may also bulk-unassign IPs from the Resource List! See Working with Entries |
Working with NAT Blocks
Track IP NAT Associations
...