IPAM Parameters - Overview
IPAM Lists Management is access from the Admin section of ProVision, under the IPAM Admin tab. Through this area, admin users can update IPAM tags, regions, IPv4 subnets, and IPv6 subnets.
| Table of Contents |
|---|
Add / Edit IPAM
Overview
The elements
...
Tags
When you are applying properties to IP blocks, you have the option to edit tags. IPAM Tags are used in a number of ways areas in ProVision and can be added or edited from this screen. You can specify tag values along with sorting options to make it simpler to use. Regions are used by the IPAM Gadget and the IPAM Management UI).
...
.
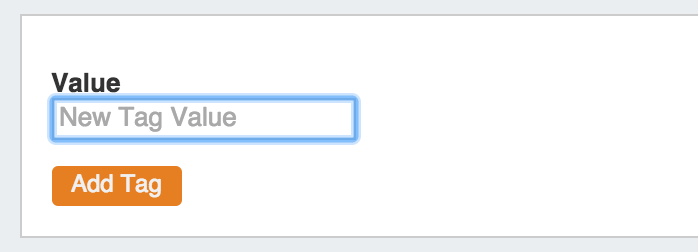
To add a new IPAM tag, click on "Add Tag" at the top of the Edit IPAM Tags page.
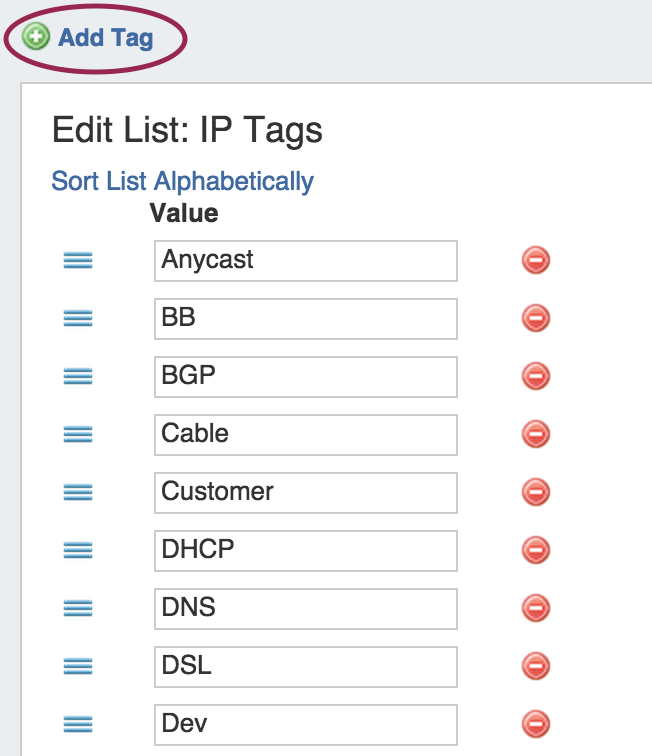
Then, type in the desired name value for the new tag, and hit "Add Tag".
To edit a tag, simply type your changes in to the text box with the tag name. Tags with unsaved changes will be highlighted until saved.
To delete a tag, click on the red "delete" symbol to the right of the tag name.
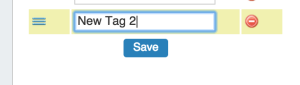
When complete, be sure to click on the "Save" button to save your changes.
Add / Edit Regions
If enabled, Regions can function as a way to further define your network segments (regional tie-downs, etc.). This simply gives you flexibility for allocations and assignments beyond simply using Tags. Regions are used by the IPAM Gadget and the IPAM Management Manage UI).
...
.
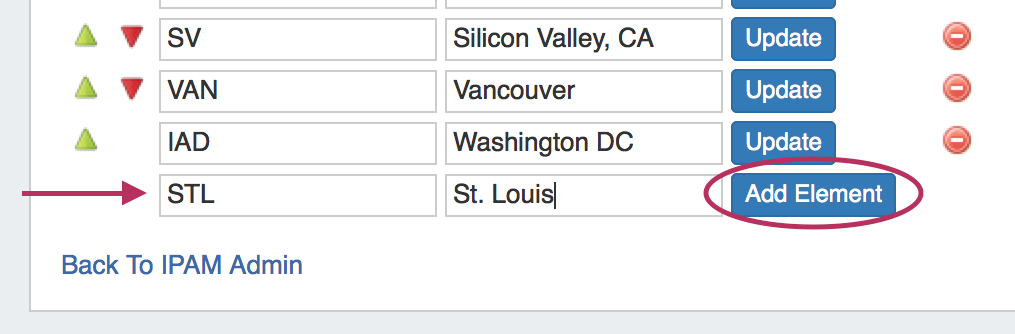
The Regions display includes fields for both Value and Display. 'Display' is the region name that will show in the IPAM Gadget and IPAM Manage screens, whereas 'Value' is the value that will be written to the database, used for API calls, and is also used for some filter selectors.
To add a new Region item, type in a new Value and Name into the empty fields at the bottom of the list.
![]()
Then, click "Add Element.
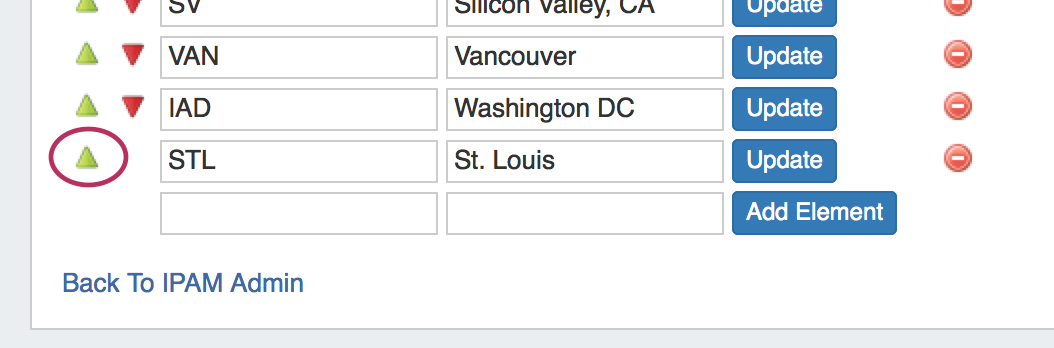
The new region entry will be added to the bottom of the region list. From here, you can manually set the entry's position in the list by clicking the up/down arrows to the left of the entry.
You may also automatically sort into alphabetical order by clicking the "Reset Order to Alphanumeric" link at the top of the page.
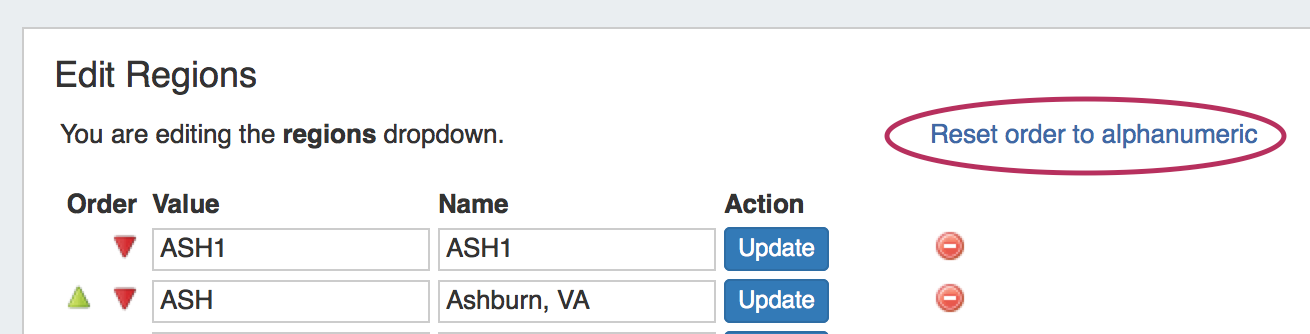
To edit a region, simply type your changes in to the text box with the region name. Then, click on the "Update" Button.
To delete a region, click on the red "delete" symbol to the right of the region name.
Add / Edit IPv4 / IPv6 Subnet Dropdowns
When assigning blocks using the "Smart Assign" function in the IPAM Gadget, the user has an option to assign an IP resource by allocation size. ProVision supports assignments down to a single host level (/32 for IPv4, /128 for IPv6).
| Info | ||
|---|---|---|
| ||
Keep in mind that this is a global edit. If the values in the dropdown are changed, it will affect ALL users of the ProVision application |
Edit Exact Filter Dropdowns for Filter by Netmask
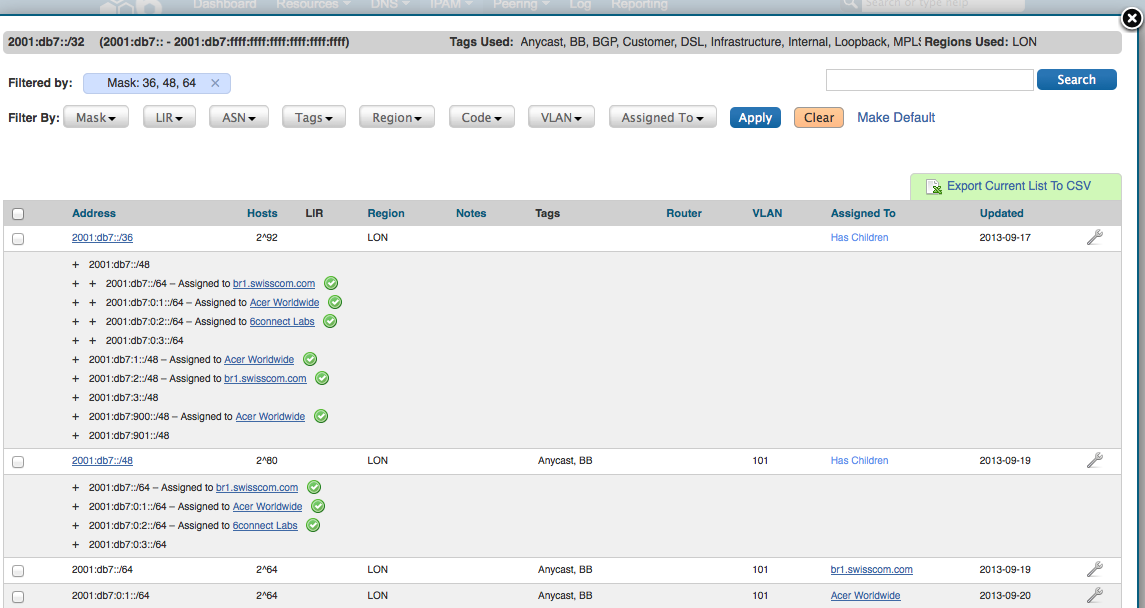
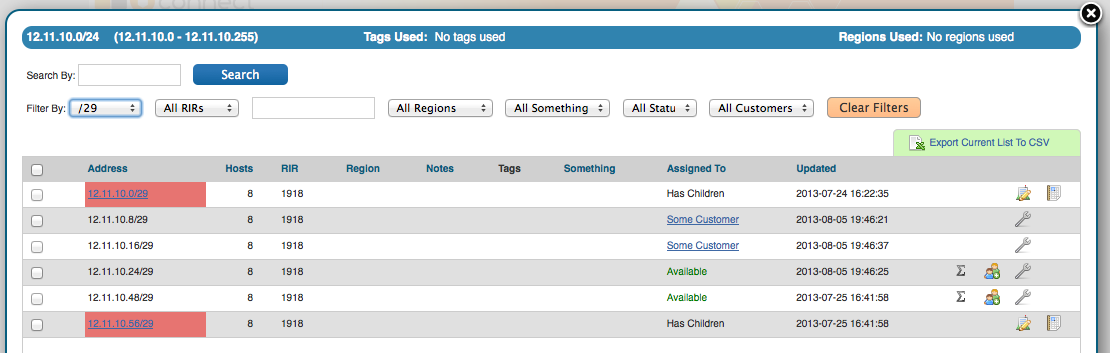
On the IPAM Manage screen, you have an option to Filter the view by selected Subnet Mask (dropdown).
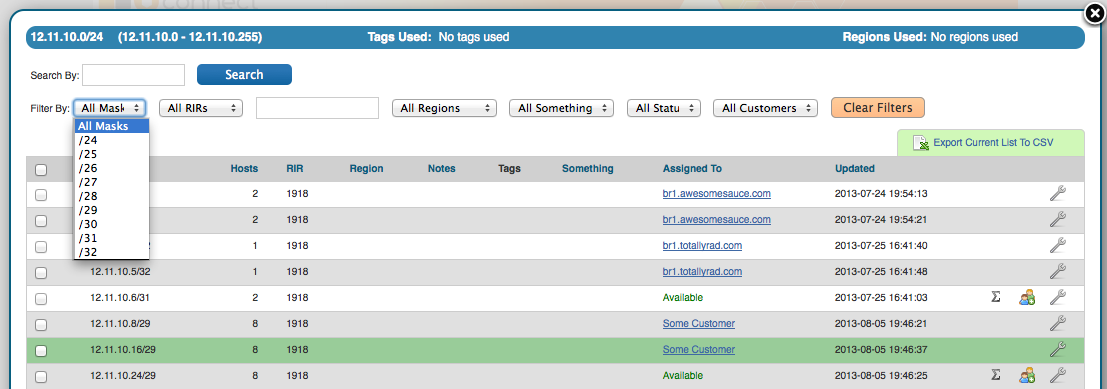
With the Filter By view enabled, the user then gets a simpler view. The user can then click on the red block, and view the additional assignments/allocations underneath it.
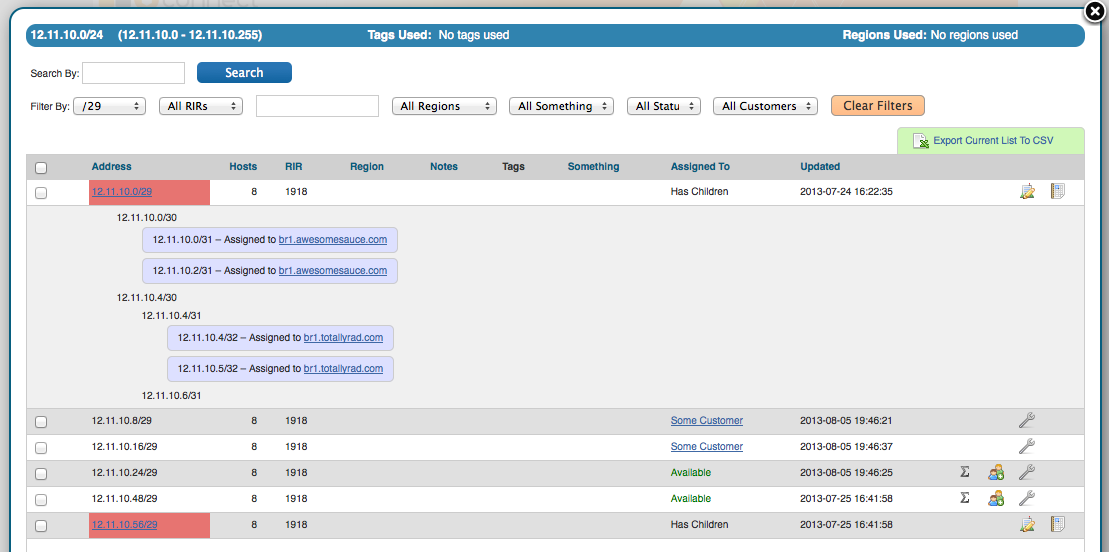
Here is the view after clicking on the block. The user can also see the SWIP/RPSL status for a given allocation/assignment if applicable.
Note that as of 4.1, there are more options for managing filter options and the ability to set a view as Default
To add a new Subnet item, click on "Add Item" at the top of the Edit List: IPv4 or IPv6 Subnets page.
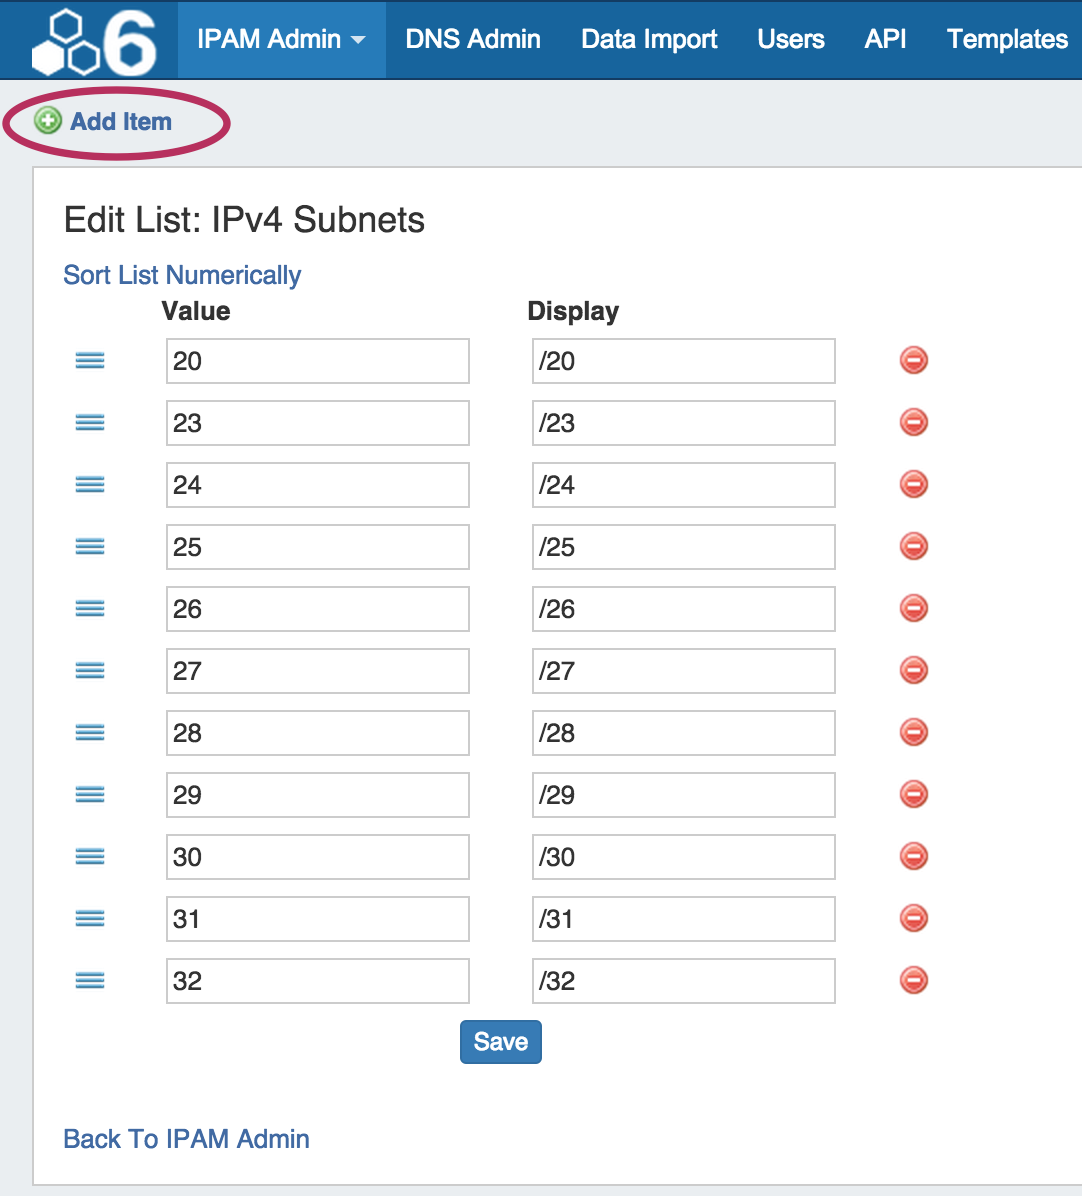

After adding a new item, it will show at the bottom of the list highlighted in yellow. Hit "Save" to save your changes.
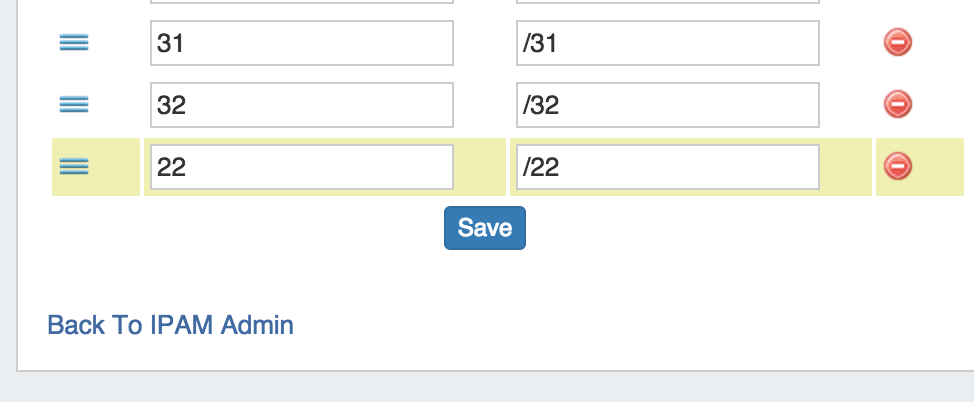
To edit a subnet, simply type your changes in to the text box. Entries with unsaved changes will be highlighted until saved.
After adding or editing a subnet, you may wish to clean up the list order by hitting "Sort List Numerically" at the top of the page to reset the list order including the new entry.
To delete a subnet, click on the red "delete" symbol to the right of the subnet entry.
When complete, be sure to click on the "Save" button to save your changes.