...
This page provides detailed instructions on performing specific tasks in ProVision's the VLAN Manager. Before reading this section, please ensure that you are familiar with navigating to the VLAN areas, including the VLAN Sidebar, VLAN Utilization area, VLAN Manage, and VLAN Advanced. For a broader overview of the VLAN system, its workflow, and basic navigation through the available VLAN pages, please refer to the the VLAN page. For domain level tasks, see Working with Domains.
...
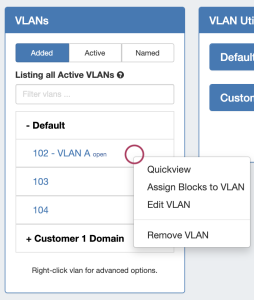
- On the VLAN Home page sidebar, by right clicking on the VLAN and selecting Remove VLAN from the menu
- From the VLAN Utilization Box for the VLAN, by clicking the gear icon and selecting Remove VLAN
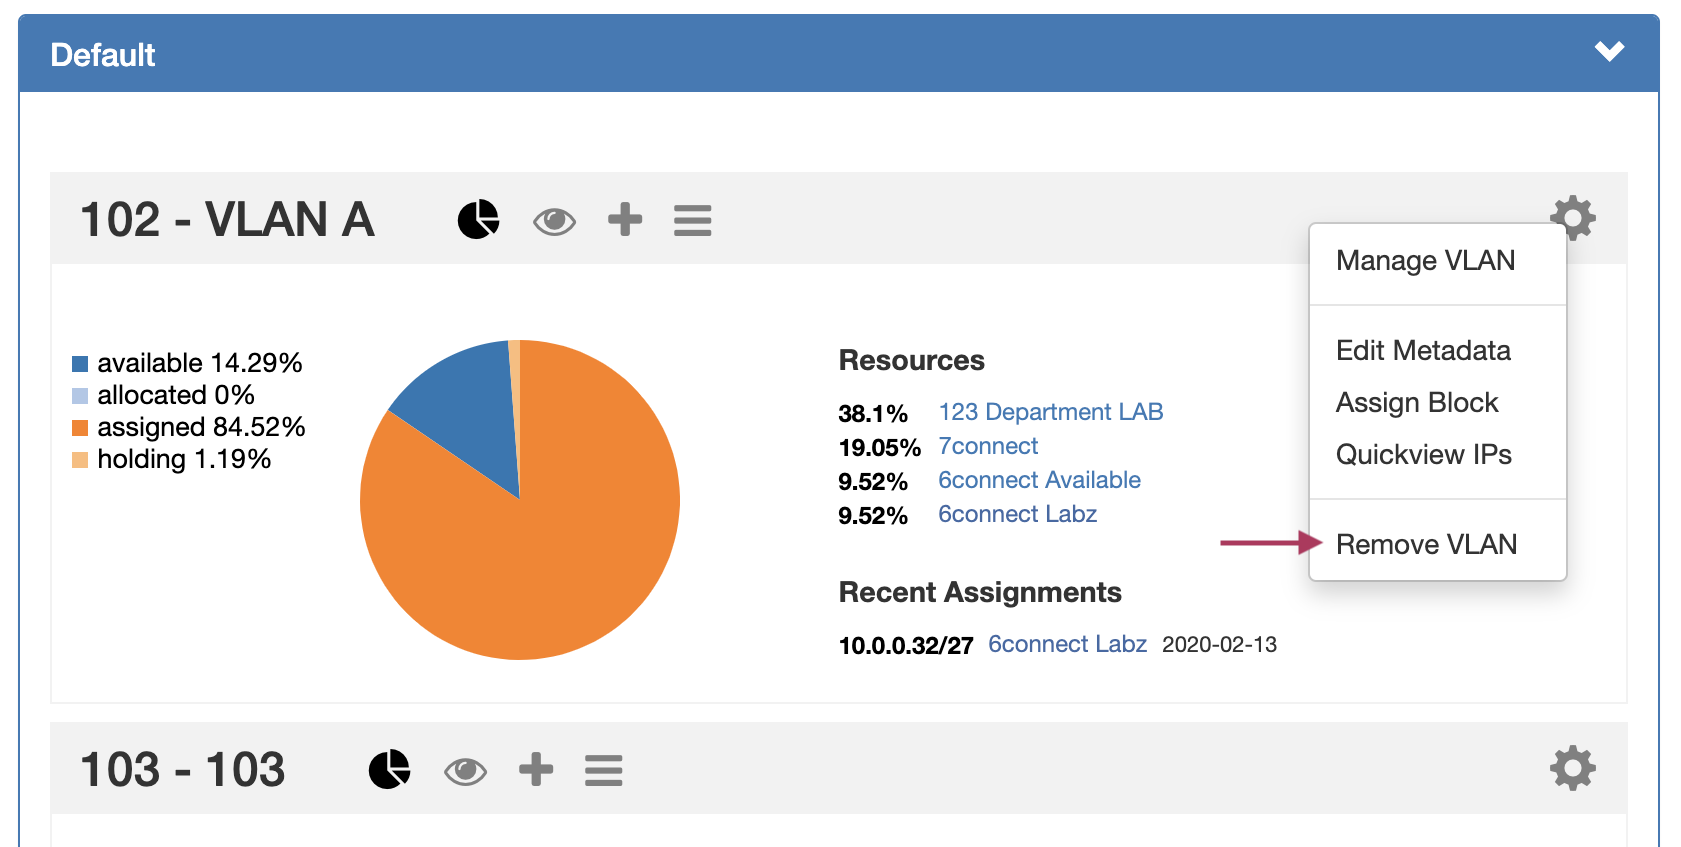 Image Removed
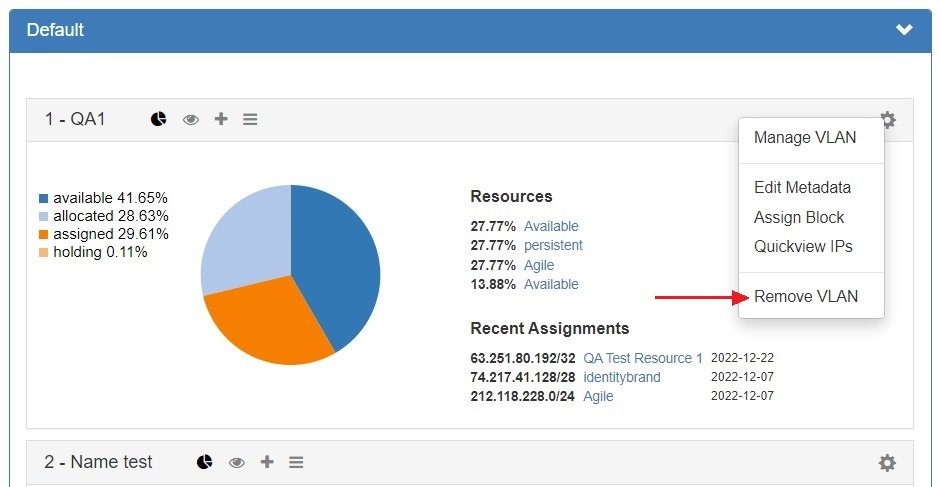 Image Added
- From VLAN Advanced, by right clicking on the desired VLAN in the list, and selecting Remove VLAN
...
| Expand |
|---|
Direct Assign to VLAN| Expand |
|---|
To Direct Assign a specific block to the VLAN, expand the Direct Assign to VLAN module, then enter the CIDR to assign into the CIDR"box, and click Add IP Block . 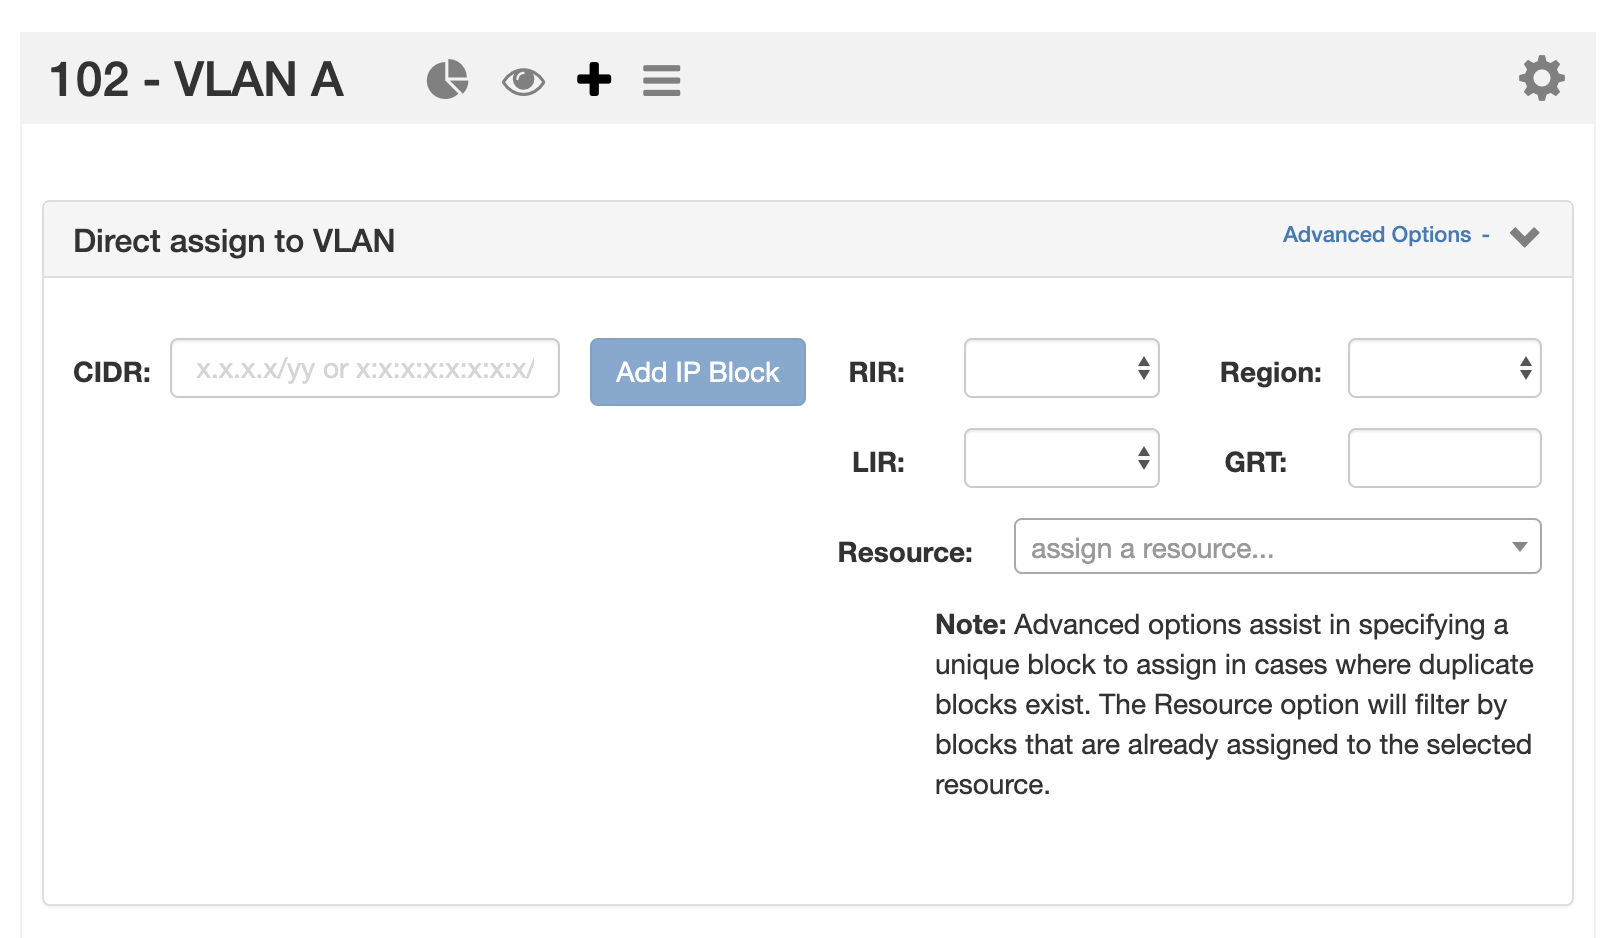
If blocks exist with the same CIDR (such as in duplicate 1918 space), you may differentiate between the two by clicking on Advanced Options, and providing additional filter criteria to use to assign a specific block. |
Smart Browse to VLANSmart Browse to VLAN is used to search for a general list of blocks available to assign to the VLAN that meets certain criteria. | Expand |
|---|
Expand the Smart Browse module by clicking on the header bar . Then, enter your filter criteria. At minimum, block type, size, and RIR must be provided; region and tags are optional. 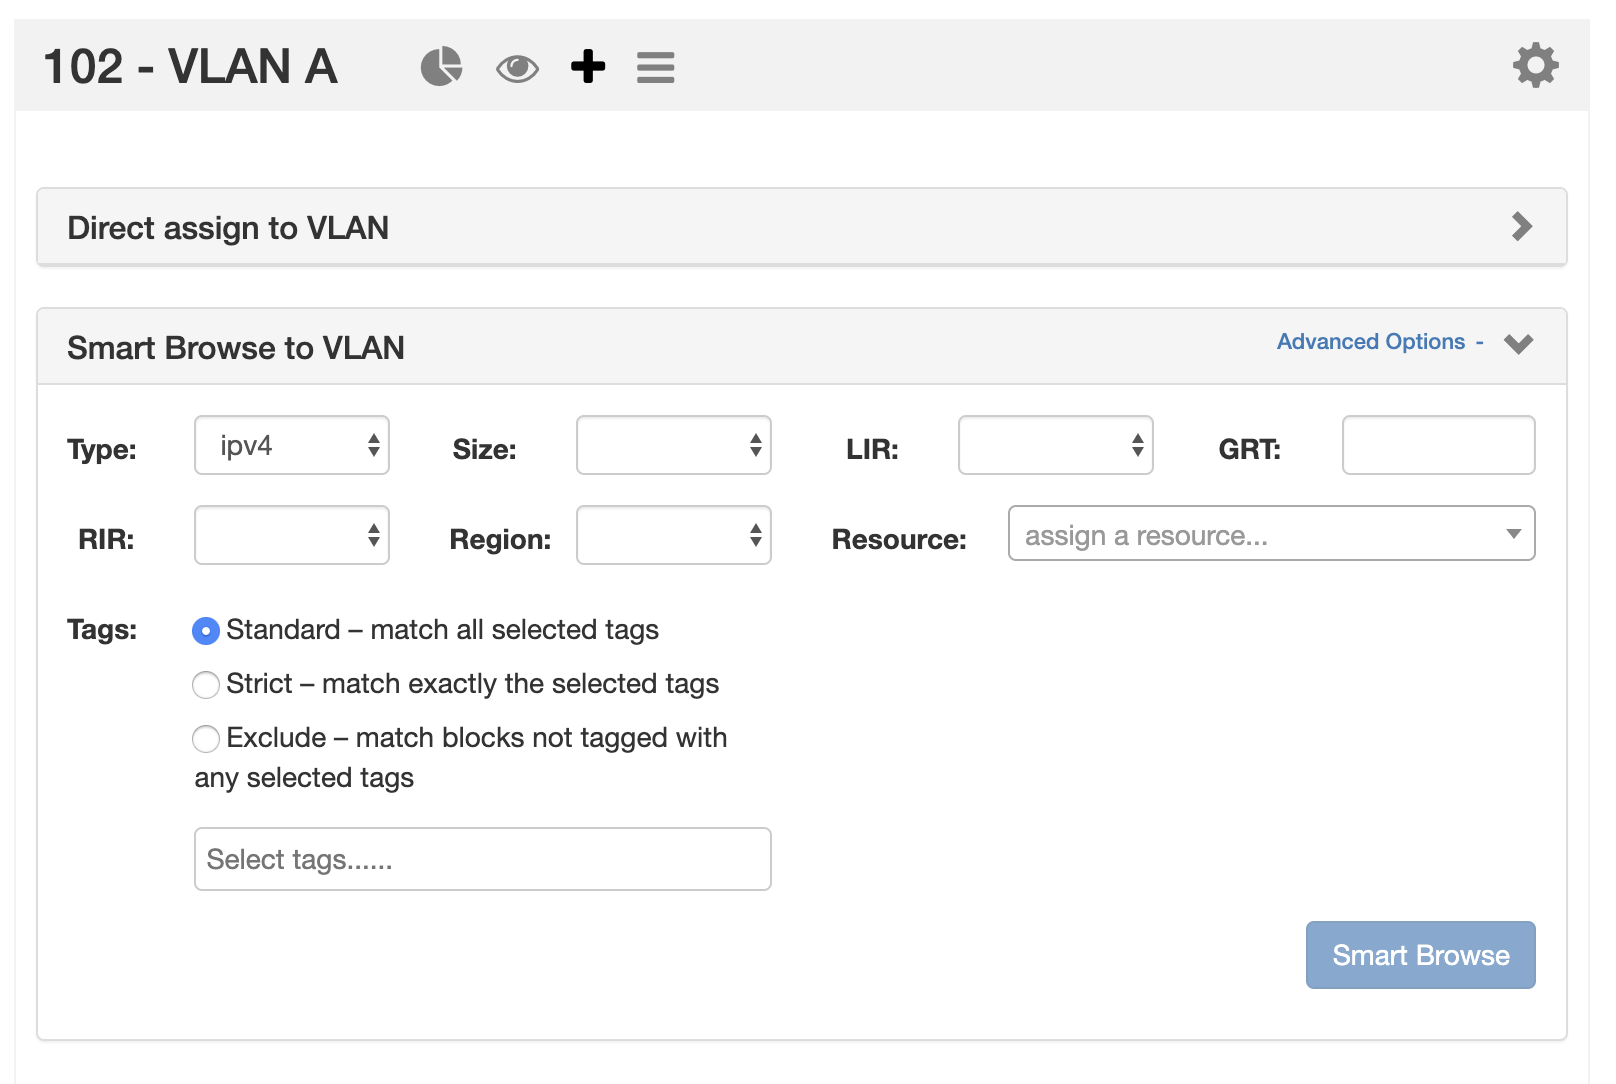
If further filtering is needed, click Advanced Options to open the LIR, Custom Code (here: as "GRT"), and assigned resource fields to use. Once you have entered your filter criteria, click Smart Browse to display your results. |
Assigning from Smart BrowseThe Smart Browse results list will display a list of blocks that a) meet your filter criteria, and b) do not already have a VLAN assigned. You may assign individual blocks immediately (Add IP Block), or select multiple blocks and delay assignment until after your final selections are complete (Assign Selected). Immediate Assignment: | Expand |
|---|
To assign an individual block immediately from the list to the VLAN, click Add IP Block for the desired block. 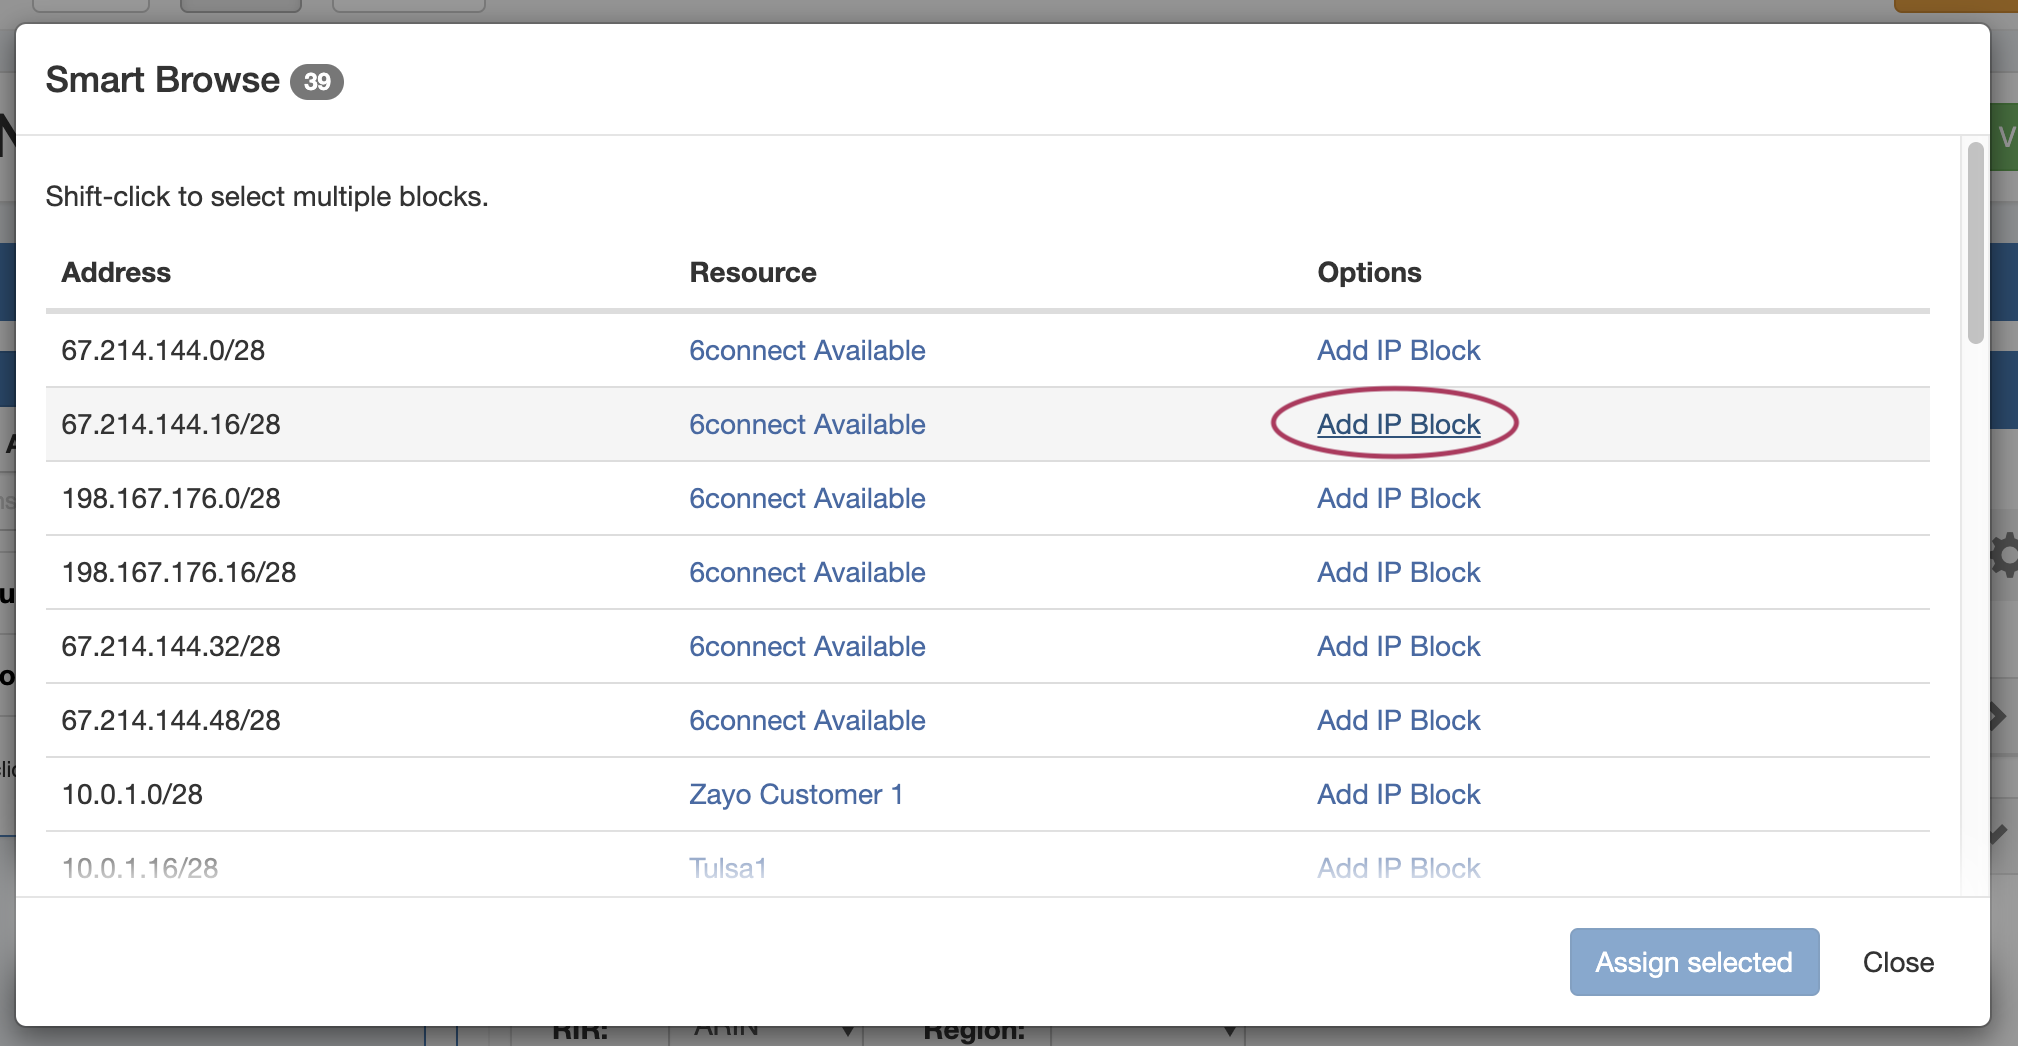 Image Removed Image Removed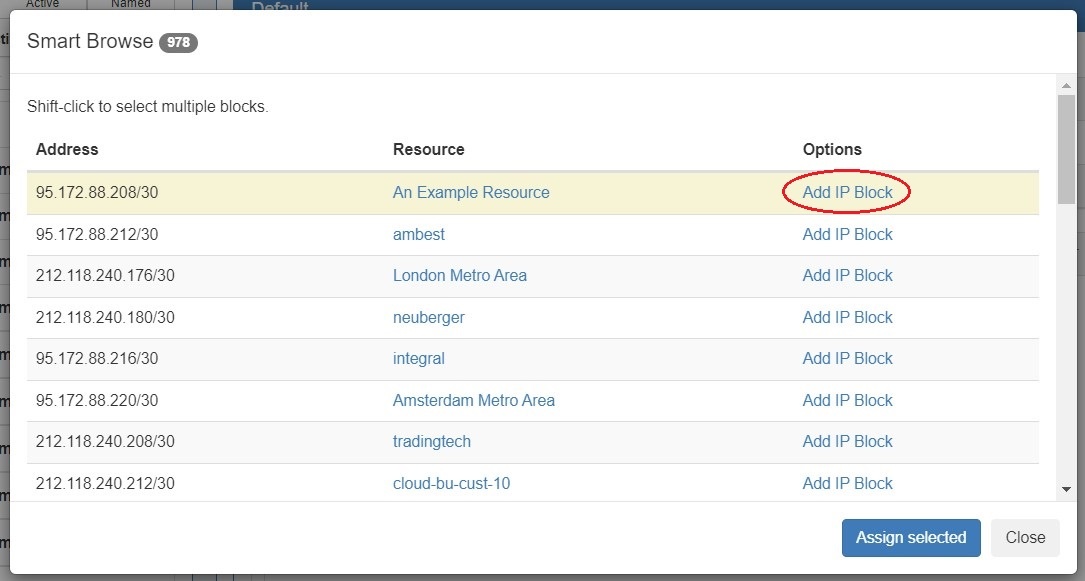 Image Added Image Added
After clicking Add IP Block, the block will immediately be assigned to the VLAN, and an "Assigned" status will display for the block in the Smart Browse list. 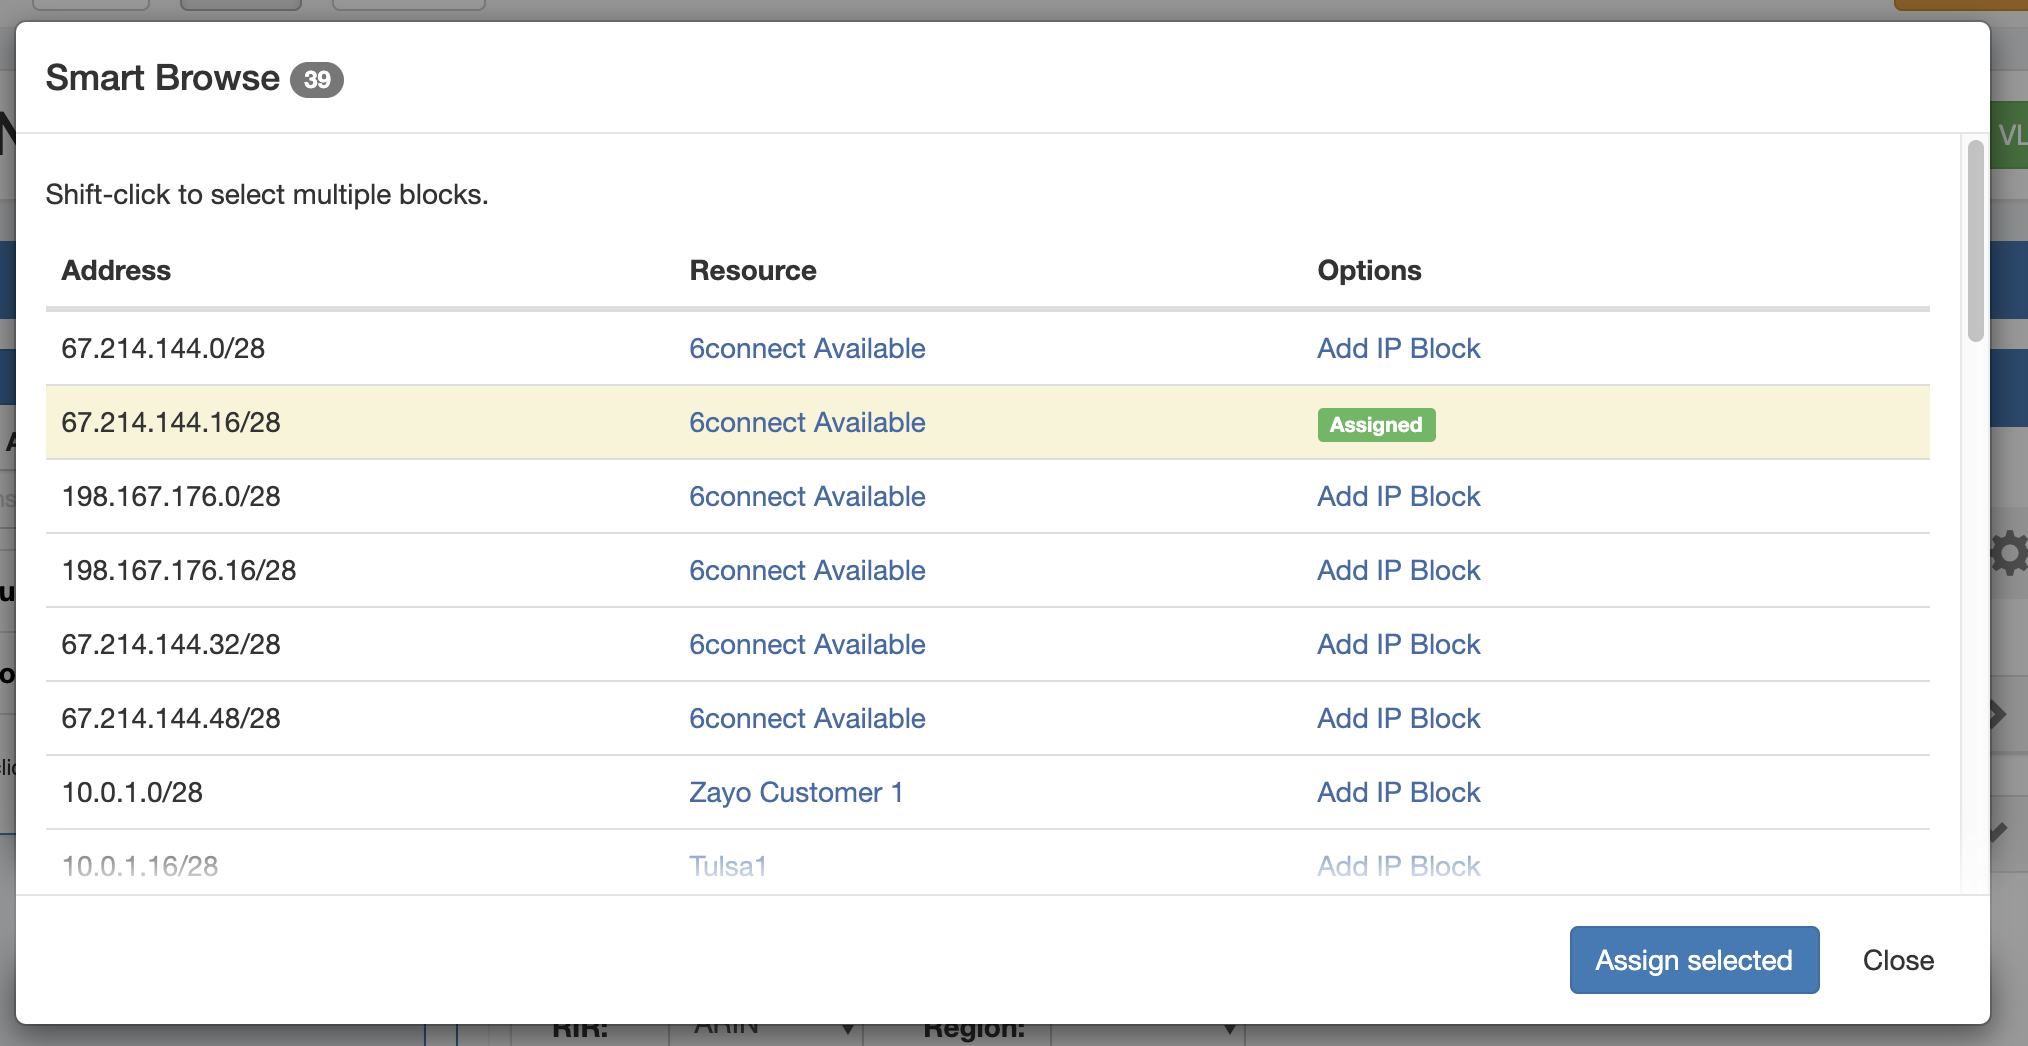 Image Removed Image Removed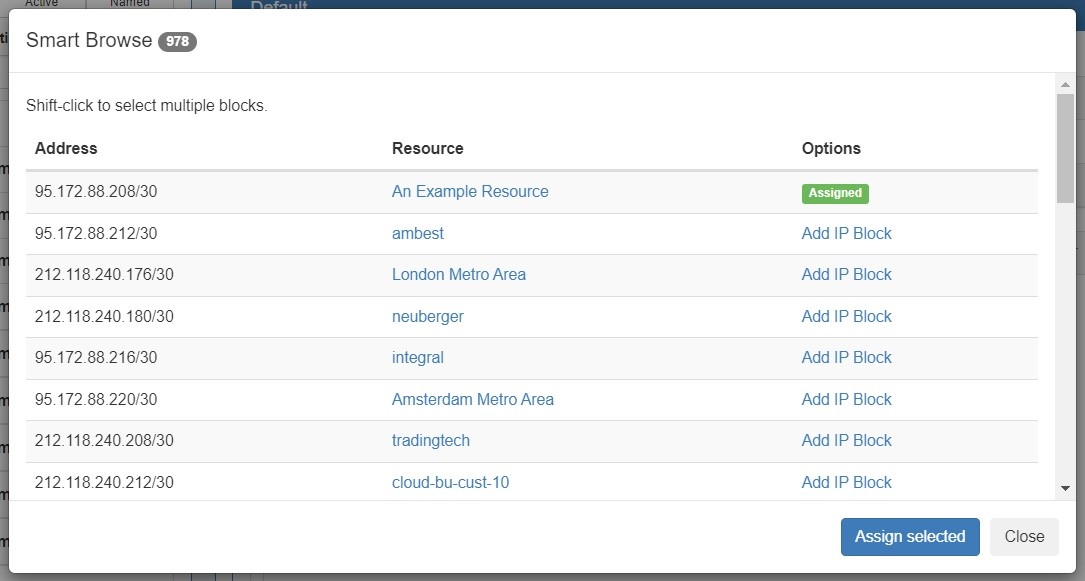 Image Added Image Added
From here, you may assign additional blocks. Click Close to exit when complete. | Tip |
|---|
| If the "Assigned" status displays for all blocks you intend to assign, then you may skip clicking Assign Selected - as nothing else remains to assign - and instead click Close to exit. |
|
Delayed Assignment / Selecting Multiple Blocks: | Expand |
|---|
If you wish to assign multiple blocks to the VLAN at the same time, or mark a single block to assign later while continuing to browse the list, you may select a block to mark for later assignment and then assign all selected blocks at once. To select a single block, left click on row for the block (taking care not to accidentally click on a blue link). Note that the row will have a yellow highlight indicating it is selected: 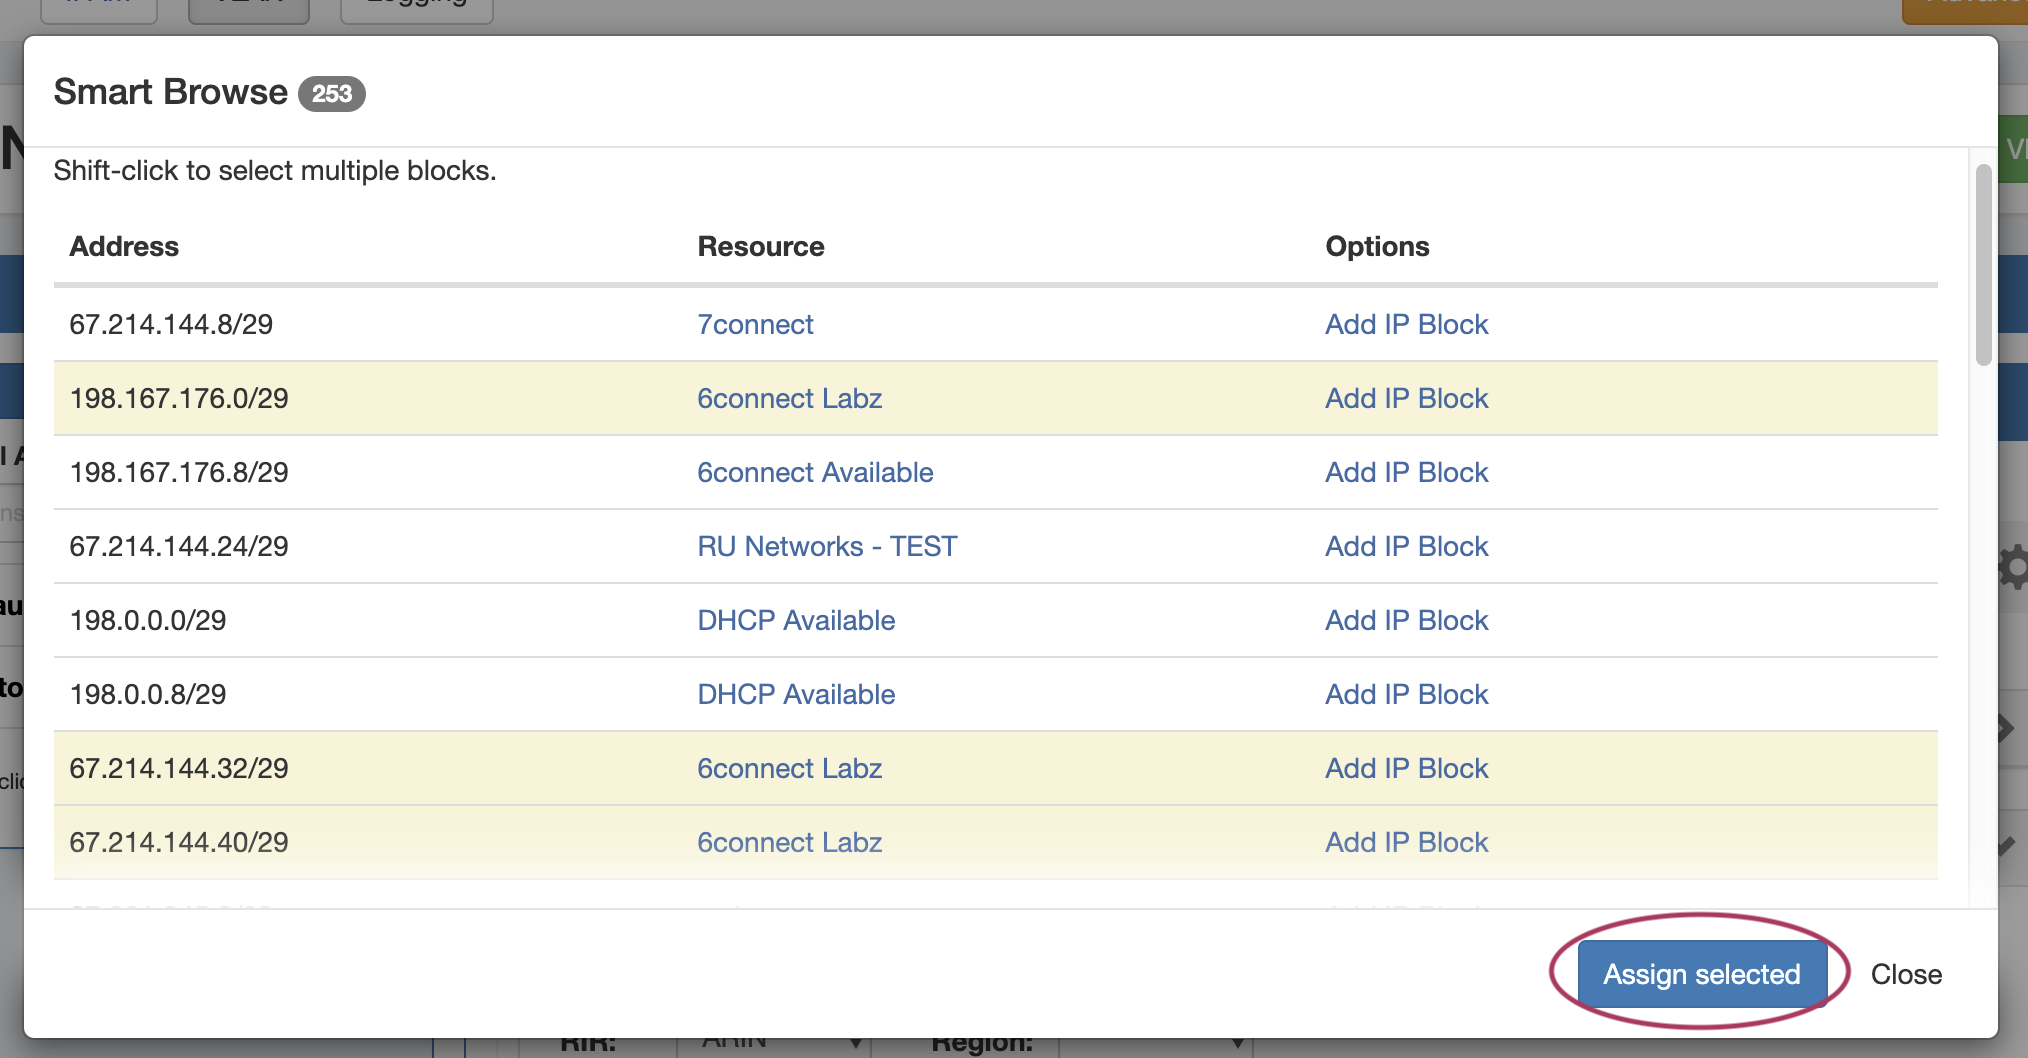
To select additional blocks, shift-click on each row you wish to mark for assignment. You may freely scroll through the results to review your selection. When done, click Assign Selected. All highlighted blocks will be assigned to the VLAN at the same time, and the Smart Browse window will close. |
|
...
To open or close the Utilization panel, click on the "Eye" icon in the grey header bar.
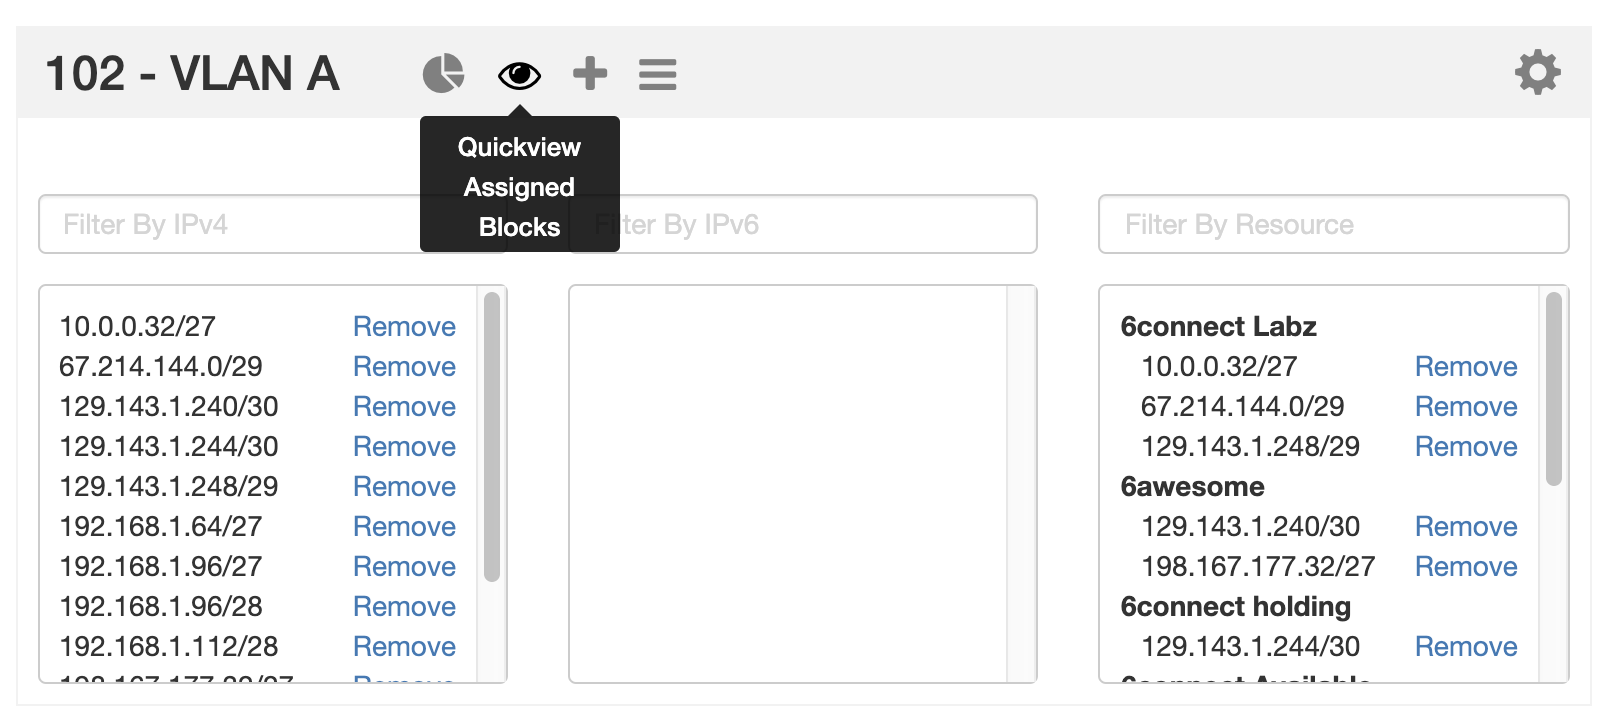 Image Removed
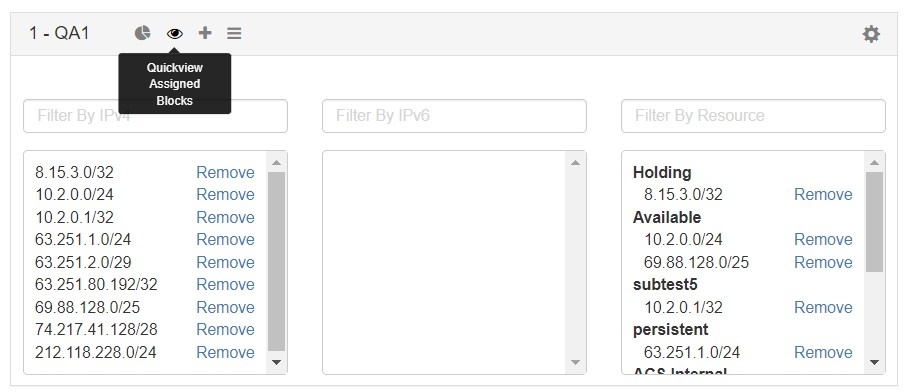 Image Added
While in the Quickview panel, you may easily search for a block by typing the all or part of the CIDR into the IPv4 or IPv6 Filter boxes - useful for verifying an assignment or quickly scanning ranges.
You may also remove a block from the VLAN with a single click of the Remove button.
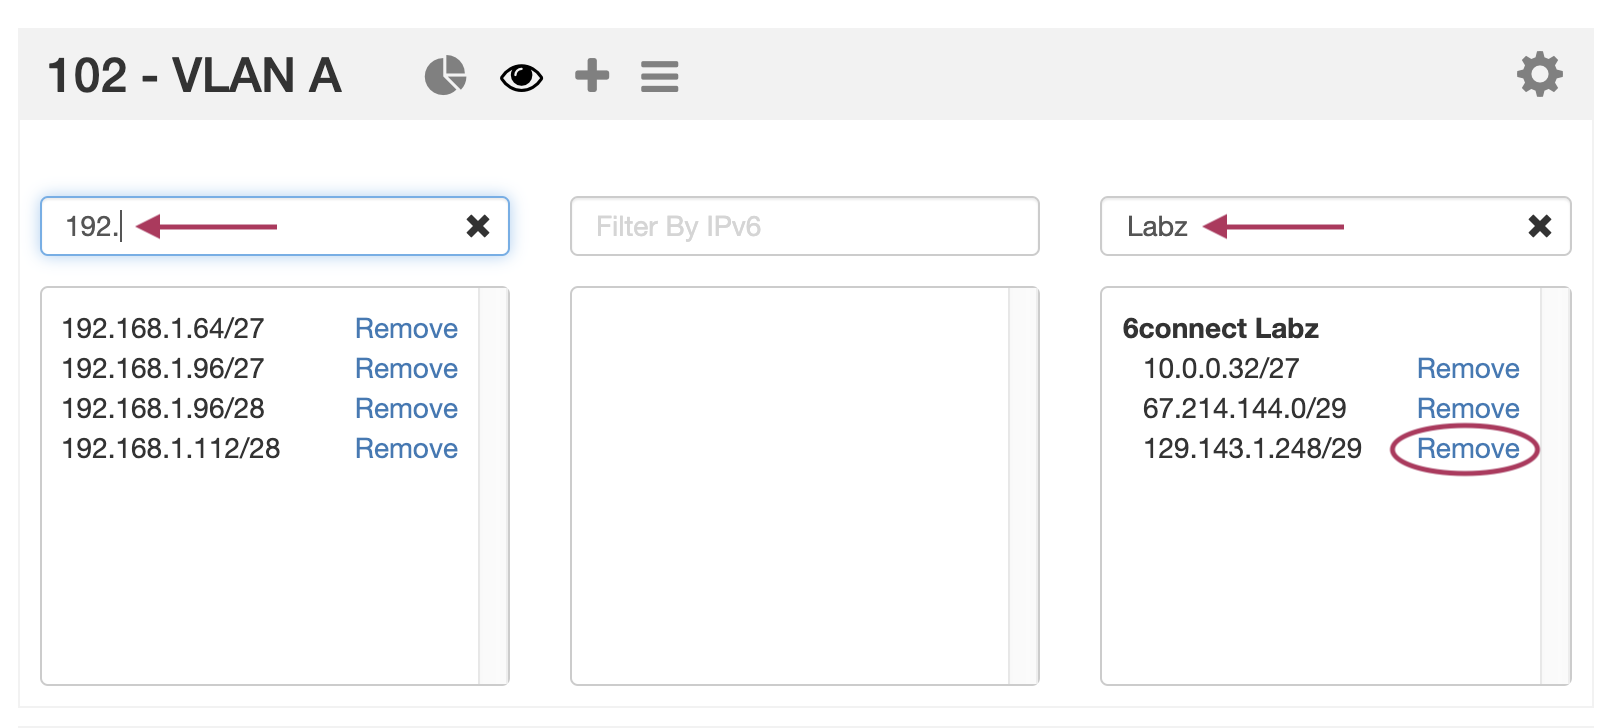 Image Removed
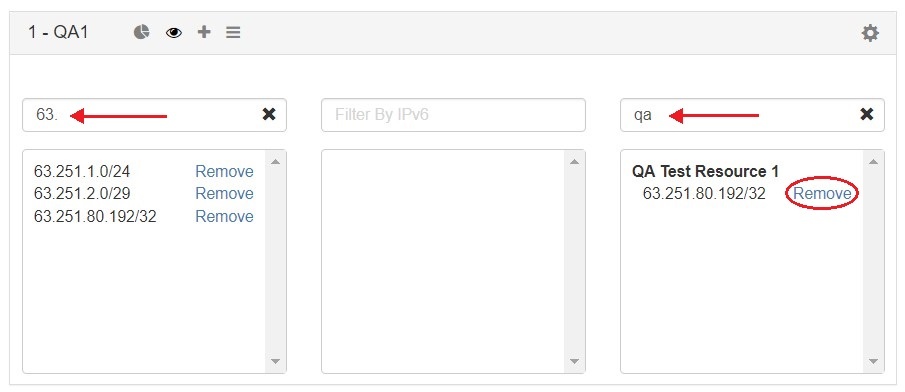 Image Added
Working with VLAN Metadata
...
VLAN metadata fields can be enabled and disabled under the IPAM Admin → VLAN Columns area of ProVision.
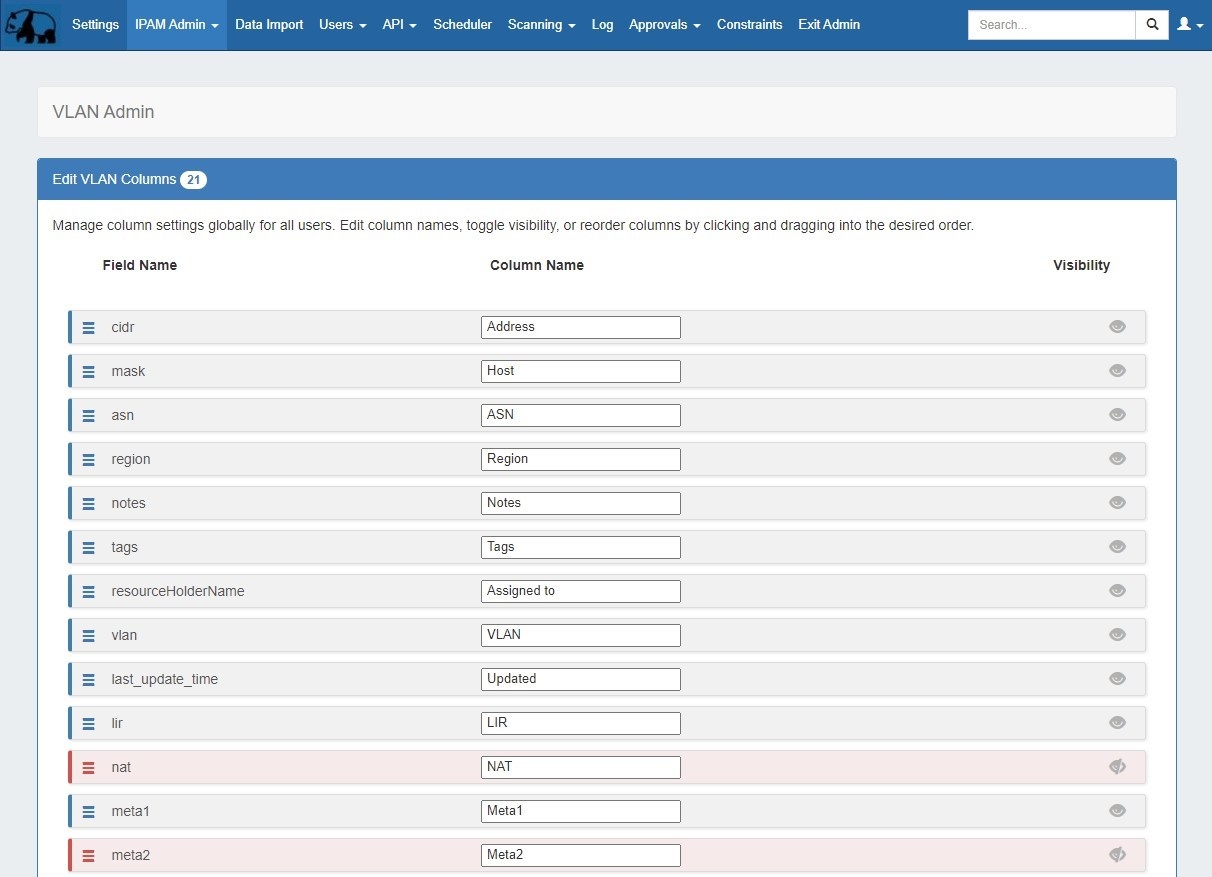
Here, you may edit the order of columns, rename columns, and enable/disable column visibility.
...
For a higher level overview of ProVision's the VLAN Manager, see: