...
| HTML |
|---|
<div id="google_translate_element"></div>
<script type="text/javascript">
function googleTranslateElementInit() {
  new google.translate.TranslateElement({pageLanguage: 'en'}, 'google_translate_element');
}
</script>
<script type="text/javascript" src="//translate.google.com/translate_a/element.js?cb=googleTranslateElementInit"></script> |
...
Users
...
Users and Groups are managed from the Admin area of ProVision, under the Users tab. Both Global and Resource level groups are shownThe Users tab contains three sub-tabs: Users, Groups, and Chart View.
| Table of Contents |
|---|
Users Overview
A User is defined as a single login account that accesses ProVision. In On the Users sectionpage, users may be addedcreated, edited, assigned to groups, have password information reset, or be removed.
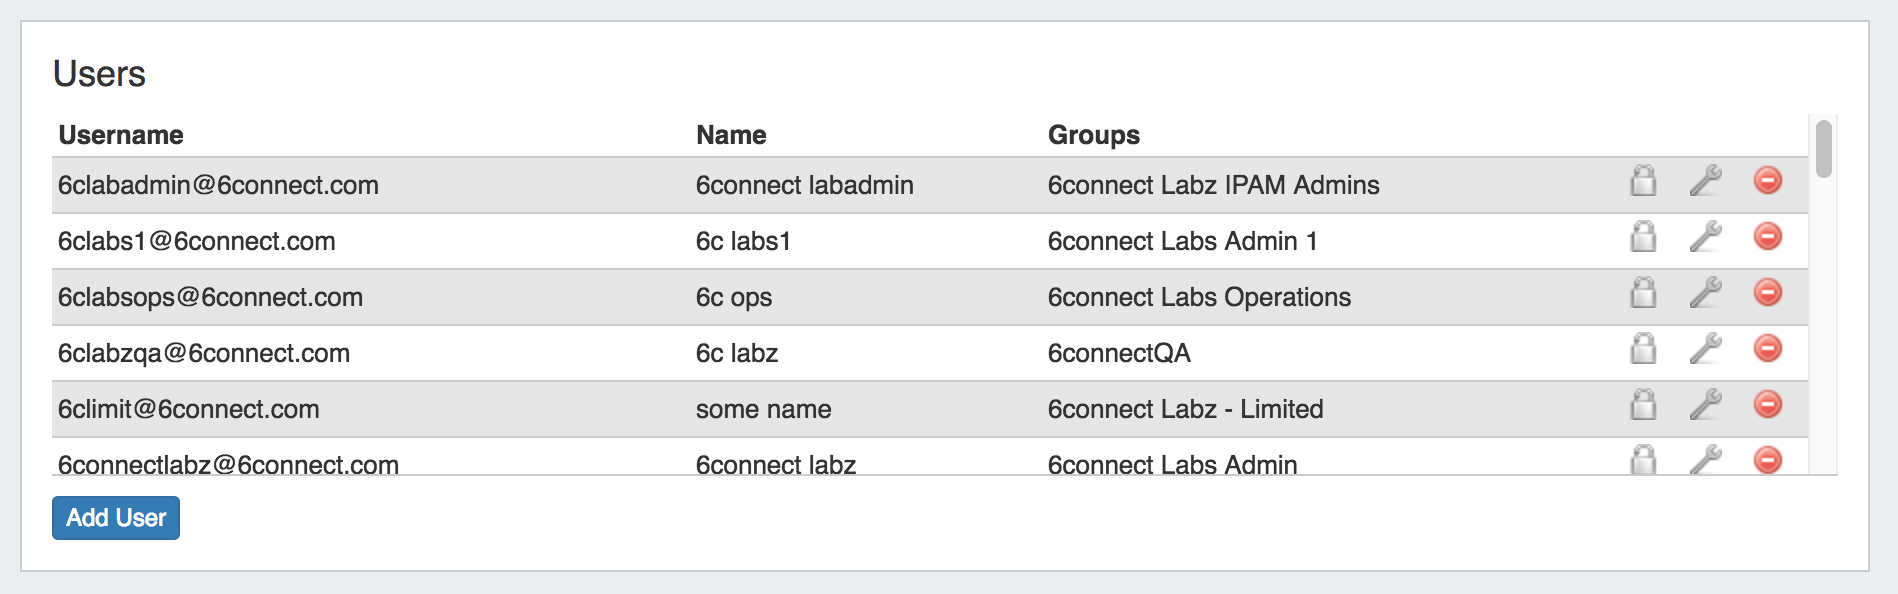
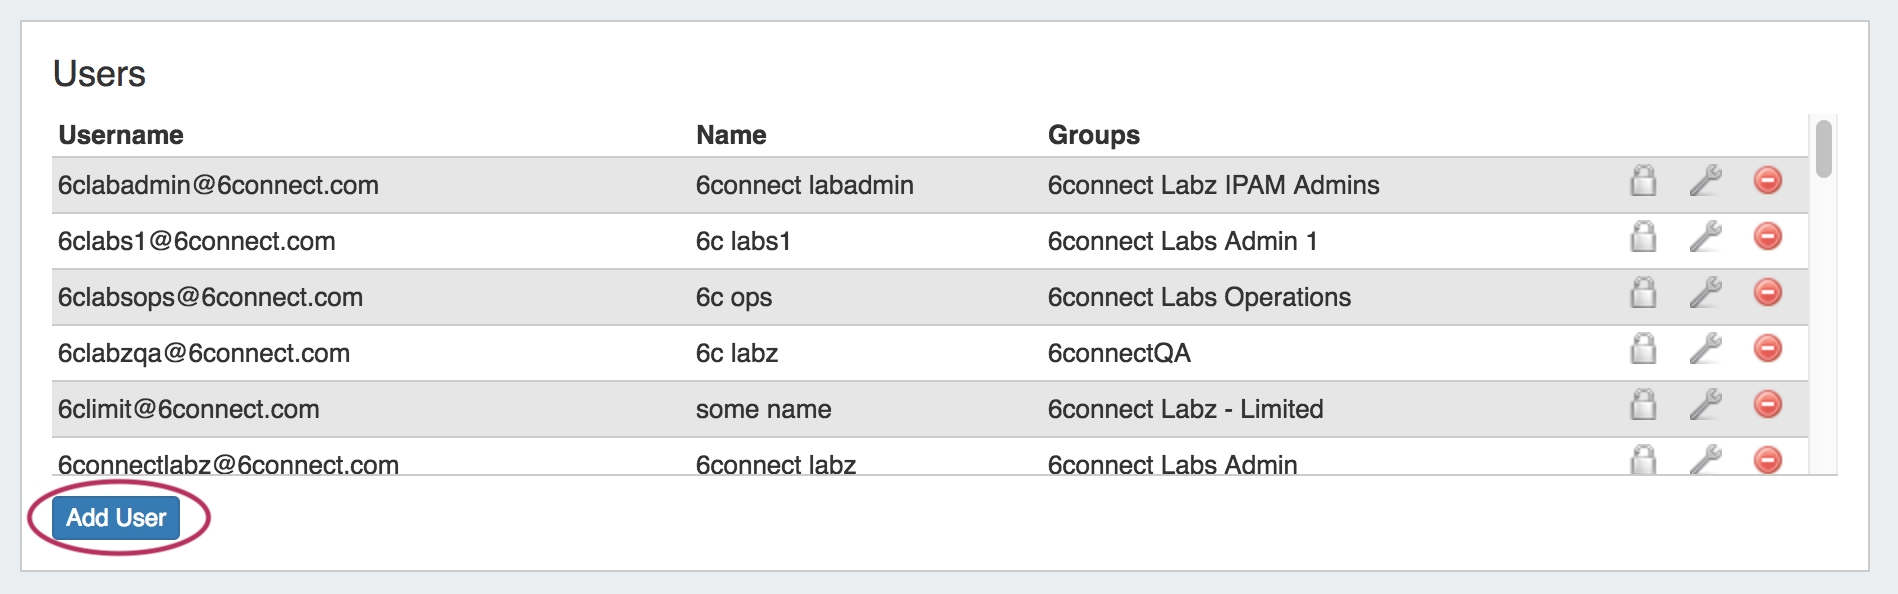
Creating/Editing User Accounts
Add Users by click on the "Add User" button at the bottom of the "Users" section of the page. The Edit User dialog will pop up.
You can also bring up the same dialog to edit a user's information by clicking on the Action Menu (wrench icon) at the end of the row for the user.

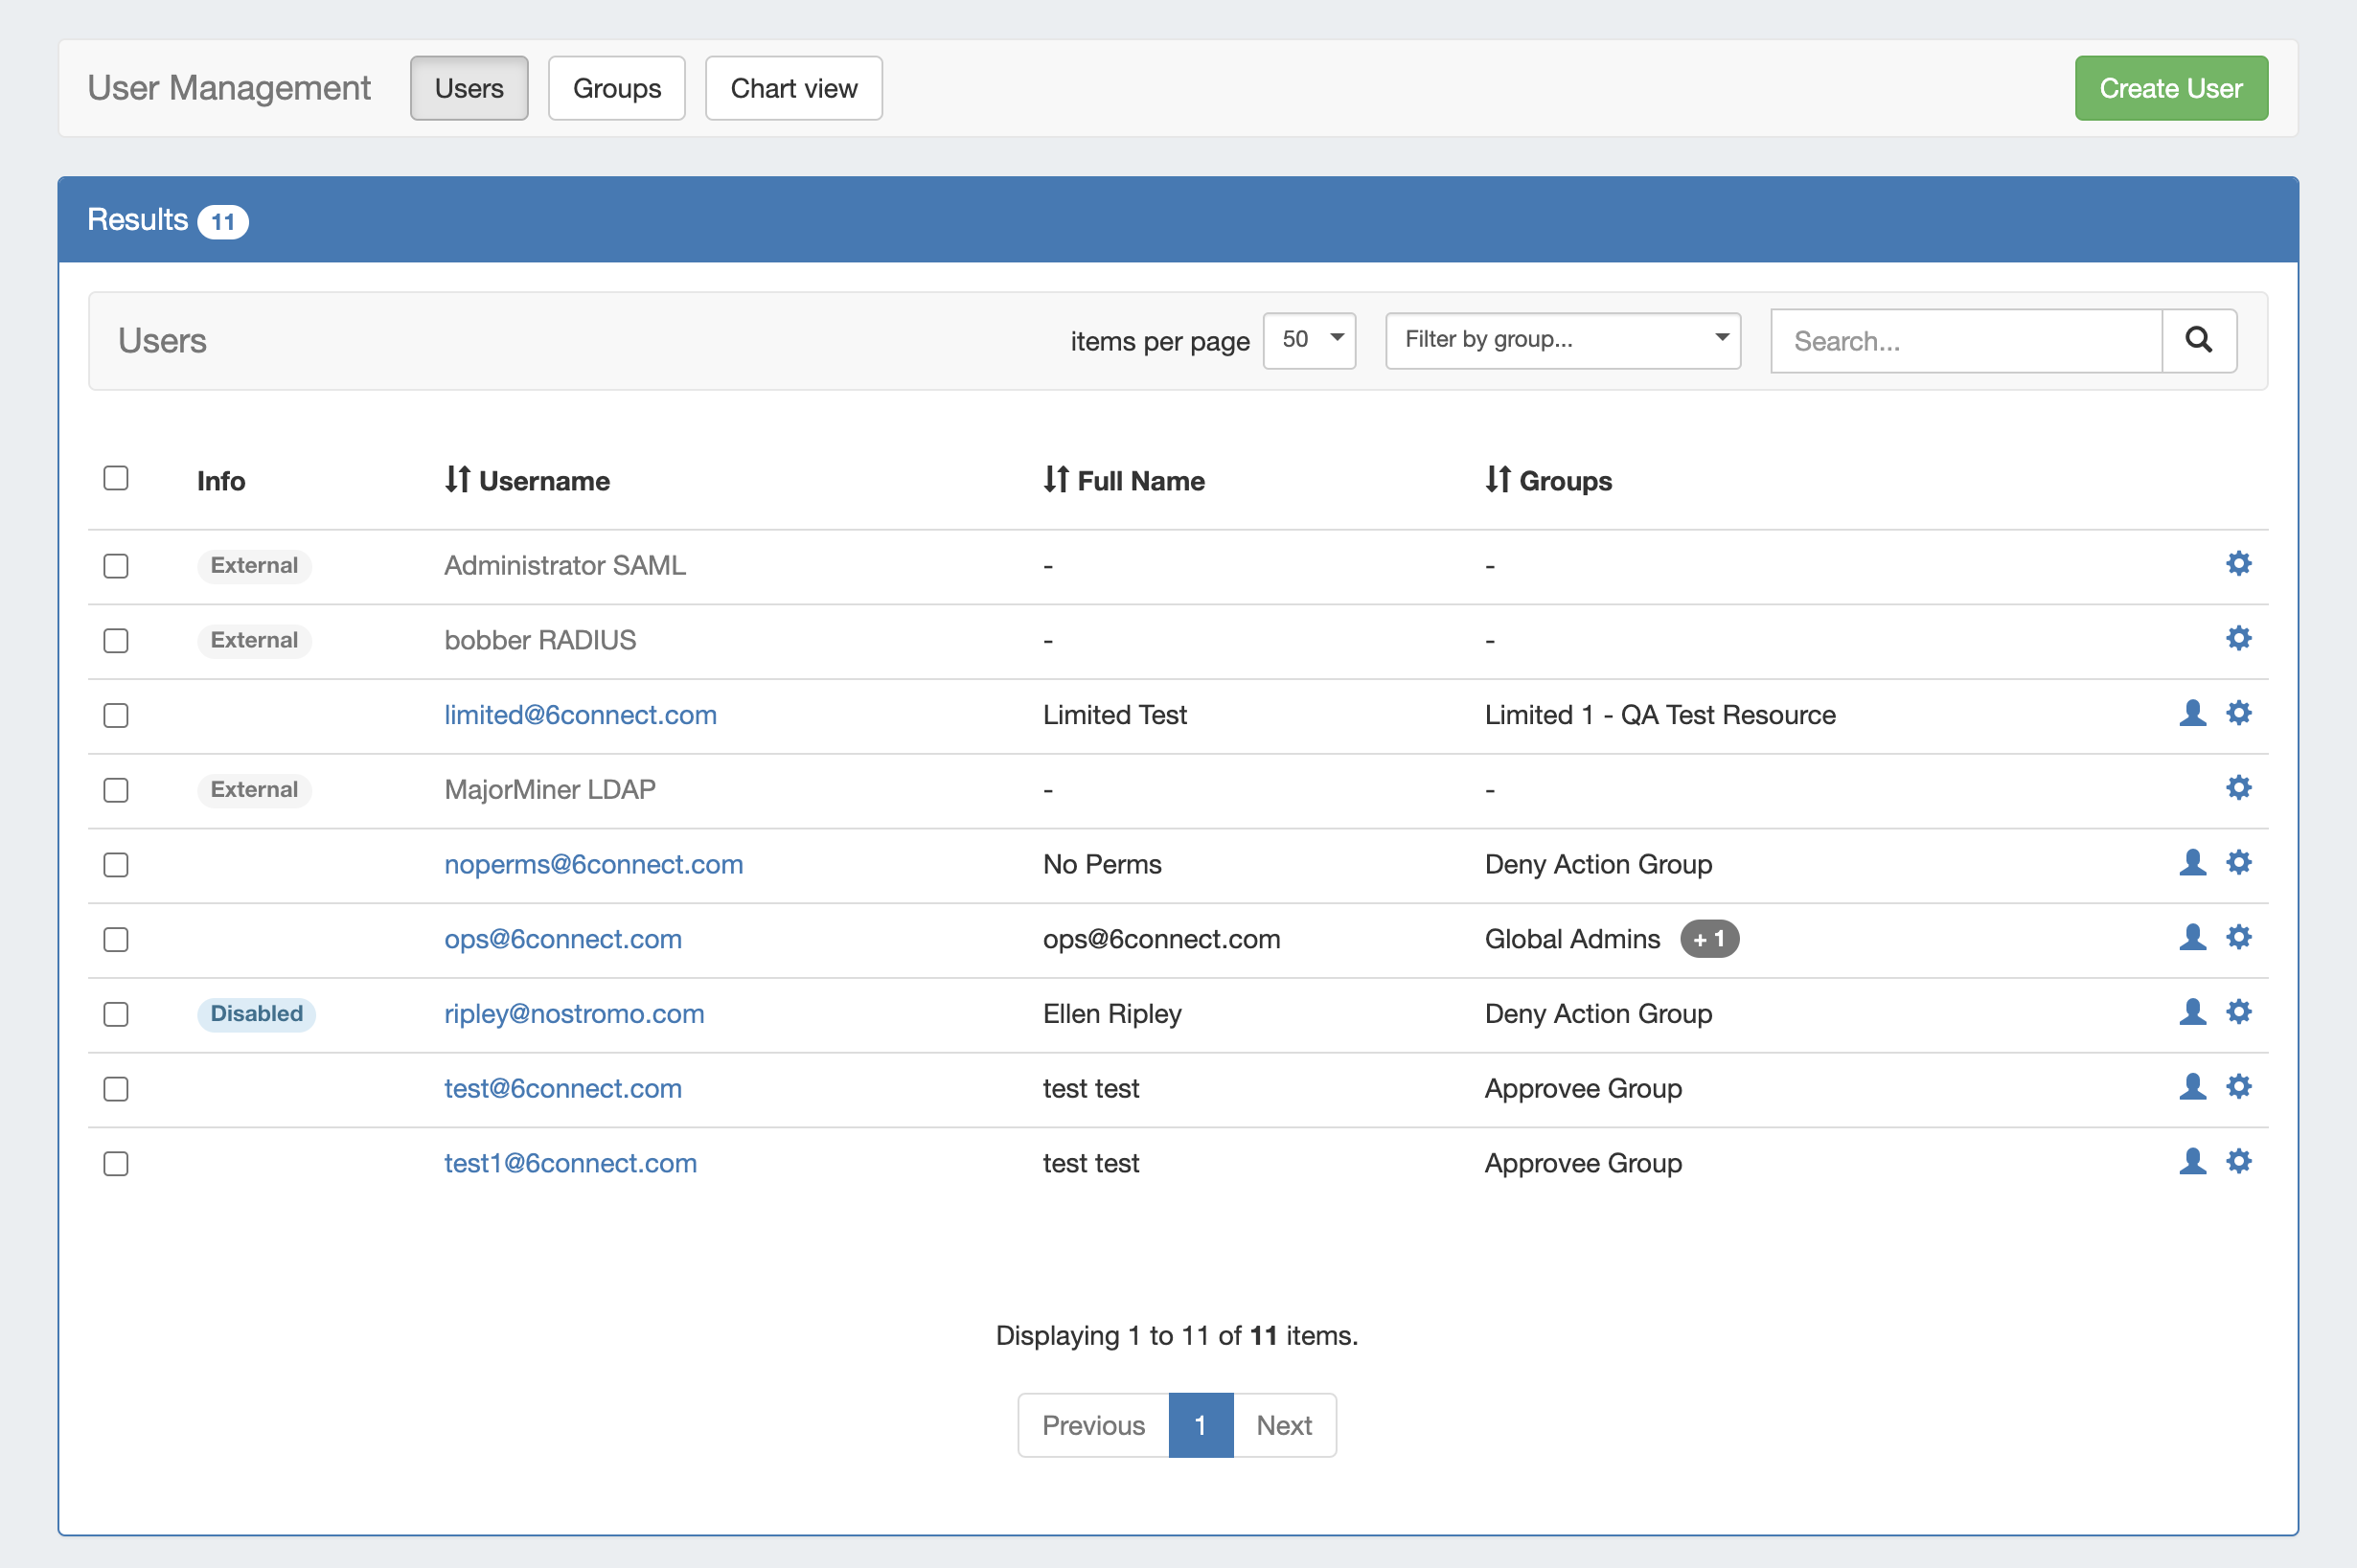
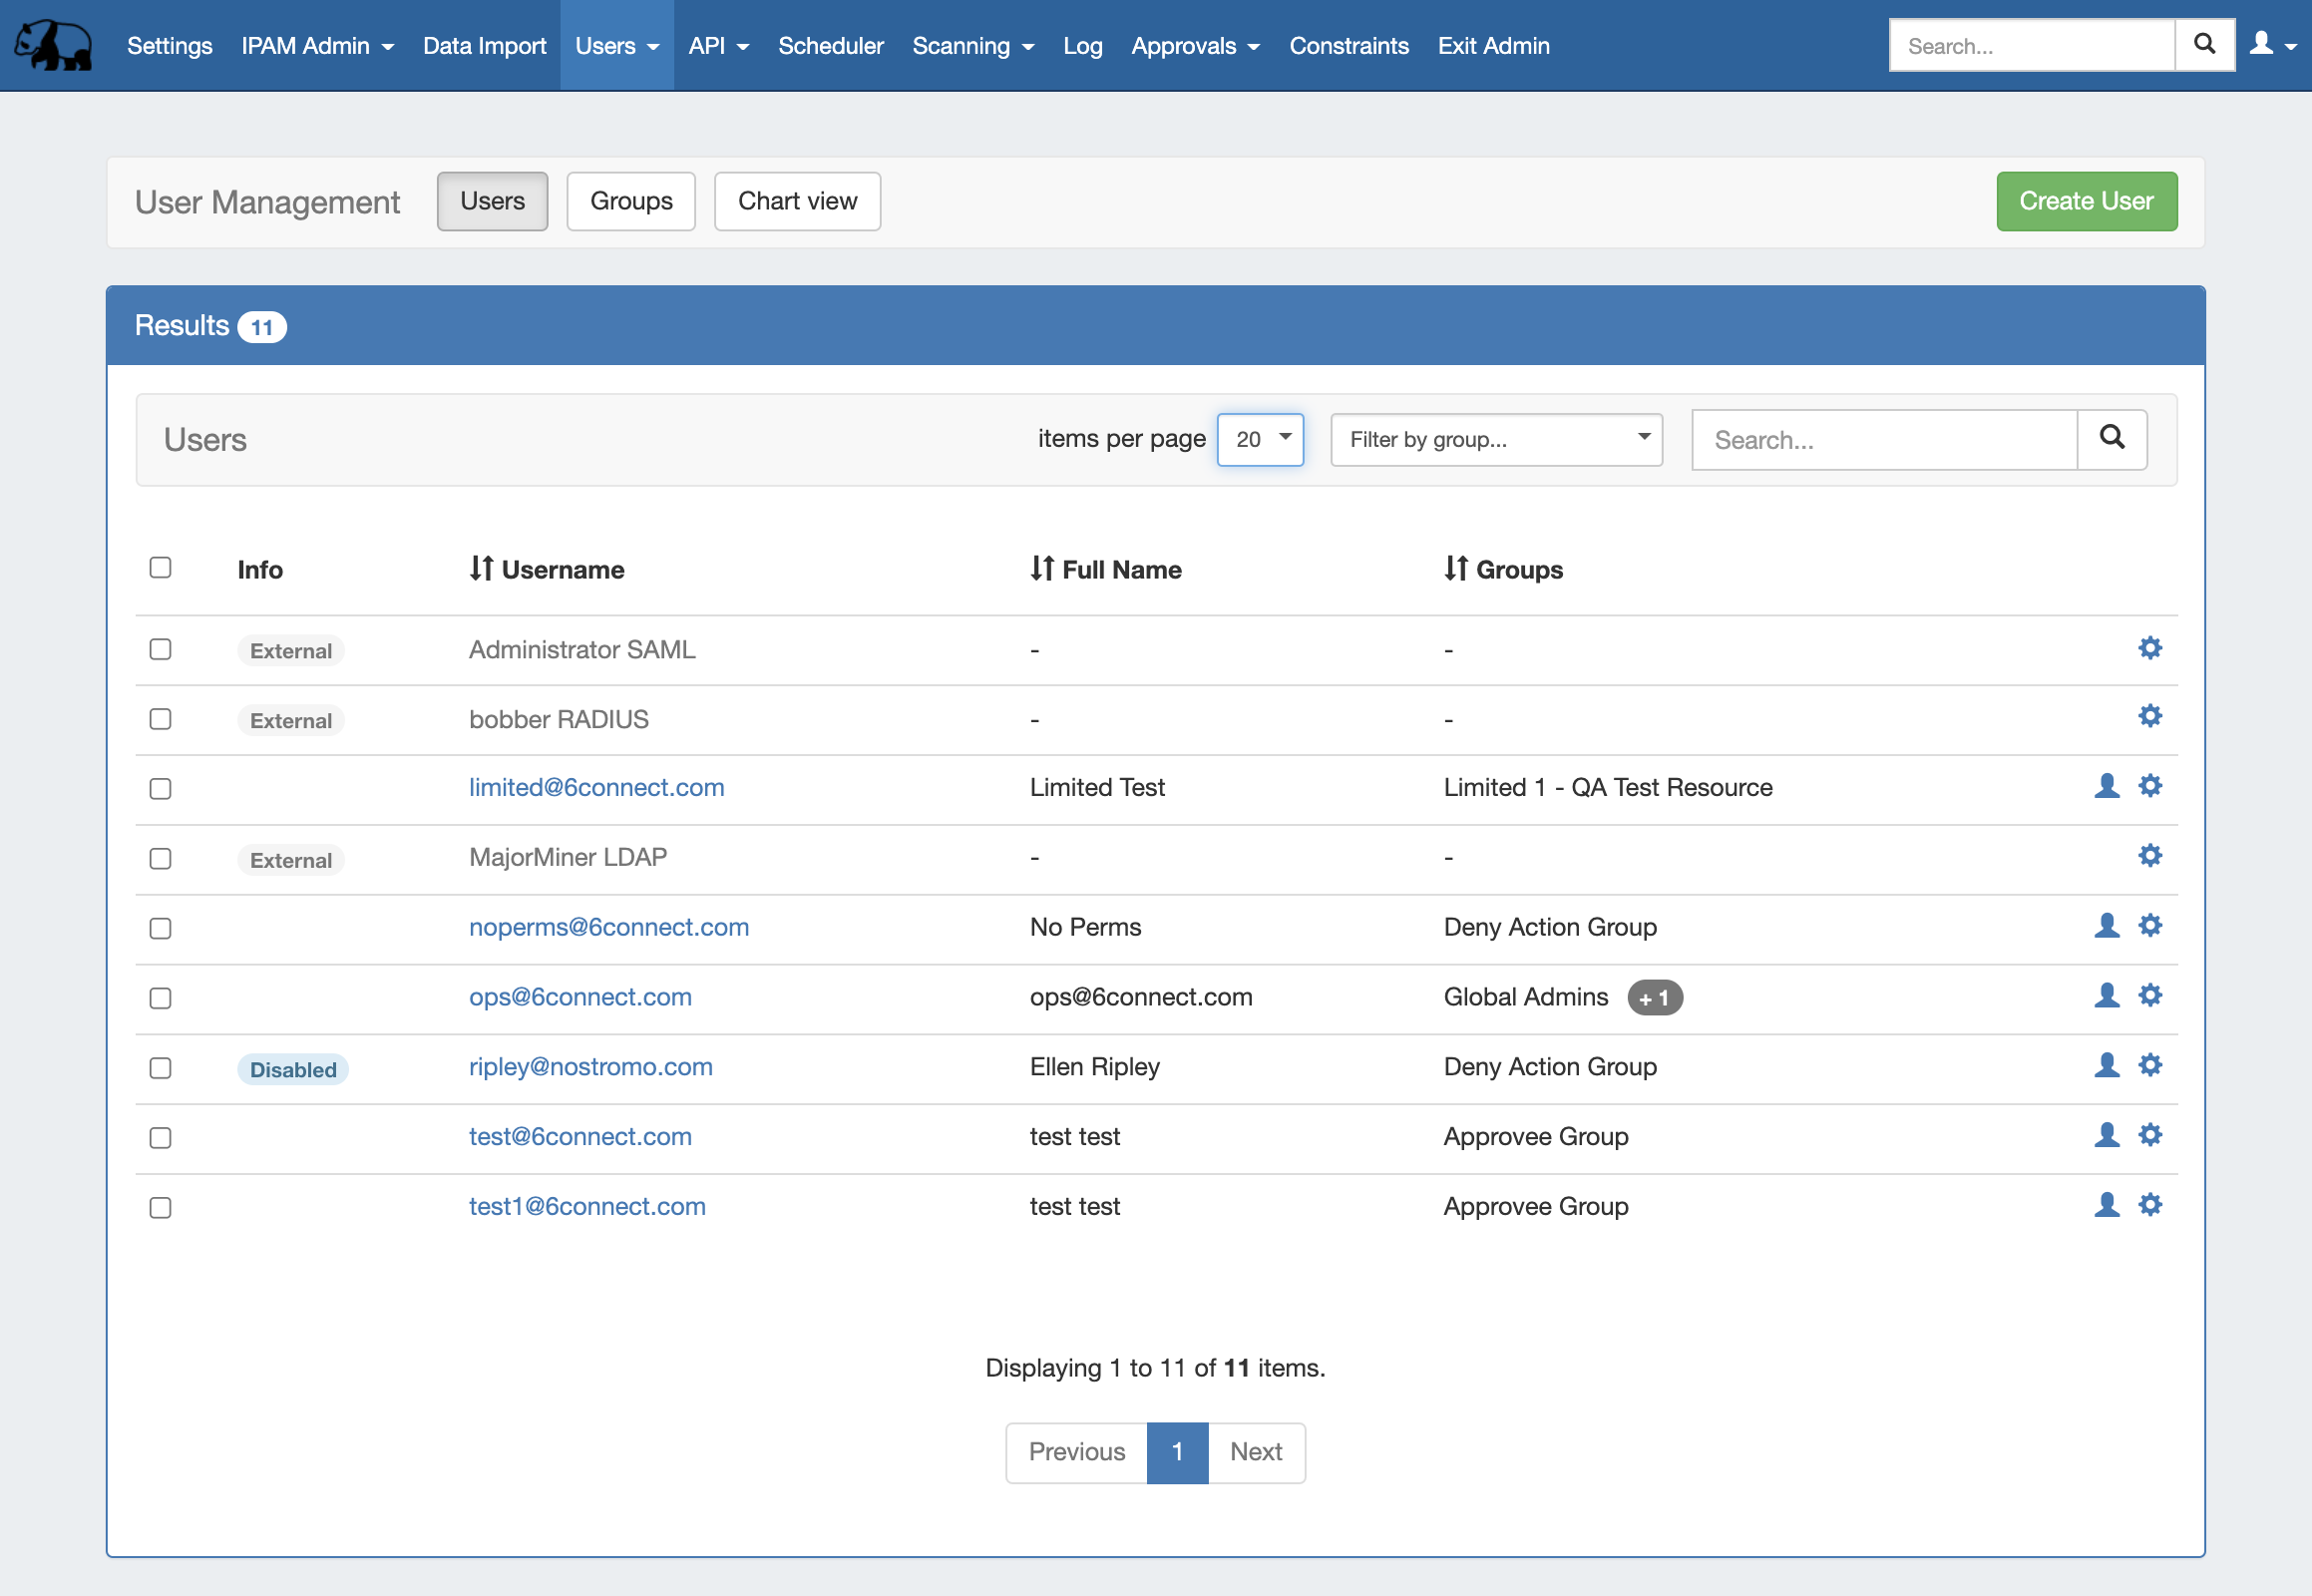
When viewing the Users List, the following is shown:
Selection checkbox: The checkboxes on the the left side of the user may be used to multi-select users to delete
Info: An informational tag displays for External (external users are not editable) or disabled users
Username: The associated login email address for local users, or the server username for external users. Click on the username to view user details.
Full Name: The manually entered first and last name of the user
Groups: The group(s) to which the user belong - if the user belongs to multiple groups, an interactive bubble will display with the number of additional groups (+1). Click on this bubble to view all groups for the user.
User Icon: Click for a shortcut to view the permission chart for the user. Once in the chart view, select the desired group to finalize the view
Gear Icon (Action Menu): Right Click on the gear icon (or anywhere on the user row) to open the action menu for the user
View Options:
Items per page
Select the "items per page" filter to limit the number of users displayed at one time. Any additional users will be displayed on following pages.
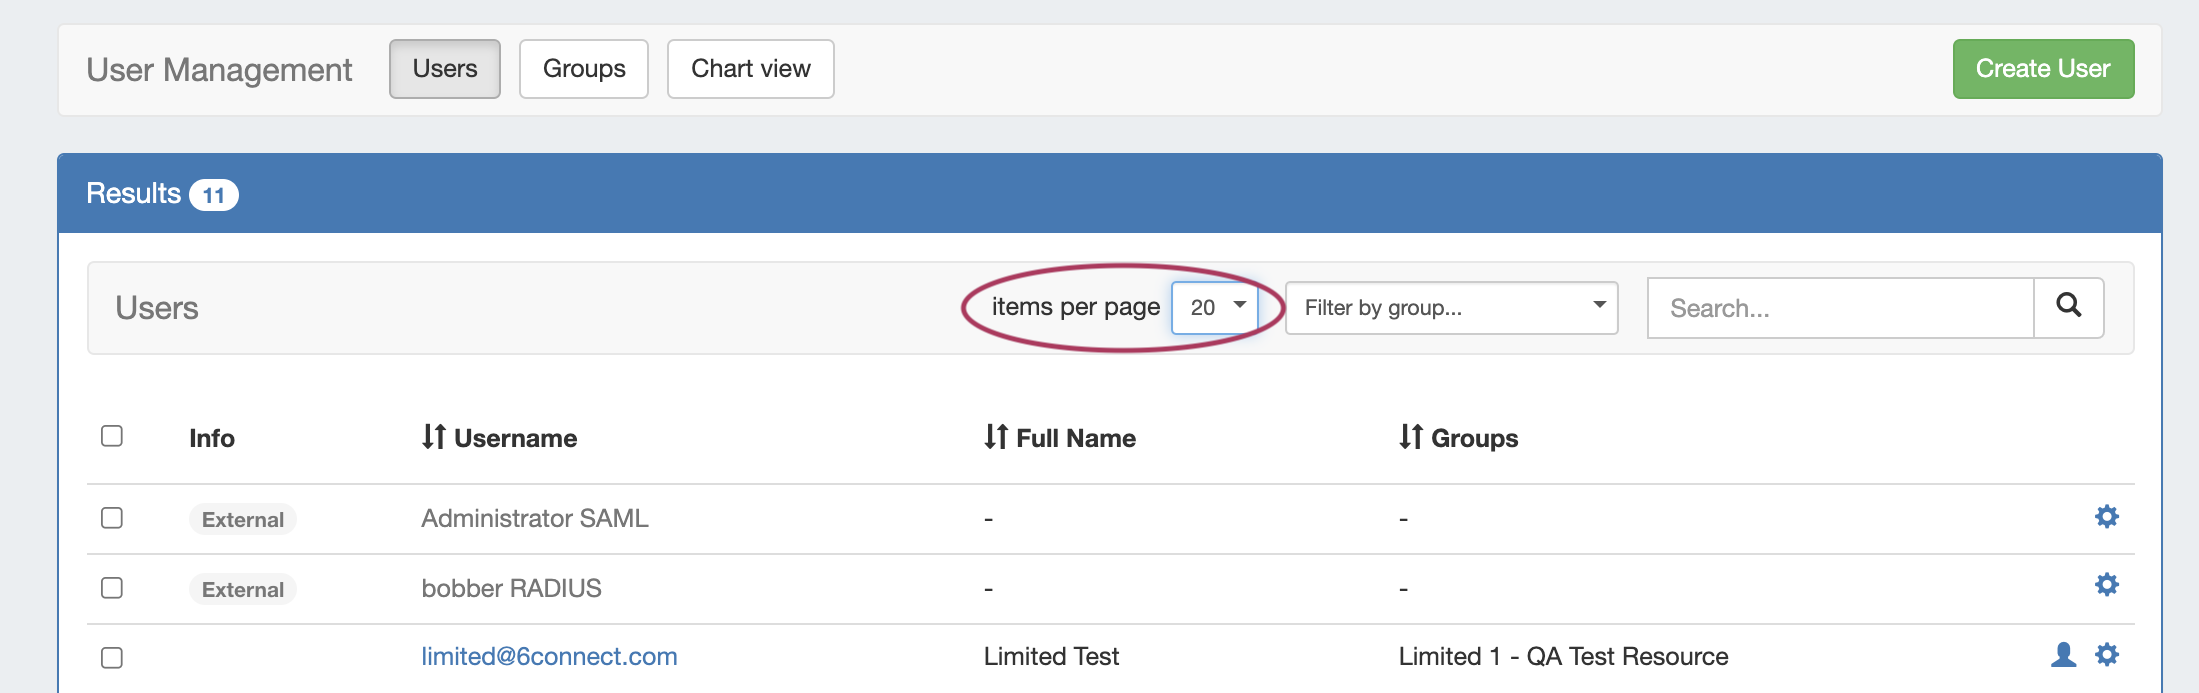
Use the page numbers and navigation arrows at the bottom of the list to view extra pages.
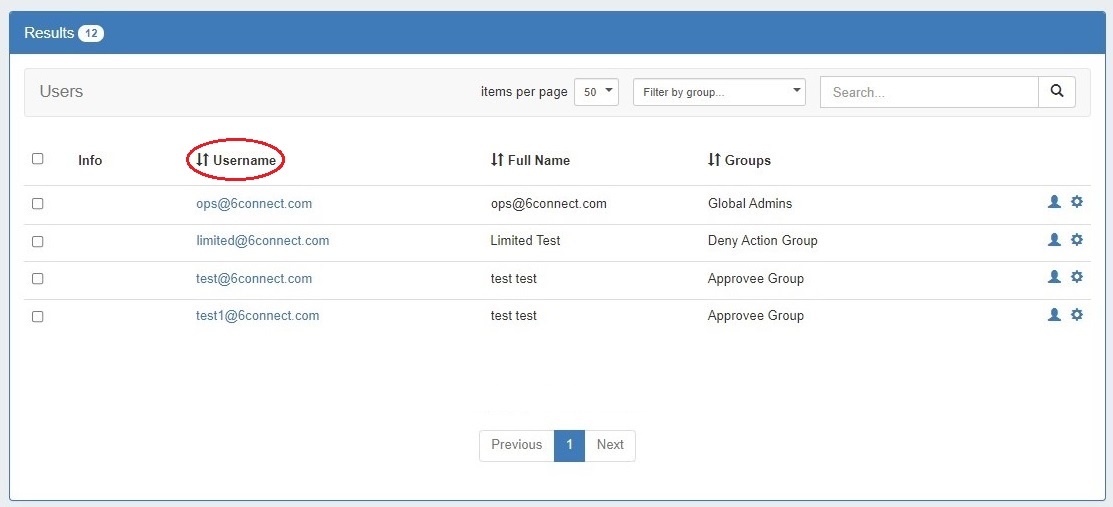
Sort
The Users list may be sorted for any column with the sort arrow icon (↓↑ ).
Click on the column name to toggle between ascending / descending order for that field.
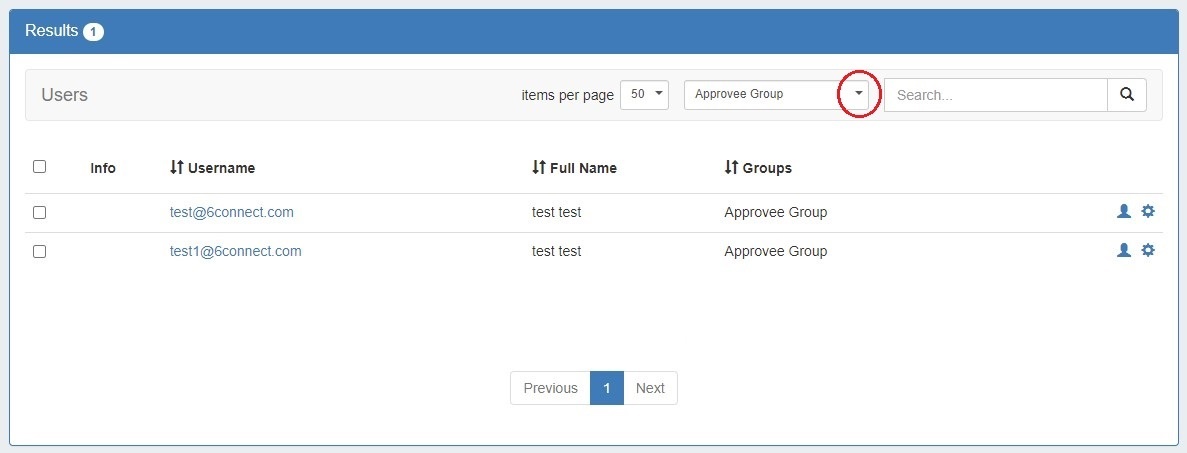
Filter by Group
Filter the Users list to only view a certain group by selecting a group from the "Filter by group" dropdown.
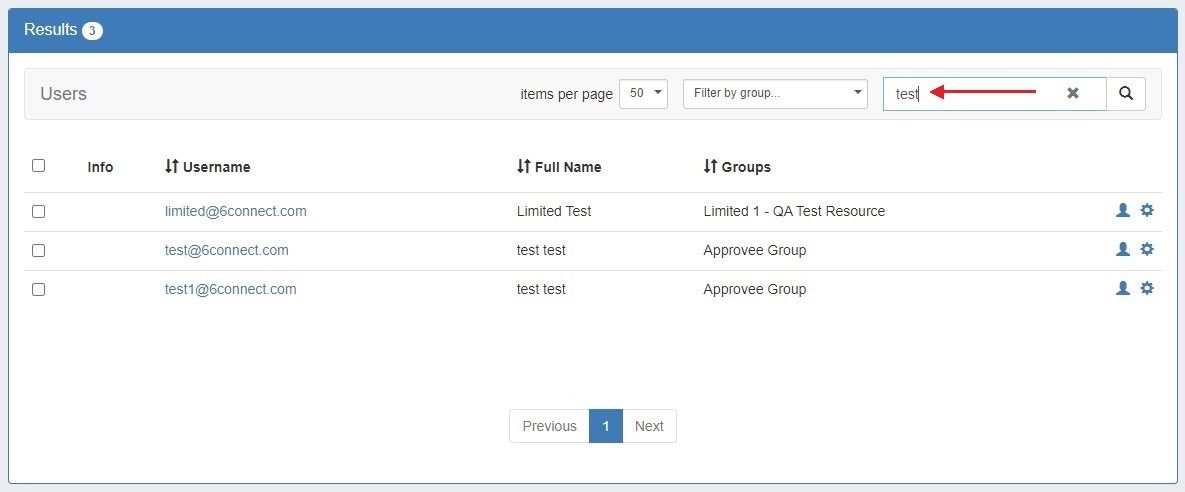
Search
Search the list for a specific username or full name by typing all or part of either name in the search box.
Working with Users
Creating User Accounts
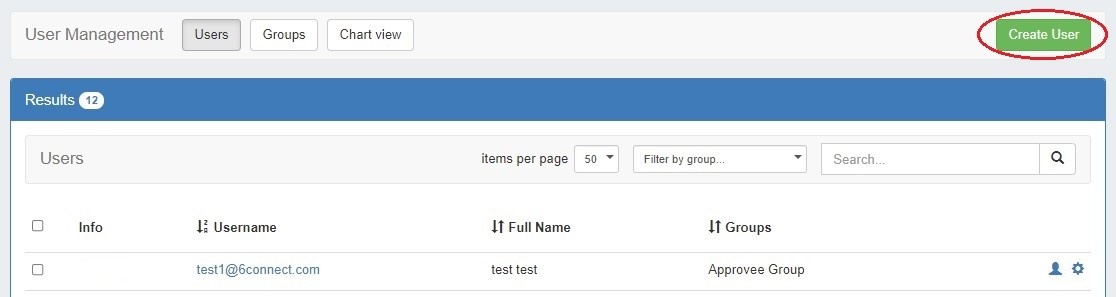
Add Users by clicking on the "Create User" button at the upper right of the "Users" page. This will take you to the Create User screen.
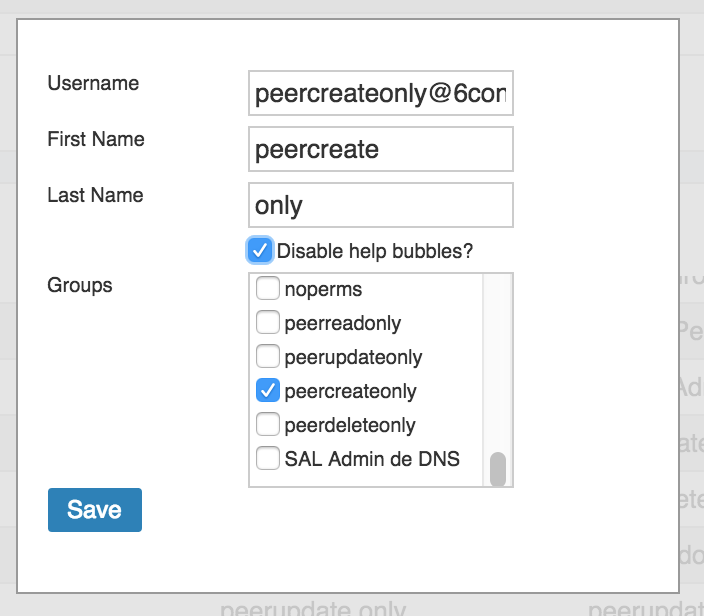
 When creating or editing User accounts, you will be presented with the following options.
You may enter or edit the Username, First Name, Last Name, whether to enable help bubbles, and select one or more permissions groups to which to assign the user.
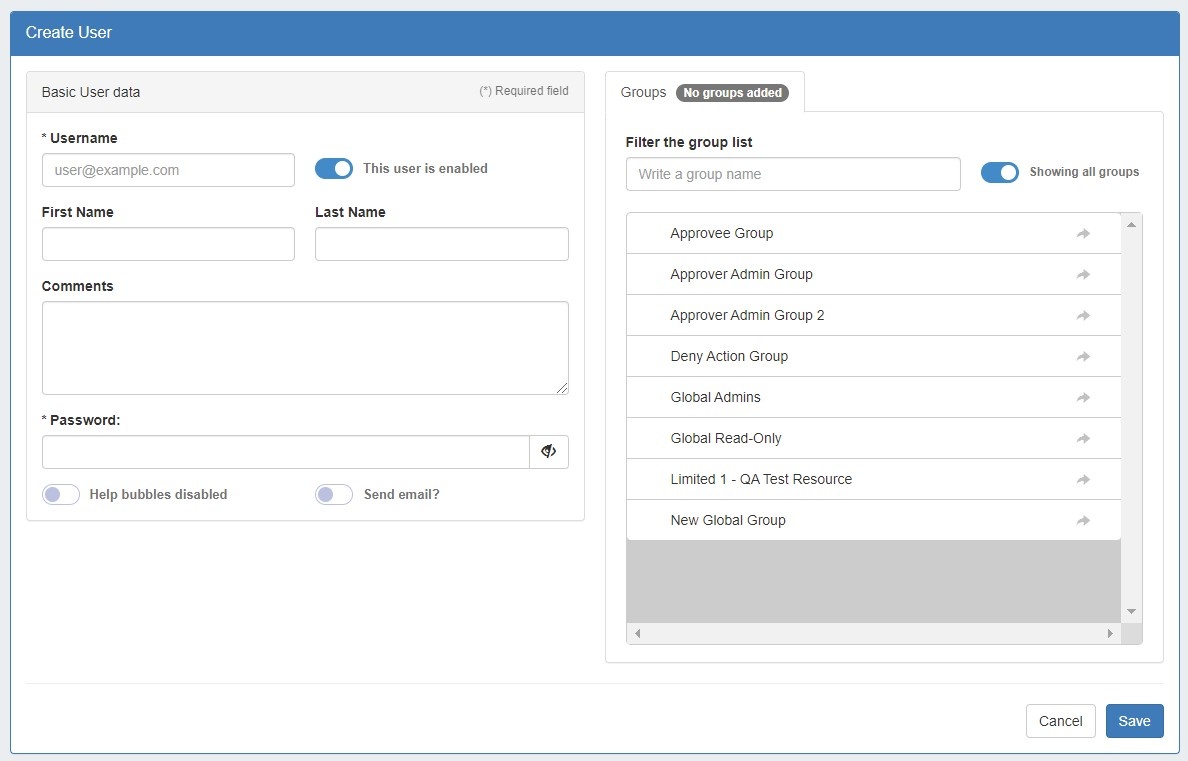
A list of existing User Groups is listed under the "Groups" tab on the right.
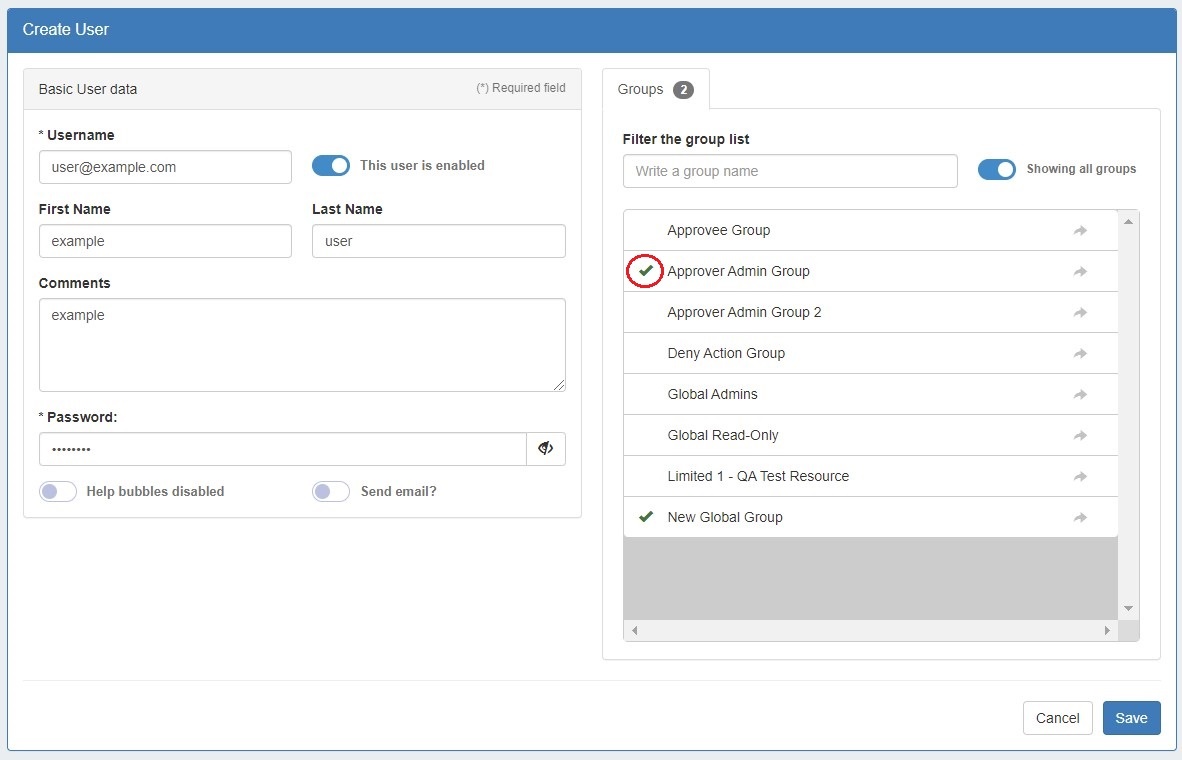
To assign a user to one or more groups, click on the area to the left of a group name. A green checkmark will appear when the user is successfully assigned. You can search for a specific group using the filter box above the list.
| Info |
|---|
When assigning users to multiple permissions groups, be sure to review the group permission details to ensure that they do not conflict with eachother! |
Setting/Resetting User Passwords
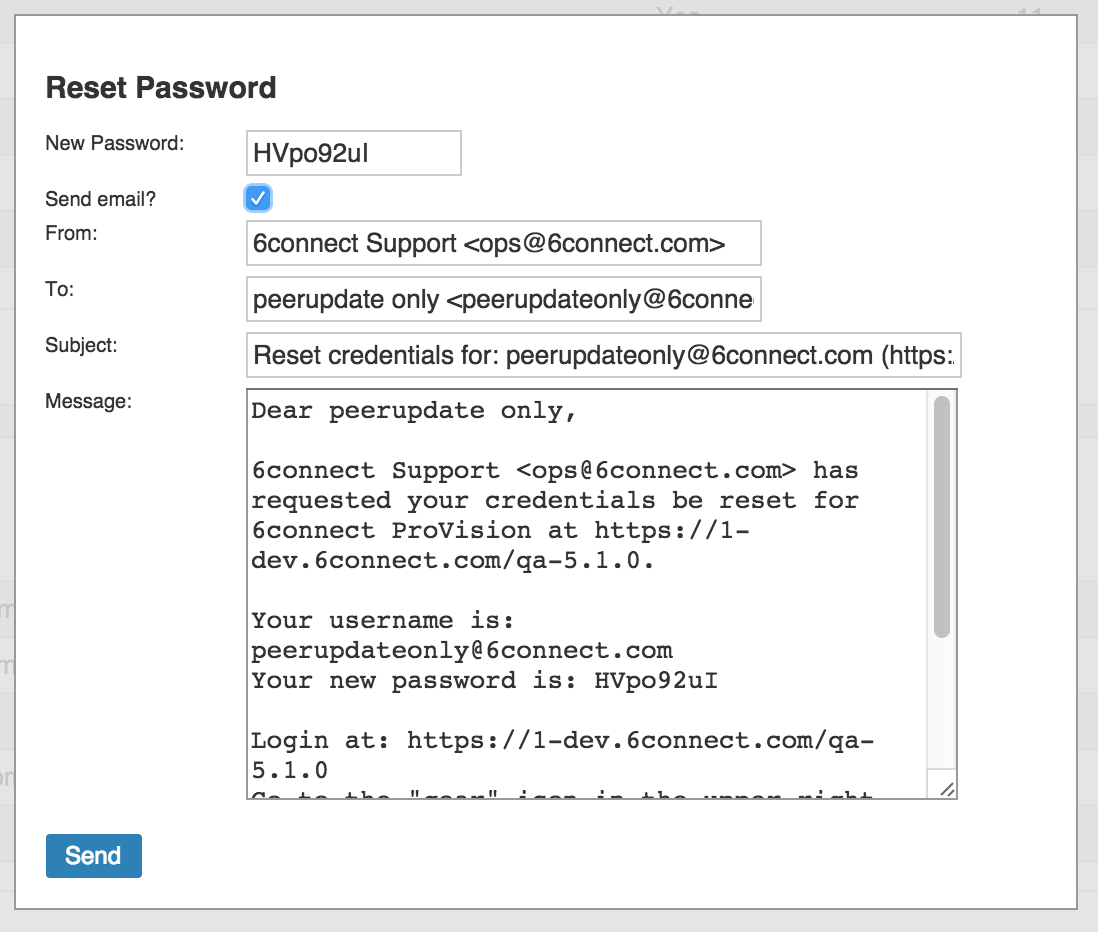
When you click on the padlock icon, you will be presented with options to set a new password and/or send a password reset email to the intended user account.

From here, you can choose a new password, or use the automatically generated random password.
If you select the checkbox next to "Send email?", email fields will appear that may be edited as desired. When complete, hit "Send".
Removing a User
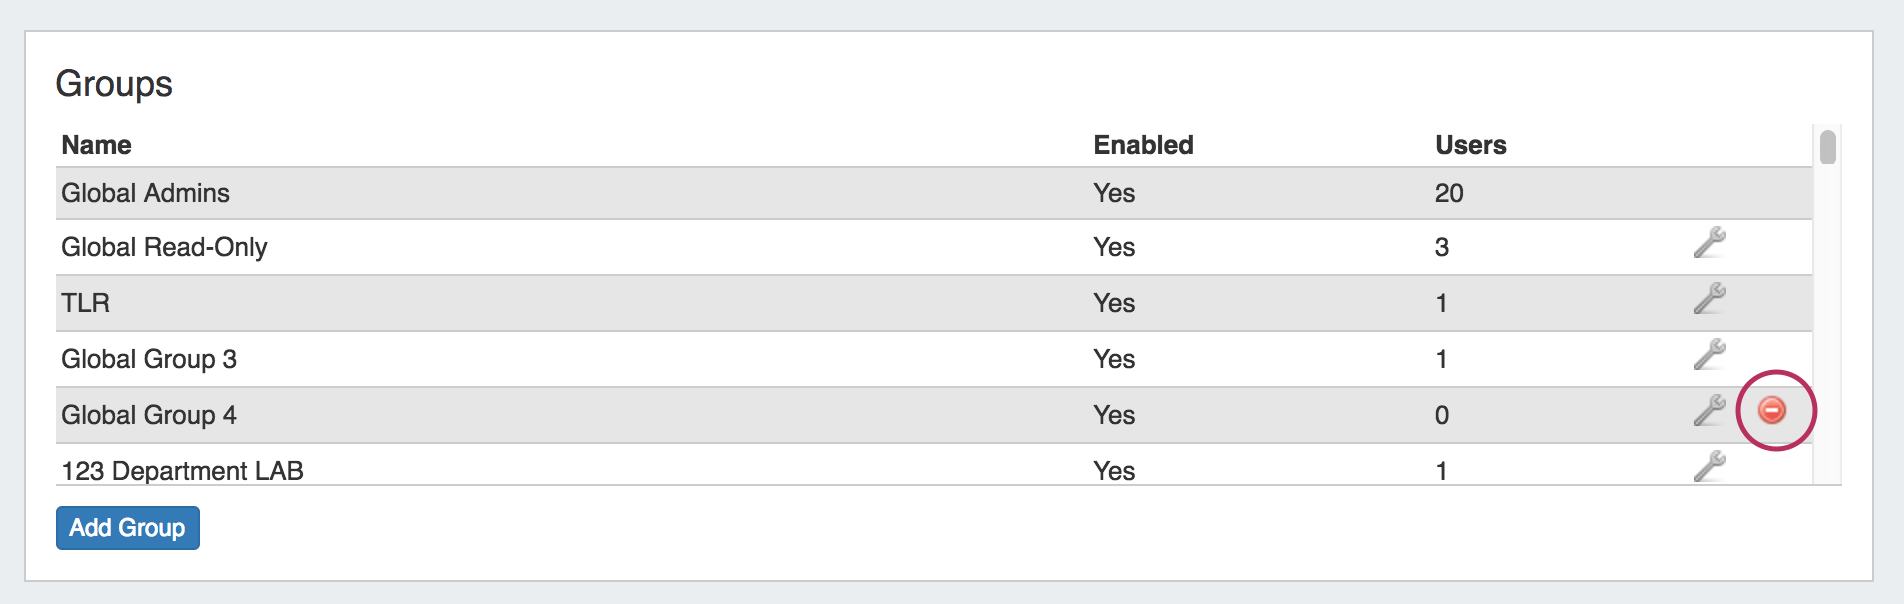
To remove a user from the Users list, click on the red circle "delete" icon next to that user.

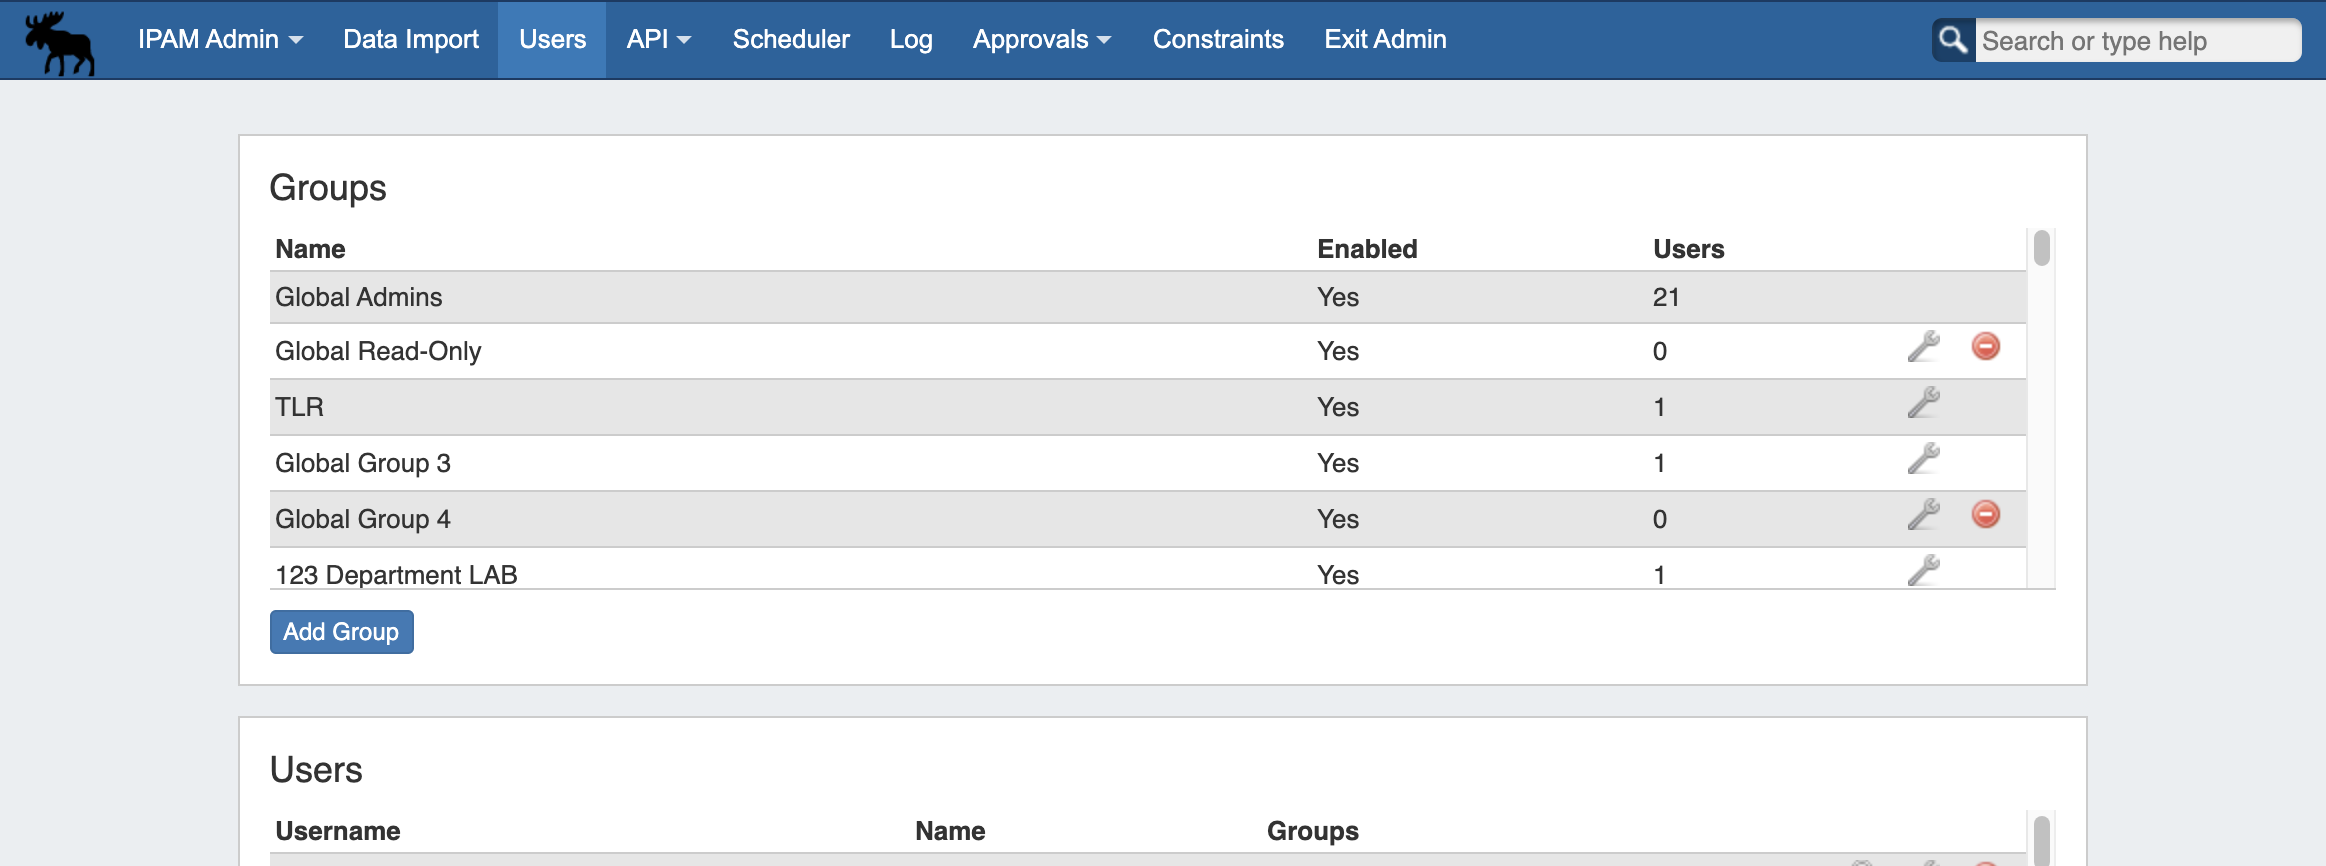
Groups
ProVision administrators can also create permission groups to assign users to. This allows more control over user roles.
A Group has four elements associated with it:
Users: The Users that are assigned to the group, and will be limited by the selected permissions.
Resources: Resources access may be set to Global TLR (applies to all resources), or to the level of individually selected resources.
Functional Area: The ProVision functional area (IPAM, Resources, Peering, etc) for the selected resource(s) that permissions are set under.
Permission Level: Create, Read, Update, and Delete (C/R/U/D) permissions may be set under each functional area for each resource selected.
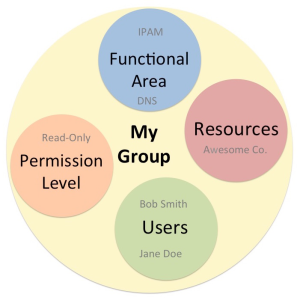
In the example above, the group “MyGroup” allows the users Bob Smith and Jane Doe to only read IPAM and DNS data for the Resource “Awesome Co”.
Through the use of these four elements, Groups can create permissions structures that are as flexible as you need.
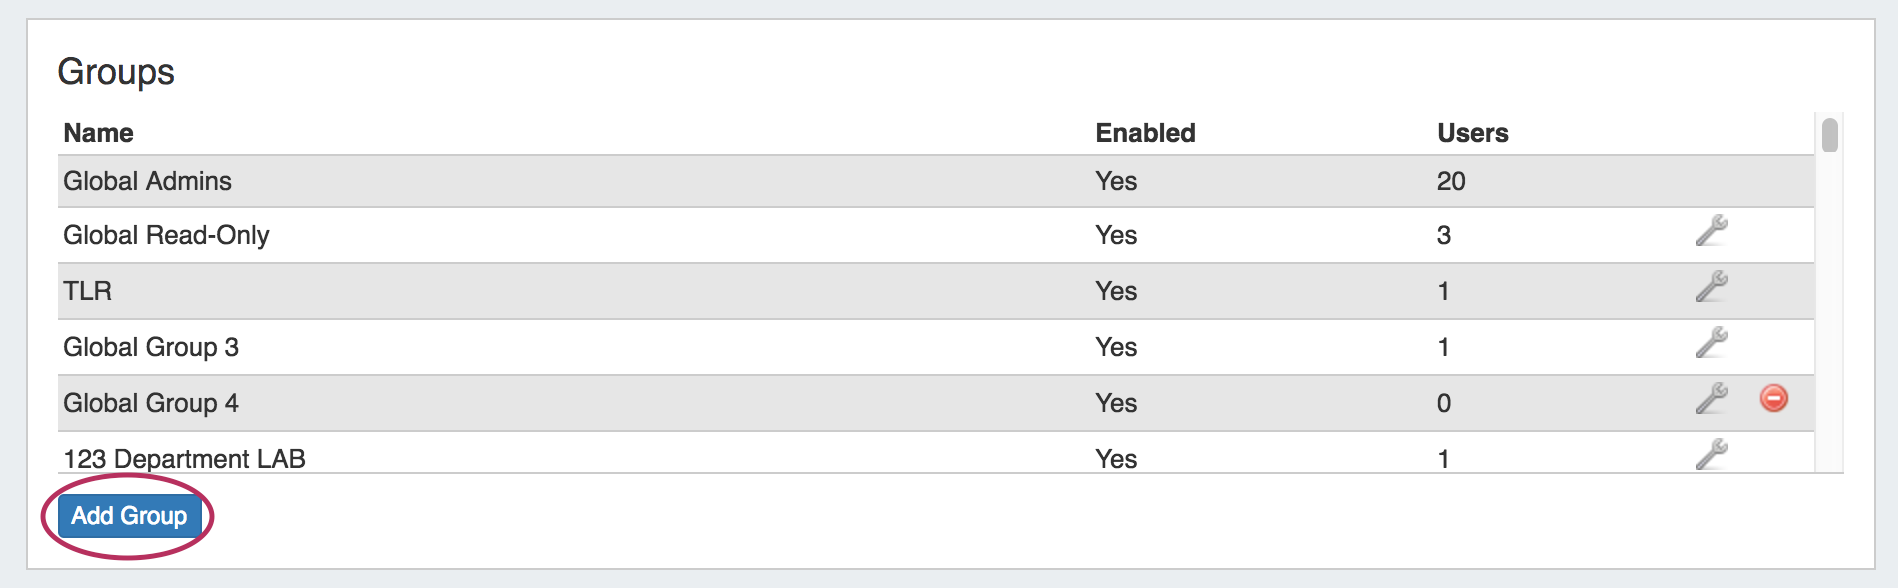
Default Groups
Two default groups are available initially in ProVision:
- Global Admin (May not be edited or deleted)
- Global Read-Only
These Global groups allow for access to the entire ProVision platform. You may add additional Global groups by creating a new group using the TLR (Top Level Resource). You may also add detailed resource level group permissions by selected individual resources.
For more detail on top-level and resource permissions, see Global Permissions and Resource Permissions.
| Info | ||
|---|---|---|
| ||
Permissions are inherited based on the hierarchy of the objects, unless you specify a different permission! |
Add or Edit a Group
New Groups can be created by ProVision administrators by pressing the green "Add Group" button. To edit a group, you may click on the Action Menu (wrench icon) for the group.
After hitting the "Add Group" button or wrench icon, the Group Information screen will pop up.
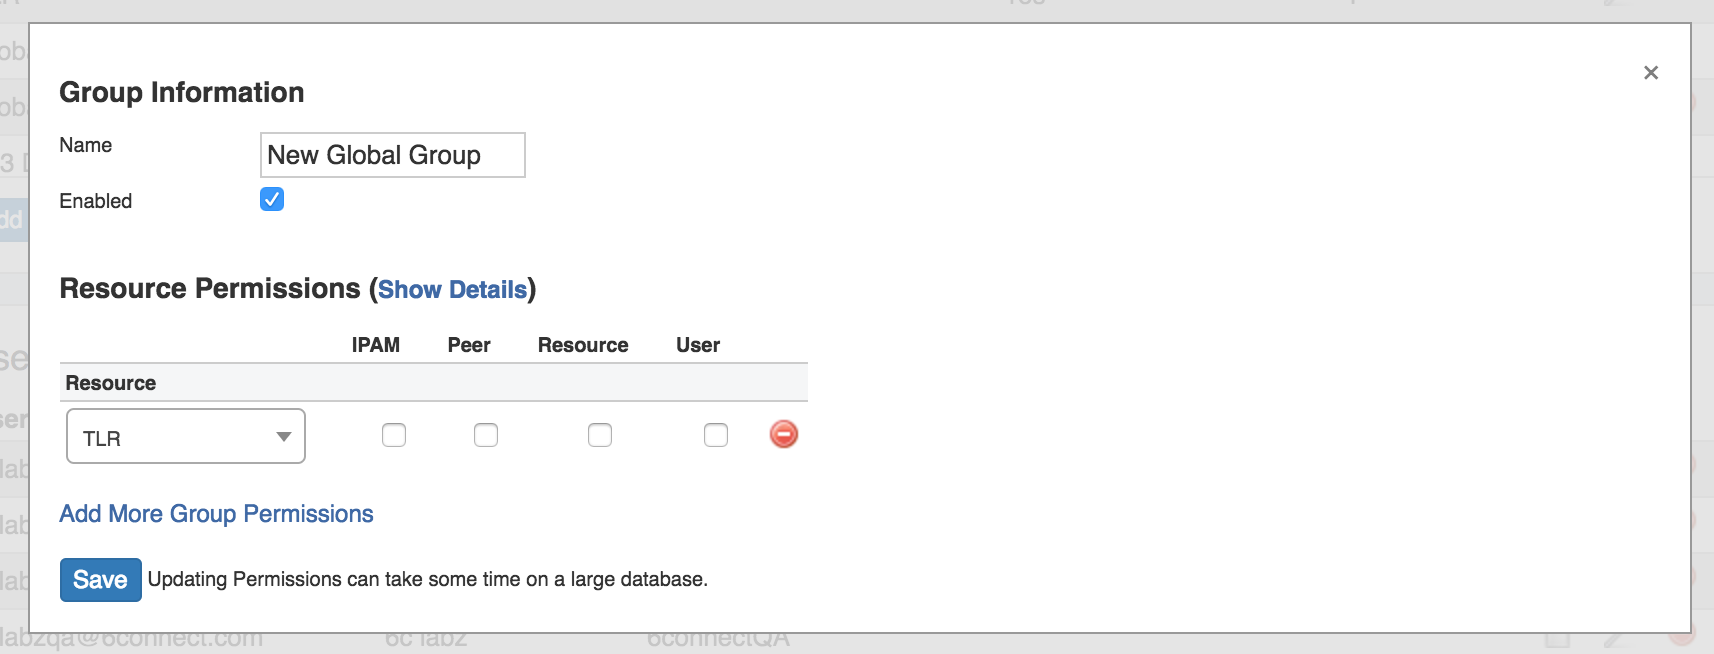
Add in the name of the new group, and set the permissions for that group by defining the resource(s) in the dropdown menu, checking the functional areas that you want accessible.
Click "Show Details" to fine tune the functional areas into Create/Read/Update/Delete level permissions.
To add permissions for additional Resources, click "Add More Group Permissions", select the Resource, and check the desired permissions.
To delete a Resource from the permissions list, simply click the red icon.
In the example below, we make a group called "Some Lab Group", whose users we want to be able to access two resources: 6connect Labz and 7connect Labs. These users will be working extensively in IPAM and Resources, so we give them full access to those areas of ProVision. However, we also want them to view other information, but not edit it. We click on "Show Details" to fine-tune the permissions, and then check the "R" column under Peer and User.
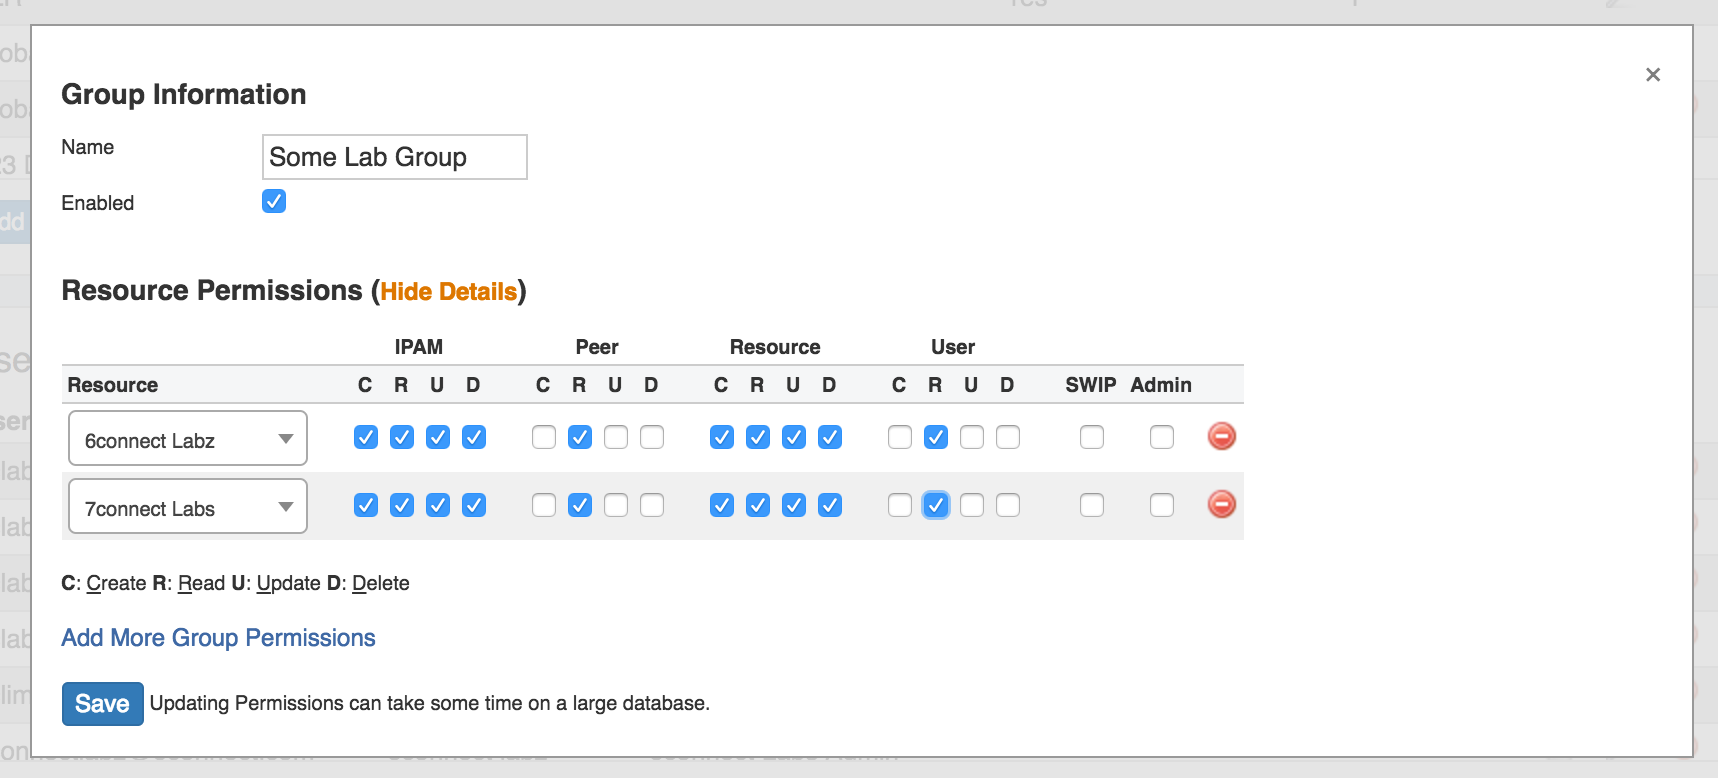
Click "Save" when complete. After adding the group, you can add users to the group by selecting the group when editing a user account.
each other! |
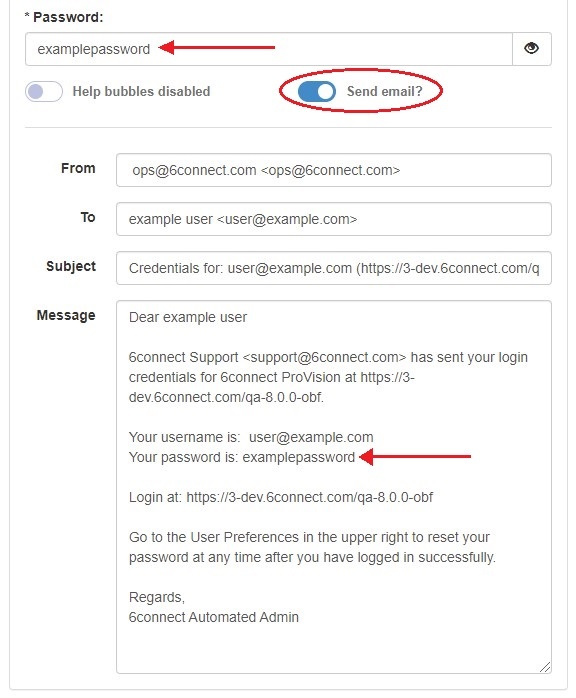
To create a password for a new user, simply type it in the "Password" field. Click the eye icon to the right of the field to toggle visibility. You may also create a password and automatically send an email to the new user with their credentials. In the Password section, move the "Send email?" selector to the "ON" position. An email template will appear. Fill in a password for the new user and it will be added to the email template. When done click "Save" and the email will be sent.
| Info |
|---|
Passwords must be eight characters in length. |
Editing User Accounts
| Info |
|---|
External users may not be edited |
To edit a user's information click on the Action Menu (gear icon) for the user and select "User Details" or click on the user name.

This will bring up the Edit User screen.
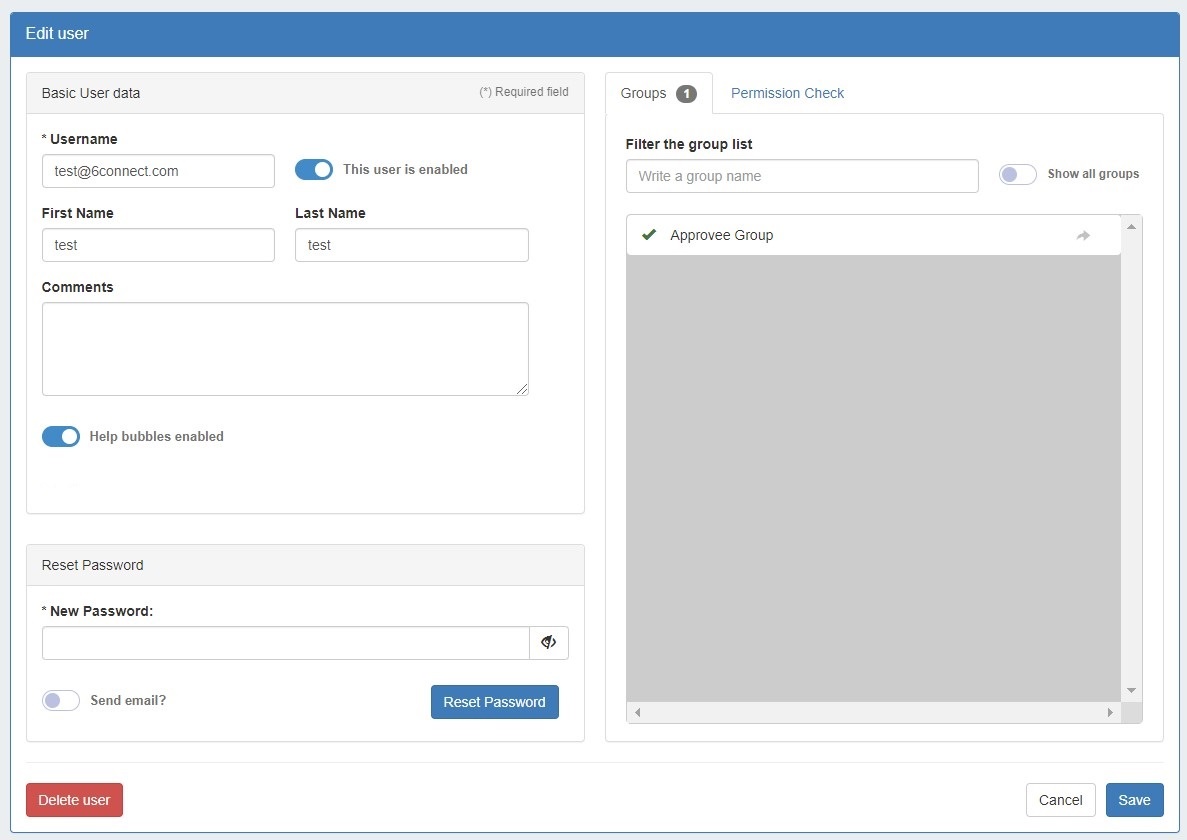
By default, the group list is filtered to show the group(s) to which the user is currently assigned.
In order to assign the user to another group, move the selector at the top of the group list to "Show all groups" and the list will expand to show all existing groups.
To assign a user to one or more groups, click on the area to the left of a group name. A green checkmark will appear when the user is successfully assigned. You can search for a specific group using the filter box above the list. Clicking the arrow to the right of a group name will take you to the corresponding Group Details page.
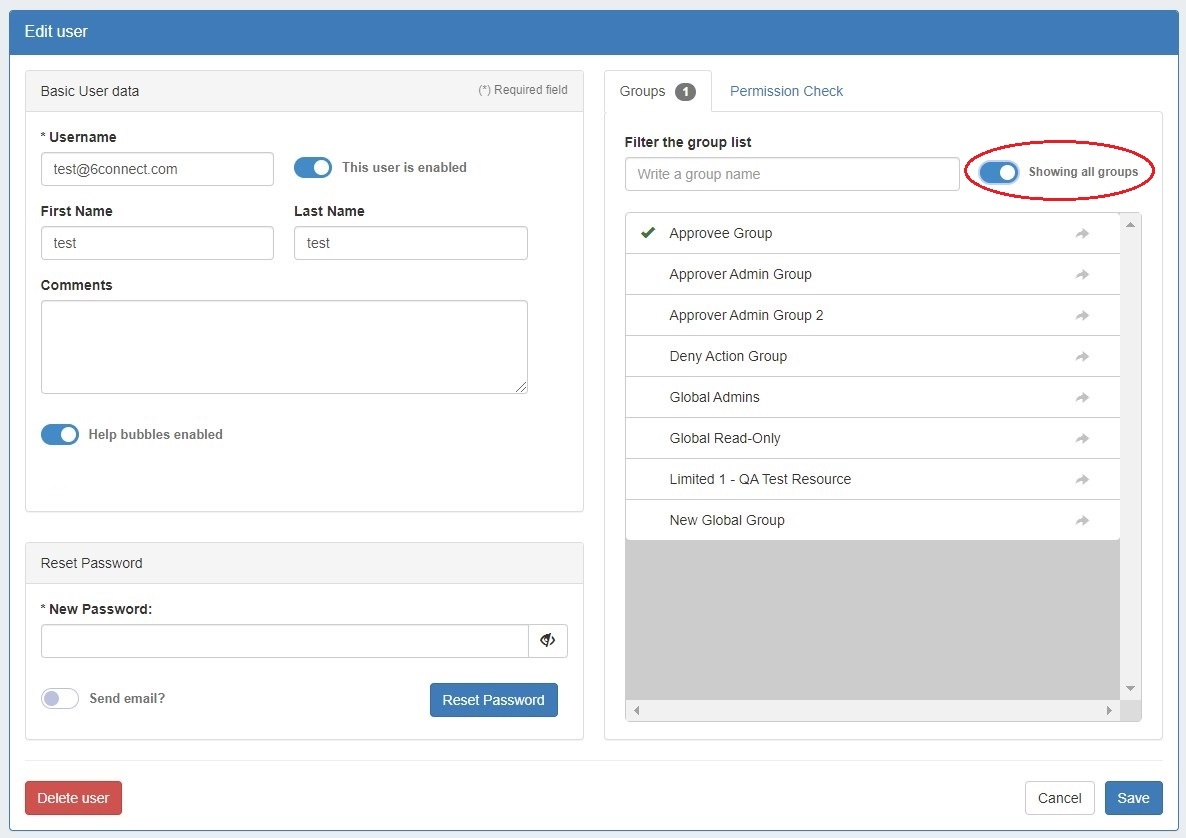
When done, be sure to save your changes by clicking "Save" at the bottom right of the page.
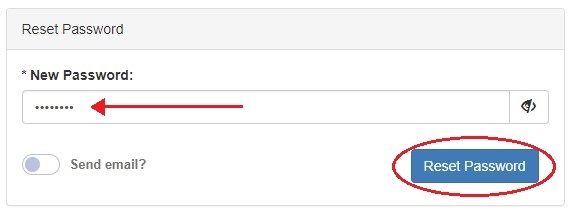
Password Management
To reset an existing user's password, simply type in a new password and hit "Reset Password". Use the eye icon to toggle field visibility.
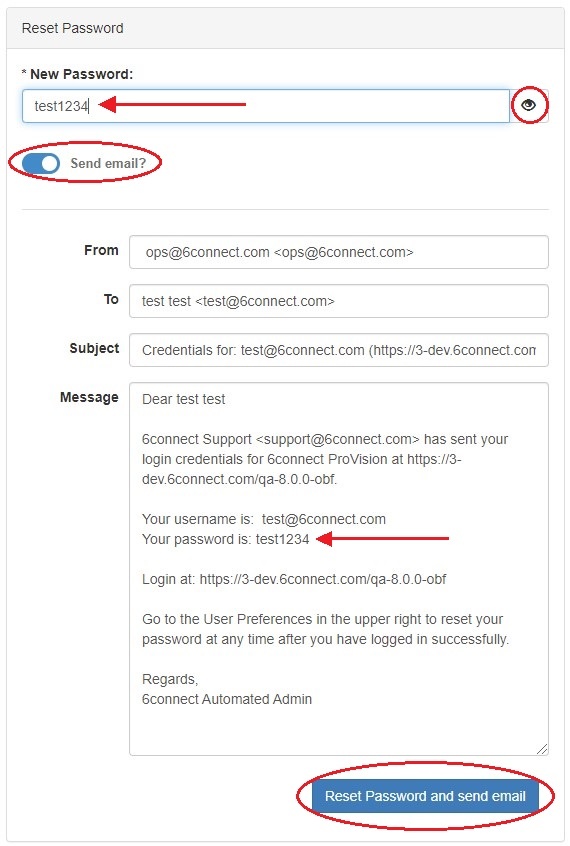
To reset a user's password and send the credentials in an email, move the "Send email?" selector to the "ON" position and email fields will appear that may be edited as desired.
Enter a new password into the password field and it will prepopulate in the email template. When complete, hit "Reset Password and send email".
| Expand | ||
|---|---|---|
| ||
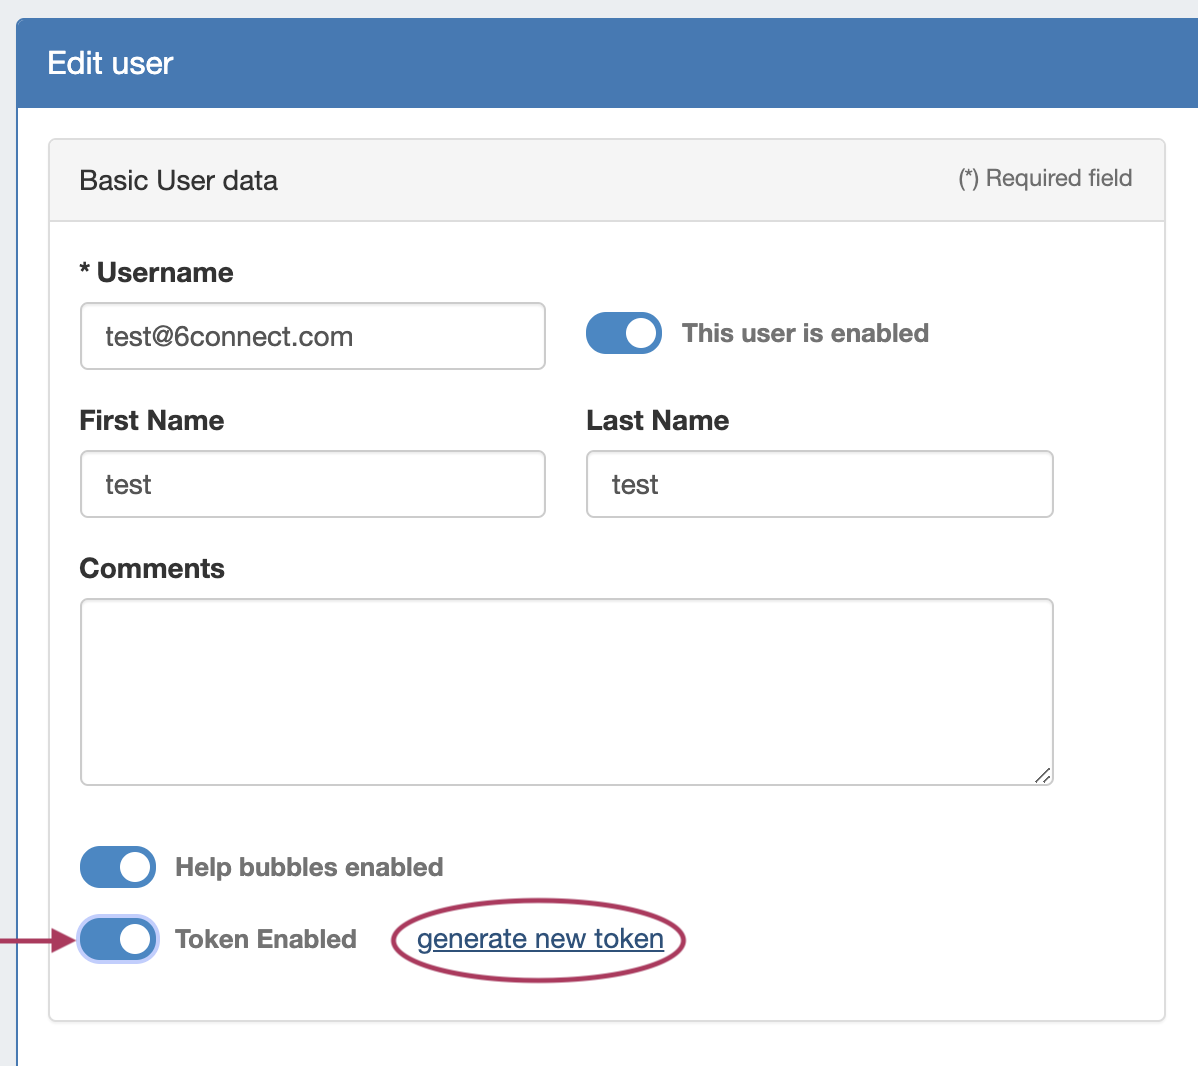
If desired, the system admin may enable login token links for users. To enable the Login Token functionality at the system level, change the ‘ENABLE_TOKEN_LOGIN’ in the includes/constants.php file to "true".
Once enabled, the option to enable tokens on a per-user level will be available under Edit User → Basic User Data. Once enabled for a user, click "generate new token" for a token link to be created.
Once enabled for a user, click "generate new token" for a token link to be created. Copy the provided URL, and save in a secure place. Token information may not be retrieved after the "Generate New Token" window is closed; a new token must be generated instead. |

Delete a User
...
To remove a user from the Users list, click on the red circle "delete" icon next to that user.
| Info |
|---|
Note: Users cannot edit or delete permissions for the Group to which they currently belong, unless they are also a member of the default Global Admin Group. |
Action Menu (gear icon) for the user and select the "Delete this user" option.

You may also delete a user from the User Details page by clicking the "Delete User" button at the bottom left of the page.

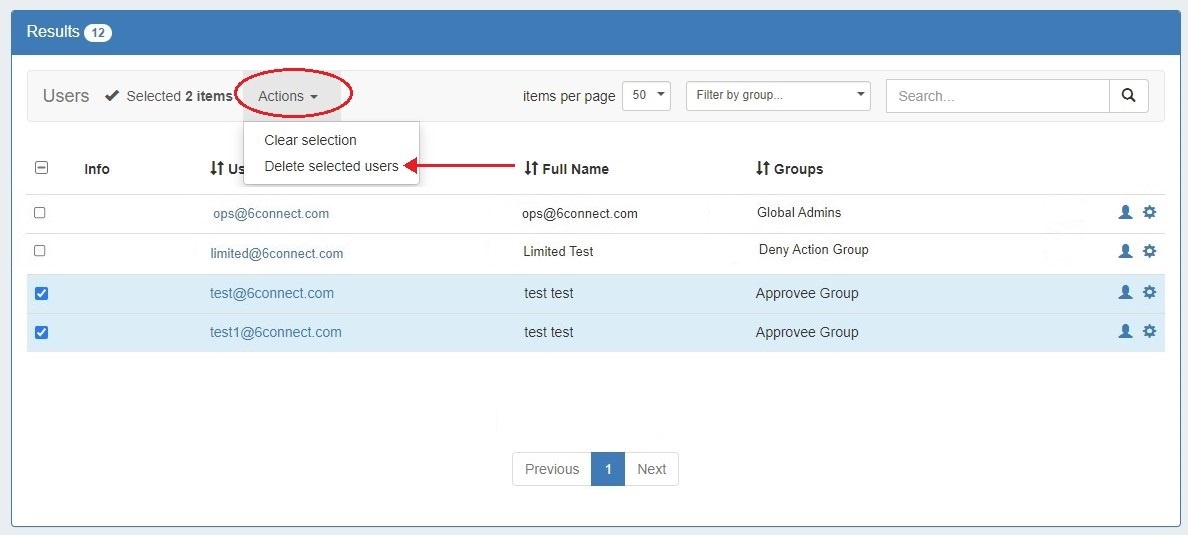
You may also select more than one user to delete.
To do so, select the checkboxes for the desired users, then under the "Actions" menu at the top of the list, select "Delete selected users".
Additional Information
For more information on Users and Groups, see the following areas:
...