...
| HTML |
|---|
<div id="google_translate_element"></div>
<script type="text/javascript">
function googleTranslateElementInit() {
  new google.translate.TranslateElement({pageLanguage: 'en'}, 'google_translate_element');
}
</script>
<script type="text/javascript" src="//translate.google.com/translate_a/element.js?cb=googleTranslateElementInit"></script> |
BIND DNS Zone Import
The BIND DNS Zone Upload / Import tool uses the named.conf configuration file tied to the zones you are uploading, a .zip or .tar file of the zones themselves, and an optional .csv file mapping zones to customers. The following steps are used when importing BIND DNS zones:
| Table of Contents |
|---|
Preparing your DNS Zones for Import
If your zone data is currently in BIND format - this is very straightforward.
...
For a sample CSV: config.csv
Importing your DNS Zones (BIND)
Video Walkthrough
Widget Connector url https://www.youtube.com/watch?v=kD3ecJOzXt4
...
| Info |
|---|
Note: Video walkthrough is from ProVision version 5.1.x - however, import steps and descriptions still apply to current version. Updated videos are in progress! |
Step 1: Create a new DNS Import Job
Navigate to the Data Import Tab from the Admin Import Tab from the Admin button to import your data. Select "BIND Zone Upload/Import" under "DNS Import".
...
After importing, the new job will appear under the "Existing Jobs" section. To continue working with this job, select it from the list and the next step will appear on the page.
Step 2: Map Data Columns (Optional)
If you chose to load an optional match CSV file to assign DNS Zones to Resource, a mapping step will be available. Otherwise, proceed to Step 3: Reviewing Data.
...
When completed, hit "Next".
Step 3: Reviewing Data
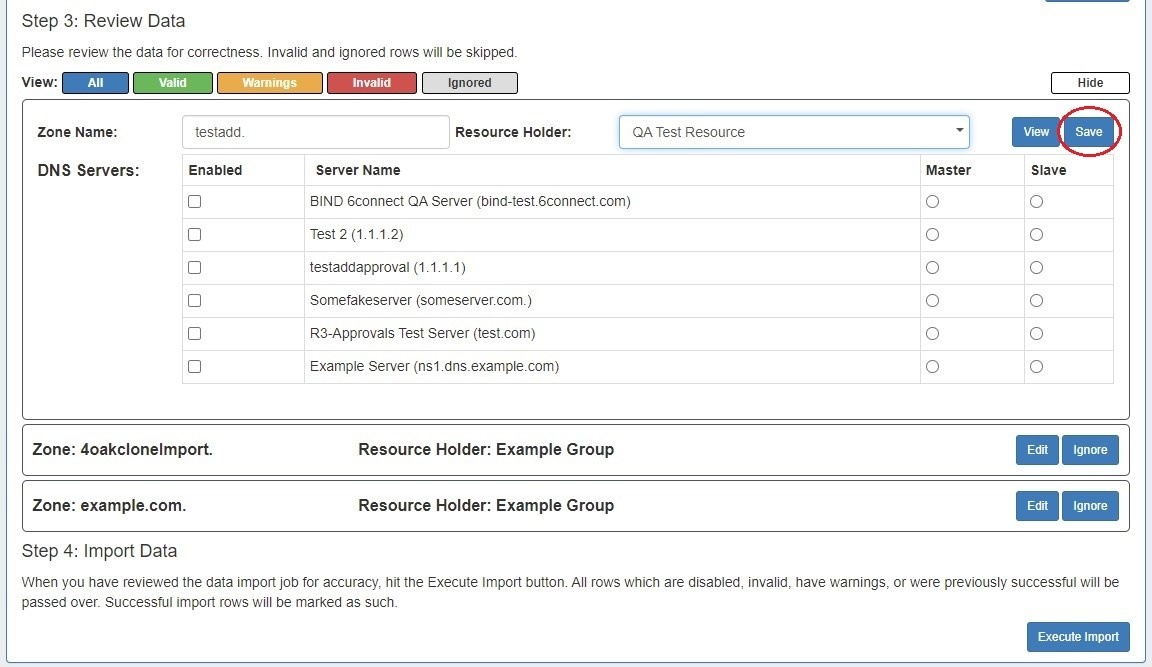
After supplying the file set and defining columns (if applicable), a review step is provided. The configuration file is broken into individual jobs, scanned for errors, and shown by row (in batches of 100) to be reviewed. Zones with errors will show as color coded. and can be filtered to be viewed by All, Valid, Warnings, Invalid, or Ignored. From here, the zone can be edited or ignored.
...
After editing, hit "Save", and continue reviewing / editing data as desired.
Step 4: Execute Import
When the review step is completed, hit the "Execute Import" button. A progress bar will appear to show progress and note errors if they occur.
...


