Working with DHCP Pools
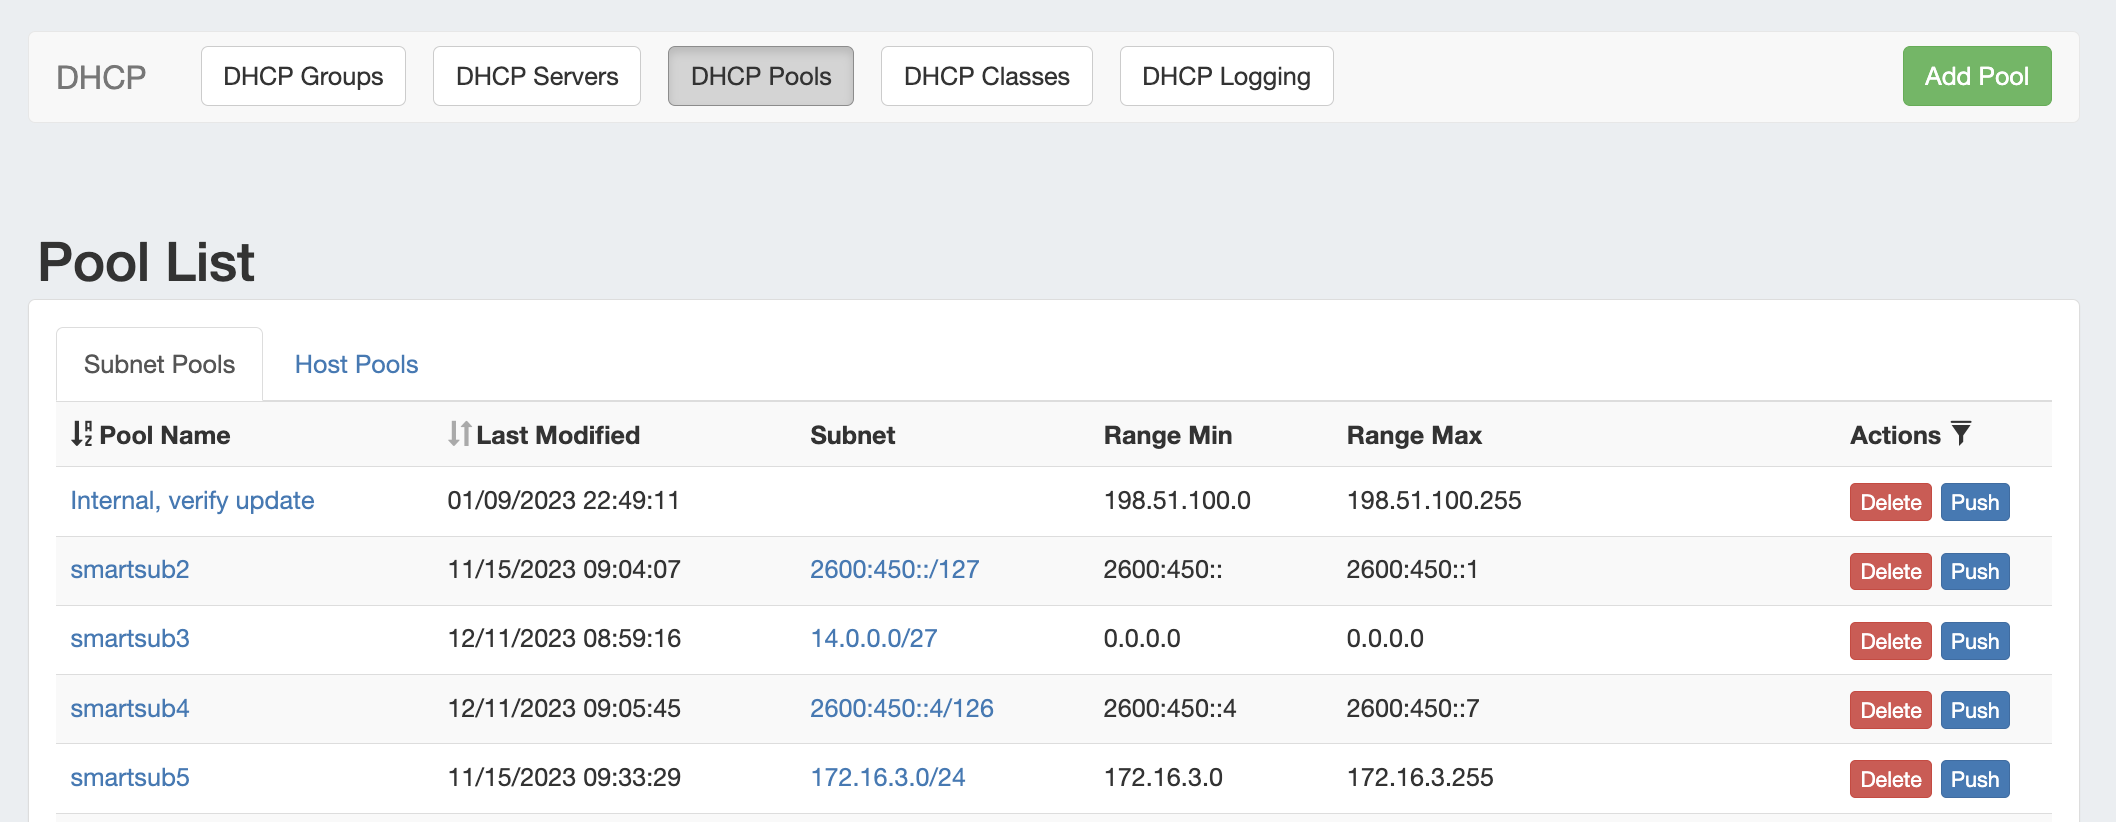 DHCP Pool Management
DHCP Pool specific tasks are managed from two main areas in ProVision - the DHCP Pools list, and the Pool Details page.
DHCP Pools List
The DHCP Pools List is accessed from the the DHCP tab, and then clicking on the the DHCP Pools subtab button.
Clicking on the Pool name from any DHCP Pool List will open the Pool Details page for the specific pool.
DHCP Pools List
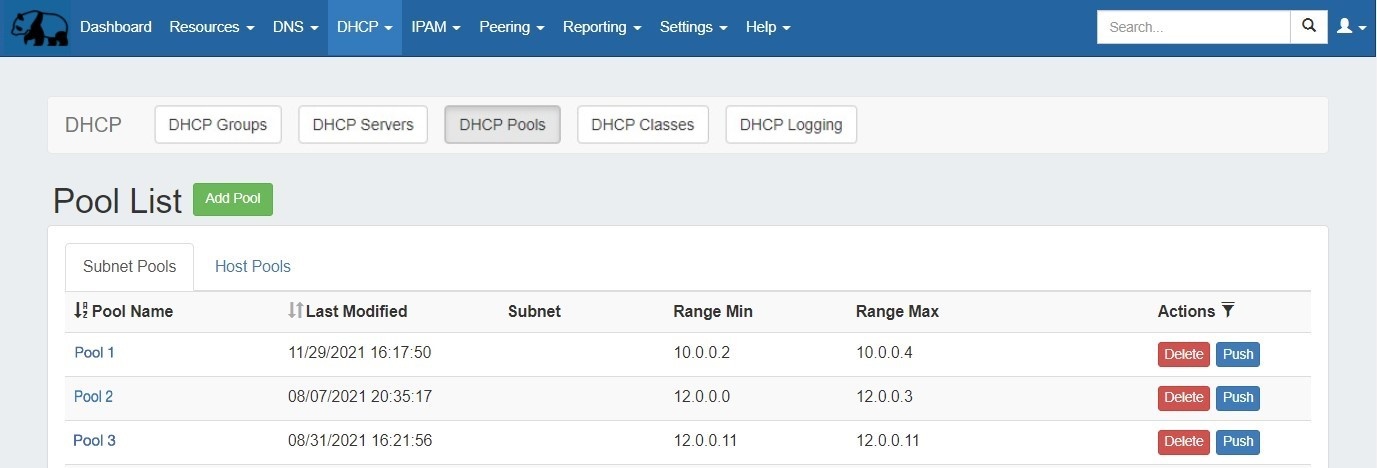
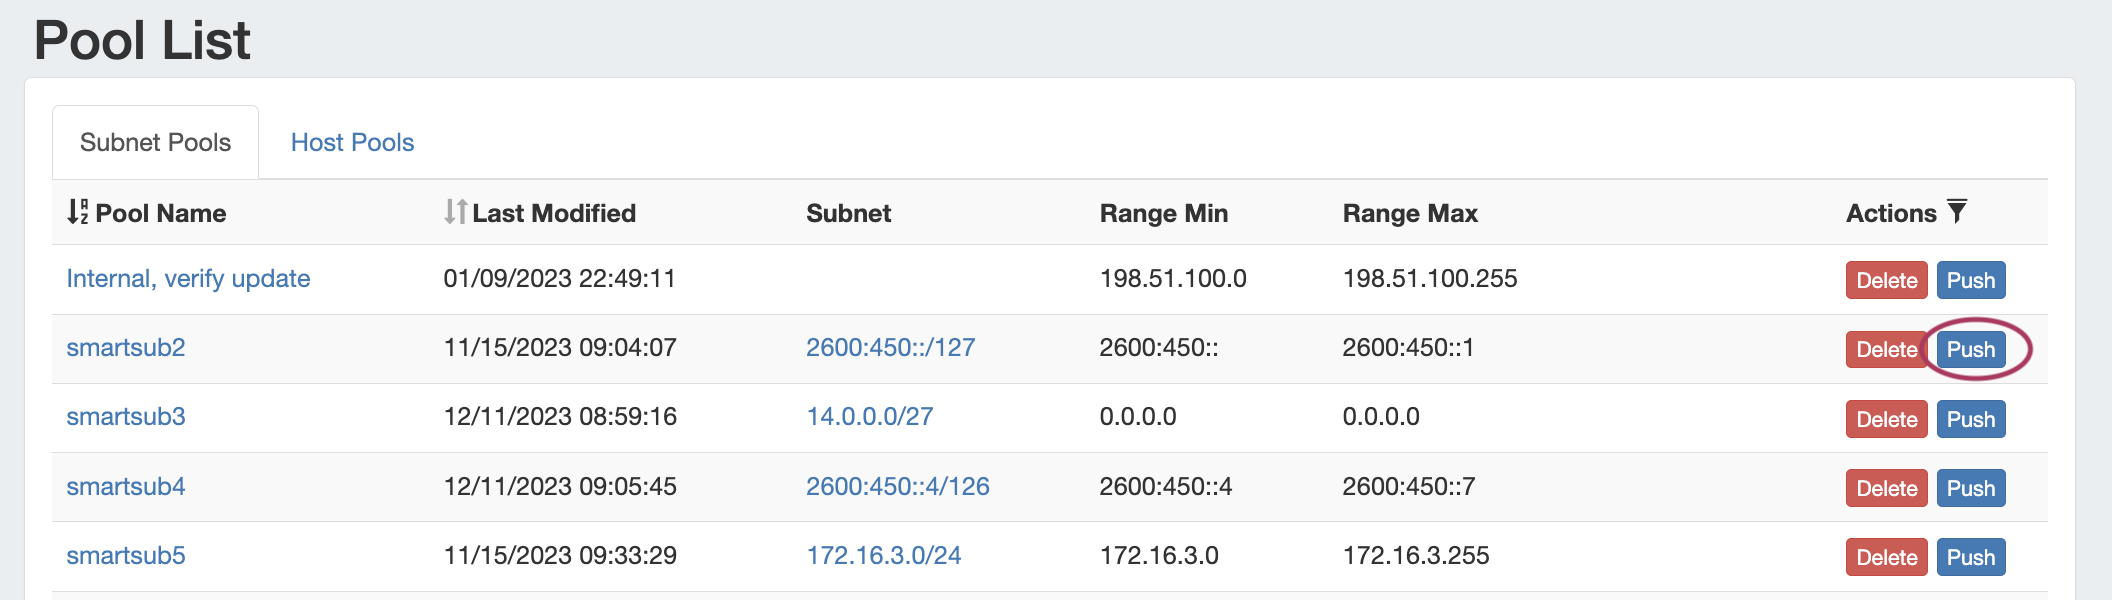
The DHCP Pools list provides the same pool-level functionality as the DHCP Groups pool lists, but includes all pools regardless of Group attachment.From this page, you may create, view, edit, and push subnet or host pools.
Pool Details Page
Clicking on the pool Pool name from any DHCP Pool List will open the the Pool Details page , and clicking on the Subnet will open IPAM Mange for the assigned specific pool block.
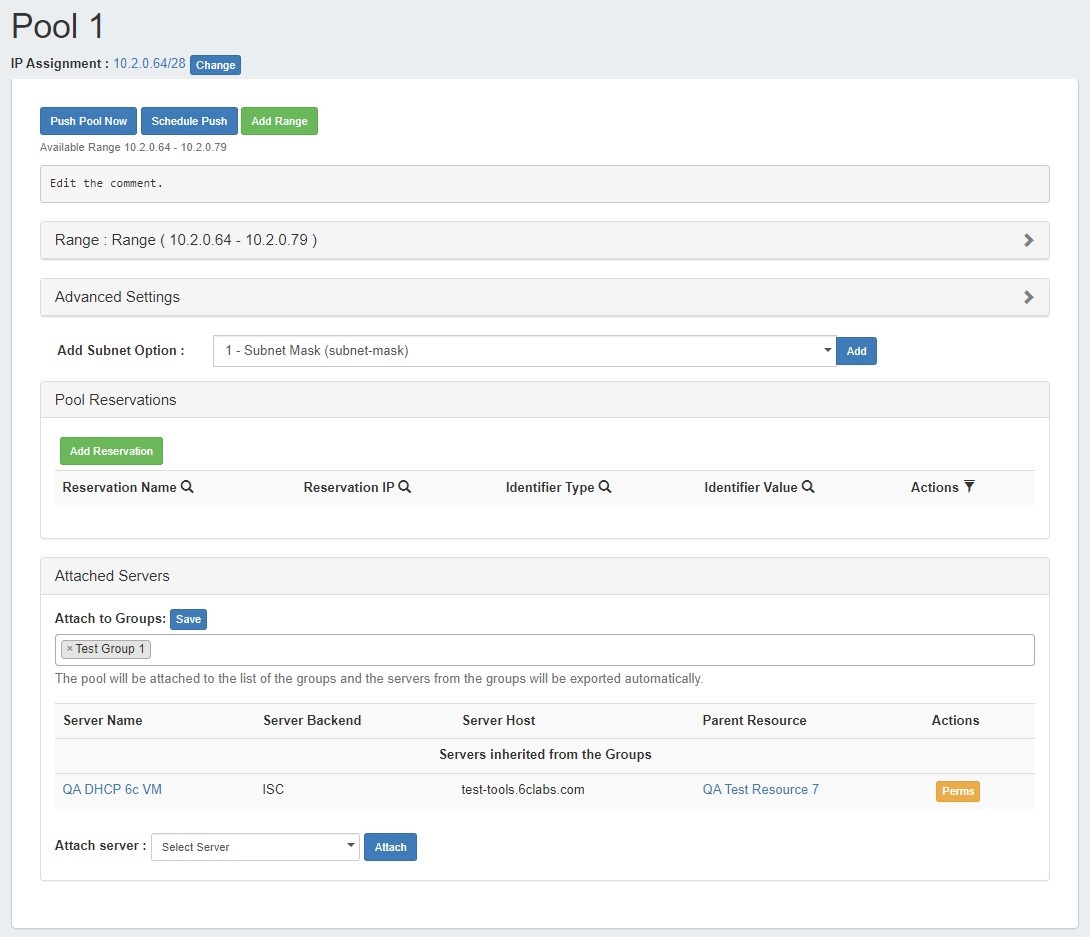
The Pool Details page allows you to view, add, delete, and push individual DHCP Host and Subnet Pools. Under a pool, you may specify and update IP assignments, ranges, reservations and optionally set BOOTP Vendor Extensions / DHCP Options to send to the DHCP server.
| Table of Contents |
|---|
Working with the DHCP Pools List
From this page, you may create, view, edit, and push subnet or host pools. Clicking on the Subnet will open IPAM Mange for the assigned pool block.
Add a DHCP Pool
Add a new DHCP Pool from the Pool List by clicking the "Add Pool" button at the top of the page.
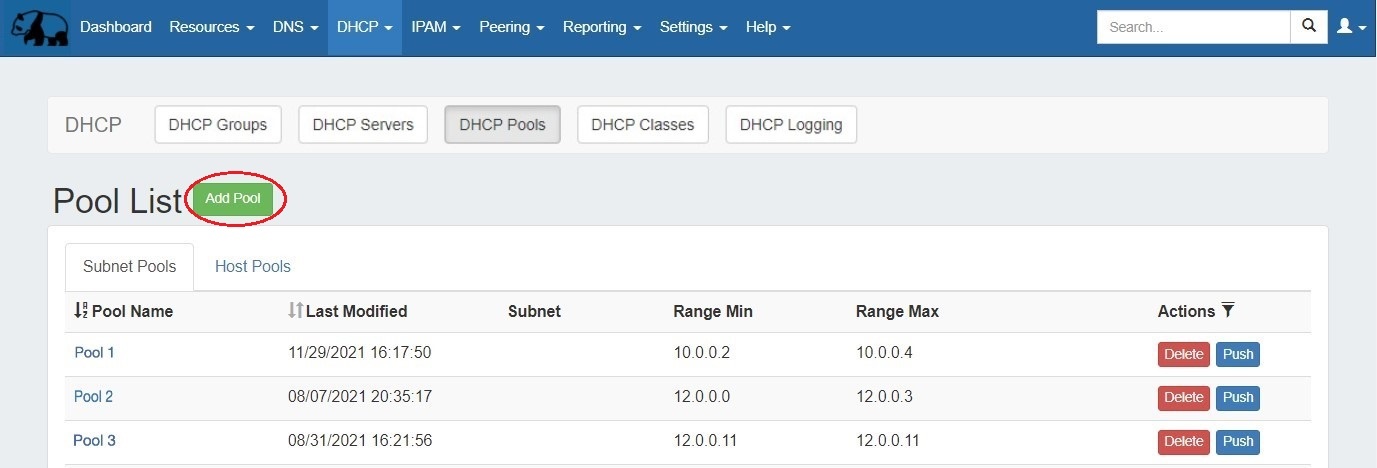
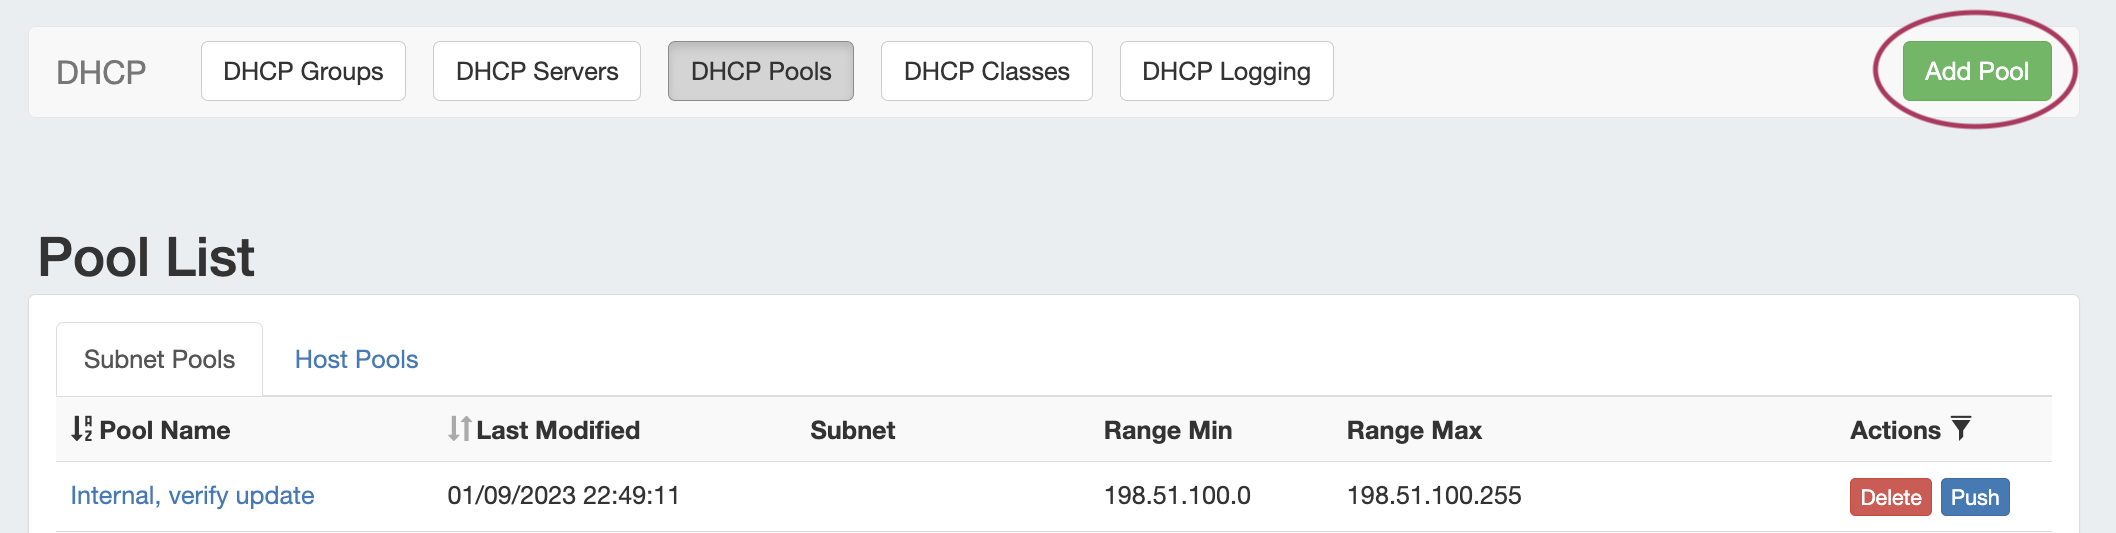
When the "Create New Pool" dialog appears, you may choose to create either a Subnet or Host Pool. Either pool type may have a block smart assigned or manually direct assigned.
Create Subnet Pool
| Expand |
|---|
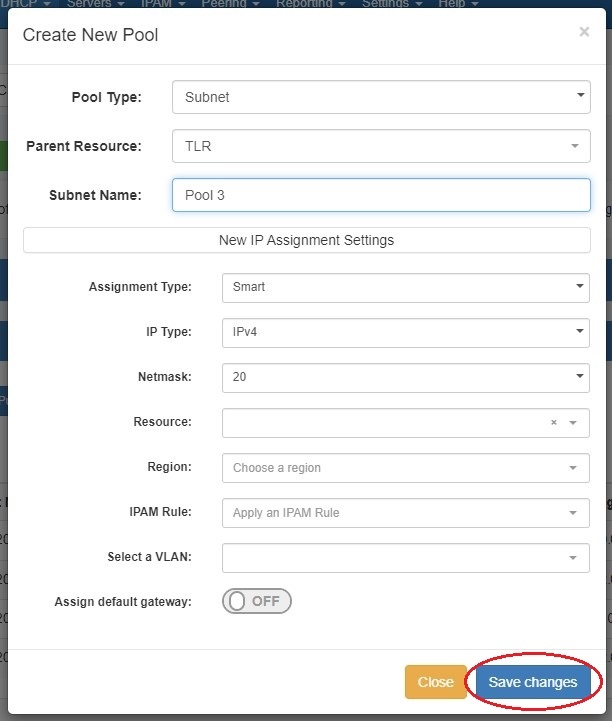
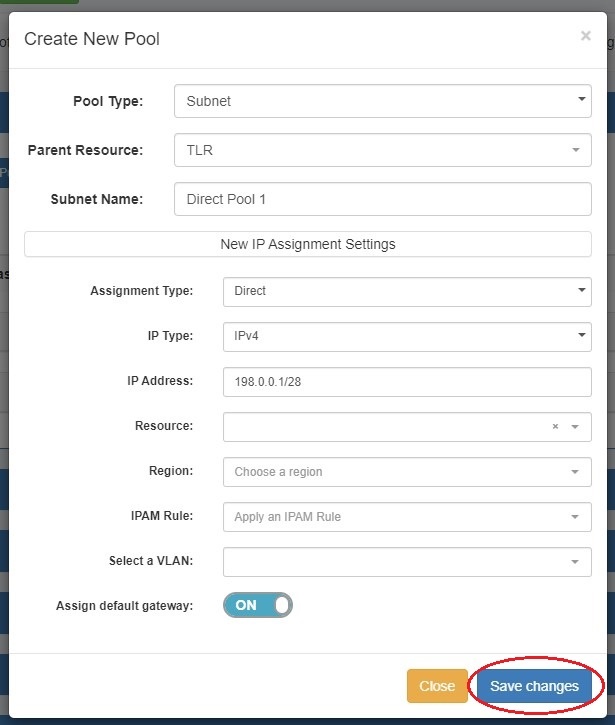
To add a new subnet pool to a DHCP Group, select "Subnet" as the Pool Type. Select the parent resource and type in a Subnet Name.
Next, choose an assignment type - you may either have ProVision smart assign a block for the pool that matches your provided criteria, or directly assign a specific block. Smart AssignTo Smart Assign a DHCP pool, select "Smart" for the Assignment type, choose IPv4 or IPv6 for the IP type, then select a netmask. All other fields are optional - Resource, Region, IPAM Rules, and VLAN may be selected to further narrow the block criteria. If desired, toggle "Assign Default Gateway" on. When done, click "Save Changes". ProVision will choose the first block matching all criteria to assign to the pool. If no block matches the given criteria, a message will state so. Try either removing some criteria, or ensure that blocks exist in IPAM (with subassignments enabled!) with the given attributes. Direct Assign
To Direct Assign a DHCP pool, select "Direct" for the Assignment type, choose IPv4 or IPv6 for the IP type, then type in the desired IP Address. All other fields are optional - Resource, Region, IPAM Rules, and VLAN may be selected to further narrow the block criteria, if duplicate blocks exist. If desired, toggle "Assign Default Gateway" on. When done, click "Save Changes". If the typed block exists in ProVision , with subassignments enabled, and meets any additional criteria, that block will be assigned to the pool. |
Create a Host Pool
| Expand |
|---|
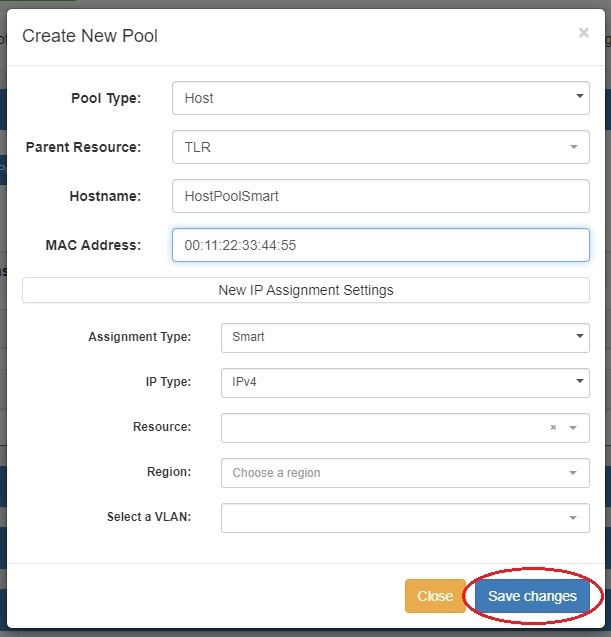
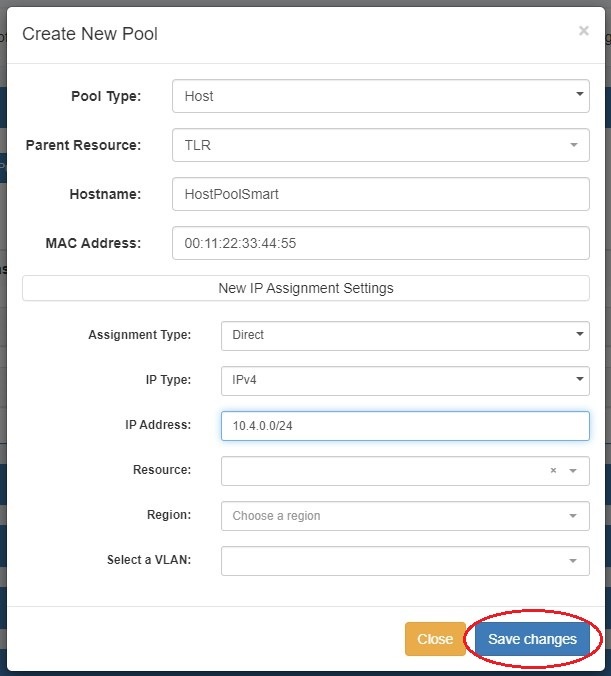
To add a new host pool to a DHCP Group, select "Host" as the Pool Type. Select the parent resource, and add a Hostname and MAC Address.
Next, choose an assignment type - you may either have ProVision smart assign a block for the pool that matches your provided criteria, or directly assign a specific block. Smart AssignTo Smart Assign a DHCP pool, select "Smart" for the Assignment type and choose IPv4 or IPv6 for the IP type. All other fields are optional - Resource, Region, IPAM Rules, and VLAN may be selected to further narrow the block criteria. When done, click "Save Changes". ProVision will choose the first block matching all criteria to assign to the pool. If no block matches the given criteria, a message will state so. Try either removing some criteria, or ensure that blocks exist in IPAM (with subassignments enabled!) with the given attributes. Direct Assign
To Direct Assign a DHCP pool, select "Direct" for the Assignment type, choose IPv4 or IPv6 for the IP type, then type in the desired IP Address. All other fields are optional - Resource, Region, IPAM Rules, and VLAN may be selected to further narrow the block criteria, if duplicate blocks exist. When done, click "Save Changes". If the typed block exists in ProVision , with subassignments enabled, and meets any additional criteria, that block will be assigned to the pool. |
...
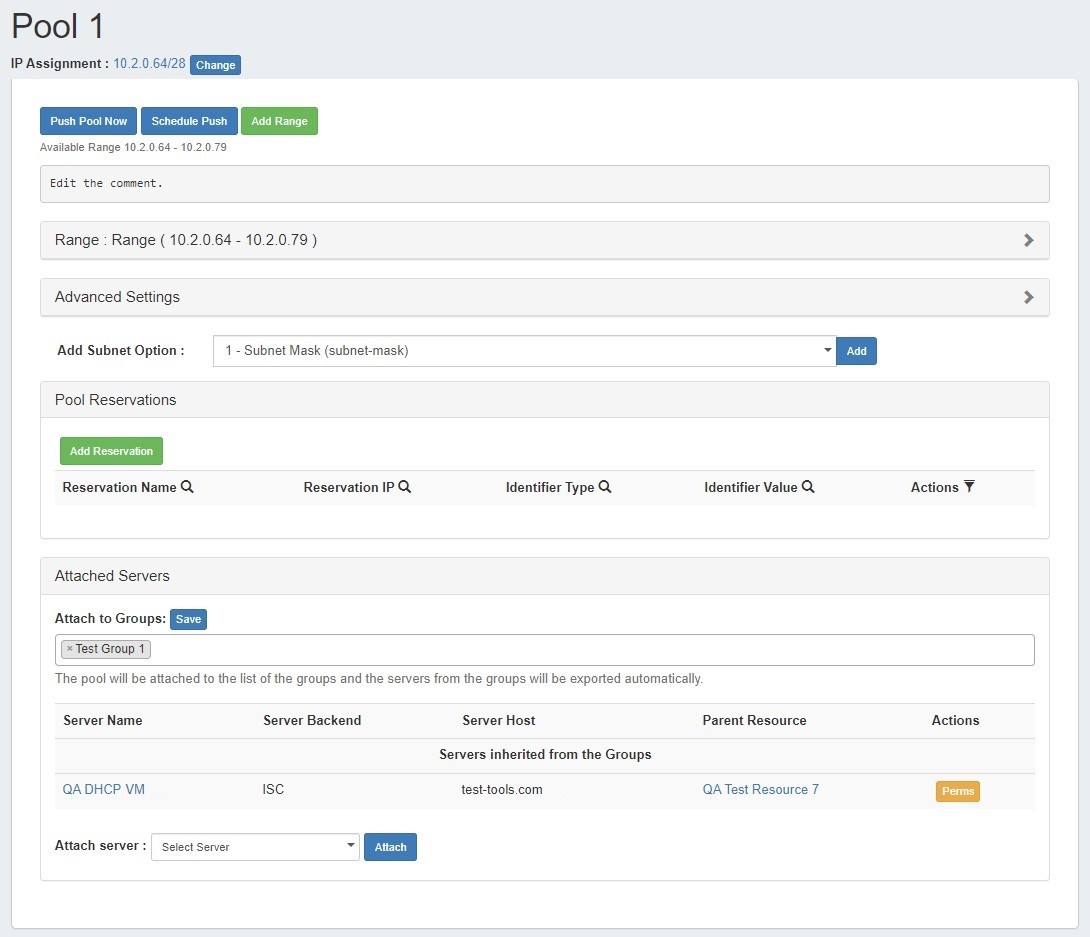
To push the pool, click the "Push Pool Now" or "Schedule Push" buttons at the top of the pool details.
Edit IP Assignment
...
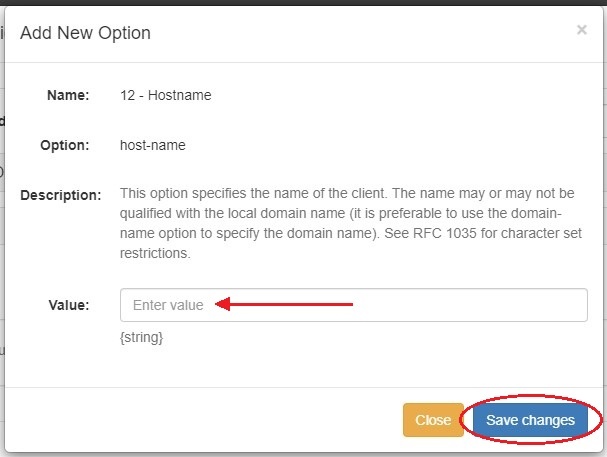
Enter a value for the chosen option and click "Save changes".
Attach Group / Server to a Pool
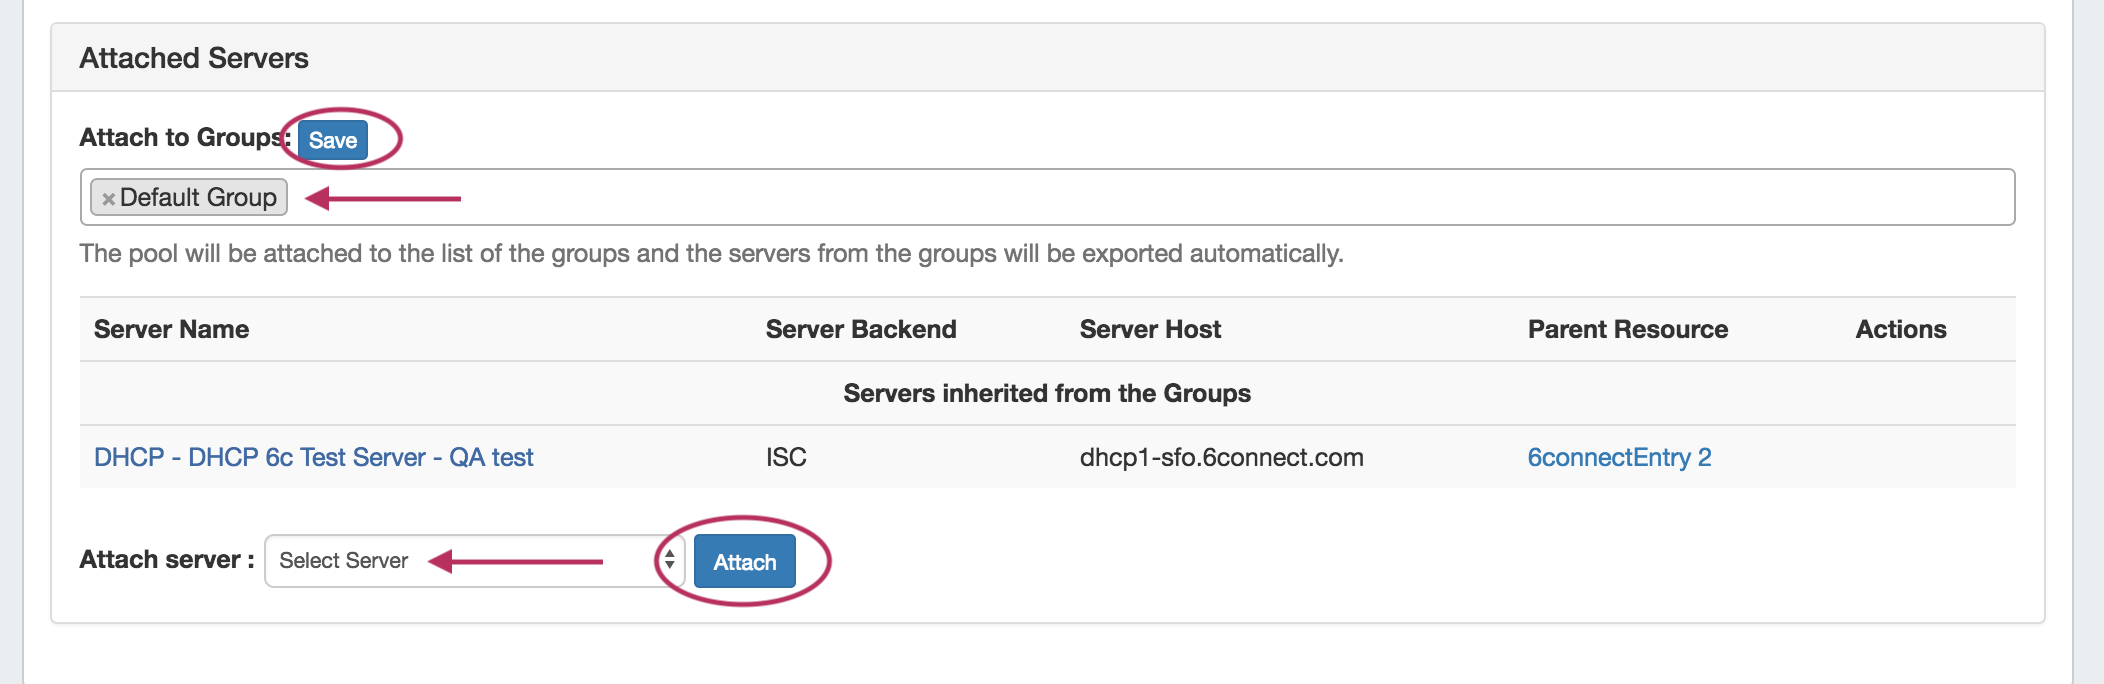
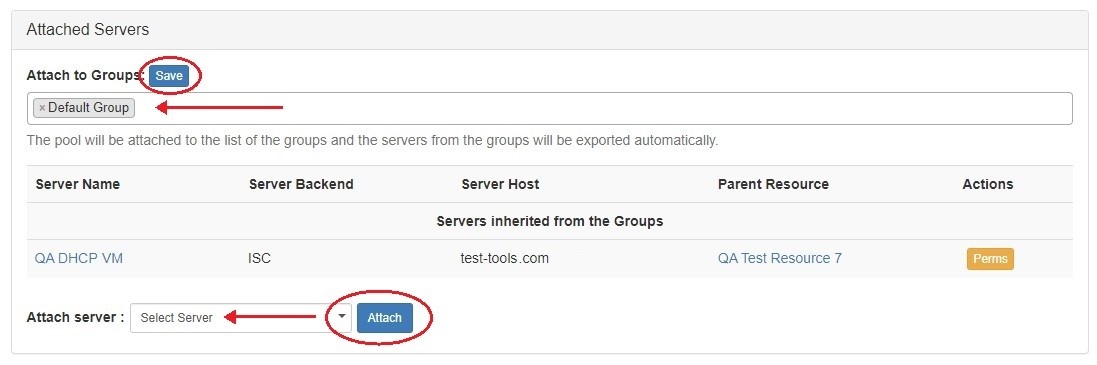
Servers may be attached to a pool either from a DHCP Group association, or directly from the Pool Details Page.
...
To directly attach a DHCP server to a pool, select the server from the "Attach server" dropdown, then click the "Attach" button.
Detach Server from a Pool
To detach a server from a pool, look for the server under the "Attached Servers" list, then click "Detach" under actions for that server.
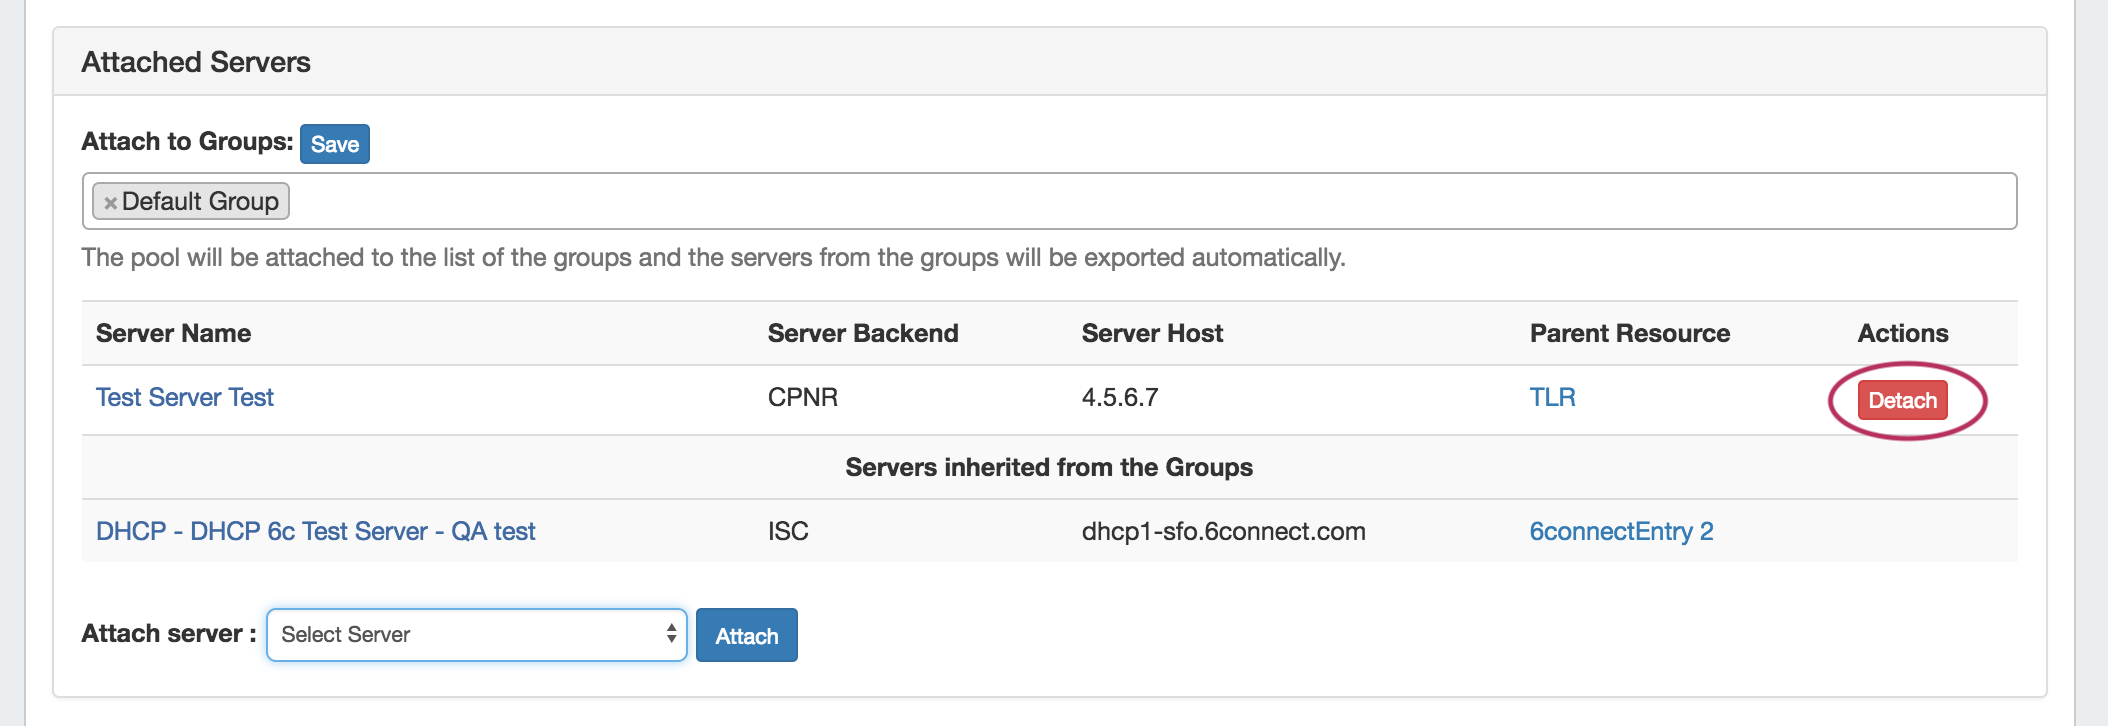
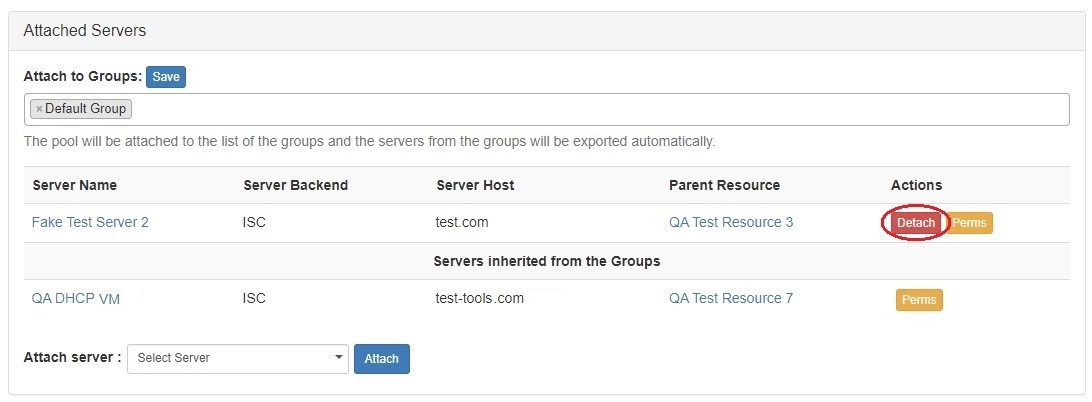
To detach a server inherited from a Group, the pool must be removed from the group. To do that, click the "x" next to the group name in the "Attach to Groups" box, then click "Save".
...
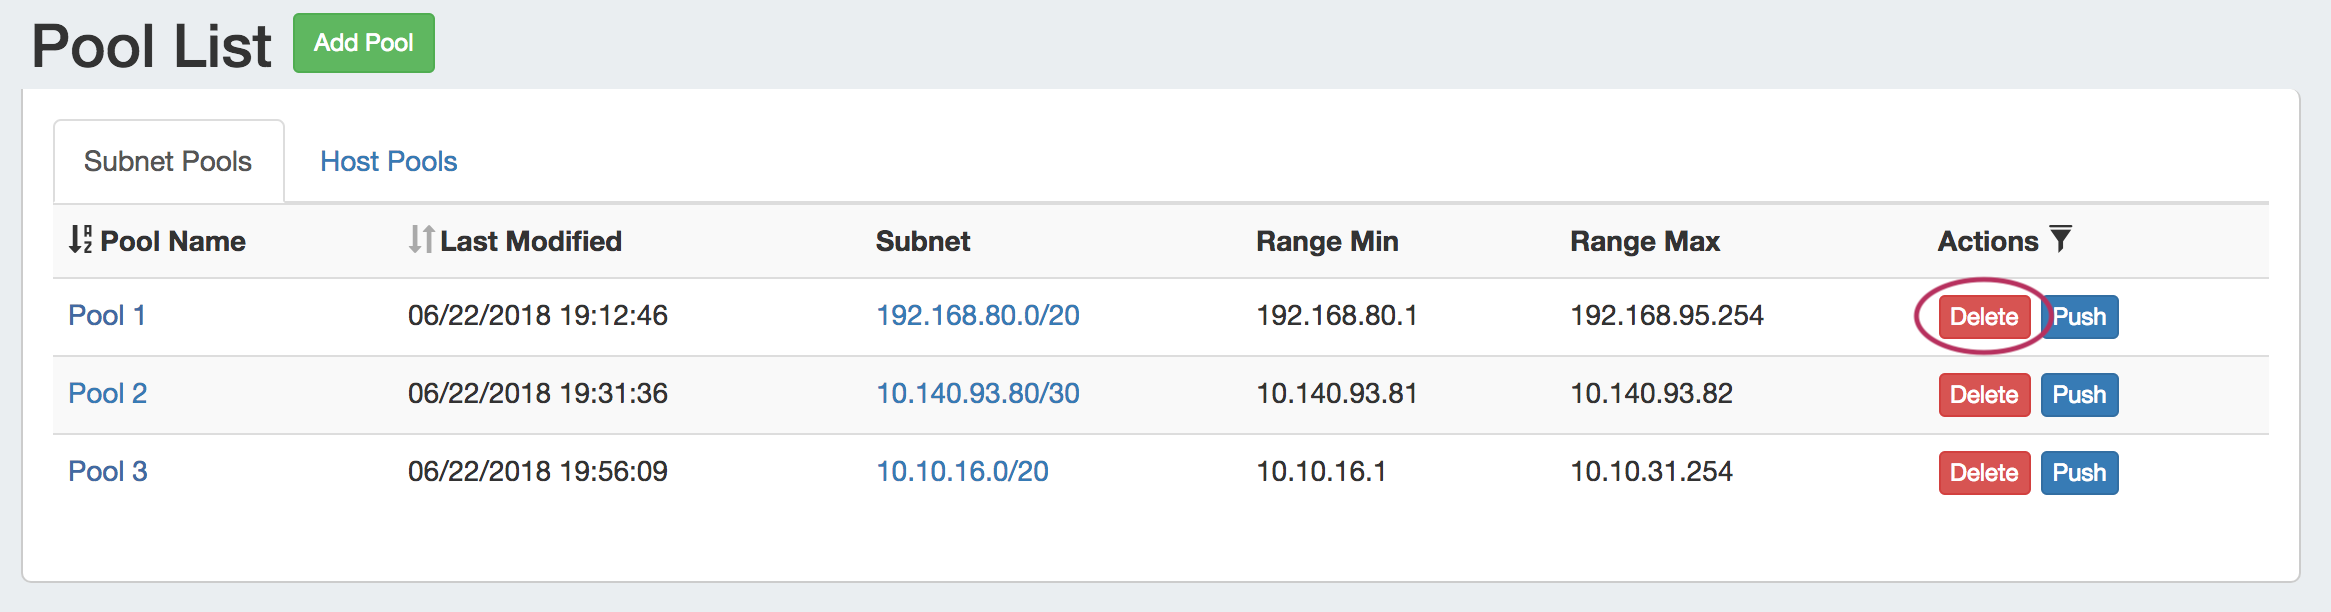
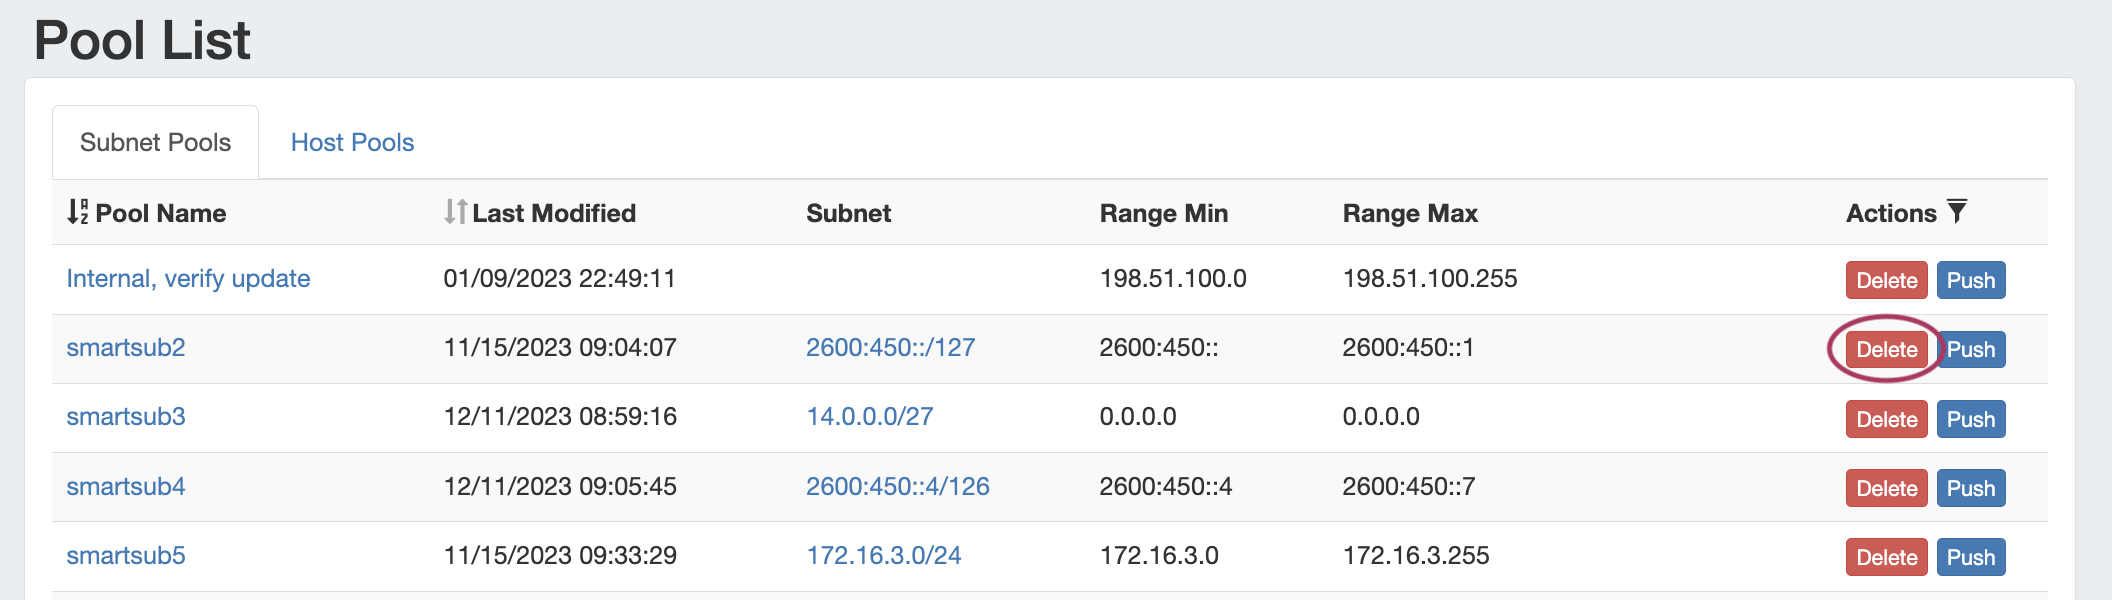
Users with delete permissions over the pool may delete it by clicking the "Delete" button under "Actions" from any DHCP Pool List.
Pushing DHCP Pools
...
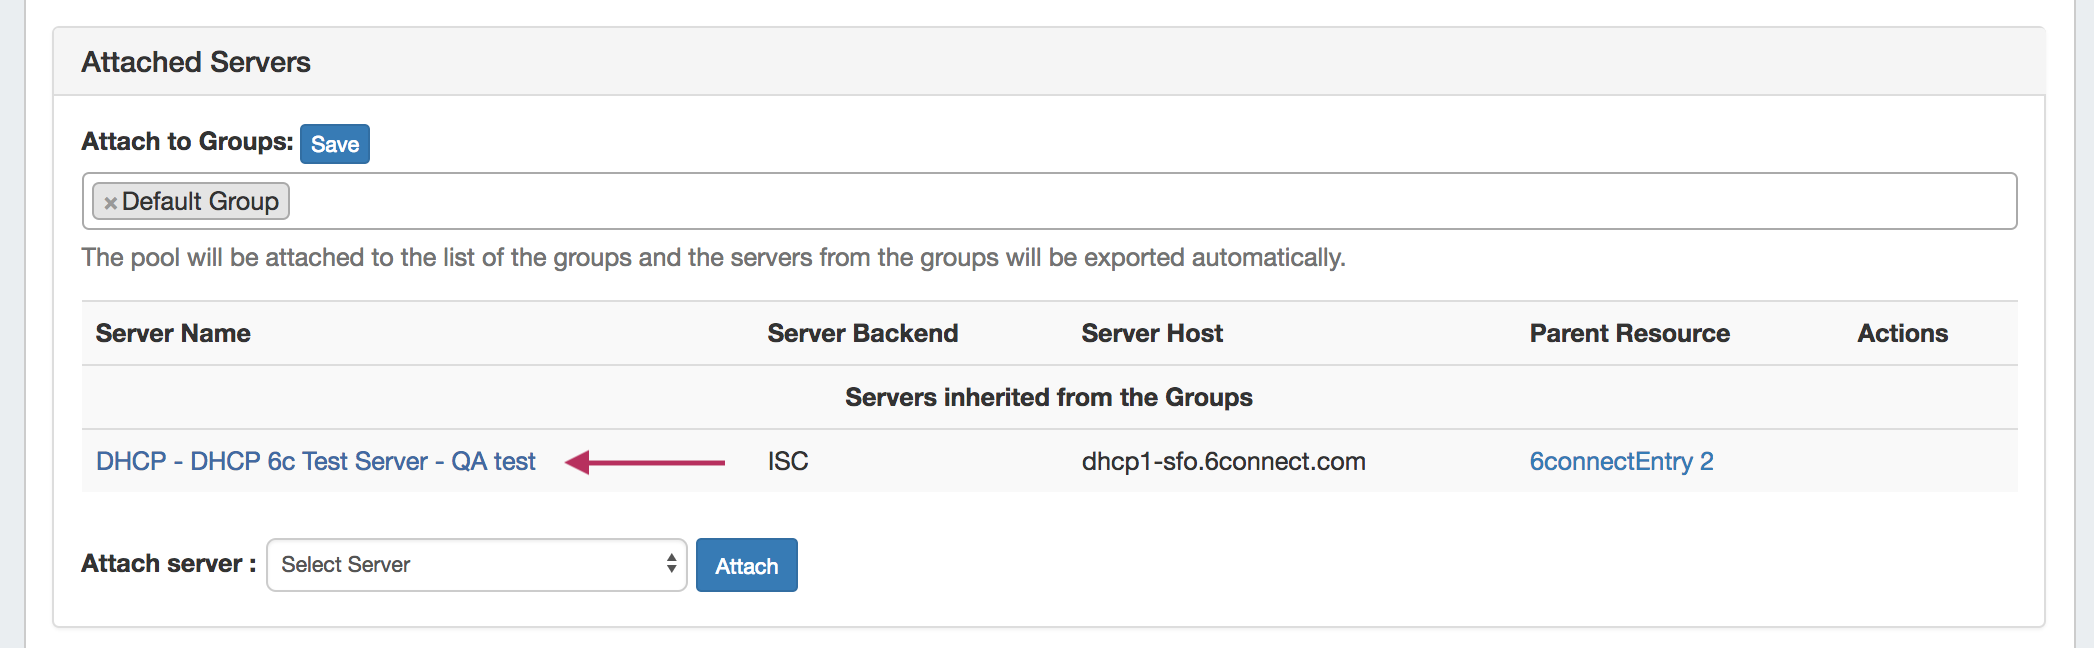
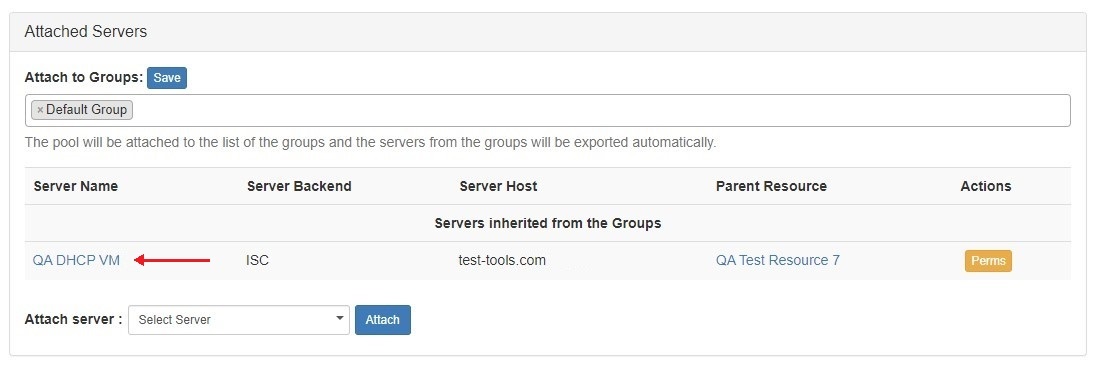
Before pushing a pool for the first time, view the "Attached Servers" section in the Pool Details page and verify that the correct server is attached to the DHCP Pool, either directly or via a DHCP Group.
Manual Pool Push (DHCP Pools List)
Pools may be manually pushed by clicking the "Push" button for the pool from any DHCP Pools list.
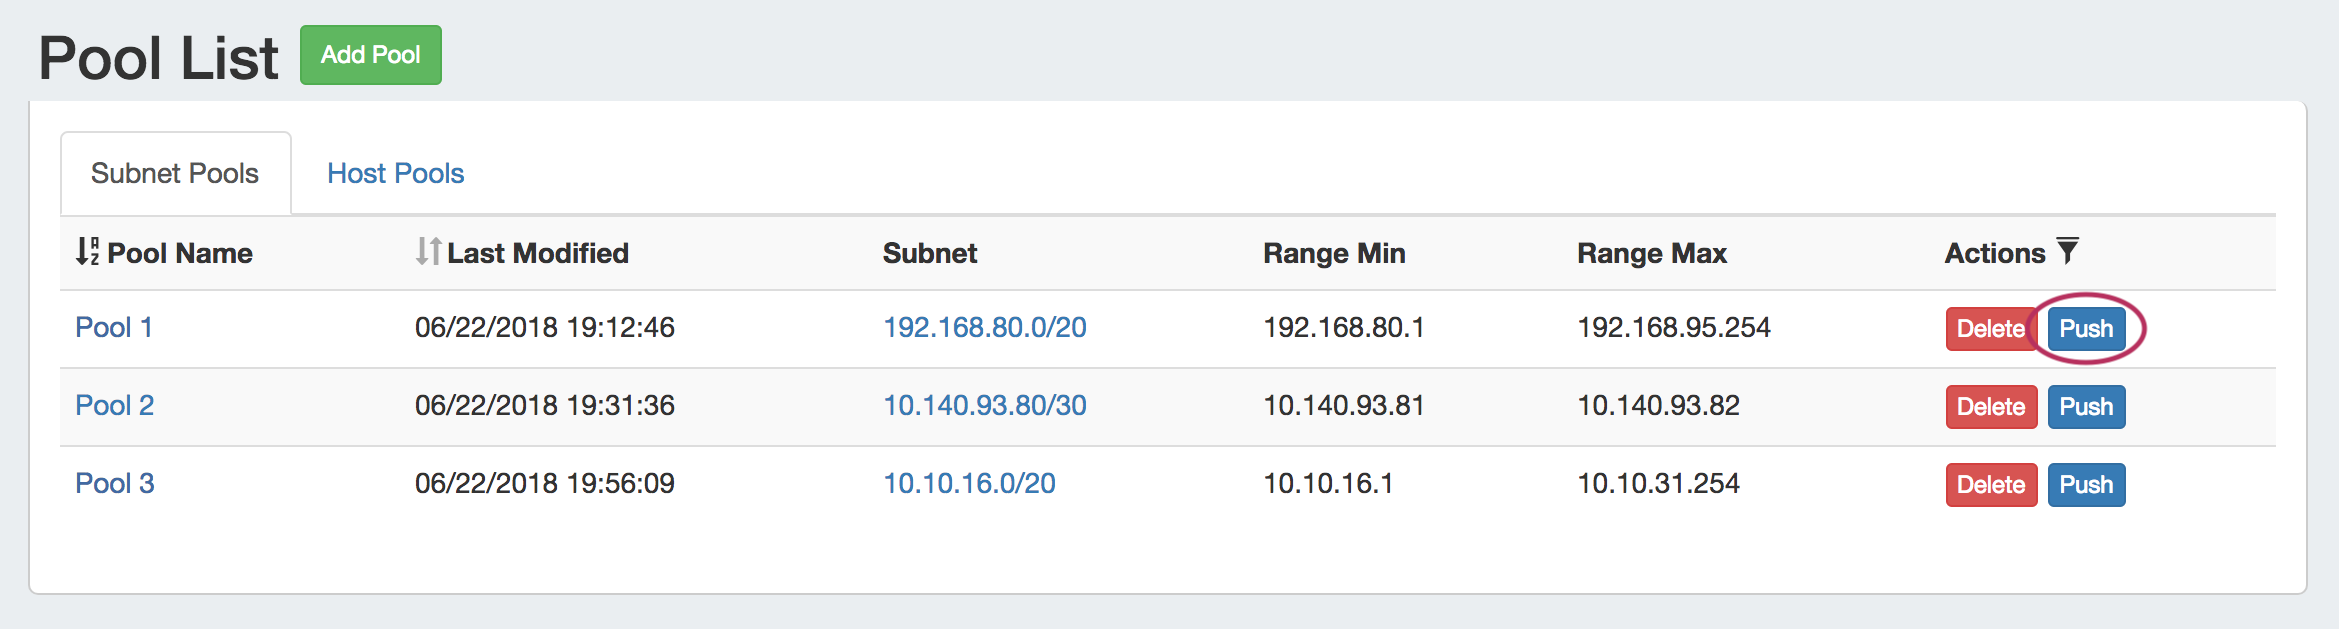
The "DHCP Push Status" modal will appear, showing status and any errors that occur.
...