...
Peers
...
The Peers subtab lists existing peers in ProVision. Here, and allows for you to search for new peers to add via the "Add Peer" button.
Peer Details Page
Clicking on a peer in the list will open the Peer Details page.
From here, additional Peers may be added, or you can view details for the existing peer, including available exchanges and what routers you have available on that exchange.
Configure Multiple Sessions
you can add new peers and view peer details. ProVision supports Peer lookup from PeeringDB, as well as creation of "Local Peers". Local or custom Peers that are 'private' or not registered with PeeringDB may also be used for session creation.
| Table of Contents |
|---|
Working with Peers
Peer List
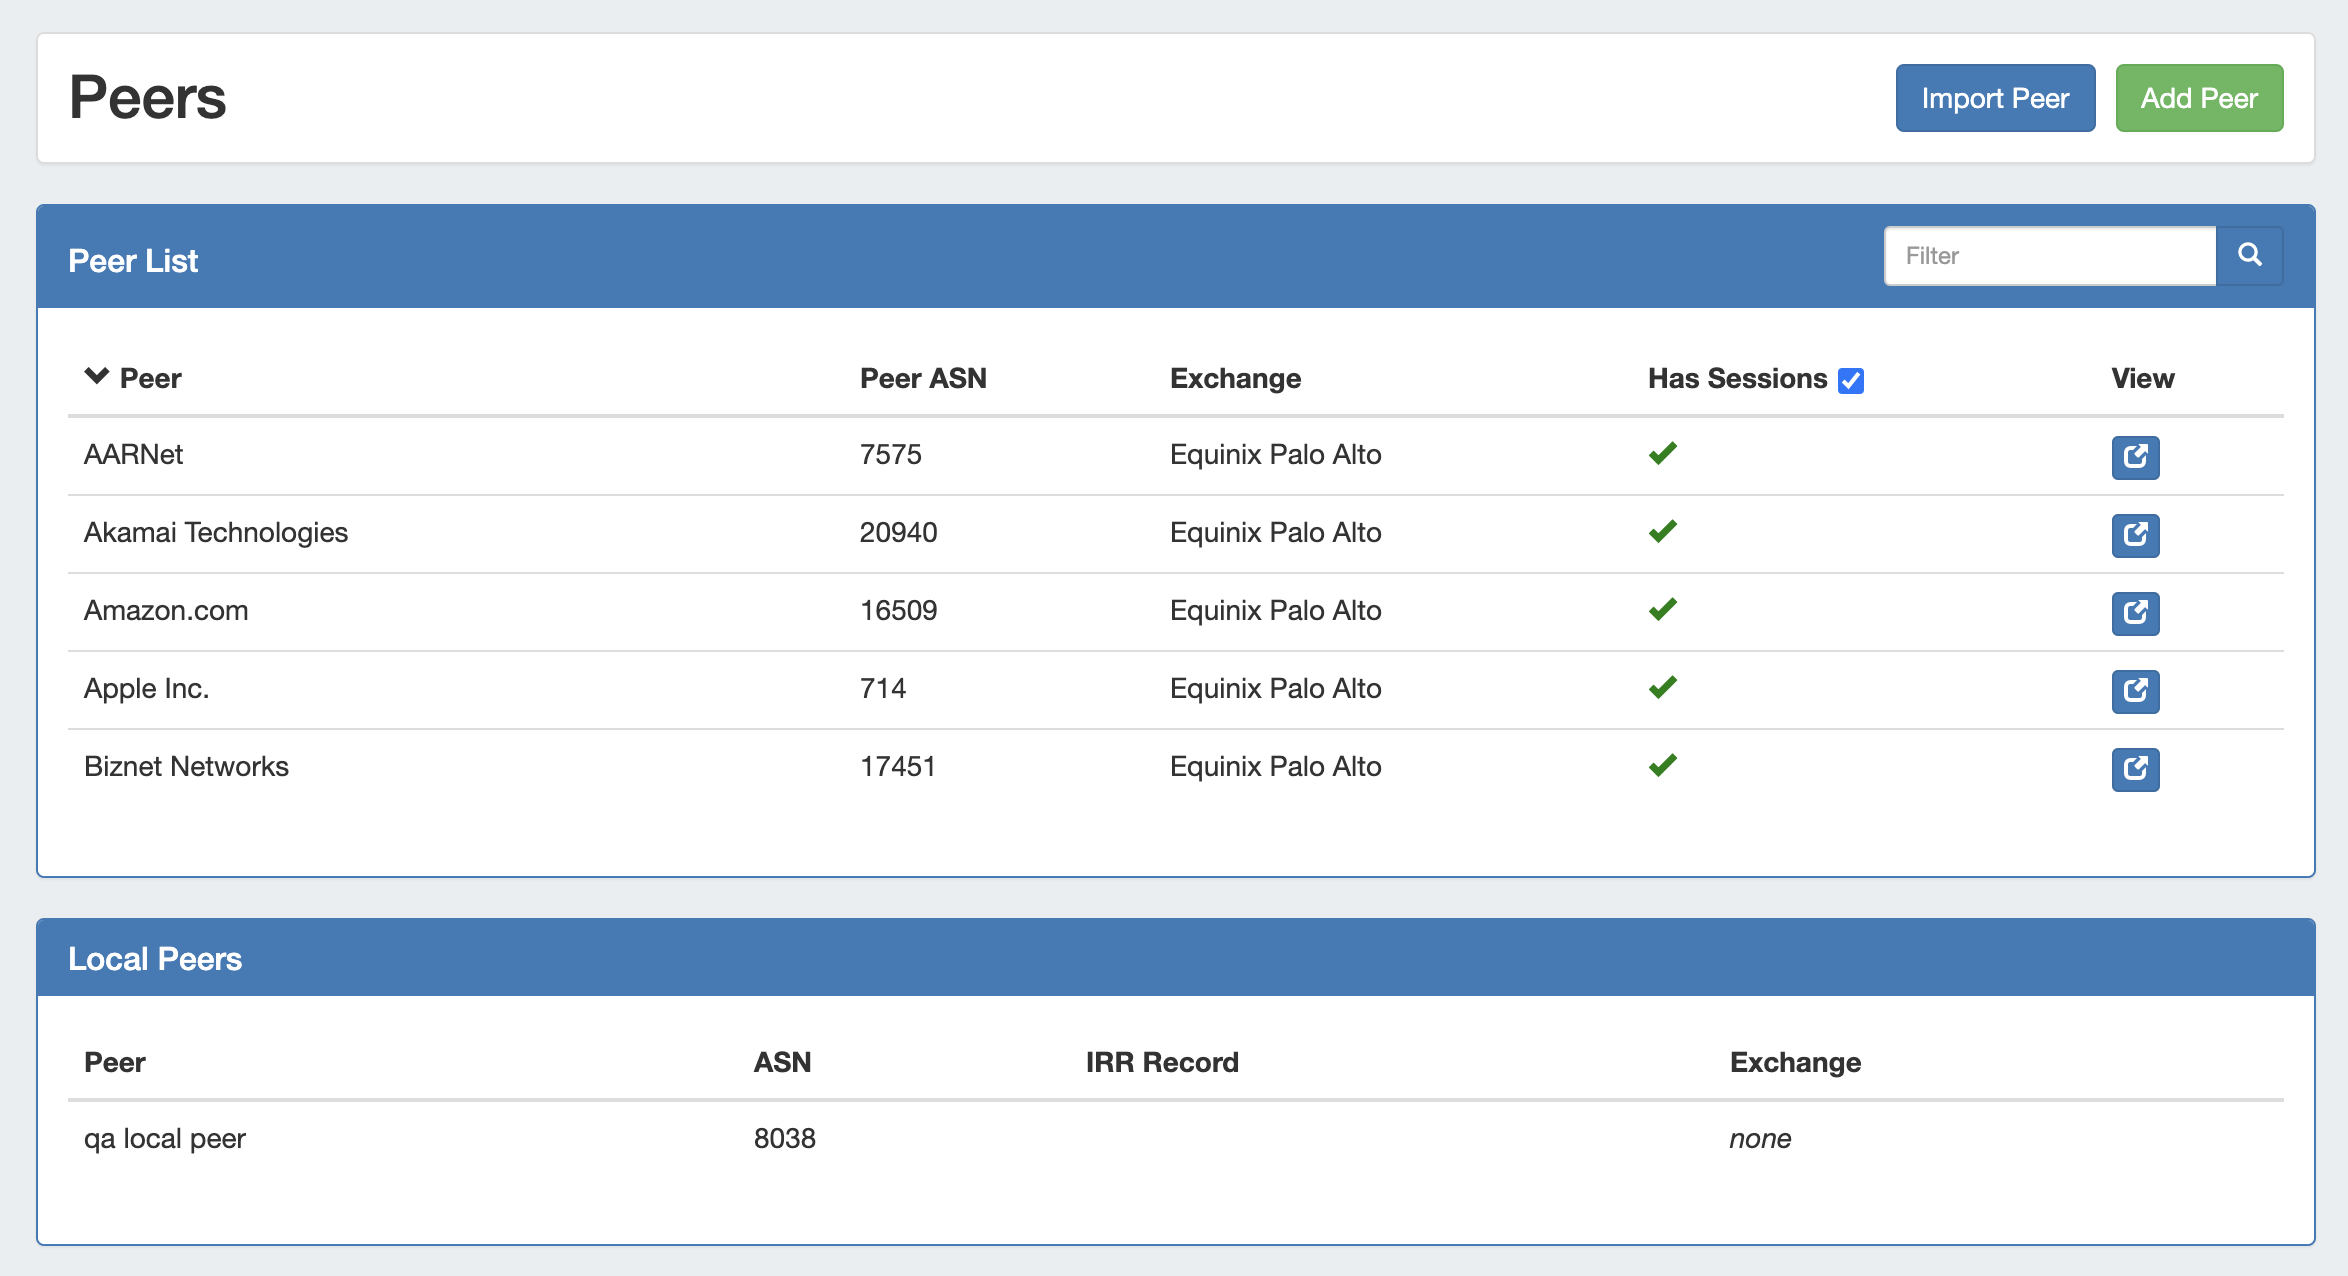
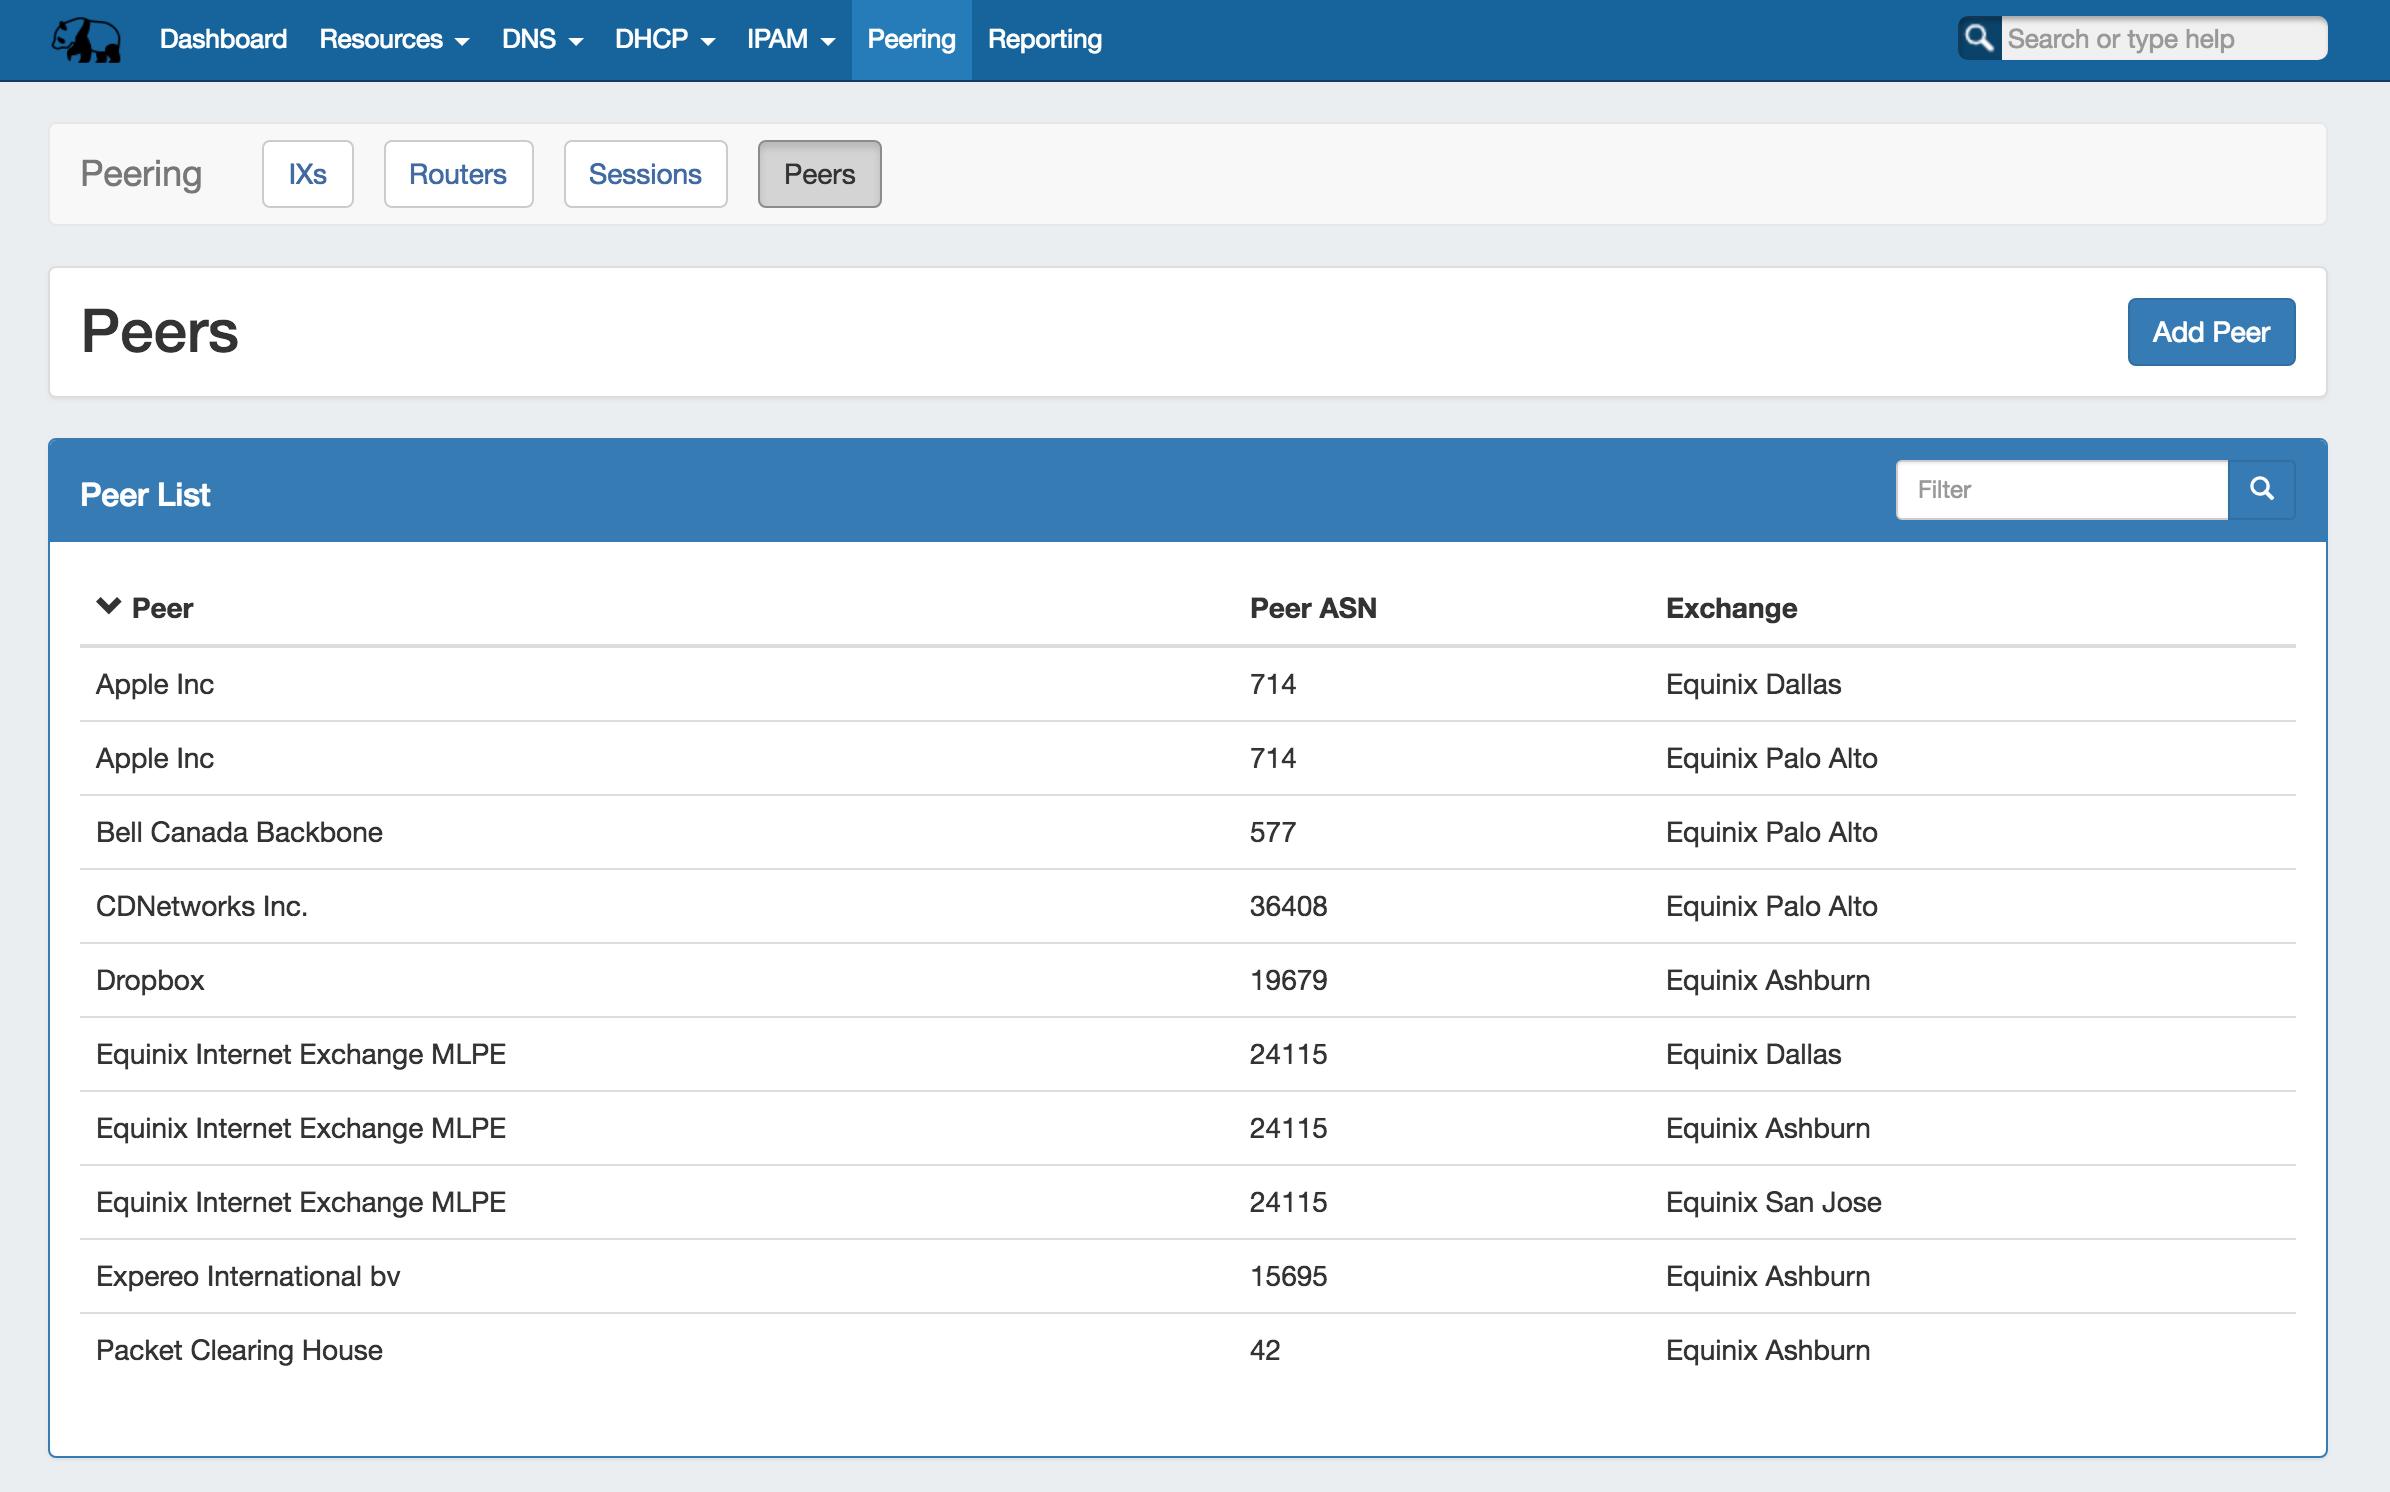
The Peer list shows peers currently in ProVision, their ASN, associated exchange, and whether session exist.
Filter the peer list by typing all or part of a peer name into the "Filter" text box in the right side of the list header, and the list will narrow down to matching Peers.
You may also sort by any field by clicking on the column name in the header. To view a Peer, you may click anywhere in the row for the peer, or click the "View" button.
Organizations will show as Peers in this list if:
- There is an existing session in Provision with the organization set as the destination - applies to both "Add Session" and "Add Peer"→ Configure Sessions
- The organization is marked "Existing Peer" in Exchange communications
Manually added Local Peers will show in the Local Peer list, below the standard Peer List.
Add Peers
Adding a Peer can be done via many methods in ProVision, depending on whether the peer is from PeeringDB, Local, and what the peer/session status is.
In general, Peers will added from either:
- PeeringDB through "Import Peer", session creation, or exchange communications
- Local / Custom creation through "Add Peer" or session creation
The following approaches will result in a Peer being added into ProVision:
- Create a session for a peer, selecting the Peer from PeeringDB options available under the Session tab → "Add Session" form.
- Create a session for a local or custom peer, selecting an existing local peer or manually entering a custom destination in the Session tab → "Add Session" form.
- Manually create a Local Peer, from "Add Peer".
- Import/search for a Peer from PeeringDB, then add the peer by configuring multiple sessions.
- Add a peer without creating sessions by marking the peer as "existing" under Exchange→Communications. The Peer will show in the Peer List, but no sessions will exist for the peer until they are created in ProVision.
Add PeeringDB Peer (Import Lookup)
Peers may be added via finding a peer from PeeringDB to import,
You can search for Peers by clicking "Import Peer" on the Peers or Peer Details pages.

The "Import Peer from PeeringDB" search module will open. Enter all or part of the peer name, then click "Search". The results will show in a list below.
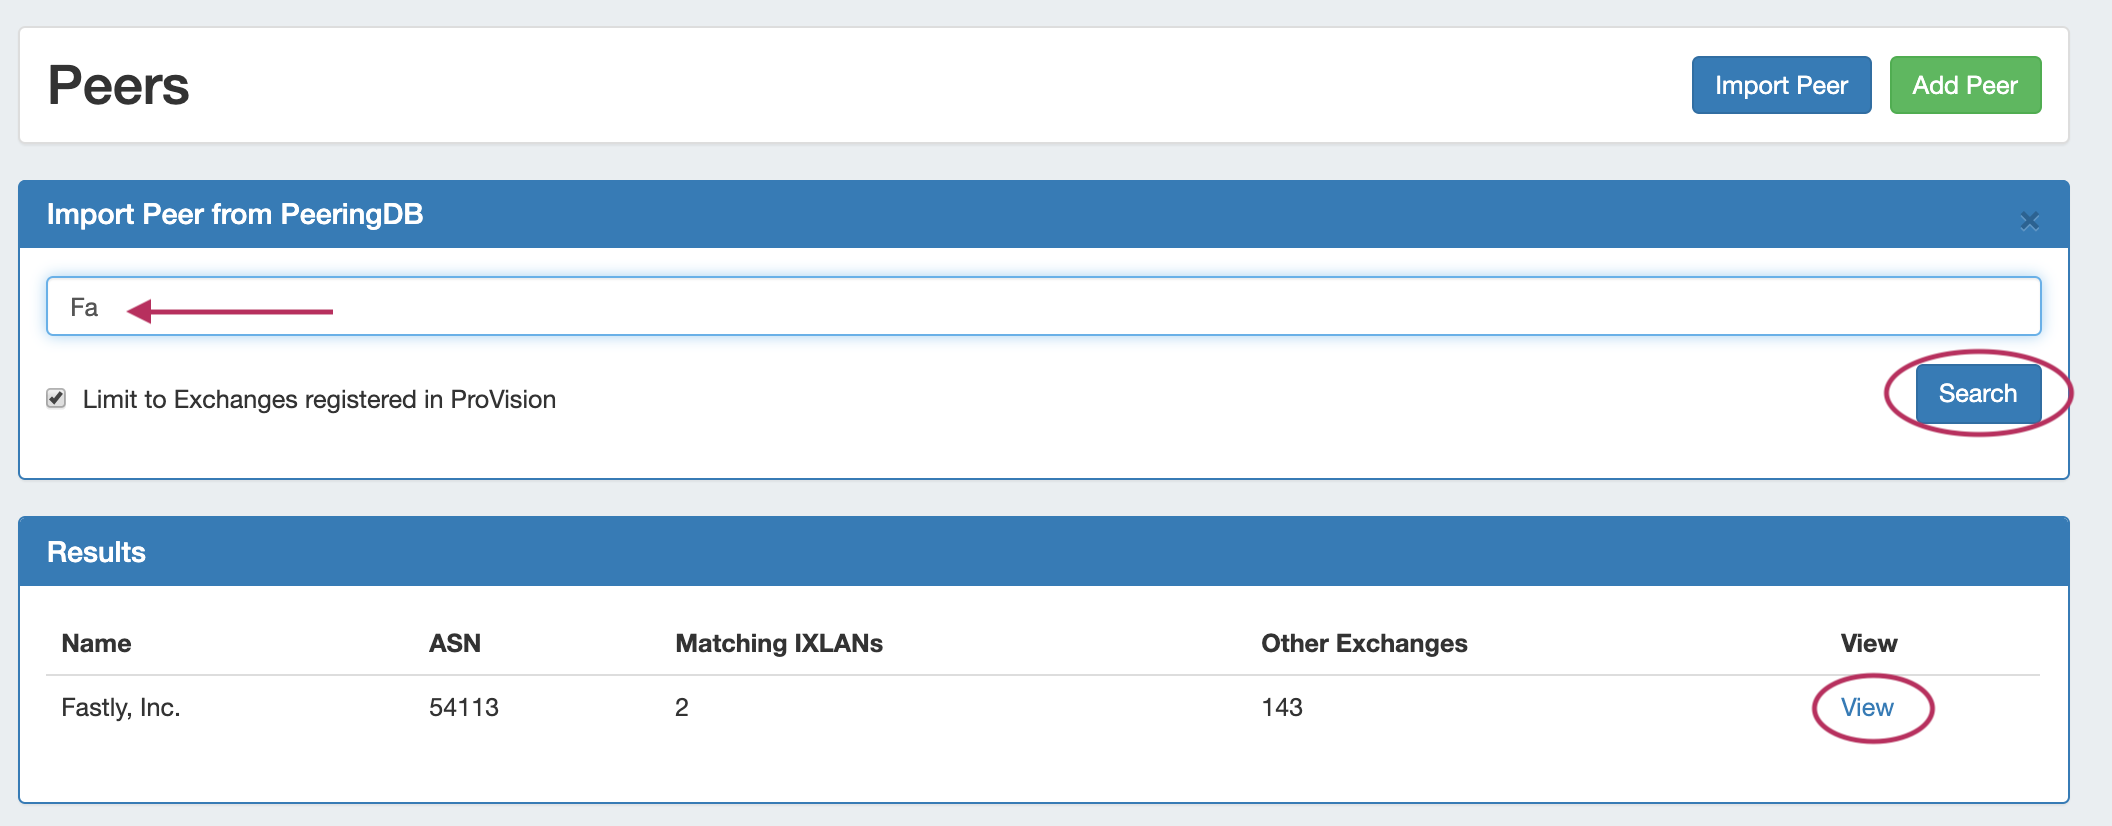
From the results list, click "View" - this will open the Peer Details page for the Peer, where you can view the peer's information, available exchanges, existing sessions, or add the peer via configuring multiple sessions.
Add Peer via Configure / Configure Multiple Sessions
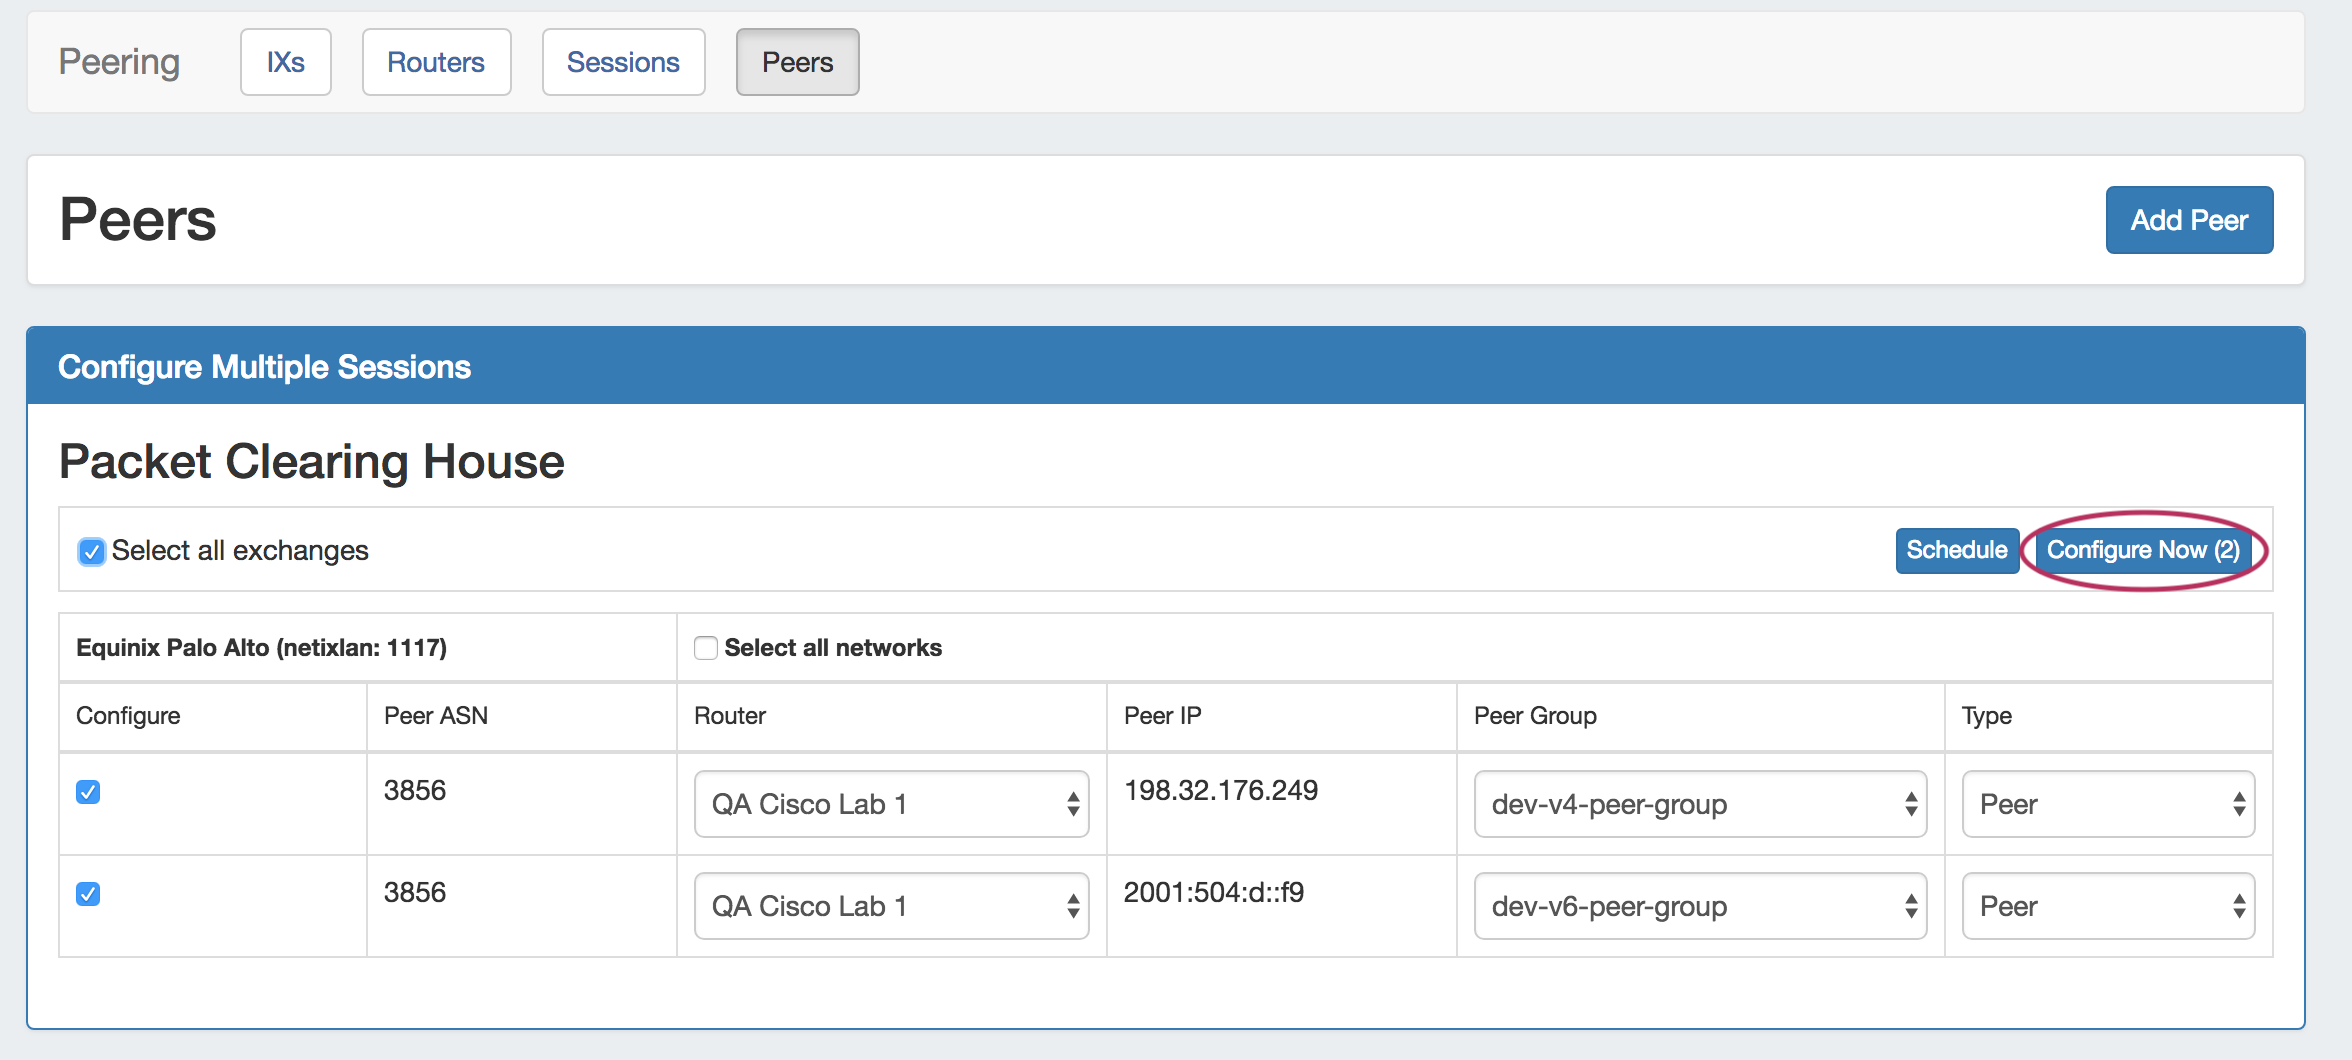
From the Peer Details page, click "Configure Multiple Sessions".
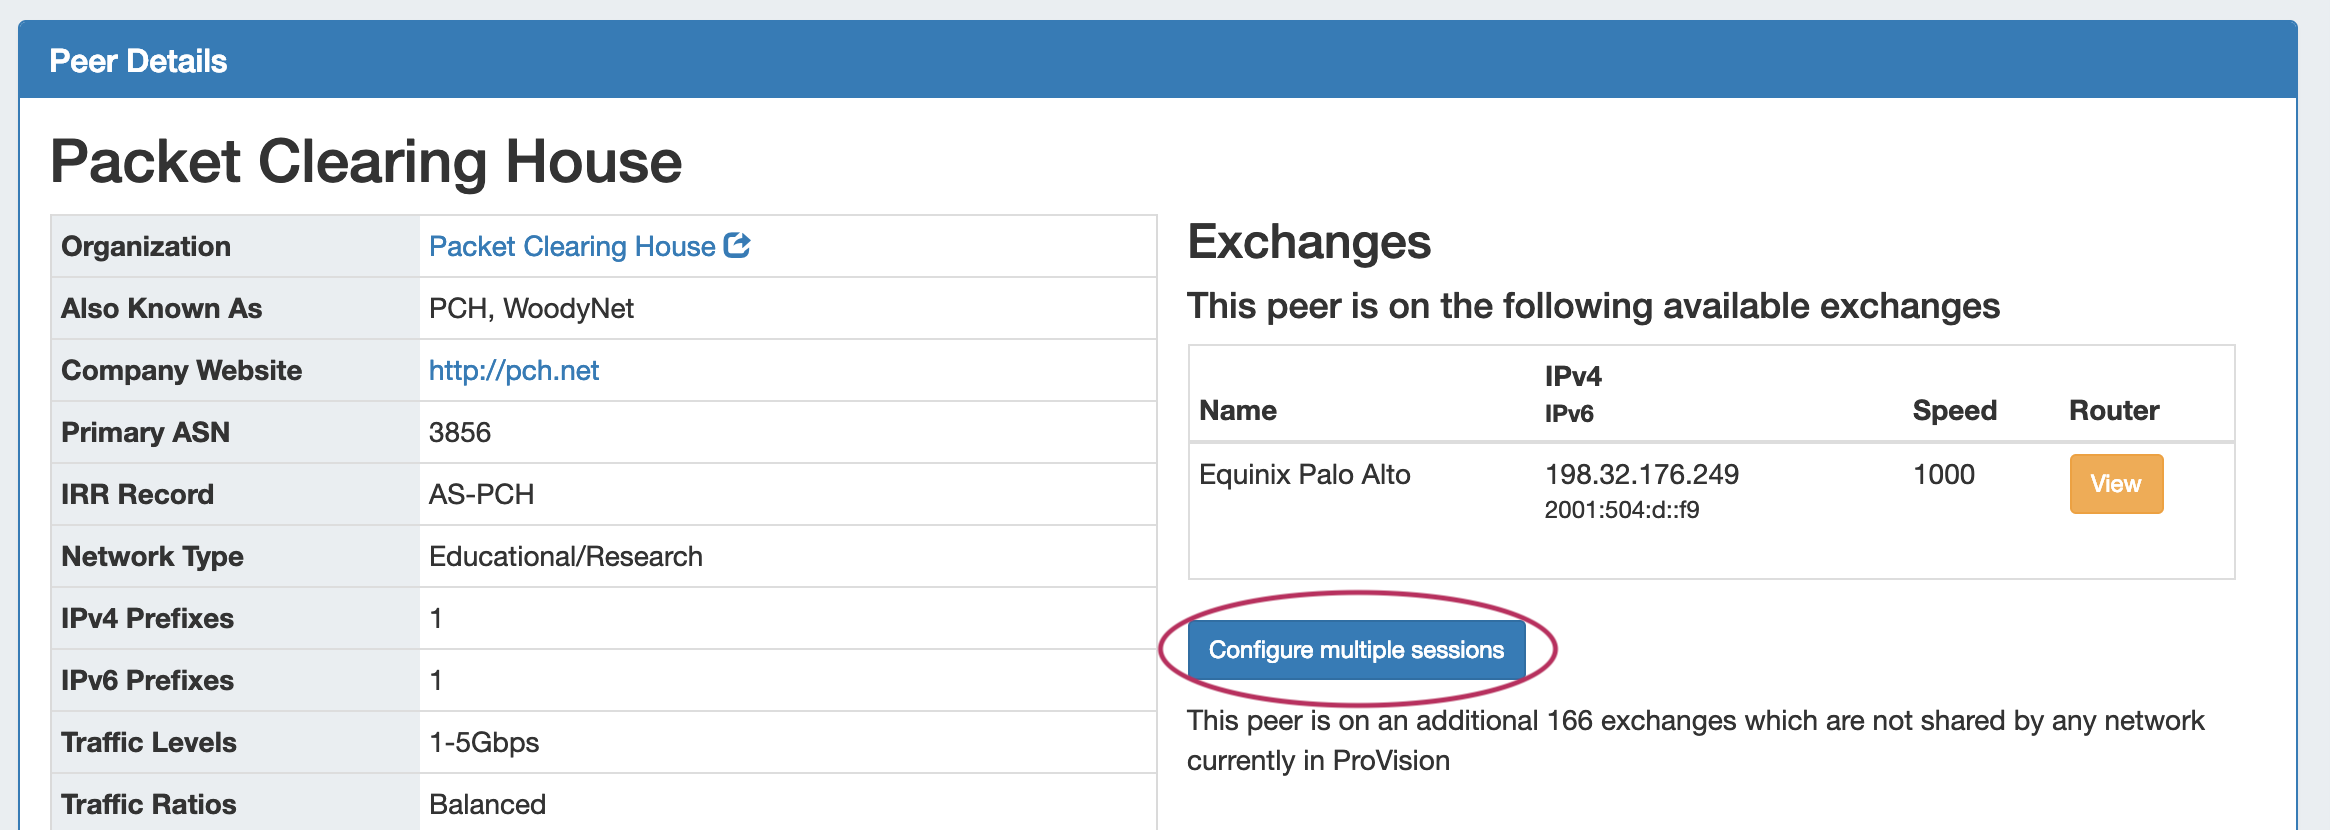
Clicking You may also choose to "Configure Multiple Sessions" - clicking the configure multiple buttons opens a page where you may select and set up multiple sessions for that peer.
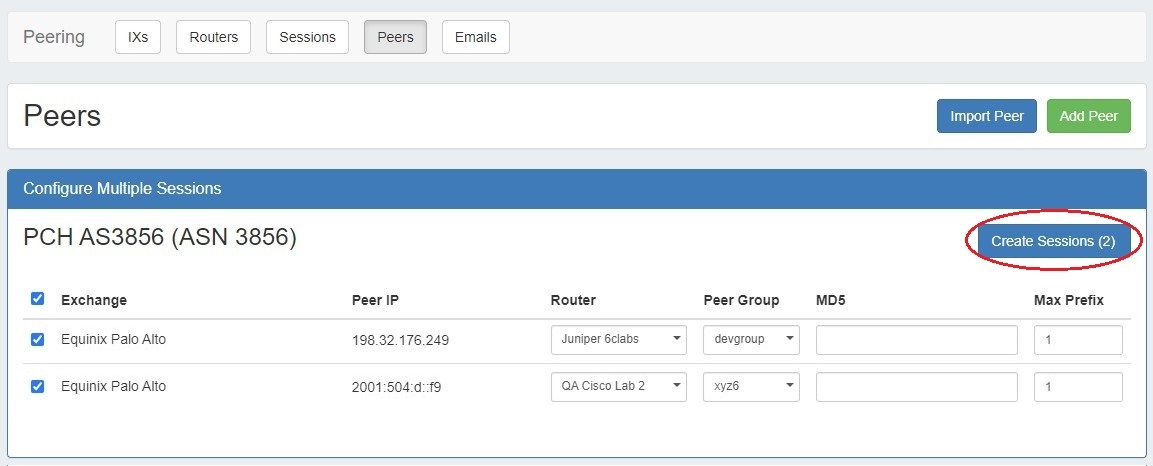
Select the desired exchanges, router, peer group, and type, and then choose to either "Configure Now" or Schedule the config to run later via the Scheduler Tab.
"Create Sessions." If a similar session already exists, a visual indicator will alert the user.
Configuring sessions here will create new sessions, and add the peer used to the Peer List.
Add a Local Peer
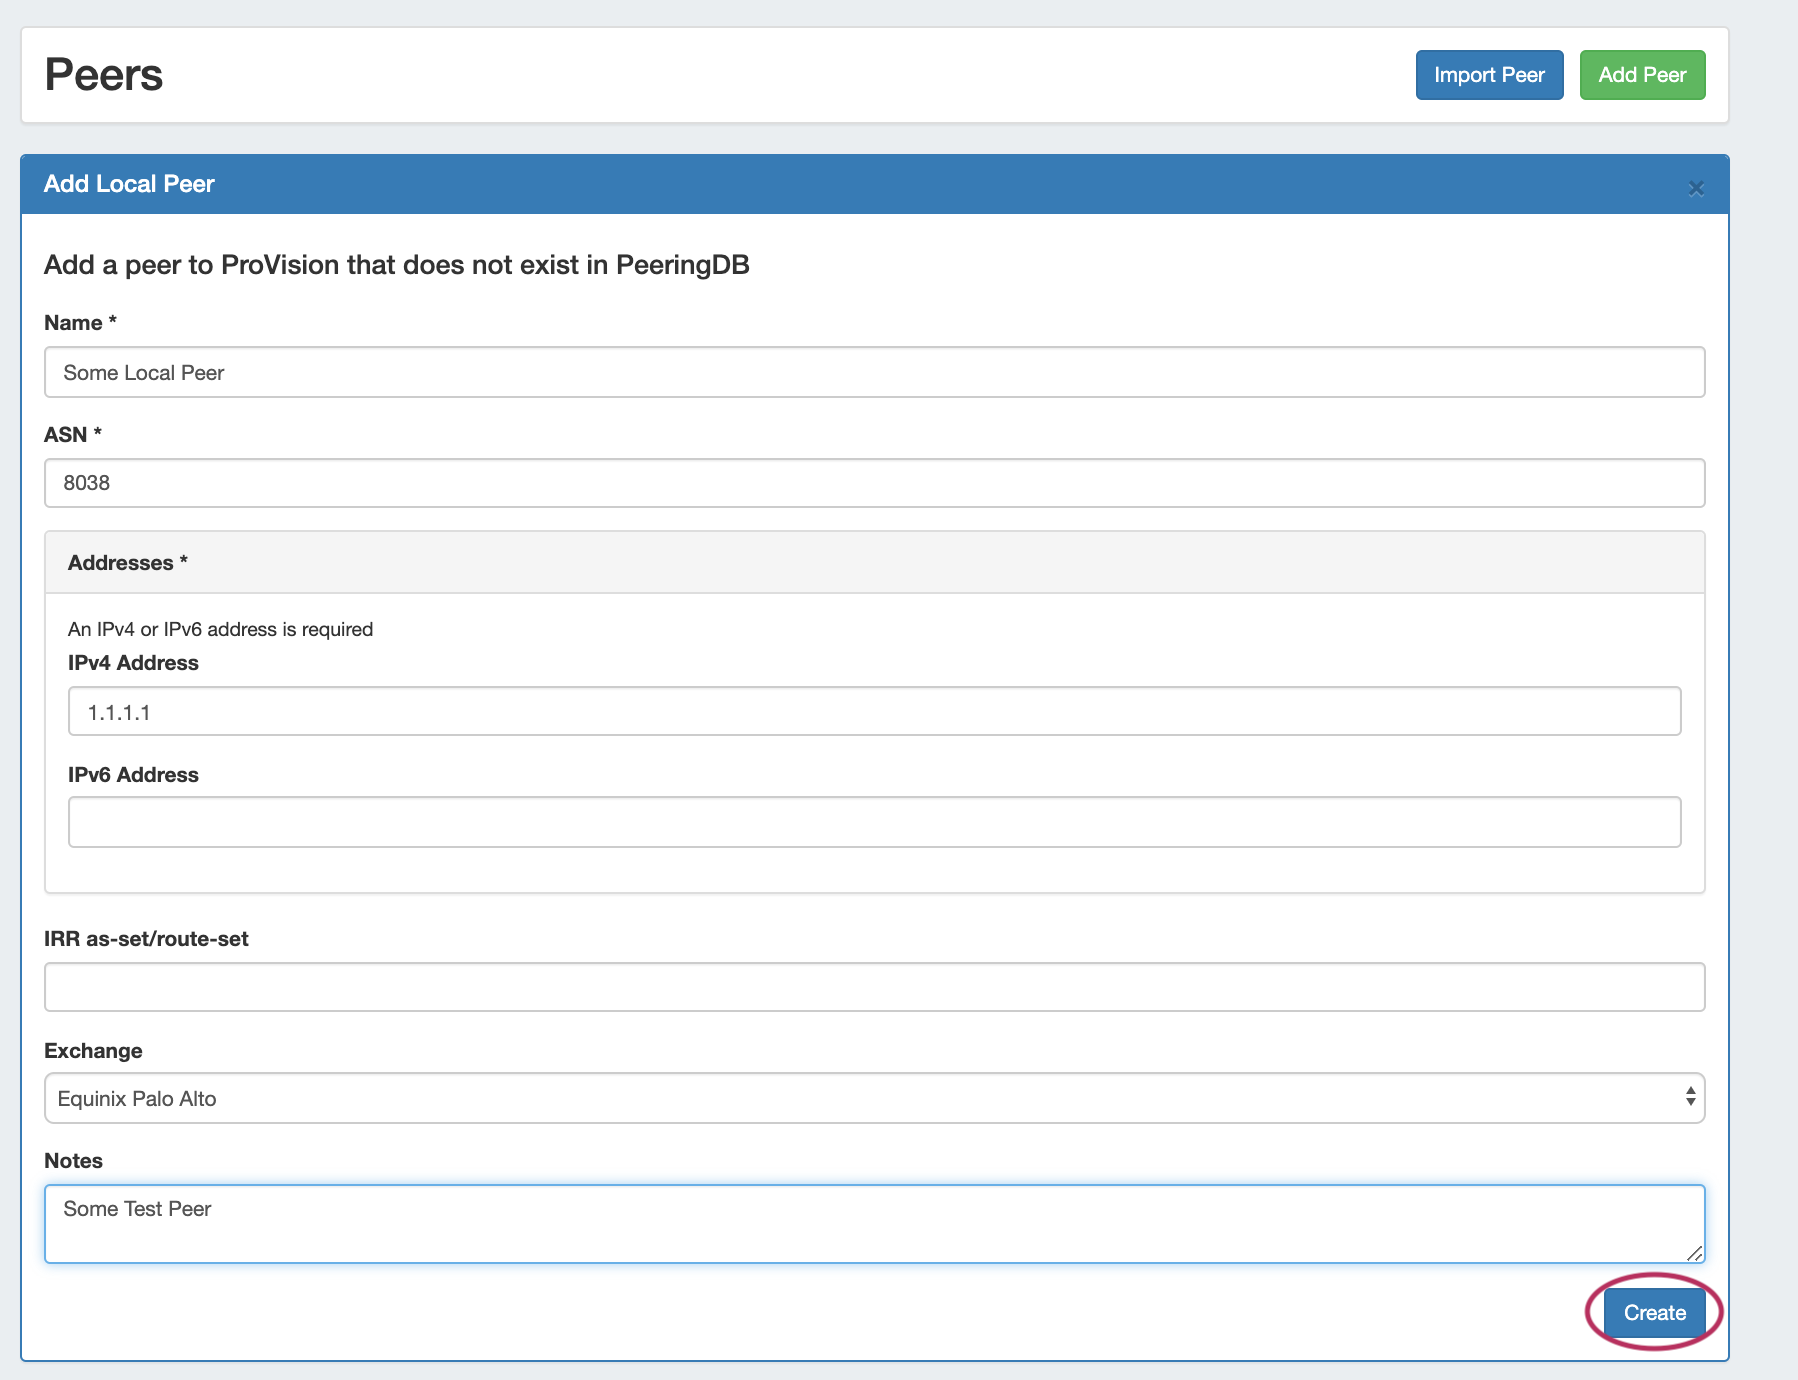
Add a new local peer by going to the Peering Tab → Peers subtab, and clicking "Add Peer".

| Expand | ||
|---|---|---|
| ||
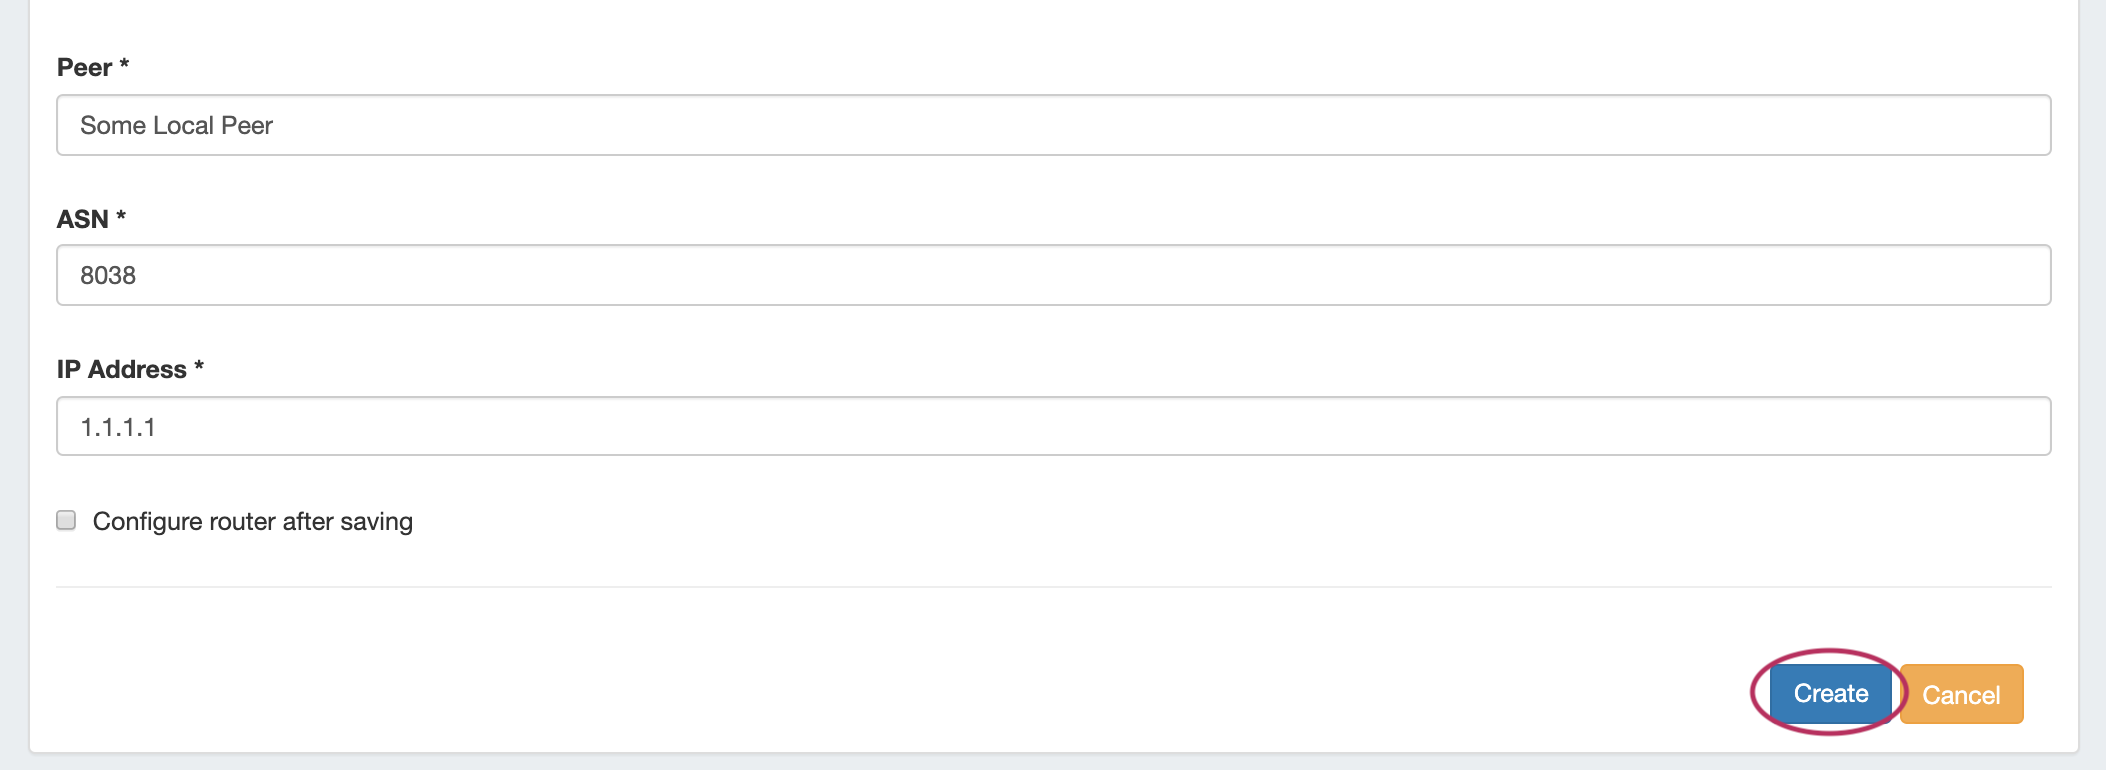
In the "Add Local Peer" form, enter the Peer details including Name, ASN, IPv4 or IPv6 Address, Route-Set, select an Exchange Option, and add notes if desired. When finished, click "Create".
The Peer will be added to the "Local Peers" list, and be available to select while creating a session.
|

Add Peer via Session
New Peers are added when creating a session with that Peer. While creating a new Session, you may select a PeeringDB Peer, an existing Local Peer, or create a new custom Peer.
| Expand | ||
|---|---|---|
| ||
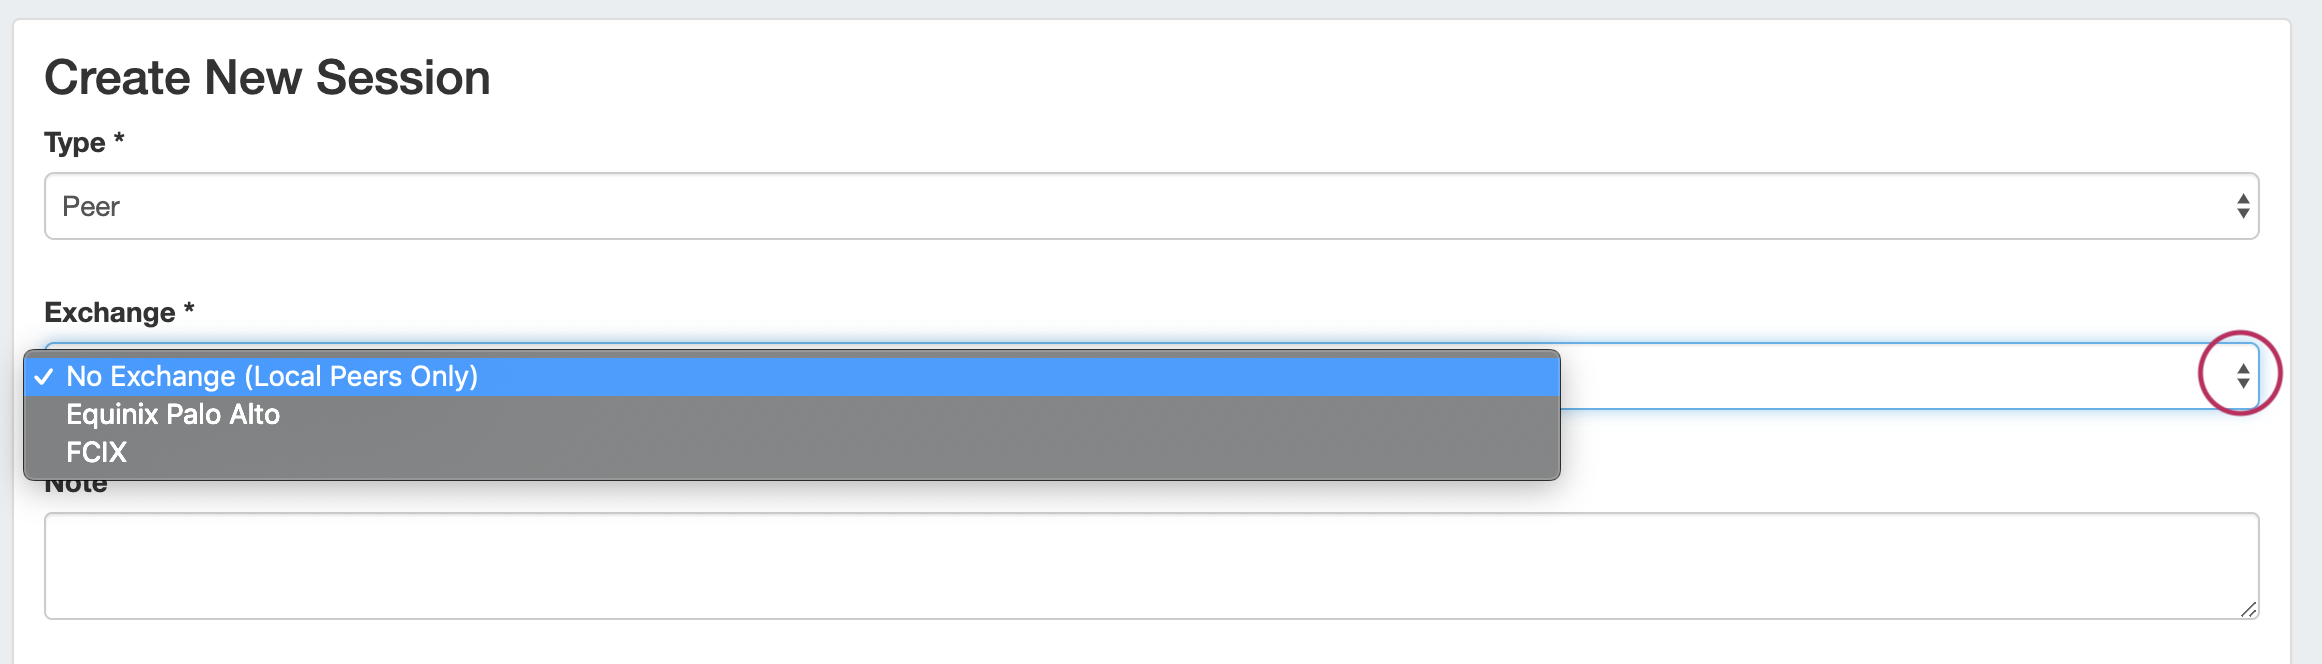
Add Session InformationClick "Add Session" from the Peering → Sessions sub-tab. In the Create New Session Form, type the session information, selecting the appropriate exchange type for the planned Peer. If using a Local Peer, "No Exchange" is an available option. 
Select or Add Destination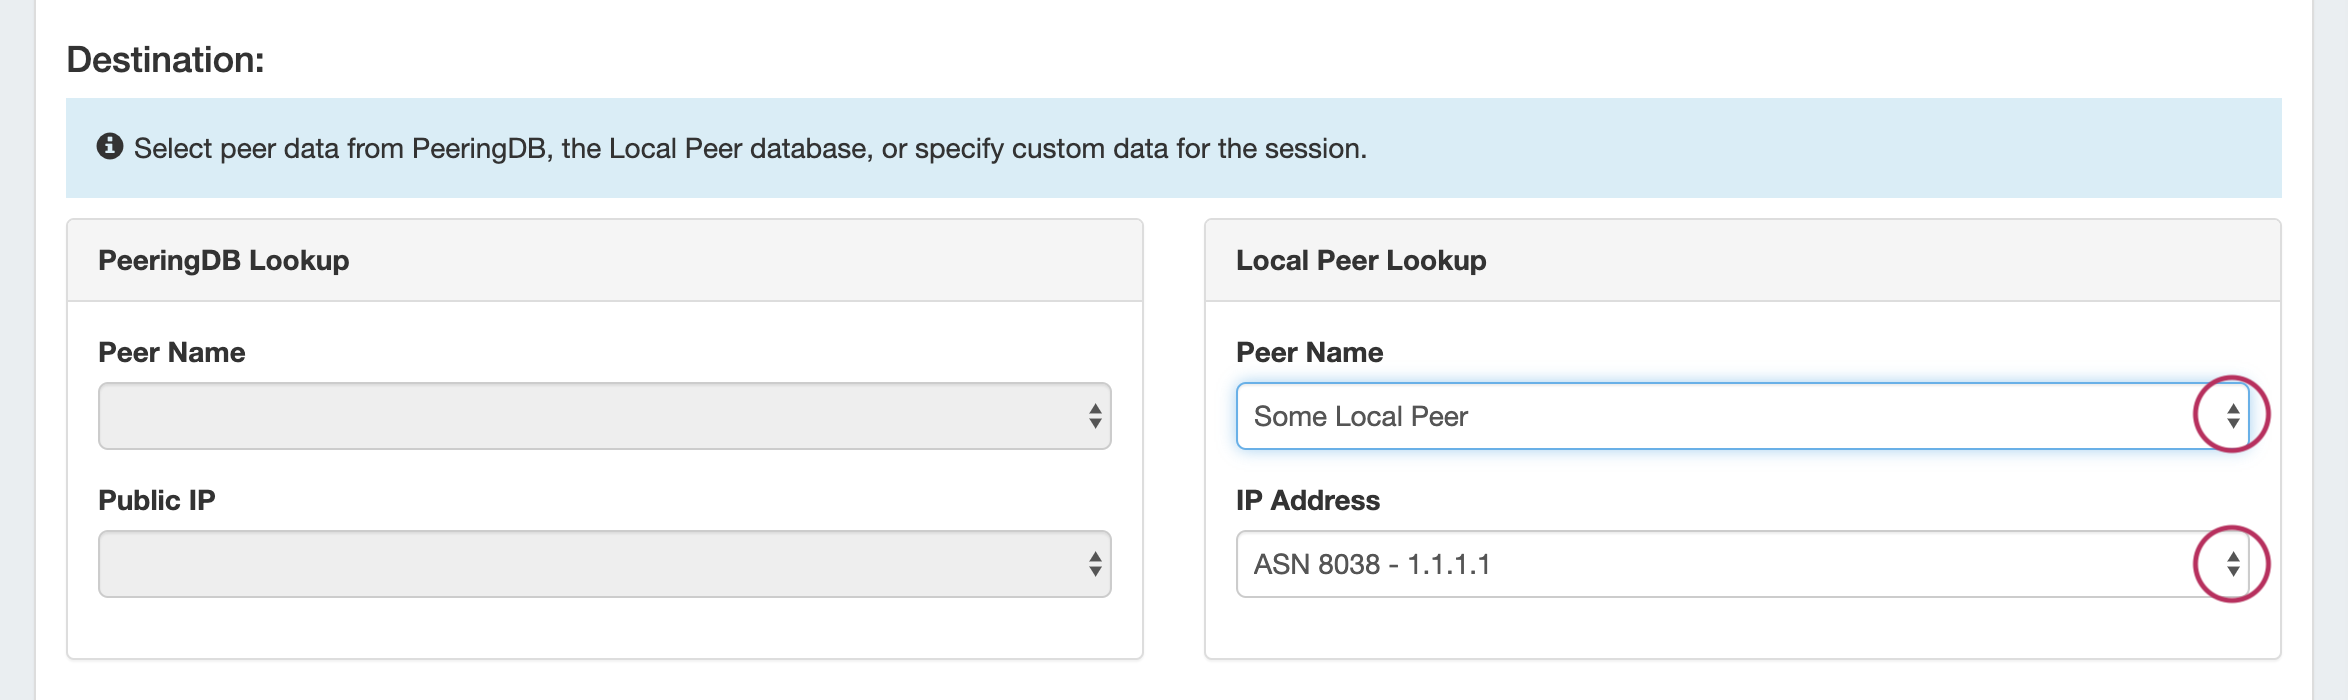 Under the Destination section, select or type in information for a peer. You may add Peer information from any of the three available methods:
 When complete, click "Create". The new Session will be added to the Session List.
|

Peer Details Page
Clicking on a peer in the list will open the Peer Details page.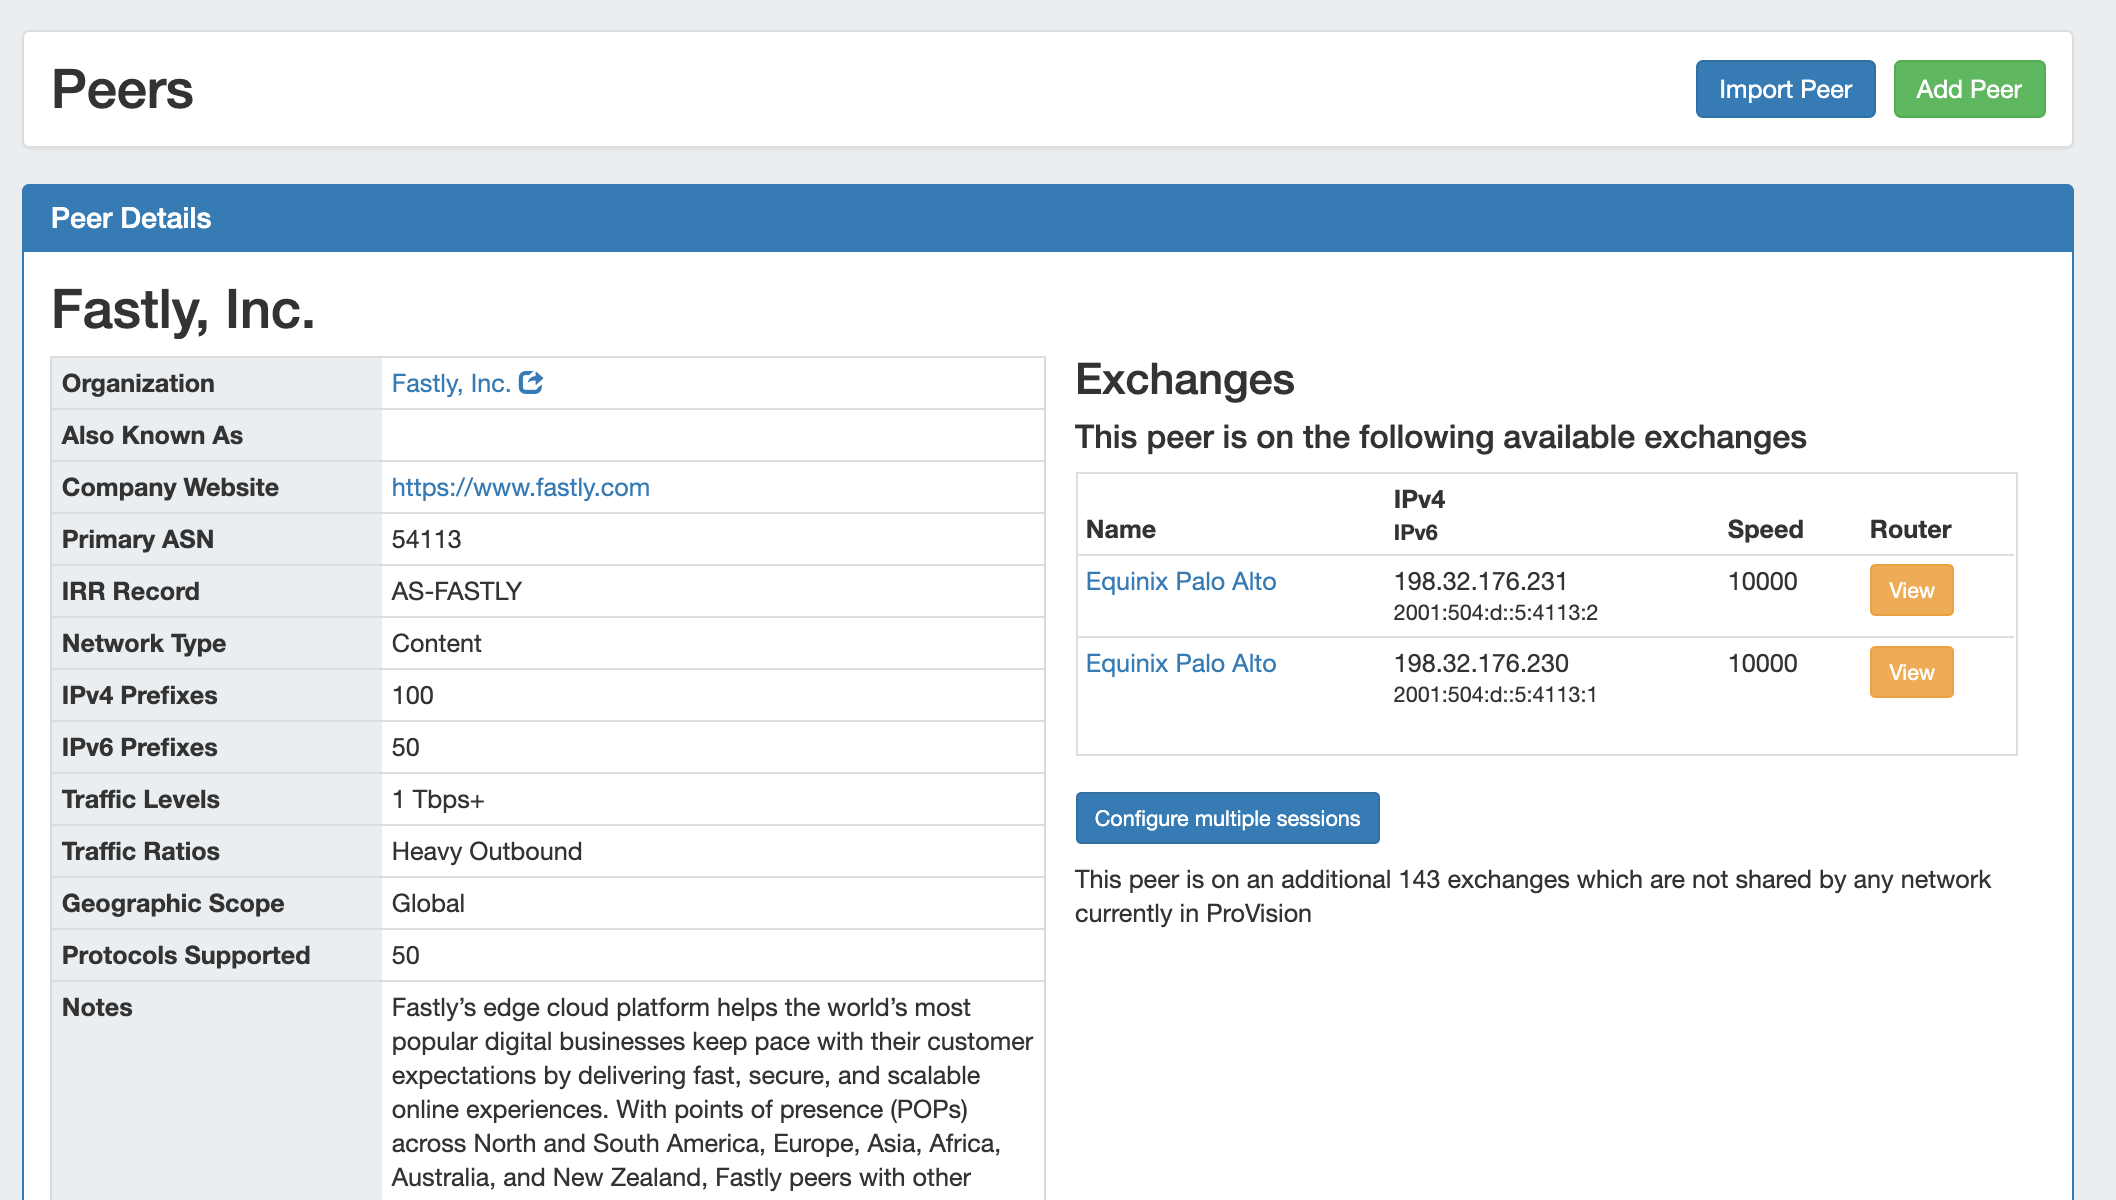
From here, you can view details for the existing peer, including available exchanges and what routers you have available on that exchange. Additional, the peer may be added by configuring new sessions via Configure Multiple Sessions.
Existing sessions for the Peer may be viewed, managed and deleted under "Sessions".

To edit, manage, or delete a single session, click on the session listing to open the Session detail page. All sessions under the Peer may be deleted by clicking "Delete All Sessions".
Additional Information
...