...
Adding a BIND Server to ProVision
Go to the DNS Admin tab and under Manage DNS Servers, click "New Server"

Select "ISC BIND" as the Transfer Type, and fill in the server information fields. For detailed descriptions of the fields, see New Server dialogue section on the DNS Admin page.
![]()
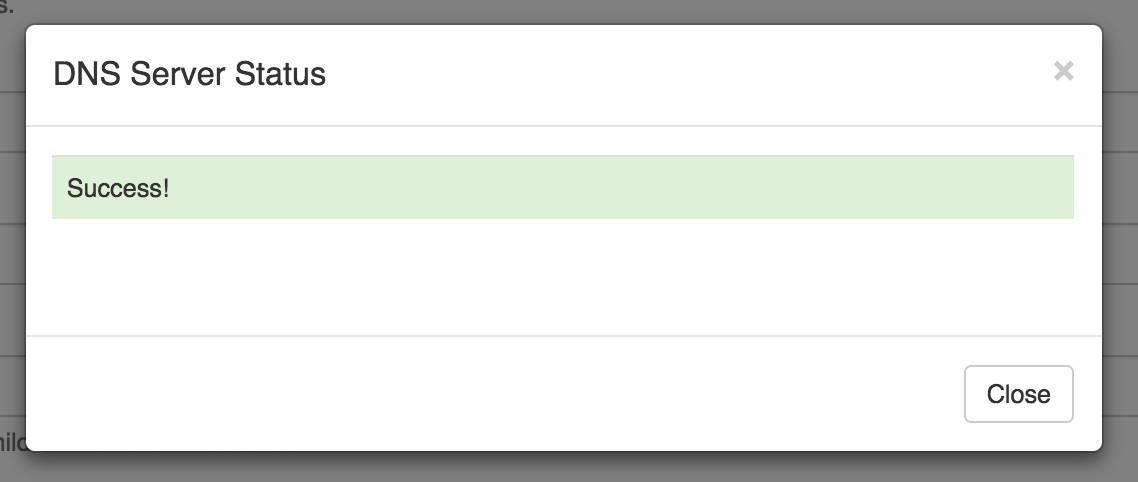
The "Test Config" button will attempt to login to the target system and write to the target directory. If any failures are encountered, an error will be written with some detail. If the test is successful, the word "Success!" will show verifying that files can be transferred. This does not test if the user can execute pre/post commands. This needs to be checked manually.
To create a new server, start from the DNS Tab, select the DNS Servers sub menu. Then, click the "Add Server" button next to "DNS Server List".
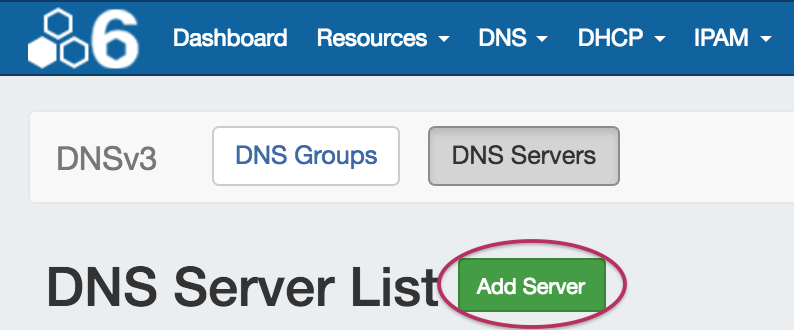
This will open the "Server Settings" page.
Server Settings
1) Set Server Common Settings
In the "Common Settings" section of Server Settings, enter the new server's Display Name (the name that will appear on the ProVision interface), the FQDN / IP, server type, service type, and desired parent Resource (may be left at the default Top Level Resource).

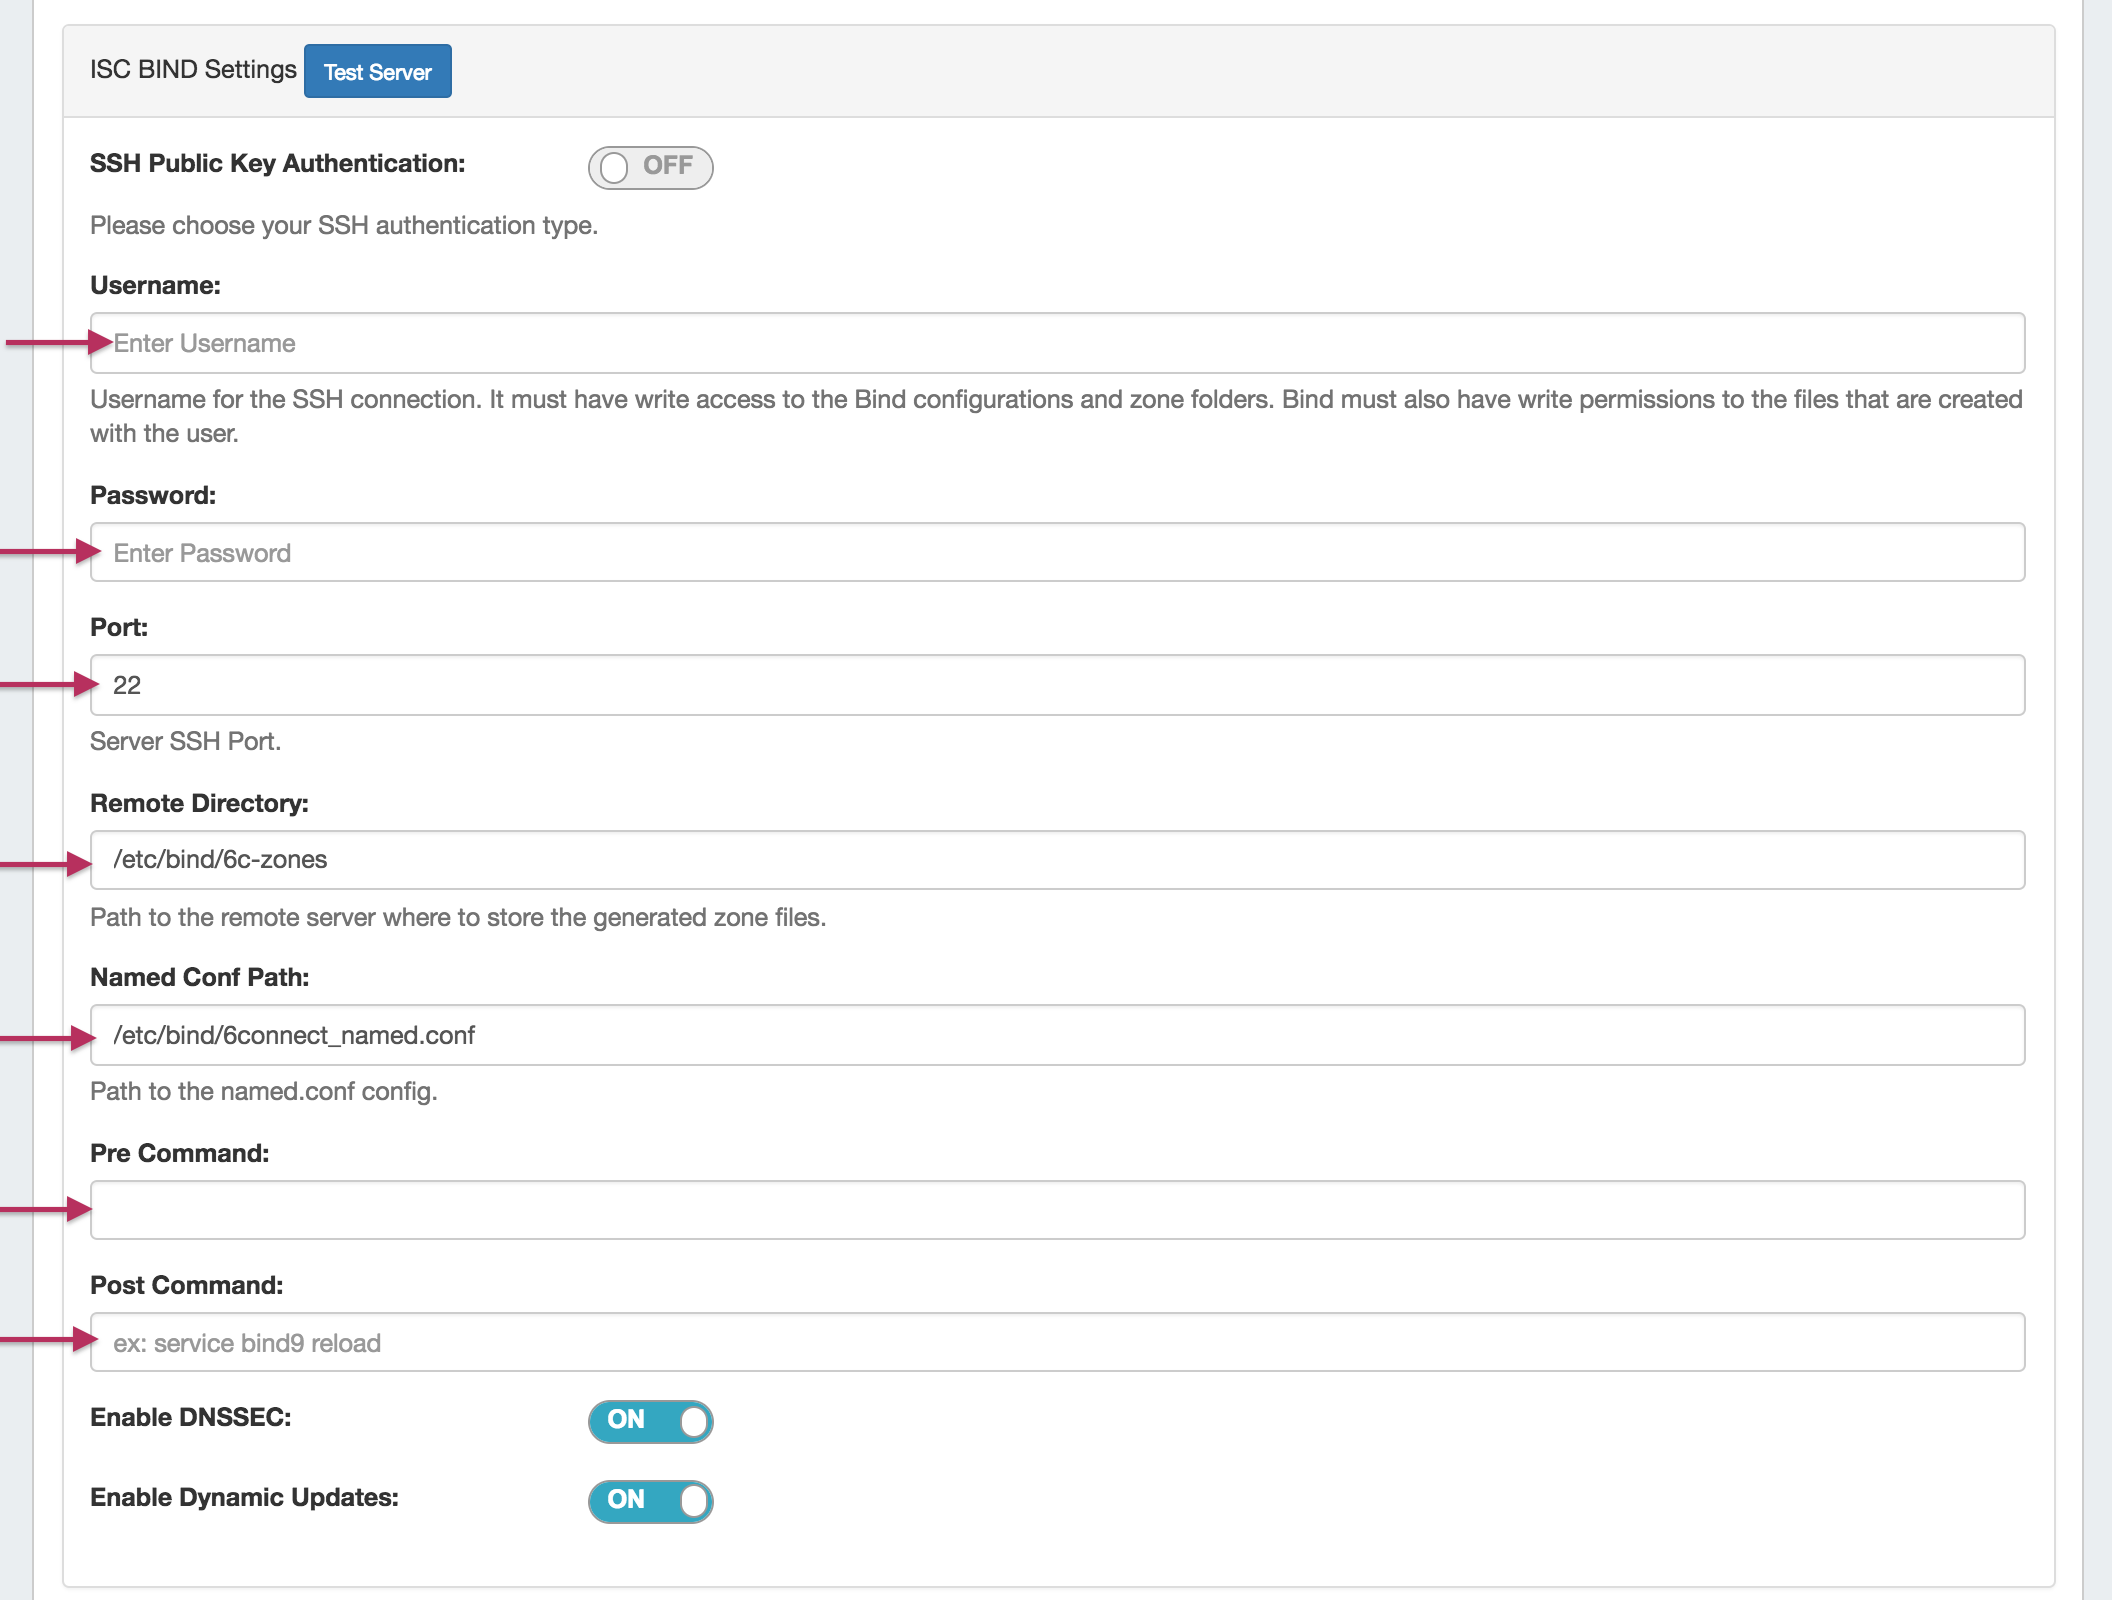
2) Set Server Specific Settings
The next section is entering server service-type specific settings. The options visible in this section will depend on the "DNS Service" type chosen under "Common Settings".
Here, we see the fields for ISC BIND server settings. Enter the server Username, Password, Port, Remote Director, Named Conf. Path, and Pre/Post Command (if desired). Your fields may vary for other server types.
For SSH Public Key Authentication, DNSSEC, and Dynamic Option updates, click on the ON / OFF toggle to select "ON" or "OFF" for each as needed.
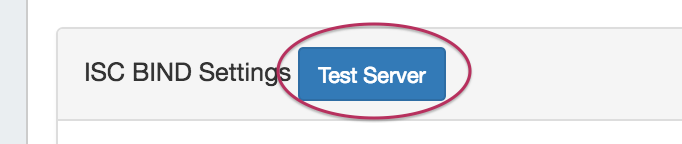
After entering the server-specific settings in this section, you can click the "Test Server" button at the top of the section to test the server connection and authentication.
A window will pop up showing a success or failure response.
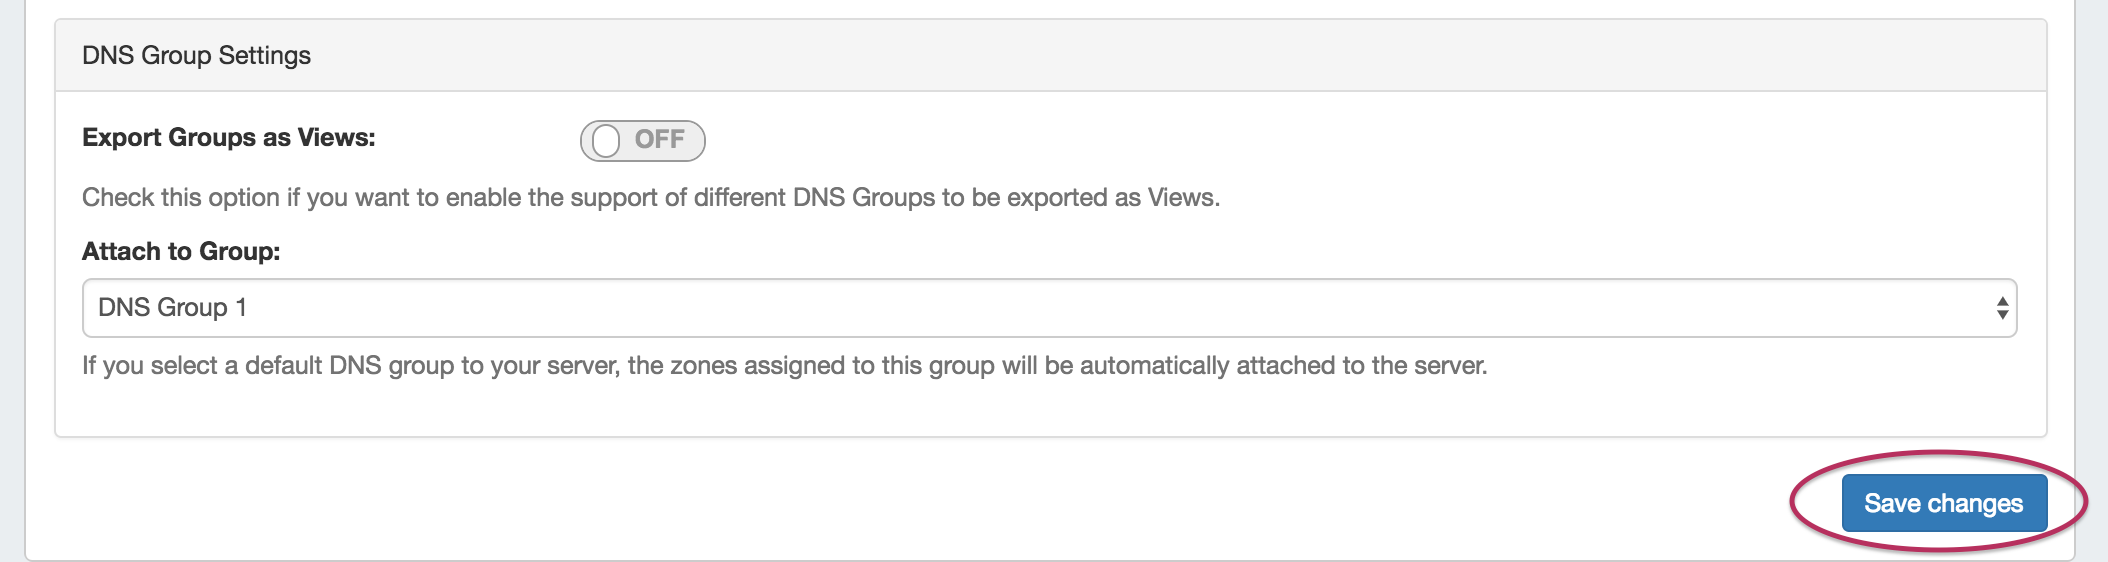
3) Set DNS Group Settings for Server
In the last section, select whether to enable support for exporting DNS Groups as Views (click to toggle ON / OFF), and select a default Group, if desired, to be associated with the server. Zones assigned to the selected Group will automatically be attached to the server.

4) Save Changes
Save your changes when done! Just click the "Save Changes" button at the bottom right of the page.
The new server will now be added to the DNS Servers list. These settings may be changed at any time by selecting the server from the server list and editing the When done, click on the "Add Server" button to save your server information.