...
...
Peering ((UPDATE AND CHECK LINKS WHEN PEERING IS DONE))
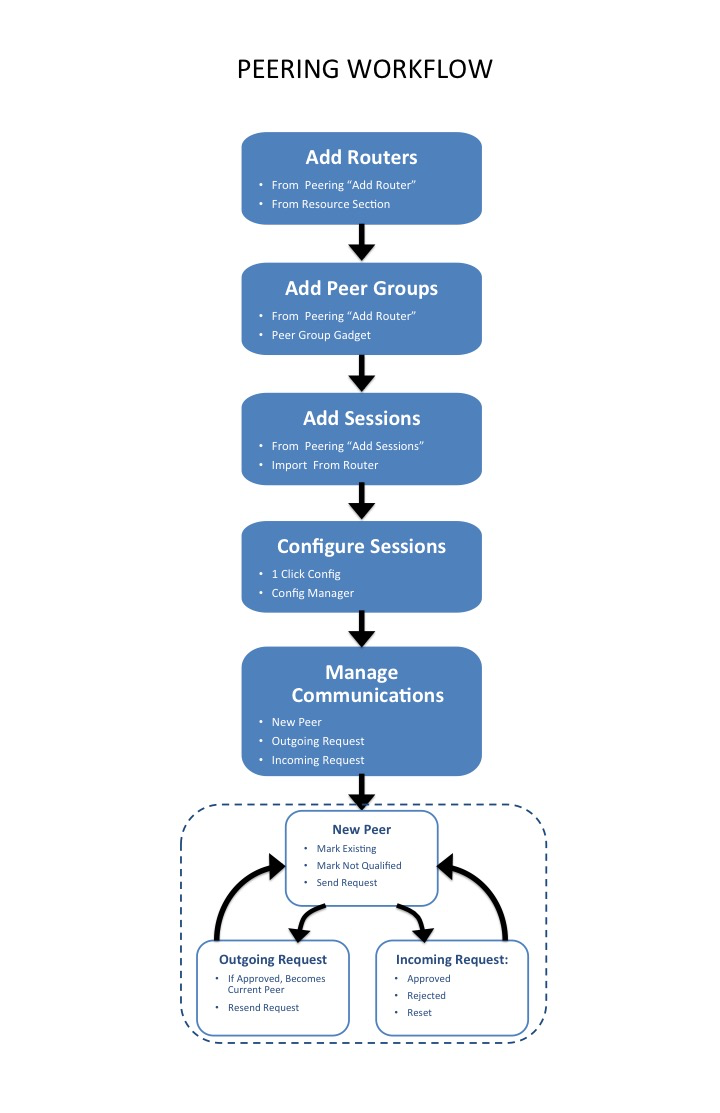
In ProVision, Peering starts with designating Routers. Routers may be added through the Resource system under a router Section, but the simpler approach is to add a new router via the the "Add Router" button under the Peering Tab. Through this dialog, Peer Groups may be added at the same time.
After the router(s) and Peer Groups have been created in ProVision, Sessions need to be added. Sessions may be added manually through the "Add Session" dialog in the Peering tab, or Imported from a router (requires ProVision Admin permissions).
Once a session has been created, it can be configured and managed through the Sessions list, or selected and configured for a specific Peer via the Communications list "Configure Sessions" option. The Peer that is associated with the session is added to the Peer Communications list, where communications and status may be managed.
For more information on performing tasks under Peering, see the following documentation sections:
...
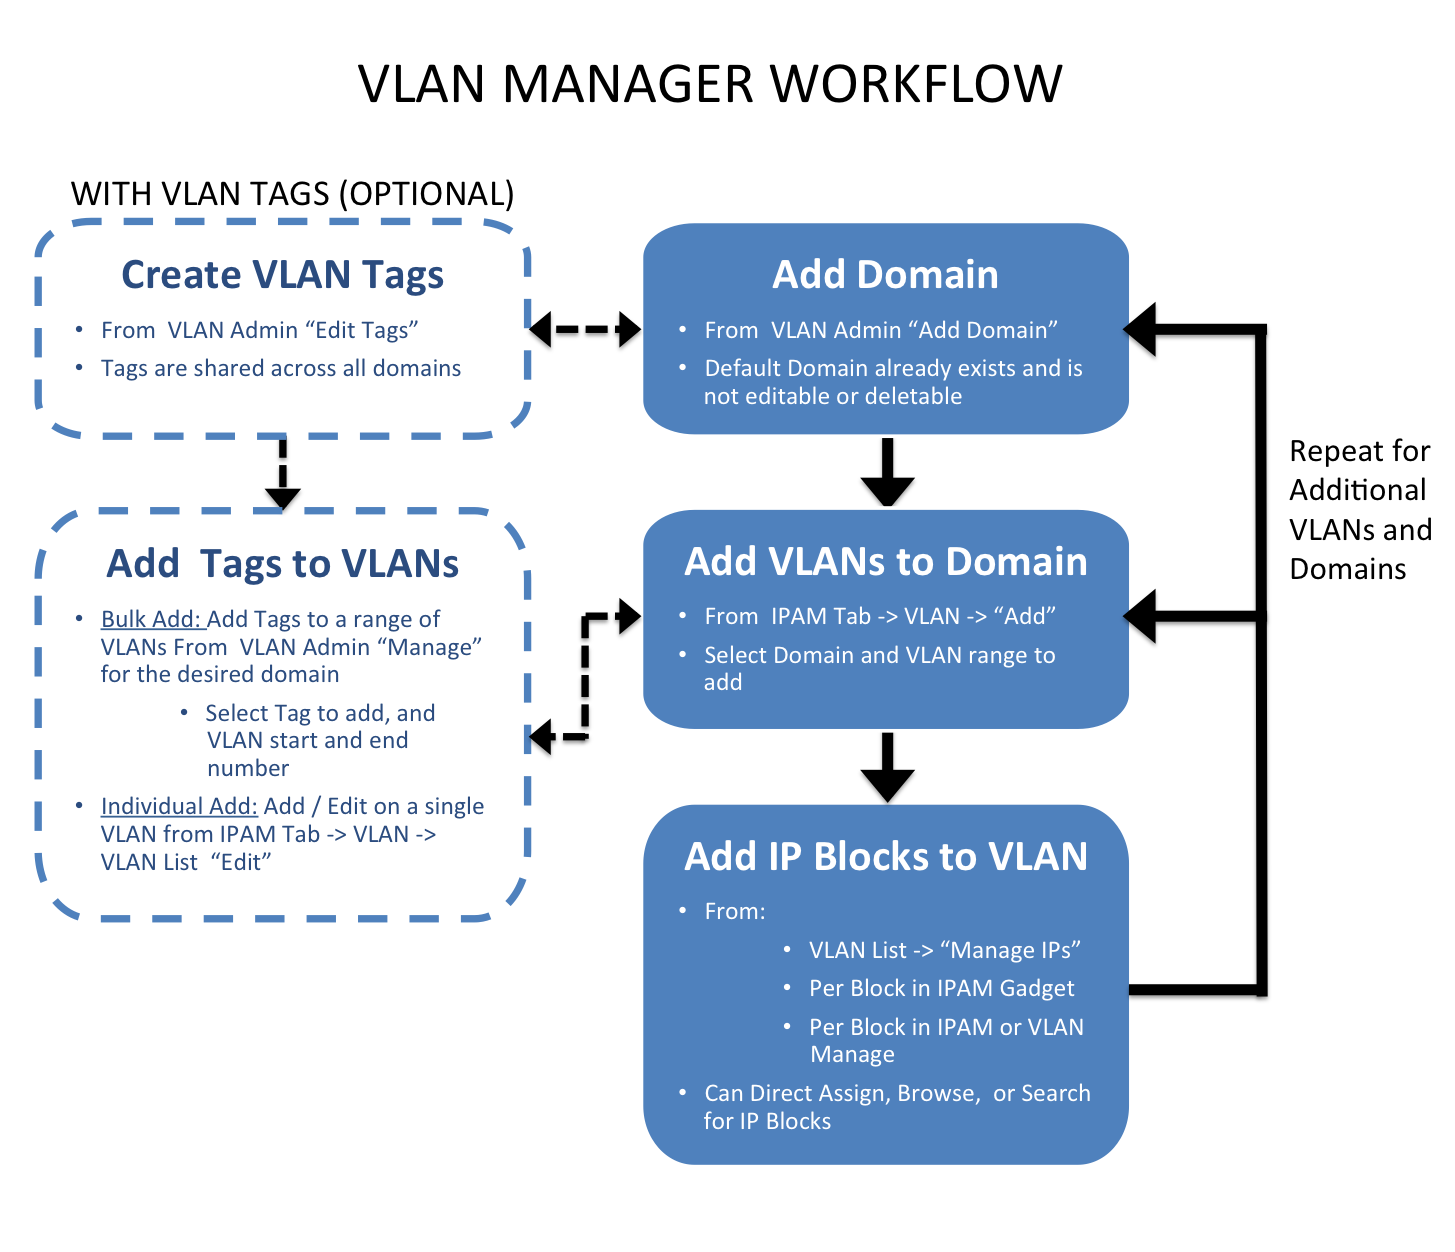
Next, VLANs must be enabled and added to the domain. This is done under the IPAM Tab -> VLAN section of ProVision. Add VLANs to the domains by clicking "Add", searching for the desired range of VLANs to enable from the standard / extended pool, and selecting the desired VLANs to enable. Once enabled, VLANs may be edited or have IP blocks associated with that VLAN. Editing VLANs and Direct / Smart Browse / Search IPs functions for adding blocks to VLANs are available from the Domain/ VLAN list under under the IPAM Tab -> VLAN section of ProVision. IP blocks may also be edited individually through the IPAM gadget, IPAM Manage, and VLAN Manage areas to add domain and VLAN information to the block.
DHCP
((UPDATE TEXT, LINKS, and WORKFLOW CHART FOR NEW DHCP))
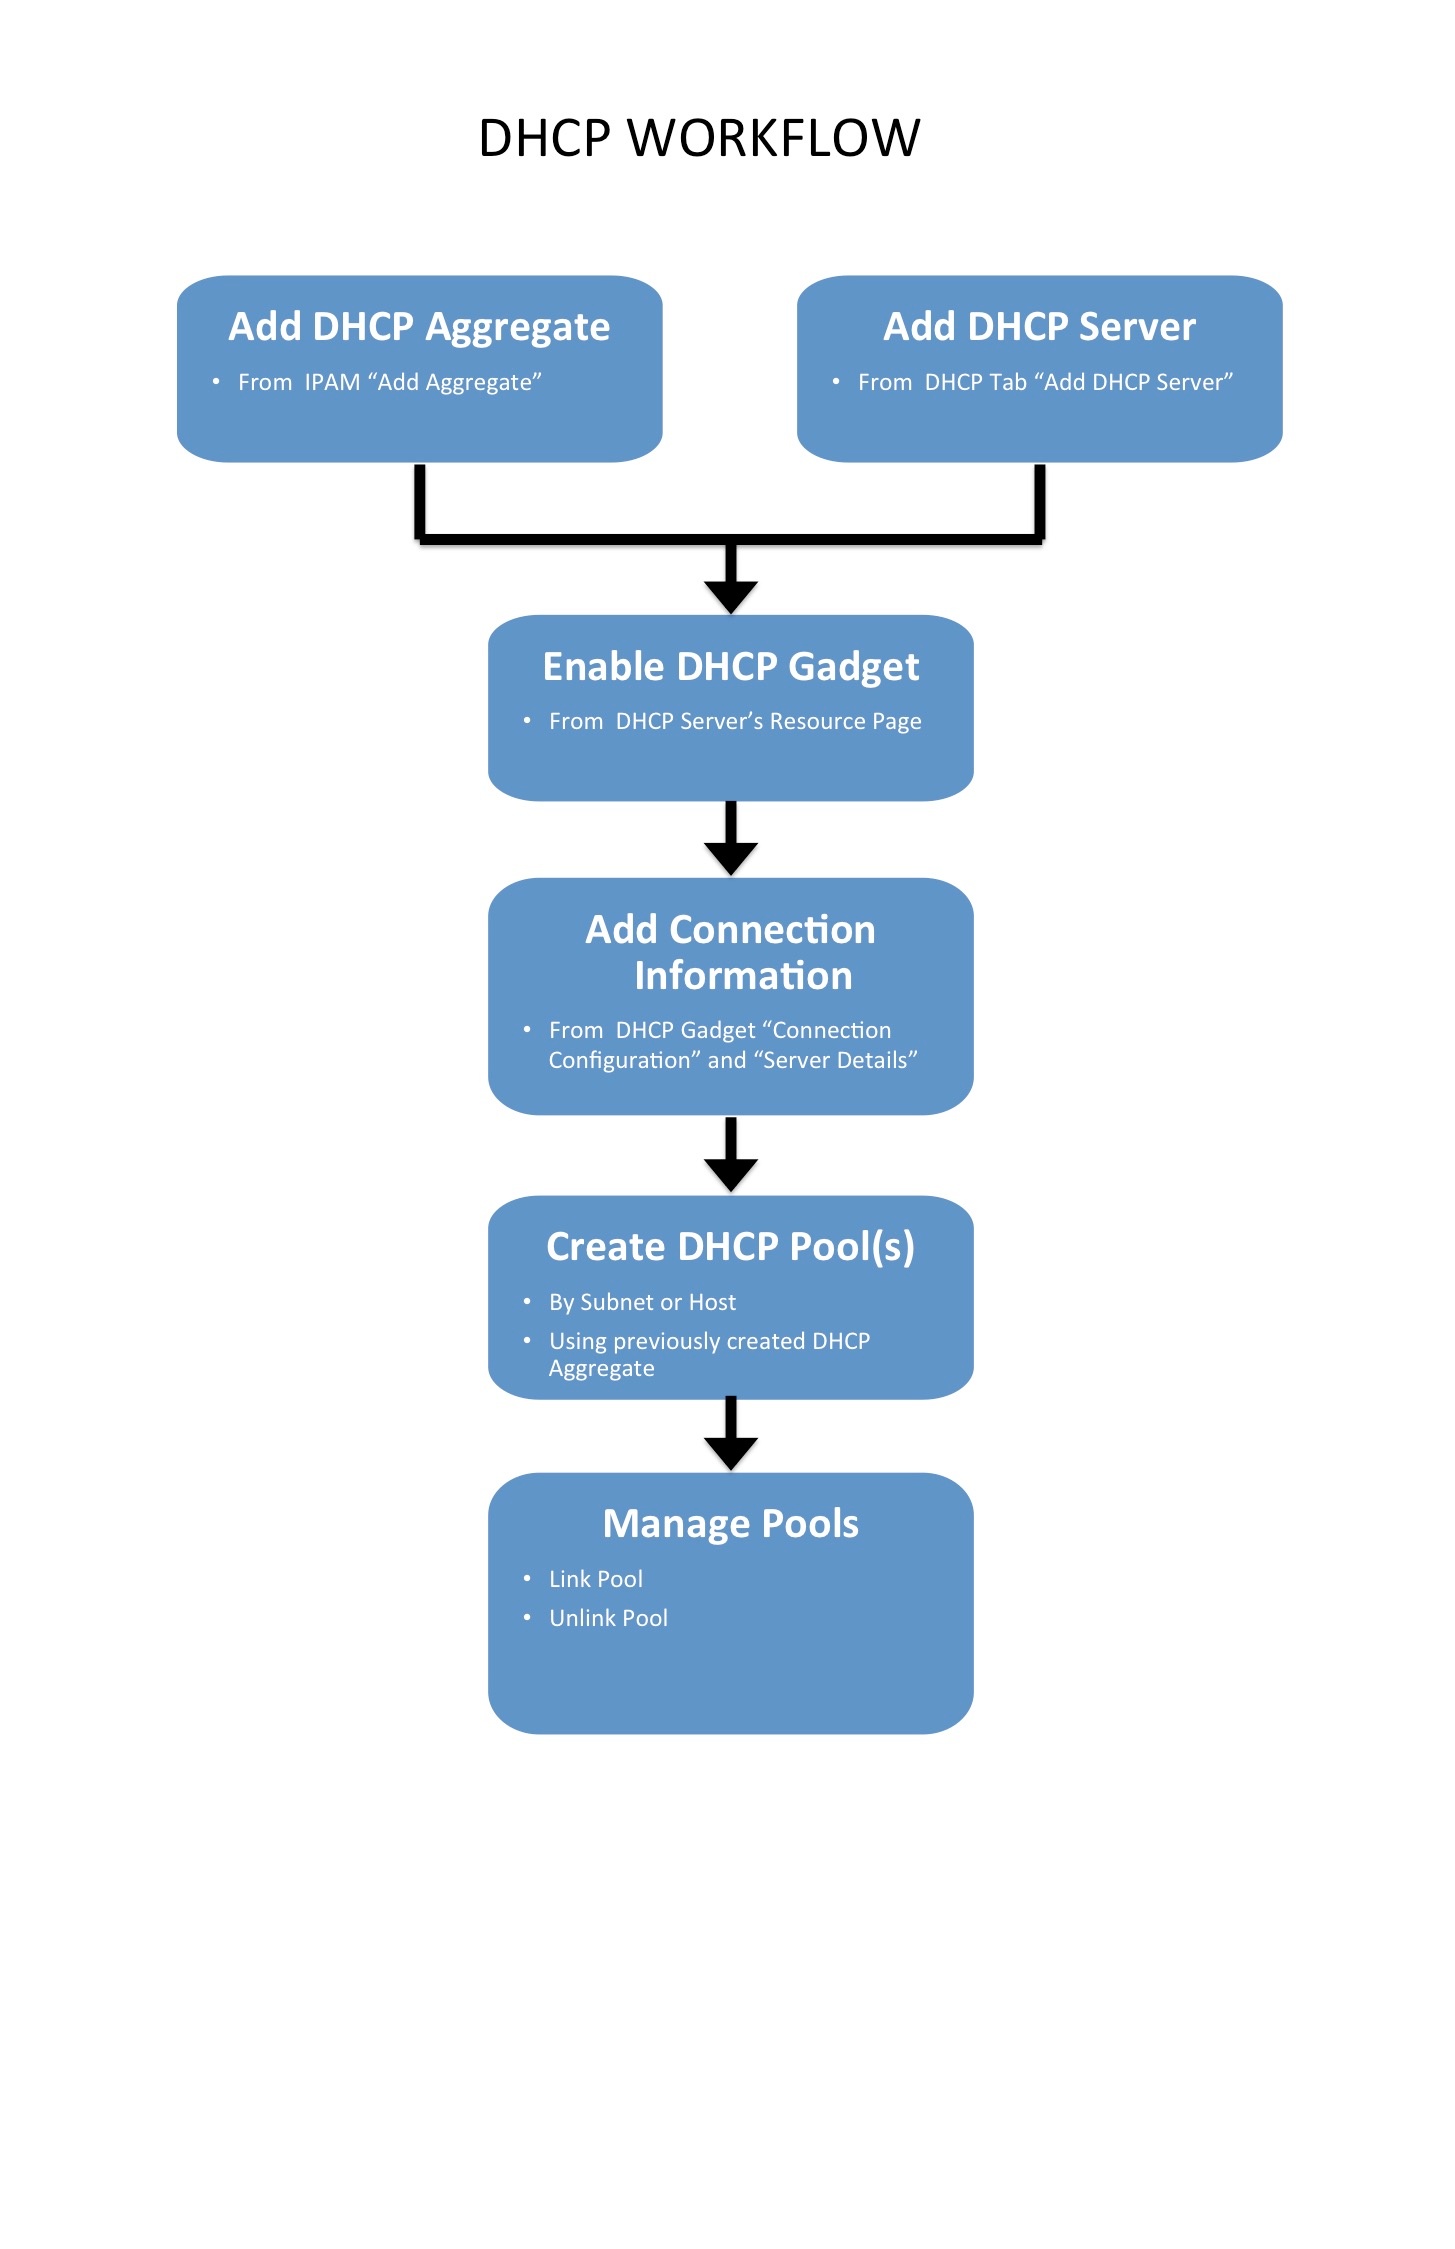
The DHCP Workflow in ProVision begins with denoting the DHCP IP Aggregate(s) from the IPAM Tab -> "Add Aggregate". When creating DHCP aggregates, ensure that the block is designated as 1918 space, and has the check boxes next to "DHCP Aggregate" and "Allow Sub-assignment" selected. This This will ensure the block is automatically added to the DHCP Available Resource, and is usable when defining DHCP Pools.
Separately, ensure that the DHCP server is added into ProVision. New DHCP servers may be added from the DHCP Tab "Add DHCP Server" button. Type Type the server name, then choose the resource to which the DHCP server belongs. This This creates a hierarchical relationship, with the server as a child resource under the selected parent.
Once the server has been created in ProVision, click on the server name in the DHCP server list to go to the server's Entry Page. If the server was created through the DHCP Tab, the DHCP Management Gadget will already be enabled for the DHCP server. If created elsewhere, the DHCP Gadget may need to be enabled by simply selecting the "On" radio toggle next to "DHCP Services", and clicking the "Update" button. Next, add in the connection configuration and server details for the DHCP server in the DHCP Gadget.
Now that the DHCP server is set up and DHCP aggregates created, DHCP Pools may be created and managed. Pools may be created by subnet or host. Creating by subnet allows for a block to either be directly assigned manually, or for ProVision to SmartAssign a block based on the provided criteria. Creating by host requires providing a host and MAC address, and then likewise may have an IP directly assigned or Smart Assigned. DHCP Pools, once created, are managed by linking or unlinking to the DHCP server. IP assignments and pool details may be changed at any time by clicking on the pool name, editing the details as desired, then clicking "Save".
For more information on working with DHCP in ProVision, see the DHCP Tab documentation.
...