...
| HTML |
|---|
<div id="google_translate_element"></div>
<script type="text/javascript">
function googleTranslateElementInit() {
  new google.translate.TranslateElement({pageLanguage: 'en'}, 'google_translate_element');
}
</script>
<script type="text/javascript" src="//translate.google.com/translate_a/element.js?cb=googleTranslateElementInit"></script> |
DNS Groups
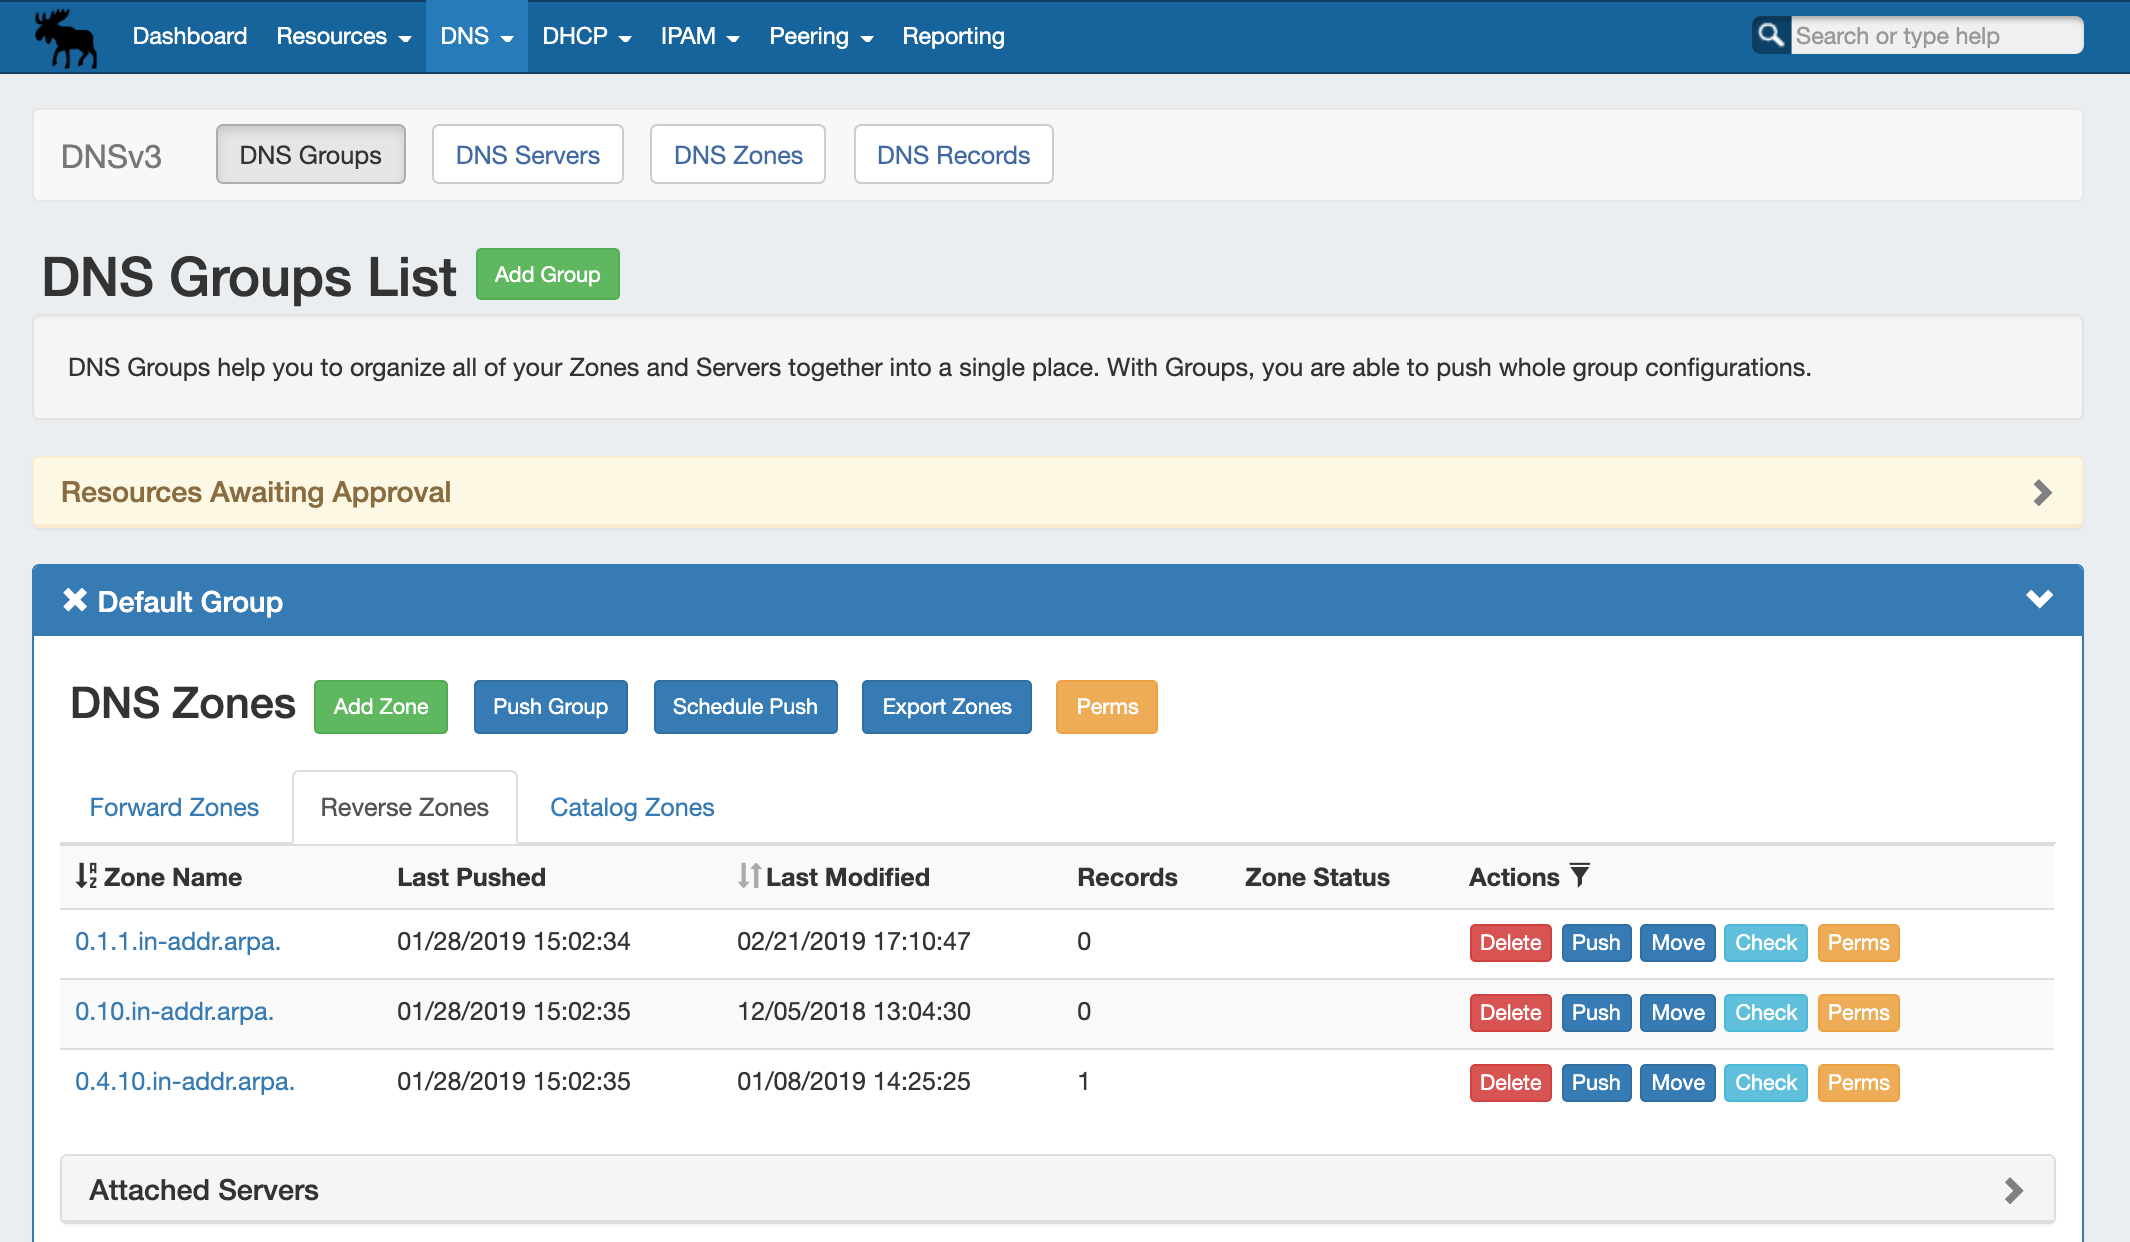
The DNS tab Groups List allows you to create, view, and manage groups of DNS Servers and Zones. Using groups, you can configure and push selected combinations of zones at one time.
...
To create a new Group, from the DNS Tab, select the DNS Groups sub menu. Then, click the "Add Group" button next to "DNS Groups List".
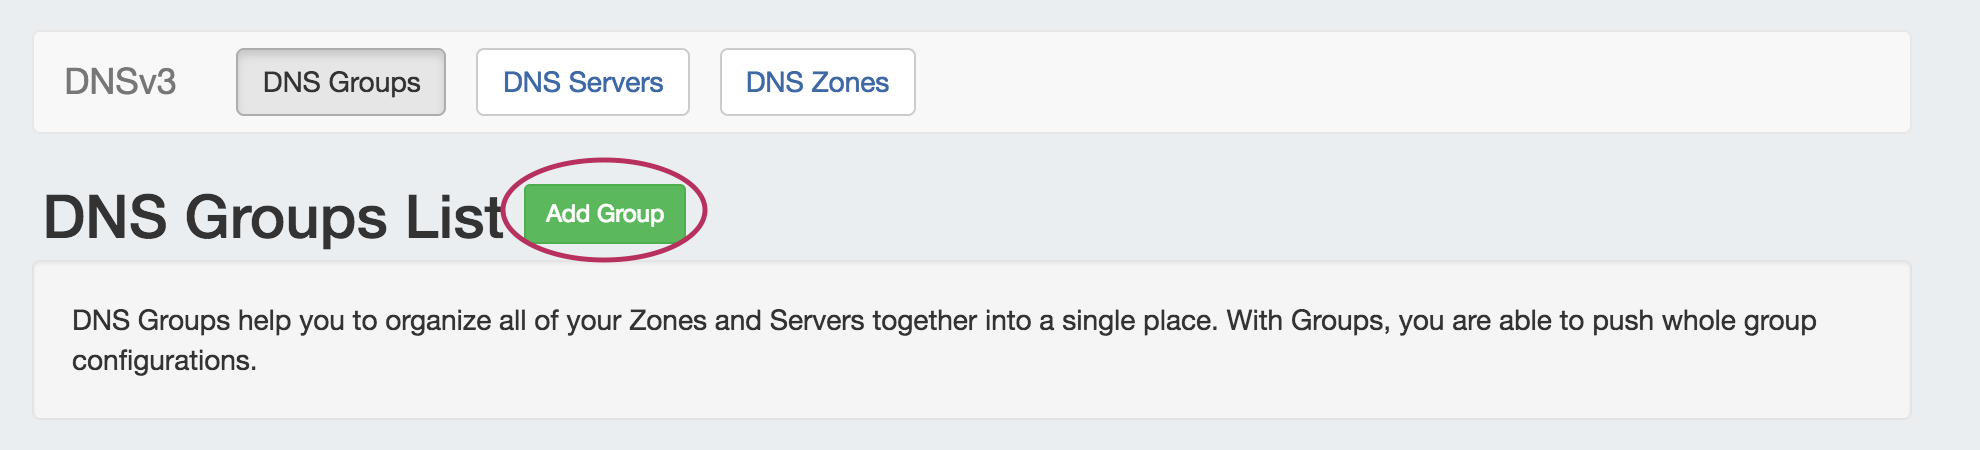

This will open the "Create New Group" dialog.
...
To edit the Default SOA values, simply click inside the value to be changed and type or select your new value. Be sure to also verify the desired Parent Resource for the Group, as the resource selected determines the Group's permissions.
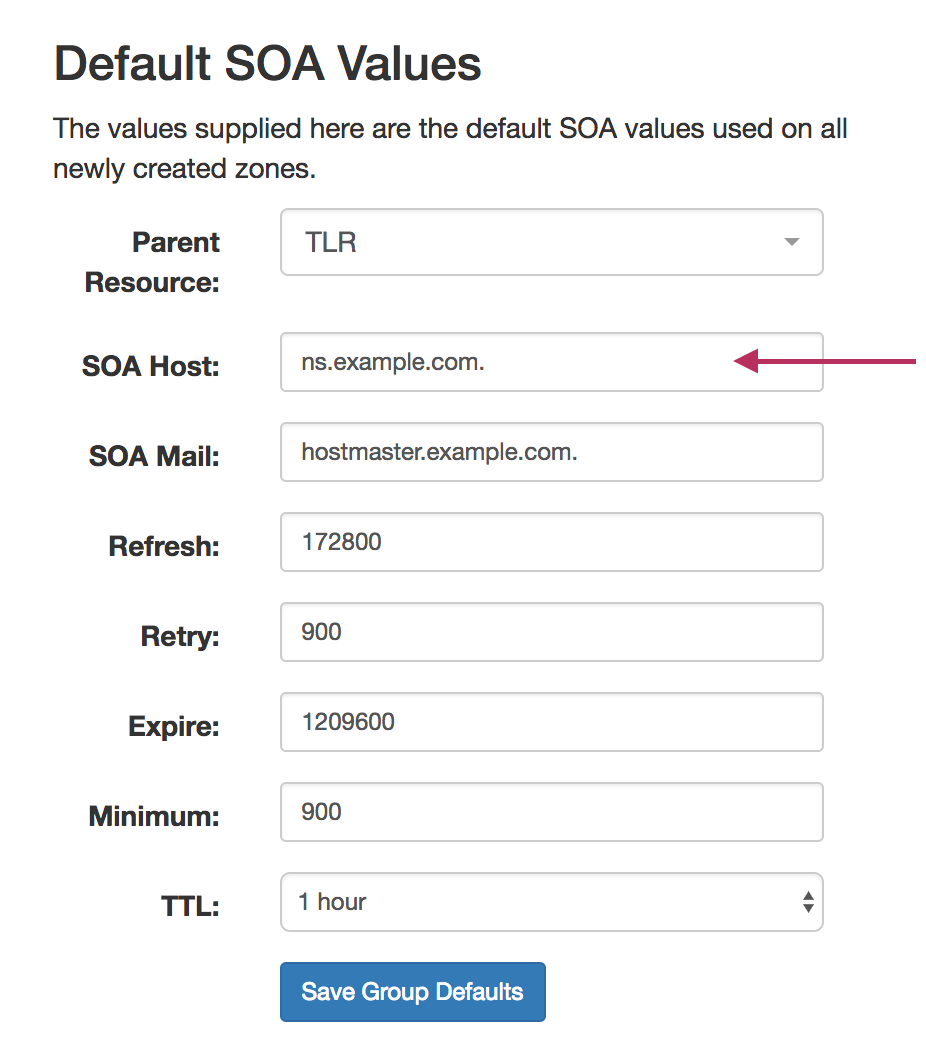
Save Changes
Save all Nameserver, Advanced Settings, and SOA value changes by clicking on the "Save Group Defaults" button at the bottom of the section.
...
| Expand | ||
|---|---|---|
| ||
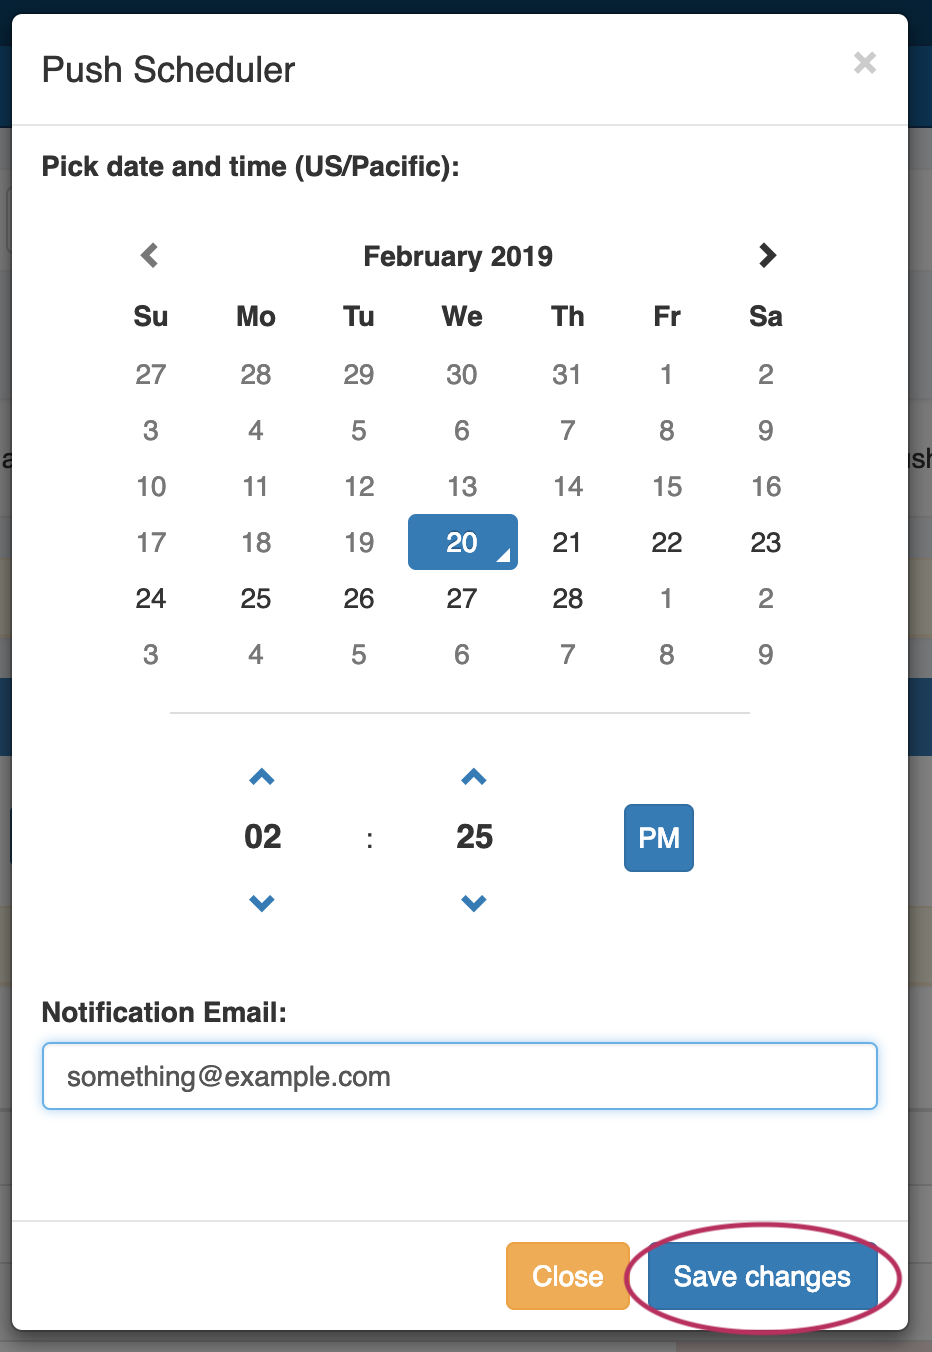
Click "Schedule Push" for the Group, then select a date, time (12 hour, with AM / PM toggle), add a notification email address, and click "Save changes".
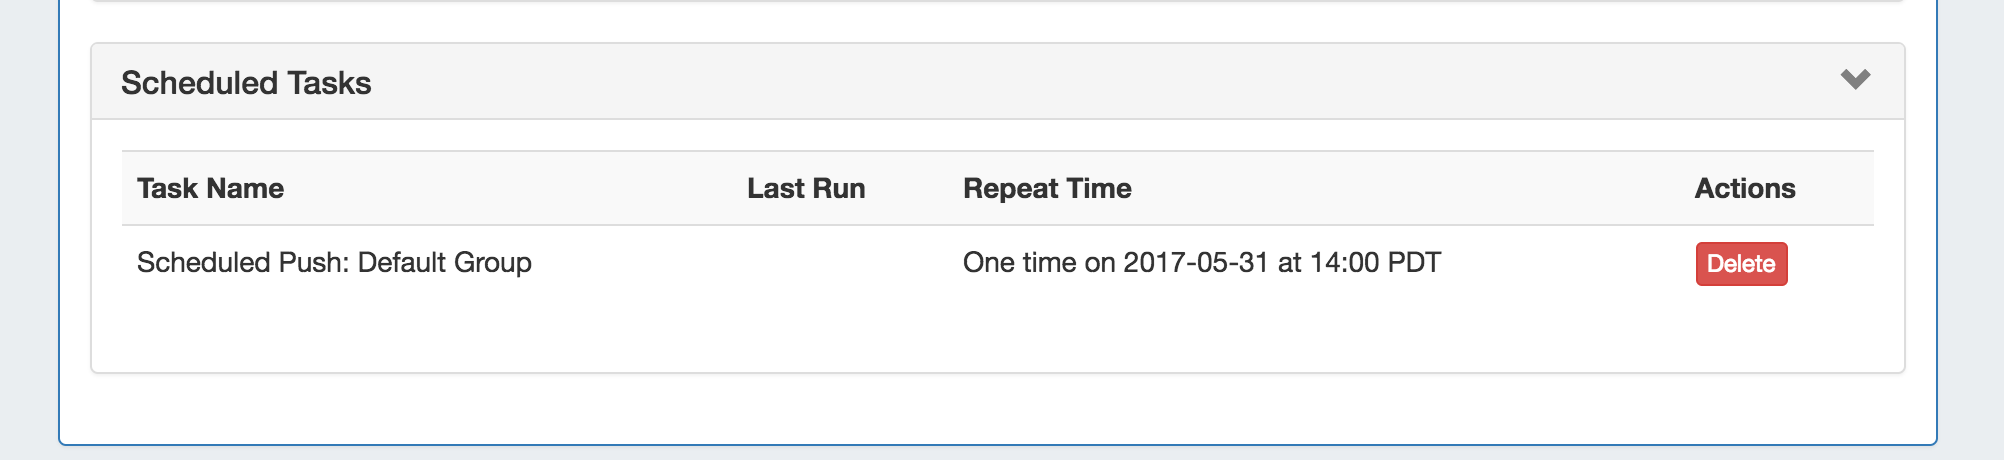
The Scheduled task will be shown in both the Group details (under "Scheduled Tasks") and the Admin Scheduler task list.
The task may be deleted prior to running by clicking the "delete" button, but will automatically be removed once completed. |
...
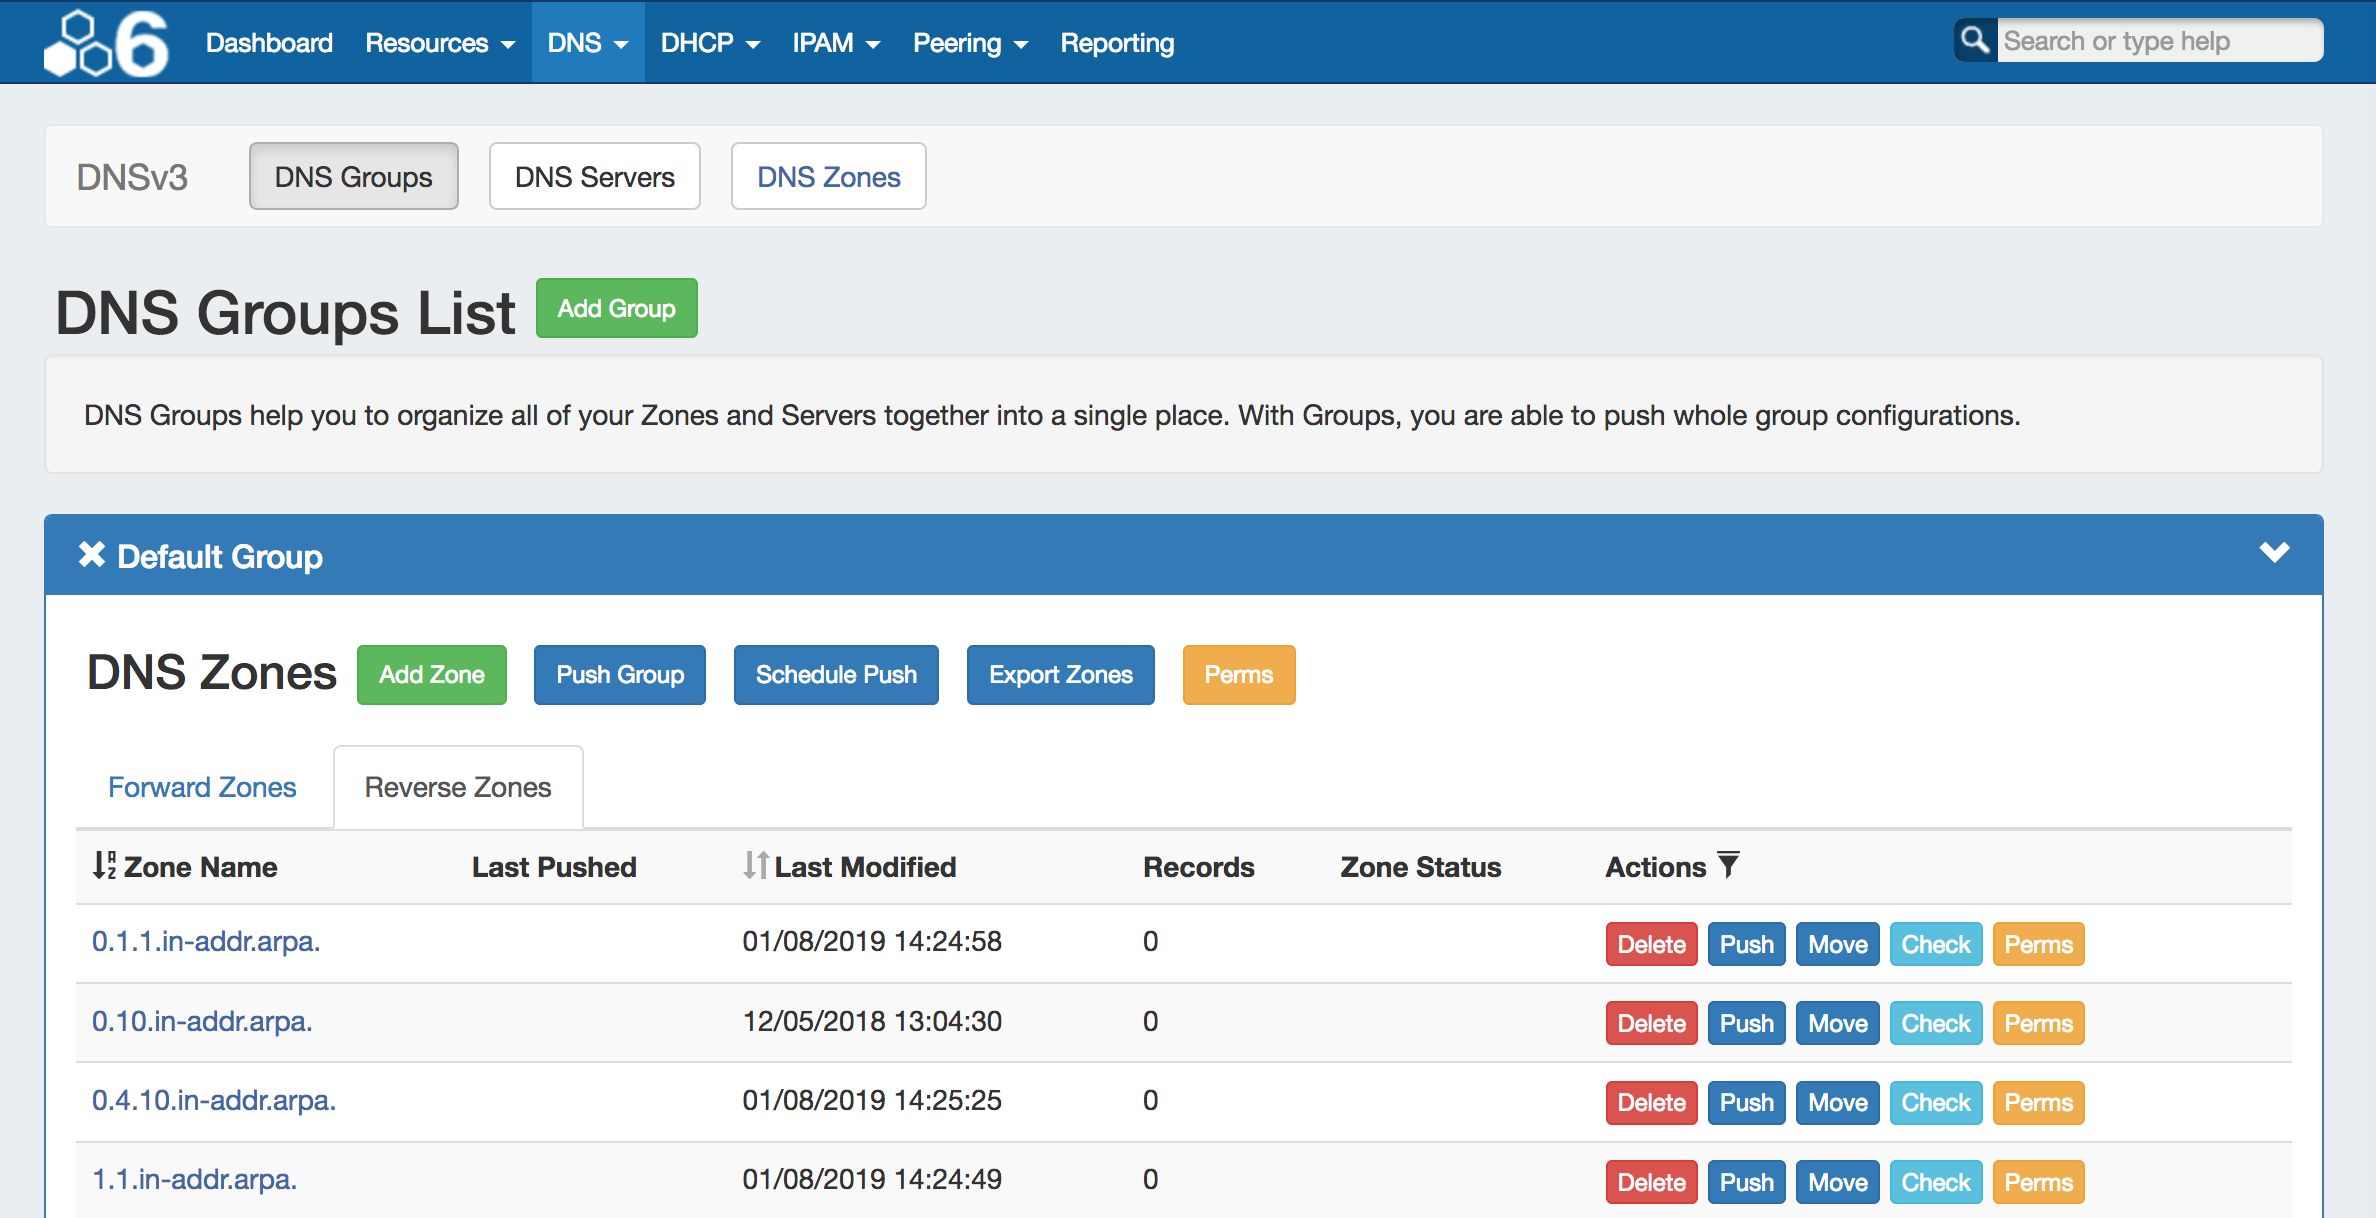
All zones under a DNS Group may be exported to a .zip file by clicking the "Export Zones" button at the top of the Group module.
The exported .zip file may be used with ProVision's BIND DNS Zone Upload / Import tool.

...
| Expand | ||
|---|---|---|
| ||
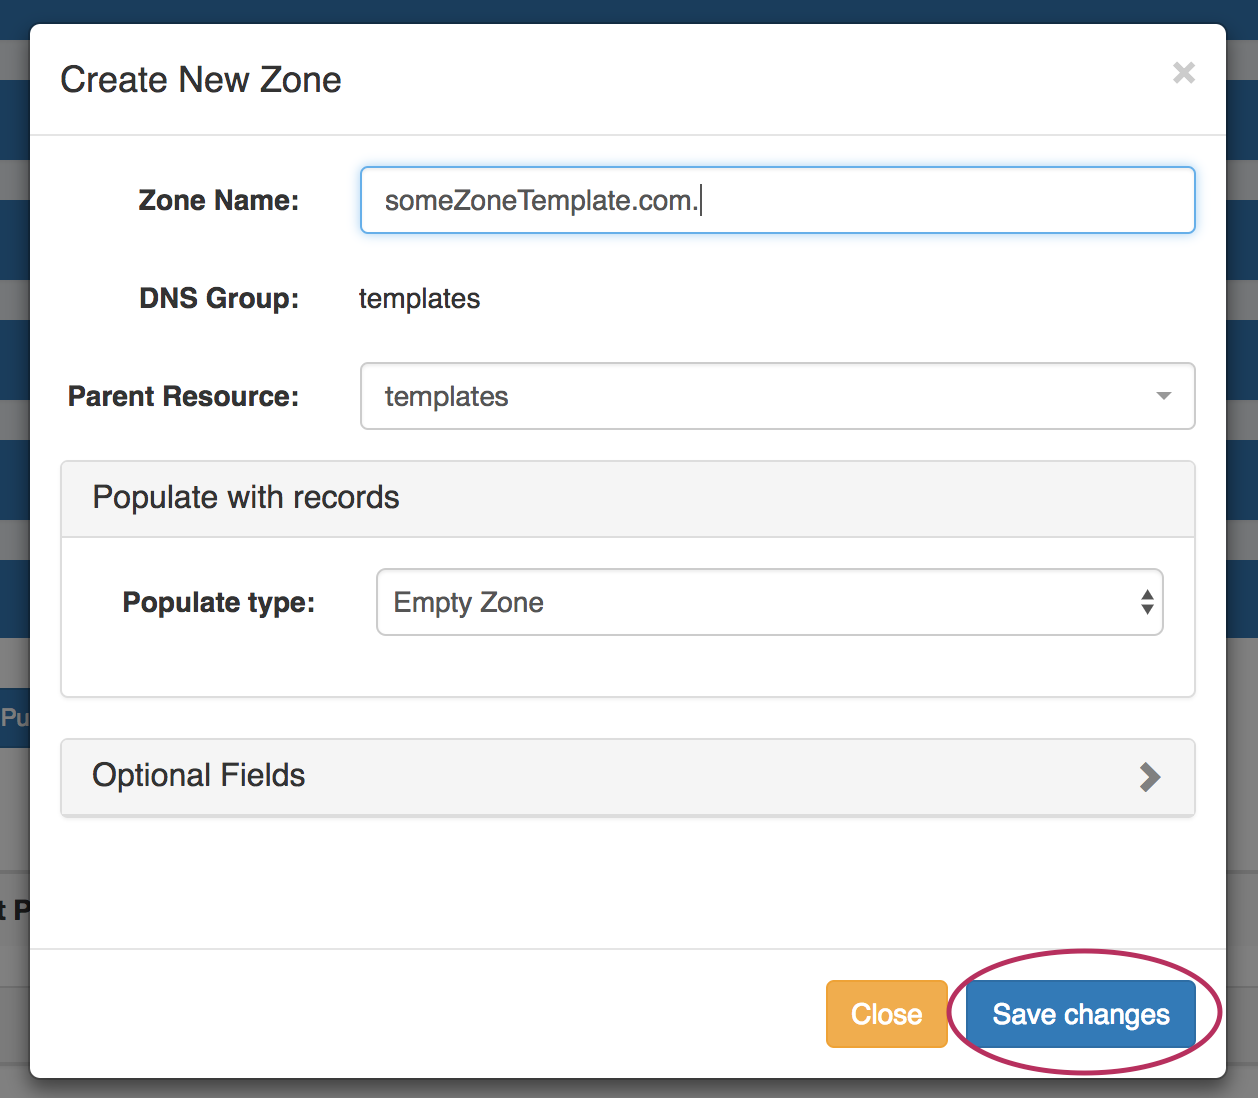
Create your template zoneAdd a template zone by clicking the "Add Zone" button, giving the zone a descriptive name to clearly identify as a template, select the populate type, and fill in any optional data. ( see Working with DNS Zones - Add a Zone.)
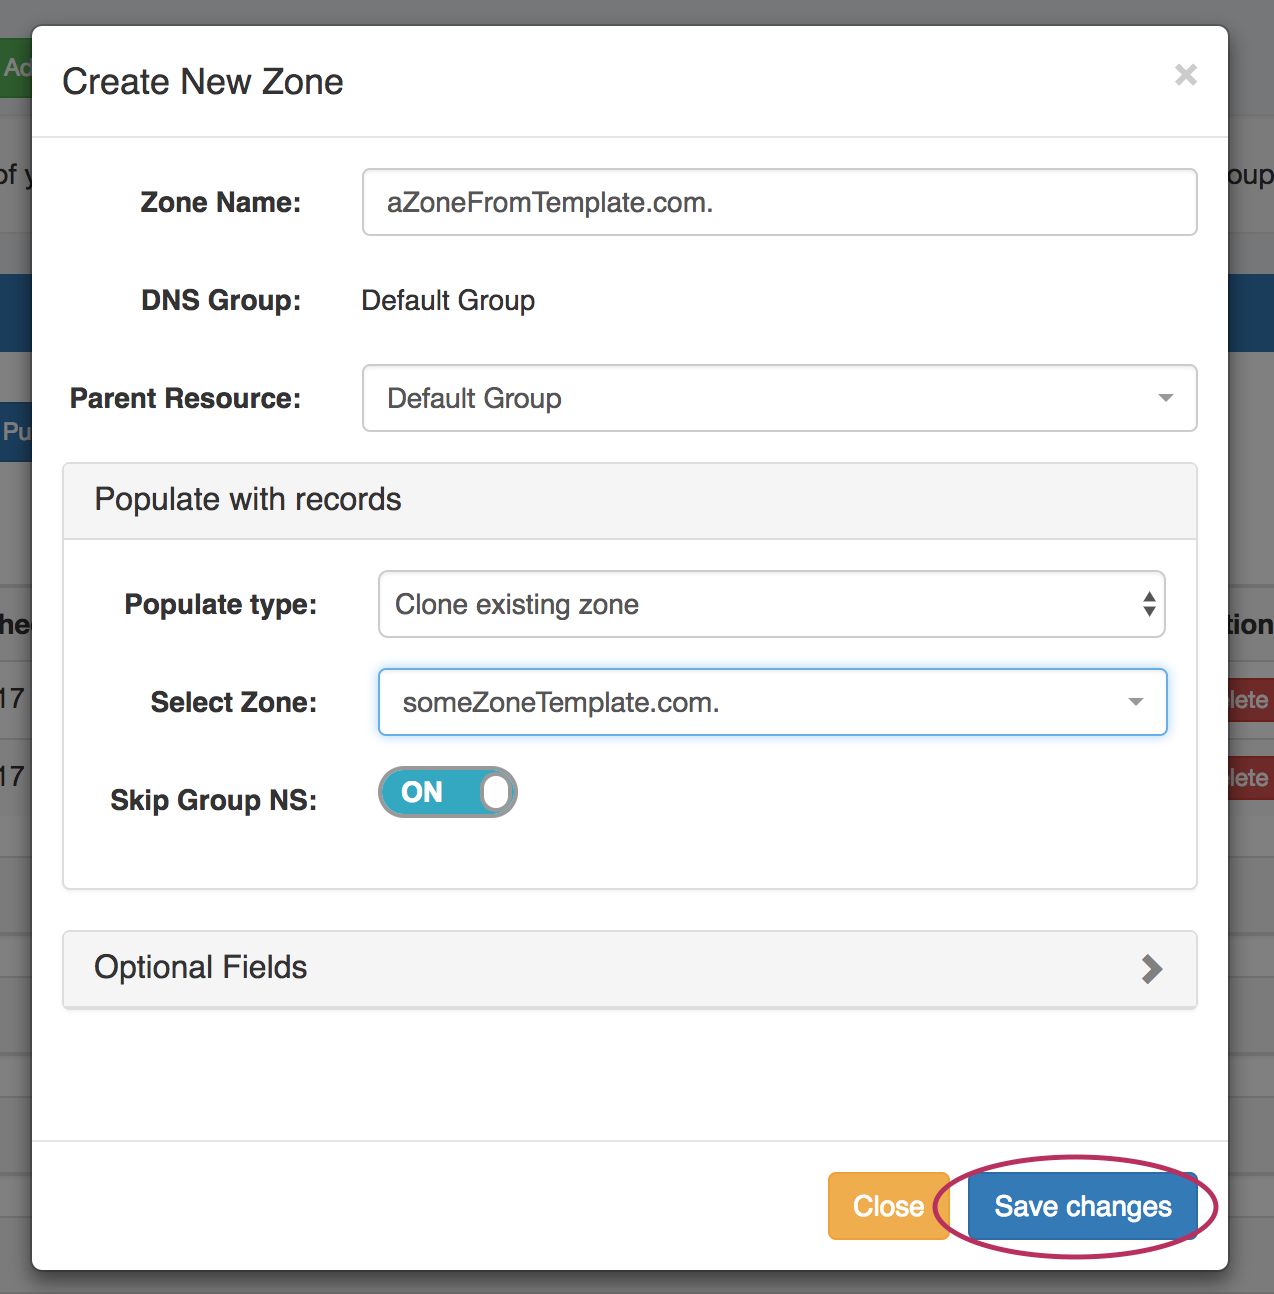
Once the zone has been created, it will show in the templates group zone list, and is now selectable as a base for the "clone existing zone" option when creating a new zone. Clone Template to a Different GroupGo to a different group, and click "Add Zone". Enter in the new zone name and parent. Under "Populate Type", select "Clone existing zone" and select /search for the template zone you created.
Edit the optional fields as needed, and click "Save changes". |
Additional Information
For more information on DNSv3 tasks, see:
...